Blog Center
All
Blog Center
Be the First to Know
Subscribe for top stories, news and tips on how to transform your business with eufy.
Baby · 05/05/2024
Best Manual Breast Pump: Top Picks for 2024
Manual breast pumps offer flexibility and portability, making them a popular choice for mothers who need to express milk on the go or without access to electricity. Finding the best manual breast pump can make a significant difference in your breastfeeding journey. In this blog, we'll explore why you might need a manual breast pump and share our top 5 recommendations for 2024. We'll also discuss key factors to consider when choosing the best manual breast pump. Whether you're a new mom or looking to replace an old pump, this guide will help you find the best manual breast pump to suit your needs. Why Do You Need a Manual Breast Pump? Manual breast pumps are valuable tools for breastfeeding parents, providing flexibility and convenience in various scenarios. Here are some reasons why you might need a manual breast pump: Portability and Travel: Manual breast pumps are lightweight and compact, making them ideal for travel. They don't require electricity or batteries, allowing you to pump anywhere, anytime. Emergency or Backup Use: If you're primarily using an electric wearable breast pump or breastfeeding directly, a hand held breast pump serves as a backup in case of power outages, equipment failure, or when you're away from your main pump. Occasional Pumping: For parents who don't need to pump regularly, manual breast pumps are a cost-effective option for occasional use, like when you want to leave milk for a babysitter or need to relieve engorgement. Silent Operation: Manual breast pumps operate quietly, making them suitable for discreet pumping in public places, at work, or when you don't want to disturb a sleeping baby. Flexibility and Control: Handpump breast allows you to control the speed and intensity of pumping, giving you a personalized experience. This can be helpful for achieving a comfortable flow and reducing discomfort. Gentle on Sensitive Nipples: Since you control the suction manually, manual pumps can be gentler on sensitive nipples. This is useful for parents who find electric pumps too aggressive. Affordability: Manual breast pumps are generally more affordable than electric pumps, making them an accessible option for parents on a budget or those who don't need frequent pumping. Overall, manual breast pumps offer a simple and convenient solution for parents who need occasional or emergency pumping, prefer a quieter and more portable option. 5 Best Manual Breast Pumps 2024 To help you make an informed decision, we've listed the 5 best manual breast pumps for 2024: 1. Lansinoh Manual Breast Pump The Lansinoh Manual Breast Pump is designed with portability and comfort in mind. Its lightweight design and ergonomic handle reduce hand fatigue, making it ideal for extended pumping sessions. The soft, flexible rim and ComfortFit technology cushion the breast, ensuring a gentle experience. You can pump directly into Lansinoh bottles or milk storage bags, offering convenience and flexibility. This best hand breast pump has two modes: stimulation and expression, allowing you to adjust the intensity as needed. Additionally, it's made from quality materials and is dishwasher-safe for easy cleaning. 2. Dr. Brown's Manual Breast Pump Dr. Brown's Manual Breast Pump is a lightweight and portable option with a silicone shield for added comfort. It comes with a 5-ounce bottle, a cleaning brush, and a level-1 nipple, providing everything you need for pumping and feeding. The adjustable pumping speeds and two pumping modes allow you to customize your experience. You can pump directly into Dr. Brown's bottles, making it easy to store and transport milk. This pump also mimics a baby's feeding patterns, providing a natural feel. The top-rack dishwasher-safe parts make cleaning simple. 3. Haakaa Silicone Breast Pump The Haakaa Silicone Breast Pump is a unique option that relies on natural suction to express milk. Made from BPA-free food-grade silicone, it's lightweight, portable, and eco-friendly. This pump doesn't require assembly, making it incredibly easy to use. Simply apply suction to the breast, and it starts collecting milk. Its compact size and noiseless operation make it perfect for discreet pumping. The Haakaa is also dishwasher-safe, allowing for effortless cleaning. This breast hand pump is ideal for mothers who prefer a simple, portable, and eco-friendly breast pump. 4. Elvie Curve Manual Breast Pump The Elvie Curve Manual Breast Pump is designed with versatility and convenience in mind. It fits inside a nursing bra, allowing for hands-free expression, which is perfect for multitasking mothers. The pump has a stable base, enabling it to stand upright on a table, reducing the risk of spillage. With only two parts, it's easy to transport and clean, making it ideal for travel. You can control the suction level to suit your comfort, offering a more personalized pumping experience. However, due to its noticeable design, it's not ideal for public use. Despite this, the Elvie Curve is a practical and efficient option for mothers seeking a hands-free manual breast pump. 5. Philips Avent Manual Breast Pump The Philips Avent Manual Breast Pump uses natural motion technology to promote quick milk flow. Its silicone inserts molds to the breast for a comfortable fit, reducing discomfort during pumping. You can pump directly into Philips Avent bottles for added convenience, and the entire unit is dishwasher-safe for easy cleaning. While it's not hands-free, the ergonomic design allows for a relaxed pumping posture. This pump is a reliable choice for mothers looking for a straightforward, easy-to-use manual breast pump. Factors to Consider When Choosing a Manual Breast Pump Choosing the right manual breast pump is crucial for a comfortable and efficient pumping experience. Here are some key factors to consider when selecting a manual breast pump: Pumping Efficiency: Pumping efficiency is essential for a manual breast pump. Look for pumps that can express milk effectively without requiring excessive effort. Features like adjustable suction levels and multiple pumping modes can improve efficiency, allowing you to express milk quickly and with less fatigue. Comfort: Comfort is a top priority when choosing a manual breast pump. Consider pumps with ergonomic handles to reduce hand strain and soft flanges to cushion the breast. A comfortable pump allows you to express milk for longer periods without discomfort. Durability: A durable manual breast pump can withstand frequent use and last longer. Look for pumps made from high-quality materials, such as food-grade silicone or BPA-free plastic. Durable pumps are less likely to break or wear out, saving you money in the long run. Portability: Portability is a significant advantage of manual breast pumps. Choose a compact and lightweight pump that is easy to carry, especially if you need to pump on the go. Portable pumps are ideal for travel and can be used in various settings without the need for electricity. Ease of Cleaning: Manual breast pumps should be easy to clean and sterilize to maintain hygiene. Look for pumps with simple designs and fewer parts, as these are easier to disassemble and clean. Dishwasher-safe parts can also make cleaning more convenient. Compatibility: Consider whether the manual breast pump is compatible with other breastfeeding accessories, such as bottles, storage bags, or nipple shields. Compatibility allows you to integrate the pump into your existing breastfeeding setup, offering more flexibility and convenience. By considering these factors, you can find a manual breast pump that meets your needs and provides a comfortable, efficient, and durable pumping experience. Of course, you can also try an electric breast pump, such as the eufy wearable breast pump S1 Pro, S1 and E10. Experience unparalleled convenience and efficiency with the eufy wearable breast pump, surpassing the limitations of manual pumping. Unlike manual pumps, eufy offers smart pumping capabilities, effortlessly managed through the eufy Baby app and OptiRhythm™ technology. Its 290 mmHg hospital-grade suction ensures optimal milk expression, providing superior output compared to manual methods. eufy Wearable Breast Pump: Pump Warm for a Better Flow The world’s first HeatFlow™ technology revolutionizes pumping for unparalleled comfort. Offers up to 290 mmHg hospital-grade suction power for efficient milk extraction. prioritizes pumping comfort with uniquely angled 105° flanges and soft silicone. Simplifies your pumping routine with the eufy Baby app. Learn More Buy Now Conclusion Manual breast pumps offer flexibility, portability, and affordability for breastfeeding mothers. By choosing the best manual breast pump for 2024 and considering key factors such as comfort, efficiency, and durability, you can make the most of your breastfeeding experience. Whether you're looking for a primary pump or a backup, manual breast pumps can be a valuable addition to your breastfeeding toolkit. FAQs Is manual breast pumping more effective? Manual breast pumps can be effective for occasional pumping and providing flexibility. However, electric pumps are typically more efficient and have higher milk output. Manual pumps are often used for quick, on-the-go pumping or when power sources are unavailable. How often should you Sterilise a manual breast pump? It's recommended to sterilize a manual breast pump before the first use and then regularly thereafter. You should sterilize the pump components after every use, especially when you're exclusively pumping or using it frequently. Following the manufacturer's instructions for sterilization is crucial to ensure safety. Is a manual pump better for colostrum? Manual pumps can be useful for expressing colostrum due to their gentle suction and flexibility. Since colostrum is thick, the slower and more controlled suction of a manual pump might be more suitable. However, some prefer to hand-express colostrum initially, as it allows for more control and sensitivity during early breastfeeding stages.
Baby · 05/05/2024
A Comprehensive Guide to Breast Pumping with Hand
Breast pumping with hand is a practical option for many mothers who want to express breast milk without the need for electric pumps. It can be an effective method for those who prefer a more natural approach and need to relieve engorgement. Breast pumping with hand offers flexibility and control, allowing you to manage the speed and pressure of expression. This guide will walk you through the benefits of manual breast pumping, the steps involved, and common challenges with simple solutions. By understanding these basics, you can make breast pumping with hand a comfortable and efficient part of your postpartum routine. Benefits of Breast Pumping with Hand Breast pumping with hand offers several benefits for nursing mothers. Here are some of the key advantages: No Equipment Needed: Breast pump with handsrequires no special equipment or power source, making it a convenient method for expressing milk. This approach is particularly useful in situations where you don't have access to a breast pump or an electrical outlet. Cost-Effective: Breast pumping with hand is a cost-effective method because it doesn't require purchasing a breast pump. This can be an attractive option for mothers who want to save money or only need to express milk occasionally. Greater Control: Hand expression allows you to control the pressure and rhythm of pumping, which can be more comfortable for some mothers. You can adjust the technique to suit your body's needs, providing a more personalized and gentle experience. Quiet and Discreet: Breast pumping with hand is quieter than using an manual or wearable breast pump, allowing for discreet expression in public places or at night. This feature is helpful for mothers who need to express milk without disturbing others. Useful for Relieving Engorgement: Hand expression can be particularly effective for relieving engorgement or blocked ducts. It allows you to target specific areas of the breast, helping to release pressure and reduce discomfort. Better Understanding of Your Body: Expressing milk by hand can give you a better understanding of your body's lactation patterns. This deeper connection can help you manage breastfeeding more effectively and respond to changes in milk production. How to Breast Pumping with Hand Here is a guide on how to prepare and carry out the steps for effective hand expression. Preparations before Breast Pumping with Hand Before you begin breast pumping with hand, follow these preparation tips: Wash Your Hands: Cleanliness is crucial when handling breast milk. Wash your hands thoroughly with soap and warm water to prevent contamination. Find a Comfortable Space: Choose a quiet, private area where you can sit comfortably. This helps you relax, which can improve milk flow. Use a Warm Compress: Applying a warm compress or towel to your breast can help stimulate milk flow. This step can be particularly useful if you have difficulty achieving a let-down reflex. Have a Clean Container Ready: Use a clean container, such as a bottle or a wide-mouthed jar, to collect the expressed milk. Ensure it's properly sterilized to maintain hygiene. Stay Hydrated: Drink water or a non-caffeinated beverage to stay hydrated, which can support milk production. Step-by-Step Guide to Breast Pumping with Hand Once you've prepared, follow these steps for successful breast pumping with hand: Step 1: Stimulate the Breast with Gentle Massage Start by gently massaging your breast to encourage milk flow. Use your fingertips to make circular motions around the breast, focusing on the outer areas and gradually moving towards the areola. Step 2: Place Your Thumb and Fingers in a C-shape Around the Areola Position your thumb above the areola and your fingers below, forming a C-shape. Keep your thumb and fingers a few centimeters away from the nipple to avoid applying direct pressure. Step 3: Apply Gentle Pressure and Compress the Breast Tissue Gently press your thumb and fingers towards your chest wall, then compress the breast tissue towards the nipple. This action helps express milk without squeezing too hard, which could cause discomfort. Step 4: Release Pressure and Allow Milk to Flow into the Container After compressing the breast tissue, release the pressure and let the milk flow into the container. Continue to apply gentle pressure and release in a rhythmic pattern to maintain a steady flow of milk. Step 5: Rotate Your Hand Position and Repeat on Different Areas of the Breast To ensure thorough expression, rotate your hand position and repeat the process on different areas of the breast. This technique helps empty the breast completely and reduces the risk of engorgement or blocked ducts. Step 6: Empty Both Breasts Completely for Optimal Milk Production For optimal milk production, express milk from both breasts. This practice can help maintain or increase milk supply. Be sure to switch breasts periodically and empty each breast completely. By following these preparation tips and step-by-step instructions, you can breast pump with hand effectively and comfortably. If you experience any pain or discomfort during hand expression, adjust your technique or consult a lactation specialist for guidance. Common Challenges and Solutions to Breast Pumping with Hand Manual breast pumping can present some challenges, but they can often be overcome with a few adjustments and a little patience. Slow or Inadequate Milk Flow If you're experiencing slow or inadequate milk flow, try relaxing your body and focusing on the baby or a calming thought. Using a warm compress on the breast can also help stimulate milk flow. Discomfort or Pain During Hand Expression Discomfort during hand expression might result from incorrect technique or too much pressure. Check your hand position and ensure you're not pressing too hard. If discomfort persists, consult a lactation specialist for advice. Difficulty Achieving Let-Down Reflex If you're having trouble achieving the let-down reflex, consider using relaxation techniques or a warm compress to stimulate the reflex. You can also try visualizing you are baby nursing or listening to soothing music. Frustration or Fatigue from Repetitive Motion Breast pumping with hand can be tiring, especially during longer sessions. Take breaks as needed and switch hands periodically to reduce fatigue. Keeping a positive mindset and remembering the benefits of expressing milk can help manage frustration. If you feel tired of breast pumping with your hand, you can say hello to a more efficient and comfortable breastfeeding experience with the eufy wearable breast pump S1 Pro. Experience the superior convenience of the eufy wearable breast pump over manual pumping methods. With smart pumping capabilities, it can effortlessly manage sessions through the eufy Baby app and OptiRhythm™ technology. Its hospital-grade suction at 290 mmHg ensures efficient milk expression, surpassing the limitations of manual pumping. Unlike manual pumps, eufy offers automated operation, freeing you from repetitive manual efforts and allowing for multitasking during pumping sessions. eufy Wearable Breast Pump: Pump Warm for a Better Flow The world’s first HeatFlow™ technology revolutionizes pumping for unparalleled comfort. Offers up to 290 mmHg hospital-grade suction power for efficient milk extraction. prioritizes pumping comfort with uniquely angled 105° flanges and soft silicone. Simplifies your pumping routine with the eufy Baby app. Learn More Buy Now Conclusion Breast pumping with hand can be an effective and convenient method for expressing milk. It offers flexibility and control, but like any technique, it requires practice and patience. By following these steps and solutions to common challenges, you can make the process more comfortable and efficient. If you encounter persistent issues, don't hesitate to seek guidance from a lactation specialist or healthcare provider. FAQs How effective is hand pumping? Hand pumping can be highly effective when done correctly. It allows for greater control over the pressure and speed of expression, which can improve milk flow. While it may take longer than electric pumping, it can be just as efficient with practice. Will hand pumping increase milk supply? Yes. Hand pumping can help increase milk supply by stimulating the breast and encouraging regular milk expression. Frequent and complete emptying of the breasts can signal the body to produce more milk, which can lead to increased milk supply over time.
Baby · 05/05/2024
Best Hands Free Breast Pump: The Top 6 Models for 2024
Hands-free breast offers freedom and flexibility that traditional pumps can't match. This type of pump allows you to move around, work, or relax while pumping, making it easier to fit breastfeeding into your busy schedule. If you're searching for the best hands free breast pump 2024, you're in the right place. In this guide, we'll discuss the benefits of handsfree breast pumps, share our top 6 picks, and explore the key factors to consider when choosing the best hands free breast pump for your needs. Whether you're a new mom or a seasoned parent, hands-free pumps can provide the convenience and efficiency you need. Benefits of Hands-Free Breast Pumps Hands-free breast pumps are gaining popularity among breastfeeding mothers, offering a convenient and flexible way to express milk. Here are some key benefits of using hands-free breast pumps: Freedom to Move: One of the most significant benefits of hands-free breast pumps is the freedom to move while pumping. This flexibility allows mothers to multitask, whether it's caring for a baby, working, or doing household chores, without being tied to a stationary pumping setup. Reduced Hand Fatigue: Hands-free breast pumps reduce the strain on your hands and wrists. Traditional manual breast pumps require repetitive squeezing, which can lead to hand fatigue. Hands-free pumps automate the pumping process, allowing you to pump with minimal effort. Quiet Operation: Hands-free breast pumps generally operate more quietly than traditional electric pumps. This can be beneficial for mothers who need to pump in a shared space without causing a disturbance. The quieter operation also contributes to a more relaxed pumping experience. Efficient Milk Expression: Many hands-free breast pumps are designed to efficiently express milk, with technology that mimics a baby's natural sucking pattern. This can lead to improved milk flow and shorter pumping sessions, providing a more effective way to express milk. Portability: Hands-free breast pumps are typically designed to be compact and portable, making them ideal for use on the go. They are often lightweight and easy to carry, allowing you to pump in various locations without the need for electrical outlets or bulky equipment. Flexibility in Pumping Position: Hands-free breast pumps allow you to pump in various positions, offering greater flexibility. This can be especially helpful for mothers who find certain pumping positions uncomfortable. The ability to adjust your position while pumping can lead to a more comfortable experience. Compatibility with Nursing Bras: Many hands-free breast pumps are designed to fit inside nursing bras, providing a secure and convenient way to pump. This compatibility eliminates the need for additional pumping gear, streamlining the process and making it easier to pump discreetly at home or in private spaces. Top 6 Hands-Free Breast Pumps Choosing the right hands-free breast pump can be challenging; but don't worry, here's a list of the top 6 best hands free breast pumps for 2024: 1. Best Overall Wearable Breast Pump for Higher Efficiency and Comfortability: eufy Wearable Breast Pump S1 Pro The eufy wearable breast pump S1 Pro is a game-changer in breastfeeding comfort and efficiency. With innovative HeatFlow™ technology and 290 mmHg hospital-grade suction, it ensures higher efficiency in milk expression. The eufy Baby app and OptiRhythm™ technology enable smart pumping, effortlessly managing sessions for maximum convenience. Featuring soft silicone and 105° angle flanges, it guarantees unmatched comfort during wear. And it allows for discreet pumping anywhere, anytime. Lightweight and capable of holding up to 177ml of milk with easy cleaning. The eufy breast pump ensures a seamless and comfortable breastfeeding experience like never before. 2. Best Overall Wearable Breast Pump: Elvie Double Electric Breast Pump Price: around $550 The Elvie Double Electric Breast Pump is a top choice for its intuitive app and discreet, quiet operation. This wearable pump offers a comfortable fit, allowing you to pump without the noise and bulk of traditional electric pumps. The app provides useful tracking features, making it easy to monitor your pumping sessions. With a battery life of approximately 2.5 hours and a 5-ounce milk capacity per pump, it's designed for efficiency. However, it's important to ensure proper alignment to avoid leakage. Overall, this best hand free breast pump is a reliable and stylish choice for hands-free pumping. 3. Best Affordable Hands Free Breast Pump: Momcozy S9 Double Wearable Breast Pump Price: around $100 The Momcozy S9 Double Wearable Breast Pump is a budget-friendly option with a range of convenient features. It’s an all-in-one unit with an auto-shutdown feature for safety. With a milk capacity of 6 ounces per pump, it's slightly larger than other wearable pumps. The battery life is nearly 2 hours, which is sufficient for multiple sessions. However, one drawback is that the pump may be visible through clothing, which could be an issue in public settings. Despite this, the Momcozy Double Wearable Breast Pump is an affordable and practical choice for mothers seeking a wearable pump. 4. Best Hands Free Breast Pump for Large Breasts: Willow Go Wearable Breast Pump Price: around $330 The Willow Go Wearable Breast Pump is designed with nine pumping levels, allowing for a customizable pumping experience. It is HSA- and FSA-eligible, and can be charged via USB for added convenience. The battery life is approximately 1.25 hours, and the milk capacity ranges from 5 to 7 ounces per pump, offering flexibility. Although the pump is quiet at lower levels, it can be noisy at higher pumping levels. Additionally, the app functionality may be limited. Overall, the Willow Go is an excellent choice for mothers with larger breasts who need a customizable and flexible pumping experience. 5. Best Large Capacity Hands Free Breast Pump: Freemie Liberty II Deluxe Price: around $110 The Freemie Liberty II Deluxe stands out for its large milk capacity of 8 ounces per pump, making it ideal for mothers who need to express more milk in a single session. It has an automatic shutoff timer for added safety, and its quiet operation ensures a discreet pumping experience. The adjustable flange size offers a comfortable fit for various breast sizes. The battery life is approximately 2.5 hours, but it may drain quickly with frequent use. Despite this, the Freemie Liberty II Deluxe is a top choice for mothers seeking a large-capacity wearable breast pump. 6. Best Wearable Breast Pump for Multitasking: Willow 3.0 Price: around $500 The Willow 3.0 is a wearable breast pump designed for multitasking mothers. Its sleek design and 360-degree mobility make it perfect for moms who need flexibility while pumping. With this pump, you can move freely without worrying about spills, thanks to its unique leak-proof milk collection bags. It has fewer parts to clean, simplifying the maintenance process. The automatic switching between stimulation and expression modes ensures efficient milk flow. The battery life supports approximately five 15-minute pumping sessions, providing ample time for daily use. However, the pump's 4-ounce bag capacity is relatively small, and the cost of bag replacements can add up. Despite these drawbacks, the Willow 3.0 is an excellent choice for busy moms seeking a hands-free and versatile breast pump. Factors to Consider When Choosing a Hands-Free Breast Pump When selecting the best hands free breast pump, it's essential to consider various factors to ensure it meets your needs. Here's a breakdown of the most important aspects to help you make the best choice: Pumping Efficiency: Pumping efficiency determines how effectively the pump can express milk. Look for pumps with adjustable suction levels and automatic switching between stimulation and expression modes. This flexibility allows you to customize the pumping experience for optimal milk flow. Comfort: Comfort is crucial when using a hands-free breast pump. Consider pumps with soft silicone flanges and ergonomic designs to ensure a comfortable fit. Pumps that allow for 360-degree movement or different positions can offer greater comfort during use. Noise Level: Hands-free breast pumps are generally quieter than traditional electric pumps, but noise levels can vary. If you plan to pump in shared spaces or at work, choose a pump with a low noise level to avoid disturbing others. Quieter pumps can also contribute to a more relaxed pumping experience. Battery Life: Battery life affects how long you can use the pump without recharging. Look for pumps with a long-lasting battery that can support multiple pumping sessions. Consider your pumping schedule and choose a pump with a battery life that suits your needs. Portability: Portability is a key advantage of hands-free breast pumps. Choose a pump that is lightweight and compact, making it easy to carry and use on the go. Portable pumps are ideal for mothers who need to express milk while traveling or in various settings. Compatibility: Compatibility with other breastfeeding accessories is an important factor. Check if the pump is compatible with different bottle brands, storage bags, or other accessories you might use. Compatibility can make it easier to integrate the pump into your existing breastfeeding routine. By considering these factors, you can find the best hands-free breast pump that aligns with your preferences and lifestyle. This approach ensures you choose a pump that is efficient, comfortable, and suitable for your pumping needs. Conclusion Hands-free breast pumps offer a convenient and flexible way to express breast milk. By choosing one of the top 6 hands-free breast pumps for 2024 in this blog and considering key factors like pumping efficiency, comfort, and portability, you can find the right pump to suit your needs. The best hands free breast pump provides freedom to move and discreet pumping, making it a valuable addition to your breastfeeding toolkit. FAQs Are hands free breast pumps better? Hands-free breast pumps offer significant advantages over traditional pumps, such as greater flexibility and portability. They can be better for mothers who need to multitask while pumping. What are the disadvantages of wearable pumps? Wearable pumps, while convenient, can have some disadvantages. They might not be as efficient as traditional electric pumps, requiring longer pumping sessions. Wearable pumps may also be more noticeable under clothing, limiting their use in public settings.
Baby · 05/05/2024
Best Breast Pump for Large Breasts: 6 Recommendations for 2024
Breast pumping can be a challenging and sometimes uncomfortable experience, especially for mothers with larger breasts. The right breast pump can make all the difference, helping you express milk efficiently and comfortably. In this guide, we're focusing on the best breast pumps for large breasts, considering their unique needs and requirements. We'll explore the common challenges faced by large-breasted mothers, highlight the 6 options for the best breast pump for large breasts, and discuss the key factors you should consider when selecting a pump. Let's dive in and find the perfect breast pump for your needs. Challenges of Breast Pumping for Large-Breasted Mothers Breast pumping with large breasts poses unique challenges. It can be difficult to find a comfortable pump that fits properly, provides adequate suction, and is easy to use. Large-breasted mothers often experience issues like leakage, poor suction, and discomfort due to ill-fitting flanges. The weight of the breasts can also make pumping positions challenging, leading to awkward postures and back strain. Finding the best breast pump large breasts can make all the difference, providing a more comfortable and efficient experience. 6 Best Breast Pumps for Large Breasts Selecting the best breast pump for larger breast requires considering comfort, flexibility, and the ability to accommodate different breast sizes. Here are the top five breast pumps for larger breasts and the reasons for their inclusion: 1. eufy Wearable Breast Pump S1 Pro The eufy wearable breast pump S1 Pro is the ultimate choice for large-breasted individuals seeking comfort and efficiency. With its smart pumping feature and innovative OptiRhythm™ technology, effortlessly manage pumping sessions through the eufy Baby app. Designed specifically for comfort, the eufy pump features 105° angle flanges and soft silicone materials, ensuring a gentle and snug fit for large breasts. Say goodbye to discomfort and hello to seamless pumping with eufy. Whether you're at home or on the go, eufy offers unmatched comfort and convenience for large-breasted individuals. eufy Wearable Breast Pump: Warm Up Own Your Flow The world’s first HeatFlow™ technology revolutionizes pumping for unparalleled comfort. Offers up to 290 mmHg hospital-grade suction power for efficient milk extraction. prioritizes pumping comfort with uniquely angled 105° flanges and soft silicone. Simplifies your pumping routine with the eufy Baby app. Learn More Buy Now 2. Medela Freestyle Hands-Free Double Electric Wearable Breast Pump The Medela Freestyle Hands-Free Double Electric Wearable Breast Pump is an excellent choice for larger breasts because it offers a range of flange size options to suit different breast sizes and shapes. Its strong suction, with adjustable levels, ensures efficient milk expression while allowing users to customize settings for comfort. The lightweight cups and soft materials make it comfortable to wear, and its USB rechargeable battery adds to its portability. Additionally, it's compatible with Medela bottles and other accessories, making this best breast pumps for large breasts a versatile option for feeding and storage. 3. Momcozy Wearable Breast Pump S12 Pro The Momcozy Wearable Breast Pump S12 Pro is designed to sit inside your bra, providing a discreet and comfortable pumping experience. Its double-sealed flange ensures a strong suction seal, reducing the risk of leakage. The pump offers three modes and nine levels of suction strength, allowing users to find the perfect balance between comfort and efficiency. The lightweight design and wireless functionality make it highly portable, while its compatibility with most bras and milk bags adds convenience. 4. Lola and Lykke Smart Electric Breast Pump The Lola and Lykke Smart Electric Breast Pump offers six stimulation settings and nine expression modes, providing a customizable pumping experience to suit various breast sizes. Its ultra-soft silicone breast shield ensures comfort, while the wireless and lightweight design, combined with a long-lasting battery, makes it ideal for portable use. This pump is also compatible with standard milk bags, allowing for direct pumping into bags for added convenience. 5. Medela Harmony Flex Manual Breast Pump The Medela Harmony Flex Manual Breast Pump is an excellent manual pump option for larger breasts, featuring Flex breast shields with a 360-degree rotatable rim for a comfortable fit. It uses Medela's 2-Phase Expression technology, providing a gentle suction that mimics a baby's natural sucking pattern. This lightweight and portable pump is easy to use and carry, making it suitable for on-the-go pumping. It is also compatible with Medela bottles, facilitating easy feeding and storage. 6. Lansinoh 2 in 1 Double Electric Breast Pump The Lansinoh 2 in 1 Double Electric Breast Pump is a versatile pump that accommodates larger breasts with its wide neck and adjustable flange size. It offers strong suction with multiple levels for effective milk expression and has dual-pump functionality, allowing users to pump from both breasts simultaneously. The soft breast shields and lightweight design contribute to comfort during use. Its ability to operate on batteries or when plugged in adds flexibility and portability. Additionally, the compatibility with Lansinoh bottles and other accessories makes it a convenient choice for seamless feeding and storage. Factors to Consider When Choosing a Breast Pump for Large Breasts When choosing a breast pump for large breasts, it's important to consider several factors to ensure comfort, efficiency, and ease of use: Flange Size Options: The flange is the part of the pump that makes contact with the breast. It's essential to have a proper fit for effective suction and comfort. Look for pumps that offer multiple flange sizes or adjustable flanges to accommodate different breast shapes and sizes. Suction Strength: Strong suction is vital for effective milk expression, but it shouldn't be too harsh. Choose a pump with adjustable suction levels to find the right balance between comfort and efficiency. This is especially important for larger breasts, as they may require stronger suction for thorough milk extraction. Adjustable Settings: Customizable settings, like variable suction levels and pumping modes, can make a significant difference. This allows you to adjust the pump to your preference, providing a more personalized and comfortable experience. Comfort Features: Comfort is crucial for a positive pumping experience. Look for pumps with features like soft breast shields, lightweight designs, and ergonomic handles or controls. These features can reduce discomfort, especially for mothers with larger breasts who may need longer pumping sessions. Portability: A portable breast pump is ideal for mothers who need to pump on the go. Consider pumps that are lightweight, wireless, and have rechargeable batteries. This makes it easier to pump wherever you are, whether at work, traveling, or running errands. Compatibility: Compatibility with other breastfeeding accessories, like bottles and milk storage bags, can be a huge convenience. Choose a pump that is compatible with a range of accessories, allowing for seamless transitions from pumping to feeding and storage. By considering these factors, you can find a breast pump that suits your needs as a large-breasted mother. Conclusion Finding the best breast pump for large breasts can make a significant difference in your breastfeeding journey. With the right pump, you can enjoy a more comfortable and efficient pumping experience. Consider the top 6 recommendations and the key factors outlined above to make an informed choice. Whether you prefer manual or electric, wearable or traditional, there's a pump that suits your needs. FAQs Do wearable breast pumps work with large breasts? Yes. Wearable breast pumps can work with large breasts, but they require a well-fitting bra to ensure proper support and a secure fit. These pumps are designed to be discreet and sit comfortably inside your bra, allowing you to pump hands-free. Does breast size affect pumping? Breast size can affect the pumping experience, particularly in terms of comfort and flange fit. Larger breasts may require larger flanges or pumps with adjustable settings to ensure a comfortable and effective pumping experience.
Baby · 05/05/2024
Best Breast Pump for Working Moms: Top 8 Recommendations for 2024
Finding the best breast pump for working moms is essential for a successful breastfeeding journey. As a professional mother, you need a pump that's efficient, portable, and easy to use during your busy day. The right breast pump can help you maintain your milk supply while juggling work and family responsibilities. In this guide, we'll explore the top 8 breast pumps for working moms, covering a range of options from manual to electric to wearable. We'll also discuss the unique challenges working moms face in breastfeeding, the key factors to consider when choosing the best breast pump for your needs and pumping at work tips. Let's get started! Challenges Faced by Working Moms in Breastfeeding Working moms face several unique challenges when breast milk pumping at work, often due to balancing professional responsibilities with the demands of parenting: Time Constraints: Working moms have limited time for pumping during the workday. Finding regular breaks to express milk can be difficult, especially in high-pressure jobs or environments without flexible schedules. Lack of Private Space: Many workplaces lack dedicated lactation rooms, forcing working moms to breast pump at work in less-than-ideal locations like restrooms or storage rooms. This lack of privacy can be uncomfortable and discouraging. Storage and Transportation: Keeping expressed milk fresh requires proper storage. Working moms need to manage transporting breast milk from work to home, which can be challenging without proper equipment like coolers or insulated bags. Support from Employers: Support from employers and colleagues can vary. Some workplaces may not fully understand or accommodate the needs of breastfeeding mothers, leading to feelings of isolation or lack of support. Work-Related Stress: Stress from work can impact milk production and pumping frequency. High-stress jobs may reduce milk supply or affect a mother's ability to maintain a consistent pumping schedule. Fatigue and Burnout: Balancing work and breastfeeding can lead to exhaustion, especially for moms with disrupted sleep schedules due to nighttime feedings. This fatigue can affect work performance and overall well-being. Travel Requirements: Business travel adds another layer of complexity. Working moms may need to find suitable places to pump on the go, manage milk storage while traveling, and navigate airline restrictions on breast milk transport. Pumping Equipment: Finding the right breast pump and accessories can be challenging. Working moms need pumps that are portable, quiet, and efficient, as well as compatible with their work environment. Top 8 Breast Pumps for Professional Mothers For working moms, choosing the right breast pump is key to maintaining a healthy breastfeeding routine while balancing a busy work schedule. Here are the top 8 breast pumps for professional mothers, categorized into manual, electric, and wearable types. Manual Breast Pumps for Working Moms: 1. Dr. Brown’s Manual Breast Pump Dr. Brown's Manual Breast Pump offers a comfortable and flexible pumping experience thanks to its SoftShape Shield, made from 100% silicone. This manual pump provides two expression modes for quick letdown and relaxed pumping. It's discreet and portable, ideal for working moms with its compact, travel-friendly design. The curved handle and stable bottle base make it easy to use, while the all-in-one system includes a bottle, slow-flow nipple, and cap for added convenience. Cleaning is simple, with dishwasher and sterilizer-safe parts. Made from BPA-free materials, this pump combines comfort, convenience, and safety. 2. Medela Harmony Manual breast pump with Flex Shields Medela Harmony Manual Breast Pump with Flex Shields is a lightweight and discreet option for working moms. Its Flex Technology features a 105-degree angle breast shield with a soft rim and oval shape, enhancing comfort and milk flow. The Two-Phase Expression technology simulates natural baby sucking, with letdown and expression phases for efficient milk collection. This manual pump is easy to operate and clean, with simple assembly for busy schedules. The package includes a 24mm PersonalFit Flex Shield, a 5oz/150mL bottle, and extra parts, providing a complete set for pumping on the go. Electric Breast Pumps for Working Moms: 3. Spectra S1 Plus: The Spectra S1 Plus Electric Breast Pump is a great option for working moms who need flexibility and power. It offers both single and double pumping capabilities, with a vacuum suction that goes up to level 12 (270 mmHg), providing strong and efficient expression. Weighing only 3 pounds, it's lightweight and easy to transport. The built-in night light and LCD screen add convenience, especially for nighttime pumping. Operating at a quiet 45 decibels, it's discreet enough for a work environment. The closed system design prevents backflow, ensuring hygiene. With its combination of power, portability, and quiet operation, it's ideal for working moms. 4. Motif Luna Battery Powered Breast Pump The Motif Luna Battery Powered Breast Pump is designed for working moms who need a powerful yet portable solution. It offers hospital-grade suction, providing strong and effective milk expression. The built-in LED night light and backlit LCD screen make it easy to pump during low-light conditions. With 2+ hours of battery life between charges, it's perfect for moms on the go. The pump's 43-decibel hum ensures quiet operation, allowing you to pump discreetly in any environment. The backflow protection feature maintains hygiene, giving you peace of mind. Wearable Breast Pumps for Working Moms: 5. eufy Wearable Breast Pump S1 Pro The eufy wearable breast pump S1 Pro is tailored to meet the needs of working moms with its smart, portable, comfortable, and capable design. With the industry's first magnetic charging case, offering 5 days of power, eufy ensures uninterrupted pumping sessions even on the busiest of days. Effortlessly manage pumping sessions using the eufy Baby app and OptiRhythm™ technology, maximizing efficiency while on the go. Experience efficient milk expression with hospital-grade suction at 290 mmHg, soft silicone material, and 105°angle flanges making it soft and comfortable to wear. Its lightweight and wearable design, coupled with easy operation, allows for seamless integration into working moms' daily routines. eufy Wearable Breast Pump: Pump Warm for a Better Flow The world’s first HeatFlow™ technology revolutionizes pumping for unparalleled comfort. Offers up to 290 mmHg hospital-grade suction power for efficient milk extraction. prioritizes pumping comfort with uniquely angled 105° flanges and soft silicone. Simplifies your pumping routine with the eufy Baby app. Learn More Buy Now 6. Willow 3.0 (Willow 360) The Willow 3.0, or Willow 360, is designed to give busy moms the freedom to pump wherever and however they need. Its 100% leak-proof latch and 360-degree mobility mean you can pump in any position, even while moving around. The hospital-grade suction, thanks to its patented Continuous Latch technology, ensures strong and efficient milk expression without spills. It's compact and portable, with a rechargeable battery that lasts up to five pumping sessions. Willow's Apple Watch compatibility adds to the convenience, allowing you to control the pump and track your sessions from your wrist. With just two parts to clean, it's a straightforward and low-maintenance option for working moms. 7. Elvie Stride Hospital-Grade App-Controlled Breast Pump The Elvie Stride is a hospital-grade wearable breast pump designed for comfort and discreet pumping. With suction up to -300 mmHg, it provides both Stimulation and Expression modes, each with 10 intensity settings, so you can find the perfect balance. The lightweight cups are designed to be comfortable even during extended wear, making them ideal for busy professionals. It operates quietly thanks to its noise reduction technology, ensuring you can pump without drawing attention. The "Pump with Elvie" app offers remote control, allowing you to adjust settings and track your pumping history from your phone. The customizable fit, with soft silicone nipple cushions in three sizes, ensures a secure and comfortable pumping experience. 8. Freemie Liberty II Deluxe Breast Pump System The Freemie Liberty II Deluxe Breast Pump System is designed for working moms who need power and versatility. With suction up to 280 mmHg and independent controls for suction and cycle, you can customize your pumping sessions to your preference. Its Turbo® power delivers a boost for effective milk expression, while the adjustable sleep timer and memory settings add convenience. The automatic shutoff feature ensures safety, and the easy-to-read LCD screen provides clear information at a glance. Ideal for busy moms, this breast pump system combines strong suction with flexible settings, making it a practical choice for efficient and comfortable pumping when working. Factors to Consider When Choosing a Breast Pump for Working Moms When selecting a breast pump for work, you need to consider several key factors that align with your work environment and personal needs: Portability: A portable breast pump is essential for working moms. Choose a pump that's lightweight and compact, making it easy to carry to and from work. Portable pumps can also be discreet, which is useful in a professional setting. Efficiency: Efficiency is crucial for a breast pump, especially when time is limited. Look for pumps with strong suction and variable settings, allowing you to express milk quickly and effectively during work breaks or lunch hours. Battery Life: A long battery life is a must for working moms who need to pump throughout the day. Choose a pump with a rechargeable battery that can last several sessions between charges, giving you flexibility and reducing the need for constant recharging. Quiet Operation: A quiet pump is ideal for office environments, ensuring you can pump without disturbing colleagues. Electric and wearable pumps with noise reduction technology are excellent choices for working moms. Customization Options: Pumps with adjustable suction levels and expression modes provide a personalized pumping experience. Customization helps you find the most comfortable settings and can improve efficiency. Pumping at Work Tips Pumping at work can be challenging, but with the right strategies, you can make it work for you: Find a Private Space: Look for a dedicated lactation room, an office, or a quiet conference room to ensure privacy and comfort while pumping. Establish a Pumping Schedule: Plan your pumping sessions around work breaks, aiming for every 2-4 hours. Inform your employer of your schedule to avoid disruptions. Use a Portable Breast Pump: Choose a lightweight, battery-operated pump or a wearable breast pump for flexibility and convenience. Keep a Spare Set of Supplies: Have a backup set of pump parts, breast pads, and bottles at work to cover any mishaps or forgotten items. Store Breast Milk at Work: Use an insulated cooler bag with ice packs to store breast milk at work. This ensures it stays fresh until you can take it home. Maintain Hygiene: Keep sanitizing wipes for quick cleaning of pump parts. Thoroughly clean and sterilize at home to maintain hygiene. Stay Hydrated and Energized: Drink plenty of water and keep snacks handy to support your energy and milk supply throughout the workday. Communicate with Your Employer: Discuss your pumping needs with your employer to ensure you have the time and space required for pumping. Conclusion Choosing the right breast pump is vital for working moms who need to balance their careers with breastfeeding. By considering factors like portability, efficiency, battery life, quiet operation, and customization options, you can find the best breast pump for working moms that suits your needs and fits into your workday. A good breast pump can make all the difference, allowing you to maintain your milk supply while focusing on your professional responsibilities. FAQs What is the best breast pump to use while working? For working mothers, the ideal breast pump balances efficiency with convenience. An electric pump is highly efficient, while a manual pump can be quieter and more portable, fitting easily into a workday routine. Consider a model with discreet carrying options and simple assembly for ease of use between tasks. How many times a day do working moms pump? The frequency of pumping varies depending on the mother's milk supply and work schedule. Typically, working moms pump every 2-4 hours to maintain milk production. This could mean 2-3 times during a standard workday, including breaks and lunch hours. It's important to establish a consistent pumping schedule to support your breastfeeding goals and communicate with your employer to ensure you have the necessary time and space for pumping.
Smart Lock · 28/04/2024
7 Best Smart Locks of 2024: Find Your Perfect Security Upgrade
Smart locks have revolutionized the way we secure our homes, allowing doors to be locked and unlocked remotely using our smartphones. These locks support keyless entry options such as apps, codes, or fingerprints, and can integrate with smart home systems. If you’re looking to upgrade to one, choosing the best smart lock for your home can feel tricky with the plethora of options available. To help you make an informed decision, this guide reviews the 7 best smart locks for home currently on the market, each offering unique features that cater to various needs and preferences. We’ll also guide you through the essential factors to consider when selecting a smart lock that fits your lifestyle perfectly. 7 Best Smart Locks Without further ado, let’s delve into the 7 best smart locks on the market, each catering to different needs and preferences. Best Video Door Lock: eufy Video Smart Lock S330 Experience triple-layered security with the eufy Video Smart Lock S330. This device combines a smart door lock, a doorbell, and a crystal-clear 2K HD camera to ensure your home’s safety is never compromised. You can choose from five convenient unlocking methods: via the eufy Security app, fingerprint, physical key, password, or voice assistant. The lock’s self-learning AI continuously enhances its fingerprint identification, becoming faster and more accurate with each use. With remote access through the eufy Security app—offered without a monthly fee—you can manage your door and receive real-time notifications from anywhere. Its long-lasting 10,000 mAh battery and robust build are designed to endure extreme weather conditions, ensuring reliable operation all year round. This best smart lock for front door also features enhanced connectivity and storage options, including a Chime that boosts Wi-Fi connectivity and supports additional video storage up to 128 GB via an SD card. Installation is straightforward, requiring no drilling and is compatible with most US deadbolts. Best Smart Deadbolt Lock: eufy Smart Lock C220 The eufy Smart Lock C220 stands out with its impressive 8-month battery life, powered by 8 AA batteries, and advanced self-learning AI that improves fingerprint recognition with each use. This lock offers 6 different unlocking methods, including fingerprint, the eufy Security app, anti-peep keypad, physical key, Apple Watch, and voice commands via Alexa or Google Assistant. Its built-in Wi-Fi allows for remote control and monitoring via the eufy Security app without additional hardware. You can easily manage user profiles who have access, receive real-time notifications for entry, and review event history. The installation process is straightforward, taking about 15 minutes without the need for drilling, and is compatible with most US deadbolts. It boasts a BHMA Grade 3 certification, enduring over 100,000 lock/unlock cycles and is equipped with an alarm for any unusual entry attempts, offering both security and durability in extreme weather conditions. Best Wi-Fi Smart Lock for Handle Replacement: Schlage Encode Smart Wi-Fi Lever The Schlage Encode Smart Wi-Fi Lever offers remote access and management of your home’s security via the Schlage Home app, thanks to its built-in Wi-Fi. This smart lock allows you to manage up to 100 access codes, view lock history, and receive customizable notifications. It features a fingerprint-resistant touchscreen and a built-in alarm that alerts you to door movement or forced entry attempts. Installation is simple and only requires a screwdriver, fitting both right and left-handed doors. The Encode Smart Lever is stylish yet secure, available in various finishes to suit any home decor. It supports auto-lock with customizable time delays and features control buttons on the interior for quick manual override. Powered by four AA batteries with a six-month lifespan under typical usage, this smart lock also notifies you when batteries are low, ensuring you’re never locked out unexpectedly. Best Ring Compatible Smart Lock: August Wi-Fi Smart Lock Upgrade your door with the August Wi-Fi Smart Lock, designed to work seamlessly over your existing deadbolt. This smart lock offers convenience without compromising the traditional key access, retaining your home’s curb appeal by installing only on the inside of your door. It features direct integration with Wi-Fi, allowing for voice control via Amazon Alexa, Google Assistant, Apple HomeKit, and more, ensuring full functionality with your smart home systems. The August app grants the ability to create temporary, scheduled, or permanent access for visitors. Installation is straightforward and can be completed in about 10 minutes without professional help. The auto-lock/unlock feature detects your arrival and secures your door after you enter. Esteemed by tech experts, the August Wi-Fi Smart Lock has received multiple awards for its innovation and reliability in smart home security. Best Keyless Door Lock: Aqara Smart Lock U100 The Aqara Smart Lock U100 redefines convenience with its integration into the Apple Home ecosystem, allowing for unlocking via Apple home keys on iPhone or Apple Watch. This lock supports multiple unlocking methods including a precise fingerprint reader, remotely set passwords through the Aqara Home app, and a mechanical key for emergencies. Designed to work with a variety of smart home devices through the Aqara Zigbee 3.0 hub, it offers extensive automation possibilities. The U100 features a Do Not Disturb mode to silence lock sounds during late hours, and an auto-lock function that ensures your door is secure. Constructed from durable zinc alloy and designed to withstand harsh temperatures, the U100 offers longevity and security, storing your data safely with full AES encryption. It operates on AA batteries with a USB-C port available for emergency charging, combining robust security with sophisticated technology. Best Smart Door Lock for Value: Ultraloq U-Bolt Pro with Wi-Fi Offering exceptional value at $117.06, the Ultraloq U-Bolt Pro is a versatile 6-in-1 keyless entry smart lock that includes features such as a fingerprint reader, an anti-peep keypad, smartphone access, auto unlock, and a physical key. The 360° Live Fingerprint ID ensures access with just a touch from any angle, and the anti-peep keypad allows entering a longer number sequence with the correct password embedded for enhanced security. The auto unlock function detects your arrival, unlocking the door as you reach it, and relocks automatically for your convenience. You can share access securely through temporary or permanent codes and eKeys. Designed for DIY installation, it fits any US standard door and operates efficiently on AA batteries, ensuring a low maintenance solution with robust security features. Best Smart Lock for Minimalistic Design: Lockly Flex Touch Pro The Lockly Flex Touch Pro merges sleek design with advanced security technology, offering multiple unlocking methods such as a highly responsive fingerprint sensor, the Lockly app, eBadge, QR code, voice control, and a physical key. Its quick 3D biometric fingerprint recognition unlocks your door in less than 0.3 seconds and can store up to 99 fingerprints. The lock’s Welcome Mode can be set to keep your door unlocked during specified times for hassle-free access. It’s designed for easy installation on most deadbolt doors in the US, supporting a fuss-free setup and long-lasting battery life of over 10 months. The Lockly Flex Touch Pro is managed through the Lockly app that provides real-time alerts, access logs, and auto-locking features, all without a subscription, making it an excellent choice for those who appreciate simplicity with functionality. How to Choose the Best Smart Lock? When selecting the right smart lock for your home, consider the following factors to make an informed decision: Evaluate Your Door Compatibility: Before exploring smart lock options, it’s essential to understand the specifications of your existing door setup. Check the type of deadbolt, door thickness, and the backset distance (the measurement from the edge of the door to the center of the lock). Most smart locks are designed to fit standard doors, but verifying compatibility is crucial to ensure a seamless installation. Think About Access Methods: Decide how you want to unlock your door. Options include keypads, smartphone apps, biometric fingerprints, or even voice commands via smart home assistants. Consider who needs access to your home and how frequently. For example, a keypad might be a better option if you have guests often, whereas biometric features offer a higher security level for family-only access. Consider Connectivity Options: Smart locks can connect via Bluetooth, Wi-Fi, Z-Wave, or Zigbee. Wi-Fi locks offer convenience by allowing you to control the lock anywhere with an internet connection but usually require more power. Bluetooth locks are more energy-efficient but work only within a close range. Z-Wave and Zigbee require a hub but integrate smoothly with a broader smart home system. Explore Integration with Your Smart Home Ecosystem: If you already have a smart home ecosystem or plan to build one, choose a smart lock that integrates well with other devices. Some locks work seamlessly with systems like Google Home, Amazon Alexa, or Apple HomeKit, allowing for routines and automations like turning on lights when you unlock the door. Look for Additional Security Features: Look for locks that provide additional security features such as built-in alarms, auto-lock capabilities, and the ability to detect and notify you of unauthorized entry attempts. Also, consider the lock’s resistance to tampering and its compliance with security standards like ANSI/BHMA grades. Review Battery Life and Power Options: Smart locks are powered by batteries, and their life span can vary significantly. Consider how often you’ll need to replace batteries and whether the lock you choose offers a low-battery indicator or an emergency power option like a USB port. Check for Easy Installation and Support: Look for locks that are easy to install, which can save you from the hassle and cost of professional installation. Also, consider the manufacturer’s customer support and warranty provisions. A responsive customer service and a robust warranty can be invaluable in resolving any issues that might arise. Set Your Budget: Finally, determine how much you are willing to invest in a smart lock. Prices vary widely based on features, brand, and technology. Setting a budget beforehand can help you narrow down your choices without compromising essential features. Conclusion Choosing the best smart lock for your home is a crucial decision that can affect your daily convenience and security. Throughout this guide, we’ve outlined the top 7 smart locks on the market and provided insights on what makes each one stand out. By considering factors like connectivity, ease of use, and security features, you can select the best smart lock that not only meets your security needs but also integrates seamlessly with your smart home ecosystem. Invest wisely and enjoy the blend of convenience and security that smart locks bring to the table. FAQs How long do smart locks last? Smart locks typically last between 6 months to a year on a single set of batteries, depending on usage and the type of batteries used. Frequent use and connectivity features such as Wi-Fi can drain batteries faster. Is a smart lock safer than a deadbolt? Smart locks offer advanced security features such as encryption, tamper detection, and remote access, making them a secure alternative to traditional deadbolts. It’s essential to choose a reputable smart lock with robust security features. Can you put a smart lock on any door? In most cases, smart locks are designed to fit standard door sizes and configurations. However, it’s essential to check the compatibility of the smart lock with your door’s thickness and deadbolt configuration before installation. Some smart locks may require additional hardware or modifications to ensure a proper fit and functionality.
Security Cameras · 28/04/2024
Best Outdoor Security Cameras for Ultimate Protection: Top 10 Picks
Outdoor security cameras are indispensable tools for safeguarding our homes and businesses alike. By their mere presence, they deter potential intruders, and modern outdoor security cameras today offer advanced capabilities extend far beyond simple surveillance. But with the myriad options available on the market, choosing the right one can feel overwhelming. This guide aims to simplify that decision with a curated list of the top 10 best outdoor security cameras of 2024. We’ll compare these top contenders side by side and discuss key factors to consider before making your purchase. What Is an Outdoor Security Camera? Outdoor security cameras are surveillance devices designed to monitor and record activities in outdoor spaces. Equipped with features like motion detection, night vision, and high-definition video recording, these cameras provide round-the-clock surveillance outside your home, offering you peace of mind and a deterrent to potential intruders. Modern outdoor security cameras connect to your home’s Wi-Fi network, allowing you to view live video feeds and receive alerts on your smartphone, tablet, or computer, no matter where you are. This connectivity also supports other advanced features such as remote pan and tilt control, two-way audio communication, and integration with broader smart home systems. Top 10 Outdoor Security Cameras Here, we delve into the 10 best outdoor security cameras for home available on the market, each tailored to meet specific needs and preferences. From cameras boasting superior resolution and battery life and to those offering Pan-Zoom-Tilt capabilities and LTE connectivity. Let’s take a closer look: Best Overall Outdoor Security Camera: eufy SoloCam S340 The eufy SoloCam S340 Wireless Outdoor Security Camera is a standout choice for those seeking comprehensive coverage. This camera boasts a dual-lens setup, offering ultra-clear 3K resolution imaging at distances up to 50 feet and 2K resolution when utilizing AI Tracking or Dual Views. With 8x zoom capabilities, you can capture fine details with precision. The 360° Pan & Tilt feature ensures complete coverage of your surroundings, leaving no blind spot unchecked. Additionally, its solar-powered operation allows for continuous, eco-friendly monitoring without any recurring costs. The camera supports local storage, avoiding additional fees, and can be installed wirelessly in just five minutes, making it an ideal solution for quick and efficient home security setups. Best Wireless Outdoor Security Camera: eufyCam S221 The eufyCam S221 is a wireless outdoor security camera designed for longevity and convenience, boasting a battery life that lasts a full year on a single charge. It captures detailed visuals in 2K resolution, ensuring that no critical detail goes unnoticed. With advanced night vision and smart image enhancement, this best outdoor security camera system delivers superior image quality even at night. Its IP67 weatherproof rating guarantees durability against the elements, while compatibility with major smart home systems enhances its functionality. Security is further bolstered by advanced encryption, ensuring that only you can access your footage. Best Outdoor Home Security Camera for Field of View: Arlo Pro 5S 2K Maximize your surveillance area with the Arlo Pro 5S 2K, which offers a broad 160° field of view complemented by 12x zoom and 2K HDR video quality. This camera is perfect for capturing detailed images like faces or license plates. Its dual-band WiFi connectivity ensures a reliable and strong connection, while color night vision capabilities provide clear, identifiable visuals after dark. The integrated spotlight deters unwanted visitors, and its wire-free design allows for easy installation. Best Outdoor Security Camera for Battery Life: Blink Outdoor 4 For those prioritizing battery efficiency, the Blink Outdoor 4 offers up to two years of surveillance on just two AA lithium batteries. This fourth-generation wire-free smart camera delivers 1080p HD live views and includes infrared night vision and two-way audio. Enhanced motion detection and optional person detection via the Blink Subscription Plan ensure you’re only alerted to significant movements. Local storage options are available with the Sync Module 2 (included) and a USB drive (sold separately), providing flexibility and control over your data. The camera’s compatibility with Alexa enables voice control for added convenience. Best LTE Outdoor Security Camera: Arlo Go 2 The Arlo Go 2 is ideal for areas with limited or no WiFi access, as it connects to cellular data with an SIM card for monitoring remote areas. Designed to operate in various weather conditions, this camera is entirely wire-free and features a swappable rechargeable battery, ensuring continuous operation. You can store footage directly onto a microSD card to view at your convenience, making it one of the best outdoor security cameras without subscription fees. The integrated spotlight enhances the color night vision, allowing for clearer identification of details in low-light conditions. With 1080p HD video and superior audio quality through 2-way audio, this camera keeps you connected and secure wherever you are. Best Spotlight Outdoor Security Camera: Ring Spotlight Cam Plus The Ring Spotlight Cam Plus provides high-quality, wide-angle 1080p HD video with Color Night Vision, ensuring you can monitor your home day or night. It features Live View for real-time streaming and two motion-activated LED spotlights that illuminate when motion is detected. Customize motion zones to focus on the most critical areas of your property, ensuring you’re alerted to the activity that matters most. Powered by the Quick Release Battery Pack, installation and maintenance are straightforward. Integrated two-way audio lets you communicate with visitors from anywhere. The camera also integrates seamlessly with Alexa, allowing for audio announcements and more interactive control. Best Wired Outdoor Security Camera: TP-Link Tapo 2K The TP-Link Tapo 2K is designed for those who prefer a reliable wired connection. With an IP66 weatherproof rating and stunning 2K HD video clarity, this camera captures every minute detail outside your home. It integrates effortlessly with Amazon Alexa and Google Assistant, allowing you to stream video directly to devices like the Amazon Echo Show or Google Chromecast. AI-powered detection algorithms deliver instant notifications if motion or a person is detected, ensuring you’re always aware of what’s happening. The two-way audio with a built-in siren enhances security, enabling you to communicate and deter intruders. Best Floodlight Outdoor Security Camera: Lorex 2K WiFi Floodlight Camera Enhance your property’s security with the Lorex 2K WiFi Floodlight Camera, featuring a 4 MP sensor that delivers 2X resolution video at 15 FPS. This camera offers both Color Night Vision and IR Night Vision, ensuring clarity in various lighting conditions. Its adjustable lights can be set to the perfect brightness and include motion, camera, manual, and scheduled modes. The Lorex Home app provides remote access to live video and playback from the pre-installed 32GB MicroSD card, ensuring your footage remains private and secure with no subscription fees. Compatible with Amazon Alexa and Google Assistant, this camera supports voice commands and two-way talk, making it a versatile and powerful addition to your home security system. Best Versatile Outdoor Security Camera: Google Nest Cam The Google Nest Cam is designed for adaptability and intelligence, differentiating between people, animals, and vehicles. It offers 1080p HDR video with night vision and provides three hours of free event video history, with additional history available through a Nest Aware subscription. This battery-powered unit can be placed anywhere outdoors and includes a magnetic mount for easy installation. For continuous power and recording, optional accessories like a weatherproof power cable are available. Stream live video on smart displays using Google Assistant or Amazon Alexa for an integrated smart home experience. Best Pan-and-Tilt Outdoor Security Camera: EZVIZ H8 Pro The EZVIZ H8 Pro camera redefines home surveillance with its 340° pan and 80° tilt coverage, ensuring no corner is left unmonitored. This camera features ultra-clear 3K resolution and robust connectivity, thanks to its powerful antenna. With AI-driven detection and innovative waving-hand recognition, it provides intuitive interaction and security. Upon detecting movement, it activates a siren and flashes spotlights to deter intruders. Its all-weather design guarantees performance in any conditions. The H8 Pro offers flexible storage options, supporting a local microSD card or EZVIZ CloudPlay for secure cloud storage, ensuring that your data and peace of mind are always intact. Outdoor Security Cameras Comparison To help you identify which camera best meets your specific needs, below is a side-by-side comparison table of these top models: Feature eufy SoloCam S340 eufyCam S221 Arlo Pro 5S 2K Blink Outdoor 4 Arlo Go 2 Ring Spotlight Cam Plus TP-Link Tapo 2K Lorex 2K WiFi Floodlight Camera Google Nest Cam EZVIZ H8 Pro Price $199.99 $369.99 $179.99 $65.00 $249.99 $129.99 $29.98 $197.99 $129.99 $139.99 Resolution 3K 2K 2K 1080p 1080p 1080p 2K 2K 1080p 3K Field of View 135° 135° 160° 143° 130° 140° 130° 122° 130° N/A Pan & Tilt Angle Pan: 360°, Tilt: 70° N/A N/A N/A N/A N/A N/A N/A N/A Pan:340° Tilt: 80° Night Vision Color Night Vision Enhanced Night Vision Color Night Vision Standard Night Vision Color Night Vision Color Night Vision Enhanced Night Vision Color Night Vision Standard Night Vision Color Night Vision Power Source Battery & Solar Power Battery Battery Battery Battery Battery Wired Wired Battery Wired Storage Option Local Storage Local Storage Subscription or Local Storage Subscription or Local Storage Local Storage Subscription Only Subscription or Local Storage Local Storage Subscription Only Subscription or Local Storage Lighting Spotlight Spotlight Spotlight None Spotlight Spotlight None Adjustable Floodlights None None Motion Detection Yes Yes Yes Yes Yes Yes Yes Yes Yes Yes Two-Way Audio Yes Yes Yes Yes Yes Yes Yes No Yes Yes Voice Assistant Alexa, Google Assistant Alexa, Google Assistant Alexa, Google Assistant Alexa Alexa, Google Assistant Alexa Alexa, Google Assistant No Alexa, Google Assistant Alexa, Google Assistant Weatherproof Yes IP67 IP65 Yes IP65 Yes IP66 IP65 IP54 IP65 Factors to Consider When Choosing an Outdoor Security Camera When choosing an outdoor security camera, several key factors should be considered to ensure you select the ideal model for your specific needs. Here’s a breakdown of the essential elements to keep in mind: Video Quality and Resolution:The clarity of the video captured by your security camera is paramount. Higher resolution cameras will provide clearer images, making it easier to identify faces, license plates, and other important details. Look for cameras with at least 1080p resolution but consider 2K or even 3K if you require more detailed imagery. Field of View:The field of view determines how much of your property can be surveyed at one time. A wider field of view will cover more area, reducing the number of cameras you need. However, the wider the field of view, the more potential for image distortion, so balance is key. Night Vision:Since most security concerns occur at night, ensuring your camera has effective night vision is crucial. Look for cameras with infrared (IR) night vision to provide clear black and white images. Many advanced models also offer Color Night Vision, which can be beneficial for identifying details like the color of clothing or vehicles. Motion Detection and Alerts:Advanced motion detection capabilities can help you monitor your property more effectively by alerting you to movement without the need to constantly watch the footage. Some cameras come with customizable motion zones, which allow you to specify the areas within the camera’s field of view that you want to monitor for activity. Audio Features:Two-way audio is a useful feature that lets you communicate through your camera. This can be used to speak to visitors at your door, whether they’re welcome or not, and can also be used to deter intruders verbally. Storage Options:Consider whether you prefer local storage on an SD card or cloud storage. Local storage can be more secure, as it’s less susceptible to hacking. Cloud storage typically requires a monthly fee but provides easy access to your data from anywhere and continuous recording. Power Source:Decide if you want a wired camera, which generally has a consistent power supply, or a wireless model, which offers more flexibility in placement but requires battery changes or recharging. Solar-powered cameras are also an option for continuous operation without the need to recharge batteries. Weather Resistance:Outdoor cameras should have a high weatherproof rating (IP66 or higher) to withstand various environmental conditions such as rain, snow, heat, and dust. Ensure the camera’s operating temperature range is suitable for your local climate. Smart Home Integration:If you have a smart home system, such as Google Home or Amazon Alexa, consider a compatible camera for seamless integration. This can allow for features like viewing camera feeds on smart displays or using voice commands to control camera settings. Installation and Setup:Consider how easy the camera is to install and set up. Many easy-to-install outdoor security cameras offer simple DIY installation, while others might require professional installation, especially if they’re wired or part of a larger security system. Conclusion Choosing the best outdoor security cameras for your home is crucial to enhancing your security measures. Today, we’ve explored various top-rated outdoor security cameras, each offering unique features that cater to different security needs. By comparing these models and considering the essential factors like video quality, connectivity, night vision, and additional security features, you are now equipped to make an informed decision that aligns with your security needs and budget. Invest wisely and stay secure! FAQs How much does an outdoor security camera cost? The cost of outdoor security cameras varies depending on factors such as brand, features, and capabilities. Basic models may start as low as $50, while more advanced cameras with features like high-resolution video, motion detection, and night vision can range from $100 to $400 or more. Do any outdoor security cameras work without Wi-Fi? Yes, outdoor security cameras that operate without Wi-Fi generally fall into two categories: Analog CCTV cameras and cellular cameras. Analog CCTV cameras use traditional analog signals and require a wired connection to a local DVR (Digital Video Recorder). Cellular cameras, on the other hand, use cellular networks to transmit video data. Both types are suitable for locations where Wi-Fi is unreliable or unavailable. Do outdoor security cameras need to be plugged in? While some outdoor security cameras require a wired power source, many modern models offer wireless options that run on batteries or solar power. These wireless cameras offer greater flexibility in placement and installation, making them popular choices for outdoor surveillance.
Security Cameras · 28/04/2024
How to Make a Smart Home: Begin Your Smart Transformation
The concept of a smart home has transitioned from a futuristic fantasy to a practical and achievable reality. Imagine controlling your lights or asking your favorite tunes to play with just your voice, or chatting remotely with delivery drivers through your doorbell. These are all attainable with various smart appliances and a few setup steps. If you are considering building a smart home, we’re here to help. In this guide, we’ll delve into the benefits of a smart home, detail the essential components you need, and most importantly, walk you through the steps on how to make a smart home successfully. Join us and transform your traditional dwelling into a connected and efficient haven. What Is a Smart Home? At its core, a smart home utilizes advanced connectivity to allow you to control and monitor internet-connected gadgets remotely, whether through a smartphone app, voice commands, or even automatically based on your habits and preferences. This smart home integration spans a wide range of functions, from basic tasks like controlling lighting and temperature to more complex systems such as security alarms, doorbells, cameras, and even appliances like refrigerators and washers. The unifying feature of these devices is their ability to communicate with one another via the internet, often referred to as the Internet of Things (IoT). This connectivity not only enhances convenience but also improves energy efficiency, security, and overall quality of life by adapting the home’s functionality to your specific needs. Benefits of a Smart Home A smart home installation offers a plethora of advantages that cater to enhanced lifestyle, efficiency, and security. Here are some of the key benefits you can enjoy: Increased Convenience: One of the most immediate benefits of a smart home is the sheer convenience it offers. Smart devices can be controlled remotely through apps or voice commands, allowing you to manage your home’s functions from anywhere. Imagine preheating your oven on your way home from work or adjusting your home’s lighting and temperature settings from your bed. Enhanced Security: Smart homes elevate home security to new levels. With connected cameras, motion detectors, and door sensors, you can monitor your home 24/7 from your smartphone. Automatic alerts inform you of any suspicious activities immediately, while smart locks and security systems can be activated remotely, providing peace of mind whether you're at home or away. Energy Efficiency: Smart homes are not only good for convenience and security, but they also promote energy conservation. Smart thermostats and lighting systems learn your habits and adjust accordingly to reduce power usage, which in turn lowers utility bills. Moreover, with the ability to monitor and control the energy consumption of appliances, homeowners can see which devices are using the most energy and manage their use more effectively. Personalized Comfort: Smart homes adapt to the personal preferences and needs of their residents. For example, smart thermostats can adjust the temperature to your exact liking at scheduled times of the day, and smart blinds can be programmed to open or close based on the time of day or the position of the sun. Components of a Smart Home Before going deep into how to make your home a smart home, let’s take a look at the various components you’ll need: Smart Hub: Often considered the brain of a smart home, the smart hub connects different devices and allows them to communicate with one another. It enables centralized control of all smart devices through a single interface, which can be an app on your smartphone or a dedicated control panel. Voice Assistants: Devices like Amazon Echo, Google Home, or Apple HomePod allow you to control other smart devices using voice commands. They act as an interface between you and your smart home, enabling hands-free operation. Networking Components: Reliable Wi-Fi and possibly additional networking equipment are necessary to ensure that all smart devices can communicate effectively and without interruption. In some cases, a more robust home network might be needed to handle the increased load. Smart Lighting: Smart bulbs and lighting systems offer remote control, scheduling, and even color changes. These systems can adjust the brightness based on the time of day or be controlled via voice commands, offering both convenience and energy savings. Smart Thermostats: These devices help in managing your home’s heating and cooling systems more efficiently. They learn your temperature preferences and schedule, making automatic adjustments to save energy while keeping your home comfortable at all times. Smart Security Systems: A smart home security system includes a range of products such as smart locks, surveillance cameras, motion detectors, and alarm systems. These devices can be monitored and controlled remotely and can send alerts to your smartphone if they detect unusual activity. Smart Entertainment Systems: From smart TVs to smart speakers and home theaters, these devices enhance your entertainment experience. They can be controlled through voice commands or apps and can also be connected to other smart devices for a seamless experience. Smart Appliances: Increasingly, large home appliances like refrigerators, ovens, and washing machines are being equipped with smart technology. These appliances offer enhanced features such as energy efficiency, remote control, and even maintenance notifications. Smart Sensors: Sensors are crucial for automation. This includes everything from temperature and humidity sensors to those that detect water leaks or smoke. These sensors help in maintaining the safety and comfort of your home by providing essential data to other smart devices. How to Set up a Smart Home? Setting up a smart home might seem daunting, but it can be broken down into manageable steps that ensure a seamless integration of technology into your living space. Here’s how to turn your house into a smart house: Define Your Needs and Budget Before diving into how to build a smart home, assess what aspects of your home life you wish to enhance through automation. Do you prioritize security, convenience, entertainment, or energy efficiency? Set a budget that reflects your priorities, as this will guide your decisions on the types of devices and systems to invest in. Choose a Smart Home Hub First thing on how to set up a smart home is to select a central hub that will coordinate all your smart devices. This could be a voice assistant like Amazon Echo, Google Home, or Apple HomeKit, or a dedicated smart home controller. Consider compatibility with existing devices and future expansions. Start with Basic Smart Devices Begin with foundational elements such as smart lighting or smart thermostats. These devices often provide the most immediate benefits and are relatively straightforward to install. Ensure that they are compatible with your hub to facilitate easy control and automation. Install Smart Security Systems One of the key aspects on how to create a smart home is to install a smart security system, including smart locks, security cameras, and alarm systems. These devices can offer peace of mind by allowing you to monitor your home remotely and receive alerts in case of suspicious activities. Smart Locks: Smart locks are one of the first security devices you should consider. Video smart locks like the eufy Video Smart Lock E330 let you lock and unlock doors remotely via a smartphone app, see and communicate with whoever is at your door, even when you’re not home. They often feature keyless entry, custom access codes, and the ability to track who comes and goes, providing both convenience and a detailed log of entries and exits. Security Cameras: Installing smart security cameras around your home can help you monitor your property in real-time from anywhere. These cameras, such as the eufy SoloCam S340 Outdoor Security Camera, often come with features like motion detection, night vision, and the ability to record and store video footage on the cloud. For indoor use, cameras can also serve as a way to check on pets or children when you’re not home. It’s important to place cameras strategically to cover entry points and sensitive areas of your property. Alarm Systems: A smart home security alarm system can be integrated with the rest of your security setup, sounding an alarm and sending an alert notification to your phone when a security breach is detected. Many modern smart home systems also allow you to arm or disarm your alarm remotely, which adds a layer of flexibility. Expand to Entertainment and Appliances Integrate smart entertainment systems like speakers, TVs, and streaming devices. Consider smart appliances if your budget allows, such as a smart refrigerator or washer. These appliances offer enhanced functionalities and can be controlled remotely. Optimize with Sensors and Routines To fully leverage the capabilities of a smart home, integrate sensors (like motion sensors, door/window sensors, and environmental sensors) that can trigger devices to react to specific conditions. Set up routines or automations that allow your devices to operate based on the time of day, your location, or other conditions. For example, lights that turn on when motion is detected or thermostats that adjust based on time of day. Secure Your Network Since smart homes rely heavily on internet connectivity, ensure your Wi-Fi network is secure. Use strong, unique passwords, enable two-factor authentication where possible, and keep your router’s firmware updated. Consider a separate network for your smart devices for added security. Monitor and Adjust After setting up your smart home, spend some time monitoring how the systems work and how they integrate into your daily life. Make adjustments as needed to ensure that your smart home is tailored perfectly to your needs and preferences. Keep Updated Lastly, keep your devices updated with the latest software to ensure they are secure and running efficiently. Check for updates regularly and follow the manufacturer’s recommendations to get the most out of your smart home technology. Conclusion As we’ve seen, creating a smart home can enhance your quality of life by providing convenience, security, and energy efficiency. By carefully planning and selecting the right components and following this step-by-step guide on how to make a smart home, you can enjoy the benefits of a connected home tailored to your needs and preferences. So, transform your living space today and enjoy the myriad benefits that smart home technology has to offer. FAQs Do smart homes use a lot of electricity? Smart homes can actually help reduce electricity usage by optimizing energy consumption through automation and smart scheduling. For example, smart thermostats can adjust heating and cooling based on occupancy and weather conditions, while smart lighting can dim or turn off lights when not in use. How to control everything in your smart home? To control everything in your smart home, you can use a centralized smart home hub that is compatible with all your devices, like Google Home, Amazon Alexa, and Apple HomeKit. Ensure all your smart devices are connected to the same Wi-Fi network and follow the setup instructions to connect each device to your central hub. Control your devices through smartphone apps or voice commands and automate routines and schedules for added convenience. How much does it cost to build a smart home? The cost of building a smart home can vary depending on the size of your home, the number of devices you want to install, and the features you desire. A basic smart home setup with essential devices like a smart hub, thermostat, and lighting can cost a few hundred dollars, while more advanced setups with additional devices and features can cost several thousand dollars. It’s essential to budget carefully and prioritize the devices that align with your needs and preferences.
Robovac · 28/04/2024
Home Cleaning Checklist: Essential Tips & Tricks
Maintaining a clean home can often feel burdensome, especially without a strategy. However, creating a tailored cleaning schedule can transform this chore into an achievable routine. A home cleaning checklist breaks the overwhelming job of sanitizing your entire living area into discrete, workable steps. This guide will explain why such a checklist is crucial, how to develop one customized for your requirements, which tasks to incorporate, techniques for use, and the advantages and disadvantages of digital versus traditional checklists. Keeping your surroundings tidy does not need to be a daunting job when divided into small, regularly completed duties outlined in a customized cleaning schedule. The Role of a Home Cleaning Checklist in Maintaining a Clean Home Importance of regular cleaning Continuous sanitization is exceptionally critical in keeping up a solid and agreeable living space. It wipes out microscopic organisms that can cause sicknesses, diminishes hypersensitivity triggers like residue and shape, and keeps bugs far from home. Furthermore, a perfect home is outwardly engaging and can essentially upgrade your state of mind and profitability. It is additionally essential for well-being as regular purging can forestall the spread of infections. A perfect home likewise encourages unwinding and reduces pressure, along these lines expanding profitability. While keeping a home clean takes effort, the advantages to one's well-being and way of life make it justified. Benefits of a systematic approach A home cleaning checklist brings a systematic strategy to the method of cleansing. It ensures that no activity is overlooked and helps distribute the work over time, making cleansing much less overwhelming. With a checklist, you can monitor your development, which can be gratifying and motivating. It additionally makes it simpler to delegate errands if you reside with others. A cleaning checklist allows you to completely cleanse your house without missing any key spaces or tasks. You can break up the extensive listing into daily, weekly, or month-to-month duties to maintain your residence spotless all year long. Assigning explicit rooms or jobs every day of the week prevents any place from going too long without cleaning. Checking off finished gadgets at the quit of every day offers an experience of achievement and maintains you targeted to finish deep cleansing duties as nicely. Living with a cleansing schedule maintains everybody's residing areas clutter-loose and sanitary. Room-by-Room Breakdown: What to Include in Your Home Cleaning Checklist In the kitchen, ensure that each appliance is thoroughly scrubbed inside and out to remove any lingering dirt or debris. Carefully wipe the countertops with a microfiber cloth to disinfect and polish the surface. Thoroughly scrubbing the sink with an all-purpose cleaner will leave it sparkling. Mopping is also essential. Living Room: Dust and polish furniture, vacuum carpets or mop floors, clean windows, and tidy up clutter. Bedrooms: Change and wash bedding, dust furniture, clean mirrors, and declutter. While bathrooms require regular cleaning to remain hygienic, it's important to sanitize each area to eliminate germs and bacteria thoroughly. Be sure to scrub the interior of the toilet bowl to remove built-up grime and wipe down the exterior. For the shower or tub, use an all-purpose cleaner and a sponge to scour its walls and flooring. Keep in mind, your checklist has the flexibility to be modified as necessary to suit the needs of your living space and way of life. While the basic categories will remain constant, the individual items within each can be tailored to your specific circumstances and priorities. eufy S1 Pro - The World’s First Floor Washing Robot Vacuum Meet eufy S1 Pro, unleash the power of real-time self-cleaning floor washing robot combined with a high-performance vacuum, all in one revolutionary device. Say goodbye to manual labor and hello to groundbreaking innovation and design. Don't miss out on the revolution in home cleaning: Go Now More Robot Vacuum and mops Implementing Your Home Cleaning Checklist: Tips and Tricks Actualizing your home cleaning rundown productively requires some procedure. Here are a couple of hints to enrich and reinforce your cleaning endeavors: Tackling the most difficult chores at the outset can make lighter duties seem more manageable in comparison. Approaching major cleaning tasks early on prevents them from looming over one's head and allows their completion to be enjoyed sooner. This strategy also helps preserve motivation, as conquering hardships builds momentum that can then be applied to easier feats. While it may be tempting to try and accomplish all of your tasks in a single day, dividing responsibilities over a longer period is often a wiser approach. Cramming everything into an overly condensed timeframe runs the risk of lowering the quality of your work as fatigue sets in. Involving all members of your household can make completing tasks more efficient and less burdensome for each individual. When responsibilities are equitably shared amongst everyone, complex projects that once felt overwhelming can transform into manageable steps. Assigning small duties aligned with each person's strengths helps everyone contribute in accordance with their abilities. To achieve optimal outcomes, it is beneficial to remain dedicated to your established routine. While minor deviations may occasionally be unavoidable, endeavoring to adhere faithfully to your planned regimen as closely as circumstances permit will help you progress steadily toward your goals. Consider each consistent implementation an investment paying future. Digital vs. Physical Checklists: Which One Is Right for You? Choosing between a digital and physical checklist depends on personal preference. While a digital checklist on an app provides the benefit of convenience and accessibility from any device, as well as useful features like reminders and progress tracking, relying solely on technology has some limitations. Apps need an internet-connected device to access the checklist, but there may be times when a device is unavailable or has a dead battery. Printing or writing a physical checklist ensures it can be accessed anywhere without requiring technology. A hybrid approach that incorporates both digital and paper checklists may be ideal. An app provides the flexibility to access and update the checklist remotely while also having a paper backup that doesn't rely on devices or internet access. Together, digital and physical checklists maximize convenience while also building in redundancy to handle situations where While a physical checklist allows for the tangible satisfaction of checking off completed tasks and is simple to utilize without technological expertise, it is possible for such lists to become disorganized or misplaced. They lack reminder capabilities to notify the user of upcoming tasks and deadlines. Digital or online checklists address these issues by retaining tasks and scheduling reminders in the cloud, keeping lists organized virtually so they cannot become lost or separated from the user. This allows tasks to be managed from any device with internet access. Details like due dates, repeating tasks, subtasks, and notes can be added to provide comprehensive oversight of ongoing projects and responsibilities. Automatic alerts help ensure essential items are not overlooked. For those who prefer a hybrid approach, apps exist that sync paper checklists digitally through photos, combining the pros of both methods. Conclusion Ultimately, having a home cleaning checklist is an extremely useful tool for sustaining a clean and cozy living space. It guarantees that no chore falls through the cracks, divides cleaning into manageable portions, and even facilitates enlisting others to help. Regardless of whether you favor a digital or printed checklist, what truly matters is discovering a process that functions for your needs and sticking with it.
Security Cameras · 28/04/2024
How to Install Security Cameras Like a Pro: Complete Guide
Ensuring the safety of our home or business is more important than ever, and security cameras play a vital role in surveillance, deterring crime, and capturing crucial evidence. However, installing these devices isn’t just about mounting a camera on the wall. It involves understanding legal considerations, determining strategic locations, and knowing the technical aspects of both wired and wireless systems. In this comprehensive guide, we’ll delve into the nuances of how to install security cameras, ensuring you’re equipped with the knowledge to enhance your security effectively and legally. Understanding Security Camera Installation Law Before diving into the installation process, it’s crucial to navigate the legal landscape first. In the United States, laws regarding home security camera installation vary significantly between states and even local municipalities, but there are common legal principles every homeowner should consider: Expectation of Privacy: One of the fundamental principles is that you cannot record areas where there is a reasonable expectation of privacy. This typically includes places such as bathrooms, dressing rooms, and other private areas. It’s crucial to position cameras so that they do not capture these areas, particularly in a neighbor's property. Audio Recording: Another critical aspect to consider is audio recording. Federal wiretap laws make it illegal to record conversations without the consent of at least one party involved. Some states have even stricter laws requiring all parties involved in a conversation to consent to being recorded. Therefore, if your security cameras also capture audio, make sure you understand the consent laws applicable in your state. Data Protection Laws: Handling the data your cameras collect is another essential aspect of the legal framework. Ensure that the storage and potential sharing of video footage comply with data protection laws. This includes securing recordings to prevent unauthorized access and understanding how long you can legally retain footage. Currently, 15 states in the U.S. have specific security camera laws: Tennessee, Michigan, and Utah: Public surveillance camera installation doesn’t require permission, but consent is needed for hiding cameras in private areas. Arkansas: State law mandates consent for recording individuals in private spaces. Hawaii: Consent of those being monitored is necessary for installing security cameras. New Hampshire, Maine, Kansas, South Dakota, and Delaware: These states require consent for hidden camera surveillance, based on the “reasonable expectation of privacy” principle. California: It’s illegal to make video recordings of confidential communications in California. Georgia: Video surveillance cameras are permitted in both public and private settings as long as they are visible. Florida, Alabama, and Minnesota: Hidden video surveillance is allowed in non-private settings. However, the concept of “non-private” should be understood in terms of the expectation of privacy. It’s recommended to consult with a legal expert to get advice tailored to your specific situation and location. Where to Install Security Cameras? Choosing the right locations to install home security cameras is crucial for maximizing their effectiveness and ensuring comprehensive coverage of your property. Here are strategic placement points for both outdoor and indoor security cameras: Outdoor Camera Placement: Front and Back Doors: These are primary entry points for intruders. Position cameras above these doors to monitor anyone approaching. Windows Off the Street: Install cameras to oversee windows that are hidden from street view, as these are less visible to passersby and more likely to be targeted by burglars. Driveways and Garages: These areas often store valuable items. A camera covering the driveway can help monitor for any suspicious activity around your vehicles and capture license plates, while one inside the garage can safeguard tools and bikes. Secluded Outdoor Areas: Any hidden or less visible areas around your property, such as side yards or back alleys, should also have camera coverage to monitor unseen approaches by potential intruders. Indoor Camera Placement: Common Areas: Place indoor cameras, such as the eufy Indoor Cam C120, in living rooms, kitchens, or family rooms—areas where people congregate. This helps in monitoring for any internal threats or emergencies. Stairways or Hallways: Cameras here can capture movement between floors or along main passages within your home, helping to track anyone inside. Entry Points: Additional cameras near points of entry, like front or rear hallways, can catch intruders as they enter or exit. High-Value Areas: Consider placing cameras near safes, art collections, or any other high-value assets within your home for enhanced security. How to Install Security Cameras? Installing security cameras can be a straightforward process and you don’t necessarily need a security camera installer. Here’s a detailed guide to help you install both wired and wireless security systems effectively: How To Install Wired Security Cameras: Wired security cameras are known for their secure connections and reliability, but they need strategic planning of the wires and routes. Here’s how to install security camera wiring: Plan Your Layout: Before drilling any holes, plan out the camera routes and monitor locations. Consider the most direct path for wiring from the cameras to the Digital Video Recorder (DVR) or monitoring system. Install Mounting Brackets: Secure the camera mounting brackets at the chosen points, ensuring they are stable and positioned to give the best coverage. Mount and Connect the Cameras: Attach the cameras to the mounting brackets securely and connect the wires, which typically involves connecting the power and video cables to each camera. Connect to the DVR: Most wired security cameras will require you to run cables from each camera back to the DVR box. Organize the cables and ensure connections are secure. For external wiring, use conduit to protect wires from the elements and potential tampering. Ensure that cables are routed away from high traffic areas to avoid damage. Power and Test: Once all connections are made, power up the system. Check each camera’s feed to ensure they are capturing the intended areas and that the image quality is satisfactory. Adjust the camera angles as needed. How To Install Wireless Cameras: Wireless security cameras offer flexibility and ease of installation. Here’s how to install outdoor security cameras wireless: Choose Optimal Locations: Since wireless cameras are not limited by cable runs, focus on placing them where they can have the best unobstructed view. Ensure they are within your Wi-Fi network’s range. Power Supply: Although wireless regarding data transmission, most wireless cameras still require power. Ensure there is access to a power outlet, or consider battery-powered models if installing cameras far from power sources. Alternatively, you can also opt for advanced solar-powered models like the eufy SoloCam S340, which comes with a solar panel for continuous operation. Mount the Cameras: Install mounting brackets in the chosen locations and mount the cameras securely. Make sure the cameras are stable and offer the desired viewing angle. Sync with Your Network: Follow the manufacturer’s instructions to connect each camera to your Wi-Fi network. This usually involves using a smartphone app to detect the camera and connect it to your internet. Configure the Software: Install any required software on your computer or mobile device. Use this software to adjust camera settings like resolution, motion detection sensitivity, and recording schedules. Test the Setup: Once all cameras are installed and connected, test the system by monitoring live feeds and checking recorded footage. Ensure there are no connectivity issues and that the coverage area is adequate. Conclusion Learning the process on how to install security cameras may seem daunting at first, but with the right knowledge and preparation, you can master the process like a pro. By understanding the legal requirements, strategically placing your cameras, and following proper installation procedures on how to set up security cameras, you can create a robust surveillance system to protect your home or business. Remember to regularly maintain your cameras to ensure they continue to function effectively over time. FAQs How far can security cameras see? The distance that security cameras can see depends on various factors, including the camera’s resolution, lens focal length, and environmental conditions. In general, most security cameras can capture clear footage within a range of 30 to 100 feet. Some high-resolution models can identify objects or individuals at distances of 200 feet or more. Can I install security cameras myself? Yes. Many home security cameras are designed for easy DIY installation, allowing you to set them up without the need for professional assistance. These systems typically come with user-friendly instructions and necessary mounting equipment. However, for more complex systems or for installations that require wiring through walls, you might consider hiring a professional to ensure everything is set up safely and correctly. Where not to install security cameras? You should avoid installing security cameras in areas where individuals have a reasonable expectation of privacy, such as bathrooms, changing rooms, and bedrooms. It’s also important to respect neighbors’ privacy by ensuring cameras do not point directly into their homes or private spaces. Additionally, avoid placing cameras where they may be easily obstructed, damaged, or exposed to harsh environmental conditions.
Baby · 28/04/2024
The Ultimate Guide to Finding the Best Baby Monitor in 2024
As a parent, ensuring your baby’s safety and well-being is a top priority. A reliable baby monitor can provide you with peace of mind by allowing you to keep an eye and ear on your little one remotely while they sleep or play. With a myriad of options available in the market, selecting the best baby monitor can be a daunting task. In this post, we will explore the top 9 best baby camera monitors that have been highly rated by parents like you and guide you on how to choose the right baby monitor that meets your specific needs. Read on to make an informed decision that offers peace of mind and enhances your baby’s safety. 9 Best Baby Monitors Here, we’ve rounded up some of the best baby monitors on the market, including local video monitors, Wi-Fi monitors, and hybrid options. These devices blend high-definition video and audio monitoring capabilities with advanced features that help you stay connected to your little ones, whether you’re in the next room or away from home. Here’s a closer look: eufy Baby Monitor E210 The eufy Baby Monitor E210 stands out as the best non Wi-Fi baby monitor that delivers sharp 720p video clarity on a large 5” display, ensuring you don’t miss any precious moments. It’s equipped with a long-lasting 5,200 mAh battery that supports up to 30 hours of monitoring in default mode, and 12 hours with more frequent activity. Nighttime checks are simplified with crisp night vision, and the camera’s ability to pan 330° and tilt 110° ensures you can view every corner of the nursery. The clear two-way audio allows you to comfort your baby from any room, and sound detection technology alerts you to their needs. Additionally, you can choose from 5 soothing lullabies and enjoy a secure, private live-stream via wireless FHSS transmission. eufy Wi-Fi Baby Monitor The eufy Wi-Fi Baby Monitor offers a 2K high-resolution camera that pans 330° and tilts 110° with a 4x zoom, allowing you to keep an eye on your baby with stunning detail. Equipped with non-invasive infrared night vision, this best Wi-Fi baby monitor lets you check on your sleeping baby without disturbing their dreams. Additionally, its continuous monitoring of noise levels and room temperature alerts you to changes such as excessive noise or uncomfortable temperatures, ensuring your baby’s environment is always safe. Prioritizing your family’s privacy, all data is stored locally but remains accessible anywhere via AES 128-bit advanced encryption. The eufy Baby app allows real-time interaction with your baby from anywhere, from talking to monitoring self-soothing. HiPP Baby Monitor The HiPP Baby Monitor delivers clarity and simplicity in one package, featuring a 720p HD camera paired with a 5” display for crystal-clear visibility. It operates over a secure 2.4GHz FHSS wireless connection to maintain your privacy, making it one of the best baby monitors without Wi-Fi. Its 4500mAh battery supports extended use up to 24 hours in audio-only mode, and setup is straightforward—plug in, turn on, and start monitoring instantly. It also offers comprehensive room coverage with 270° pan and 108° tilt, and zoom capabilities, ensuring you can see every corner of the nursery. Real-time sound monitoring, two-way talk, and temperature alerts keep you connected and informed. Miku Pro Contact-Free Baby Monitor The Miku Pro Contact-Free Baby Monitor offers advanced monitoring without any wires or wearables. It tracks breathing and sleep patterns using proprietary SensorFusion technology, providing real-time updates on your child’s respirations per minute (RPMs) directly to your smartphone. This best video baby monitor boasts a 1080P HD video quality with night vision, dual Ole Wolff speakers for clear audio, and sensors that monitor nursery conditions like temperature and humidity. Security is paramount with an embedded crypto chip, advanced encryption, and two-step authentication, ensuring that you can safely monitor your baby from anywhere. Hubble Connected Nursery Pal Baby Monitor The Hubble Connected Nursery Pal baby monitor offers exceptional versatility and value, featuring both a 5” 720p touchscreen parent unit for in-house monitoring within a 1,000-feet range, and the HubbleClub app for remote monitoring from your smartphone. The touchscreen parent unit enhances your experience by allowing easy navigation to pan, tilt, and zoom around the room. Its ability to double as an interactive kids’ tablet with games, videos, and stories adds a unique touch, especially useful during busy moments like diaper changes. This best baby monitor with screen and app also includes soothing lullabies and white noise options, enhancing your baby’s comfort. Infant Optics DXR-8 Video Baby Monitor The Infant Optics DXR-8 Baby Monitor stands out for its dependable performance and straightforward functionality. It provides clear 480p video quality and comes with a dedicated monitor unit that operates without Wi-Fi, eliminating delays and maintaining privacy with a hack-proof FHSS connection. The monitor features remote pan, tilt, and zoom capabilities, ensuring comprehensive coverage of your baby’s room. Additionally, it offers night vision and two-way talk, making it one of the most reliable and highly-rated baby monitors for parents seeking both functionality and security. LeapFrog LF930HD Remote Access Smart Video Baby Monitor The LeapFrog LF930HD Baby Monitor offers clear and detailed visuals with 1080p FHD video for remote viewing and a 720p HD local display on a 7” color LCD screen, ensuring you can watch your baby’s every move. This best travel baby monitor features a comprehensive 360-degree pan and tilt functionality with an impressive 8X zoom, making it feel as though you’re right there with your baby. Its color night vision technology surpasses traditional black and white night vision, providing clear views under low light conditions. The adaptive, dimmable night light can be controlled via the parent viewer or the mobile app, enhancing comfort in your baby’s nursery. Furthermore, the two-way talk-back intercom allows you to comfort your baby from any room or remotely through your smartphone. Motorola Nursery PIP1610 Baby Monitor The Motorola Nursery PIP1610 Baby Monitor integrates seamlessly with the Motorola Nursery App, offering HD 1080p video through an advanced triple-layer security Wi-Fi encryption to protect your privacy. It also features a 5” local viewing display and remote pan-tilt-zoom camera functionality. The monitor includes a wall mount for optimal placement and boasts special sound features, including a high-sensitivity microphone and a selection of lullabies to soothe your baby. The two-way communication system allows you to reassure and interact with your baby from any location. VTech RM7764-2HD Video Baby Monitor Designed for families with more than one child, the VTech RM7764-2HD Baby Monitor comes with two HD cameras, providing a split-screen display so you can keep an eye on both children simultaneously. It offers 1080p FHD remote and 720p HD local viewing, ensuring high-quality visibility. This best split screen baby monitor features 360-degree pan and tilt capabilities and a 10X zoom, offering extensive room coverage. Enhanced night vision, motion detection, and triggered recording ensure you never miss a moment. Additionally, it includes soothing sounds and a temperature sensor to maintain a comfortable nursery environment. The two-way, talk-back intercom allows you to comfort your baby from anywhere, whether you’re at home or on the go. How to Choose the Best Baby Monitor? Choosing the right baby monitor involves considering various factors to ensure it meets your specific needs and preferences. Here are some key factors to consider: Video and Audio Quality: High-definition video quality can make a significant difference in how clearly you can see your baby, especially in different light conditions. Look for monitors that offer clear night vision—a crucial feature for uninterrupted overnight monitoring. Audio clarity is just as important, so ensure the monitor has a high-quality microphone and speaker to hear and soothe your baby effectively. Connectivity Options: Decide whether you prefer a Wi-Fi-connected monitor that allows you to check on your baby from your smartphone or tablet, or a traditional radio frequency monitor that relies on a dedicated parent unit. Wi-Fi monitors offer the convenience of remote access but consider the security features to protect your privacy. Non-Wi-Fi monitors typically offer more secure, stable connections and are simpler to set up. Safety and Security: When choosing a Wi-Fi-connected baby monitor, ensure it offers secure encryption (like AES 128-bit). Regularly update the software to protect against vulnerabilities. For non-Wi-Fi models, ensure the frequency bands are secure to avoid interference and ensure privacy. Ease of Use: A baby monitor should be intuitive and easy to set up and use. Complicated settings or difficult navigation can be frustrating, especially in the middle of the night. Check for user-friendly interfaces and reliable customer support. Additional Features: Many baby monitors come with extra features that can enhance their usability. Temperature sensors, humidity levels, and air quality monitors can help ensure your baby’s comfort. Other features like lullabies, two-way talk, and camera pan, tilt, and zoom capabilities might also influence your decision. Budget: Finally, set a realistic budget. Baby monitors can range from basic audio models costing less than a hundred dollars to advanced video monitors with multiple features costing several hundred dollars. Decide which features are must-haves and which you can live without, balancing functionality with affordability. Conclusion Finding the best baby monitor for your family involves thorough research and consideration of your specific needs and preferences. Throughout this post, we’ve introduced a variety of top-tier baby monitors, each with unique features tailored to different needs and budgets. Whether you prioritize video clarity, connectivity range, or additional features like temperature sensors and lullabies, there is a perfect option out there to fit your family’s needs. By evaluating the top models reviewed and assessing the factors outlined, you can make an informed decision to ensure your baby’s safety and your peace of mind. FAQs Is it worth getting a smart baby monitor? Yes, getting a smart baby monitor can be worth it for many parents. These monitors offer advanced features like live video streaming, temperature sensors, and motion alerts, which can provide peace of mind by allowing you to keep a close eye on your baby from a distance. However, it's important to consider your specific needs, budget, and any privacy concerns you might have before making a purchase. How much should you spend on baby monitors? The cost of baby monitors can vary widely depending on the brand, features, and technology. Basic audio monitors may range from $20 to $50, while video monitors can range from $50 to $300, depending on the quality of the video and features like two-way audio and night vision. Smart Wi-Fi baby monitors with real-time remote viewing and more advanced features may cost upwards of $200 to $400. What is the average range of a baby monitor? Most baby monitors offer a range of around 1,000 to 1,200 feet in open spaces, but this may be reduced indoors due to interference from walls and other electronic devices. It’s essential to consider your home’s layout and choose a monitor with sufficient range to cover the desired areas.
Baby · 22/04/2024
Best Portable Breast Pump 2024: The Ultimate Buyer’s Guide
In the bustling life of a modern mother, finding the perfect blend of convenience and efficiency is paramount. Enter the realm of the best portable breast pumps: compact guardians of maternal well-being and infant nutrition. This article delves into the essence of these ingenious devices and their manifold benefits. We'll guide you through the top 6 portable breast pumps of 2024, and arm you with the knowledge to select your champion, ensuring a seamless fit with your lifestyle and needs. What are Portable Breast Pumps? Portable breast pumps are lightweight and compact devices designed to express breast milk from lactating mothers conveniently and efficiently. They are used particularly when you are away from your baby or require to pump milk on the go. These pumps are usually smaller in size in comparison with hospital-grade pumps. Additionally, they are designed for personal use. Speaking about the benefits of portable breast pump, many of them pumps are operated by batteries, thereby enabling to use in locations where access to power outlets might be inconvenient or limited. Portable breast pumps are designed to be more lightweight and smaller in comparison to conventional electric breast pumps, thereby making them easy to carry in a purse or bag. They often come with adjustable pumping patterns and suction levels to mimic a baby's nursing rhythm and offer customized personalized comfort while pumping milk. Some breast pump portable devices are designed to operate quietly, thereby making them ideal to use while the baby is sleeping or in public. 6 Best Portable Breast Pumps 2024 Here are the top 5 best portable breast pump devices that you can have. 1. eufy Wearable Breast Pump S1 Pro The eufy wearable breast pump S1 Pro is with HeatFlow™ technology, optimizing milk flow and output. Its industry-first magnetic charging case provides five days of portable power. Effortlessly manage sessions with the eufy Baby app and OptiRhythm™ technology. Benefiting from efficient hospital-grade suction at 290 mmHg, soft silicone, and 105° angle flanges, you will feel comfortable and happy. When you pump, it can be quiet, small, and leakproof. Its lightweight and wearable construction holds up to 177ml of milk and is easy to clean with only four parts. eufy Wearable Breast Pump: Pump Warm for a Better Flow The world’s first HeatFlow™ technology revolutionizes pumping for unparalleled comfort. Offers up to 290 mmHg hospital-grade suction power for efficient milk extraction. prioritizes pumping comfort with uniquely angled 105° flanges and soft silicone. Simplifies your pumping routine with the eufy Baby app. Learn More Buy Now 2. Spectra 9 Plus Breast Pump The Spectra 9 Plus is an incredibly lightweight and one of the best portable breast pump hands free options. Weighing just half a pound and equipped with a built-in rechargeable battery, it's a discreet yet powerful option for travel. It boasts hospital strength suction up to 260mmHg, a true closed system for hygiene, and multiple massage modes to mimic natural nursing, enhancing comfort during use. This pump supports both single and double pumping, ensuring versatility and efficiency for nursing mothers 3. Elvie Double Electric Breast Pump The Elvie Double Electric Breast Pump is the next portable pump breast device in our list and it allows you to pump quietly and fairly discreetly from anywhere without having to change out of your regular bra. The pump provides 7 levels of suction intensity. It has six small parts to assemble and five parts to clean, making it easy to assemble and clean. 4. Momcozy S12 Pro Wearable Breast Pump The Momcozy S12 Pro Wearable Breast Pump boasts an intuitive design with nine intensity levels and two distinct pumping modes, ensuring personalized comfort and efficiency. Remarkably user-friendly, it operates seamlessly without the need for complex instructions or smartphone applications, offering a clutter-free pumping experience. Additionally, its thoughtful automatic shutdown feature, activating every 20 minutes, enhances safety and convenience, making it a top choice for moms seeking a reliable, hassle-free milk expression solution. 5. Elvie Stride The Elvie Stride is a hands-free, hospital-grade electric breast pump. It stands out for its portability and wire-free convenience, offering control via the Elvie app. Features include 10 intensity settings, lightweight cups under 5 oz each, discreet design, app connectivity, easy assembly and cleaning, nearly three hours of pumping per charge, and BPA-free components. Available in various shield and cushion sizes, it promises a comfortable and efficient pumping experience 6. Genie Advanced Portable Breast Pump The Genie Advanced Portable Breast Pump is celebrated as the best portable breast pump for hands-free convenience, allowing mothers the flexibility to pump wherever they go. This highly adaptable device offers both double and single electric pump functionality. It includes a practical lanyard and clip for easy wear during use, enabling active mothers to stay on the move. Impressively, it allows for personalized pumping experiences by recording and replaying preferred pumping sessions. Factors to Consider When Choosing the Best Portable Breast Pump Before buying any portable breast pump, make sure to consider the following factors: 1. Pumping Efficiency Breast pump suction is calculated in mmHG (millimeters of mercury). Therefore, higher suction power means the pump is more efficient to express milk. Make sure to check the suction power of breast pumps, which should be usually around 220 to 350. 2. Portability and Size You must also consider the weight, size, and ease of carrying the breast pump portable device. When you decide to buy the pump, ensure it is compact and lightweight enough to fit into your purse or bag for pumping anywhere. 3. Noise Level Make sure to consider the place where you will be using the pump. If it is not at your home, choosing a pump with less noise is a must. Some pumps operate silently, which is beneficial if you plan to pump while your baby is sleeping or in public. 4. Battery Life and Power Options Determine whether the pump works on electric power, batteries, or both. Electric pumps are usually more powerful but need access to an outlet, while battery-based pumps offer more flexibility for pumping anywhere. 5. Comfort and Customization Features When selecting portable breast pumps, comfort is an essential factor to consider. These pumps offer adjustable suction levels and various flange sizes, ensuring a tailored, gentle experience. Such personalization not only enhances comfort but also optimizes milk expression. 6. Compatibility with Breastfeeding Needs The breast pump that you select must be able to suffice your breastfeeding needs and must be compatible. Ensure it supports various lactation stages, efficiently expressing milk while maintaining comfort. Conclusion In a nutshell, selecting the best portable breast pump in 2024 hinges on understanding the available top options and considering essential factors tailored to your needs. This guide not only highlights the best picks but also empowers you to make an informed decision. Embrace the convenience and flexibility of modern motherhood by choosing your ideal companion for breastfeeding on the go. FAQ What is the most reliable portable breast pump? The most reliable portable breast pump often praised by users is the Spectra 9 Plus. It is highly regarded for its efficiency, portability, and quiet operation. However, this completely depends on one’s needs and requirements. Is it worth getting a portable breast pump? There are many advantages of having a portable breast pump, but it is not a must-have for everyone who pumps. Wearable pumps are not necessary for every mom. However, working moms can benefits a lot with potable pumps. What wearable breast pump is best? The best wearable breast pump largely depends on individual needs and preferences. However, the Elvie Pump and Willow Pump are highly regarded for their efficiency, portability, and discreetness. Both offer hands-free pumping, multiple intensity settings, and are quiet, making them popular choices among nursing mothers.
Baby · 22/04/2024
How to Get Free Breast Pump through Medicaid?
Do you know that moms-to-be can get a free breast pump through Medicaid. However, it is essential to note that many Medicaid coverage plans will only ship your pump after the delivery of the baby. In addition to this, a number of Medicaid plans are funded by the states and the benefits offered by them can vary a lot from each other. On one hand, many states will cover a personal use double-electric breast pump, and on the other hand, few states might offer a breast pump rental or manual breast pump instead. Lastly, there are some states that offer no breast pump coverage. You need to verify your insurance coverage, get a prescription, and keep track of your breast pump when it’s on the way to you. This article covers all the details that can help you get your free breast pump through Medicaid easily. Are All Breast Pumps Covered by Medicaid? Does Medicaid cover breast pumps of all categories? Well, some breast pumps will be completely free under your plan. On the other hand, there can be rules on what kind of breast pump your coverage allows you to get, such as electric vs manual, or only specific brands. In addition to this, some plans might only allow you to rent a pump, rather than offering free breast pump Medicaid. While most Medicaid plans cover a breast pump throughout the country, there are some state Medicaid plans that did not take federal money. Such plans do not have to follow the ACA Preventive Health Services guidelines. These plans normally has a breast pumps covered by Medicaid if there is medical necessity, meaning the baby does not have the ability to initiate breastfeeding due to a medical condition such as oral defect or prematurity. To ensure you are fully informed about your options, it's advisable to consult directly with your Medicaid provider. They can offer detailed guidance on the breast pumps covered by Medicaid in your region, including any necessary steps to obtain one. This approach not only clarifies what's available to you but also streamlines the process of acquiring a breast pump through Medicaid, making your postpartum experience a little easier. How Can I Get a Free Breast Pump Through Medicaid? (Detailed guide) Though getting a free breast pump with Medicaid is easy, it can be an extensive process. Some users might need help to get their free pump. This guide will help you get your pump easily without any trouble. Step 1: Begin by calling your Medicaid provider to find out what all things are covered. Identify if breast pumps through Medicaid plan are covered. Step 2: If your plan does not provide a breast pump, you can get one through WIC (the Special Supplemental Nutrition Program for Women, Infants and Children), which is a program run by the Food and Nutrition Service of the U.S. Department of Agriculture. Step 3: Once you have identified that Medicaid breast pump is covered under your plan, ask your doctor to write a prescription. This will be needed in future. If you need the pump for a medical reason, the prescription must have that diagnosis included within. Step 4: Make sure that the prescription mentions the name of the pump so that you get the best breast pump covered by Medicaid. Step 5: After the delivery, you will need to submit the other documents requested by your provider and sign a form that states to get Medicaid free breast pump. Step 6: You will receive your breast pump in the mail. Does Medicaid Cover Breast Pump Replacement Parts? Some Medicaid policies need that breast pumps meet specific manufacturing and performance standards, and have warranties. If you have breast pump Medicaid under your plan, you might get some of the best breast pumps that comply with the standards outlined under your health plan. Some Medicaid plans might also cover additional breast pumping replacement parts and equipment. However, many breast pump brands provide their own warranties to suffice your needs. If your Medicaid plan does not cover extra equipment and parts, you can order replacement parts covered under the breast pump provider warranty. Additional Benefits: Beyond Breast Pumps Apart from covering your breast pump via insurance, Medicaid also offers coverage for postpartum compression garments and milk storage bags. These are medical devices that have been developed by healthcare professionals to offer relief, support, and stabilization for enhanced comfort during pregnancy and to help with postpartum healing. Medicaid provides a range of benefits apart from breast pumps, although coverage can differ depending on the individual circumstances and state. These benefits include preventive care; doctor visits and hospital stays; prescription medications; mental health services; dental care; vision care; physical therapy and rehabilitation; medical equipment and supplies; transportation to medical appointments; home health services; maternity and newborn care; and hospice care; among others. Conclusion Getting a free breast pump through Medicaid is a simple task. Verify with the Medicaid provider whether your plan offers a free breast pump or not. If not, you can get one through WIC. Once you have identified, you can follow the instruction to order your free breast pump through Medicaid. Also, do not forget to take advantage of other benefits offered by your Medicaid plan such as postpartum compression garments and milk storage bags. FAQ Can I really get a free breast pump? Yes! If your insurance plan covers a free breast pump, you can get one. How to find out what breast pump is covered by insurance? The best way to know the type of breast pump covered under your insurance is to get in touch with the insurance provide and ask them. When should you order a breast pump through insurance? Most of the insurance plans require you to deliver the baby and then order the breast pump. However, you need to check with your provider about the right time of ordering the pump.
Baby · 22/04/2024
Choosing Your Path: Breastfeeding vs Breast Pumping Explained
Some moms choose to exclusively breastfeed their babies. This means feeding your baby from the breast right from the beginning. On the other hand, some moms choose to exclusively opt for breast pumping. This allows you to take advantage of many of the benefits of breastfeeding along with added convenience. By using a breast pump to express your milk and a bottle to feed your baby, moms experience added benefits. This article specifically talks about the pros and cons of breastfeeding vs breast pumping, so that you can make a sound decision when it comes to breastfeeding or pumping for your child. Advantages and Disadvantages of Breastfeeding There are certain advantages that are exclusively offered by breastfeeding. It offers many cognitive and health benefits to babies and lowers the risks of various long-term health issues in both the baby and the mom. Let us dive deep into the pros and cons that come with breastfeeding. Benefits of breastfeeding for both mother and baby Some of the benefits of breastfeeding versus pumping are as follows: Nutritional advantages: Breast milk nutrients are delivered more deeply to your especially well when your body comes in contact with your baby, similar to how it comes in contact while breastfeeding. Your breast responds to the baby’s saliva, creating antibodies for bacteria and viruses to which the baby has been exposed. Bonding experience: While considering between breastfeeding vs pumping, many moms prefer breastfeeding since it offers a more bonding experience with their baby as compared to pumping. Health benefits for the baby: One of the benefits of breastfeeding versus pumping is that it assists your baby's palate and jaw develop. Breastfeeding is also beneficial for baby health because breast milk stimulates the baby's immune system, thereby protecting against infections and allergies. Challenges and limitations of breastfeeding Some of the disadvantage that comes with breastfeeding are: Time commitment: When a baby breastfeeds, you must feed the baby when it is hungry. This becomes a task that requires time and commitment since breastfed babies are fed on demand and not on a schedule. Possible discomfort or pain: Breastfeeding comes with painful breasts when the mother is producing a lot of milk. Also, sometimes there can be a build-up of milk or blocked milk duct, which can cause inflammation of the breast. Difficulty with latch or milk supply: Breastfeeding can be a challenge for moms who are not lactating correctly, thereby generating inadequate milk supply. Advantages and Disadvantages of Breast Pumping With breastfeeding offering different pros and cons, people offer move towards breast pumping and wonder: is breast pumping same as breastfeeding? Well, the process may be different but offers the same nutrients to the babies. Breast pumping comes with its own set of advantages and disadvantages. Benefits of breast pumping for mothers and infants Let us have a look at some pros first. Flexibility and convenience: Breast pumping allows you to feed your baby on a schedule that works better for you. Ability to share feeding responsibilities: With pumping, not only moms can feed the baby, but also dads, grandparents, and siblings can lend a helping hand. Support for mothers returning to work or facing breastfeeding challenges: If you are a working mom or facing challenges while breastfeeding, then pumping can help you store milk and feed your baby as per requirement. Challenges and drawbacks of breast pumping Some of the major disadvantages of pumping breast milk includes: Potential decrease in milk supply: Is breast pumping the same as breastfeeding?Although the answer might be dicey, one major difference and drawback of pumping is possible decrease in milk supply. Therefore, exclusively pumping can result in less milk production than breastfeeding. Cost and maintenance of breast pump equipment: One of the major disadvantages of electric breast pumpis that you cannot just rely on your boobs when pumping. You need to spend extra dime on breast pump, pump parts, bottles, a bottle brush, breast milk bags, and soap, among others. Possible discomfort or difficulty achieving let-down: Breast pumping may cause discomfort or hinder milk let-down, often due to improper fit or technique, necessitating professional guidance to optimize efficiency and minimize discomfort. But as technology advances, breast pumps are becoming smarter. For example, the eufy wearable breast pump S1 Pro has smart pumping feature, effortlessly manage sessions via the eufy Baby app and innovative OptiRhythm™ technology. This ensures a tailored and comfortable pumping experience. Moreover, boasting hospital-grade suction at 290 mmHg, the eufy pump guarantees efficient milk expression, reducing the likelihood of poor flow. Embracing these advancements, mothers can now pump with ease, optimizing their breastfeeding journey. eufy Wearable Breast Pump: Pump Warm for a Better Flow The world’s first HeatFlow™ technology revolutionizes pumping for unparalleled comfort. Offers up to 290 mmHg hospital-grade suction power for efficient milk extraction. prioritizes pumping comfort with uniquely angled 105° flanges and soft silicone. Simplifies your pumping routine with the eufy Baby app. Learn More Buy Now Factors to Consider When Choosing Between Breastfeeding and Breast Pumping Is pumping same as breastfeeding? Well, we just saw that these both things are different and come with their own set of pros and cons. However, whatever may be your decision or choice, there are some things that you need to consider. Lifestyle and schedule considerations: While choosing between pump feeding vs breastfeeding, both need time and dedication. Consider your schedule and how much time you can commit to either of the options. Health considerations for mother and baby: Some moms and their babies might have difficulty in the initial phase and latching. This can also be due to different medical reasons. Make sure to consider the health of mom and baby while opting for either option. Support system and resources available: Having support from your family, partner, or friends can make a huge difference. This can lessen some of the burdens associated with either option. Personal preferences and comfort level: Whileselecting between pump vs breastfeed, both offer different comfort. While Breastfeeding is convenient and can be done anywhere, pumping allows for flexibility and can help manage busy schedules. Recommendations from healthcare professionals or lactation consultants: Healthcare professionals and lactation consultants can provide tailored advice, considering each mom and baby's unique needs, guiding the choice between breastfeeding and breast pumping effectively. Conclusion It is very essential to note that breastfeeding vs breast pumping comes with different pros and cons. Breastfeeding offers a bond between two people while pumping offers flexibility and convenience. Make sure to opt for the method that suits you, your baby, and your needs. FAQs Is pumping just as good as breastfeeding? Even though both offer the same nutrients to the baby, the benefits of both the methods highly depends on the needs of the baby and the mom. Does breastfeeding produce more milk than pumping? While breastfeeding may have a slight benefit in producing more milk for some moms, the effectiveness of this method over pumping can different from person to person. What happens if you never pump or breastfeed? Not pumping or breastfeeding leads to gradually decreasing of milk production and eventually stopping. This phenomena is also known as lactation suppression or lactation cessation.
Baby · 22/04/2024
Manual vs Electric Breast Pump: Selection Guide
New moms can easily get confused between manual vs electric breast pump. Having a difficult time while deciding which breast pump will be ideal for your feeding journey is a common situation. While both, manual and electric breast pumps, are great options, some might prefer one over the other. This article will help you decide which type of pump will be ideal for you. What Are Manual Breast Pumps Before choosing either manual or electric breast pump, let us learn more about each of the option. Manual breast pumps operate without electricity and are hand operated. But, is a manual breast pump better than an electric? Well, one thing to consider is that manual pumps can only be used for one breast at a time. Since these pumps are less costly than electric pumps, and are normally compact and lightweight, most of the moms prefer manual pumps over electric ones. How Manual Breast Pumps Work Manual breast pumps work by generating a vacuum seal around the breast with the help of a funnel-shaped shield. When you squeeze and release the handle, the pump generates suction, transferring milk from the breast into the container. By manually managing the pumping, you can draw breast milk as per your preferred pressure and pace. Once the milk is expressed, the pump can be disassembled to clean. Advantages of Manual Breast Pumps Portability and convenience: Manual breast pumps offer unparalleled portability and convenience, allowing for easy transport and discreet use anywhere, anytime. Cost-effectiveness: These breast pumps are cost effective as compared to electric pumps due to their simple design. Control over suction strength and speed: As mentionedearlier, you can draw breast milk as per your preferred pressure and pace. Limitations of Manual Breast Pumps Requires physical effort: Manual pumps require physical efforts and are not hands-free. You need both hands to effectively operate the pump. Slower pumping process: They are time-consuming as they can only remove and collect breast milk from one breast at a time. Not suitable for frequent or long-term use: Since using manual pumps is a time-consuming and slow process, it is not suitable for frequent use. What Are Electric Breast Pumps Electric pumps, as the name suggests, are operated via a battery or power outlet. They allow for double or single breast expressing and is suitable for moms who need to express exclusively or daily. How Electric Breast Pumps Work Is an electric breast pump better than manual? When it comes to operation, they provide better user experience. These pumps operate using an electric motor to generate suction for milk expression. You need to place the breast shield over the breast. Next, the motor creates vacuum pressure that mimics a baby's sucking action. This suction leads to milk flow, drawing into a container. Advantages of Electric Breast Pumps Efficiency and speed: You can easily and quickly understand different modes and speed for expressing the necessary amount in a shorter time. Adjustable settings for comfort: With the correct electric pump, you get the best breastfeeding experience and comfort. Hands-free pumping options: Unlike manual pump, electric pumps do not need any manual intervention. As one of the outstanding representatives of electric breast pumps, the eufy wearable breast pump S1 Pro offers a multitude of benefits that redefine the breastfeeding experience. Its revolutionary HeatFlow™ technology provides unparalleled comfort, mimicking the warmth of a baby's hug while reducing clogged ducts and optimizing milk flow. Its industry-leading portability, featuring a magnetic charging case, ensures up to 5 days of uninterrupted power, making it perfect for on-the-go mothers. The eufy Baby app and OptiRhythm™ technology allow for effortless management of pumping sessions, maximizing efficiency. With hospital-grade suction and soft silicone flanges, the eufy pump ensures both comfort and effectiveness. Its discreet operation, lightweight design, and easy cleaning process make it a convenient choice for busy mothers. Limitations of Electric Breast Pumps Higher initial cost: Electric breast pumps are more expensive than manual breast pumps. Dependence on power source: Since they depend on battery or power source, they are not ideal for carrying out with such dependency. Less convenient: Most of the electric pumps are heavier in size and dependent on a plug socket. This makes it difficult for you to carry out anywhere. Factors to Consider When Choosing Between Manual and Electric Breast Pumps Is a manual breast pump better than electric? Deciding hinges on several key factors tailored to your lifestyle and needs. Frequency and duration of pumping sessions In this electric pump vs manual breast pump comparison, considering the frequency of use is very essential. If you do not plan to pump daily, then manual pump is the ideal choice for you. On the other hand, for working moms or who need to pump daily, electric breast pump is a big time-saver as compared to manual ones. Lifestyle and mobility preferences Electric pumps are not as portable as manual pumps, which are generally smaller, lighter, and easier to clean. Also, they are dependent on a power supply in order to operate. However, if you need an electric pump due to your need of daily pumping, there are some electric pumps that are portable enough to carry on the go. Budget considerations Price factor plays an important role in the electric v manual breast pump battle. Electric breast pumps are much more expensive as compared to manual ones. While there are affordable and good options out there, some cost-effective pumps tend to break easily. Recommendations from healthcare professionals or lactation consultants If you feel that you are not able to decide for your self or are facing issues like sore and tender breasts and nipples, taking recommendation from your healthcare for selecting the pump can also help. Conclusion To sum up and decide the best between manual vs electric breast pump is a tough call. Manual pumps are best for those who do not pump often and need something portable and reliable. Electric pumps are best for those who need to pump a lot or for moms who pump at work. Regardless of all this, selecting the breast pump as per your comfort and needs is necessary. FAQs Which is better manual pump or electric pump? The choice between a manual and electric breast pump depends on lifestyle, individual needs, and preferences. Electric pumps are faster and require less effort, making them ideal for regular use. Manual pumps, however, offer more control and are quieter, lighter, and more affordable, suitable for occasional use or when portability is essential. Do you get more with a manual pump? Some moms claim that they get more milk by using a manual breast pump in comparison with an electric pump. Manual pumps offer more control over suction and speed, thereby contributing in more milk production. Is manual breast pump enough? Whether a manual breast pump is enough relies on individual needs and circumstances. For some moms, a manual breast pump can be totally sufficient for their pumping need. On the other hands, working moms will agree to disagree.
Baby · 21/04/2024
Common Causes and How to Avoid Breast Pain After Pumping
Just like breastfeeding, using a breast pump should be an easy and smooth process. However, most women feel breast pain after pumping. Incorrect usage of breast pumps can lead to pain and can damage breasts or nipples. Using breast pumps correctly not only prevents issues but also helps in removing the milk more efficiently. Whether you pump occasionally for back up or use the pump multiple times in a day, understanding common mistakes and avoiding them can help prevent breast injury and pain. Common Causes of Breast Pain After Pumping There are different factors that can be responsible for breast hurt after pumping. We have listed some of the common causes for this irritation. Incorrect Flange Size or Improper Pump Fit Flanges are the horn-shaped breast shields placed over the areola while pumping. Now, using the incorrect flange size can have a drastic impact on the comfort level as well as the output during and after your pumping session, thereby leaving your breast sore after pumping. Breast pumps often only come with two flanges sizes. When you buy your pump, you are normally given an average-sized flange. But as you know, one size is not suitable for everyone’s breasts and areolas. You need to look up your pump brand online and order a flange size that suits you. Engorgement or Oversupply Issues If you experience nipple pain after pumping, chances are high that your breasts are engorged. Let us know a bit more about engorgement. Once your transitional milk comes in on about the 3rd or 4th day after birth, your breasts grow larger and heavier as they fill with fluid. This is a sign that your breasts are filling up with milk. However, it causes pain & swelling and can flatten your nipples, making them unable to move freely in the pump. Incorrect Pumping Technique or Settings If your nipple hurts after pumping, the pump setting can be the culprit behind this. It is normally recommended that you turn the suction to the setting that is well suited for to you. Ensure that there must be no pain associated with pump suction. Using a suction strength that is painful might inhibit you from releasing as much milk while pumping. Mastitis or Other Breast Infections Breastfeeding women are most likely to get mastitis, a type of breast infections, which can cause breast pain during pumping. Such types of infections can occur in the breast tissue and often need treatment by a medical professional. If you feel you are suffering from a possible breast infection, stop pumping and feeding your baby the affected milk and get in touch with your doctor. Damaged or Irritated Nipples If you feel pain that is burning, stabbing, or feels like pins and needles, then these might be signs of breast tissue damage from pumping. You might also notice your nipples turning white, then red or blue. Tender, chafed, or sore nipples can develop into cracks or open wounds, thereby causing breast pain while pumping. How to Address Painful Pumping: Effective Solutions While there are many reasons contributing to pain in breast when pumping, you can try the below solution to get some relief. Place the flange on your breast before a pumping session to ensure it fits correctly. It must create a seal by covering your areola and nipple, and the tunnel of the flange must fit over your nipple, leaving about 3–5mm of extra circumference around it. Speaking about the breast pump settings, increase the suction gradually after your breasts have started to leak milk. If you feel pain while breast pumping, lower the suction a bit. To deal with engorgement, avoid pumping often and keep it under 8–12 times in a day. Mastitis is a breast infection that might be from plugged ducts or damaged nipples. A proper and clean washing of hands before touching pump equipment or breasts is recommended. Also, massaging your breast and nipple after pumpingcan cause relief and lessen skin sensitivity as well as build elasticity. Massaging before pumping can increase the milk flow as well. Choose a smarter, more comfortable breast pump. The eufy wearable breast pump S1 Pro is a game-changer for addressing painful pumping experiences. With HeatFlow™ technology, revel in revolutionary comfort reminiscent of your baby's embrace, effectively reducing clogged ducts and enhancing milk flow and output. Crafted with 105° angle flanges and soft silicone, the pump prioritizes your comfort during each session, ensuring a gentle and snug fit. Tips in Preventing Breast Pain After Pumping Try these tips to prevent or treat breast pain after pumping. Rubbing breast milk on nipples and applying warm compresses has claimed to help lower the pain and ease soreness. Apply cold packs or moist, cool cloths to your breasts for almost 20 minutes post pumping to get relief from the pain. If you have cracked nipples due to pumping, apply moisture on open wounds. Research shows that this can help the wounds heal up to 50% faster and lower pain. Consider using an all-natural ointment that protects and soothes your nipples. Vegetable glycerin gel pads have a cooling effect on chafed and sore nipples, offering instant relief, and can easily be worn in bras. Conclusion As mentioned earlier, breast pumping should not be a difficult task for you. Watch out for the common causes for the pain and treat them immediately to avoid further hassle and trouble. If you feel breast pain after pumping, you can try different tips to get instant relief. If you continue to feel the pain or have sore nipples after pumping, make an appointment with your healthcare provider. They can offer you with correct treatment, guide you know how to use the breast pumps correctly, and provide tips on how to deal with the pain after pumping. FAQ Is it normal for breast to hurt after pumping? It's common for breasts to feel tender or sore after pumping, especially if you are new to it or if you are pumping more frequently than usual. How to relieve breast pain after pumping? You can try different methods to find instant relief from pain after pumping. This includes applying hot and cold compress, using a gentle massage, expressing milk by hand, using a proper support bra, checking for correct pump setting, and over-the-counter medicines, among others. How can I maintain my milk supply if pumping is painful? If you feel pain after pumping but want to maintain milk supply, you can hand express milk instead of using a pump. Hand expression can be gentler on the breasts and may be less painful.
Baby · 19/04/2024
Best Breast Pump through Insurance: Top 10 Options
Breastfeeding is a beautiful and natural way to nourish your baby, but it's not always possible to be present for every feeding. This is where a breast pump becomes invaluable. Many insurance plans cover the cost of a breast pump, making it accessible to more mothers than ever before. In this article, we'll explore why a breast pump is essential for new mothers, and delve into the 10 best breast pumps covered by insurance. Read on to learn more! Why Is a Breast Pump Essential for New Mothers? Breast pumps offer numerous benefits for new mothers and their babies. Firstly, they provide flexibility and freedom by allowing mothers to express milk and store it for later use. This means you can maintain your milk supply while being away from your baby for work, appointments, or personal time. Additionally, breast pumps can help alleviate engorgement and discomfort, especially in the early postpartum period when the milk supply is still regulated. They also enable partners or other caregivers to participate in feeding, fostering bonding and sharing the caregiving responsibilities. Moreover, for mothers who may have difficulty breastfeeding directly, such as those with latch issues or preterm babies, a breast pump allows them to provide their milk to their baby in an alternate way, promoting the numerous health benefits of breast milk. Top 10 Breast Pumps Covered by Insurance The following are the best breast pumps through insurance that we carefully selected: 1. Zomee Fit Wearable Hands-Free Breast Pump The Zomee Fit Wearable Hands-Free Breast Pump offers moms the flexibility to pump discreetly while on the move. Designed to be worn inside a bra, it frees up the hands for multitasking. With a powerful motor similar to those used in hospitals, it ensures efficient pumping with three modes to choose from. Plus, it's rechargeable and doesn't require any app for operation. Its quiet operation lets moms pump without drawing attention, and it comes with soft silicone shields and inserts for comfort. The pump's containers can hold up to 5 ounces of milk, and its anti-backflow system prevents leaks, making sure every drop is collected. Easy to store and designed for convenience, this best breast pump covered by insurance makes hands-free pumping a comfortable and hassle-free experience. 2. Ardo Calypso-To-Go Breast Pump The Ardo Calypso-To-Go Breast Pump is a highly adaptable and user-friendly device crafted to support breastfeeding mothers. Its standout features include its ability to function as a single pump, double pump, or manual pump, offering versatility for various pumping needs. With its straightforward controls, users can easily operate it without hassle. Additionally, the pump comes with a one-year guarantee, ensuring reliability and peace of mind for users. Its customizable settings allow individuals to adjust suction strength and frequency independently, tailored to their comfort and requirements. The inclusion of different breast flange sizes ensures a comfortable fit for diverse breast shapes. Furthermore, its Vacuum Seal technology provides comprehensive protection against contamination and ensures hygiene by preventing milk from entering tubes. Lastly, this best insurance breast pump includes a cleaning brush for convenient maintenance, enhancing ease of use and longevity. 3. Spectra S1 Hospital Strength Double Electric Breast Pump As one of the best free breast pumps through insurance, the Spectra S1 Hospital Strength Double Electric Breast Pump is renowned for its powerful performance, quiet operation, and customizable features. Its notable attributes encompass adjustable suction levels, which allow users to personalize their pumping experience for optimal comfort and efficiency. The inclusion of a massage mode simulates natural suckling, enhancing milk flow and comfort during pumping sessions. Moreover, practical features such as a built-in night light and timer facilitate convenient use, especially during late-night pumping sessions. The pump's rechargeable internal battery ensures portability, enabling users to pump even when away from a power source. 4. BabyBuddha Portable Breast Pump Kit The BabyBuddha Portable Breast Pump Kit is designed with ultimate portability in mind, making it an ideal choice for busy parents on the move. Its standout feature is its compact size, which is smaller than a smartphone, ensuring easy transportation and discreet use. Despite its small footprint, the pump remains powerful, providing efficient and effective expression of breast milk. The inclusion of a rechargeable battery further enhances its portability, allowing for convenient use even in situations where access to power sources may be limited. Overall, the BabyBuddha Portable Breast Pump Kit offers a combination of portability, power, and convenience, catering to the needs of busy parents striving to maintain their breastfeeding routines while on the go. 5. Medela Pump In Style with MaxFlow The Medela Pump In Style with MaxFlow epitomizes reliability, convenience, and efficiency for breastfeeding mothers. Its wearable design ensures ease of use, allowing mothers to pump discreetly and comfortably. Equipped with two-phase expression and MaxFlow micro-vibrations, it effectively stimulates milk production, ensuring optimal milk yield. The pump's secure seal prevents spills, guaranteeing a mess-free pumping experience. Additionally, its battery-powered operation enhances portability, enabling pumping sessions wherever and whenever needed. From its user-friendly interface to its innovative features, the Medela Pump In Style with MaxFlow simplifies the pumping process, providing mothers with a reliable and effective solution to meet their breastfeeding needs. 6. Motif Luna Breast Pump with Battery Bundle The Motif Luna Breast Pump with Battery Bundle is convenient and efficient. Its powerful suction ensures effective milk expression, while the rechargeable battery provides mobility for on-the-go pumping sessions. With a battery life of over 2 hours and quick recharge time, it's perfect for busy moms needing flexibility. The sleek and lightweight design enhances portability, and the inclusion of Milk Storage Bags and Pump to Bag Adapters simplifies storage and cleanup. This pump bundle is a must-have for modern moms, making the pumping journey easier and more manageable, whether at home or away. 7. Ameda Mya® Joy Hospital Strength Portable Electric Breast Pump Boasting hospital-grade strength, the Ameda Mya® Joy Hospital Strength Portable Electric Breast Pump features two modes of pumping to cater to individual preferences. Its lightweight and portable design, combined with the ability to clip onto various items, ensures seamless integration into daily life. Operating at less than 45dB, it provides quiet and discreet pumping sessions. The true closed system guarantees hygiene and prevents contamination. With up to 250 mmHg suction strength, it delivers efficient milk expression. The LCD display and timer make tracking pumping time effortless, while the smart auto power-off feature enhances safety and energy efficiency. Additionally, the pump offers 2-phase adjustable suction modes, adaptable for both single and double pumping. Whether powered by batteries or an AC adapter, this best insurance covered breast pump provides flexibility and reliability to meet the needs of breastfeeding mothers. 8. Cimilre S6 Breast Pump The Cimilre S6 Breast Pump is a versatile and efficient solution for breastfeeding mothers. Its ability to perform single or double pumping offers flexibility to suit individual needs. With two modes, massage and expression, it ensures a comfortable and effective pumping experience. The adjustable suction strength levels provide personalized comfort, while the hospital-strength suction guarantees optimal milk expression. Its quiet motor operation allows for discreet pumping sessions, complemented by the backlit LCD screen and timer display for easy monitoring. Moreover, its lightweight design makes it portable and convenient for use at home or on the go, making it a reliable companion for breastfeeding mothers. 9. Elvie Stride The Elvie Stride breast pump epitomizes discreet and efficient pumping for modern mothers. Designed to be worn inside a bra, it operates silently, allowing seamless integration into daily activities such as virtual meetings or running errands. Its smart-enabled features include connectivity to a smartphone app, providing real-time monitoring of milk volume and tracking of pumping history. Additionally, the app enables remote operation of the pump, offering convenience and flexibility. With its innovative design, the Elvie Stride ensures a hassle-free and discreet pumping experience, empowering mothers to prioritize their breastfeeding journey without interruption. 10. Motif Twist Breast Pump The Motif Twist Breast Pump is designed with the needs of breastfeeding moms in mind. Its Expression Mode efficiently extracts milk from the breast, while the Massage Mode helps stimulate let-down, mimicking a baby's nursing pattern. With a Closed System, it prevents contamination by keeping the motor and tubing clean. Offering both stationary and battery-powered options, it provides flexibility for pumping anywhere. Weighing less than half a pound, it's incredibly lightweight and portable. Plus, its quiet motor ensures discreet pumping without any disruptive noise, making it ideal for use in various settings. These are just a few options for the best breast pump to get through insurance. It's essential to check with your insurance provider to see which models are available to you and any specific requirements or steps you need to follow to obtain one. Conclusion In conclusion, a breast pump is an essential tool for new mothers, offering convenience, flexibility, and numerous health benefits for both mother and baby. With many insurance plans covering the cost of breast pumps, access to this vital piece of equipment has never been easier. By exploring the options of the best breast pump through insurance available and finding the right pump for your needs, you can enjoy the many advantages of breastfeeding while still maintaining a vibrant lifestyle. FAQs What breast pump can I get through insurance? The specific breast pumps available through insurance may vary depending on your plan and provider. However, most insurance plans offer a selection of popular models from reputable brands such as Medela, Spectra, and Lansinoh. What if the breast pump I want isn't covered by my insurance? If the breast pump you desire isn't covered by your insurance, you still have options. You can explore purchasing the pump out-of-pocket or look into rental options for high-end hospital-grade pumps. Additionally, some manufacturers offer discounts or payment plans to make their pumps more accessible.
Baby · 19/04/2024
How to Get Breast Pump through Insurance? (Explained)
If you have had a baby recently, among the endless to-do lists and baby gear research, you might have stumbled upon the question: "How to get breast pump through insurance?" Don't worry, we've got your back! We're here to break it down in simple terms. From understanding what your insurance covers to figuring out which pump is right for you, we'll walk you through it step by step. How Do Insurance Policies Cover Breast Pumps? Insurance coverage for breast pumps can vary depending on your specific insurance plan and where you are located. However, under the Affordable Care Act (ACA) in the United States, many insurance plans are required to cover breast pumps and lactation support services. Here's how it generally works: Type of pump covered:Insurance plans typically cover the cost of a standard electric breast pump. Some plans may also cover manual pumps or upgraded models if deemed medically necessary. Timing:Insurance coverage for breast pumps usually begins either before birth or shortly after delivery. You might need a prescription from your healthcare provider, and there may be specific timing requirements regarding when you can obtain the pump. In-network providers:Insurance plans often have a list of preferred suppliers or vendors from whom you can obtain the breast pump at no cost or at a reduced cost. Working with an in-network provider can help ensure that your insurance covers the pump fully. Coverage limitations:As to how many breast pumps will insurance cover? This can vary depending on your insurance plan. While some plans may offer coverage for a single breast pump, others may provide coverage for multiple pumps if medically necessary. Additionally, some insurance plans may have limitations on the type or brand of breast pump covered, as well as the duration of coverage (e.g., coverage for a rental pump for a specific period of time). Documentation:You may need to provide certain documentation, such as a prescription from your healthcare provider, proof of pregnancy or birth, and possibly other forms or information to process the insurance claim. Reimbursement:If you purchase a breast pump upfront and your insurance plan offers reimbursement, you may need to submit a claim with proper documentation to receive reimbursement for the cost of the pump. Medicaid coverage:In addition to private insurance plans, some state Medicaid programs also cover breast pumps for eligible beneficiaries. It's important to check with your specific insurance provider to understand the details of your coverage. You can typically find this information in your plan documents or by contacting your insurance company directly. Additionally, your healthcare provider or a lactation consultant may be able to provide guidance on navigating the process of obtaining a breast pump through your insurance. What Types of Breast Pumps Can You Get Through Insurance? The types of breast pumps you can get through insurance may vary depending on your insurance plan and provider. However, most insurance plans cover standard electric breast pumps. These pumps are typically designed for regular use and are powered by electricity or batteries. Some insurance plans may also cover: Manual Breast Pumps:These pumps are operated by hand and do not require electricity. They are usually more affordable and portable but may require more effort to use compared to electric pumps. Hospital-Grade Breast Pumps:These pumps are designed for frequent and long-term use, often in cases where a baby is unable to breastfeed directly at the breast. They are typically more powerful and efficient than standard electric pumps and may be available for rent through insurance. Double Electric Breast Pumps:These pumps have two flanges and can express milk from both breasts simultaneously, which can save time for pumping mothers. Single Electric Breast Pumps:These pumps have one flange and express milk from one breast at a time. They are often smaller and more portable than double electric pumps. The specific types of breast pumps covered by your insurance plan may depend on factors such as medical necessity, your healthcare provider's recommendation, and the policies of your insurance provider. How to Order Breast Pump Through Insurance: A Step-by-Step Guide Ordering breast pumps through insurance may seem daunting at first, but it doesn't have to be. Here's a simple step-by-step guide on how to get free breast pump through insurance to help you through the process: Check Your Insurance Coverage: Review your insurance plan documents or contact your insurance company to understand your coverage for breast pumps. Determine what types of pumps are covered, any requirements or limitations, and whether you need a prescription from your healthcare provider. Consult with Your Healthcare Provider: If your insurance requires a prescription for a breast pump, schedule an appointment with your healthcare provider. Discuss your breastfeeding goals and any medical reasons why you may need a breast pump. Your provider can then write a prescription for the type of pump that is most suitable for your needs. Research In-Network Suppliers: Find out which suppliers or vendors are in-network with your insurance plan. Your insurance company may provide a list of preferred suppliers, or you can contact them directly to inquire about coverage. Working with an in-network supplier can help ensure that your breast pump is fully covered by insurance. Choose Your Breast Pump: Once you have confirmed your insurance coverage and identified in-network suppliers, select the breast pump that best meets your needs. Consider factors such as pump type, portability, and features like double pumping capabilities. Your healthcare provider or a lactation consultant can offer recommendations based on your individual circumstances. Submit Required Documentation: If your insurance plan requires documentation, such as a prescription or proof of pregnancy or birth, gather these documents. Submit them to your chosen supplier along with any other required information, such as your insurance information and contact details. Place Your Order: Contact the supplier to place your order for the breast pump. Provide them with the necessary information and documentation, and verify that they accept your insurance plan. They will process your order and arrange for the delivery of your breast pump to your home or another specified location. Follow Up as Needed: Stay in communication with the supplier to track the progress of your order and ensure that everything is proceeding smoothly. If you encounter any issues or delays, don't hesitate to reach out to your insurance company or the supplier for assistance. Some Top Insurance-Supported Breast Pump Suppliers and Products When it comes to sourcing your breast pump through insurance, it's essential to partner with reputable suppliers who specialize in working with insurance companies. Some top suppliers include Yummy Mummy, Aeroflow Breast Pumps, and other durable medical equipment (DME) providers. These suppliers can guide you through the process and ensure that you receive the pump covered by your insurance plan. Conclusion Accessing a breast pump through insurance can be a valuable resource for expecting and new parents. By understanding your coverage options, exploring the types of pumps available, and following the necessary steps on how to get breast pump through insurance, you can unlock this important benefit. FAQs Do you need a prescription to get breast pump through insurance? While prescription requirements may vary depending on your insurance plan, some providers may require a prescription from your healthcare provider to obtain a breast pump. It's advisable to check with your insurance company to determine whether a prescription is necessary. How far along do I have to be to get a breast pump through insurance? The timing for obtaining a breast pump through insurance can vary depending on your insurance company's guidelines. Some plans may allow you to order your pump during pregnancy, while others may require you to wait until after giving birth. It's recommended to inquire about the timing specifics with your insurance provider. Do I have to wait until my baby arrives to order my breast pump through insurance? While some insurance plans may allow you to order your breast pump during pregnancy, others may require you to wait until after your baby's birth. However, it's advisable to check with your insurance provider to confirm the specific timing requirements for ordering your pump.
Security Cameras · 16/04/2024
Top Picks: Best Home Security Camera 2024 for Ultimate Protection
Home security cameras have become an indispensable part of modern-day households, providing peace of mind and enhancing safety measures. Whether you're looking to monitor your property while you're away or keep an eye on your loved ones inside the house, the best home security camera can make all the difference. In this guide, we’ll explore what security cameras are, highlight the top 7 options for the best security cameras, discuss how to choose the best one for your needs, address common questions, and offer valuable insights to help you make an informed decision. What are Home Security Cameras? Home security cameras are innovative devices designed to enhance the safety and security of residential spaces by providing real-time monitoring and surveillance capabilities. These cameras, which can be installed both indoors and outdoors, offer homeowners the ability to observe and record activities around their property. With features such as motion detection, night vision, and remote access through smartphones or computers, home security cameras enable users to stay vigilant and respond promptly to potential security breaches. Furthermore, the presence of these cameras often acts as a deterrent to would-be intruders, contributing to a safer home environment. Top 7 Home Security Cameras Now that we understand what home security cameras are, let's explore the top 7 options available to help keep your home safe and secure. eufy Indoor Cam S350 The eufy Indoor Cam S350 boasts dual 4K and 2K resolution lenses for detailed indoor monitoring. With 8x hybrid zoom and 360° pan and tilt capabilities, it provides comprehensive coverage. Enjoy enhanced connectivity of the best security cameras for home with dual-band Wi-Fi 6. Advanced AI features include human, pet, and crying detection, with privacy mode for added security. It can recognize faces up to 30ft away in night vision mode. Compatible with HomeBase 3, it offers local storage and patrols points of interest for versatile indoor surveillance without any monthly fees, making it the best home security camera without subscription. SoloCam S340 Wireless Outdoor Security Camera The SoloCam S340 Wireless Outdoor Security Camera features dual cameras, including a wide-angle camera with 3K resolution and a telephoto camera with 2K resolution, providing detailed imagery up to 50 feet away. It offers hybrid 8x zoom, color night vision, and a spotlight for enhanced visibility. With a 135° field of view and 360° horizontal and 70° vertical pan and tilt, it ensures comprehensive coverage. With this best wireless home security camera, enjoy extended battery life and solar power options, along with built-in 8GB local storage. eufyCam S330 (eufyCam 3) The eufyCam S330 (eufyCam 3) delivers high-resolution 4K video with a remarkable battery life of one year on a single charge, or indefinitely with Forever Power and its integrated solar panel. Advanced AI features include facial, human, vehicle, and pet detection, with self-learning capabilities, making it one of the best outdoor home security camera. Benefit from built-in 16GB EMMC local storage, expandable up to 16TB, offering three months of storage. Arlo Pro 5S 2K Spotlight Camera The Arlo Pro 5S 2K Spotlight Camera offers high-resolution video for sharper details and excellent home security. Its dual-band wifi ensures seamless setup and connection to the strongest network. Enjoy color night vision and integrated spotlight for enhanced visibility. Installation is quick and easy with wire-free setup and included mount. With a wider 160° view and Arlo SecureLink, this best home security camera system provides longer range, more secure connections, and extended battery life, ensuring comprehensive surveillance and peace of mind. Google Nest Cam Outdoor or Indoor, Battery - 2nd Generation The Google Nest Cam Battery offers advanced intelligence best home surveillance cameras, distinguishing between people, animals, and vehicles for personalized alerts via the Google Home app. Enjoy 1080p HDR video with night vision and 3 hours of free event video history. It stores up to an hour of recorded events during Wi-Fi outages. Installation is flexible with battery power and a magnetic mount, suitable for indoor or outdoor use. Ring 1080p Wireless Stick Up Security Camera The Ring Indoor/Outdoor Security Camera offers versatile battery-powered operation for the best home security system with cameras, with the option for a solar panel for continuous charging. It can be placed on any flat surface or wall-mounted for flexible installation. Features include customizable privacy zones, advanced motion settings with mobile notifications, 1080p HD video, and two-way talk. Integration with Alexa devices enables announcements for doorbell presses or motion alerts. Lorex® 4K Spotlight Wi-Fi 6 Security Camera Lorex offers the top rated home security cameras with its 4K remote video and two-way communication for indoor or outdoor monitoring. Users can capture snapshots, record video manually, and playback previous recordings. It features an 8-megapixel 1/2.8" CMOS sensor, recording up to 4K UHD video resolution at 15 fps. With a 2.8mm equivalent focal length, aperture of f/1.6, and shutter speed range from 1/3s to 1/100,000s, it provides a wide 140° field of view, ensuring comprehensive surveillance with clear, detailed imagery. How to Choose the Best Home Security Camera? When selecting the best cameras for home security, consider the following factors: Resolution: Choose higher resolution cameras for clearer images. HD (720p) or Full HD (1080p) are common options, but 4K resolution offers the highest clarity. Field of View: Consider the camera's field of view to ensure it covers the desired area adequately. A wider field of view reduces blind spots. Motion Detection: Look for cameras with motion detection capabilities to alert you of any activity. Advanced systems may distinguish between humans, pets, and other objects. Two-Way Audio: Cameras with two-way audio allow for communication between you and visitors or intruders, enhancing security. Remote Access: Choose cameras that offer remote access via mobile apps or web browsers, enabling you to view live footage and receive alerts from anywhere. Storage: Decide between cloud storage or local storage options. Cloud storage offers convenience but may require a subscription, while local storage may involve additional equipment but eliminates monthly fees. Budget: Determine your budget and prioritize features accordingly. Keep in mind any additional costs for subscriptions or storage. Conclusion In summing up, identifying the best home security camera involves understanding your specific needs, exploring the top options available, and considering key features that align with your security objectives. With the diverse range of home security cameras discussed, you're equipped with the knowledge to make an informed decision. Remember, the best home security camera for you is the one that effectively balances innovation, efficiency, and user-friendliness. We encourage you to review your options carefully and choose a camera that not only provides peace of mind but also enhances the safety of your home. Stay secure and informed! Frequently Asked Questions Is Wired or Wireless Better for Home Security Cameras? The choice between wired and wireless depends on your specific needs. Wired cameras offer constant power and reliable connectivity but require professional installation. Wireless cameras are easier to install and offer more flexibility but may experience signal interference or require battery changes. Should I Get a 2K or 4K Outdoor Security Camera for Home? The decision between 2K and 4K cameras depends on your preferences and budget. 4K cameras provide higher resolution and better image quality, ideal for larger areas or detailed surveillance needs. 2K cameras offer sufficient resolution for most applications and may be more cost-effective. Do Home Security Cameras Need WiFi? Home security cameras do not necessarily need WiFi to operate. Many models can record and store footage locally on SD cards or connected hard drives. However, WiFi connectivity is required for features like live streaming, remote viewing, and receiving real-time alerts on your smartphone. Without WiFi, these internet-dependent functions are not available, limiting the camera's capabilities.
Vacuum · 16/04/2024
Bagged vs Bagless Vacuum Cleaners: How to Choose the Right One for You
Choosing the right vacuum cleaner for your home inevitably brings you to the crossroads of deciding between bagged and bagless models. This decision impact not only your cleaning routine, but also the quality of your indoor air and your finances over time. This guide aims to illuminate the key differences between bagged vs bagless vacuum cleaners, presenting a balanced view of their pros and cons. We'll also highlight key factors to consider, such as flooring type, allergies, and maintenance needs, to help you make an informed decision. Read on and find out which type suits your cleaning needs better. Pros and Cons of Bagged Vacuum Cleaners Bagged vacuum cleaners are traditional models that use replaceable bags to collect and store dirt, dust, and other debris sucked up during cleaning. Here's an overview of their pros and cons: Pros Enhanced Allergen Containment:The bag acts as a sealed container, ensuring dust, pollen, and other allergens don't escape back into the air during disposal. Many bagged models come with high-quality, multi-layered bags that serve as advanced filtration systems, ensuring cleaner exhaust air. This is particularly beneficial for individuals with allergies or respiratory sensitivities, offering a cleaner, healthier home environment. Hygienic Disposal:With a bagged vacuum, disposing of accumulated debris is a breeze and hygienic. You can simply remove the bag and toss it in the trash, minimizing direct contact with dust and allergens. Low Maintenance: Aside from regular bag replacement, bagged vacuums typically require less maintenance. Since the dust and debris are contained within the bag, the internal components of the vacuum are less likely to get clogged or damaged, leading to potentially longer lifespan. Cons Ongoing Costs:The need to purchase replacement bags represents an ongoing cost that can add up over time. Depending on the vacuum model and the frequency of use, this could be a significant factor in its overall cost. Environmental Impact:Disposable bags contribute to environmental waste. Although some bags are biodegradable, the majority are not, which can be a significant concern for environmentally conscious consumers. Lower Efficiency as Bags Fill Up:As the bag fills with debris, many bagged vacuum cleaners may experience a reduction in suction power. This can affect cleaning efficiency, requiring more passes over the same area to achieve the desired level of cleanliness. Pros and Cons of Bagless Vacuum Cleaners Bagless vacuum cleaners are a modern alternative to traditional bagged vacuums, designed to collect and store dirt, dust, and debris in a canister or dustbin. Here's a look at their pros and cons: Pros Cost-Effective Over Time:One of the most significant advantages of bagless vacuum cleaners is the elimination of the need to buy replacement bags. This can lead to substantial savings over the lifespan of the vacuum, making it a cost-effective choice for many households. Visible Dirt Compartment:An upright bagless vacuum cleaner typically feature a transparent canister that allows you to see the amount of dirt and debris collected. This visibility makes it easy to know when it's time to empty the vacuum, ensuring optimal performance without guesswork. Environmental Friendliness:By doing away with disposable bags, bagless vacuums offer a more environmentally sustainable option. They reduce waste and are a preferred choice for eco-conscious consumers who are looking to minimize their environmental footprint. Cons Potential Exposure to Allergens:When emptying a bagless vacuum, there's a chance that dust and allergens can be released back into the air. For individuals with allergies, asthma, or sensitivities to dust, this can be a significant drawback, potentially affecting indoor air quality. Frequent Maintenance:Bagless vacuums often require more frequent cleaning and maintenance of their filters and canisters to maintain optimal performance. Dust and debris can accumulate in these parts, necessitating regular washing and drying, which can be time-consuming. Factors to Consider When Choosing Making an informed decision between bagged vs bagless vacuum cleaners involves considering several key factors. Each plays a crucial role in determining which vacuum type will best suit your needs. Flooring Type If your home has a lot of carpeting, especially thick pile carpets, you might prefer a vacuum cleaner that offers strong suction power. Bagged vacuums are often praised for their deep cleaning power needed to extract embedded dirt and allergens effectively. For homes with mostly hard flooring, such as hardwood, laminate, or tile, a vacuum that offers gentle yet effective cleaning is ideal. Bagless vacuums often come with versatile attachments suitable for these surfaces and can be easier to maneuver around hard floors. The eufy HomeVac H30 Mate, for example, comes with a mini-motorized pet brush tool, making it exceptionally proficient at gathering pet hair. Take a look at this blog if you're looking for flooring ideas: Cheapest Flooring Options for Any Home Allergies and Sensitivities For households with members who suffer from allergies or asthma, bagged vacuums are typically recommended due to their superior ability to contain allergens within sealed disposable bags. The less exposure to dust and allergens during disposal, the better for allergy sufferers. Both bagged and bagless vacuums can come equipped with HEPA filters, which are crucial for trapping fine particles. Ensure whichever type you choose has adequate filtration to meet your health needs. Maintenance and Upkeep Bagless vacuums often require more regular cleaning of the canister and filters to maintain optimal performance. If you prefer a low-maintenance option, a bagged vacuum, which simply needs a bag change, might be more appealing. Consider the long-term costs of replacement bags for bagged vacuums. Depending on the vacuum model, the price of replacement bags can vary widely. Opting for bagless vacuums can save on the cost of bags. Weight and Size Bagged vacuum cleaners tend to be heavier and sometimes cumbersome to move, partly due to the inclusion of the bag system. On the other hand, bagless vacuums often lean towards a more compact and lightweight design. If you prefer a lightweight and compact vacuum for quick cleanups and difficult-to-reach areas, then a cordless, bagless model like the eufy Clean H20 is the right choice. Weighing only 1.44 lb, it's easy to maneuver, ideal for navigating different furniture and tight spaces. Personal Preferences If minimizing your environmental impact is important, the reusable containers of bagless vacuums might be more appealing than the disposable bags of their counterparts. Some people find satisfaction in seeing the amount of debris the vacuum collects, which is a feature unique to bagless models with transparent canisters. Conclusion Navigating the choice between bagged vs bagless vacuum cleaners is more than a simple preference. Throughout this guide, we've explored the advantages and drawbacks of both bag and bagless vacuum cleaners and delved into how factors like flooring type and allergies play a pivotal role in your decision. Ultimately, the right vacuum cleaner for you is one that not only tackles dirt and debris effectively but also aligns with your home's specific requirements. Whether you lean towards the hygienic benefits of a bagged model or the efficiency and eco-friendliness of a bagless one, there is a model that not only keeps your living spaces clean but also supports your well-being and fits seamlessly into your routine. FAQ Are bagged vacuums better than bagless? It depends on individual preferences and needs. Bagged vacuums are often better at containing dust and allergens due to their sealed bags, making them preferable for allergy sufferers. However, bagless vacuums are eco-friendly and offer cost savings since there are no replacement bags to purchase. Are bagless vacuums worth it? Yes, bagless vacuums can be worth it for many people. They eliminate the need to purchase replacement bags, which can save money and reduce waste over time. Bagless models often feature transparent dust containers, allowing you to see when they're full and need to be emptied. Are bagged vacuums better for dust? Yes, bagged vacuums are often better for containing dust due to their sealed bags, which prevent dust from escaping during disposal. This makes them a preferred choice for individuals sensitive to dust and allergens.
Robovac · 16/04/2024
Finding the Best Robot Vacuum: Top Picks for Effortless Cleaning
In the realm of household chores, vacuuming often ranks high on the list of mundane tasks. However, with the advent of robotic technology, keeping your floors clean and tidy has become more convenient than ever. Robot vacuums promise to autonomously navigate through your home, sucking up dirt, dust, and debris, all while you sit back and relax. But with a plethora of options flooding the market, finding the perfect robot vacuum for your needs can be overwhelming. Fear not because in this article, we will go over the realm of robotic cleaning to uncover the best robot vacuum that promise effortless cleaning. 5 Best Robot Vacuums on the Market Now, let’s discover the top 5 robot vacuums that are transforming the way we clean our homes. Best Robot Vacuum Overall Topping our list of the best robot vacuums overall is the eufy X10 Pro Omni. This best robot vacuum and mop combo offers powerful 8,000 Pa suction for thorough carpet cleaning and features MopMaster 2.0 for spotless floors, automatically lifting mop pads on carpets. Its AI.See technology identifies over 100 obstacles, even at night, while the iPath Laser Navigation ensures efficient cleaning routes. With customizable AI.Map 2.0, users can create No-Go Zones and virtual boundaries. The All-in-One Station facilitates hands-free cleaning, washing and drying mop pads and emptying the dust bin making it among the best automatic vacuum cleaner. Best Robot Vacuum for Pet Hair Pet owners rejoice, for the Shark RV1001AE Robot Vacuum that offers comprehensive cleaning with features like Total Home Mapping, allowing room selection for immediate cleaning. Powerful suction handles large debris and pet hair. Control via phone or voice commands, and designed for pet homes, it includes a self-emptying base and high-efficiency filter. Plus, forget about emptying for up to 45 days with the bagless, self-emptying base. Its self-cleaning brushroll effectively tackles debris on all surfaces, while row-by-row cleaning ensures thorough coverage. With recharge and resume functionality, this best robotic vacuum autonomously returns to the dock and continues cleaning. Best Budget Robot Vacuum For those seeking a budget-friendly option without compromising on performance, look no further than the eufy Clean 11S MAX. This best budget robot vacuum features a re-engineered super-slim design at just 2.85" thick, coupled with powerful suction capabilities. Each purchase includes the 11S MAX itself, along with a remote control (batteries included), charging base, AC power adapter, cleaning tool, 1 side brush, and a user manual. With its sleek profile and enhanced cleaning performance, this best affordable robot vacuum, the eufy Clean 11S MAX, offers a convenient and efficient solution for keeping your floors pristine, making it an essential addition to any home. Best Self-Cleaning Robot Vacuum Bid farewell to the hassle of manual dustbin emptying with this product’s self-cleaning feature. The Roborock Q5+ Robot Vacuum ensures long-lasting cleaning with its high-capacity battery and 470 ml dustbin. Its PreciSense LiDAR Navigation creates accurate 3D maps, allowing virtual home recreation. Featuring powerful 2700 Pa suction, it effortlessly removes debris and pet hair, aided by the multi-plane floating main brush for deeper cleaning on any surface. With the Self-Empty Dock, this best self emptying robot vacuum automatically empties its dustbin after each use, storing up to 7 weeks of dirt in its 2.5L dust bag, providing hands-free cleaning convenience, also making it among the best robot vacuum for carpet. Best Robot Vacuum for Multiple Floors The iRobot Roomba s9+ stands out as a top contender for households with multiple floors. It impresses with its ability to memorize multiple floor plans, making it the ideal companion for navigating and cleaning multi-storey homes effortlessly. Its advanced mapping technology ensures that it cleans every nook and cranny of each level with precision. The Roomba s9+ also comes with a self-emptying base, reducing the need for frequent maintenance. Its powerful suction and corner-cleaning design make it highly efficient at removing dirt and debris. Friendly and highly intelligent, this robot vacuum adapts to your home's layout, ensuring a thorough clean on every floor. What to Look for in an Automatic Robot Vacuum? When shopping for a top rated robotic vacuum cleaners, several key factors should influence your decision: Suction Power: Choose a robot vacuum with powerful suction to effectively lift dirt and debris from various floor surfaces. Navigation Technology: Advanced mapping and navigation systems ensure efficient cleaning by avoiding obstacles and covering all areas of your home. Battery Life: Look for a model with a long-lasting battery to ensure extended cleaning sessions without frequent recharging. Dustbin Capacity: Consider a robot vacuum with a large dustbin capacity to minimize the frequency of emptying. Smart Features: Explore additional features such as app control, scheduling options, and compatibility with virtual assistants for added convenience and customization. Conclusion Investing among the best robot vacuum is a game-changer for anyone looking to simplify their cleaning routine and reclaim valuable time. Whether you prioritize overall performance, pet hair removal, affordability, self-cleaning capabilities, or versatility across multiple floors, there's a robot vacuum on the market to suit your needs. With advanced features and intelligent design, these top picks promise effortless cleaning, leaving your floors immaculate with minimal effort on your part. Frequently Asked Questions Are robot vacuums really worth it? Robot vacuums offer convenience and time savings by automating floor cleaning, ideal for maintaining cleanliness between deeper cleaning sessions. They're especially beneficial for those with busy lifestyles, pets, or allergies. However, their effectiveness varies by model and home layout. Considering their cost, it's essential to assess your specific needs and preferences to determine if a robot vacuum is a worthwhile investment for your household. Are more expensive robot vacuums worth it? The price of a robot vacuum often correlates with its features, performance, and build quality. While more expensive models may offer advanced navigation technology, longer battery life, and additional smart features, budget-friendly options can still provide satisfactory cleaning results for many households. Ultimately, the decision to invest in a higher-priced robot vacuum depends on your cleaning needs, preferences, and budget constraints. What is the life expectancy of a robotic vacuum? The life expectancy of a robotic vacuum can vary depending on factors such as usage frequency, maintenance practices, and build quality. On average, most robot vacuums are designed to last between 4 to 6 years with proper care and maintenance. Regular cleaning of brushes and filters, along with timely battery replacements if necessary, can help prolong the lifespan of your robot vacuum and ensure consistent performance over time.
Vacuum · 16/04/2024
Vacuum Cleaner Storage: Creative Solutions Where to Store Vacuum Cleaner
Finding the perfect spot to store your vacuum cleaner can often feel like fitting the last piece into a puzzle. This article will dive into the importance and challenges of choosing just the right nook for your cleaning companion, highlighting inventive storage solutions that maximize space and efficiency. Additionally, we'll uncover common storage missteps to avoid, ensuring your vacuum not only fits seamlessly into your home but also maintains its condition over time. Join us as we explore practical tips and creative ideas on where to store your vacuum cleaner, aiming to make your living space both tidy and functional. The Importance and Challenges of Vacuum Cleaner Storage Storing your vacuum cleaner effectively is crucial, not only to maintain its lifespan but also to keep your living space tidy and organized. The challenge often lies in the varied sizes and shapes of vacuum cleaners, which can make finding the right spot a bit tricky, especially in homes where space is at a premium. Furthermore, improper storage can lead to damage or loss of parts, making your vacuum less efficient and potentially shortening its lifespan. This predicament underscores the need for inventive and practical storage solutions. By exploring creative storage options, you can ensure your vacuum is both out of the way and easily accessible when you need it, all while preserving your home's aesthetic and functional harmony. Creative Storage Solutions Exploring innovative vacuum cleaner storage ideas can transform how you organize your cleaning essentials. Let's dive into creative storage solutions that keep your space tidy and your vacuum easily accessible. Wall-Mounted Storage Wall-mounted storage solutions offer a sleek and efficient way to keep your cleaning tools, like eufy handheld vacuums, organized and easily accessible. By utilizing vertical space, these compact and lightweight vacuums can be stored conveniently on walls, freeing up floor space and reducing clutter. This approach not only enhances the aesthetic of your home but also ensures that your vacuum is ready to go at a moment's notice, perfectly blending functionality with modern home design. Hidden Cabinet Storage Hidden cabinet storage offers a sleek and organized solution for concealing clutter. These cabinets can be integrated seamlessly into existing furniture or architectural features, such as under staircases or within walls. They provide ample space for storing items that you want to keep out of sight, such as vacuum cleaners, toys, or seasonal decorations. Hidden cabinet storage not only enhances the appearance of a room but also creates a sense of tidiness and simplicity. Open Shelving Storage Open shelves may become functional and stylish features in your home that will allow you to put your items on display while keeping them accessible. It permits you to display vacuum cleaners , decorative items, kitchenware, or books, which brings character to your room. Furthermore, open racking facilitates the organization of things and makes it possible to spot and get hold of things quicker. Nevertheless, it is also necessary to keep these shelves neat to avoid visual clutter and retain the aesthetic character of the room. Basement/Storage Room Storage Employing the basement or a spare storage room can largely increase your storage space. Such spaces give enough area for putting seasonal items like vacuum cleaners, large equipment, or things that are used less often. Shelving units put in the right position, bins or cabinets can help to utilize the space to the maximum and keep things in order. Furthermore, investing in appropriate lights and organization systems can improve accessibility and efficiency within the storage rooms. Outdoor Storage An outdoor storage solution is key in making sure gardening tools and outdoor furniture are organized and protected from the elements. Whether it’s a simple shed, a deck box, or a storage bench, getting organized becomes much easier when items are kept outdoors, and ready for use. Providing weather-resistant materials and dependable lock systems will allow you to be sure that your possessions like vacuum cleaners are still intact after any season. Multifunctional Furniture Multifunctional furniture is designed to combine storage spaces with practical use. Objects like ottomans with hidden compartments, beds with built-in drawers, or coffee tables with storage space provide thorough, versatile solutions for tiny rooms. These elements not only do this but also serve the purpose of taking up less space by accommodating many functions such as keeping vacuum cleaners. Multifunctional furniture selection helps to keep the space maximum without compromising on a clutter-free environment. Customized Storage Solutions Customized storage solutions cater to the unique layout of each home, ensuring every nook serves a purpose without compromising aesthetics. Incorporating a compact and versatile vacuum like the eufy HomeVac H30 Mate into these solutions allows for effortless cleaning storage. Whether it's a built-in slot within a multifunctional kitchen unit or a sleek hideaway in a living room console, the idea is to blend functionality with design seamlessly. This approach not only maximizes space but also keeps essential cleaning tools within easy reach, ready for any mess that life throws your way. Common Vacuum Cleaner Storage Mistakes Here are the common mistakes that you like to avoid during vacuum cleaner storage: Visible Clutter One of the most frequent blunders is leaving vacuum cleaners in plain sight. Not only does this contribute to visual clutter, but it also makes spaces feel less organized and clean. A simple solution is to designate a specific, out-of-the-way spot for your vacuum. Closets, utility rooms, or even under-stair storage areas can provide a discreet home for your appliance. This small change can significantly enhance the overall aesthetics of your living space, creating a more serene and inviting environment. Corner Piling Resorting to corner piling is another mistake to avoid. Squeezing your vacuum cleaner into the first available corner might seem convenient, but this habit can lead to damage and decreased efficiency. Corners often expose vacuums to unnecessary bumps and knocks, potentially harming their mechanisms. Instead, opt for a dedicated space that supports the vacuum's structure and protects it from accidental damage. Lack of Proper Protection Finally, a common oversight is the lack of proper protection for stored vacuum cleaners. Dust, debris, and humidity can all degrade your vacuum's performance over time. To combat this, ensure your storage area is clean and dry. For extra protection, consider using a breathable cover to shield your vacuum from dust accumulation while still allowing air circulation to prevent moisture buildup. Conclusion Finding where to store vacuum cleaner can become a real challenge, especially in small apartments or flats with a lack of storage space, or when you are trying to accommodate a particularly large vacuum cleaner. However, with some careful planning, creative thinking, and a whole lot of effort, the perfect place to tuck your vacuum cleaner can be found. This not only will increase the beauty of your space but also provide enough space for other things to create room for them, save tidiness, and even safeguard your vacuum cleaner from damage. FAQ How do you store vacuum and mops? Vacuums and mops can be stored in various ways, such as using wall-mounted racks, designated cabinets, or under-stair storage. Hanging them on hooks or storing them in a utility closet are also common options. It's better to buy a robot vacuum with self-care station to store the machine best. Where do most people store their vacuum cleaner? Most people store their vacuum cleaners in utility closets, laundry rooms, or tucked away in a corner of a room. Some may also keep it in a storage room, garage, or under the bed if space permits. Where should I store my vacuum without a closet? If you don't have a closet, consider storing your vacuum cleaner in a designated area in the hallway, under a bed, or in a corner of the room. Wall-mounted storage solutions, such as hooks or racks, can also be utilized to keep it off the floor and out of the way.
Vacuum · 15/04/2024
Discover the Best Cordless Vacuum for Pet Hair in 2024 for Your Home
Pet owners know all too well the struggle of finding pet hair on virtually every surface of their home. Whether it's on the couch, carpet, or strewn across floors, pet hair can be a persistent nuisance that not only affects the cleanliness of your space but can also trigger allergies. The right vacuum can address this cleaning challenge effectively, making it more efficient and far less frustrating. To make your searching easier, this guide delves into what features make a vacuum ideal for tackling pet hair and spotlight some top contenders that could be considered the best cordless vacuum for pet hair on the market today. Join us and discover the perfect vacuum for you and your furry friends! Why Is It Important to Have a Vacuum for Pet Hair? For pet owners, investing in a cordless vacuum for pet hair means investing in a healthier, cleaner home environment and the well-being of both your family and pets. These vacuums are designed with powerful suction and specialized brushes to effectively remove pet hair and allergens like pet dander from various surfaces, keeping your home clean and hygienic. Unlike traditional vacuums, which are often bulkier, tethered by power cords, and may struggle with the volume and texture of pet hair, leading to clogs and reduced efficiency, a specialized cordless pet hair vacuum is built for the task. It saves time and effort during cleaning sessions by eliminating the need to switch outlets as you move through your home and ensures the vacuum itself lasts longer due to its ability to handle high volumes of hair without succumbing to wear and tear. What Makes A Perfect Pet Hair Vacuum? A perfect pet hair vacuum embodies several key features tailored to address the challenges of cleaning up after pets efficiently and effectively. Here are the essential attributes to consider: High Suction Power The most important aspect to evaluate when choosing the best cordless pet vacuum is its suction power. High suction ensures that pet hair, dander, and dirt embedded deep within carpets, upholstery, and other surfaces are efficiently extracted. This power needs to be consistent, enabling the vacuum to maintain its effectiveness across various surfaces without losing momentum. Great Adaptability A vacuum that excels in removing pet hair is one that can adapt to various environments and surfaces with ease. This includes adjustable power settings to seamlessly transition between different types of flooring, such as hardwood and carpet. Moreover, it should feature tangle-free brush rolls, easy maneuverability, and specialized attachments for upholstery, tight corners, and crevices, where pet hair usually accumulates. Easy to Empty and Clean When dealing with pet hair, the ease of emptying and cleaning the vacuum itself is crucial. The best cordless stick vacuum for pet hair features straightforward, hygienic systems that allow for the bin to be emptied without coming into contact with the collected pet hair and allergens. Additionally, washable filters and detachable components make regular maintenance simple and efficient, ensuring the vacuum remains in top condition. High-Quality Filtration System Equally important for an ideal pet hair vacuum is the inclusion of a high-quality filtration system. A high-efficiency particulate air (HEPA) filtration system is crucial for trapping allergens, dander, and fine dust particles, making the environment healthier, especially for allergy sufferers. The filtration system should effectively prevent these particles from being expelled back into the air. PRO TIPS: If you're spending most of the time cleaning pet hair on floor, you really should consider get a floor washing robot to help with the chore. eufy S1 Pro - The World’s First Floor Washing Robot Vacuum Meet eufy S1 Pro, unleash the power of real-time self-cleaning floor washing robot combined with a high-performance vacuum, all in one revolutionary device. Say goodbye to manual labor and hello to groundbreaking innovation and design. Don't miss out on the revolution in home cleaning: Go Now More Robot Vacuum and mops What Is the Best Vacuum for Pet Hair? When it comes to keeping your home free of pet hair, eufy pet vacuums offer some of the best options that combine power, convenience, and pet-friendly features. Here's a closer look at the top contenders from eufy: eufy N930 Pet Grooming Kit with Vacuum The eufy N930 Pet Grooming Kit with Vacuum stands out as a revolutionary solution, blending pet grooming and vacuuming into one seamless process. With its 5-in-1 Pro Pet Grooming Kit, it offers professional tools for hair removal, trimming, and grooming, making it easier than ever to give your pet a healthy makeover without the mess. The powerful 400W vacuum suctions an impressive 99% of pet hair directly into a 4.5L large capacity dust box, minimizing cleanup and ensuring your home remains fur-free. The kit includes 5 detachable guard combs for a customizable grooming experience, catering to all hair lengths. Moreover, its ultra-low noise operation ensures a stress-free grooming session for your furry friend. eufy HomeVac H30 Mate For quick, everyday cleanups, the eufy HomeVac H30 Mate shines with its 80 AW / 16kPa suction power at Max mode, tackling pet hair on various surfaces with ease. This best handheld cordless vacuum for pet hair also offers an Eco mode with 12kPa suction, lasting up to 20 minutes on a single charge. Weighing just 1.78 lb, it's incredibly lightweight, making it easy to maneuver around the house. The vacuum comes equipped with a mini-motorized pet brush and a 2-in-1 crevice tool, ensuring no pet hair is left behind. All these attachments can be stored neatly in its charging dock, combining convenience and power in a compact, efficient package. eufy Clean H20 Ideal for car owners who often travel with their pets, the eufy Clean H20 delivers 40AW strong suction, ensuring clean-ups are quick and thorough. It recharges fully in just 1 hour and offers 30 minutes of cleaning time, perfect for on-the-go maintenance. The vacuum's ultra-lightweight design at 1.44 lb makes it easy to handle around various furniture. Equipped with specialized attachments, including a built-in retractable tool, an extension hose, and a brush head, it ensures effective cleaning of pet hair. The built-in LED light is a thoughtful addition, illuminating hidden dust and dirt in every corner for meticulous cleaning. eufy HomeVac H11 The eufy HomeVac H11 is a powerful, lightweight, and convenient handheld cordless vacuum that weighs only 1.2 lbs. It is as easy to handle as a wine bottle, making it perfect for quick clean-ups and hard-to-reach places. Despite its size, it packs a punch with 5500Pa of suction power, efficiently capturing every speck of dust and pet hair. The included 2-in-1 crevice tool ensures you can reach into the deepest corners and under furniture effortlessly. With micro USB connectivity for easy charging and a comprehensive 24-month warranty, the H11 is a must-have for tackling everyday messes and pet hair with ease. Conclusion Choosing the best cordless vacuum for pet hair is not just about keeping your home clean; it's about creating a healthier, more comfortable living environment for you and your furry friends. As we've explored, high suction power, adaptability to various surfaces, and ease of cleaning are non-negotiable features for managing pet hair effectively. From the eufy N930 Pet Grooming Kit with Vacuum to the compact eufy HomeVac H11, each highlighted model offers unique benefits tailored to the needs of pet owners. With the right tool in hand, the battle against pet hair becomes one you can win, leaving more time for enjoying the moments that matter most with your beloved pets. FAQ Can cordless vacuums effectively pick up pet hair from all types of surfaces? Yes, cordless vacuums can effectively pick up pet hair from all types of surfaces, including carpets, hardwood floors, upholstery, and more. Modern cordless vacuums are equipped with powerful suction and specialized attachments designed to lift and remove pet hair from various surfaces with ease. Is a cordless vacuum for pet hair as powerful as a corded one? While cordless vacuums may not always match the raw power of corded models, advancements in technology have significantly improved their performance. Many cordless vacuums for pet hair offer comparable suction power and cleaning capabilities to their corded counterparts, making them a convenient and effective choice for pet owners seeking versatility and mobility. How do I maintain my cordless pet hair vacuum? To maintain your cordless pet hair vacuum, regularly empty the dustbin and clean or replace filters as per manufacturer's guidelines to ensure optimal suction. Remove hair and fibers from the brush roll frequently, and check for blockages in nozzles and attachments. Store the vacuum in a cool, dry place away from sunlight, and charge the battery properly to prolong its lifespan and maintain performance.
Robovac · 15/04/2024
Removing Wax from Carpet: Step-by-Step Guide
Wax spills on carpets are a common but frustrating issue that many of us face. Whether it's from a candlelit dinner gone awry or a mishap during a power outage, the aftermath often leaves us scrambling for effective cleanup methods. The issue at hand isn't just the wax itself, which hardens quickly upon contact with our carpets, but the potential for lasting stains and damage to the carpet's delicate fibers. In this step-by-step guide, we'll walk you through the most effective methods on how to get wax out of carpet, from cooling and scraping to heating and final cleaning. Let's dive into the know-how of wax removal and turn this daunting task into a manageable chore. Step-by-Step Guide to Wax Removal Follow these steps on how to get candle wax out of carpet to restore your carpet to its original condition without causing damage: Step 1: Cooling the Wax Before attempting to remove the wax, it's crucial to let it cool and harden completely. This prevents the wax from spreading further into the carpet fibers. You can accelerate the cooling process by placing a bag of ice or a cold compress over the wax spill. Ensure the ice is wrapped in a thin cloth or plastic bag to avoid water seeping into the carpet, which could complicate the cleaning process. Once the wax is solid, you're ready for the next step. Step 2: Scraping Off Excess Wax Using a blunt knife or a plastic scraper, gently scrape off the hardened wax from the carpet. Be careful not to pull at the carpet fibers. Work from the edges of the wax spill towards the center to avoid spreading the wax further. Remove as much wax as possible with this method. The goal is to eliminate the bulk of the wax before applying heat, which will melt the remaining wax into a more manageable residue. Use a vacuum cleaner with strong suction, like the MOST powerful robot vacuum, eufy X10 Pro with its 8,000 Pa of hard-hitting suction, to vacuum up the scraped-off pieces before moving on. Step 3: Using Heat to Melt Remaining Wax Place a clean, white cloth or a piece of brown paper bag over the wax residue. With an iron on a low to medium setting (without steam), gently press over the cloth or paper bag. The heat from the iron will melt the wax, which will then be absorbed by the cloth or paper. Keep moving the cloth or paper to a clean area as the wax is absorbed. Repeat this process until no more wax transfers to the cloth or paper. Be cautious not to leave the iron on the carpet for too long to avoid scorching the fibers. Step 4: Removing Residual Stains After removing the wax, there may be some residual stain left on the carpet, especially if it was colored wax. To tackle any residual stains, mix a solution of one part vinegar and one part water, and apply it lightly to the stained area. For tougher stains, you can use a carpet stain remover according to the manufacturer's instructions. Blot the area with a clean cloth to lift the stain. Avoid rubbing, as this can work the stain deeper into the carpet. Step 5: Final Cleaning and Drying Once the wax and any stains have been fully removed, it's important to clean the area one last time to remove any cleaning solution residue. Use a damp cloth with clean water to blot the area, then use a dry cloth to remove any excess moisture. Allow the carpet to air dry completely. Once dry, vacuum the area to restore the carpet's texture and remove any remaining debris. Consider using a vacuum with powerful suction capabilities, take a look at eufy S1 Pro, the world's first floor washing machine. Its powerful suction effectively loosens, extracts, and vacuums debris, ensuring a deeper clean and helping to restore your carpet's texture and appearance. eufy S1 Pro - The World’s First Floor Washing Robot Vacuum Meet eufy S1 Pro, unleash the power of real-time self-cleaning floor washing robot combined with a high-performance vacuum, all in one revolutionary device. Say goodbye to manual labor and hello to groundbreaking innovation and design. Don't miss out on the revolution in home cleaning: Go Now More Robot Vacuum and mops Alternative Methods and Tips for Wax Removal Here's a look at some alternative methods and additional tips that can come in handy depending on the type of wax, carpet, or the tools you have available: Freezing Method A quick and effective alternative for wax removal from carpets is utilizing freeze spray, a product designed to rapidly chill and harden substances. It is particularly useful for small to medium-sized wax spills and can be more controlled than the traditional method of placing ice cubes. Hold the can of freeze spray a few inches away from the wax spill, ensuring you're targeting the wax directly. Apply the spray according to the manufacturer's instructions until the wax becomes hard and brittle. The rapid cooling effect of the freeze spray will solidify the wax, making it easier to remove. Gently scrape off the brittle wax with a blunt knife or plastic scraper. Clean any residue with a mild detergent solution, dabbing gently, and let the area dry. Vacuum over the treated spot to refresh the carpet's texture. Hair Dryer Method If you prefer not to use an iron, a hair dryer set on a medium to high heat setting can be used to gently melt the wax. Hold the dryer a few inches above the wax until it melts, then press an absorbent paper towel onto the wax to soak it up. Repeat as necessary until all the wax is removed. This method offers a bit more control and is less likely to overheat the carpet compared to an iron. Using Carpet Cleaner Machines Utilizing a carpet cleaner machine can be an effective way on how to get dried wax out of carpet, or when faced with a substantial wax spill. These machines, especially those with a soft brush attachment, are designed to gently yet thoroughly cleanse and lift debris from within the carpet. After manually removing as much wax as possible, prepare the machine with a gentle, carpet-friendly detergent. Carefully run the machine over the affected area, following the manufacturer's guidelines to avoid any potential harm to your carpet. The combination of the machine's cleaning action and the detergent can effectively dislodge and remove remaining wax residue. Precautions and Considerations Here are several precautions to keep in mind to minimize the chance of damaging your carpet: Test First:Before applying any heat, freezing, or cleaning solution, always test it on a small, inconspicuous area of your carpet to ensure it doesn't cause discoloration or damage. Color Transfer:When using heat with a cloth or paper bag, ensure the material doesn't have any print or color that could transfer to the carpet. Gentle Scraping:Regardless of the method, be gentle when scraping wax off to avoid damaging the carpet fibers. Blot, Don't Rub:When dealing with residual stains, always blot the stain with a cleaning solution rather than rubbing it. Rubbing can spread the stain and embed it deeper into the carpet fibers. Conclusion Removing wax from carpets might seem like a daunting task, but with the right techniques and a little patience, it's entirely achievable. Whether you're dealing with a fresh spill or an old stain, the steps on how to get wax out of carpet outlined in this guide are designed to help you tackle the problem effectively, ensuring your carpet is left looking as good as new. And with the additional tips and alternative strategies outlined, you have a comprehensive toolkit at your disposal to tackle future spills. Armed with this knowledge, you can now enjoy your candles with peace of mind, knowing any accidents can be handled with ease. FAQ Does vinegar remove wax from carpet? Yes, vinegar can help remove wax from carpet. Its acidic properties can break down the wax and make it easier to lift from the carpet fibers. Mix equal parts vinegar and water, apply the solution to the wax stain, and blot with a clean cloth to remove the wax residue. Will nail polish remover get wax out of carpet? Yes, nail polish remover can help dissolve wax stains. However, it's essential to use a non-acetone nail polish remover to prevent damage to the carpet fibers. Apply a small amount of the remover to a clean cloth and blot the wax stain until it lifts from the carpet. Does rubbing alcohol remove wax from carpet? Yes, rubbing alcohol can be used to remove wax from carpet. Its solvent properties help break down the wax, making it easier to remove. Apply a small amount of rubbing alcohol to a clean cloth and gently blot the wax stain until it transfers from the carpet fibers onto the cloth.
Vacuum · 15/04/2024
Top 10 Best Vacuum Cleaners of 2024
Keeping your home clean requires the right tools, and a vacuum cleaner is one of the most essential. With a plethora of options available, finding the best vacuum cleaner can be overwhelming. To simplify your research, we've compiled a list of the top vacuum cleaners across various categories to suit your specific needs. Best Robot Vacuum Cleaner The eufy X10 Pro Omni is an exceptional robot vacuum cleaner that stands out for its advanced features. It boasts a powerful 8,000 Pa suction capability for deep cleaning and an innovative MopMaster 2.0 system that ensures spotless floors with its dual mop pads. Its AI.See technology allows for smart cleaning by identifying obstacles, even at night. The vacuum comes with an all-in-one station for hands-free maintenance, featuring mop washing, drying, and dustbin emptying. Additionally, it includes an auto-detangling roller brush and customizable AI.Map 2.0 for efficient navigation and cleaning tailored to your home's layout. Best Budget Vacuum Cleaner The eufy Clean 11S MAX stands out as a budget-friendly vacuum cleaner that doesn't skimp on performance. It's re-engineered for a sleek 2.85-inch profile, allowing it to slide under most furniture effortlessly. With a powerful 2000Pa suction, it tackles dirt and pet hair on various surfaces, from hardwood floors to medium-pile carpets. The 11S MAX operates quietly at 55dB and provides up to 100 minutes of cleaning on a single charge. Safety features include drop-sensing and anti-collision technology, ensuring it navigates your home smartly. Plus, it automatically returns to its charging base when low on battery. Best Vacuum Cleaner for Pet Hair Pet owners understand the struggle of keeping pet hair at bay. Experience unparalleled pet hair cleaning with eufy HomeVac H30 Mate. Boasting 80 AW / 16kPa suction power, this best vacuum cleaner for pet hair effortlessly removes stubborn pet hair with Eco and Max modes. Weighing just 1.78 lb (808 g), it's lightweight for easy maneuverability. Equipped with a Mini-Motorized Pet Brush and 2-in-1 Crevice Tool, it ensures thorough cleaning. Best Vacuum Cleaner for Bare Floor The LG Cordless A9 Kompressor with Power Mop is a versatile cleaning solution for bare floors, offering advanced technology for effective dirt removal. It features a powerful Smart Inverter Motor™ that ensures superior suction across all types of floors, complemented by a Power Mop Nozzle for impeccable bare floor cleaning. With two quick-release batteries, it delivers up to 120 minutes of continuous performance, allowing for uninterrupted cleaning sessions. This makes it an excellent choice for maintaining spotless bare floors with ease and efficiency. Best Handheld Vacuum Cleaner Handheld vacuum cleaners offer convenience and portability, making them perfect for quick clean-ups and reaching tight spaces. Our top pick, the Ryobi 18V One+ Performance Hand Vacuum Kit, is a versatile and efficient solution for all your cleaning needs. With its cordless design, you can easily maneuver it around the home and in the car without worrying about tangled cords. Best Upright Vacuum Cleaner Upright vacuum cleaners are renowned for their robust cleaning performance on carpets and large floor areas. The Shark Navigator Lift-Away NV352 offers exceptional versatility and value. With its reliable performance, effective cleaning abilities, and user-friendly design, this best home vacuum cleaners is a trusted companion for maintaining a clean home environment. Best Canister Vacuum Cleaner For versatility and efficiency, canister vacuum cleaners are unbeatable. With their compact design and flexible hose, they excel at cleaning stairs, upholstery, and hard-to-reach corners.The Miele Complete C3, recognized for its excellence, features a power nozzle that adapts the brush roll to various carpet levels, easing vacuuming on dense, plush carpets. This best vacuum for apartment impresses in cleaning tests with top-notch performance and innovative design, earning the Good Housekeeping Seal for Best Canister Vacuum Cleaner. Best Vacuum Cleaner for Cars The Black+Decker 16V MAX dustbuster Cordless Hand Vacuum is the best car vacuum cleaner for keeping your car and bare floors immaculate. Its cordless design ensures hassle-free maneuverability, perfect for reaching tight spaces in cars and on floors. Equipped with a 16V lithium-ion battery, it offers strong, fade-free suction power, making it highly efficient on bare floors. The inclusion of a crevice tool and brush further enhances its cleaning capabilities, allowing for precision in removing dust and debris. Compact, powerful, and easy to maintain, it's an essential tool for quick, thorough cleanups. Best Cordless Stick Vacuum Cleaner Cordless stick vacuum cleaners provide the ultimate freedom of movement without compromising on performance. The Wyze Cordless Vacuum, good vacuum cleaner, stands out as the ultimate budget-friendly option in the cordless stick vacuum category. With impressive debris pickup on both bare floors and carpets, it effortlessly tackles solid debris and pet hair. Equipped with a HEPA exhaust filter, it effectively traps fine particles like dust and pet dander. Best Vacuum Cleaner for Carpet The SEBO Felix Premium is an ultra-quiet, stylish vacuum that excels in cleaning carpets. Its 180° steering ability and manual height adjustment ensure flexibility and deep cleaning. The vacuum comes with a 12-inch-wide ET-1 power head, perfect for lifting pet hair and deep-seated dirt from carpets. It also features a brush roller that can be turned off for delicate rugs, ensuring versatility. Additionally, its three-layer AeraPure™ bag and S-class exhaust microfilter provide excellent filtration, making it the best vacuum cleaner for carpeted homes. How to Choose the Best Vacuum Cleaner for Home? Choosing the best vacuum cleaner for your home involves considering several factors to ensure it meets your cleaning needs effectively. Here's a comprehensive guide to help you make an informed decision: Flooring Type: Consider whether you have carpets, hardwood floors, tiles, or a combination. Some vacuums are better suited for specific floor types. Suction Power: Opt for a vacuum with adjustable suction power settings to accommodate various surfaces and cleaning needs. Filtration System: Look for HEPA filters if you have allergies or asthma, as they effectively trap dust, pollen, and other allergens, preventing them from being released back into the air. Capacity: Consider the size of the dustbin or bag. Larger capacities reduce the frequency of emptying or changing bags. Attachments and Accessories: Ensure the vacuum comes with a variety of attachments such as crevice tools, upholstery brushes, and pet hair brushes to cater to different cleaning needs and surfaces. Cord Length or Battery Life: For corded vacuums, longer cords provide more flexibility and reduce the need to switch power outlets. If opting for a cordless vacuum, check the battery life to ensure it can handle your cleaning sessions without frequent recharging. Brand Reputation and Warranty: Research brands known for their quality and reliability. Check customer reviews and warranties to ensure satisfaction and peace of mind with your purchase. Budget: Set a budget based on your requirements and stick to it, considering both the upfront cost and ongoing maintenance expenses. Conclusion Discovering the best vacuum cleaner transforms household cleaning into a seamless experience. Discover our curated selection across various categories to unearth the perfect fit for your home. From powerful uprights to versatile canisters, innovative robots to compact handhelds, each option is meticulously chosen to ensure efficiency and satisfaction. Elevate your cleaning routine with confidence, knowing that the best vacuum cleaner for your needs is within reach. Say goodbye to dust, dirt, and debris, and embrace a sparkling clean home effortlessly. Frequently Asked Questions What Is a Good Suction Power for A Vacuum Cleaner? The ideal suction power depends on your cleaning needs and floor type. Generally, a vacuum cleaner with a suction power of at least 200-300 air watts is considered powerful enough for most homes. How Much Should You Spend on A Vacuum Cleaner? Vacuum cleaner prices vary widely depending on brand, features, and performance. While high-end models can cost several hundred dollars, there are also budget-friendly options available for under $100. It's essential to consider your cleaning requirements and long-term investment when determining your budget. How Long Should a Vacuum Cleaner Last? The lifespan of a vacuum cleaner depends on various factors, including usage frequency, maintenance, and build quality. On average, a well-maintained vacuum cleaner can last anywhere from 5 to 8 years. Regular cleaning of filters and brushes, as well as timely replacement of worn-out parts, can help prolong its lifespan.
Robovac · 15/04/2024
How to Get Dog Smell Out of Carpet: Effective Tips and Tricks
Dealing with lingering dog smells in carpets can be a daunting task for many pet owners. These persistent odors can permeate through the entire house, affecting the overall ambiance and comfort of your living spaces. Addressing this problem promptly is crucial, as the smell can embed itself deeper into the fibers of the carpets over time, making it harder to eliminate. But fear not! In this guide, we will explore effective methods on how to get dog smell out of carpet. From homemade cleaning solutions to professional cleaners, we'll cover a range of practical techniques to remove these odors, as well as tips to prevent their recurrence. Let's get into it! Why Dog Odors in Carpets Understanding the source of these unpleasant odors is the first step in effectively addressing and eliminating them. Dog odors in carpets can originate from several sources: Pet Dander:When dogs shed, they can release tiny skin flakes called dander that get stuck in the carpet fibers over time, creating a musty pet smell. Urine:If accidents like urine aren't cleaned promptly and thoroughly, they can seep into the carpet pad, causing a persistent odor. Saliva:Dogs' saliva from licking or drooling can harbor bacteria that contribute to bad smells on carpets. Sweat:Though not as prolific sweaters as humans, dogs do sweat from their paws and hair follicles. This sweat can transfer to your carpets, especially in areas where your dog likes to lie down or rest. The combination of these sources contributes to the distinctive "dog smell" that can permeate your home if not properly managed. Effective Ways to Remove Dog Odor Eliminating dog odors from carpets requires a mix of regular maintenance and targeted treatments. Below are proven strategies to freshen your carpets: Regular Vacuuming Consistent vacuuming is your first line of defense against dog odors. It removes pet hair, dander, and dirt before they have a chance to settle deeply into carpet fibers. Vacuuming at least twice a week can significantly reduce odor buildup, especially in high-traffic areas and spots where your dog spends most of its time. Choosing the right vacuum can significantly enhance your cleaning efforts. For instance, eufy handheld vacuums are specially designed to tackle pet-related messes with powerful suction and pet-specific attachments. Boasting 80 AW of strong suction power, the eufy HomeVac H30 Mate is extremely lightweight at just 1.78 lb, facilitating easy maneuverability around your home. It comes a mini-motorized pet brush to tackle pet hair effectively, ensuring your carpets remain fresh. Or you can let robot vacuum to clean the mess - try floor washing robot eufy S1 Pro. eufy S1 Pro - The World’s First Floor Washing Robot Vacuum Meet eufy S1 Pro, unleash the power of real-time self-cleaning floor washing robot combined with a high-performance vacuum, all in one revolutionary device. Say goodbye to manual labor and hello to groundbreaking innovation and design. Don't miss out on the revolution in home cleaning: Go Now More Robot Vacuum and mops Baking Soda Treatment Baking soda is a natural deodorizer that's safe for both pets and carpets. It absorbs odors and moisture, leaving your carpets smelling fresh. For mild odors, sprinkle a generous amount of baking soda directly on the carpet, let it sit for several hours, then vacuum it up thoroughly. For stronger odors, you can mix baking soda with a few drops of essential oil safe for pets and work it into the fibers with a brush. Let it sit overnight for maximum odor absorption and vacuum it up thoroughly the next day. Vinegar Solution Utilizing vinegar, specifically white vinegar, is another effective way on how to get dog smell out of carpet naturally. Its acidic nature breaks down odor-causing bacteria without leaving a residue. Mix equal parts of white vinegar and water in a spray bottle. Lightly mist the solution over the carpet (without soaking it), and let it air dry. The vinegar smell will dissipate as it dries, taking the dog odor with it. For deeper odors, after misting, gently brush the carpet with a soft brush to help the solution penetrate the fibers, then let it dry. Enzymatic Cleaners When considering how to get dog urine smell out of carpet, enzymatic cleaners are highly effective. These cleaners contain natural enzymes that break down the organic matter in dog stains (like urine, feces, and vomit) that cause odors, effectively neutralizing the smell. For the best results, follow the product instructions closely, usually involving applying the cleaner to the affected area and allowing it sufficient time to work before blotting or rinsing. Steam Cleaning Steam cleaning is a powerful deep-cleaning method on how to get dog pee smell out of carpet. The high-temperature steam kills bacteria and dissolves odorous substances without the use of chemicals. If you don't own a steam cleaner, renting one is a straightforward option available from many local hardware stores. When operating a steam cleaner, be mindful to prevent soaking the carpet too much. Excessive moisture can lead to mold development, creating additional issues. Professional Cleaning Services Sometimes, despite your best efforts, dog odors can persist, deeply embedded in your carpet's fibers. In such cases, professional cleaning services may be the answer. These services have access to industrial-strength equipment and cleaning solutions not available to the general public. A professional cleaner can assess the condition of your carpet and use targeted treatments to eliminate odors. While this option may be more costly than DIY methods, it's often the most effective way to ensure your carpets are thoroughly cleaned and deodorized, especially in severe cases. Preventive Measures Maintaining a fresh-smelling home involves more than just cleaning up after incidents occur. Implementing preventive measures can significantly reduce the likelihood of dog odors becoming a persistent problem. Here are key strategies to consider: Regular Grooming Regular grooming of your dog is one of the most effective ways to minimize odors. This includes brushing to remove loose fur and reduce dander, bathing with pet-safe shampoos to keep their coat clean, and proper dental care to prevent bad breath and saliva odors. Regular grooming not only keeps your pet smelling fresh but also reduces the amount of hair and dander that can accumulate in your carpet. Pet Training Training your pet to avoid certain behaviors can significantly reduce carpet odors. This includes house training to prevent accidents on the carpet and teaching your dog not to bring food or chew toys onto carpeted areas. Establishing designated eating and play areas can help confine messes and odors to more manageable and cleanable spaces. Carpet Protection Investing in a carpet protector is an effective strategy to shield your carpets from the direct impact of dog-related odors. Typically crafted from a sleek, transparent plastic, these protectors maintain the aesthetic of your carpets while providing an essential barrier against odor sources. Alternatively, consider using throw rugs or runners in high-traffic areas or places your dog frequents. These can be easily removed and washed, reducing the wear and tear on your underlying carpet. Conclusion Tackling the challenge of removing dog smell from carpets may seem daunting, but as we've seen, there are numerous effective methods at your disposal. From regular vacuuming to the use of baking soda, enzymatic cleaners, and steam cleaning, each strategy on how to get dog smell out of carpet offers its own benefits. Moreover, preventive measures such as regular grooming, pet training, and carpet protection are essential in ensuring that these smells don't become a recurring issue. By adopting a comprehensive approach that combines immediate odor removal with long-term preventive measures, you can maintain a fresh and odor-free living space for both you and your pets. FAQ Why does my carpet still smell like dog after cleaning? When your carpet still smells like dog after cleaning, it's likely due to pet odors that have penetrated deep into the carpet fibers, padding, or subfloor, where surface cleaning doesn't reach. Additionally, incomplete removal of pet urine or other organic matter during cleaning can contribute to persistent odors. How long does dog scent last on carpet? Generally, dog scents can linger on a carpet for several weeks to a few months if not effectively addressed. The duration varies depending on factors such as the intensity of the odor, the carpet's material, how the carpet is cleaned, and the humidity and temperature of the environment. Does baking soda really deodorize carpet? Yes, baking soda can effectively deodorize carpet by absorbing and neutralizing odors rather than merely covering them up. Sprinkling baking soda on your carpet, letting it sit for a few hours or overnight, and then vacuuming it up can help eliminate unpleasant smells.
Robovac · 15/04/2024
The Don'ts of Vacuuming: 10 Things You Can't Do with Vacuum
Pulling out the vacuum cleaner often feels like the quickest way to tackle any spill or mess that crosses our paths at home. Yet, despite their convenience and versatility, there are specific things you can't do with vacuum. Understanding these limitations is crucial for maintaining your device's longevity and avoid unnecessary hazards. This guide debunks some common misconceptions about vacuum capabilities and outlines 10 specific messes that are better left untouched by your trusty vacuum cleaners. Additionally, we'll delve into what happens when these guidelines are ignored to help you understand the risks and provide insights into selecting the right vacuum for various tasks. Join us for better and safer vacuum use. Common Misconceptions About Vacuum Capabilities Despite their widespread use, several myths about vacuum capabilities persist, leading to misuse and unrealistic expectations. Let's debunk some of these common myths: Vacuums Can Handle Wet and Dry Messes Equally One of the most prevalent myths is that standard vacuums are equipped to deal with both wet and dry messes. While there are specialized wet-dry vacuums designed for this purpose, most household vacuums are only meant for dry debris. Vacuums Can Handle All Types of Debris Another common misunderstanding is that vacuums can suck up any kind of debris, no matter its size, shape, or material. While it's true that vacuums are designed to pick up a wide variety of household dirt and dust, they are not suited for everything. Items like large or sharp objects can cause significant damage to the interior workings of your vacuum or tear the vacuum bag or filter. All Vacuums Work Effectively on Any Surface While vacuums come with various settings and attachments, not all are suitable for every surface type. Using the wrong setting or attachment can lead to inadequate cleaning or, worse, damage to delicate surfaces. For example, a beater bar is great for agitating carpet fibers but can scratch hardwood floors or snag area rugs. 10 Things You Should Never Vacuum From the liquid spills that can short-circuit your machine to the sticky substances that cling onto its internals, let's delve into 10 specific items you should never vacuum: Liquids The answer to the question "Can you vacuum water?" is a big no. Vacuuming liquids with a standard vacuum cleaner can lead to electrical hazards, damage the motor, and encourage the growth of mold and mildew within the unit. For wet spills, use a mop or a wet-dry vacuum designed for such tasks. Fireplace Ashes Ashes from the fireplace may seem like fine dust that a vacuum could easily handle, but they can clog filters and damage the motor. Moreover, hot embers hidden within the ashes can pose a significant fire risk if vacuumed. Utilize a fireplace shovel and metal container is a safer way to handle them. Large or Sharp Objects Objects that are too large or sharp can cause physical damage to your vacuum. Large pieces of plastic or coins can obstruct the airflow by clogging the hose or the brush roll, while sharp objects like glass shards can tear the vacuum bag or filter, leading to costly repairs. So, can you vacuum glass? No, it's safer to pick up them up by hand with a rubber glove. Wet Foods Just like water in vacuum cleaner, wet foods can also cause electrical shock and damage to the motor. They can stick to the interior components and promote mold growth, which is difficult to clean and can cause unpleasant odors. It's best to clean up these messes with paper towels or a cloth. Besides, the best way to handle a wet floor is to try eufy S1 Pro, the world's first floor washing robot. 123 Power Cords Careless vacuuming over power cords is risky. Not only can it damage the cord, leading to potential electrical hazards, but it can also cause wear and tear on your vacuum's brush roll or even entangle the cord around moving parts. Always remove cords from the floor or lift them away as you vacuum. Soil Vacuuming large amounts of soil carried from outdoors inside on your shoes or spilled potting mix can quickly fill up your vacuum bag, leading to reduced suction power or clogged filter. Heavy particles can also scratch the interior of your vacuum. If you have a lot of soil or mud inside, it's best to let it dry and sweep it up with a broom and dustpan first. Hair in Large Clumps Hair in large clumps can be particularly troublesome for standard vacuums. Long strands can wrap around the brush roll, leading to a decrease in efficiency and potentially damaging the motor if the brush cannot rotate. It's best to pick them up by hand or use a rubber glove to gather them before running the vacuum. Soft Fabrics Soft fabrics, such as socks, small towels, or washcloths, should never be vacuumed. These items can easily be sucked up into the vacuum hose, causing clogs that are difficult and sometimes costly to remove. Additionally, the fabric can wrap around the brush roll, similar to hair, and lead to motor burnout. Always ensure small fabric items are picked up before vacuuming. Sticky Substances Vacuuming sticky or tacky substances is a definite no. Not only can these substances clog your vacuum's tubing, but they can also coat the interior components, leading to a decrease in performance and potential damage. For spills of this nature, it's best to use a cleaning solution suited to the substance, and perhaps a scraper or paper towels, before vacuuming the residue. Lit Cigarette Butts Vacuuming lit cigarette butts can pose a fire hazard within the vacuum, potentially melting plastic components and filters. Even when they are completely extinguished and cool, vacuuming them should be avoided due to the odor embedding into your vacuum. What Happens If You Ignore the Guidelines? Ignoring these guidelines can lead to several issues, affecting not only the appliance itself but also potentially your safety and well-being. Here's a closer look at the consequences: Damage to the Vacuum Vacuum cleaners are designed to handle specific types of debris and usage conditions. Introducing materials like liquids, sharp objects, or sticky substances can cause physical damage to the machine's internal components, including the motor, hose, brush roll, and filters. This can lead to costly repairs or necessitate a complete replacement of the vacuum. Reduced Efficiency Even if the vacuum doesn't break down immediately after vacuuming inappropriate materials, its efficiency can be significantly reduced. Clogs in the hose, filters, or brush roll can diminish suction power. This means more time and effort is required to clean your home, and even then, the results may not be up to par. Safety Risks Perhaps the most immediate concern when ignoring vacuuming guidelines is the safety risk it poses. Vacuuming over power cords or using a standard vacuum to clean up liquids can lead to electric shocks, endangering you and your household. Similarly, vacuuming flammable items like fireplace ashes or lit cigarette butts can cause fires within the vacuum cleaner, posing a significant risk to your home. What to Consider When Choosing a Vacuum for Different Tasks? Now that you understand the don'ts of vacuuming, there are several factors to consider when you are choosing a vacuum cleaner for the various tasks it can handle. Suction Power The heart of a vacuum's performance is its suction power. For general cleaning, a vacuum with moderate suction might suffice, but for more demanding tasks like deep-cleaning carpets or removing pet hair, look for models with higher suction capabilities. The eufy HomeVac H30 Mate vacuum cleaner, for example, features 80 AW / 16kPa strong suction power and a mini-motorized pet brush to pick up pet hair with ease. Adaptability A versatile vacuum that can adapt to different surfaces and situations is invaluable. Look for models that offer a range of settings or attachments for various tasks—such as hardwood floors, carpets of varying thickness, upholstery, and tight corners. Features like an adjustable brush roll height can make transitioning from carpet to hard flooring seamless and protect delicate surfaces. Additionally, compact handheld models, such as eufy handheld vacuums, are perfect for quick cleanups, reaching tight spaces, cleaning car interiors, or addressing specific spots that are too cumbersome for larger full-sized vacuums. Filtration System A good filtration system not only improves air quality but also prevents fine particles from being expelled back into the room. Vacuums equipped with HEPA (High-Efficiency Particulate Air) filters are especially beneficial for those with allergies or respiratory issues, as they can trap a higher percentage of dust mites, pollen, mold, and other airborne particles. Ensure the vacuum's filter is easy to clean or replace to maintain its effectiveness. Attachments and Tools The right attachments can significantly extend a vacuum's utility, making it a more valuable cleaning tool. Look for accessories tailored to your specific cleaning challenges—be it crevice tools for reaching into narrow spaces, upholstery attachments for furniture, or soft-bristle brushes for dusting delicate items. Specialized pet tools can also make a huge difference in homes with furry friends. The more targeted the tool, the better the cleaning outcome. Conclusion As we've navigated through the things you can't do with vacuum, it's clear that while vacuums are powerful tools for maintaining cleanliness, they have their limitations. From liquids and fireplace ashes to sharp objects and sticky substances, it's vital to recognize what your vacuum can and cannot handle. Ignoring these guidelines can lead to damaged equipment, reduced efficiency, and even safety risks. Moreover, by considering factors like suction power, filtration systems, and attachments, you can choose a vacuum that enhances your cleaning efficiency without compromising safety or performance. Remember, knowing the limitations of your tools is the first step towards using them more effectively and ensuring they last for years to come. FAQ Can I vacuum up rice? It is recommended not to use your vacuum cleaner to pick up rice, whether it is cooked or dry. Dry rice grains can easily clog the filters in a vacuum cleaner. And if the rice is wet or cooked, it could clog your vacuum's hoses and potentially damage the motor. Can I vacuum a fly? Yes. Vacuuming is an effective method to quickly remove flies from your living space without having to chase them around. However, using a vacuum might not always kill the fly, and it could potentially escape when you next use or empty the vacuum. To minimize this risk, you might want to immediately empty the vacuum canister outside after capturing the fly, especially if you're using a bagless vacuum. Will sawdust ruin a vacuum? Using a regular vacuum to clean up sawdust can indeed potentially damage it. Fine particles like sawdust can clog the vacuum's filter, reduce suction power, and even lead to motor burnout due to overheating.
Robovac · 15/04/2024
How Do Robot Vacuums Work? From Components to the Cleaning Process
The quest for efficient and hassle-free solutions for keeping our homes clean has led to the remarkable rise of robot vacuums. These ingenious devices have revolutionized the way we maintain our living spaces, offering a glimpse into a future where household chores are no longer a tedious part of our daily routines. But have you ever paused to wonder, "How do robot vacuums work?" This guide delves deep into the mechanics of robot vacuums, from the basic components that drive their functionality to the sophisticated processes that guide their path across your floors. Read on to learn the secrets behind these autonomous cleaning marvels! What is a Robot Vacuum? A robot vacuum, or robovac, is an autonomous cleaning device engineered to simplify floor cleaning with minimal human intervention. These disk-shaped machines navigate home spaces using advanced sensors and AI algorithms, capable of avoiding obstacles, adjusting to different floor types, and self-charging by returning to their docking stations. Their compact and low-profile design allows them to clean under furniture and in tight spaces where traditional vacuums might not reach. Many advanced robot vacuum and mop integrate with smart home systems and can be controlled via smartphone apps or voice assistants, allowing for customizable cleaning schedules and preferences. Understand Different Components of a Robot Vacuum To answer the question "How do robotic vacuum cleaners work?", let's first break down the key components that work in harmony to provide the seamless operation of these smart devices: Sensor Sensors are the eyes and ears of a robot vacuum, allowing it to navigate through spaces with precision. These include obstacle sensors to avoid furniture and walls, cliff sensors to prevent falls from stairs, and dirt sensors to detect particularly dirty areas that need extra attention. Brushes and Suction Mechanism At the heart of a robot vacuum's cleaning ability are its brushes and suction mechanism. Side brushes sweep debris into the path of the vacuum, while a main brush or rubber extractors grab and lift dirt, which is then sucked into the dustbin. This combination ensures thorough cleaning on a variety of surfaces. Navigation System Robot vacuums are equipped with advanced navigation systems. These systems may use a combination of algorithms, map data, and sometimes cameras or laser-based technology (LIDAR) to map out cleaning areas, ensuring thorough coverage without retracing steps unnecessarily. Many advanced robot vacuums feature mapping technology, which allows them to create a digital map of your home. This not only aids in more efficient navigation but also enables room-specific cleaning instructions through companion apps. The eufy X8 Pro for example, employs advanced LIDAR technology and Customizable AI Map 2.0. with its iPath Laser Navigation system. It can scan rooms and create accurate maps of your home in just 15 minutes, allowing it to navigate efficiently, avoiding obstacles while planning effective cleaning routes. Through the accompanying app, you can leverage these detailed maps to command specific room cleanings, set up No-Go Zones to avoid certain areas, and utilize the Multi-Floor Mapping feature for efficient operation across different levels of your home. Docking Station A docking station serves as both a home and charging point for robot vacuums. Once their battery runs low or cleaning is complete, they automatically return to the dock to recharge, ready for the next cleaning session. General Process of Cleaning with a Robot Vacuum Now that you are familiar with its components, let's go through the typical cleaning cycle of a robot vacuum to see how it cleans our home: 1. Mapping Before the actual cleaning begins, robot vacuums start with a mapping phase. Using its navigation system, the vacuum scans the environment of your home to create a digital map of the space. This map helps in planning an efficient cleaning route, avoiding obstacles, and ensuring complete coverage. Some advanced models, as we discussed above, allow you to view these maps via an app, setting specific rooms or areas for targeted cleaning. 2. Cleaning With the map as a guide, the robot vacuum proceeds to clean. It moves systematically across the floor, its brushes and suction mechanism working in tandem to pick up dirt, dust, and debris. Side brushes extend the vacuum's reach, pulling debris from edges and corners towards the center of the machine. Meanwhile, a main brush (or brushes) agitates the floor, dislodging dirt from carpets and cracks. As brushes loosen the debris, the vacuum's suction mechanism draws it into the machine. The suction power may vary based on the model and the surface being cleaned. Many advanced vacuums, like the world's first floor washing robot - eufy S1 Pro, can automatically adjust this power when transitioning between different floor types, such as carpet or hard flooring, for optimal cleaning. eufy S1 Pro - The World’s First Floor Washing Robot Vacuum Meet eufy S1 Pro, unleash the power of real-time self-cleaning floor washing robot combined with a high-performance vacuum, all in one revolutionary device. Say goodbye to manual labor and hello to groundbreaking innovation and design. Don't miss out on the revolution in home cleaning: Go Now More Robot Vacuum and mops 3. Docking and Recharging After completing its cleaning task, or when its battery runs low, the robot vacuum autonomously returns to its docking station. This is made possible through sophisticated navigation systems and sensors that allow the vacuum to remember the location of the dock and navigate back to it, even from another room. Upon docking, the robot vacuum begins to recharge. If the cleaning task is not completed, it resumes cleaning from where it left off after recharging, ensuring no spot is missed. Otherwise, the vacuum remains in standby mode on the dock, ready to spring into action according to its cleaning schedule or when commanded by the user through a smartphone app or voice command. Conclusion Understanding "How do robot vacuums work?" illuminates the complexity behind their seemingly simple operation. From their intricate sensors and effective brushes and suction mechanisms to the sophisticated navigation systems that guide them, robot vacuums embody a perfect harmony of components working together to make our lives easier. As they map out our homes, clean with precision, and return to their docks for recharging, these smart devices ensures our living spaces are clean with minimal effort on our part. By integrating a robot vacuum into your daily routines, you can free up time for more enjoyable activities, maximizing the potential of this innovative technology. FAQ What types of surfaces can a robot vacuum clean? Robot vacuums are designed to clean a variety of surfaces, including hardwood floors, tile, laminate, and low- to medium-pile carpets. Some models can even handle high-pile carpets and rugs with ease. How does a robot vacuum handle furniture and objects in its path? Robot vacuums utilize sensors to detect furniture and objects in their path, enabling them to navigate around obstacles and avoid collisions while cleaning. Do robot vacuums automatically return to their charging docks? Yes, most robot vacuums are programmed to automatically return to their charging docks when their battery is low or after completing a cleaning cycle.
Robovac · 12/04/2024
5 Essential Tips for Choosing the Best Home Carpet Cleaner
1. Understanding Different Types of Home Carpet Cleaners When it comes to choosing the best home carpet cleaner, understanding the different types available can help you make an informed decision tailored to your specific needs. Below are the main types of carpet cleaners you may come across: a) Upright Carpet Cleaners Upright carpet cleaners are popular for their powerful suction capabilities and wide cleaning paths. They are great for cleaning large carpeted areas efficiently. b) Portable Carpet Cleaners Portable carpet cleaners are compact and lightweight, making them ideal for spot cleaning or cleaning in tight spaces such as stairs, upholstery, or car interiors. c) Commercial-Style Carpet Cleaners These heavy-duty carpet cleaners are designed for professional cleaning tasks and are suitable for large areas or commercial use. They often come with additional features for enhanced performance. d) Carpet Shampooers Carpet shampooers use a mix of water and cleaning solution to deep clean carpets, effectively removing embedded dirt and stains. They are recommended for thorough cleaning on a regular basis. e) Steam Cleaners Steam cleaners utilize hot water vapor to clean and sanitize carpets without the need for harsh chemicals. They are eco-friendly and can be effective in removing dirt and allergens. f) Dual Tank Carpet Cleaners Dual tank carpet cleaners have a separate tank for clean and dirty water, ensuring that you are using fresh water for each cleaning session and avoiding cross-contamination. g) Carpet Extractors Carpet extractors are powerful machines that use water and cleaning solution under high pressure to clean carpets deeply. They are commonly used for professional carpet cleaning services. h) Automatic Robot Vacuums eufy S1 Pro - The World’s First Floor Washing Robot Vacuum Meet eufy S1 Pro, unleash the power of real-time self-cleaning floor washing robot combined with a high-performance vacuum, all in one revolutionary device. Say goodbye to manual labor and hello to groundbreaking innovation and design. Don't miss out on the revolution in home cleaning: Go Now More Robot Vacuum and mops 2. Consideration Factors for Choosing a Home Carpet Cleaner When it comes to selecting the right home carpet cleaner, there are several essential factors to keep in mind. By considering these key elements, you can ensure that you make an informed decision and choose a carpet cleaner that suits your specific needs. Cleaning Performance When evaluating carpet cleaners, pay close attention to their cleaning performance. Look for features such as powerful suction, efficient scrubbing brushes, and targeted cleaning settings for different types of stains. Ensure the carpet cleaner can effectively remove dirt, grime, and tough stains from your carpets. Check if it offers customizable cleaning options to tackle specific cleaning needs. Look for innovative features like deep cleaning modes or stain-specific cleaning settings for more effective results. Tank Capacity and Water Management The size of the clean water tank and the dirty water tank is crucial for the convenience and efficiency of your cleaning process. Opt for a carpet cleaner with a large clean water tank to minimize refills during cleaning sessions. Consider models with separate clean and dirty water tanks to avoid cross-contamination and ensure hygienic cleaning. Look for carpet cleaners with easy-to-fill and empty tank systems for hassle-free maintenance. Portability and Maneuverability For flexibility in cleaning various areas of your home, choose a carpet cleaner that is portable and easy to maneuver. Opt for a lightweight and compact carpet cleaner for effortless transportation between rooms. Look for features like carrying handles and swivel steering for enhanced maneuverability around furniture and tight spaces. Consider a carpet cleaner with a long power cord and hose length for extended reach without constantly unplugging and moving the unit. Noise Level The noise level of a carpet cleaner can significantly impact your cleaning experience, especially in multi-level homes or shared living spaces. Choose a carpet cleaner with a quiet operation to minimize disturbances during cleaning. Look for models with noise reduction technology or insulated components for quieter performance. Consider user reviews and expert recommendations on noise levels to find a carpet cleaner that offers a balance between effectiveness and quiet operation. Brand Reputation and Customer Support Select a carpet cleaner from reputable brands that offer reliable products and excellent customer support. Research the brand's reputation for manufacturing durable and high-performing carpet cleaners. Check customer reviews and ratings to gauge satisfaction levels and identify any common issues or strengths. 3. Best Practices for Maintenance of Home Carpet Cleaners Establish a regular cleaning schedule to prevent clogs and malfunctions. Clean the tank, filters, hoses, and nozzles monthly for optimal performance. Store the carpet cleaner in a cool, dry place after each use. Empty and rinse the dirty water tank to prevent odors and mold growth. Regularly check and replace filters to maintain suction power and cleaning quality. Periodically inspect for wear and tear, addressing issues promptly to maintain optimal performance. Schedule professional maintenance annually for deep cleaning and internal inspection to extend the lifespan of your carpet cleaner. 4. Comparison of Top Home Carpet Cleaner Models When it comes to choosing the best home carpet cleaner, comparing different models is crucial to ensure you make an informed decision. To help you in your search for the perfect carpet cleaner, here is a comprehensive comparison of some of the top models available in the market: eufy x10 Pro Omni The eufy x10 Pro Omni offers powerful suction capabilities, making it highly effective in removing tough stains and embedded dirt from carpets and rugs. Its advanced technology ensures thorough cleaning, leaving carpets fresh and revitalized. The machine features multiple cleaning modes and adjustable settings, providing versatility to cater to different carpet cleaning needs. With its professional-grade performance and convenience, the eufy x10 Pro Omni is a reliable choice for maintaining clean and hygienic carpets. Hoover SmartWash Automatic Carpet Cleaner Offers a commercial-style cleaning experience for both large areas and small spot cleaning. The automatic cleaning technology dispenses the right amount of water and solution for optimal results. Designed to tackle pet hair and tough stains with ease. Hoover Power Scrub Elite Pet Upright Carpet Cleaner Specifically designed to combat pet hair, this model is carpet's worst enemy. Features a large capacity water tank to minimize refills during cleaning. Comes with specialized tools for cleaning upholstery and stairs. Rug Doctor Deep Carpet Cleaner Renowned for its deep cleaning capabilities for high-traffic areas. A go-to choice for those looking to clean their carpets on a regular basis. Offers a noise level that ensures a comfortable cleaning experience. Bissell SpotClean Pro Portable Carpet Cleaner Ideal for tackling small areas and spots with ease. Features a compact design with a large tank capacity for effective cleaning. Recognized as a top pick for quick clean-ups and professional results. 5. Ensuring Longevity of Carpets with Proper Carpet Cleaning Techniques Maintaining the cleanliness and longevity of your carpets goes beyond just surface cleaning. By adopting proper carpet cleaning techniques, you can ensure that your carpets stay fresh and plush for years to come. Here are some essential tips to help you preserve the beauty and lifespan of your carpets: Gentle Cleaning Solutions: Using harsh chemicals and detergents can damage the fibers of your carpet over time. Opt for gentle cleaning solutions that are specifically formulated for carpets to avoid any discoloration or fiber damage. Look for products that are labeled as safe for use on carpets and follow the manufacturer's instructions carefully. Regular Vacuuming Schedule: Regular vacuuming is key to preventing dirt and debris from settling deep into the carpet fibers. Make it a habit to vacuum high-traffic areas at least twice a week and less frequented areas once a week. This will not only keep your carpets looking clean but also help to maintain their texture and quality. Professional Cleaning Services: While regular maintenance is essential, professional deep cleaning is also crucial to remove embedded dirt and allergens that regular vacuuming may not reach. Schedule a professional carpet cleaning service at least once a year to thoroughly clean and rejuvenate your carpets. Spot Cleaning Technique: Address spills and stains promptly to prevent them from setting into the carpet. Blot the area with a clean cloth to absorb as much of the spill as possible, then use a carpet-safe cleaning solution to gently remove the residue. Avoid rubbing the stain, as this can spread it further and damage the fibers. Proper Drying Methods: After cleaning your carpets, ensure they are adequately dried to prevent mold and mildew growth. Open windows or use fans to promote airflow and expedite the drying process. Avoid walking on freshly cleaned carpets until they are completely dry to prevent re-soiling and damage. "Investing time and effort in proper carpet cleaning techniques not only enhances the appearance of your carpets but also prolongs their lifespan, keeping them looking newer for longer." Conclusion When selecting a home carpet cleaner, consider factors like cleaning power, tank capacity, and ease of use. Prioritize quality over price, investing in a reputable brand for long-term savings. Research brands and read reviews to gauge real-world performance. Check for warranty options and customer support for a satisfying experience. With these tips, you can confidently choose the best carpet cleaner. FAQ What types of carpet cleaners are available for home use? Various types of carpet cleaners are available for home use, such as steam cleaners, upright cleaners, and portable spot cleaners. Robot vacuum cleaners are also a viable option for an automatic cleaning experience. Each type offers unique benefits and may suit different carpets or cleaning requirements. Before selecting the best carpet cleaner for your home, research and compare options carefully. What are the top home carpet cleaner models? Some of the top home carpet cleaner models include the eufy X10 Pro Omni, Bissell ProHeat 2X Revolution Max Clean Pet Pro Full-Size Carpet Cleaner, Hoover Power Scrub Elite Pet Upright Carpet Cleaner, and the Rug Doctor Deep Carpet Cleaner. It's important to research and compare different models to find the best one for your specific needs and budget. How can I ensure the longevity of my carpets with proper cleaning techniques? To ensure the longevity of your carpets, be sure to follow these proper cleaning techniques: Vacuum regularly to remove dirt and debris. Blot spills immediately with a clean cloth. Use a carpet cleaner specifically designed for your type of carpet. Test any cleaning solution on a small, inconspicuous area first. Avoid using too much water, as it can damage the carpet fibers.
Robovac · 11/04/2024
Best Garage Floor Ideas in 2024
Your garage is more than just a home for your beloved car. If neatly done, it can become a multi-purpose room that acts as your home store, gym, or workshop. So, if you want to renovate your garage, we recommend starting with flooring. There are tons of pocket-friendly garage flooring options, including the good old concrete floors. In this guide, we have rounded up the best garage floor ideas that are pocket-friendly and easy to clean and maintain. Check out our list! Part 1: Quick Overview of Our Best Garage Floor Ideas Floor type Average cost (Per square foot) Durability Advantages Disadvantages Epoxy Coatings $2-$3 Medium · Great aesthetics · Easy to maintain · Long service life · Slippery when wet · Lengthy curing time Interlocking Tiles $3-$10 High · They look great · Can fit any space · Easy to remove · It can be an expensive option · Best for level floors Roll-Out Vinyl Flooring $2-$9 Medium · Water and stain-resistant · Durable and comfortable · Hides concrete cracks · Prone to discoloration · Relatively soft Peek-and-Stick Tiles $1-$5 Medium · Simple to install · Affordable · Many color and design options · Not so waterproof · Adhesive breaks down over time Polished Concrete $3.5-$10 High · Low maintenance · Durable · Affordable · Needs regular maintenance · Hard and cold Porcelain Tiles $8-$44 High · Extremely hardwearing · Easy to clean · A showroom finish · Professional installation · Hard and brittle Part 2: Detailed Analysis of Each Flooring Option We have already identified some of the most common garage floor options for the upcoming makeover and their pros and cons. However, you might struggle to choose the best option from the list above. But don't worry. We'll provide a more detailed explanation of these garage flooring methods. 1. Epoxy Coatings This is one of the best and most widely used options for refinishing garage floors. It involves adding a paint coat mixed with a hardener to the floor. If applied right, epoxy coatings are durable and aesthetically appealing. These coatings are also available in varying colors and finishes, including metallic, granite, and marble. And yes, they don't absorb moisture, making them the perfect protection for your concrete floor. 2. Interlocking Tiles You should know what we're discussing here if you're a fitness enthusiast. Interlocking rubber titles are often used on gym floors to prevent the weights from breaking the concrete floor or titles. You can use these rubber titles in your home garage and transform it into a fitness room or playroom. The good thing is that interlocking rubber titles are available in varying colors and patterns. They also require minimal maintenance. 3. Roll-Out Vinyl Flooring Roll-out vinyl flooring is among the most straightforward garage flooring ideas for installation. It's recommended for high-traffic garages, whether your family has several sedans or you own a heavy-duty truck. Compared to concrete floors, vinyl sheets don't get cold and are more comfortable than wood flooring. Even better, you can easily clean it with a simple damp mop. They can last for decades if cared for properly. 4. Peel-and-Stick Tiles Aesthetically speaking, this is one of the best garage floor ideas you can find. Most peel-and-stick garage titles are made using PVC, making them hardwearing. These titles also come in varying colors to add more personality to your titles, and they are actually water-resistant. Besides being pocket-friendly, they are quick to install and will stick directly to the floor. 5. Polished Concrete These are arguably the most common garage flooring ideas. It's a budget-friendly option that can handle any rough situation in your garage. Polished concrete uses high-quality sealer to withstand staining and high pressure from any equipment. You can also easily maintain it using a coat of water or solvent-based sealant. 6. Porcelain Tiles Want to give your home garage a showroom finish? Porcelain tiles are the perfect fit. They are also best if you're looking for something maintenance-free. These durable flooring options are most common in automotive shops. They often use raised patterns to provide anti-slip properties. Porcelain tiles are also hardwearing, easy to clean, and are available in multiple color options. Part 3: Side-by-Side Comparison of the Best Garage Flooring Options So, what are the most popular garage floor ideas, and which is best for you? When choosing a garage floor makeover, always keep in mind the intended use, weather, and heavy traffic. The right flooring option must provide the right balance between maintenance and durability. The table below provides a more detailed comparison to help make an informed decision: Floor type Durability Maintenance Design options Installation Epoxy coating Medium Low Many Professional Interlocking vinyl tiles High Low Limited Easy Roll-out vinyl flooring Medium High Many Professional Peel-and-stick tiles Medium High Many Easy Polished concrete High Low Limited Professional Porcelain tiles High Low Many Professional Part 4: Innovative Trends and Ideas in Garage Flooring eufy S1 Pro - The World’s First Floor Washing Robot Vacuum Meet eufy S1 Pro, unleash the power of real-time self-cleaning floor washing robot combined with a high-performance vacuum, all in one revolutionary device. Say goodbye to manual labor and hello to groundbreaking innovation and design. Don't miss out on the revolution in home cleaning: Go Now More Robot Vacuum and mops You can never run out of ideas for transforming your neglected garage floor. For instance, you can enjoy the durability of epoxy coatings, the versatility of interlocking titles, or the resilience of rubber flooring. You can go even further to transform your garage floor into something awe-inspiring by leveraging some innovative and modern trends. Below, we've listed some trending garage flooring ideas to explore in this transformative journey: 1. Metallic Epoxy Coating Epoxy coatings can come with a mix of several colored pigments. This allows you to create elegant garage floors that range from bazaar-looking to exceptionally durable metallic coating. Besides providing beautiful metallic surfaces, metallic epoxy can make a fantastic marble effect flooring. There are also excellent color choices, including a high gloss finish. 2. Garage Floor Painting You don't need to hire a contractor to paint your garage floor and give it an appearance lift. You can paint a plain garage floor and even include tile-like patterns to make the surface look unique. Remember that good preparation before painting your garage floor is critical to success. Also, we recommend using paint that makes it easy to spot dust, stains, and debris. 3. Add Glow-in-the-Dark Concrete Effects This idea will work wonders, especially if you want to repair floor cracks. You can live in the wild by creating special effects on your garage floor that will glow in the dark and leave your friends amazed. Remember to clean up and vacuum any cracks before pouring your mix of fast-drying resin and glowing catalyst. 4. Custom Printed Vinyl Flooring Printed vinyl flooring is one of the best ways to ensure your garage floor has a personal touch. This bespoke flooring can help create the ideal staging for your garage and transform your dull space into an eye-catching environment. Even better, custom vinyl flooring is robust, anti-slip, and can be rolled up and used anywhere. Part 5: Maintenance Tips for Your Garage It's almost useless to transform your garage floor if you cannot maintain it properly. Thankfully, you have already done the hard work by adding the much-needed makeover. Maintaining your garage is one of the easiest things you can do with all the available technologies. Let's discuss some tips! Tip #1: DIY or Professional Garage Floor? This is where the maintenance work begins. Most garage floor ideas listed here will not last long if not correctly installed. It's, therefore, essential to answer the age-old question of DIY or professional installation. While taking a hands-on professional approach can be rewarding, hiring a professional can come with efficiency and precision, especially where complexity is involved. Comparing these factors can help ensure a successful transformation and minimal garage floor maintenance. Tip #2: Regularly Clean and Vacuum the Floor Regardless of the garage flooring idea you choose, regularly cleaning and maintaining the floor is recommended. If poorly maintained, your precious floor could stain and attract dust, leading to faster wear and tear. eufy X10 Pro Omni can help you efficiently clean any garage floor without lifting a finger. This bot packs enough suction power to suck any dirt particles in your garage floor. It also has rolling mop pads and AI.See technology for avoiding objects in your garage as it cleans the floor. Give it a try! Tip #3: Remove Oil Stains Immediately You never know when your car or bike could start leaking oil. If left unattended, this could lead to staining of your garage floor or even risk accidental slips. You can remove oil stains by sprinkling sawdust over the area and stepping on the stain to ensure it gets soaked. Avoid cleaning using hot water, especially with PVC or vinyl garage floors, which can lead to permanent damage. Tip #4: Do Timeline Repairs Performing timely repairs on your garage floor can prevent those expensive floor rebuilds. Repair your floor promptly, whether it's a PVC garage floor or a concrete floor. Look for those tiny cracks that can become bigger problems and seal them. Spending a few dollars on a floor repair kit should also be worth it. These kits are easy to use and can restore the garage floor to its previous condition. Tip #5: Use Security Cameras This point may not be related to the best garage floor ideas. But still, it's refreshing to know that everything inside your garage is safe and secure. With an advanced camera such as the eufy Floodlight Smart Camera, you'll enjoy maximum security in your garage. These cameras provide real-time monitoring and motion detection to keep off intruders and capture any evidence. The super bright floodlights can also act as enough lighting in your garage. Part 5: FAQs About Garage Floor Ideas Q1: What is the best garage floor idea? This depends on many things, such as your budget, intended use, and maintenance level. However, concrete flooring is still considered the most affordable and durable for garage floors. The only disadvantage is that it can be prone to cracks over time and get colder with the weather. Remember that most garage floor ideas on this list should provide 10+ years of service if properly maintained. Q2: What is the most cost-effective to cover garage floors? Using floor mats is one of the cheapest and most straightforward ways to cover your garage floor. These mats come in various styles and colors, meaning you can always find one that matches your taste. Floor mats are also easy to install by simply rolling them out on the floor. Q3: Is epoxy paint worth considering for my garage floor? Epoxy garage floors are undoubtedly great investments. They can make your garage floor look great and protect the concrete surface from staining and cracking. Epoxy paints also prevent wear and tear on your garage floor. And yes, they are easy to clean and maintain. Q4: How often should I clean my garage floor? Okay, this is a million-dollar question! We advise cleaning your garage floor as often as possible to prevent dirt and dust build-up. However, some experts recommend thoroughly cleaning your garage twice a year or more than that. But this should depend on the amount of traffic on your garage floor. The Summing Up Now you have all the reasons to renovate your garage floor with the ideas we've just listed. An upgraded garage floor can be easier to clean and maintain. These floors can also better handle oils, greases, and other irritants. Another thing, a professionally reworked garage floor can improve the ambiance of your tiny space. But before wrapping up, we must remind you to regularly clean and maintain your garage floor for it to last longer. A premium-grade robot cleaner like eufy X10 Pro Omni should make cleaning easier and more effective. You only need to sweep the floor and let the robot vacuum do all the dirty work. Have fun!
Baby · 09/04/2024
Breast pumping is a significant aspect of many mothers' breastfeeding journeys. However, there comes a time when it's necessary to transition away from it. Whether due to returning to work, the baby's weaning, or personal choice, stopping breast pumping requires careful consideration and planning. Understanding the process of weaning from breast pumping, preparing both emotionally and practically, and ensuring proper nutrition and care afterward are crucial steps. Let's delve into the details of how to stop breast pumping effectively, care tips for the baby and yourself, and also let is address some frequently asked questions. What is Weaning from Breast Pumping? Weaning from breast pumping refers to gradually reducing and ultimately ceasing the practice of expressing breast milk using a pump. It involves transitioning the baby from receiving expressed breast milk to other sources of nutrition, such as formula or solid foods. As nursing babies naturally wean from their mothers' breasts, it occurs organically. Their nursing frequency and volume gradually decrease as they begin consuming more solid foods, and their growing curiosity and independence lead them to spend longer periods away from their mother. This gradual process unfolds naturally, allowing the body to adjust safely and effectively. How to Prepare to Stop Pumping? Stopping pumping can be a significant decision for both you and your baby. Here's a guide preparing you on how to stop pumping breast milk: Check if the Baby is Ready Before initiating the weaning process, assess whether your baby is ready for the transition. Look for signs of readiness such as showing interest in solid foods, reduced frequency of breastfeeding or bottle feeding, and overall growth and development. You can also do the following: Observe feeding patterns: If your baby is consuming more solid foods and breastfeeding or bottle-feeding less frequently, they might be ready to transition away from breast milk. Monitor their reactions: Pay attention to how your baby reacts during feedings. If they seem disinterested or easily distracted, they might be ready to wean off breast milk. Consult with a pediatrician: Discuss your decision to stop pumping with your pediatrician to ensure it aligns with your baby's developmental needs and nutritional requirements. Prepare for the Emotional Impact Stopping breast pumping can evoke various emotions, including relief, sadness, or even guilt. It's essential to acknowledge and address these feelings. Remember that every mother's journey is unique, and it's okay to feel a range of emotions during this transition. You can assess yourself through the following: Acknowledge your feelings: Understand that ceasing to pump can trigger various emotions such as relief, sorrow, guilt, or worry. It's crucial to accept and work through these emotions. Seek support: Talk to your partner, friends, or a lactation consultant about your decision. Sharing your emotions and concerns can help alleviate any anxiety or stress you may experience. Process of Weaning from Breast Pumping Weaning from breast pumping involves gradually reducing pumping sessions, duration, and frequency over time. Here's a breakdown of the process: Gradual Reduction of Pumping Sessions Start by gradually reducing the number of pumping sessions per day. Begin with eliminating one session at a time and spacing them out evenly throughout the day. Monitor your breasts for any signs of discomfort or engorgement and adjust the pace accordingly. Decreasing Pumping Duration Alongside reducing the frequency of pumping sessions, gradually decrease the duration of each session. Aim to express less milk during each session while ensuring your breasts remain comfortable. This gradual approach helps prevent engorgement and allows your body to adjust to producing less milk over time. Reducing Pumping Frequency Over Time Continue to decrease both the frequency and duration of pumping sessions over several days or weeks until you eventually stop pumping altogether. Pay attention to your body's signals and adjust the weaning process accordingly to avoid discomfort or complications such as mastitis. The eufy wearable breast pump like eufy Wearable Breast Pump S1 Pro is your trusted companion during the weaning process. As you transition your baby from breastfeeding to solids, choosing a suitable breast pump is crucial. With our innovative OptiRhythm™ technology and the intuitive eufy Baby app, smart pumping becomes effortless. Whether you're reducing eufy Wearable Breast Pump: Pump Warm for a Better Flow The world’s first HeatFlow™ technology revolutionizes pumping for unparalleled comfort. Offers up to 290 mmHg hospital-grade suction power for efficient milk extraction. prioritizes pumping comfort with uniquely angled 105° flanges and soft silicone. Simplifies your pumping routine with the eufy Baby app. Learn More Buy Now Nutrition and Care Tips after Weaning After weaning, it's important to focus on nutrition and self-care to support your body's transition and overall well-being. Here are some tips: Nutrition Tips: Stay hydrated: Continue to drink plenty of water to support overall health and hydration, especially if you were breastfeeding. Eat a balanced diet: Focus on consuming nutrient-dense foods, including fruits, vegetables, lean proteins, whole grains, and healthy fats. Include calcium-rich foods: Since lactation increases calcium needs, incorporate foods rich in calcium such as dairy products, leafy greens, tofu, and fortified foods. Maintain protein intake: Protein is essential for tissue repair and overall health. Include sources of protein such as lean meats, poultry, fish, eggs, legumes, nuts, and seeds. Consider a postnatal vitamin: Talk to your healthcare provider about whether you should continue taking a postnatal vitamin or switch to a regular multivitamin to support your nutritional needs. Self-Care Tips: Rest and relaxation: Prioritize rest and relaxation to support your physical and emotional well-being. Aim for adequate sleep and incorporate relaxation techniques such as meditation or deep breathing exercises. Exercise regularly: Engage in regular physical activity to boost mood, energy levels, and overall health. Choose activities you enjoy, whether it's walking, yoga, swimming, or dancing. Connect with others: Maintain social connections with friends, family, or support groups to share experiences and receive emotional support. Practice self-compassion: Be gentle with yourself during this transition period. Recognize that weaning can bring about a range of emotions, and it's okay to feel both relieved and saddened by the change. Breast Care: Gradually reduce milk production: To alleviate discomfort, gradually reduce milk production by wearing a supportive bra and using cold compresses as needed. Monitor for signs of mastitis: Watch for symptoms of mastitis, such as breast pain, redness, and fever. If you experience these symptoms, seek medical attention promptly. Breast health check: Perform regular breast self-exams to monitor for any changes in breast tissue. Notify your healthcare provider if you notice any unusual lumps, changes in size, or other concerns. Conclusion In conclusion, learning how to stop breast pumping is a gradual and personal journey that requires preparing both you and your baby, acknowledging the emotional impacts, and implementing a step-by-step approach to reduce pumping sessions, duration, and frequency effectively. Remember to focus on nutrition and care after weaning to ensure a smooth transition. Your comfort and your baby's health are paramount during this period, making it a journey worth navigating with patience and care. Frequently Asked Questions How Long Does It Take to Wean Off Pumping? The duration of the weaning process varies for each individual and depends on factors such as milk supply, pumping frequency, and the baby's readiness to transition to other forms of nutrition. On average, it may take several weeks to a few months to fully wean off pumping. What Happens to Your Body When You Stop Pumping Milk? When you stop pumping milk, your body gradually adjusts to the decreased demand for milk production. Initially, you may experience engorgement, discomfort, or changes in breast size as your breasts regulate milk production. Over time, your milk supply will decrease, and your breasts will return to their pre-pregnancy state. How Do I Stop Pumping Without Getting Mastitis? To stop pumping without getting mastitis, gradually reduce pumping frequency and duration over several weeks. Replace some pumping sessions with gentle breast massage and hand expression to manage discomfort and prevent engorgement. Stay hydrated, wear comfortable bras, and apply cold compresses for relief. Consult a healthcare provider for personalized advice, especially if experiencing symptoms of mastitis such as pain, redness, or fever.
Baby · 09/04/2024
What Size Breast Pump Flange is Right for You? Finding Your Fit
A breast pump flange, often referred to simply as a flange, is a crucial component of a breast pump. It's the funnel-shaped piece that fits over the breast and nipple during pumping. Flanges come in various sizes to accommodate different breast shapes and sizes. Recognizing the significance of the flange and knowing how to select the correct size are crucial for ensuring successful and comfortable pumping sessions. In this article, we'll explore the importance of knowing what size breast pump flange is to suit your needs. We'll discuss the signs that indicate you might be using the wrong size, and we'll address some of the most commonly asked questions on this topic. How to Determine Your Perfect Breast Pump Flange Size Selecting the correct breast pump flange size is essential for efficient and comfortable pumping sessions. Here are some factors to consider on how to measure breast pump flange size: Consider by Nipple Size One of the key considerations when choosing a breast pump flange size is your nipple diameter. Flanges come in various sizes, typically ranging from small to extra-large, to accommodate different nipple sizes. To accurately determine your nipple size, you can measure the diameter of your nipple at its base when it's in its most erect state, an essential step in understanding how to size your breast pump flange. Keep in mind that your nipple size may change throughout your breastfeeding journey, making it essential to reassess periodically. This practice ensures that you are always using the most comfortable and efficient flange size for your needs. Comfort and Sensation Comfort during pumping is paramount for maintaining milk supply and preventing discomfort or pain. Using a flange that is too small or too large can lead to discomfort, nipple pain, or decreased milk flow. When selecting a flange size, aim for one that provides a snug fit around your nipple without causing any pain or discomfort. You should also pay attention to how your breast feels during pumping; if you experience any rubbing, pinching, or soreness, it may indicate that the flange size is not right for you. Milk Extraction The efficiency of milk extraction is another crucial factor in determining the right flange size for your breast pump. A properly fitted flange will ensure optimal milk flow and extraction, allowing you to empty your breasts effectively. If you notice that your milk output is consistently low or that you're experiencing uneven milk removal, it could be a sign that your flange size needs adjusting. Experimenting with different flange sizes can help you find the one that maximizes milk expression and minimizes discomfort. Signs You May Be Using the Wrong Flange Size Using the wrong flange size can lead to various issues that may impact your pumping experience and milk supply. Here are some signs that indicate you may need to adjust your flange size. Insufficient Milk Expressing One of the most common signs of using the wrong flange size is insufficient milk expression. If you're struggling to pump an adequate amount of milk during each session, it could be due to an improper flange fit. A flange that is too small may constrict milk flow, leading to decreased milk output. Conversely, a flange that is too large may not create enough suction to effectively empty your breasts. Monitoring your milk output and adjusting your flange size accordingly can help improve your pumping efficiency. Visible Symptoms Post-Pumping Using the wrong flange size can also result in visible symptoms on your breasts and nipples after pumping. If you notice redness, irritation, or swelling around your nipples or areola, it may be a sign that the flange is too small or too large. Additionally, if you experience pain or discomfort during or after pumping, it could indicate an improper flange fit. Paying attention to these visible symptoms can help you identify when it's time to reassess your flange size. It is recommended the eufy wearable breast pump S1 Pro, where comfort and innovation converge to redefine your breastfeeding journey. The key to maximizing comfort and efficiency lies in selecting the right breast pump flange size. eufy understands this importance and ensures a perfect fit for every user. By prioritizing personalization, eufy empowers mothers to tailor their pumping experience to their unique needs, ultimately enhancing comfort and milk expression. eufy Wearable Breast Pump: Pump Warm for a Better Flow The world’s first HeatFlow™ technology revolutionizes pumping for unparalleled comfort. Offers up to 290 mmHg hospital-grade suction power for efficient milk extraction. prioritizes pumping comfort with uniquely angled 105° flanges and soft silicone. Simplifies your pumping routine with the eufy Baby app. Learn More Buy Now Conclusion Choosing the right breast pump flange size is essential for ensuring comfortable and effective pumping sessions. In this article, we learned how to determine what size breast pump flange is by considering factors such as nipple size, comfort, and milk extraction, you can determine the perfect flange size for your needs. Pay attention to signs such as insufficient milk expressing and visible symptoms post-pumping, as they may indicate that you're using the wrong flange size. Experimenting with different flange sizes and seeking assistance from lactation consultants or breastfeeding professionals can help you find the optimal fit for a successful pumping experience. Frequently Asked Questions What Happens If Flange Size Is Too Big? Using a flange size that is too big can result in several issues. Firstly, it may lead to ineffective milk extraction as the flange may not create a proper seal around the breast, causing air leakage and reduced suction. This can result in decreased milk output during pumping sessions. Additionally, a flange that is too large may cause discomfort or pain as it can stretch and pull on the nipple and surrounding tissue. Prolonged use of an incorrectly sized flange can also increase the risk of nipple trauma and damage. Can Flange Size Change Over Time? Yes, flange size can change over time, especially during the breastfeeding journey. Factors such as fluctuations in nipple size, changes in breast tissue elasticity, and variations in milk supply can all affect the ideal flange size. It's essential to regularly reassess your flange size to ensure optimal comfort and efficiency during pumping sessions. As your breastfeeding journey progresses, you may find that you need to adjust your flange size to accommodate these changes. Will Pumping Hurt If Flange Is Too Big? Pumping with a flange that is too big can indeed cause discomfort or pain. A flange that doesn't fit properly may rub against the nipple and surrounding tissue, leading to irritation, chafing, or even bruising. Additionally, a flange that is too large may not create a proper seal around the breast, resulting in decreased suction and ineffective milk extraction. Prolonged use of an improperly sized flange can exacerbate discomfort and may impact milk supply.
Baby · 09/04/2024
How to Measure Nipple for Breast Pump?
Breastfeeding is an intimate experience between a mother and her baby, but it's not always without its challenges. For many mothers, utilizing a breast pump becomes necessary for various reasons such as returning to work, sharing feeding responsibilities, or simply maintaining milk supply. However, the effectiveness and comfort of pumping depend significantly on the correct fit of the breast pump components, particularly the breast shield or flange, which directly interacts with the nipple. This guide will walk you through how to measure nipple for breast pump to ensure a snug, efficient fit, making your pumping journey smoother. We'll delve into why accurate nipple measurement is crucial, outline simple steps for measurement, and help you select the perfect breast shield, aiming to enhance your pumping experience with ease and confidence. Why Correct Nipple Measurement is Important for Pumping Correct nipple measurement plays a crucial role in pumping, ensuring both comfort and efficiency. Just like finding the perfect shoe size, the right fit for a pump flange can prevent discomfort and promote better milk flow. Using a flange that's too small or too large can lead to nipple pain, irritation, and potentially reduce your milk supply. Moreover, a well-fitted flange makes the pumping experience more pleasant, encouraging consistency and ease in your pumping journey. Think of it as customizing your pumping gear for optimal performance. So, taking the time to measure your nipples for the correct flange size isn't just about comfort; it's about making your breastfeeding journey smoother and more effective. Steps to Measure the Nipple Understanding why correct nipple measurement is essential for effective pumping sets the stage for learning how to measure nipple size for a breast pump, a crucial step to ensure a comfortable and efficient pumping experience. Follow these steps to accurately measure your nipple for a breast pump: First Method: Using a Nipple Ruler or Normal Ruler to Measure Stimulate Your Nipple: Gently stimulate your nipple to encourage it to become erect or perk up. Hold the Ruler: Hold a nipple ruler or a normal ruler perpendicular to your breast. Align the 0 scale of the ruler with the base of your nipple, ensuring that the ruler's edge meets your areola at the same horizontal line. Take Measurements: Determine the distance in millimeters between the base and the top of your nipple. This measurement indicates the size of your nipple. Second Method: Using a Nipple Ruler with Holes to Measure Stimulate Your Nipple: Stimulate your nipple to make it erect or perk up for accurate measurement. Place Nipple into Holes: Insert your nipple into each hole of the nipple ruler, one by one, to find the hole that comfortably accommodates your nipple. Ensure your nipple protrudes fully through the hole, and the ruler touches your areola simultaneously. Measure Hole Size: Once you've identified the hole that fits comfortably, note the size indicated on the ruler. This measurement represents the size of your nipple. Nipple Measurement Recommended Size 11-13mm 15mm 13-15mm 17mm 15-17mm 19mm 17-20mm 21mm 21-23mm 24mm 24-26mm 27mm 27-29mm 30mm These two methods provide simple and effective ways to measure the size of your nipples, allowing you to determine the appropriate breast shield size for optimal comfort and efficiency during pumping sessions. How to Choose the Right Breast Shield of the Pump Finding the perfect fit for your breast pump can make a world of difference in your nursing journey; let's explore how to choose the right breast shield for your pump. Consider the Fit During Pumping: The correct breast shield size will allow your nipple to move freely in the tunnel during pumping. It should not rub the sides, and minimal or no areola should be pulled into the tunnel. Watch for Red Flags: Signs of an ill-fitting breast shield include discomfort while pumping, redness, or soreness of the nipple, and decreased milk output. These are indicators that you may need to switch sizes. Know That Size May Change: It's not uncommon for your breast shield size to change over time due to natural variations in nipple size and elasticity. Be open to re-measuring and adjusting your shield size as needed. Consult with a Lactation Consultant: If you're unsure about your sizing or if pumping continues to be uncomfortable, consider seeking advice from a lactation consultant. They can offer personalized guidance and ensure you're using the right size. Experiment if Necessary: Sometimes, the recommended size based on measurements might not feel the best. Don’t hesitate to try one size up or down to find your perfect fit. We recommend the eufy wearable breast pump S1 Pro, S1 and E10, where comfort meets innovation to redefine your breastfeeding experience. With HeatFlow™ technology, enjoy revolutionary warmth akin to your baby's embrace, minimizing clogged ducts and enhancing milk flow and output. But the significance doesn't stop there. We understand the pivotal role of selecting the right breast shield for optimal performance. That's why eufy offers customizable breast shields, ensuring a perfect fit for every user. By prioritizing comfort and efficiency, eufy empowers mothers to personalize their pumping journey, resulting in a seamless and rewarding experience. eufy Wearable Breast Pump: Pump Warm for a Better Flow The world’s first HeatFlow™ technology revolutionizes pumping for unparalleled comfort. Offers up to 290 mmHg hospital-grade suction power for efficient milk extraction. prioritizes pumping comfort with uniquely angled 105° flanges and soft silicone. Simplifies your pumping routine with the eufy Baby app. Learn More Buy Now Conclusion Accurate nipple measurement is fundamental for optimizing the comfort and efficiency of breast pumping. In this article, we learned how to measure nipple for breast pump and by selecting the correct breast shield size based on your size, you can ensure a comfortable and effective pumping experience, ultimately supporting your breastfeeding journey. Let's embrace this knowledge to make breast pumping a more enjoyable part of nurturing our little ones. Happy pumping! Frequently Asked Questions What Tools Do I Need to Measure My Nipple Size? You'll need a ruler or measuring tape and a marker to measure your nipple size accurately. Can I Use a Breast Shield That's Larger Than My Nipple Size? Using a breast shield that is significantly larger than your nipple size may not provide adequate stimulation and may result in reduced milk output and discomfort. It's best to choose a shield size that closely matches your nipple measurement. Is It Normal for Nipple Size To Change During Breastfeeding? Yes, it's normal for nipple size to fluctuate during breastfeeding due to various factors such as milk production, hormonal changes, and baby's feeding patterns. It's essential to monitor your nipple size regularly and adjust your breast pump settings or shield size accordingly.
Baby · 09/04/2024
How Do You Increase Breast Milk Production While Pumping?
Are you wondering how to increase breast milk production while pumping? You're not alone. Many nursing mothers face challenges with milk supply, often seeking effective strategies to enhance production. In this article, we'll explore the common causes behind a decreasing breast milk supply and provide practical strategies for enhancing production during pumping. Our goal is to offer support and solutions to help you navigate this aspect of motherhood with ease and confidence. Common Causes of a Decreasing Breast Milk Supply Many new mothers experience fluctuations in their breast milk supply at some point during their breastfeeding journey. Understanding the common causes behind a decreasing supply can empower mothers to make informed decisions and adjustments. Let's explore these common reasons behind a decreasing breast milk supply. Feeling Stressed or Anxious Feeling stressed or anxious can significantly impact your breast milk supply. When you're stressed, your body releases hormones like cortisol, which can interfere with the production of prolactin, the hormone responsible for milk production. It's like your body is so busy worrying about the stressor that it forgets about the need to make milk. To help manage stress, consider relaxation techniques such as deep breathing, yoga, or meditation. A calm mind can help maintain a healthy milk supply. Health Issues Certain health conditions such as thyroid disorders, diabetes, or infections like mastitis can affect your ability to produce milk. If you suspect any underlying health issues, consult with a healthcare provider for proper diagnosis and treatment. They can prescribe medications or supplements and offer guidance and treatment options to help get your milk production back on track. Diet Poor nutrition can impact milk production, so it's essential to maintain a healthy diet while breastfeeding or pumping. Avoid crash diets or extreme calorie restriction, as this can decrease milk supply. Instead, focus on consuming nutrient-dense foods that support lactation, such as oatmeal, fenugreek, and leafy greens. Consider consulting with a registered dietitian specializing in lactation for personalized dietary recommendations. Lifestyle Certain lifestyle factors can also affect milk supply. Smoking, excessive alcohol consumption, and certain medications can decrease milk production and potentially harm your baby's health. If you smoke, consider quitting or reducing smoking to improve milk supply and protect your baby from harmful toxins. Limit alcohol intake and consult with a healthcare provider before taking any medications while breastfeeding or pumping. How to Increase Milk Production While Pumping After understanding the common causes behind a decreasing breast milk supply, it's empowering to explore how to increase breast milk supply when pumping, ensuring you can continue to nourish your baby effectively and maintain your milk production. Maintain Consistent Pumping Schedule Consistency is key when it comes to pumping milk. Establishing a regular pumping schedule mimic, the natural feeding pattern of a baby and signals the body to produce milk accordingly. Aim to pump at least every two to three hours during the day, including at least once during the night if possible. Frequent and regular pumping sessions help stimulate milk production and ensure a steady milk supply for your baby. Proper Nutrition and Hydration Another way on how to increase breast milk production while pumping is to have a proper nutrition. A well-balanced diet rich in nutrients is vital for maintaining milk production. Make sure to include plenty of fruits, vegetables, whole grains, and lean proteins in your meals. Additionally, stay adequately hydrated by drinking plenty of water throughout the day. Dehydration can significantly impact milk supply, so aim to drink at least eight glasses of water daily. Here are some of the foods that you can eat to help you increase your milk production: Salmon and Fatty Fish Leafy Green Veggies like Spinach, kale, and Swiss chard Brown Rice Oranges and Citrus Lean Beef Beans and Lentils Low-Fat Dairy Products like milk, yogurt, and cheese Sweet Potatoes Avocados Other Tips: Consider opting for organic produce to reduce exposure to pesticides and toxins. Stay adequately hydrated by drinking plenty of water throughout the day to support overall health and milk production. Correct Use of Breast Pump Using a breast pump correctly is crucial for efficient milk removal and stimulation of milk production. Ensure that you have the right size breast shields for a comfortable and proper fit. Position the pump flanges directly over your nipples, and adjust the suction settings to a level that feels comfortable yet effective. Utilize massage and compression techniques while pumping to maximize milk flow and empty the breasts fully. Of course, choosing the right breast pump is crucial, the eufy wearable breast pump S1 Pro, is a revolutionary choice for new mothers prioritizing comfort and efficiency. With HeatFlow™ technology, experience warmth akin to your baby's embrace. The pump also offers smart pumping capabilities through the eufy Baby app, powered by innovative OptiRhythm™ technology. Effortlessly manage pumping sessions, ensuring maximum comfort and efficiency with every use. Relaxation and Stress Management Stress can negatively affect milk production, so finding ways to relax and manage stress is essential for breastfeeding success. Practice deep breathing exercises, gentle stretching, or meditation to promote relaxation during pumping sessions. Create a calm and soothing environment by playing soft music, dimming lights, or surrounding yourself with comforting scents. Additionally, seek support from family members, friends, or lactation consultants to alleviate any breastfeeding-related concerns or anxieties. Conclusion Understanding how to increase breast milk production while pumping is essential for new mothers facing challenges with their milk supply. By identifying common causes of decreased production and implementing strategies to enhance it, mothers can ensure a sufficient supply for their little ones. Remember, every mother's journey is unique, and what works for one may not work for another. Stay relaxed, reach out for support when needed, and don't hesitate to consult a lactation expert for personalized advice. Your dedication and effort to nourish your baby are admirable and crucial for their healthy development. Frequently Asked Questions Why is my milk supply not increasing with pumping? Several factors, including inconsistent pumping, inadequate nutrition, stress, or underlying health issues, can contribute to a lack of increase in milk supply. Identifying and addressing these factors can help improve milk production. What are signs your milk is drying up? Signs that your milk supply may be decreasing include a decrease in pumping output, reduced breast fullness, or your baby showing signs of hunger after feedings. Consulting with a lactation consultant or healthcare provider can help assess and address any concerns about diminishing milk supply. What foods decrease milk supply? Certain foods and beverages, such as sage, peppermint, or excessive caffeine, may decrease milk supply. Additionally, an imbalanced or inadequate diet can also impact milk production. It's essential to maintain a balanced diet and be mindful of any foods that may negatively affect lactation.
Robovac · 08/04/2024
Top 10 Cheapest Flooring Options for Any Home in 2024
Are you planning to build a home or renovate the floors? We've researched and compared some exciting home flooring options if you're working under budget constraints. With the cheapest flooring options, you can leave a significant and impressive impact on your home without breaking the bank. Our research covers everything from price to installation and maintenance costs. You'll be surprised that there's something that fits into any price point. Stick around to know your options! Part 1: Comprehensive List of Budget-Friendly Flooring Options Finding a flooring option that fits your budget without sacrificing attractiveness and durability can be challenging. So, let's compare the most affordable options per square foot and the pros and cons of each method. Flooring type Average cost (per square foot) Durability DIY friendliness Vinyl Floor $0.50-$5 Medium Entry-level Laminate Flooring $0.70-$2 High Professional Linoleum Flooring $2-$2.50 High Professional Carpet $1-$20 Medium Entry-level Polished Concrete $2-$15 High Professional Ceramic and Porcelain Tiles $1-$30 High Professional Bamboo Flooring $1.50-$11 High Professional Cork Flooring $3-$6 Medium Professional Reclaimed Hardwood $5-$20 High Professional Epoxy Flooring $0.50-$3 Medium Professional 1. Vinyl Flooring Vinyl flooring can be tiles, sheets, and planks manufactured using PVC. The result is a waterproof and durable flooring option for any space in your home. This versatile flooring material requires minimal maintenance to last up to 25 years with the correct quality and installation. At the lowest price of $0.50 per square foot, it's one of the cheapest flooring options around. Pros: Comfortable feeling underfoot. Easy to maintain. Simple DIY installation. Numerous color and pattern options. Cons: It can dent easily. No refinishing option. 2. Laminate Flooring Here is another low-cost flooring option that can last 15-25 years if correctly installed and maintained. Generally, you'll spend around $0.70 per square foot on wood and non-wood laminate flooring. Maintenance is also a cakewalk if you stick to the manufacturer's instructions. Avoid mopping regularly because most laminate flooring materials are not waterproof. This also means cleaning up spills and messes as soon as possible. Although laminate wood floors are the most common, tile and stone options are also popular. Pros: Available in varying patterns, styles, and colors. Versatile and affordable. It can last over 25 years. A damp mop is sufficient. Cons: Sensitive to moisture and liquid. No refinishing option. 3. Linoleum Flooring One of the reasons why linoleum flooring should be an appealing buy is its impressive longevity. With proper installation and care, linoleum floors can give you up to 40 years of service. Linoleum flooring often comes in solid colors and patterns to provide a natural vibe. But while this means it won't fade over time, it limits the available design options. It's relatively easy to maintain and is water resistant, making it excellent for kitchen and bathroom flooring project. Pros: Long-lasting flooring option. Available in many colors, styles, and patterns. It's water-resistant. It can easily camouflage wear and tear. Cons: Needs professional installation. Susceptible to sunlight exposure. 4. Carpets (Tiles and Rolls) Many homeowners and businesses still use this flooring method and get good results. It's a relatively affordable option, costing around $2 to $7 per square foot. Carpets are soft and comfortable underfoot. This makes them excellent for homes with toddlers. Also, carpet materials are available in various styles, colors, patterns, and materials. You can easily install a carpet yourself, and its maintenance is one of the easiest. However, carpets are not ideal for rooms with regular water spills, such as bathrooms and kitchens. Pros: Carpers are affordable. Softer and more comfortable. Multiple styles and designs. Easy to install and maintain. Cons: Needs regular vacuuming and cleaning. Ideal for specific rooms only. 5. Polished Concrete Concrete floors are famous worldwide for various reasons. First, polished concrete floors are beautiful if done correctly and can make a bold statement in your home. You can find different styles and finishes to create aesthetics that match your renovation project. Concrete floors are also highly durable, making them an excellent option for high-traffic rooms and commercial places. Moreover, polished concrete is easy to clean using a vacuum and a simple broom. Pros: Highly durable. Easy to clean and maintain. Moisture and water-resistant. It is cheap to purchase and install. Cons: They are hard. It can be cold. 6. Ceramic and Porcelain Tiles At first glance, it may be challenging to differentiate between ceramic and porcelain tiles. Both use clay mixtures, giving them the same looks and feel. However, porcelain tiles use more refined clay for higher durability and density. But whichever option you choose, these tiles are highly liquid-resistant, making them ideal for damp locations. They are also highly durable and stain-resistant. Porcelain and ceramic tile floors require low maintenance, too. Pros: Highly water resistant. Available in multiple design options. Tough to break. Stain-resistant flooring. Cons: Hard flooring surface. Regular maintenance with grout. 7. Bamboo Flooring Bamboo is a trendy floor choice these days. This flooring method provides natural aesthetics, sturdiness, and renewability. It's important to note that bamboo is a grass, meaning it grows much faster than trees. Therefore, there are no environmental concerns with this flooring method. Bamboo floors can be of any color or paint to give your floor greater taste varieties. They are also easy to clean by regularly sweeping and vacuuming and are ideal for any room. What's more, bamboo can be refinished just like other hardwood floors. Pros: Durable like traditional hardwood. It provides natural aesthetics. Easy to clean and maintain. It's ideal for almost any room. Cons: Prone to scratches and dings. Susceptible to water damage. Professional installation. 8. Cork Flooring Cork flooring can be planks or tiles with various colors, patterns, and finishes. Despite providing a sturdy surface, cork flooring is comfortable underfoot and prevents possible heat loss. Another advantage of this flooring method is that you can refinish it just as you would with hardwood and bamboo materials. With proper installation and maintenance, cork flooring can last 20-40 years. Experts recommend sealing this flooring method to create a barrier against moisture, dirt, and dust. Pros: It can be refinished. It provides a contemporary look. Long-lasting flooring option. Soft underfoot feeling. Cons: Susceptible to dents and scratches. Sunlight can fade cork materials. 9. Reclaimed Hardwood Homeowners and interior designers have turned to environmentally friendly flooring options these days. Reclaimed hardwood is one of those options that gives a unique rustic look. This type of flooring uses hardwood salvaged from old buildings, factories, and barns. But don't be quick to dismiss this option. Reclaimed hardwood floors provide excellent durability and longevity, especially with correct installation and care. It doesn't expand or contract with age, preventing potential warping and cracking. And, of course, you can refinish reclaimed wood. Pros: Environmentally sustainable. Durable and long-lasting. Unique and natural aesthetics. Refinishing potential. Cons: Limited availability. Installation challenges. 10. Epoxy Flooring These flooring solutions are in high demand in industrial and commercial facilities. You can also use epoxy floor coatings in your home and enjoy its advantages without breaking your budget. Although the initial cost could be higher than alternatives like polished concrete, replacing epoxy coating is more pocket-friendly when it finally wears out. Don't forget that this flooring option is highly resistant to hazards, including oil, transmission fluid, and car gas. Epoxy coatings can last 7 to 20 years with heavy use. Pros: Outstanding durability and longevity. Excellent resistance to damage. Limitless color options. Low cost per square foot. Cons: Not recommended for damp floors. It can be slippery. Part 2: How to Choose the Right Cheap Flooring for Your Home Besides your budget, there are several things to consider when choosing flooring options. Before we list the choosing guide, it's important to remind you that the cheapest flooring options aren't necessarily the worst. Everything should hinge on your taste, uses, and other preferences. Below are the five critical things to consider: 1. Consider the Traffic Do you want to update your living room, bedroom, bathroom, or kitchen floor? Or are you looking for the cheapest flooring options for your garage? Either way, consider how the traffic. For example, epoxy flooring or concrete polish are ideal for your garage due to their hard-wearing nature. On the other hand, consider something more comfortable underfoot for your kitchen, bedroom, or living room. 2. What's Your Lifestyle? Think about how you occasionally use the room. For example, you can be a cooking fan who spends much time standing on the kitchen floor. In that case, skip the tiles and go for something comfortable underfoot. You should also worry about frequent liquid spills on the floor, especially if you have kids. Such a situation may require something durable and waterproof without sacrificing comfort and looks. 3. Your Style and Taste Don't be too hard on yourself when buying a cheap flooring option. Stop overthinking the little details and choose a flooring option that matches your favorite colors and patterns. Also, consider the floor textures you like, be it the rich grain of reclaimed hardwood or the luxurious feeling of thick carpets. Don't forget to choose a flooring option that compliments your furniture and paint in the room. 4. The Installation Process Different types of cheap flooring options are installed differently. Some are DIY-friendly, while others may require the services of a professional. For instance, laminate floors use interlocking floorboards with zero adhesives. This makes them easy to install for DIYers. On the other hand, reclaimed wood flooring is nailed down or glued to the floor. Such cases are better left to the professionals. 5. Calculate the Numbers Even the cheapest flooring options require you to crunch the numbers and know your budget. While keeping in mind the cost of the flooring materials, you may also need to consider the cost of delivery, installment, and maintenance. Sometimes, you may also need to consider the cost of removing the existing floor. Ultimately, everything should be within a budget you're comfortable spending. Part 3: Floor Installation Tips and Tricks for DIY Enthusiasts There are many benefits of installing affordable flooring options by yourself. First, it saves you from spending your money on a professional installer. You may also enjoy the challenge of a project and be 100% satisfied with the outcomes. So, to make this exciting project a success, let's share some tips for DIY installation. First of all, prepare the floor for installation. Ensure that the floor is level and free of any damp or moisture. If you're concerned about the dampness of your existing subfloor, test it using a sealed square plastic sheet. You'll see water drops or dark patches on the plastic after 24 hours. It's also essential to fill up any dips where the floor is uneven. After preparing the floor, gather all the materials and equipment needed. Always use the right tools to ensure your floor lasts long and is secure. If you don't have a budget to spend, rent equipment from the local store. Below are some essential tools needed for this project: Jigsaw Nail gun and nails Saw Tape measure Safety glasses Pencil Utility knife Level Duct tape Learning how to install the corners and transitions is also crucial because these are often the trickiest. For example, if you're laying laminate around your door frames, you can cut under the frame and lay the floor underneath it. Alternatively, you can cut the panels around your door frame. For the latter, your jigsaw will come in handy. Remember to seal off the edges where the flooring meets the wall to block water or moisture from entering. Part 4: Maintenance and Longevity: Maximizing Your Investment Always give your floor the love and care it deserves by using proper cleaning and maintenance routines. This will ensure your floor looks stunning and increase its longevity. So, we want to share some tried and approved hacks for the ultimate floor caregiver. Tip #1: Use a Doormat Consider spending a few coins on quality doormats to ensure dust and debris remain outside the door. These rugs can be the unsung heroes in the story by ensuring dirt and sand don't enter the house. Remember that stepping on mud and dirt on the floor can cause scratches and wear and tear. Tip #2: Clean the Floor Routinely This is one of the easiest ways to maintain your floor investment. Even with a quality doormat, dirt and dust will still find their way onto the floor. So, sweep, vacuum, and mop the floor regularly. If you're too busy with other chores, get a robot vacuum like eufy X10 Pro Omni. This intelligent machine can create a daily schedule to automatically clean the floor and ensure your investment is always clean and fresh. Alt: eufy pro omni Tip #3: Clean Up Spills Immediately You can do almost nothing to prevent spills like juice, coffee, and oil on the floor. But when this happens, it's vital to act immediately to prevent stains. Note that some stains could be harder to clean if left unattended for long. eufy X10 Pro Omni can sense any liquid spills, making it the perfect helping hand in the house. Tip #4: Lift Heavy Objects Sometimes, you may want to change the positions of your sofas or bed. Navigating such weighty furniture shouldn't be a task for only one person. Seek help to lift up the furniture or appliances and move them to the new spot. Sliding heavy objects on your precious floor is a big no! Tip #5: Use Blinds or Curtains As mentioned earlier, some of the cheap flooring options can be affected by sunburn. You can prevent this by closing blinds or curtains where the light gets too intense. This will prevent any shading or discoloration of your new flooring. Part 5: Creative Flooring Ideas on a Tight Budget Updating your floors doesn't always mean spending big bucks on flooring materials and technicians. Instead, use some cheap and creative flooring ideas for your home. So, let's explore some cost-effective ideas to spruce up your floor without emptying your wallet. 1. DIY Painted Flooring Designs Painted floors are fun and creative options. This idea is excellent for those with a small budget and can unleash the artist in you. The good thing about this idea is that you can paint almost any flooring surface, including vinyl. Also, you can choose from a variety of designs and colors. Just remember to shop for durable, stain-resistant paints designed for high-traffic areas. 2. Use Vinyl Floor Stickers Vinyl floor stickers can cost around $1-$2 per square foot, making them excellent budget-friendly flooring options. These floor decals are applied directly onto an existing floor to create new and satisfying looks. You can find vinyl floor stickers in varying colors, patterns, and designs. It's one of the most customizable and versatile flooring options. 3. Use Area Rugs Area rugs like carpets can significantly improve the aesthetics and feel of your new flooring. They provide an affordable way to increase the looks of your floor while making them comfortable underfoot. For example, you can purchase cozy modular carpet squares that don't require wall-to-wall installation. 4. Use Peel-and-Pick Wallpaper Peel-and-stick wallpapers might sound crazy, but they are actually excellent flooring solutions for DIYers. This option works best for small spaces where you don't need to invest much on the floor. Also, they offer something funky and modern for rooms that don't get much traffic. You can get one for around $10 and improve the aesthetic perspective of your house. Part 6: Comparison with High-End Flooring Options As we've seen, cheap flooring options offer cost-effective ways to update flooring without spending all your money. But how do these options compare to other high-end flooring materials? Are you better off spending big bucks on premium-class flooring materials with guaranteed performance? If you ask us, the cheapest flooring options are as good as high-end alternatives. Let's start with hardwood, for example. Most homeowners spend an average of $25 per square foot on exotic hardwood. You can save money by going for reclaimed hardwood. This material should cost less while providing excellent aesthetics and durability. You can also enjoy the natural looks of stone flooring options like granite, marble, and sandstone. However, the problem with these high-end materials is that they are limited to specific spaces like entrances, kitchens, and baths. Stone flooring can look awkward in your bedroom or living room. Conversely, the most affordable options provide fantastic versatility. All in all, cost-effective flooring options aren't just about the price per square foot. Instead, consider expenses like delivery, durability, and maintenance. There's no problem spending a reasonable sum on natural stone flooring in your home because of the guaranteed low maintenance and extended durability. Conclusion The type of flooring material you use should align with the vision you have for your dream home. You don't need a bank loan to install your home flooring. Most of these materials are affordable, long-lasting, and easy to install. Remember that any floor can last for decades with constant care and maintenance. So, protect your flooring jealously. FAQs Q1: What is the most affordable DIY flooring? Affordable flooring options can be ceramic tiles or carpet rolls/tiles. But we must remind you that you'll need some installation know-how to install the flooring options in this article. Hire a professional if you're unsure about the installation process. Q2: What cheap flooring options are ideal for high-traffic areas? Materials like ceramic tiles, polished concrete, and laminate are excellent choices for high-traffic areas. They are durable and generally hold up quite well. Consider using high-quality carpets in high-traffic rooms like the kitchen and living room for a cozier underfoot feeling. Q3: What is the best flooring option for pet owners? If pets are part of your family, consider cheap flooring options resistant to dents and scratches. Usually, laminate, tile, and vinyl should serve you quite well.
Robovac · 08/04/2024
Best Wood Floor Cleaner 2024: Top Recommendations and Reviews
Choosing the right vacuum cleaner and cleaning solution is crucial for maintaining hardwood floors. In this guide, we'll recommend top vacuums designed to protect and clean your floors effectively. Additionally, we'll share homemade cleaning solutions and tips to keep your hardwood in top condition while avoiding common cleaning mistakes. Get ready to make your floors shine! Part 1: Our Vacuum Cleaner Top Picks in 2024 Vacuum cleaner Best for Miele Classic C1 Best Overall Hardwood Vacuum eufy X10 Pro Omni Best Overall Robot Vacuum Dyson Omni-Glide Best Mop Vac for Large Areas Bissell 3061 Featherweight Cordless Stick Vacuum Best Budget Vacuum Cleaner Part 2. Why the Right Cleaner Matters Any vacuum can literally suck dust, pet hair, and food crumbs off your precious hardwood floor. But some models do it better than others. When choosing a vacuum for wood floor cleaning, choose a brand with enough suction power to pick up big food crumbs and dirt particles. Ideally, you would want to clean the floor thoroughly without wasting time in the same spot. According to Paul Henthorn, the founder of the California-based Slaughterbeck Floors, a wood vacuum must have soft rubber wheels. He says this prevents the vacuum from marring the wood floor. Henthorn advises using vacuums with soft brushes instead of canister vacuums with power brushes. Power brushes, he says, can potentially remove wood finish and fibers. Our review focuses on vacuums that won't cause wear and tear to your floor. We also select these vacuums based on your unique needs and convenience. For example, cordless vacuums are best for mopping large areas and preventing accidental trips over power cords. You might also want to consider a robot vacuum that offers unparalleled convenience without sacrificing efficiency. Part 3. Top 4 Wood Floor Cleaners| Comparison and Reviews 1. Miele Classic C1 – Best Overall Hardwood Floor Cleaner The Miele Classic C1 vacuum is lightweight, powerful with a 1,200-watt motor, and versatile with six suction settings and a 4.5L dust bag. It easily switches between carpet and hardwood floors with its universal floor brush and includes accessories for delicate surfaces and tight spaces. Equipped with Miele's Hygiean AirClean filter, it's great for dust allergies, though it's not bagless. Overall, it excels in cleaning wood floors. Likes: Immense suction power. 5L dust bag. Six suction settings. Sturdy three-wheel system. Dislikes: Approximately 30ft cleaning radius. Uses a bag system. "This is the perfect vacuum for our wood, and brick floors. It does well on our area rugs as well. It is super lite weight and very compact, but is powerful." – Verified purchase on BestBuy 2. eufy X10 Pro Omni – Best Overall Robot Vacuum If you're not a fan of canister vacuums, consider using premium-grade robot vacuum like the X10 Pro Omni. It's a full-featured D-shaped robot mop with all the features of robovacs double its price tag. Its multi-functional dock allows it to self-clean, dry, and refill. In short, it's a self-maintenance vacuum with convenient hand-free cleaning. The X10 Pro Omni has a hidden roller brush for scrapping hair and dust off your wooden floor before depositing it in the onboard dust bin. The gentle roller brush is made using a sturdy combination of bristle and rubber. It also has two pentagon-shaped plates holding the thick and soft mopping pads. The mopping pads can auto-lift when the vacuum senses your carpets and rugs. eufy specifies that the all-in-one station houses a 2.5L self-emptying dust bag and a 3L clean water tank. The developer says this water capacity is enough to clean wooden surfaces up to 150 square meters two or three times. Let's not forget the impressive 8,000 Pa of suction power that will suck any stubborn dust and debris on your floor. This robot vacuum is one of the best options for under $1,000. Likes: Adaptive pressure mops for deep cleaning. Soft roller brush material. RGB camera for object avoidance. Self-cleaning capabilities. Self-empty the dust bag. Dislikes: Small auto-emptying bag. Complex app setup. "I found the clean on hardwood floors was decent, but it wasn't fantastic on carpets, as I found debris and fluff still lingered. However, this all changed once I dove into the settings in the app." – Review comment on UK. eufy also offers another robot vacuum with cutting-edge floor washing features: eufy S1 Pro - The World’s First Floor Washing Robot Vacuum Meet eufy S1 Pro, unleash the power of real-time self-cleaning floor washing robot combined with a high-performance vacuum, all in one revolutionary device. Say goodbye to manual labor and hello to groundbreaking innovation and design. Don't miss out on the revolution in home cleaning: Go Now More Robot Vacuum and mops 3. Dyson Omni-Glide – Best Mopping Large Areas The Dyson Omni-Glide is a highly versatile and maneuverable cordless vacuum with an omnidirectional soft roller head that allows it to move in any direction, making it ideal for cleaning various surfaces. Its slim design features an articulating neck and 360-degree casters for exceptional maneuverability, and its ergonomic handle has adjustable performance settings. Although it may have less suction power compared to some competitors, its mechanical design ensures effective dirt pickup, potentially revolutionizing hard floor vacuuming. Likes: Soft Omni-directional rollers. Conveniently designed handle. Side-to-side cleaning motion. Extremely lightweight design. Pocket-friendly price. Dislikes: It cannot clean carpets and other fabrics. Short battery power. "Easy to use, easy to charge. The wireless vacuuming is a great change from your standard vacuum. It is small which is a good thing if you want something simple." – Verified Amazon review. 4. Bissell 3061 Featherweight Cordless Stick Vacuum – Best Budget Vacuum Cleaner You don't have to break your budget to get a hard floor vacuum that gets the job done. With this vacuum from Bissell, you'll enjoy a premium-class vacuuming experience at a pocket-friendly price tag. You will be glad that this cordless vacuum performs nearly as well as other winners on this list. Straight out of the box, the Bissell 3061 Featherweight Cordless Stick Vacuum has a multi-surface brush with soft bristles. This makes it ideal for vacuuming your wood floors without leaving any scratches. Once connected, experience the incredible side-to-side motion for flexible and effective cleaning. However, occasionally clean up any hair or fabric entangled on the roller. Another feature you'll like is the two-way folding handle for seamless maneuverability. You can adjust it to vacuum hard-to-reach surfaces under the table or bed. Thanks to the two attachment tools, you can also detach it and use it as a handheld vacuum. It's a tempting vacuum for cleaning tiny houses and spaces. Likes: Folding handle. Lightweight design. Easy to set up and use. Flexible swivel design. Removable hand vacuum. Dislikes: Medium suction power. Short battery runtime. "This is great. So lightweight, so easy to steer and maneuver and get under furniture, and I got a big ball of fluff when I emptied the canister so it did pick up well." – Verified Amazon review Part 4. DIY Natural Wood Floor Cleaner Recipes Let's continue this interesting rundown by listing the best wood floor DIY cleaners. These natural cleaning solutions will leave your floor spotless without damaging the wood finish. Most importantly, you don't need to spend a dime on commercial floor cleaners with harsh chemicals that can cause allergic reactions. Below are some DIY wood floor cleaners to try out: 1. Water and Vinegar Most people consider white vinegar to be an effective natural hardwood cleaner. You only need to dilute it with a bit of water to create the perfect cleaning solution for your wood floors and walls. Apply the following steps: Mix one gallon of clean water with half a cup of vinegar. Test the solution on a separate wood before cleaning the floor. Vinegar can react with specific wood finishes. If you are satisfied with the results, use the solution to mop and clean your floor. 2. Water, Vinegar, and Orange/Lemon Essential Oil Sometimes, mixing vinegar and water only may not produce the intended cleaning solution. I'm also sure you may not like the smell of white vinegar. In that case, mix the solution with a few drops of essential oil. Lemon and orange are my preferred choices, although cedar, lavender, and rose are great alternatives. Follow these steps: Mix one gallon of clean water with half a cup of vinegar. Add a few drops of essential oil to the solution. Test the solution on a separate wood surface. Use a sponge mop to clean the house using this solution. 3. Water, Vinegar, Olive Oil, and Essential Oil This is more of a complete package than the first two solutions. Adding olive oil to the mixture can create the perfect wood floor cleaner/polish. This will leave your hardwood floor clean and shiny. Here are the steps: Add two spoons of olive oil to a clean jar or bottle. Add one tablespoon of vinegar. Add 10-15 drops of essential oil to the solution to add fragrance. Lastly, add two cups of warm water and shake the solution. Use it to thoroughly clean and polish your precious hardwood floor. 4. Vegetable Oil and Vinegar Vegetable oil cleanser will do the magic if you don't want to clean the hardwood floors using water. This should preserve the floor finish and keep it shiny. Let's list the steps below: Mix two cups of white vinegar with two cups of vegetable oil. Spray this solution on the hardwood floor and clean the surface using a sponge mop. Use a separate cloth to buff and dry off the solution. 5. Black Tea Black tea has been doing a fantastic job of cleaning and preserving hardwood floors for years. However, this solution isn't best for laminate floors. Here's how to go about it: Boil a few cups of water. Add up to six black tea bags to the hot water. Let the water settle for 10 minutes. Pour the mixture into your mopping bucket and mix with cold water if necessary. Mop the hardwood floor as usual. Part 5. Choosing the Right Hardwood Cleaning Tools When selecting a vacuum cleaner for wood floors, it's important to choose one with features tailored for delicate surfaces to prevent scratches. Look for a vacuum with a soft brush roll designed for wood and sufficient suction power to handle both large debris and fine dust. Even robot vacuums, like the X10 Pro Omni with its 8,000 Pa suction, can be effective. For cleaning solutions, opt for water-based products without ammonia or bleach, avoiding multi-purpose cleaners that could damage the wood. Part 6. FAQs About Wood Floor Cleaning What is the best vacuum for cleaning wood floors? Choosing the best wood floor cleaner might depend on a lot of factors. Consider the brush type, suction power, price, and more. Ensure the brush roll and mop pads are soft and gentle to avoid damaging your floor. It must also have enough suction power to clean up stubborn dirt and pet hairs. Other advanced capabilities found in premium-grade robot vacuums are great additions. Are homemade cleaning solutions effective on hardwood? Yes, homemade solutions have proved effective, safe, and cost-friendly alternatives to overprized commercial cleaning products. Essential oils like lavender, lemon, and tea tree oil have antibacterial cleaning properties and can add a pleasant scent to your vinegar solution. Use vegetable oil and vinegar to leave your floor spotless and shiny. What is the best method to clean wood floors with pets? If you're a pet owner, cleaning a hardwood floor doesn't always feel straightforward. But this doesn't always have to be the case. Use homemade cleaning solutions to clean the floor without affecting your pet's health. There are also numerous pet-friendly commercial products to clean your floors safely. Before anything, thoroughly vacuum the floor and carpets to remove any pet hairs. An all-in-one vacuum like X10 Pro Omni should be handy. Part 7. Common Mistakes to Avoid When Cleaning Hardwood Floor Hardwood floors require special care to ensure they maintain their timeless elegance. Knowing how to clean your hardwood floor correctly can ensure it remains beautiful and durable for years. This begs the question: what mistakes do we often make when cleaning hardwood flooring? Using water-based cleaners: There are some wood floor finishes where water isn't recommended. So, use vegetable oil and vinegar. This solution effectively removes dirt and brings back the shine of your hardwood floor. Sweeping with any broom: Only clean your wood floor using a soft-bristled broom. This will not only remove those big dust particles but also protect the floor from scratches. Using excess water: Most homeowners clean their wood floors with soaking wet mops. However, this can lead to floor warping and water stains. Remember that wood absorbs water and swells. So, wring your mop thoroughly before cleaning. Steam cleaning: This type of cleaning may not be as effective on your wood floor as on your carpets. The steam cleaning moisture can lead to dumping or denting. Part 8. Maintenance Tips for Hardwood Floor Cleaning Learning to clean your hardwood floor is one thing, and caring for it effectively is another. But don't worry because maintaining your precious wood floor isn't an energy-supping experience. Below are some regular care tips: Leave all the dirt outside: Place rugs and mats on your door to leave out dust and sand, which can act as sandpaper. If possible, leave your shoes outside. Vacuum and clean regularly: Have a cleaning schedule to ensure the wood floor is always clean and fresh. Wipe out any moisture immediately to prevent wood absorption. Trim pet nails: Your furry friend in the house can be an enemy to your wood floor. Regularly trim the sharp nails they might use to scratch the wood floor. Don't slide furniture: Always lift the furniture when rearranging the house. Dragging or rolling heavy objects can lead to dents and scratches. We also recommend using a carpet to prevent surface compression. Maintain optimal room temperature: Maintain an average indoor temperature of 60 to 80 Degrees Fahrenheit to minimize the contraction and expansion of wood. Related Products Check out these collection pages for more products: eufy Self-emptying Robot Vacuum for Hands-free Cleaning Robot Vacuum for Pet Hair, Effortless for Pet Owner eufy Robot Vacuum and Mop Combos for Effortless Cleaning Top Robot Vacuums with Mapping that Map Fast and Accurate The Summing Up Cleaning and maintaining your hardwood floor can be tasking and time-consuming. But it's nothing complex once you get the hang of it. Always know the type of wood floor finish you have before buying or making a homemade cleaning solution. Homemade solutions are best for this job because they don't use aggressive chemicals. Ultimately, you'll discover that maintaining wood floors doesn't cost a fortune. Time to get to work!
Security Cameras · 08/04/2024
The Ultimate Guide to Solar Security Lights: What You Need to Know
Security lights have become an integral factor if you look at the uncertain circumstances happening widely in our neighborhoods. It provides a complete view of the area, especially in public spaces, so that you can see anyone suspicious moving around your surroundings. Moreover, it clears out any hiding spots around the routes from which pedestrians travel. With the enhanced concern for the environment and innovation in technology, most people prefer solar security lights over traditional ones. These lights not only illuminate your desired area efficiently, but they also protect the environment by working on solar energy. In this blog, we'll discuss more perks of solar security lights and top brands. Why Choose Solar Security Lights? Nowadays, the inclination towards sustainable and eco-friendly solutions is increasing daily. Solar-powered security lights have become a turning point in changing the way of lighting up public spaces. Here are a few reasons to pick solar security lights over traditional lighting systems. Highly Reliable with Low Maintenance Traditional lights are difficult to maintain and can be expensive to replace, particularly in remote public areas. For this, it has been a drastic hit, having fewer moving components. Moreover, it doesn't have any dependency on an externally powered grid that adds to its lifespan and decreases maintenance expectations. Long-term Saving Without Energy Cost A majority of people are attracted to solar security lights because they operate without any energy cost. Due to their solar-powered capability, these lights store solar energy and convert it into electricity to light up the surroundings after the sun sets. High-Output LED Fixtures They can perform better due to high-output LED fixtures. You get better brightness and a more luminous environment without consuming much energy. Better for the Environment These lights were designed to consider sustainable resources, making them a conscious choice for our environment. It uses clean and renewable solar energy, reduces fossil fuel dependence, and decreases carbon footprints. Flexibility for Multiple Needs You need security for different areas, such as streets, parks, or even outside the porch of your house. The best thing about solar security lights is that they fit every location's requirements. Every component can be adjusted based on your needs. Ease of Installation Traditional lighting systems need complex wiring and detailed groundwork. In contrast, these lights can be easily installed with complex trenches or wires. It minimizes any damage to public space during installation. Top Features to Look for in Solar Security Lights Many hardware stores and online websites offer various solar security lights with diverse components and features. But are they right for you? The following are the key features you have to consider when installing them. Build Quality When buying security lights, the most critical aspect to consider is the quality, as they are meant for outdoor usage. You should check if the lights are water resistant and the waterproofing is high enough according to your budget. Since these solar security lights will be exposed to every weather condition, ensure the lights are made of weatherproof material. Light Intensity The main purpose of buying a security light is to see in the dark. Most security lights have motion detectors that brighten to the max when motion is detected, and after the certain person is gone, the light returns to normal. So, look for security lights that illuminate the environment with high intensity to scare away burglars. Battery Life For solar-powered security lights, the first thing to consider is that batteries should be replaceable. If the battery is irreplaceable, you'll have to dump it down every time it runs out. Moreover, you should go for the lights that demand high battery capacity as they are more durable but take longer to charge. Design and Flexibility Make sure to consider a flexible design structure. If the light tilts, rotates, or adjusts on its own, then it is always a plus. Most people buy panels separately from the lights so they can place panels where sunlight hits more conveniently. Motion Detection Coverage Another feature that is always relevant is to determine the coverage for which the motion is detected. On average, motion detection ranges up to 50 feet, but you can always find a unique one extending up to 72 feet, maximizing 120 seconds of brightness if detected illumination. Best Solar Security Lights for 2024: Our Picks Now that you know the primary features of top solar security lights, here are some of our best recommendations that you don't want to miss. eufy Solar Wall Light Cam S120 eufy has introduced a built-in camera in their solar security lights featuring the S120 Solar Wall Light Cam. It is meant for people who are looking to DIY their home-related fixtures. eufy S120 features high-intensity security with 300-lumen outdoor lights and doesn't require any major modification to install. The security lights are completely solar-powered and record the solar energy up to two hours a day. Its 2K HD camera offers 120° field of view capture, colored night vision, and two-way audio. Pros High-intensity brightness up to 25 feet Motion detection IP65 waterproof 2K HD color night vision Compatible with Alexa and the Google Assistant Cons Require ideal placement to work eufy S330 Floodlight Cam Another 2K camera by eufy, named the S330 floodlight cam, offers a live stream that captures 130° vertical and 360° horizontal views of your surroundings. These flood lights provide you with three motion detectors: small AI support for human detection, color night vision, and AI lock. eufy S330 features Wi-Fi connectivity, 100 dB siren, two-way audio, and weatherproofing. Pros User-friendly installation guide Great picture quality One-time purchase Expandable local storage Compatible with Alexa and Google Assistant Cons Doesn't support Apple HomeKit HMcity 120 LED Solar Lights For those who don't like DIY projects but are still looking to add outdoor solar lighting for security, HMcity 120 LED lights are the way forward. These lights operate properly and are 6 feet long, making them the least bright on our list. It has a 270° field of view without getting into any wire complexity. Pros Easy to install Adjustable settings Three-panel design 18-month warranty Cons Motion detection is extremely sensitive Tuffenough 3000LM LED Security Light Offering 3000 lumens, Tuffenough has introduced a high-brightness security light with customizable settings according to your needs. It provides you with motion sensor sensitivity so you can easily adjust the gestures that trigger light and brightness. Tuffenough 3000LM offers a wireless remote control with three lighting modes. Pros Easy to install Good value Durable Operate well in bad weather Battery or hardwired installation Cons Batteries don't hold their charge Brightness level could be improved Common Questions Answered Do solar security lights work on cloudy days? Yes, since solar security systems work to store solar energy that is converted into electricity. Depending on which brand you consider, it functions well in cloudy and ashen skies. eufy S120 Wall Lights offers high efficiency, quality panels and resilience. How long do the batteries last? Typically, solar light replaceable batteries last up to 5 years, but LED lights can work for over a decade, so you can replace the batteries when needed. Can solar security lights replace traditional security lighting? Yes, these lights have already replaced traditional lights as they are more efficient and eco-friendlier. It uses a clean and convertible energy source and has a rather long battery life. Solar-powered batteries have more brightness, intensity, flexibility and build quality than traditional lights. User Guide: Maximizing the Performance of Your Solar Security Lights If you want to get the most out of your solar security lights, then you need to understand every component and the settings to maximize the intensity. The following are some key components of this system. Solar Panels Solar security light systems come with solar panels that have diverse configurations and various wattage rates that reflect how much power they can store and generate under perfect temperatures and sun exposure. It is important to have a 30% to 50% safety margin between energy needs and wattage outputs. Battery When the solar energy is captured by solar panels, it gets stored in the battery. It is the responsibility of the power controllers to handle the power load between the panel and battery to avoid overcharge or reverse current flow. Solar Generators This system features combined units of panels and batteries with solar generators that secure electricity and serve as regulators. You get the required cables and wiring for solar generators with solar setup. Troubleshooting Common Issues in Solar Security Light System If your solar-powered security lights suddenly stop operating, then some initial troubleshooting methods are needed to identify and resolve the issue quickly. Some of these steps are below: Check Proper Panel Placements – Make sure the solar panels that come with your lights are getting proper sun exposure. If not properly placed under sunlight, then obstacles that may cast shadows or block charging should be removed. Monitor Solar Panels –Regularly check and remove dirt, dust, or leaves on solar panels that may impact efficiency. Also, ensure the panels are not damaged as it stops them from working properly. Examine Battery Performance –Keep a consistent track of the condition of your rechargeable batteries. Replace the batteries once they reach the end of their lifespan to make sure they are perfect. Assess LED Functionality – Examine individual LED bulbs to identify if any one of them doesn't work or is damaged. Change these damaged ones to restore proper brightness. Ensure Secured Wiring – Repair and replace any broken wiring connections and secure them to avoid corrosion and prevent disruption of the electric flow. Confirm Proper Sensor Function – Check if the light sensors are uninterrupted and operate properly. Adjust sensitivity settings according to environmental conditions. Reset or Reboot System – If nothing else works, simply reset the solar light system, which may restore it to its original settings. Turn the lights off, disconnect the batteries, wait for a few seconds, and then reconnect. Seasonal Adjustments for Optimal Performance For optimal performance of your solar security lights, it is essential to maintain them with seasonal adjustments. Here's how: Replace your old batteries if you detect any decrease in performance. As they work continuously, batteries tend to lose their capacity, affecting durability and intensity. Adjust the sensitivity setting from time to time based on environmental factors so that they maximize and minimize light levels according to your surroundings. Make sure to conduct maintenance to keep all the components in optimal condition. If your light has color temperature adjustment, match it according to the intended use. Use cozy colors for warm temperatures and vibrant colors for cool weather. Solar lights should be adequately sealed to prevent any water damage; weatherproof them occasionally or replace the seal frequently. Conclusion Solar security lights have become the new innovation in security light systems, offering sustainable and reliable lights to secure your outdoor spaces. It is a budget-friendly choice that avoids any dependence on grid power sources or complex wiring. Moreover, they have motion sensors, longevity, remote control functions, and efficiency. They provide customized settings for improved security and various adjustments. eufy security lighting system offers two-in-one functionality of camera options with added lights that offer affordability and reliability.
Robovac · 08/04/2024
Ultimate Guide: How to Clean Prefinished Hardwood Floors Without Damage
Using prefinished hardwood floors will elevate the aesthetic appeal of your space and reduce the installation time. But since they come “prefinished,” they also demand meticulous care and maintenance to preserve their pristine condition which may differ from traditional hardwood floors. Once you decide to use prefinished hardwood floors in your home, you have to learn how to clean and maintain them properly. Here, we will discuss how to clean prefinished hardwood floors and everything you need to know to keep them looking their best for years to come. Quick Start: What You Need to Know Using a powerful robot vacuum is the best tool to remove surface debris and dust without causing damage to the finish of your prefinished hardwood floors. Use a slightly damp mop and a hardwood floor cleaner specifically formulated for this purpose. Avoid too much water or soap when cleaning prefinished hardwood floors to prevent both streaks and potential damage. Regularly dusting or vacuuming with a soft brush will minimize the risk of surface scratches and keep the floor clean. Choosing the Right Cleaning Products To keep prefinished hardwood floors in top shape means you need to clean them regularly. Not only that, but you also need to choose the right cleaning products. There are some products to make your cleaning routine easier, but which one gives the best result? pH-Neutral Cleaners vs. Popular Brands You might feel torn when choosing between pH-neutral cleaners and popular brands like Bona Hardwood Floor Cleaner. Based on experience, pH-neutral cleaners are gentle on floors and effectively remove dirt without causing harm. On the other hand, popular brands offer convenience, like being easy to find and familiar to use. But, it may contain harsh chemicals that could damage your floors. The Truth About Vinegar or DIY Solutions Many homeowners see DIY tips online and consider using vinegar for cleaning their prefinished hardwood floors. Using vinegar is easy, affordable, and seemingly effective for various cleaning tasks. However, this misconception is what we want to caution against. While vinegar can cut through grime, its acidic nature may harm your floor's finish over time. DIY solutions might seem harmless and cost-effective, but they may lack the right balance of ingredients for proper cleaning. Recommended Products for Daily and Deep Cleaning For a thorough cleaning, we recommend investing in a powerful vacuum like the eufy x10 Pro Omni robot vacuum. This vacuum is designed for deep cleaning and has maximum suction. Additionally, you can opt for pH-neutral cleaners designed for hardwood for daily upkeep. Step-by-Step Cleaning Process Keeping prefinished hardwood floors clean and well-maintained requires a consistent cleaning routine. Consistent daily, weekly, and monthly cleaning maintenance will ensure that your floors remain in good condition for years ahead. Here is a step-by-step guide on how to clean prefinished hardwood floors. Daily Maintenance: Step 1. Dusting Start by removing loose debris and dust from the floor using a soft-bristled broom. Make sure you reach all corners and under furniture where dust tends to accumulate. Step 2. Vacuuming Follow up with a thorough vacuuming session to pick up any remaining dirt or particles. Use a vacuum cleaner with a soft brush attachment, like the Eufy x10 Pro Omni robot vacuum, to avoid scratching the surface of the wood. Weekly Cleaning Routine: Step 1. Preparation Before you begin mopping, clear the floor of any obstacles or furniture to make an even and thorough cleaning surface. Step 2. Mopping Use a slightly damp mop paired with a pH-neutral hardwood floor cleaner. Avoid using excessive water to prevent pooling, which can lead to damage to the wood. Start from one corner of the room and work your way towards the exit to avoid stepping on wet areas. Step 3. Drying Air-dry the floor before walking on it or replacing furniture. This step is crucial to prevent water damage and maintain the integrity of the hardwood finish. Monthly Deep Cleaning: Step 1. Inspection Start by inspecting the floor. Look for any stains, spills, or areas of heavy dirt buildup that may need extra attention. Step 2. Spot Cleaning For stubborn stains or spills, spot clean using a specialized hardwood floor cleaner or a mixture of mild soap and water. Apply the cleaner to the stains or the spills, then scrub it with a soft-bristled brush. Step 3. Deep Cleaning Once the spot cleaning is complete, proceed with a deeper clean. Use a dedicated hardwood floor cleaning solution and a microfiber mop. Follow the instructions listed on the solutions for dilution and application. Make sure you apply them to the entire floor. Step 4. Buffing For an extra shine, consider buffing the floor with a clean microfiber cloth or a buffing machine. This step will help restore the luster of the wood and leave your floors looking brand new. Overcoming Common Cleaning Challenges Cleaning prefinished hardwood floors can sometimes present challenges. But, with the right techniques and solutions, you can keep your floors looking their best. How to deal with stains and spills Immediate action is the key when dealing with spills on prefinished hardwood floors. To prevent damage, immediately blot spills with a clean, dry cloth. Refrain from rubbing, as this may drive the liquid deeper into the wood. For stubborn stains, use a damp cloth with a mild soap and water solution. Then gently scrub the affected area and let it air dry. Solutions for removing scuff marks and scratches Scuffs and scratches can damage the appearance of hardwood floors. But most of the time, you can deal with them without professional help. For minor scuff marks, gently rub the area with a clean, damp cloth. For deeper scratches, consider using a hardwood floor touch-up pen or crayon matched to your floor's color. Apply the product to the scratch and buff it with a soft cloth to blend it in. Tips for maintaining shine and preventing dullness Regular maintenance is key to keeping prefinished hardwood floors shiny and preventing dullness. Avoid using harsh cleaners or abrasive tools, as these can strip away and dull their appearance. Instead, use a microfiber mop and a pH-neutral hardwood floor cleaner for routine cleaning. Additionally, apply a hardwood floor polish or conditioner every few months. These will help to maintain shine and protect the wood from wear and tear. The Do’s and Don’ts Checklist Do's for Hardwood Flooring: Add Protectors:Protect your hardwood floors by attaching felt floor protectors to your furniture legs, especially on chairs and stools that are frequently moved. Without them, furniture can scratch and scrape the wood. Sweep Often: If you aren’t regularly sweeping, rocks, dirt, and debris that are dragged in from outside can cause damage to your floors. That is why you need to sweep your hardwood floor regularly to remove grit and debris that can cause scratches over time. Use Gentle Cleaning Tools: Use gentle cleaning tools to clean your hardwood floors. Softer and gentler cleaning tools are better for cleaning hardwood floors. Protect from Sunlight: Shield your hardwood floors from sunlight exposure to prevent bleaching and maintain a uniform finish. Do consider using sheer curtains or light shades to minimize sunlight exposure. Keep a Steady Temperature: Maintain a consistent temperature in your home. Steady temperature will prevent the wood from expanding and contracting, which can lead to permanent cracks. Don'ts for Hardwood Flooring: Avoid Wet Mopping: Refrain from wet mopping your hardwood floors because prolonged exposure to water can damage the finish and wood. Clean up spills immediately and avoid letting water sit for more than one minute. Avoid Cleaning with Hot Water: Using hot water for cleaning can dissolve the luster of your floor's finish and penetrate the wood, causing damage over time. Use cold or lukewarm water to clean hardwood floors. Avoid Oil, Wax, or Citrus-Based Cleaners: Cleaners containing oil, wax, or citrus can be damaging to certain types of wood flooring. Don't Use Steel Wool:Using steel wool to remove stubborn stains can scratch the surface of your hardwood floors and cause further damage. Advanced Care Tips Seasonal Adjustments: Adjust your floor care routine based on the seasons. In dry weather, use a humidifier to prevent the wood from drying out. You can also use a dehumidifier to control moisture levels and prevent warping in humid conditions. Protective Measures:Place rugs and mats in high-traffic areas and near entryways. Do this to protect your floors from wear and tear caused by foot traffic and external elements. Regular Checks: Inspect your hardwood floors for signs of damage, such as cracks or changes in appearance. Address any issues to prevent further deterioration of the hardwood floors. FAQ Section What is the difference between prefinished and finished hardwood floors? Prefinished hardwood floors are already finished before they're installed. They undergo sanding, staining, and coating with polyurethane at the factory. This means they're ready to use as soon as they're installed. On the other hand, unfinished hardwood floors need finishing after installation. These floors are made of raw hardwood planks, which must be installed first and then sanded and finished on-site. Do prefinished hardwood floors scratch easily? Prefinished floors usually offer longer warranties, with some even providing lifetime coverage. They are known for their attractive appearance and durability. Hence, they are less prone to scratching or staining. How long do prefinished hardwood floors last? Hardwood floors, whether prefinished or not, are known for their durability. However, over time, the finish may need to be reapplied to preserve its protective qualities and appearance. Typically, the factory finish on prefinished flooring can endure for up to 25 years before needing to be refreshed. Conclusion Maintaining prefinished hardwood floors requires consistent care and attention to detail. By following the step-by-step on how to clean prefinished hardwood floors above, you can ensure that your floors remain in pristine condition for years to come. Remember to apply a do's and don'ts checklist to avoid damage to your floors. Those can help enhance the longevity and aesthetic appeal of your prefinished hardwood floors. With consistent care and maintenance, your hardwood floors will continue to be beautiful for generations.
Baby · 08/04/2024
How to Sterilize Breast Pump Parts?
Ever wondered why it's crucial to know how to sterilize breast pump parts? This simple practice is key to safeguarding your baby's health. In this guide, we'll explore the importance of sterilization, identify the specific parts that require attention, and walk you through each step of the process. Join us as we ensure your little one's feeding time is as safe as it is nourishing. Why ls Sterilizing Breast Pump Parts Crucial? Sterilizing breast pump parts is crucial for several important reasons, ensuring both the health and safety of infants and the effectiveness of the breast pump itself. Prevent Bacterial Growth One of the primary concerns associated with not sterilizing a breast pump is the risk of bacterial growth. Breast milk provides an ideal environment for bacteria to thrive, especially when left at room temperature or warmer. If the pump parts are not properly sterilized after each use, any residual milk left in the pump can become a breeding ground for harmful bacteria. This can pose a risk of contamination when feeding the expressed milk to the baby, potentially leading to gastrointestinal upset or more serious infections. Reduce Fungal Infections In addition to bacterial growth, failure to sterilize the pump can also increase the risk of fungal infections, such as thrush. Fungi, like bacteria, can multiply rapidly in warm, moist environments. If the pump parts are not adequately cleaned and sterilized, fungi spores present in the environment or on the skin can contaminate the equipment and transfer to the expressed milk. Infants who consume milk contaminated with fungal spores may develop oral thrush or other fungal infections, causing discomfort and requiring medical treatment. Promotes Pump Efficiency Aside from health concerns, neglecting to sterilize the breast pump after each use can also impact its efficiency and performance. Milk residue left in the pump parts can build up over time, leading to clogs, decreased suction power, and reduced milk output. This can be frustrating for breastfeeding mothers who rely on the pump to maintain their milk supply or to express milk efficiently while away from their baby. Regular sterilization helps prevent the buildup of milk residue and ensures that the pump continues to function optimally. Which Parts of the Breast Pump Need to Be Sterilized? Understanding the importance of sterilizing breast pump parts is crucial for maintaining a healthy feeding environment for your baby. This essential step ensures that every feeding session is as safe as it is nourishing. So, which parts of the breast pump need this vital attention? Breast Shields/Flanges: These funnel-shaped parts directly touch your skin and collect the milk, so they definitely need a thorough sterilizing after each use. Valves and Membranes: These small but mighty parts are vital for your pump's suction. Milk can easily get trapped in these nooks, so sterilizing them is a must to keep things hygienic. Bottles and Caps: Any part of the bottle that comes into contact with milk should be sterilized to prevent any bacteria from thriving. Connectors: These parts attach your breast shield to the milk bottles. Since they can come into contact with breast milk, they need to be sterilized as well. Tubing (if applicable): Not all pumps have tubing, but if yours does and it comes into contact with milk (though it ideally shouldn't), it needs to be cleaned and dried thoroughly. Check your pump's manual because the cleaning method may vary. Steps to Sterilize Breast Pump Parts Next, let's walk through the steps to ensure your breast pump parts are properly sterilized, keeping everything safe and hygienic for your little one. Disassemble and Rinse After pumping, carefully disassemble the breast pump parts, including the breast shields, valves, membranes, and bottles. Rinse each component with warm water to remove any visible milk residue. Avoid using hot water, as it can cause protein in the milk to adhere to the surfaces, making cleaning more difficult. Clean Once the parts have been rinsed, wash them thoroughly with mild dish soap and warm water. Use a bottle brush or nipple brush to scrub the inside of the bottles and any hard-to-reach areas. Pay close attention to areas where milk can collect, such as the valve and membrane assembly. Rinse the parts again to remove any soap residue. This step is fundamental in the process of how to clean your breast pump, setting the stage for proper sterilization and safety for both you and your baby. Sterilize After cleaning, sterilize the breast pump parts using one of several methods: Steam Sterilization: Place the disassembled pump parts in a steam sterilizer and follow the manufacturer's instructions for sterilization time and temperature. Boiling: Submerge the pump parts in a pot of boiling water for at least five minutes. Ensure that all parts are fully submerged and not touching the sides or bottom of the pot. Chemical Sterilization: Use sterilizing tablets or solution according to the manufacturer's instructions. Soak the pump parts in the solution for the recommended duration before rinsing thoroughly with water. Dry and Store Once sterilized, allow the breast pump parts to air dry on a clean, dry surface or use a clean paper towel to pat them dry. Avoid using towels or cloths that may introduce bacteria or other contaminants. Once completely dry, reassemble the pump parts and store them in a clean, covered container until the next use. We highly recommend eufy wearable breast pump S1 Pro, S1 and E10, where convenience meets cleanliness for your peace of mind. Our pump is not only wearable and lightweight but also capable of holding up to 6 oz (177ml) of milk, catering to your busy lifestyle. With only four parts, it's effortlessly easy to clean, ensuring hygiene without the hassle. We understand the importance of keeping breast pump parts sterilized for your baby's health. Trust eufy to provide a seamless breastfeeding experience while prioritizing cleanliness, because your baby's well-being is our top priority. eufy Wearable Breast Pump: Pump Warm for a Better Flow The world’s first HeatFlow™ technology revolutionizes pumping for unparalleled comfort. Offers up to 290 mmHg hospital-grade suction power for efficient milk extraction. prioritizes pumping comfort with uniquely angled 105° flanges and soft silicone. Simplifies your pumping routine with the eufy Baby app. Learn More Buy Now Conclusion Proper sterilization of breast pump parts is essential for maintaining hygiene and ensuring the safety of expressed breast milk. Neglecting this crucial step can lead to bacterial and fungal contamination, reduced pump efficiency, and potential health risks for the infant. In this article, we learned the importance of sterilizing and how to sterilize breast pump parts. By diligently following the steps outlined for sterilization after each use, breastfeeding mothers can ensure the optimal performance of their breast pump equipment and provide their babies with safe and nourishing milk. Frequently Asked Questions Do You Need to Sterilize the Breast Pump After Each Use? It's recommended to sterilize breast pump parts after each use to prevent bacterial growth and ensure the safety of expressed milk. Is It OK To Just Rinse Pump Parts? Rinsing pump parts is not sufficient for proper sterilization. Thorough cleaning and sterilization are necessary to eliminate bacteria and other contaminants effectively. How Long Does a Breast Pump Stay Sterilized? The duration of sterilization depends on the storage conditions. Sterilized breast pump parts should remain sterile as long as they are stored in a clean, dry environment. It's essential to re-sterilize parts if they come into contact with any potentially contaminated surfaces or substances.
Baby · 08/04/2024
Ease the Ache: Your Guide on How to Relieve Breast Pain After Pumping
Breastfeeding is a beautiful but sometimes challenging journey, and many new mothers experience breast pain after pumping, leaving them searching for relief and answers. This article dives into the common causes of this discomfort, providing practical tips on how to relieve breast pain after pumping. Additionally, we'll outline when it's time to seek medical advice, ensuring mothers have the knowledge and confidence to navigate these hurdles. Join us as we explore effective strategies for managing breast pain, designed to support your breastfeeding journey in a relaxed, informative manner. Common Causes of Breast Pain after Pumping "Does breast pumping hurt?" is a common question among new mothers navigating the complexities of breastfeeding. Understanding the common causes of breast pain after pumping can help mothers address these issues effectively and continue their breastfeeding journey with greater comfort and confidence. Improper Flange Fit One of the leading causes of breast pain after pumping is an improper fit of the flange, also known as the breast shield, which is the part of the breast pump that comes into contact with the breast. If the flange is too small or too large, it can cause friction, rubbing, and even compression of the milk ducts, leading to discomfort and pain. High Suction Levels Using a breast pump with a suction level set too high can also contribute to breast pain after pumping. While it's natural to assume that higher suction levels will yield more milk, excessively high suction can actually cause trauma to the delicate breast tissue, resulting in soreness and discomfort. Engorgement Engorgement occurs when the breasts become overly full of milk, often due to infrequent or incomplete milk removal during pumping. This can lead to swelling, inflammation, and tenderness in the breasts, making pumping sessions uncomfortable or even painful. Blocked Milk Ducts Blocked milk ducts occur when milk flow becomes obstructed within the breast, leading to localized swelling, tenderness, and sometimes pain. Pumping alone may not always effectively clear blocked ducts, especially if the obstruction is stubborn or located deep within the breast tissue. Mastitis Mastitis is a bacterial infection of the breast tissue that can occur when milk ducts become blocked or damaged, allowing bacteria to enter and multiply. Symptoms of mastitis include breast pain, redness, warmth, and sometimes fever. While pumping can help alleviate some of the discomfort associated with mastitis, prompt medical attention, including antibiotics, is often necessary to treat the infection effectively. Nipple Trauma Nipple trauma is another common cause of breast pain after pumping, resulting from damage to the nipple area. This can happen due to several reasons, including the continuous friction from an improperly fitting flange, excessive suction, or an incorrect pumping technique. Symptoms of nipple trauma may include cracking, bleeding, or blistering of the nipple skin, leading to significant discomfort during and after pumping. How to Relieve Breast Pain After Pumping Understanding the reasons behind breast pain after pumping is the first step to finding comfort. Now, let's explore some gentle, effective strategies to soothe your discomfort and make your pumping journey more comfortable. Finding the Perfect Fit One of the key players in pumping comfort is the flange size. A flange that's too small or too big can lead to discomfort and even pain. It’s like wearing shoes that don’t fit; you won’t get far without feeling it. Consider consulting with a lactation expert who can help you find the flange size that’s just right for you. A perfect fit means less friction and more comfort. Gentle Settings Are Your Friend High vacuum settings on your pump might seem like a fast track to more milk, but it's actually not about the strength but the rhythm. Your breasts are not just milk factories; they need to be treated gently. Experiment with lower settings on your pump. You might find that a gentler approach yields the same, if not better, results without the pain. Keep It Clean and Moisturized Just like any other part of your skin, your nipples can get dry and irritated, especially with frequent pumping. Keep them clean and consider applying a nipple cream or coconut oil after pumping. This not only helps in keeping the skin hydrated but also reduces friction during pumping sessions. The Right Technique Sometimes, it’s all in the technique. Make sure you’re relaxed and your pump is properly positioned. A poor latch, even on a pump, can cause unnecessary pain. Think about how your baby latches; the pump should mimic this as closely as possible. Take Breaks and Massage Don’t forget to give yourself a little TLC. Gentle breast massages before and after pumping can improve milk flow and reduce engorgement, which in turn can lessen discomfort. Also, taking short breaks during pumping sessions can help relieve pressure and prevent pain. Stay Hydrated and Relax Keeping hydrated is essential for milk production and can also reduce discomfort during pumping. Try to relax while pumping by creating a comfortable environment, maybe listening to calming music or practicing deep breathing. Stress can inhibit milk flow and increase discomfort. Consider Pumping Frequency Sometimes, adjusting how often you pump can help manage pain. Overpumping can lead to discomfort and even engorgement, so find a schedule that keeps you comfortable and meets your milk supply needs. Here introducing the eufy wearable breast pump S1 Pro, your solution for relieving breast pain after pumping. With HeatFlow™ technology, experience revolutionary warmth reminiscent of your baby's hug, reducing clogged ducts and optimizing milk flow and output. Additionally, our pump is designed for ultimate comfort with 105° angle flanges and soft silicone, prioritizing your well-being during pumping. When it comes to choosing a breast pump to relieve breast pain after pumping, trust eufy for innovation, comfort, and efficiency. eufy Wearable Breast Pump: Pump Warm for a Better Flow The world’s first HeatFlow™ technology revolutionizes pumping for unparalleled comfort. Offers up to 290 mmHg hospital-grade suction power for efficient milk extraction. prioritizes pumping comfort with uniquely angled 105° flanges and soft silicone. Simplifies your pumping routine with the eufy Baby app. Learn More Buy Now When Should You Seek Medical Advice? While some degree of discomfort during breastfeeding or pumping is normal, severe or persistent breast pain should not be ignored. If you experience any of the following symptoms, it's essential to seek medical advice promptly: Fever: A fever could indicate an infection, such as mastitis, which requires prompt treatment with antibiotics. Redness or warmth: These symptoms, along with breast pain, can also be signs of mastitis or another infection. Persistent pain: If you experience persistent breast pain that doesn't improve with home remedies or changes in pumping technique, it's crucial to consult a healthcare professional for further evaluation. Conclusion In wrapping up, understanding the common causes of breast pain after pumping is crucial for new mothers navigating postpartum challenges. We've explored various strategies on how to relieve breast pain after pumping, emphasizing gentle, supportive techniques that can make a significant difference. Remember, while most discomfort can be alleviated with these tips, it's important to seek medical advice if your symptoms persist. Taking care of your health ensures you're in the best position to care for your little one. Stay informed, stay supported, and don't hesitate to reach out for help when needed. Frequently Asked Questions Is It Normal to Experience Breast Pain While Pumping? A: Some degree of discomfort during pumping is common, especially in the early days of breastfeeding. However, severe or persistent breast pain may indicate an underlying issue that requires medical attention. How Can I Prevent Breast Pain While Pumping? A: Ensuring proper latching and positioning, using correct pumping techniques, applying warm compresses, and performing breast massages can help prevent and relieve breast pain after pumping. When Should I Seek Medical Advice for Breast Pain After Pumping? A: If you experience symptoms such as fever, redness, warmth, or persistent pain that doesn't improve with home remedies, it's essential to consult a healthcare professional for further evaluation and treatment.
Baby · 08/04/2024
Feeling the Buzz: Should You Pump When Your Breasts Tingle?
Experiencing tingling sensations during pumping can leave many new mothers wondering, "Should I pump when my breasts tingle?" This common query touches on the intricacies of breastfeeding and pumping, a journey unique to every mother. In this informative piece, we'll explore the normalcy of tingling during pumping and whether it's a cause for concern. By understanding the reasons behind this sensation and learning when to act, we aim to provide reassurance and guidance to nursing mothers. Our goal is to ensure your pumping experience is both effective and comfortable, helping you make informed decisions about your breastfeeding journey. Is Tingling Normal during Pumping? Tingling sensations in the breasts are not uncommon during pumping sessions. Many breastfeeding individuals experience this sensation, particularly when using breast pumps. However, understanding the underlying reasons can help determine whether it's a cause for concern. Several factors contribute to tingling sensations while pumping breast milk: Milk Letdown Tingling sensations often accompany the letdown reflex, where milk is released from the breast. This reflex can be triggered by various stimuli, including the sound of a baby crying, thinking about your baby, or even the sensation of breast shields during pumping. The tingling sensation is a signal that your body is responding to the stimulation, preparing to release milk for your baby. When the letdown reflex is triggered in your body, you might notice: Tingling or a pins-and-needles sensation in your breasts. A sudden sensation of (potentially painful) fullness in your breasts. Dripping of milk from the other breast. Thirstiness, which could be connected to the release of oxytocin. Nerve Stimulation During pumping, the stimulation of nerves in the breast is inherent to the lactation process. This stimulation can evoke tingling sensations as the nerves transmit signals to the brain, indicating the initiation of milk production and release. While tingling may vary in intensity from person to person, it's generally a sign of the body's physiological response to breastfeeding or pumping. Poorly Fitting Breast Shields Using breast shields that don't fit properly can cause discomfort and tingling. When breast shields are too small, they can compress the breast tissue, leading to discomfort and tingling sensations. On the other hand, shields that are too large may not provide adequate suction, resulting in ineffective milk removal and potential nipple irritation. Ensuring the correct size and fit of breast shields can minimize this issue and improve pumping efficiency. Blocked Milk Ducts or Mastitis In some cases, tingling can be a sign of blocked milk ducts or mastitis, which are more serious conditions requiring attention. Blocked milk ducts occur when milk is unable to flow freely through the ducts, leading to pressure and discomfort in the breast. Mastitis is an inflammation of the breast tissue, often caused by bacterial infection. In these cases, tingling may be accompanied by pain, redness, or swelling in the breast, and it's essential to seek medical advice promptly. Overstimulation Prolonged or frequent pumping sessions can overstimulate the breasts, leading to continuous tingling sensations. This overstimulation may result in discomfort and even pain, affecting the breastfeeding experience. It's crucial to establish a balanced pumping routine that allows adequate rest periods for the breasts to prevent overstimulation and maintain comfort during breastfeeding or pumping sessions. Feeling the Buzz: Should You Pump When Your Breasts Tingle? In most cases, tingling during pumping is a normal part of the breastfeeding experience and not a cause for concern. Here are reasons not to worry: Natural Response: Tingling is often a natural response to the stimulation of breastfeeding or pumping. It indicates that your body is working as it should to produce milk for your baby. Temporary Sensation: Tingling sensations usually subside once the letdown reflex has occurred and milk is flowing freely. It's a temporary sensation that typically resolves on its own. Common Occurrence: Many breastfeeding mothers experience tingling sensations during pumping or breastfeeding. It's a common occurrence and doesn't necessarily indicate any underlying issues with lactation or breast health. However, if you experience persistent or severe tingling, especially if accompanied by other symptoms such as pain or swelling, it's advisable to seek medical advice. Additionally, if you have any concerns about your milk supply or breastfeeding journey, consulting a lactation consultant or healthcare provider can provide reassurance and support. Tips for a Comfortable Pumping Experience Right Pump Fit: Ensure that the breast shield of your pump fits correctly. An ill-fitting breast shield can cause discomfort and affect milk flow. Gradual Increase in Suction: Start with a lower suction setting and gradually increase to find a comfortable level that mimics your baby’s natural sucking rhythm. High suction settings right from the start can cause discomfort. Warm Compresses: Applying a warm compress to your breasts before pumping can help stimulate the milk flow and reduce the intensity of the tingling sensation. Stay Relaxed: Try to be in a comfortable, stress-free environment while pumping. Stress can affect milk let-down and make the tingling more noticeable. Choose a Breast Pump that Suits You: The eufy wearable breast pump S1 Pro, S1 and E10 is tailored to reduce tingling normal during pumping, ensuring a comfortable and efficient experience. With HeatFlow™ technology, minimizing clogged ducts and optimizing milk flow and output. The smart pumping capabilities, driven by the eufy Baby app and OptiRhythm™ technology, empower you to effortlessly manage pumping sessions. eufy's hospital-grade suction at 290 mmHg ensures efficient milk expression, alleviating discomfort. Designed with your comfort in mind, the pump features soft silicone and 105° angle flanges, providing a gentle and snug fit. eufy Wearable Breast Pump: Pump Warm for a Better Flow The world’s first HeatFlow™ technology revolutionizes pumping for unparalleled comfort. Offers up to 290 mmHg hospital-grade suction power for efficient milk extraction. prioritizes pumping comfort with uniquely angled 105° flanges and soft silicone. Simplifies your pumping routine with the eufy Baby app. Learn More Buy Now Conclusion Experiencing tingling during pumping is not only common but typically signals the onset of milk flow. This sensation, often described as a precursor to milk letdown, means your body is responding as it should. So, when you find yourself wondering, "Should I pump when my breasts tingle?" the answer is a resounding yes. Embrace this natural response as a positive sign of your body's milk production process. Always remember, if the sensation becomes uncomfortable or concerning, consulting a healthcare professional for personalized advice is wise. Keep pumping, and trust in your body's natural capabilities! Frequently Asked Questions Does Tingling Breasts Mean Milk Is Coming In? Tingling breasts often indicate the letdown reflex, where milk is released from the breast during breastfeeding or pumping. This sensation is a positive sign that milk is flowing and is a natural part of the lactation process. Do Your Nipples Tingle When You Need to Pump? Some women may experience tingling in their nipples as a signal that they need to pump or breastfeed. This sensation can be a helpful indicator that your body is preparing to release milk and that it's time for a pumping session. Can Pumping Too Much Lead to Continuous Tingling? Pumping too frequently or for extended periods can overstimulate the breasts and lead to continuous tingling sensations. It's important to find a balanced pumping schedule that allows your breasts time to rest between sessions to avoid overstimulation and discomfort.
Baby · 07/04/2024
How to Massage Breast while Pumping? Enhance Milk Flow & Comfort
Breastfeeding is an intimate journey that can be filled with moments of both joy and challenge. One of the hurdles many mothers face is ensuring an efficient milk flow during pumping sessions. This is where the practice of breast massage can play a pivotal role. If you're a new mom wondering how to massage breast while pumping effectively, you've come to the right place. In this guide, we will walk you through the benefits of massaging breast while pumping and offer practical steps and tips on how to massage your breasts during this intimate process. Join us and learn the knowledge and techniques to make your breastfeeding journey as smooth and fruitful as possible. How Will Massage Benefit Your Breasts during Pumping? Integrating breast massage for breastfeeding into your pumping routine offers a range of benefits that can enhance both the quantity and quality of expressed breast milk, while also promoting your overall comfort and well-being. Let's have a closer look: Stimulates Milk Flow and Production The first and perhaps most compelling benefit of breast massage is its ability to stimulate milk flow and production. Gentle, rhythmic massage mimics the natural suckling of your baby and can help trigger the let-down reflex. This reflex is crucial for efficient pumping, as it allows milk to flow more freely from the ducts. By massaging your breasts, you're essentially encouraging your body to produce and release milk more easily, which can be particularly beneficial for mothers worried about their milk supply. Prevents Mastitis Mastitis, an inflammation of breast tissue caused by milk duct blockages or bacterial infections, is a common concern among breastfeeding mothers. Regular breast massage during pumping sessions can help prevent mastitis by ensuring that milk ducts are not blocked and that milk is being efficiently expressed. By focusing on areas that feel particularly full and applying gentle pressure, you can help clear any clogs and reduce the risk of inflammation or infection. Increases Comfort Milking massage can significantly increase comfort during pumping. Many moms find pumping to be a somewhat mechanical and uncomfortable process. Massage introduces a level of warmth and care to the experience, making it feel more natural. By alleviating tension in the breast tissue and improving circulation, massage can reduce the discomfort of engorgement and make the entire process more relaxing. How to Massage Your Breast? Massaging your breasts can significantly enhance your pumping experience, offering not only increased milk production but also a more comfortable and efficient process. Here's how you can effectively massage your breast while pumping to reap the maximum benefits: Warm Compress Before you start pumping, apply a warm compress to your breasts for a few minutes. This can be as simple as a warm, damp towel or a specially designed warm pack for breastfeeding mothers. The warmth not only comforts but also stimulates blood flow to the breasts, making the tissues more supple and responsive to pumping. Circular Massage Once you're ready to begin pumping, start with a gentle circular massage . Using the flat pads of your fingers, move around the entire breast in a circular motion, gradually covering all areas. You can start from the outer areas of the breast, slowly working your way toward the nipple. This technique helps to stimulate the milk ducts and encourages milk to flow towards the nipple, easing the pumping process. Focus on Full Areas As you pump, you may notice certain areas of your breast feeling fuller or firmer, indicating stored milk that hasn't been expressed. Focus your massage on these full areas, applying gentle pressure with your fingers or knuckles. Compress these areas in a rolling motion, moving towards the nipple. This targeted approach helps to break up any clogged ducts and ensures that milk is expressed more completely from the breast. It's important to be gentle to avoid discomfort, applying just enough pressure to stimulate milk flow without causing pain. Listen to Your Body While massage should not be painful, you may experience some discomfort, especially in areas that are engorged or if you have blocked ducts. Always use gentle pressure and stop if you feel any pain. If you continue to experience discomfort or have concerns about your milk supply, consider consulting a lactation consultant for personalized advice. Integrating these massage techniques into your pumping routine can transform your experience, making it more productive, comfortable, and beneficial. Every mother's experience is unique, so feel free to adapt these techniques to what feels best for you and your body. With practice, breast massage will become a natural and invaluable part of your breastfeeding journey. In addition, choosing the right breast pump, it can also help massage the breasts and reduce the discomfort when sucking. The eufy wearable breast pump S1 Pro is such a product, with HeatFlow™ technology, experience revolutionary warmth akin to your baby's hug, reducing clogged ducts and optimizing milk flow and output. Our pump is designed for comfort with 105° angle flanges and soft silicone, ensuring a gentle and snug fit during pumping sessions. It is sure to be a good partner for every mom. Conclusion As we've explored, mastering the technique of how to massage breast while pumping not only maximizes milk flow and production but also serves as a proactive measure against discomfort and potential complications like mastitis. By incorporating the warmth of a compress, the rhythm of circular massage, and the focus on full areas, you can transform your pumping experience into one of ease and abundance. Embrace these moments of self-care, knowing that you are doing something wonderful for both you and your baby. FAQs Will massaging improve my milk supply? Yes, massaging can help improve your milk supply. Breast massage can stimulate the milk ducts and increase milk flow, making it easier to express milk and ensuring a more efficient emptying of the breast. Is it supposed to hurt when I massage my breasts while pumping? When massaging your breasts while pumping, it's normal to feel pressure, but it should not be painful. If you experience pain, it might be a sign that you're using too much pressure or that your techniques need to be adjusted. Gentle, soothing massage techniques should be used to avoid discomfort. Can massaging help with mastitis or blocked milk ducts? Yes, massaging can help with mastitis or blocked milk ducts. Gentle massage of the affected area can help to relieve the blockage, reduce inflammation, and promote better milk flow. It's important to use careful, soft movements to avoid further irritation.
Security Cameras · 03/04/2024
Restaurant Security Camera Guide: Key Insights for Enhanced Safety
Restaurants are businesses that have had casual accidents and mishaps on a day-to-day basis. So, if you’re running a restaurant without a security camera, you’ll be blind to everyday operations and unprepared to deal with unforeseen incidents. One of the proactive measures to establish security in your restaurant is through security cameras. Restaurant security cameras are essential due to the high risk of crime and theft due to the high traffic rate, long working hours, and major staff turnover. When you install a restaurant security camera system, it’ll also help to keep track of your employee productivity and customer interactions. Let’s explore more how restaurant cameras can be beneficial, their installation process, and legal guidance. Choosing the Right Security Camera for Your Restaurant Restaurant security cameras take a lot of consideration as they need to work unusually long hours, for some restaurants throughout the day. Some key aspects to consider when choosing CCTV for a restaurant include: Coverage Area: It is important to choose a camera with a detailed coverage area. It should cover all the critical areas with a wider field of view from the dining space to the entrance and parking. Pick wide-angle lenses and install multiple cameras to remove any blindspots in large spaces. Camera Quality: In many thefts or quarrels in restaurants, you have to watch the footage in detail to know all about the incident. Make sure that you get a camera that delivers high-quality video to identify details. Go for high-res cameras that give you clear images for effective surveillance. Integration & Connectivity: It isn’t always possible to get Wi-Fi connectivity on all sides of your restaurant or a certain integration with the app. You should look for restaurant security camera systems that are easy to integrate and compatible with both Wi-Fi and cellular connectivity. Easy to Conceal: Nowadays, eating out is about soaking up the peace and beauty of the ambiance. In most restaurants, it is preferred to use discreet cameras for aesthetic purposes and to avoid customer discomfort. Indoor Camera for Restaurants Considering your restaurant’s ambiance and aesthetic nature, you can install an indoor camera. There will be a minimum amount of exposed wires to help the environment. Make sure to choose a camera with ideal lens angles, motion detection, facial recognition technology, and night vision capabilities. Outdoor Camera for Restaurants Most outdoor cameras are generally wall-mounted to monitor parking lots or entry/exit. These cameras are easily monitored through online applications. When buying outdoor cameras, make sure they can cover a wide area with high-quality image resolution and license plate recognition. The weatherproofing feature is key in outdoor cameras to confirm its reliability in different atmospheric conditions. eufy 4G LTE Cam S330 - Forever Power with 4G or WI-FI Experience the pinnacle of security and versatility with dual connectivity, offering both 4G and Wi-Fi options to suit your needs. With Forever Power, your surveillance knows no bounds; the enhanced solar panel and robust 9,400 mAh battery ensure continuous, off-the-grid operation. Check this 4G LTE cam with forever power for the best discounts now! Buy Now Learn More Types of Cameras for Restaurants Choosing a CCTV camera for a restaurant also requires proper knowledge about different types of cameras. Following are some of the ideal camera types suitable for the restaurant business: PTZ Cameras If you’re looking for flexibility in monitoring, there’s no camera better than Pan-Tilt-Zoom. It allows you to move right or left, up or down, and it even lets you zoom in on any area. PTZ cameras are ideal for large spaces, particularly outdoors, and can be remotely controlled to monitor critical areas like cash counters, entry/exits, etc. Dome Cameras Another popular type of restaurant security camera is dome-shaped, best for its stealth look. It offers you a detailed 360° field of view when mounted on the ceiling. Because of its discreet design, it is difficult to know the direction, which brings uncertainty for potential thieves or mishaps. Thermal Cameras Many restaurants also consider choosing thermal cameras to record videos through heat detection. It works best when you have closed the restaurant or in case of fire. It is generally meant for outdoor parking to detect unexpected heat that may mean equipment malfunction, intrusion, etc. It is a bit challenging to maintain restaurant security without compromising the guest experience. Installing innovative solutions like eufy E120 offers a fine balance between blending into the restaurant’s ambience and offering top-scale surveillance. Its 2K HD real-time view and instant alerts via the eufy app keep you informed of any activity in the area, while its on-device AI effectively reduces false alarms by distinguishing between human activity and insignificant movements. Installation Tips for Maximum Coverage and Efficiency When you’re planning to install a restaurant security camera, you should consider all the possible locations you want to cover, along with the lights and obstacles. Following are a few locations where you can try installing security cameras: Entry and Exit: The doors or entrance points are where you have the most traffic. Having continuous movement of different people, you’ll need identification in case of any incidents. You can always mount a high-resolution camera to record people coming in and going out of your restaurant. Kitchen Area: Another important space is the kitchen area, which monitors kitchen operations and makes sure they are abiding by health codes. You can also check when to restock inventory and track internal theft and violations. Consider a camera with weatherproofing and vandal resistance features so that it can’t be tampered with or moved anywhere. Dining Space or Bar: The highlight of every restaurant is its dining space, which is the root of installing CCTV in your restaurant. Most restaurant owners install discreet cameras to avoid any tip issues, dine-and-dash scenarios, and unexpected fights. You should consider a camera with either a 180° or 360° view to cover wide space and support videos without distortion. Cash Register: The foremost rule of running a business is that supervision is mandatory wherever there’s a money exchange. Make sure to install a camera just above the cash register and go for the PTZ camera so that you can pan and zoom into the bills and money given by the customers. Parking Area: Mostly overlooked, parking space is a very important place that is often an entryway for vandalism, theft, or suspicious activities. It is recommended to install outdoor cameras with proper weatherproofing features with license plate detection and facial recognition. Key Installation Tips for Restaurant Security Cameras After knowing the areas to cover with your security camera, you’ll need proper installation and integration with online apps to perform seamlessly. Some of the prominent tips are: Avoid any blind spots and install two cameras to cross every view for additional surveillance Make sure to install security camera as high as possible with the right angle to cover the entire space Avoid any obstacles to excessive distance in case of low-quality cameras Consider sufficient lighting in every space you want to monitor. Get a camera with night vision to bring clarity to your footage. Get your cameras regularly inspected and updated with experts as recommended by manufacturers. Advanced Features and Technologies Once you know which type of camera you are looking for, try searching for the exclusive range with the best features according to your restaurant’s requirements. Following are the features you don’t want to miss: NVR or DVR: There are two popular technologies in security cameras: digital video recorder and network video recorder. Both security camera systems record videos from the camera and store them to be played later. The major difference is that DVR transmits data in digital format through coaxial cables, whereas NVR systems record video with IP cameras through Ethernet or Wi-Fi. Integration: Make sure the security camera you choose is compatible with other security systems, including sensors, controllers, alarms, and point of sales systems to monitor transactions. Local or Cloud-based Storage: As per your storage requirements and confidentiality, you can choose restaurant cameras to store videos on SD cards or cloud storage. Ideally, you can pick a camera with both of these storage options. Cost Considerations and Return on Investment While having many long-term benefits, setting up restaurant security cameras isn’t a cost-effective process. From installation to constant maintenance and update, the following is the complete breakdown of the cost: Equipment Cost: To install a security camera in your restaurant, you’ll also need equipment, including an alarm system, sensors, control panels, or integration with virtual assistants. Mostly, security equipment comes within a bundle package, costing $1000-$2000. Installation Restaurant Security System: You have two options to install a security camera system in your restaurant: either do it yourself or hire an installation expert. For some security cameras, the installation is free of cost combined with purchase. However, if your camera provider doesn’t support it, it can range from $300 to $500, depending on the security camera system you’ve bought. Monthly Monitoring: After installation, maintaining your restaurant security camera is also important to preserve it. Most restaurants buy subscriptions to professional security camera monitoring as it guarantees that whatever happens, you have experts to handle your security system. On average, the monitoring cost of restaurant security cameras can scale from $40 to $100 per month. Return on Investment As mentioned, security cameras have many benefits that can make your investment worthwhile. The return on your investment can be viewed as decreased theft, consistent sales, and security of your space from any harm or mischief. Once your restaurant gets recognition as safe and family-friendly, it’ll also reflect positively on insurance costs. Legal and Privacy Guidelines When using a security camera for your restaurant, you are subjected to many legal considerations. Some may involve: Learn about the privacy laws of your state, as some prohibit recording people without their consent Some state laws also forbid restaurant owners from recording audio without consent, so make sure to know if recording audio is allowed. Ethically, you need to put a board or sign stating you are being monitored when eating in our restaurant to avoid misconduct. Restaurant owners should clarify the footage retention policy as a timeline for storing the video. At most, the retention period of a particular CCTV footage lasts a month. It is important for restaurant owners to hand over the footage whenever authorized personnel ask for it and lawful purposes. Case Studies and Success Stories Scott Dismuke, Manager at McDonald’s located in Dallas, states that they kept having food shortages during his tenure, and the number didn’t match the order count. At the end of the month, we would find store finances showing more food than sold. After discussing this with his friend, who was the Target Manager, they came to the conclusion of discreetly installing a PTZ camera on the storage unit without informing any of the staff. After a few days of installation, when the first batch of raw food was loading in the storage unit, we discovered that cases of raw frozen meat were mounting out of the truck but never reaching the storage unit. The delivery sheets stated that a certain number of frozen meat cases were reached, but a huge chunk was missing when counted. Without much intervention, we realized the receiving department unloading staff were stealing cases of frozen meat from us. Installing PTZ restaurant security cameras at blindspots became a lifesaver for our franchise that ended up profiting us in the future. Conclusion When it comes to ensuring the safety and security of your restaurant environment, installing a high-quality restaurant security camera system is a must. It is important to track every minor event and major incident, from daily restaurant operations to theft or vandalism. Getting a security camera is also important to let people know that you’re offering a secure environment. Before getting on the hunt to install a camera, consider your space, areas to monitor, budget, and environmental conditions. If you’re looking for a robust and sustainable security camera system, then try out eufy business security solutions. It helps you prevent theft loss and resolve customer issues for 24/7 worry-free protection. FAQs – All About Restaurant Security Cameras Can I install hidden cameras in my restaurant? Yes, most restaurant owners want to install cameras so that no staff members or customers can see them. You may see wireless cameras installed just for this purpose, but consider reviewing your state law to confirm whether that’s not a legal issue for your location. How do I protect my surveillance system from hacking? There are some easy ways to protect your security camera from hacking: Regularly update firmware and software Use firewall and antivirus Choose unique and protected passwords Stay away from pirated emails, links, or messages on monitoring device What are the ongoing maintenance requirements? To improve the durability of your restaurant security system, you must consult with professionals, particularly those linked to camera manufacturers. You can clean lenses regularly, check for power supply, sort your cables, and look for corrosion to avoid any major damage.
Security Cameras · 02/04/2024
Warehouse Security Camera Essentials: Insights for Modern Businesses
For businesses that deal with hardware products, warehouses are of significant importance. All of their hardware equipment is stored in warehouses, which are usually located in far-off places, away from their distribution centers. For this reason, strong security measures are required for warehouses so that theft and vandalism can be deterred. Many businesses tend to neglect the very simple steps involved in managing a security plan, which results in major losses for their companies. Understanding the Different Types of Security Cameras and Their Uses in Warehouses Ensuring that your warehouse remains secure means that the entire area’s vulnerable spaces are adequately covered. This includes the entrance and exit doors and gates but is not limited to these. A prominent aspect of protecting your warehouse is safeguarding your inventory, such as moving machinery, goods, and equipment. One of the best ways to protect your warehouse from theft and vandalism is to install suitable cameras that cover every nook and corner of your property. Here are a few types of security cameras for warehouses that you can choose from. Dome Cameras Dome cameras tend to blend smoothly with their surroundings, owing to their circular shape and compact design. They are amazingly versatile, as they can work both outdoors and indoors. If we consider their usage in warehouses, they can monitor goods and employees without interfering quite effectively. Moreover, they can also safeguard the outside areas of the warehouse without being very noticeable, thanks to their unimposing design. Bullet Cameras Bullet cameras are also a great option when it comes to protecting your warehouse, as their design offers a high-scrutiny performance. Where the dome cameras work discreetly, bullet cameras are best when one wishes to have a visible deterrent for the thieves. For instance, for warehouses, bullet cameras tend to be a constant and strong reminder to both the employees and the criminals that they are being watched. This definitely helps keep the warehouse protected and secure. PTZ Cameras Pan, tilt, and zoom cameras, also known as PTZ cameras, are a remarkable choice for warehouses as they come with functions such as panning left and right and tilting up and down. Moreover, these cameras also have the ability to zoom in on the targets. Because of their unique view capabilities, these cameras are perfect for use in warehouses. The best part about using PTZ cameras is that only a single camera is enough for most of the space as it can focus on certain objects and provide optimum protection against threats. Turret Cameras Turret cameras are a perfect solution for warehouses that wish to have external and internal surveillance. These cameras tend to integrate with IR lighting, allowing them to provide high-quality video. This lets them detect threats even in darkness. If we talk about their physical build, they are compact, small, and easily adjustable. Thermal Cameras As previously discussed, the key to managing warehouse security is the timely detection of threats. Thermal cameras are a great way of boosting warehouse security as they possess a versatile and unique ability to produce images that the human eye is unable to. This is made possible through the infrared sensor inside the cam that is able to convert objects into a colored image, making them ideal for use in warehouses. They also can detect threats in both low and no-light settings. Key Features to Look for in Warehouse Security Cameras Here are some essential features of the warehouse security camera system. Night Vision Capabilities Cameras inside the warehouse security systems need to have a high resolution along with excellent night vision abilities that can provide detailed and clear images. This ensures that there is perfect visibility even during nighttime, making it convenient for individuals’ identification of incidents and objects. Motion Detection Motion detection alerts are mandatory when it comes to warehouse security cameras, as this way, warehouse managers and security responders can effectively identify suspicious activity inside or outside the warehouse whenever it happens. When there is a motion detection feature inside the cameras, these devices begin working when an action or motion is detected around them. Wide and Dynamic Range Warehouses need to be monitored at all times, both day and night. It is best to have warehouse security cameras with a dynamic range, which means they have sensors for balancing the distinction in lighting for a single clear image. Field of View The security camera selected for a warehouse must have a wide coverage to ensure that all critical areas are being monitored efficiently. In order to decide how many such cameras you require, determine the layout and size of your warehouse. Warehouses are really huge and have large perimeters. Therefore, it is best to determine how many cameras you require for comprehensive coverage. Advanced Features Warehouses must use security cameras that come with other advanced features such as facial recognition, license plate detection, and integration with other security systems. These features allow for quick threat detection and easy scalability, improving the overall security of your warehouse. Every inch of the warehouse is valuable and can be utilized to store items, making security even more important. This is where eufy E120 camera comes in to provide state-of-the-art surveillance with crisp 2K HD real-time views, allowing peace of mind and a hassle-free experience for your safeguarding assets in the warehouse. You will get instant notifications via the eufy app to remain in the loop on what is happening in the warehouse. Moreover, its on-device AI technology minimizes false alarms, making it an efficient guardian against unauthorized access or unexpected incidents. Strategic Placement of Cameras for Optimal Surveillance Imagine investing in an expensive warehouse camera system and still not being able to detect any suspicious activities. This sad situation is bound to occur when your cameras have not been strategically placed around your property for optimal surveillance. Here are a few things to keep in mind: Be sure to place surveillance cameras in open, vast areas such as warehouse floors. All entrance and exit doors must be covered by video cameras to oversee shipping and delivery, as well as documenting all your warehouse visitors. Position video cameras in inventory storage areas. Ensure warehouse security cameras are also placed inside management areas and offices so that no theft of petty cash or documents can occur. Covert or Overt? An important aspect of maintaining warehouse security is to strike the right balance between overt and covert cameras. So, how can you decide whether you need an overt camera, a covert camera, or both? It all depends on the nature of security that you require for your warehouse. Sometimes, you may want to catch a thief or detect abuse or harassment inside your warehouse, in which case a covert camera is the right choice for you. On the contrary, you might need a camera that blends in perfectly with your warehouse environment but is also recognizable so that people around it can be wary of the fact that they are being watched. Technological Advances in Warehouse Surveillance With the thieves improving their technological front, it has become even more important that warehouses use innovations in security systems to have a competitive advantage over these thieves. Here are a few innovations essential to improving your overall warehouse surveillance. Automated Control of Inventory Automated control of your warehouse inventory improves its overall safety by improving accuracy and organization to minimize accidents related to misplaced or miscounted items. It also reduces physical strain on your employees. Next time a piece here or there is missing, you will be automatically notified. AI and Data Analytics Looking into optimizing your workflow processes, inventory management, and warehouse layout? Artificial intelligence and data analytics are the answer for you. AI can be leveraged to immediately detect any hazards, equipment failure, or human errors to avoid disruption. Through AI, warehouse security can be significantly improved. Cloud Storage Solutions One of the basic steps towards safeguarding your warehouse data is a cloud storage solution. In case of any mishap, fire, or any other loss of an important document, when all of it is saved in the cloud storage, it can easily be accessed and shared by the relevant people for reference. Remote Access Capabilities Having remote access to your warehouse is mandatory to maintain its security. Owners can have remote access to all the physical points of the warehouse as well as the security system. They can switch it on or off when required. Moreover, the doors and the gates can also be remotely locked or unlocked at any time. Cost Analysis and Budgeting for Warehouse Security Cameras The cost analysis of warehouse security systems can be divided into four main categories. Here are the general details of the expenses that you will incur. Hardware The hardware involved in the warehouse security systems is possibly the most expensive part of the entire package, and it may cost you between $1000 and $2500. Surprisingly, this cost is associated with only one business location. However, in order to open new locations, the price will go up. Activation and Installation Your hardware will require the involvement of professionals in activation and installation. This service can go up to $500. Business Monitoring Business monitoring and maintenance per month needs around $120. This involves tracking individual devices such as cameras and alarms. FAQs – What More You Need to Know About Warehouse Security Cameras What are the best practices for data storage? The best practices for data storage include cloud storage, which lets owners have remote access to the stored data. What are the benefits of a waterproof camera? Waterproof cameras offer enhanced durability and reliability by providing surveillance in various weather conditions, ensuring consistent performance regardless of moisture or rain. What is the lifespan of a security camera? Warehouse cameras can last anywhere from 5 to 20 years if maintained properly. However, after a few years, the image definition will start to decline, making it challenging to perform monitoring tasks. It is recommended that these cameras be replaced promptly. How do you maintain a security camera? A few ways of maintaining a security camera are regularly cleaning the camera lenses, checking its housing, periodically checking the power supply, and dusting it properly.
Security Cameras · 02/04/2024
Boosting Security: A Comprehensive Guide to Choosing the Right Office Camera System
Considering the threats around us all the time, running a fully functional office without security cameras is risky. It is important particularly for business owners to prevent any mishap by taking worst-case scenarios into account. Whether you want protection against theft, scams, unauthorized access, or unforeseen circumstances, installing an office camera for security can help reduce unnecessary expenses. For this purpose, it is essential to choose the best security camera for the office, aligning with your budget and requirements. In this blog, we’ll discover all about office security cameras, including types, cost metrics, technology, and legal guidance for usage. Types of Cameras Suitable for Office Environments Office security cameras are categorized into different types, and you can choose the one that suits your office environment and monitoring requirements. Based on Data Transmission Analog Camera: Analog cameras capture and transmit video signals directly through a wired connection. These cameras can save you a huge amount of money, but they are considerably outdated. Digital Camera: Digital security cameras convert captured footage into digital data for storage and transmission. These cameras are cheap to install but are expensive to buy. IP Security Camera: Internet Protocol or IP camera is the type of digital camera that transmits captured data digitally over an IP network. Most cameras are designed to be interoperable, making them compatible with other hardware and software. Based on Connectivity Wi-Fi Connection: Office surveillance cameras with Wi-Fi as network connectivity can be considered secure and faster to transmit. However, if the router or Wi-Fi signals are over 500 feet, then they become weak for consistent video transmission. RF Security Cameras: There are many analog office security cameras that use RF signals to transmit recordings. Cellular Networks: Many office security cam systems allow only 4G LTE cellular connection. It enables remote monitoring and alerts without relying on Wi-Fi or wired internet connections. Based on Field of View Capture PTZ Camera: Many office security cameras capture the video using the pan, tilt, and zoom approach. It allows you to pan across a wider area range and zoom in when you want to see something specific. PTZ cameras won’t be able to be repositioned remotely; they can record whatever is in the field of view. Bullet Camera: One of the most common office security cameras, which is preferable due to its small size and easy installation. These are meant for both indoor and outdoor recording and are less noticeable, giving you the edge to record suspicious activities. Dome Camera: As the name suggests, these office security cameras have a dome on top. The dome poses two benefits: protecting the camera from vandalism and great security value, as you can’t figure out the direction of your camera inside the dome. Legal Guidelines and Privacy Considerations Before knowing about the features list or budget allocation, you must know the legal regulations and privacy considerations for installing an office security camera system. According to the Data Protection Act 2018 and the General Data Protection Regulation, businesses must lawfully and fairly process personal data obtained through office security cameras. The main objective of the usage of cameras should be clearly communicated to your employees and documented to make sure recorded data remains confidential. Moreover, it is important to note that every employee or individual must have the right to request a video recording. Business owners can not ignore or refuse the request for footage without mentioning it in writing, as per DPA. Video Storage and Retention In office security policy, businesses have to determine the time frame for which the recording will be saved. All recordings must be deleted as per the mentioned retention period. The length of retention periods depends on the purpose of installing an office security camera; the ideal period should be at least one month. Video Monitoring Regulations Video monitoring policies and regulations can vary based on the state law of your business location. A few general regulations include: Notify your employee about the installation of a security camera. Sign a consent form to record employee activity at work Place boards to let your customers know that there are cameras on the premises Make sure to only install cameras in common spaces Mention a clear and legitimate reason for installing a camera within office premises Technology and Features When it comes to buying and installing an office security camera, there are many features and technological factors to consider. Some of them are: Motion Detection Many office security cameras come with a motion detection feature that works by assessing the change in pixels between consecutive frames. It detects any movement within the field of view and triggers notifications or alerts. Night Vision Based on the type of office security cameras, one of the key features is night vision, which works on infrared technology. It helps detect intrusion so that even if the lights in your working space are off, they’ll record with proper visibility. Local or Cloud Storage The storage factor is another major feature of an office security camera, but it primarily depends on your choice. Some need traditional local storage with an SD card to keep a consistent log. There are many latest cameras that offer cloud storage options where your recordings can be directly uploaded to cloud service so that you can retrieve them at any time. Wi-Fi Connectivity For office security cameras, network connectivity is the base for operating smoothly. Many cameras offer the option to choose between Wi-Fi or LTE cellular connectivity. With your suitable medium of connection, you can link your phone to the office security camera to broadcast live video or adjust camera settings. Smart Integration Integrate office security cameras with smart devices to remotely monitor, enhance security, and automate office management. These cameras are featured with integration with compatible software platforms or virtual assistants to control the camera system and connected devices. Cost Analysis and Budget Management Taking out a hefty amount of money from the operational budget for a long-term investment isn’t easy in most workplaces. Following is the complete breakdown of the cost it takes to install and maintain office security cameras: Security Equipment To install a security camera, you’ll also need equipment, including an alarm system, sensors, control panels, or integration with virtual assistants. Mostly, security equipment comes within a bundle package, costing an average of $130 for a base station, $100 contact sensor, $80 motion detector, $45 glass break sensor, and more. Installation Security System Installing a security camera system can be done through two options: do it yourself or hire an installation expert. For some security cameras, the installation is free of cost combined with purchase. However, if your camera provider doesn’t support it, then it can range from $120 to $600, depending on the type of security camera system you’ve bought. Security Camera Monthly Monitoring Once your camera is installed, the work still isn’t done. Maintaining your office security camera keeps on going and can change based on your usage and ability to preserve it. Most businesses buy subscriptions to professional security camera monitoring as it guarantees that whatever happens, you have experts to handle your security system. The main objective of monitoring agents is to confirm the cause of alarms caused by cameras, contact the concerned government department, and inform any stakeholder. On average, the monitoring cost of an office security camera can scale from $25 to $75 per month. Tip: Security systems for businesses and offices, like eufy smart business solotion, are invaluable in legal matters and can also help lower insurance costs.Top of Form Comparative Analysis of Top Office Camera Systems Now that you know all about the features of your perfect office security camera and the different factors affecting the installation process. Following are our top recommended office security camera systems that you may like: eufy 4G Camera S230 LTE Starlight Security Camera The eufy 4G S230 camera is one of the most frequently used office security cameras for outdoor workspaces. It has IP67 water-resistant features to bear every type of condition. This office security camera doesn’t support Wi-Fi connectivity and is compatible with a 4G cellular SIM card for uninterrupted monitoring. Key Features Wireless support with 120° horizontal and vertical viewing angle Track camera through GPS 8 GB local storage 2K max resolution for outdoor quality Records audio for both premises with local storage Filter more than 95% of false alarms using AI Support Alexa and Google Assistant Video recordings sent to the phone Pros Easy installation Record sharp, ultra-quality video Colored night-vision display Motion sensor Cons Requires cellular data plans Lorex 4K Active Deterrence Security Bullet Camera When it comes to office security cameras, Lorex is the industry leader in providing professional-grade equipment. Lorex’s latest 4K Active Deterrence Security Bullet Camera is no exception, offering a vast selection of cameras to suit any situation and size of working space. It can cover a complete 180° view, but the monitoring process isn’t accompanied by agents. You have to do the monitoring yourself. Key Features Both local as well as cloud storage Clear HD resolution up to 4K Wide range of camera options Field of view up to 180° Wi-Fi and ethernet connectivity Smart integration with Alexa and Google Home Pros High-grade equipment Multi-storage capacity Long-range night vision Multiple camera choices Cons Expensive No professional installation No choice for professional monitoring Limited customer support options Ring Stick Up For those small businesses who think they can’t afford to invest in an office security camera, Ring Stick Up is an affordable and reliable way to install protection in your business. It comes with proper weatherproofing so that you can use it for both outdoor and indoor working spaces. This security camera captures videos in 1080p HD, allowing communication in both ways. Ring Stick Up also notifies you when any motion is detected in uncertain timings and records with infrared night vision in dark passages of your office. Key Features Live view of your office premises with real-time motion detection alert 115° field of view Streaming video after motion detection Activate in-app siren Integration with Amazon Alexa Pros Flexibility to DIY or professional monitoring Prompt customer support Cons No free storage Limited equipment range Prone to false alarm FAQs How do you detect and handle hidden cameras? Some key tips for locating a hidden camera include any suspicious item nearby, objects emitting light in the dark, using a flashlight, checking the mirror, and looking for signal interference. Many office security cameras are connected to similar Wi-Fi connections as employees, so you can check if there are security camera devices connected. How long do office security cameras last? An efficient security camera in the office can exceed a 10-year lifespan, and the current IP camera may last up to 2-3 years. Make sure to ask for the manufacturer’s warranty for not only the camera but all equipment to ensure durability. Is 720p good enough for large workspaces? Yes, a 720p office security camera will be good enough to install in a large workspace if it’s positioned better and covers a major field of view. However, it is always recommended that you buy the latest 1080p wireless office security camera to get better and clearer video recordings. Conclusion Office security cameras are a crucial investment, especially when you have confidential client data and a constant hazard risk. From ensuring your employee safety to preventing any mishap, the technological capabilities of security cameras are undisputed. There are many different types and feature options that you must know clearly when choosing a security camera for your workplace. Some offer night vision AI motion detection with notifications and alerts for ultimate protection.
Security Cameras · 02/04/2024
Maximizing Safety: The Ultimate Guide to Retail Stores Security Cameras
One of the biggest factors that impact retail stores is theft. It doesn’t matter how secure and safe you think your store is, there is always a risk of theft occurring. Considering this, a retail security system is necessary for theft and loss prevention. Retail stores security cameras have a significant role in boosting retail security. If you own any retail establishment and want vigilant guards against theft, improve store operations, or wish to ensure employee safety on your store premises, installing store security cameras is an essential investment. Types of Security Cameras for Retail Stores There are several different types of security cameras available for retail stores. Choosing the correct ones for your business is crucial for protecting your store and the first step towards building a strong retail security system. Here are a few of the most commonly used types of security cameras in retail stores. Bullet Cameras A bullet security camera is a type of CCTV surveillance camera for retail stores that is often used in parking lots, offices, schools, and areas with a high crime rate. These are thin, cylindrical-shaped devices for video monitoring and are placed on ceilings or walls. In retail stores, they are a perfect choice for continuous tracking both indoors and outdoors. Pros: They are perfect for outdoor use and are robust devices built to withstand different weather conditions. They are also weatherproof and come with an Ingress Protection rating. They also remain effective in various lighting conditions. These cameras have a long focal length and come with a fixed lens, which allows for long-range surveillance. This makes them especially suitable for retail stores where the target area may be at a distance, inside the aisles or near the doors. Nearly all bullet security cameras come with built-in LEDs or built-in IR illuminators, letting them capture clear and sharp images in complete darkness or low light. This is particularly useful for retail stores when they get closed at night. These cameras are generally easy to set up and maintain. They usually come with accessories such as mounting brackets, easing the installation. Cons: They tend to be very easily noticeable, which may not be an ideal option if you wish to discreetly conduct surveillance inside your retail store. Bullet cameras that are placed outside of the premises of the retail store may collect debris and cobwebs too often, requiring regular cleaning for perfect performance. Dome Cameras Dome cameras have been named this due to their dome-shaped top covering. It offers the following advantages: Pros: The dome cover provides protection against potential vandalism. The camera inside the dome can be positioned at the required angles, enhancing its overall capabilities. Cons: They possess a specific viewing angle, which is hard to adjust remotely. PTZ Cameras PTZ cameras or pan-tilt-zoom cameras come with mechanical parts which allow them to swivel left and right, tilting up and down and zooming in and out of a scenario. They are usually used in areas which require comprehensive monitoring. Pros: Control– Operators have maximum control over the field view Broader Coverage– Enhanced monitoring for larger areas Motion Sensors– Investigates moving subjects Cons: Costly– Usually higher cost as compared to multiple fixed cameras Fragile– Less durable because it contains several moving parts Limitations– They cannot tilt, zoom or pan areas simultaneously IP Cameras Internet Protocol cameras, also known as IP cameras, are perfect for monitoring activities around retail stores. This camera offers several features. Pros: Ease of Storing Recorded Videos– All the recorded video files can be recorded on the server, so you can easily access the videos in the future. Easy Installation– IP cameras don’t have any complicated installation procedures that can save a lot of effort and time. Easy Integration With Other Devices– IP cameras can easily connect with other devices such as PCs, laptops, smartphones, tablets and other popular devices. Affordable– IP cameras are more affordable than other cameras. Cons: More Bandwidth – IP cameras normally require more bandwidth than other cameras, so one must be careful regarding internet quotas. Security Breach– Since IP cameras are connected to the server, there is a greater risk of security breach when you use them. If you wish to reduce this issue, you will need to buy the best IP camera from a reputable company such as Top Retail Security Camera Systems for 2024 Big or small, every retail store wishes to keep their security top-notch and updated. If you are running a retail store and do not have security camera systems installed, you are causing trouble. Before selecting any one security camera, take a look at our list of the top retail security camera systems available in 2024. eufy SoloCam S340 Price: Go get best discount now eufy has given its best and has ticked all the right boxes for this camera. It is not only a compact device, but it also has a dinky solar panel that can be mounted on top of the camera in case it receives direct sunlight. It also has double-lens and a battery-powered outdoor camera. Even better, it has the ability to track motion, such as humans and cars. Another amazing feature is its full-colored night vision. Pros: Above-average quality of video Quick motion tracking Cons: Literally no faults at all Lorex Cameras Price: Some options starting from $49.99 Lorex is the industry leader in the top retail store security cameras. The company provides professional-level equipment with a wide range of cameras to select from that are designed to suit your specific retail needs. It must be noted that monitoring and surveillance with Lorex is DIY. This is a perfect option for someone who wishes to handle their own retail security requirements. Pros: Professional level equipment Several storage options Multiple camera choices Long-range vision at night Cons: Professional monitoring options aren’t available Relatively expensive Customer service options are limited No professional installation available Ring Cameras Price: Various options available, starting from $69 If you have a small business, you might not be in a position to invest in a big security system. Ring is the perfect choice for you in this scenario. No matter how small your business is, you can still invest in Ring cameras without sacrificing your budgetary requirements, as its low-end models are super affordable. Pros: Professional monitoring and emergency dispatch available at a cost as low as $20. These cameras have two-way audio, meaning you can converse with visitors without entering your front door. Ring cameras tend to work great with Alexa and Google Assistant. Important functions such as turning the devices on and off, altering settings or taking out videos can all be done through voice commands. It has convenient DIY installation and highly responsive customer service. Cons: There is no free storage available Equipment has a limited range High-end models are very costly Quite prone to incorrect alarms ADT Cameras Pricing: A complete installation of the security system costs between $599 to $1449. Looking for a security company that offers an all-in-one solution for your retail store security needs? ADT is the best option for you. As a company with 145 years in this field, ADT knows well how high-quality equipment can be produced with a complete security bundle. Pros: 24/7 monitoring by professionals Professional installation A long history in the industry User-friendly app Cons: No DIY options available Relatively costly as compared to its counterparts Minimum subscription time is three years Advanced Features to Look For in a Retail Store Security Camera Retailers struggle with several challenges, such as vandalism, shoplifting and fraudulent claims. In such scenarios, a strong security camera system is the first line of defense. Here are the most necessary features that must be the core of each retail security camera. Facial Recognition The security camera you have chosen must have impressive video resolution to clearly recognize faces and other important things, such as car plate numbers and other key markers. Unmatched clarity of the security cameras will empower you as a retail store owner and solve issues such as violence, vandalism and theft. Motion Detection Motion sensors are essential for security cameras as they provide safety and protection for your belongings and people by preventing any intrusions. This means that you can be immediately informed of any unusual activity inside or outside your retail store at any time during the day. Night Vision After the sun has set, your retail store security is at the greatest risk as criminals tend to engage in illegal activities in the darkness. Night vision capabilities in the cameras can be the perfect solution for this problem. They can help ensure you get proper footage of your retail store in all sorts of lighting conditions. Remote Access There are several key benefits of being able to remotely access your security cameras. Firstly, it allows you to efficiently monitor store visitors and employees, whether you are inside the store or not. Secondly, it helps owners to keep a strict check on whether a visitor is entering a restricted area or even attempting theft. Integration Capabilities The integration capabilities of your retail security camera with other devices ensure timely deterrence of possible threats, comprehensive surveillance and quick response to any security breaches. Installation and Placement Strategies From everyday shoplifting to organized crimes, violence, and transaction fraud, as well as retail crime, all of these have been regularly destabilizing the shopping industry. Here are a few retail security camera installation and placement strategies to help you effectively deal with all the above issues. Ensure that cameras on sales floors are strategically placed and carefully selected for the provision of a full 360-degree coverage. Consider cameras that have lenses with a wide angle, such as dome or fisheye cameras. These must be installed on ceilings so that the entire area can be monitored. Cameras also need to be installed in the store’s stockroom for monitoring both external and internal theft. Ensure cameras are also placed at the points of sale, such as self-service checkouts, so that consumer-staff interactions can be continuously monitored. Cameras must also be installed in the retail store’s parking areas to deter vandalism and violent crime. Legal Considerations and Privacy There is no doubt about the benefits of having surveillance cameras in retail stores. They prevent crime and help in catching thieves. Not only this, they also help to build trust between consumers and employees by protecting both. However, before embarking on this journey, it is important to address the checklist for privacy compliance. Regulations require that a sign ‘Cameras are watching’ or a similar one is posted inside your retail store where customers can clearly read it. It also must make it clear who owns this camera system. Customers must be able to easily find further information regarding what will be done to the personal information acquired by these cameras. When a customer requests, the retail store is bound to present access to the recorded footage for review. You should be able to explain the policies on holding information adequately. It is mandatory to develop safeguards that can protect the stored footage data. As a retail store, you are responsible for preventing any data breach by a third party. Case Studies and Success Stories Employee theft and shoplifting are real issues that cause retail stores a lot of loss annually in only the US alone. In order to fight this, retailers have turned to installing camera security systems in their stores. A retail store in Georgia had to deal with rampant issues of shoplifting. They installed security cameras that also had a remote monitoring system. It lets the owners directly see several stores from a central location. The result of this was very encouraging. Within months, the number of shoplifting incidents dropped by a massive 60%—remote access allowed for quick interception and monitoring of shoplifting incidents. In another case study, a gas station convenience store required instant access to their monitoring of visual alarm. Having security cameras enabled them to effectively respond and monitor the alarm events, ensuring improved security and complete peace of mind. FAQ Section How are security cameras used to secure retail stock? Security cameras in retail stores not only protect merchandise but also ensure the safety of customers and staff. Immediate response to safety concerns and creating a safe environment become possible with these cameras. How do I choose the right security camera for my retail store? First, determine where you wish to place the security camera inside your store. This is typically the place that requires the most surveillance and can be both inside and outside the store. Consider other smart features, such as two-way audio and motion detection, for additional convenience. Can I install a security camera in my store myself? A simple retail store security camera can be installed yourself easily. However, for an extensive setup, you might need to hire a professional company.
Security Cameras · 02/04/2024
Protecting Your Investment: Small Business Security Systems for Entrepreneurs
Business security systems are a must-have for modern businesses today. These systems are ideal for bringing the needed peace of mind to your team and keeping them safe. In case of an unusual incident happening, you will be able to know immediately and also be able to view the visual evidence of all that happened. There are several small business security systems available in the market. Keep reading the article for a detailed review and comparison of these systems. Overview of What Each Service Has to Offer We made a list of some of the best business security systems available for various use cases. Here is a list of our top picks from business security systems in 2024: Vivint Vivint is undoubtedly one of the most powerful smart home security systems owing to its smart touchscreen-based control panel and AI-powered security cameras for small businesses. It delivers an unmatchable smart security experience for its users. Some of its notable features include. Professional Monitoring – All Vivint systems come with cellular backup and professional monitoring options for home security. Easy Integration – Vivint works very well with Google Assistant, Alexa, Nest, and Philips Hue smart lighting. User-friendly – It is super convenient to use on both Androids and iPhones. Its starting price is $19.99 per month. ADT ADT has undergone the tests of time and is ahead of several of its competitors when it comes to small business security systems. It is not only trustworthy but is also one of the oldest business security systems in the market. Its features are as follows. Smart Integration – ADT easily integrates with different third-party products such as Alexa and Google Assistant. These integrations tend to make it truly possible for users to control their security systems effectively with their voice or create special smart home commands that make life convenient. User-Friendly – It is also one of the most user-friendly apps on the market and is easy to use with both Androids and iPhones. It costs $194.98 as a starting price. SimpliSafe The best thing about SimpliSafe is that it provides its users with multiple options, such as DIY installation, professional one-to-self, or professional monitoring. Another great thing about choosing SimpliSafe is that it does not require users to sign up for a very long time, as all its contracts are from month to month. Here are its top traits. Easy Integration – It integrates with both Google Assistant and Alexa. Installation can be professional or DIY. User-Friendly – The free app makes the management of home security more convenient and accessible. It costs somewhere around $124.98. Abode Even though it’s a relatively newer security system on the block, it has the smartest platform integrations. Moreover, its system boasts an innovative design. Unlike ADT and Vivint, it does not force users to subscribe to long, monthly plans or long contracts. The features are listed here. Convenient – It has a very easy installation system, which allows you to save money on having it installed professionally. Smart – It comes with several options for CUE home automation and vocal commands. It costs a reasonable rate of $6.99 per month. Frontpoint If you are looking for the easiest and the simplest way of adding a security system to your business, try Frontpoint, and you won’t be disappointed. It has a lot to offer of value and also has one of the easiest DIY setups in the market. Following is what it has to offer. Smart Management – This can be controlled by voice alone and integrated with Google Assistant and Alexa. Easy to Install – It takes very little time to do a DIY installation. Excellent Support – It offers great customer support, which is better than any other small business security system. Frontpoint’s starter package is available at $129. Security System Best Features Starting Price Vivint Home Automation Two-way Audio Detection for carbon monoxide $19.99/m ADT Convenient cellular setup One system supports a large zone Comes with digital security protection $24.99/m SimpliSafe Entirely wireless Supports Nest and Alexa On-order add-ons $124.98 (one-time) Abode Smart business ready Automatically detects occupancy Ability to customize packages $6.99/m Frontpoint Easy enough to install DIY Remarkable outdoor small business surveillance cameras Supports business automation $49/m Detailed Reviews and User Experiences Let us take a look at some of the real-world applications and user experiences for our chosen business security systems. Vivint Users were generally very happy with Vivint as its systems always function correctly. They reported that if there is an issue with the equipment, it is quickly replaced or fixed. Moreover, the customer representatives at Vivint are extremely friendly and fairly accessible in case of any problems. Users reported that they felt safe using this security system. ADT Customers have reported that ADT’s reliability has improved over the years and is very easy to use. There also have been hardly ever shipping or delivery issues. However, customer service may not be as great as that of other small business security systems. Simplisafe Users claim that SimpliSafe’s installation is super easy and can be easily done by the users themselves. The cost of the monitoring, if included, is also very reasonable. The users were of the view that it was hard to find any other business security system as good as SimpliSafe at this price. Abode Customers were reported to be extremely happy with Abode because of its ease of use and the fact that it has no monitoring fees. Moreover, the users were also impressed with its cool features, such as control through a phone app and an exceptional range of door sensors. Frontpoint Frontpoint customers loved the customer support service that they received from the company. Moreover, the customers reported that the signup was super convenient, as well as its installation. Security Risks and Needs Assessment Guide Conducting a security risk assessment is a very systematic process that is crucial for the mitigation and identification of potential threats. Here is a step-by-step guide to ensuring your business undergoes a deep evaluation. Catalog all digital and physical assets and understand the importance and value of each asset. Determine the threats and vulnerabilities by identifying potential threats and analyzing them in the present security measures. Assess the potential impact and likelihood of each threat. Develop plans for reducing, eliminating, or managing risk identification. Consider both reactive and preventive strategies. Here is a checklist of areas where a business must keep a careful look at: External Security Controlling measures for the entry points Security at gates, fencing, and barriers Patrolling and camera systems Adequate lighting in and around the premises Internal Security Employee Access Controls – Restricted access levels and areas Safeguarding critical assets and data Working on emergency procedures such as evacuation plans, fire exits, and emergency drills Physical Security Adequate internal and external lighting Operational surveillance system Access to control measures for all sensitive areas Regularly tested for emergency and safety equipment Technology and Integration It is very important for modern business security systems to be flexible and scalable. They should be able to integrate well with third-party apps and systems such as smart lighting and environmental controls. Here are the top five trends in business security systems when it comes to technology and integration. Artificial Intelligence AI has become a game changer in the security industry. They can analyze massive amounts of data, helping them distinguish between suspicious and normal activities accordingly. This technology has efficiently reduced any false alarms, making the security systems more reliable and efficient. Remote Monitoring Cloud-based storage has completely revolutionized how security footage is accessed and stored. This recorded video footage can also be stored remotely on secure servers. Biometric Security Biometric security has also become very significant, which includes using unique biological characteristics for individual authentication such as facial features, fingerprints, voice recognition, and iris patterns. These are being integrated into business security systems in different ways. Cybersecurity Measures As businesses rely excessively on technology, cybersecurity has become a significant priority for them, and they are vulnerable to attacks and cyber threats. Businesses are implementing robust measures to protect their data against breaches and unauthorized access. Legal and Insurance Considerations Legal compliance and insurance coverage are really important for business security. Both are cornerstones for small businesses as they provide security against third-party claims for property damage, bodily injury, and advertising liability. For instance, if a customer slips and falls inside your company’s premises, insurance can help in dealing with the issues effectively. Business security systems such as eufy are a great help in cases like these where legal issues are involved. They also help in reducing insurance premiums. DIY (Do It Yourself) vs. Professional Installation All businesses wish to feel secure and sound to ensure that their functions are running smoothly. Different security systems come with different handling requirements. While some might opt for professional installation, others will choose DIY. Let us take a look at the pros and cons of each separately. DIY Security System The best aspect of DIY security systems is that there are no installation fees involved. Therefore, it is ideal for small businesses that are on a budget. This can be beneficial when you have chosen a simple security system. However, if you have bought a more complex system, DIY might not be as easy. In addition, as it does not involve collaboration with professionals, you might be missing out on key components of building up an impactful security network. A DIY security system will also hardly ever come with warranties or guarantees. Professional Installation The best part about professional installation is that it requires significant help from the experts; therefore, it means that professionals who understand security well are involved. They can help out wherever hiccups arise. Moreover, with professionals involved, you do not need to worry about the security of your business. The only con of using professionals for installation is the significant cost involved, as well as the maintenance service investments. These costs tend to be quite high as compared to a DIY system that is just installed once. Security System Maintenance and Upgrades Regular maintenance and upgrading of a security system are fairly crucial parts of any business’s strategy to maximize efficiency. Business owners who tend to perform a regular security system checkup are able to take the most out of their security system, minimizing the chances of any downtime. Many businesses, whether large or small, use preventive maintenance measures to anticipate potential faults in the security processes. By combining maintenance with upgradation, the security system is bound to function at an optimal level. Questions to Ask Providers If you are running a business, you would know that finding a security system that best fits your needs can be quite a daunting task. Here are a few important questions to ask your providers that can help you get the ball rolling. What is the approach to assessing a site and making security-related recommendations? Which solutions does your company represent? How many dedicated engineers and staff do you have locally? What are your specific contract terms? What do we need to pay once and then recurring? Do you allow for system customization? How do you support your customers? Future Trends in Business Security The following are the future trends in business security: 1. Adoption of Mobile Credential Systems The adoption of mobile credential systems is going to be a new trend in business security as it will allow businesses to implement wider integrations and additional policies for improving on-site security. 2. Cloud-Based Data Storage As many organizations shift to hybrid and remote working schedules, cloud-based data storage will become even more central. With so many employees working remotely, it is only necessary that they acquire access to important company data from several remote locations. This calls for the strengthening of cloud security measures to prevent data breaches. 3. Drone Surveillance As employees work remotely and even in different sections or departments, drone surveillance will be a new trend in business security to ensure that no place remains unchecked. 4. Biometrics Biometrics are essential to individual authentication and ensure that only the relevant people have access to confidential data.
Security Cameras · 02/04/2024
The Ultimate Guide to Garage Door Security: Innovations and Strategies
Have you ever noticed how we sometimes forget about our garage door security? It's more than just a place to park; it's often a direct entry point for burglars. With one in four garage owners experiencing break-ins, it's time to prioritize its protection. Investing in a top-notch roller garage door system can keep those intruders at bay and give your home the security upgrade it deserves! Investing in garage door security keeps burglars at bay and protects valuables, like vehicles, from unauthorized entry and vandalism. Moreover, a practical garage door security system could save your home insurance premiums. So, here is our detailed guide on solutions for your garage protection. 1. Immediate Solutions for Enhanced Security Smart Locks for Garage Doors: Smart door locks use Bluetooth or Wi-Fi for remote control and monitoring. To lock or unlock doors remotely, you can operate these via smartphone apps, keypads, or voice commands. Add-ons like temporary access codes and integration with other smart home devices provide high security, including biometric authentication and remote access. Their tamper-resistant design makes them a secure choice for peace of mind. These offer a high-tech solution to traditional mechanical locks when you integrate your garage door opener with a smart home system. However, consult a professional garage door service provider before buying one for your garage door security. The Role of Security Cameras: If strategically placed with reinforced windows using security film or bars, security cameras can protect against unauthorized access. Now, there are many security cameras you can opt for: Night vision cameras are perfect for monitoring in low-light conditions, even during dark hours. High-resolution cameras provide clearer images, crucial for identifying details in any scene. Waterproof cameras are great for outdoor use. They offer durability against the natural elements. Motion-sensing cameras detect the slightest movement or sound, deterring potential thieves with features like floodlights and zoom capabilities. One excellent camera for your garage door security would be a eufy security camera. Their wide range of security cameras, including indoor and outdoor models, are high-end, durable, and affordable. A security camera that we recommend is the SoloCam S340. It is a wireless outdoor security camera with a dual-lens and solar panel. For optimal coverage, place security cameras at the garage entrance so you can monitor activity as people come and go. Additionally, motion sensors in this area help capture footage of any suspicious activity near your vehicle, even when you're not around. Floodlight Security Cameras: Floodlight security cameras have motion sensors that activate the lights upon detecting movement. These innovative devices integrate a floodlight and a security camera into one outdoor fixture for comprehensive surveillance capabilities. An excellent floodlight security camera is the eufy S330. The S330 integrates easily with Apple HomeKit, Google Assistant, and Amazon Alexa at your home without monthly fees. Its selective memory features discern between human and pet activity, so the recording is triggered only by meaningful events. It captures stunning 2K video resolution clarity while maintaining a high-definition 1080P visual standard, even when integrated with HomeKit. It offers 360° horizontal pan, 96° vertical tilt, and motion detection auto-tracking from every angle. Engage in real-time dialogue with visitors using the built-in two-way audio feature for instant communication from anywhere. 2. Long-Term Security Investments: Upgrading to Smart Garage Door Openers: On busy days or in bad weather, tap to access your garage door security without leaving your car. Modern garage door openers have Wi-Fi connectivity and smartphone apps to control your garage door from anywhere. Alongside convenience, automatic openers enhance security with features like rolling codes and vacation mode. Additionally, these prioritize safety with sensors that prevent accidents and injuries. 2024 is a golden age of home gadgets that blend ease, security, and cutting-edge technology. You can check out the sleek control of the Chamberlain B970, the budget-friendly Skylink Atoms ATR-1611C, or the voice assistant compatibility of the Genie 7155-TKV. Each system brings its unique features. Options like the beamUP, The Workhorse BU100, and the Chamberlain B550 offer top-notch security and easy setup. In short, these gadgets promise to make your garage door security smarter and safer. Reinforcement of Garage Doors: To improve your garage door security against potential break-ins, first, ensure that all hinges, brackets, and locks are high-quality and in good working condition. For added security, install metal plates or bars along the interior side of the doorframe. These reinforcements add structural strength, so kicking or forcing the door open is much more challenging. Another smart move is to equip all doors leading to and from the garage with deadbolts and locking knobs, including the door between your house and the garage. Add extra locks to these entry points for additional barriers against unauthorized access. Use latches and padlocks on your garage doors for even greater protection. While some opt to install bars on garage windows for added security, it might not suit everyone. Instead, ensure you lock any windows in your garage from the inside. This way, even if an intruder attempts to break a window to gain entry, they'll find it nearly impossible to open it. 3. Preventative Measures and Best Practices: Routine Security Checks: A checklist to assess your garage door security weekly or fortnightly must include: Assess Garage Door's Balance Pull the emergency release cord to unlink the opener from the door. Raise the door halfway and let go. If it stays, it's balanced; if not, there may be an imbalance. Close the door and lift each side separately. If they drop evenly, it's balanced; otherwise, adjustments are needed. Adjust the tension spring or seek professional assistance to rectify any imbalance promptly. Examine the Tracks and Rollers Look for damage or misalignment, such as dents or bends. Remove debris and grease buildup for smooth operation. Tighten loose nuts, bolts, and screws securing the tracks. Look for wear and tear, and lubricate them regularly for optimal performance. If rollers show significant damage, replace them to maintain smooth movement. The Springs and Cables Check for wear, damage, or imbalances in the springs. Look for signs of fraying, rust, or loose cable strands. If issues are detected, promptly consult a professional for repairs or replacements. Inspect the Safety Features Check auto-reverse and photoelectric sensor functions for proper operation. Examine sensor alignment and wiring and clean or replace as necessary. Follow specific instructions in the opener manual for testing and maintenance. Maintain and Lubricate the Garage Door Components Apply silicone-based lubricant or white lithium grease to hinges, rollers, bearings, and springs. Check for cracks or issues and replace if necessary to maintain proper sealing. Security Layering: Imagine your garage door security like layers of protection. The first layer is your locked doors and windows. Think of the second layer as your trusty alarm system. They're watching over every entry point. These alarms will let you know if someone tries to sneak past the first layer. Community Watch Programs: Here's how to create a community watch program for garage door security. Gather as many neighbors as possible interested in boosting garage door security. Contact your local police department to arrange a meeting. They can provide valuable insights and support. Sit down with your neighbors and law enforcement to discuss concerns and devise a plan. Include neighborhood patrols, share security tips, or install surveillance cameras. Hold regular meetings and offer training sessions on relevant skills, such as recognizing suspicious behavior or effectively securing garage doors. 4. Innovative Technologies in Garage Security: Integration with Home Security Systems: Garage door sensors are like superheroes in your home security team. Connect them to your security setup to get an instant alert on your phone if someone tries to mess with your garage door. Plus, you can set up clever tricks like having the garage door close automatically at bedtime or turning on lights inside if the garage gets opened unexpectedly. It's about making your entire home a fortress of safety from the palm of your hand. The Future of Garage Security: Imagine upgrading from basic manual systems to high-tech setups that practically think for themselves! These advancements are changing safety and convenience. Picture this: Motion sensors that detect movement around your garage. AI Infrared sensors that spot heat signatures. Laser sensors that measure distances with pinpoint accuracy. Together, they will form a super-smart network that will open and close your garage door smoothly without bumps or bruises. But wait, there's more! With smartphoen access, no more keypad tapping or worrying if you left it open. Plus, with features like biometric access control and AI integration, only you (or whoever you choose) can get in. With innovative insulation and smart energy-saving tech, the future of garage door security seems smart and eco-friendly. 5. DIY vs. Professional Installation: Pros and Cons of DIY Security Enhancements: Here is how to boost their garage door security independently: Find a spot close to your main entry door and power source to install the panel. Use a small nail to mount it on the wall, or opt for a removable adhesive to avoid holes. Your DIY kit will likely include door sensors, window alarms, and motion detectors. With their peel-and-stick backing, you can place them around your garage and move them as needed. Follow the manual to ensure all alarms and sensors are working as they should. Now, let's talk about components: Main Panel with Keypad: This panel acts as the control center for your system to arm and disarm it easily. Entry Sensors:Detect any movement on windows or doors and adjust the quantity based on your garage's layout. Motion Detectors: Positioned in key areas, these kick into action when they sense movement, and some even pair with cameras for added security. Environmental Sensors: Protect yourself against more than just intruders. These sensors guard against fires, floods, and gas leaks. When to Consider Professional Installation: While DIY systems are great for many, they're not for everyone. So, here are a few reasons professional installation is a better option: With their expertise, you can trust that your garage door security will function flawlessly. You're guaranteed top-notch materials and craftsmanship when you opt for professional installation. The pros deliver precise measurements to perfect alignment. Professionals can bolster your system with advanced features and controls. Professional installers offer various choices for a well-designed garage door securitysystem that enhances curb appeal and adds to your home's aesthetic. Professional installation includes ongoing maintenance and warranty coverage. You won't need to invest in specialized tools or spend hours watching tutorials. Plus, you'll avoid costly mistakes. DIY installation poses safety risks, from handling heavy doors to working with electrical components. Thus, while the DIY route may seem tempting, professional installation has benefits that far outweigh the cost of garage door security. Conclusion: Hence, there are plenty of ways to beef up garage door security. And hey, it's not just about protection; it's also about peace of mind. So, stay vigilant and explore new technologies, like the eufy security camera and floodlight cameras, to make your home the safest it can be. After all, there's no place like home, and we want to keep it safe, secure, and welcoming. FAQ Section Q1: Which garage door material offers the highest level of security? A: Roller doors, known for their absence of visible leverage points, pose a significant challenge for potential intruders. Made from aluminum, you can reinforce these doors with double-skin layers to improve security measures. Q2: What is the common safety feature on garage doors? A: A staple in garage door opener design since 1993, photo eyes ensure the garage door halts and reverses its direction upon detecting any obstruction. They transmit an invisible infrared beam across the opening of your garage door. Q3: What are some troubleshooting tips for garage doors? A: Here are a few tips: Plug in the opener and switch on the circuit breaker. Check if the door is accidentally manually locked. Swap out the batteries in the keypad or remote. Confirm you're within range for the remote to work. To open a closed door, use the emergency release cord, typically a red rope. This disconnects the trolley, enabling manual opening. Safety reminder: Seek professional assistance if the door is open when you pull the cord, as it could slam shut.
Security Cameras · 02/04/2024
15 Essential Security Tips for Apartment Dwellers: A Comprehensive Guide
Although essential, we often overlook apartment security for many reasons. If you're a landlord or property manager, it's not just about getting new tenants but also to ensure your current ones feel safe and happy. One easy way to do this is to invest in security systems for your apartment buildings. Did you know that renters are more likely to have break-ins than homeowners? Yep, it's true! That's because apartment buildings have more people coming and going every day. According to a new study, renters in apartments with 2-4 units are especially at risk. So, top-notch security solutions are a must today. Thus, let us begin with the top 15 tips for apartment security. 1. The Ultimate Checklist for Choosing a Secure Apartment An ideal apartment is about location or space with security. Location: Always check out the outside areas while finalizing an apartment. Some places have impressive gates at the front but need more protection at the back. Test keypad entry systems, and if there's a security guard, try chatting. Also, map out your usual routes from parking to your apartment or other spots like the mailbox, laundry, or gym. Are they well-lit? Building Security Features: Examine key fob entries, coded access pads, or the presence of a door attendant to regulate entry effectively. See the condition of locks on doors and windows and scrutinize the building's design for potential vulnerabilities like poorly lit areas. Check the surveillance equipment coverage, security cameras in common areas, and the integrated alarm system. Inquire about installing personal security systems and the building's protocols for guest access and emergency or unauthorized entry. Neighbourhood Crime Rate: For statistics, visit local law enforcement websites or databases like NeighborhoodScout. Explore the area day and night to gauge street lighting adequacy and observe locals' demeanor. Additionally, consider the Neighborhood's overall maintenance and cleanliness. 2. Advanced Locking Mechanisms: Beyond the Basics Smart locks combine traditional locking mechanisms with advanced technology via smartphone apps to lock or unlock doors from anywhere with internet access. Advanced locks include: Deadbolt Replacements: These substitute the existing deadbolt on a door. Available in various designs, they require basic DIY skills for installation. Retrofit Devices: These gadgets upgrade traditional locks into smart ones without replacing the entire lock assembly. Built-in Smart Locks: Some manufacturers embed smart lock technology directly into door hardware. So you do not need a separate smart lock device. Keyless Entry Systems: Smart locks with keyless entry grant access using keypad codes, fingerprint recognition, or proximity sensors. Advanced lock systems include enhanced security with encryption, two-factor authentication, and real-time monitoring, with some models even offering tamper alerts. Integrate them with security cameras and home automation for additional protection. Additionally, these locks offer monitoring and activity logs for tracking family members or investigating security incidents. 3. The Role of Technology in Apartment Security Technology plays a vital role in boosting apartment security. Access control systems, surveillance cameras, and intercoms create a safer environment for residents. We recommend the eufy HomeBase S380 (HomeBase 3), which seamlessly integrates with your security devices. With the HomeBase 3, you can enjoy up to 16 TB of expandable local storage (additional storage drive not included), ensuring ample space for your security footage. Its BionicMind AI distinguishes between family members and strangers, enhancing security measures. Furthermore, HomeBase 3 facilitates centralized security management and offers privacy through AES-128 and RSA-1024 encryption. eufy also offers a 30-day money-back guarantee, a hassle-free warranty, and lifetime customer support. 4. DIY Security Measures That Anyone Can Implement With some reorganizing and clever thinking, you can enhance the apartment security at the least cost and with no significant installations. Close blinds when away to hide tempting electronics visible through windows. Windows and doors must have working locks, and sliding glass doors must have dowels or boards in the track. Opt for double-cylinder deadbolts or mortise locks. Explore digital or smart locks for keyless entry or remote access, which enhance security and convenience. Invest in a portable safe or utilize unlikely storage spots like the freezer's back. Explore disguised hiding spots such as hollow books or false containers to deter burglars from quickly finding valuables. 5. Window Security: An Often-Overlooked Aspect Research shows that many break-ins occur through unsecured windows. So, here are some best-practice window security tips to follow: Lock Your Windows: Install smarter locks such as pin locks, hinged wedge locks, window latches, or child safety latches, especially if you live on the ground floor. Swap out the Glass: Upgrade to tempered glass, as it is stronger and more resistant to breakage than regular glass. Tempered glass makes it harder for burglars to access your home quickly. 6. The Importance of a Secure Wi-Fi Network in Your Security Arsenal As the use of smart home technology increased, so did the importance of better cybersecurity practices. Fortunately, it's relatively easy. Wi-Fi Network: Pick a strong password for your Wi-Fi router to avoid unauthorized access to your network and connected devices. Strong and Unique Passwords: Keep all account and device passwords long, complex, and unique. Research: Before purchasing smart devices, research the manufacturer's reputation for security and privacy practices. Opt for devices that offer control over data collection and usage. Multi-Factor Authentication: Enable multi-factor authentication, such as fingerprint scans, adds an extra layer of security. Update Devices: Regularly update device software and mobile apps to install security patches and protect against vulnerabilities. Your Network: Secure your router by changing default settings, using encryption methods like WPA2, and setting up a separate guest network for IoT devices. Security Software: Use comprehensive security software to safeguard your home network and connected devices against online threats. 7. Lighting: The First Line of Defense To effectively use lighting as a deterrent against burglaries, create the illusion of occupancy by mimicking natural human behavior. Set indoor lights to switch on and off at various, unpredictable intervals to simulate the presence of someone at home. This random pattern will deter potential intruders by giving the impression that someone is inside. Also, install motion lights around the perimeter of your home, especially in shaded areas where trees are present. Motion lights illuminate the surroundings as soon as they detect movement. 8. Security Cameras: Eyes When You're Not There With the soaring real estate prices, renting has become the norm for many. However, setting up an apartment security system as a renter can pose challenges, as most landlords are reluctant to make major alterations to their property. Nonetheless, overlooking your security needs is not an option. Thus, you can opt for equipment that minimizes wall damage, such as the eufy Video Doorbell S220 Add-on. This wireless add-on video doorbell offers 2K resolution and two-way audio, with simple self-installation and compatibility with HomeBase 2. Enjoy enhanced clarity, dual power options, and an expanded field of view for comprehensive security without compromising your rental agreement. 9. Building a Community Watch: Safety in Numbers Build rapport with neighbors to increase vigilance and create a support network. Exchange contact information for quick communication and inform trusted neighbors of vacations so they can watch your place and vice-versa. 10. Balcony Security: Protecting Your Outdoor Space Making your balcony safer is easy and friendly! Add safety nets, check railings, install fences, and set up motion lighting and security screens. Not only will these steps boost safety, but they'll also let burglars know your home isn't an easy target. 11. Mail and Package Theft: Minimizing the Risk Want to keep your packages safe in your apartment? First, try redirecting deliveries to a secure location or monitoring them with tracking. Request a signature upon delivery for extra security or hold the packages at the front desk. Install a video doorbell camera, like the eufy doorbell, and use parcel locker services for safe storage. And explore options like Amazon Key for even more secure delivery alternatives for worry-free shopping. 12. Pet Security: Keeping Your Furry Friends Safe First, watch out for cables and electrical outlets, especially in older buildings where they might pose a greater risk. Cover outlets and wound cables neatly to prevent any accidents. Keep a close eye on open windows and doors to prevent curious pets from exploring dangerous areas, especially if on an upper floor. Add childproof locks or gates to windows. If you have a balcony, make it pet-proofed with netting or gates to prevent falls. Keep plants, prescriptions, and cleaning products out of reach. Be aware of chipped paint, as it may contain lead. Introduce your pet to your neighbors to help them differentiate between friends and strangers, and never leave them unattended in common areas. 13. Insurance: The Safety Net You Shouldn't Ignore Have you heard of renters insurance? Well, renters insurance protects personal belongings in a rented apartment, condo, or home. It shields you from unforeseen events like theft, fire, or sewer backup damage and compensates you for any losses or damages. Additionally, it covers liability in case someone is injured on your property. Renters' insurance can also extend coverage to apartment security equipment, an extra financial security in case of theft or damage to these devices. 14. Security Audits: Identifying Weak Spots A security audit for your apartment helps examine key areas of your property's security system, such as perimeter fences and access points. You can identify weakpoints and make necessary improvements to prevent future crime and keep everyone safe and secure. Plus, conducting these audits provides tenants and landlords peace of mind. It offers valuable insights into the building's safety procedures and potentially increases its value. So take the proactive step to enhance your home's security and address any weak spots. 15. Staying Informed: The Key to Ongoing Security Understanding the safety of your surroundings goes beyond just looking at crime statistics. Tools like the FBI Crime Data Explorer and AreaVibes can provide valuable insights. Other helpful factors are good lighting at night, sidewalks, fire stations, clean parks, the quality of schools, and the availability of medical care. While tools like Family Watchdog and CityProtect help identify specific crime data, they may not capture all aspects of neighborhood safety. Therefore, use a combination of tools and multiple factors when assessing the safety of your neighborhood. Conclusion Thus, remember the power of proactive measures in keeping our apartments safe and sound. We can all contribute to a more secure living environment by installing security systems and monitoring home safety. So, let's take care of each other and our homes with neighborhood watch and enhance apartment security. Here's to safer and happier living spaces for all of us!
Security Cameras · 02/04/2024
The Best Off-Grid Security Cameras in 2024
Due to increasing threats to personal safety, privacy, and assets, effective surveillance has become an essential part of today’s modern society. For that, you need reliable monitoring sources like off-grid security equipment. It is a renowned, sustainable, and efficient way to monitor the premises of your property, particularly in remote areas. These security cameras are perfect for grid-free environments and power outages for accurate and comprehensive monitoring. In this blog, we’ll discuss the importance, features, and variations of off-grid security cameras. Understanding the Needs for Off-Grid Security Off-grid security is the modern form of hiring a security guard to watch over your premises. It is especially helpful in areas without proper electric connection when you go for a getaway in the cabins or camp through the woods with your friends and family. Moreover, in farms and plowing sites, the importance of off-grid security is undeniable as it helps to oversee the insects and predators that may destroy the farm. The construction sites also utilize the benefits of off-grid security to protect against vandalism, threats, and unauthorized access without needing external power resources. Key Features to Look for in Off-Grid Security Cameras The importance and necessity of security are unquestionable, but choosing the best camera that is aligned with your needs is difficult. Following are some prominent features that you need to consider when choosing an off-grid security camera: Solar-Powered vs. Battery-Powered Options Off-grid security cameras are mainly divided into two popular categories based on energy sources: solar-powered and battery-powered. So, depending on the condition and environment of your premises, you can pick any. Solar-powered compatibility allows you to charge your security camera system without any reliance on traditional electricity wirings. It is equipped with solar panels that can store solar energy for continuous operations even with limited electric power, a particularly durable option. Whereas battery-powered cameras have rechargeable batteries with built-in systems and power management features to continuously operate even in reduced electric supply The Importance of Weather Resistance and Durability For Various Climates Another important factor to consider is the weatherproofing feature on the off-grid security camera. Choose the one that is able to resist environmental pressure and efficiently operate in different types of weather, including rain, dust, snow, and extreme temperatures. Most IP65 and IP66 rating cameras are able to withstand tough outdoor environments. - Night Vision Capabilities There are many off-grid security cameras that provide night vision features with infrared technology. This means that your camera isn’t restricted to daylight surveillance, and you don’t even have to put a light on your premises after sunset. It offers consistent visibility and complete protection around your off-grid property. Motion Detection and AI-Powered Recognition Features Traditionally, off-grid security cameras come with motion detection in case of any sudden movement or to prevent burglary. However, with the evolution in technology, these cameras come with AI-powered face or retina recognition features with motion detection as well. Storage Options: Local vs. Cloud The storage factor is another key consideration when buying an off-grid camera, depending on your choice. Some need traditional local storage as it helps to keep track of the records, whereas the more modern approach is to use a cloud storage option where your recordings can directly upload to cloud service, which can be retrieved at any time. Connectivity options beyond Wi-Fi, such as LTE Cellular Connections Lastly, the network connection is the base of an off-grid security camera, relying on the connectivity to function seamlessly. You will be given the option to choose either a Wi-Fi connection or LTE cellular connectivity. With your suitable medium of connection, you can link your phone to the off-grid camera for live video or adjust camera settings. Top Off-Grid Security Camera Systems Comparison With the essence of an off-grid security camera, it is equally important to know the top brands in the surveillance industry to find the right pick. Following are some of our recommendations: eufy 4G LTE S330 Camera eufy 4G LTE Cam S330 - Forever Power with 4G or WI-FI Experience the pinnacle of security and versatility with dual connectivity, offering both 4G and Wi-Fi options to suit your needs. With Forever Power, your surveillance knows no bounds; the enhanced solar panel and robust 9,400 mAh battery ensure continuous, off-the-grid operation. Check this 4G LTE cam with forever power for the best discounts now! Buy Now Learn More eufy Security 4G LTE S330 camera is another prominent addition to the eufy security family. Its versatile features include a dual connection for both Wi-Fi and 4G LTE, powered by a solar panel with a 9400 mAh battery. This off-grid security camera offers a combination of reliability and convenience, perfect for monitoring your remote properties. Key Features AI-powered detection 100-lumen spotlight for better visibility 4K UHD for night vision Two-way audio Dual connectivity Pros Weatherproof Compatibility with virtual assistants Quick setup The battery can last up to a month when fully charged Cons Face detection distance during the night is limited VOSKER V300 Ultimate Vosker remains a leading brand in surveillance, and their latest rendition, V300 Ultimate, provides a wide range of functionalities. It provides a robust battery pack and quick connectivity with multiple devices. This off-grid camera offers reliability even when exposed to external factors year long. Key Features 4G-LTE support Sturdy built External solar panel Multi-camera access Fully remote monitoring Pros Consistent performance all year Quick installation Prompt customer support Cons Poor battery life No update or alarm in case of motion trigger Reolink Argus 2E Reolink is known for its security devices, and Argus 2E is the third of its range. It has weatherproofing and can be operable without wires. The power source of this off-grid security camera is the rechargeable battery pack that can work for up to 2 years. Key Features Fully wireless Full 1080p HD resolution Night vision Built-in siren Local storage option Smart home integration Pros Flexible and easy installation Two-way talk feature Low-cost cloud storage Cons Glitch in-app setup Heavy reliance on Wi-Fi No continuous recording Off-Grid Cameras Installation Tips and Best Practices When it comes to installing an off-grid security camera, covering the maximum possible space is the key. You have to optimize the field of view and make sure they work with you simultaneously in every weather condition. Following are step-wise tips for installing off-grid security cameras properly: Step 1: The higher your security camera is placed, the more field it can cover, so make sure you plant it all at the highest point. Step 2: You should be aware of every feature and functionality of your off-grid camera, so when installing the camera, you have to know what you want to see and then place. Step 3: Whether you’ve bought a 360° movable camera or 96° static off-grid, you want to cover the maximum area of your premises, so make sure to maximize the field of view. Installing it on a wall is good, but you should consider planting it on the corners to make the most of it. Step 4: Nature is harsh, and it doesn’t care about your camera. If you’ve placed your camera poorly, then it may end up on the ground very soon. It is recommended that it be positioned in a sturdy manner with a small shed on top. Step 5: Nothing should be in front of your camera. Your camera can not see through any obstacle, not even glass, so make sure to install it in a clear space. PRO TIP: You don’t need 100 cameras to get a complete view of your property. Only 1 camera that is well-placed and well-protected is enough; just get the maximum field of view. Maintenance and Troubleshooting of Off Grid Cameras After installation, maintenance, and durability are needed to extend the lifespan of your off-grid security camera. Some of the major tips for maintaining an off-grid camera include: Schedule cleaning sessions for your camera regularly to avoid fogging and scratches Make sure to check firmware updates to prevent data loss Sometimes tough weather can result in displacement, so adjust camera placement according to your optimal coverage from time to time Cable management and protection are also important, so use clips or align it with walls If any component is damaged, make sure to instantly inspect and replace them You can also make a maintenance log for system tracking Following are some troubleshooting tips to ensure non-stop camera coverage and seamless monitoring: Check the power supply of your camera and router should be securely plugged in Every camera has a unique IP address to send and receive data, avoid connected devices with the same IP If your camera feed doesn’t show any display or picture, you need to update your firmware Unplugging and resetting the camera for a few seconds also helps revise the connection or restore settings If nothing else works, then factory reset your camera; it’ll get the system working again Case Studies and Real-World Applications A rural crime report by NFU Mutual Report 2023 suggested that rural crime affected the UK at the cost of £4.9 million in 2022. At the Fisherman’s Quay in Portsmouth, the owners were dealing with continuous issues regarding access to their boats and sail equipment. Several key machinery had also been stolen even when the gate code lock was installed. After a few suggestions, they decided to install a complete off-grid eufy 4G LTE S330 camera with solar-powered operations and wireless connectivity. The system helped their team control theft and vandalism with efficient security. FAQs Is it possible to set up an off-grid security camera without an internet connection? Yes, it is totally possible to install an off-grid security camera without Wi-Fi or a cellular network. The only difference would be that instead of showing a live view through a camera, you’ll have to install local storage, like an SD card, and watch it afterward. What is the battery life of an off-grid security camera? Different aspects like make, model, capacity, and usage frequency depend on the lifespan of an off-grid camera. Most of these cameras, on average, can work for up to 1 to 3 years on a single battery, whereas solar-powered panels can go as long as 20 years with battery change after 3 years. How much storage does an off-grid security camera have? Off-grid security camera capacity mainly varies based on the memory card or the model. They often support more than 128GB of card storage, and you can also connect it to unlimited cloud storage. Conclusion Whether you’re thinking of living off the grid or want to go camping with family, having an off-grid security system is a basic necessity. Off-grid security cameras are a great way to protect yourself and your property and enjoy your happy moments freely. Ensure you get the most out of your off-grid security camera by choosing the right features and having a maximum field of view. However, investing in a security camera isn’t a single team action; you need to carefully maintain and troubleshoot it to extend its lifespan. Protect your remote properties and exclusive spaces anywhere and anytime. Try out this latest innovation in surveillance technology to take control of your security today.
Robovac · 31/03/2024
Best Self-Cleaning Robot Vacuums You Should Know
A self-cleaning robot vacuumis a self-sufficient machine that makes cleaning easier and more convenient. These machines have self-maintenance capabilities like self-cleaning, bin-emptying, and self-drying. But we understand that getting started with these features can be confusing. For this reason, this review discusses everything there is to know about self-cleaning robot vacuums. We'll also list and review top-rated self-cleaning vacuums based on their unique capabilities. Our team tested dozens of floor-cleaning bots to pick and review the crème of the crop. Let's dig into the tiny details! Part 1: What's the self-cleaning feature of robot vacuums? Robot vacuums have become more convenient and fun to use. These devices have moved from traditional robot vacuums to completely hands-free devices. They are fitted with advanced technologies for more efficient, convenient, and hassle-free cleaning and maintenance. That said, self-cleaning is an innovative self-maintenance feature that significantly reduces your input. After cleaning the floor, a self-cleaning vacuum will automatically wash its mop pad using clean water on its charging station. This technology prevents the mop pads from building up bacteria or foul odors. Some robot vacuums also self-clean the pads while cleaning/vacuuming to prevent the spread of bacteria and dirt. Self-drying is another hand-free feature in most self-cleaning vacuums. Once the mop pads are clean, these robot vacuums produce heated air to dry the pads. Again, this prevents any bacterial build-up or unwanted odors around the house. It also prolongs the lifespan of your mop pads. Meanwhile, robot vacuums can automatically empty their bins after a certain period. These machines have dust bags in the station to capture and store dirt, pollen, and grime for several weeks or months. Interestingly, some mopping bots come with bagless bases, so you don't need to spend money on new dust bags. In short, the best self-cleaning robot vacuum is 100% worth your time and investment. These machines can save you the stress of occasionally cleaning and drying your mob pads. This could also cause faster wear and tear. They provide convenient daily maintenance and hands-free cleaning capabilities. Part 2: Best self-cleaning robot vacuum recommendations 1. eufy Robot Vacuum Omni S1 Pro Key features: AI mapping and navigation 3D Matrix Eye sensors 8,000 PA of suction power Child safety lock Hidden and external LiDAR units Eco-Clean Ozone sterilization S1 Pro is a premium-class robot vacuum cleaner from the celebrated eufy brand. It's a new robot vacuum released in March 2024, so expect to find a collection of modern and improved features. eufy S1 Pro has a unique blend of aesthetic elegance and cutting-edge features. First, this robot vacuum can automatically replace dirty water on the mop with clean water at its docking station. But that's not all. S1 Pro uses cutting-edge technology to remove dirty water from the mop pads thanks to the onboard tank. This self-cleaning feature significantly reduces the spread of dirt and recontamination of bacteria while cleaning. eufy S1 Pro - The World’s First Floor Washing Robot Vacuum Meet eufy S1 Pro, unleash the power of real-time self-cleaning floor washing robot combined with a high-performance vacuum, all in one revolutionary device. Say goodbye to manual labor and hello to groundbreaking innovation and design. Don't miss out on the revolution in home cleaning: Sign up for discounts See eufy deals Another feature that makes it arguably the best self-cleaning robot vacuum is the Eco-Clean Ozone technology. It has an ozone generator for cleaning the floor and itself during self-cleaning. The mineral tap water is automatically purified and sterilized, so you don't have to worry about residue and odors. Remember that the S1 Pro also has an impressive 8,000 PA of suction power, as well as self-emptying and drying abilities. 2. eufy X10 Pro Omni Key features: AI mapping and navigation Self-washing and refilling 8,000 PA of suction power Two side brushes Google Assistant and Amazon Echo support Eco-Clean Ozone sterilization X10 Pro Omni is a tried and tested machine that considers every little detail to make cleaning sessions efficient and effortless. It comes with 8,000 PA of suction power, which has become a bare minimum from the developer these days. There are also two side brushes for effectively picking up debris in tight spaces. Back to the day's topic, this machine has a self-washing mode for auto-cleaning the mop pads. This happens when the machine returns to its control station. After washing, the funs will produce heated air of up to 45 Degrees Celsius to dry the mop pads completely. This prevents any bacterial growth and foul smell in the house. In addition, the all-in-one station houses a 2.5L dust bag that needs replacing every 2 months or so. There is also a 3L clean water tank that can wash up to 2,000 square feet twice or thrice. Of course, the self-refilling capabilities ensure you don't have to refill the clean water tank manually. Robovacs cannot be any better! 3. Shark Matrix Key features: Bagless self-emptying system Holds up to 45 days of dirt 360-degree home mapping system Detect objects 4 inches or greater Amazon Echo voice control One side brush Shark Matrix is a powerful robot vacuum cleaner from SharkNinja. This floor-cleaning solution has an efficient self-cleaning brush roll that can dig deep into floors and carpets and remove trapped dirt, debris, and pet hair without spreading dirt. However, Shark Matrix has only a single side brush. It can effectively pick up the toughest dirt thanks to its incredible suction power. But what sets this machine apart is its impressive self-emptying capabilities. It can self-empty into the bagless base when it returns to its smart docking station to recharge. This saves you the time and money of purchasing new disposal bags. The bagless base can store up to 45 days of dirt. This machine's fancy advancements can be set in the simple-to-use smartphone app and a remote control. This is quite in line with the latest smart home cleaning technologies. With these functionalities, you can control and schedule this vacuum to clean while you're away from home. Note that Shark Matrix doesn't offer moping capabilities. 4. Roomba Combo j9+ Key features: Automatic dirt disposal Auto-emptying after 60 days. Personalized cleaning suggestions Auto-map for efficient and faster cleaning Voice-controlled cleaning. Flexible cleaning schedules In 2002, iRobot introduced the Roomba model. Since then, this brand's lineup of vacuums has enjoyed immense popularity in America and worldwide. Roomba models are known for their eye-catching designs, powerful suction motors, and seamless navigation systems. So, in this review, we'll focus on the new Roomba Combo j9+, which can mop and vacuum at the same time. Is it worth it? This bot comes with a compact and nicely designed base station that does its fair share of the maintenance work. The plus sign denotes that this robot vacuum has a self-emptying base station. But like other iRobot vacuums, the mopping dock cannot clean or dry the detachable mopping pad. So, your work is cut out to keep that mopping pad tidy. Of course, Roomba Combo j9+ uses the iRobot OS. This system provides Roomba Combo j9+ with advanced navigation and object detection capabilities for wall-to-wall cleaning without missing a spot. It can also build a tailored map for faster and more accurate cleaning sessions. Amazingly, iRobot OS can learn your cleaning habits and provide personalized suggestions. It's a pretty powerful smart cleaning appliance if you don't mind cleaning and drying the vacuum yourself. Part 3: FAQs Q1: How do self-cleaning robots work? These are floor-cleaning machines with convenient self-cleaning capabilities. These robot vacuums can automatically clean and dry the mopping pads on the docking station to ensure maximum hygiene. Some advanced robot vacuums, such as S1 Pro, can self-clean while mopping and vacuuming the surface. Besides self-cleaning and drying, most robot vacuums can empty dust bags automatically. Q2: How often should I clean my robot vacuum? The frequency for cleaning and maintaining your robovac differs depending on the manufacturer. However, it's best practice to empty the dust bin and dirty water tank occasionally. You should also clean any debris stuck in the mopping pad. Experts recommend cleaning your vacuum at least every 4 to 5 weeks. Note that you may need to do that occasionally with robot vacuums that don't have self-cleaning capabilities. Conclusion Floor-cleaning robots are improving, with the S1 Pro already going futuristic. This exciting robot vacuum can self-clean the mopping pads using fresh water to prevent recontamination and the spread of dirt. Others, like Shark Matrix, provide a bagless, self-emptying base to ensure you no longer spend on dust bags. It's an exciting time to buy a robot vacuum.
Baby · 31/03/2024
Breast milk is crucial for a baby's development, and understanding when to start pumping is essential for new mothers. Pumping at the right times can maximize milk production, maintain a steady milk supply, and avoid discomfort from engorgement. Additionally, a well-timed pumping schedule can provide flexibility, allowing both mother and baby to adapt to a routine that works best for them. In this article, we'll cover the key aspects of timing your pumping sessions and offer straightforward steps and tips to make pumping more effective and manageable. When to Start Pumping After Birth? Starting to pump after birth can vary depending on individual circumstances, but many lactation experts recommend initiating within the first few days postpartum to help establish milk supply, especially if direct breastfeeding isn't possible right away. For mothers with a healthy newborn who latch well, it might be beneficial to wait 4 to 6 weeks before introducing a pump to allow time for the mother-baby breastfeeding relationship to establish and to prevent nipple confusion. However, if separation from the baby occurs, such as a NICU stay, starting to pump as soon as possible after birth, typically within 6 hours, is crucial to stimulate milk production and build a milk supply for the baby. Best Pumping Time in a Day Research has shown that the frequency of pumping directly impacts milk production. Mothers who pump at least 6 times per day produce significantly more milk compared to those who pump less frequently. But if you ask “When should I start pumping in a day for the baby's breast milk needs,” this part will answer you. In this part, we will delve into three key times. AM Hours Starting early around 5-7 a.m. can be an ideal time to kickstart your pumping session. Research suggests that hormone levels are higher during these hours, which may increase milk production. On average, mothers can pump around 0.5 to 2 ounces (15 to 60 milliliters) from both breasts combined during a pumping session. By incorporating a pumping session during this period, you can take advantage of your body's natural rhythms and potentially yield more milk. After Nursing Except for the morning, when can I start pumping? Another opportune moment is after nursing your baby. Waiting approximately 30-60 minutes after nursing allows time for milk to replenish, making it easier to express more efficiently. For instance, if you breastfeed at noon, you can pump milk at 1 p.m. This method helps stimulate breasts further and boost milk supply, especially in the early weeks postpartum. Between Feedings Between feedings, typically mid-morning or mid-afternoon is an opportune time to pump. For instance, if your baby feeds every 3 hours, aim to pump about halfway between feedings. This timing allows breasts to promote ongoing milk production while ensuring they're not overly full, facilitating efficient milk expression without discomfort. Steps to Start Pumping Appropriate time is crucial to milk supply, but the right pumping manner is also vital. As a new mom embarking on your pumping journey, please follow specific steps to ensure a comfortable and effective pumping experience. Let's delve into the key actions you should take when to start pumping after birth. Research and Select a Breast Pump Before you start, research the types of breast pumps available (manual, electric, battery-operated). Manual pumps suit occasional use, while electric pumps cater to regular pumping. Look for adjustable settings to mimic your baby's nursing rhythm for comfort and efficiency. Prioritize ease of cleaning, portability, and noise level to fit your daily routine. A portable breast pump like eufy Wearable Breast Pump S1 Pro can perfectly meet the needs of new mothers. With HeatFlow™ technology, experience revolutionary comfort akin to your baby's embrace, reducing clogged ducts and optimizing milk flow and output. eufy prioritizes your comfort and efficiency, ensuring a seamless breastfeeding journey. Choose eufy Breast Pump for unparalleled comfort and optimal milk expression. eufy Wearable Breast Pump: Pump Warm for a Better Flow The world’s first HeatFlow™ technology revolutionizes pumping for unparalleled comfort. Offers up to 290 mmHg hospital-grade suction power for efficient milk extraction. prioritizes pumping comfort with uniquely angled 105° flanges and soft silicone. Simplifies your pumping routine with the eufy Baby app. Learn More Buy Now Find a Comfortable Place Creating a cozy and relaxing environment for pumping can significantly impact your milk flow. Consider setting up a dedicated pumping station in your home where you can comfortably sit and focus on expressing milk. Moreover, you should ensure the area is quiet, private, and equipped with all your pumping essentials within reach. Prep and Position Prepare yourself physically in a relaxed state before starting to pump. Find a comfortable chair with good back support, position yourself upright, and place the breast shields correctly over your breasts. Maintaining proper posture during pumping can enhance milk flow and prevent discomfort. Start to Pump Begin with a low suction setting and gradually increase to a comfortable level. Pumps often have a stimulation phase to encourage milk flow, followed by an expression phase. Mimic your baby's natural nursing pattern for the best results. Other Pumping Tips for New Moms Any new mom may find it daunting to pump for the first time. The right knowledge and tips can help pump with confidence. Here are some essential tips to help you navigate pumping and ensure a successful breastfeeding experience for you and your baby. Prioritize Self-Care Amidst the demands of motherhood, new moms must prioritize self-care. You need to ensure that you are well-rested, hydrated, and nourished, which can positively impact your milk supply. Break, relaxation, and a healthy lifestyle contribute to overall well-being and support optimal milk production. Remember, caring for yourself is essential in nurturing you and your baby. Learn the Best Time for Breastfeeding And Pumping As a new mom, you'd better figure out when is it too early to pump breast milk. Starting too early may disrupt the milk supply or cause nipple confusion for the baby. Therefore, it's generally recommended to wait until breastfeeding is well-established, usually around 4-6 weeks postpartum, before pumping breast milk. Set Realistic Expectations You should set realistic expectations regarding pumping in the first few weeks postpartum. It is advised that pumping about 6 times every 24 hours can enhance your overall milk production journey. Follow Storage Guidelines After pumping, store breast milk properly with a label to prevent contamination. On the counter (less than 77°F), breast milk can sit for up to 4 hours. In the refrigerator (40°F), it's good for 4 days, or 1 day if thawed. In the freezer (0°F or colder), store for up to 12 months. Seek Professional Support Reach out to lactation consultants or breastfeeding support groups for advice and encouragement. Their expertise and guidance can provide invaluable insights tailored to your individual needs, helping you navigate the intricacies of pumping with confidence and success. Remember, you're not alone on this journey. Conclusion The timing of when to start pumping is crucial for establishing a healthy milk supply for your baby and nurturing the bond created through pumping. Embrace the guidance provided above, including the best pumping practices and helpful tips, with patience and perseverance. Your efforts as a new mom are invaluable, shaping your baby's health and fostering a deep, lasting connection. FAQs Should you start pumping before baby is born? It's not advisable to start pumping before the baby is born. Premature pumping can induce labor and typically yields minimal milk. It's best to wait until after delivery to begin pumping, focusing initially on establishing breastfeeding. Is it OK to bottle feed during the day and breastfeed at night? Yes, it's okay to bottle-feed during the day and breastfeed at night. This approach can provide flexibility for caregivers and ensure the baby receives breast milk while accommodating different schedules. Nighttime breastfeeding also promotes bonding and can help soothe the baby back to sleep. Will pumping every 2 hours increase milk supply? Frequent pumping every 2 hours can help increase milk supply by stimulating milk production. This approach mimics a baby's feeding pattern, signaling the body to produce more milk. However, individual results may vary, and factors like proper latch, hydration, and nutrition also influence milk supply. You can consult a lactation specialist who can provide personalized guidance.
Baby · 31/03/2024
How Long is Breast Milk Good for After Pumping?
Breast milk provides essential nutrients, and antibodies, and promotes bonding between mother and baby. As a new mom navigating breastfeeding, knowing how long is breast milk good for after pumping is essential for your baby's health and your peace of mind. This article will explore the science of storage and factors influencing breast milk quality, ensuring optimal nourishment for your baby. How Long Will Breast Milk Last? Proper storage practices are essential for maintaining the nutritional value of breast milk. By understanding how long can breast milk stay out after pumping, you can ensure that your freshly expressed breast milk remains safe and beneficial for your little one. Here are some storage suggestions: Freshly Pumped Breast Milk According to a recent study released by the National Library of Medicine, freshly expressed breast milk can be safely kept at room temperature (15 to 27°C) for up to 4 hours. Generally, when freshly pumped, breast milk is at its peak regarding nutrients. It is suggested to use within 4 hours to retain its full nutritional value, especially if the room is warm. Beyond this timeframe, vitamins, fatty acids, enzymes, antibodies, and growth factors might be a gradual loss. Refrigerated Breast Milk The WHO recommends refrigeration as an effective method for preserving breast milk's quality when immediate consumption is not possible. It can be safely stored in the refrigerator (14 to 10°C) for up to 24 hours. The Centers for Disease Control and Prevention (CDC) highlights that this temperature inhibits the growth of harmful bacteria while preserving the integrity of breast milk. However, it's essential to note that while refrigeration extends the lifespan of breast milk, utilizing it within 24 hours is ideal for maximizing its benefits. Frozen Breast Milk Freezing breast milk is a proven method for long-term preservation. Frozen breast milk maintains its nutritional value for up to 6 months at -18°C. According to a study published in the Journal of Pediatric Gastroenterology and Nutrition, frozen breast milk retains its levels of antioxidants and immune-boosting factors over this timeframe. However, proper thawing techniques are essential to preserve its quality. It is suggested to thaw frozen breast milk gradually by placing it in the refrigerator overnight or under cool, running water. Avoid microwaving to prevent nutrient loss and uneven heating. Factors Affecting the Pumped Breast Milk Integrity Understanding how to store breast milk after pumping properly ensures optimal nutrient retention and reduces the risk of contamination. Here are some other key factors: Temperature: As we mentioned above, breast milk should be cooled as soon as possible after pumping. The optimal storage temperatures are 0-4°C (32-39°F) for refrigeration and -18°C (0°F) or lower for freezing. Thawed breast milk should be kept at room temperature for no more than fourhours or in the refrigerator for up to 24 hours. Collection and Storage Containers: Using clean, sterilized containers is crucial. BPA-free plastic, glass, and special breast milk storage bags are the best options. Containers should be sealed properly to prevent contamination. Contamination: The cleanliness of the pump and its components is essential. All parts that come into contact with milk should be sterilized to prevent bacterial growth. Also, hands should be washed thoroughly, and surfaces should be clean. Freeze/Thaw Cycle: Repeated freezing and thawing of breast milk can degrade its quality. It's best to store milk in small quantities to avoid waste and minimize the need for reheating. Handling and Thawing:Gentle handling of breast milk is important. Avoid shaking the milk vigorously, as this can break down some of its important components. Thaw milk in the refrigerator or gently warm it in a container of warm water. It is worth mentioning that breast pumps like eufy Wearable Breast Pump S1, S1 Pro and E10 perfectly combine practicality and storage functions. Our pump boasts lightweight portability, holding up to 6 oz (177ml) of milk in its clean and easy-to-clean container. With just four parts, maintenance is a breeze, ensuring hygiene without hassle. But what truly sets us apart is our commitment to cleanliness. Our containers are designed with convenience in mind, making them not only easy to use but also easy to clean, providing peace of mind for busy moms. eufy Wearable Breast Pump: Pump Warm for a Better Flow The world’s first HeatFlow™ technology revolutionizes pumping for unparalleled comfort. Offers up to 290 mmHg hospital-grade suction power for efficient milk extraction. prioritizes pumping comfort with uniquely angled 105° flanges and soft silicone. Simplifies your pumping routine with the eufy Baby app. Learn More Buy Now Signs of Spoiled Breast Milk It's essential to inspect pumped breast milk carefully before feeding to ensure it is safe for the baby to eat. To quickly check, you can decide whether the breast milk is spoiled through smell, taste, and color. Here are some tips. Smell Spoiled breast milk often emits a foul or rancid odor, indicating bacterial growth. Research published in the Journal of Human Lactation confirms that off-smelling breast milk is a sign of spoilage due to the presence of lipase activity, which breaks down fats, leading to an unpleasant smell. If you smell a sour or rancid odor, discard the milk promptly to prevent any potential harm to your baby. Taste The taste of breast milk can also provide clues about its freshness. Studies in lactation science, such as those published in Breastfeeding Medicine, highlight that changes in taste occur as milk undergoes bacterial degradation, compromising its quality and safety. Fresh breast milk typically has a slightly sweet and pleasant taste, while spoiled milk may taste bitter or sour, or soapy taste. Therefore, if you detect an off-putting taste, avoid feeding it to your baby. Color According to research published in the Journal of Perinatology, color alterations result from oxidation and bacterial contamination, signaling a loss of freshness and nutritional integrity. Freshly expressed breast milk typically appears bluish-white or creamy in color due to the presence of fat globules. However, if stored for extended periods, it may exhibit color changes, appearing yellowish or even brownish. Clumps or Chunks The presence of clumps or chunks in breast milk is a definitive sign of spoilage. This is often caused by the separation of fats due to improper storage or bacterial activity. Studies in pediatrics, such as those cited in the American Academy of Pediatrics guidelines, emphasize that visible changes in breast milk consistency indicate microbial contamination and render the milk unsafe for consumption. While small white particles are considered normal and safe, larger clumps or chunks could indicate spoilage, thus you should be vigilant about any unusual textures. Conclusion In conclusion, the question of how long is breast milk good for after pumping hinges on proper storage and handling. Factors like temperature, storage practices, and equipment sterility significantly impact milk integrity. It's crucial to recognize signs of spoilage, such as unusual smell, taste, color, or consistency, to ensure the milk's safety for infant consumption. Proper handling and storage are key to preserving breast milk's nutritional and immunological benefits. FAQs Can I put breast milk back in fridge after baby drinks from it? No, it's not safe to put breast milk back in the fridge after the baby has drunk from it. Once breast milk is removed from the fridge and exposed to bacteria in the baby's mouth, it can't be stored again. Can I pump into the same bottle all day? It's generally not recommended to pump into the same bottle all day. Doing so increases the risk of bacterial contamination as milk accumulates. It's safer to use separate bottles for each pumping session. Can I mix morning and evening breast milk? Yes. You can mix morning and evening breast milk at the same temperature. Combining milk from different pumping sessions is safe as long as they are both cooled to the same temperature before mixing. However, avoid mixing milk from different days or temperatures.
Baby · 31/03/2024
A breast pump is an important tool for nursing mothers, it allows the milk to be extracted and emptied from the breast and stored for later use, helping mothers who need to be away from their babies for long periods or who find it difficult to breastfeed directly. To help new moms understand how to use a breast pump, this guide will explain the different parts of a breast pump, the basic steps to successful breast pumping, and more. Read on! How Important Is Breast Pumping? Pumping can help moms and babies in many ways during the breastfeeding process. Aside from the obvious convenience of storing breast milk, here are some reasons why breast pumping is important: When there is enough milk, pumping prevents blockages and lumps in the breasts. It also relieves the swelling sensation associated with excess milk. Breast pumps stimulate the mother's breasts and gradually increase the breast's ability to produce milk. You can use it anytime and store the milk for later on. This is especially important for mothers who need to return to work. Since the breast milk extracted from the breast pump is stored in a container, you can know exactly how much milk your baby is taking. In short breast pumps can help moms keep breastfeeding in different environments as well as scenarios. Understand Different Parts in A Breast Pump Generally, breast pumps are categorized into manual breast pumps and electric breast pumps. Whether it's manual or electric, it will have several key components that are used to mimic a baby's sucking motion to help expel milk. The most prominent components are: Flange: It is the cup that attaches directly to the breast and usually comes in different sizes to ensure comfort during use. Breast milk bottle: The sucked-out breast milk will flow directly into the bottle for easy storage or to feed directly. Connector: The part that connects the breast shield to the valve. Valve: The valve controls the intake and release of milk. Electric breast pumps will have extra accessories that are: Charging or battery accessories: Requires power to maintain use. Mode selection: From gentle to powerful, there are multiple suction modes to choose from. Massage cushion: Promoting the flow of breast milk. The eufy wearable breast pump S1 Pro redefines comfort and discretion in breastfeeding. Crafted with soft silicone and angled at 105°, our flanges ensure optimal comfort during expression, prioritizing your well-being. The pump is designed to operate quietly and efficiently, allowing you to express milk discreetly wherever you are. Compact and leakproof, it seamlessly integrates into your daily routine without drawing unwanted attention. We understand the importance of different parts in a breast pump, and that's why eufy combines comfort, discretion, and functionality in one sleek package. eufy Wearable Breast Pump: Pump Warm for a Better Flow The world’s first HeatFlow™ technology revolutionizes pumping for unparalleled comfort. Offers up to 290 mmHg hospital-grade suction power for efficient milk extraction. prioritizes pumping comfort with uniquely angled 105° flanges and soft silicone. Simplifies your pumping routine with the eufy Baby app. Learn More Buy Now Basic Steps to Pump Once we understand the parts of electric and manual breast pumps, next are some basic steps regarding how to use breast pump. Cleanliness First It is very important to keep it clean. It's not just your hands that need to be cleaned, but all the breast pump parts that come into contact with the breast milk and your baby's mouth. Wash your hands before and after breastfeeding, clean the breast pump, and wipe it dry. Stay Comfortable and Relaxed The breast-pumping process takes quite a bit of time, so prepare everything you need, such as your favorite snacks and drinks, and turn on the music if you like Besides, staying relaxed and comfortable can help with breast production. You'll need to find a quiet, private setting and dim the lights. Stay comfortable by putting multiple cushions behind your back and under your armpits. Take deep breaths or prompt breaks to relieve discomfort and emotions. Position the Flanges Fit the flange to the nipple, making sure it is in the center of it. You should measure the diameter of the nipple, not including the areola, before making a purchase. Breast size changes during breastfeeding, so you can measure the flange size at intervals. The correct size flange should have no space between it and the breast and not be able to move easily. Start with Gentle Suction After aligning the breasts with the flange, you can begin to start suction: When using a manual breast pump, gently press the handle or bottle of the manual breast pump. Suck gently to stimulate the production of milk. At this point, you can use your other hand to hold the breast and massage it gently to promote milk flow. When using an electric breast pump, simply aim the flange of the breast pump at the nipple and make sure the pump is tightly attached to the breast. Wear a bra to prevent the breast pump from falling off, which frees up your hands. Then, choose the breast pumping mode. Again, it is recommended to start with the gentlest mode and then adjust the sucking mode to suit you. Whether it's a manual or electric breast pump, it will expel milk after a few minutes of suctioning. Time Your Session During breast pumping, it is best to change one side of the breast every 5 minutes if you are single pumping. The suggested breast pumping time for each side is 15 minutes, or longer if milk is still coming out. Don't worry about taking longer, the goal of breast pumping is to empty the breast milk. After breast pumping, you can touch your breasts to check that they are soft and free of lumps. If you feel pain during breast pumping, stop immediately. Store Safely Food-grade containers or specialized breast milk storage bags are required to store breast milk. If it will not be consumed immediately, cool the breast milk promptly to maintain quality. It's a good idea to label the container with the breast milk extrusion time to make the expiration date clear. According to the CDC, breast milk should not be kept at room temperature for more than 4 hours. It should not be kept in the refrigerator for more than 4 days, while frozen time is 6-12 months. Never refreeze breast milk after thawing. Clean After Use Disassemble the breast pump after use and wash off any breast milk residue on the parts with water. Afterwards, wash them again with soap and water, leave them on a clean surface to air dry and finally make sure that all parts are sterilized. Conclusion Mastering how to use breast pump efficiently is key to simplifying the breastfeeding experience. Knowing these simple tips in the guide, such as proper cleaning, preparation, and breast pumping steps, with practice you will have an easy and efficient breast pumping process. If you experience discomfort or problems with the breast pumping process, listen to your body and seek help from a lactation specialist. FAQs How to breast pump effectively? To be able to breast pump more efficiently, you can: Choose a breast pump with a double pump. This can save half the time compared to a single pump. Keep a happy mind, taking deep breaths, and massaging the breasts while pumping can also help to expel milk more easily. Switch breasts in time and adjusting the pumping mode will also be more efficient. How do you properly put on a breast pump? To properly use a breast pump, start by washing your hands. Attach the breast shield to the pump, ensuring a snug fit around your nipple without pinching. Turn the pump on at a low setting, gradually increasing suction until comfortable. Ensure a good seal for efficient milk expression. H3-Can I pump into refrigerated breast milk? According to the CDC, it is not recommended to mix freshly pumped breast milk with breast milk that has been cooled. However, you can wait until the fresh breast milk has cooled down and then mix it.
Baby · 31/03/2024
Mastering the Essentials: How Long does It Take to Pump Breast Milk?
Have you ever wondered, "How long does it take to pump breast milk?" or found yourself asking, "How long should I pump each breast?" If these questions resonate with you, you're not alone. Many new parents grapple with the intricacies of pumping breast milk, seeking to balance efficiency with the well-being of both mother and child. This article aims to shed light on the general time frame for pumping breast milk and delve into the various factors that can influence this duration. Additionally, we'll explore practical tips for making pumping a more efficient and comfortable experience. Whether you're a new parent or looking to refine your pumping routine, this guide is crafted to provide valuable insights and support your journey in nurturing your little one. What Is the General Time Frame for Pumping Breast Milk? Many new moms might find themselves pondering a common question: how long should I pump breast milk? This is a crucial aspect of breastfeeding that can vary depending on the mother's milk supply and the baby's needs, but generally, a pumping session should last about 15 to 20 minutes for each breast. It's recommended to pump around the same times that your baby normally feeds to help maintain a consistent milk supply. For mothers who are exclusively pumping, every 2 to 3 hours is ideal, including at least once during the night to mimic a baby's natural feeding schedule. However, this schedule can be adjusted based on how much milk you're producing and how much your baby consumes. The key is finding a rhythm that works for you and your baby, ensuring that both of you are happy and healthy. Remember, every mother's experience is unique, so it's okay to tailor your pumping schedule to fit your specific needs. Keeping a light and positive approach will make the process smoother and more enjoyable for you. What are Some Factors Influencing Pumping Time? Understanding what affects how long you spend pumping is crucial for efficiency and effectiveness; let's explore the factors influencing pumping time. Pump Quality The quality of the breast pump you use can significantly impact pumping time. High-quality pumps are designed to efficiently extract milk from the breast, reducing the time required for each pumping session. A well-functioning pump with adjustable suction levels and comfortable flanges can help stimulate milk flow and ensure effective milk removal. Milk Supply from Mother The amount of milk a mother produces can also influence pumping time. Mothers who struggle with low milk supply may need to spend more time pumping to ensure adequate milk removal and maintain milk production. Techniques such as breast massage, warm compresses, and relaxation techniques can help stimulate milk flow and maximize pumping efficiency. Baby's Age The age of the baby can affect pumping time due to changes in milk demand and breast sensitivity. In the early postpartum period, when milk production is establishing, mothers may need to pump more frequently to initiate and maintain milk supply. As the baby grows and becomes more efficient at nursing, pumping sessions may become shorter. For a newborn, for instance, this could be every 2 to 3 hours; depending on the time of day, it could be every 3 to 5 hours for an older baby who has regained their birth weight. Feeding Patterns The frequency and timing of breastfeeding or pumping sessions can influence pumping time. Mothers who breastfeed on demand may find that they need to pump less frequently than those who follow a strict pumping schedule. However, establishing a consistent pumping routine can help regulate milk production and ensure a steady milk supply. Health Condition of Mother The mother's health can impact her ability to pump effectively. Certain health conditions, such as engorgement, mastitis, or breast infections, can cause discomfort and hinder milk flow during pumping sessions. It's essential for mothers to prioritize self-care and address any health concerns promptly to ensure optimal breastfeeding outcomes. Proper nutrition, hydration, and rest are also crucial for maintaining milk supply and overall well-being, which can indirectly affect pumping time and efficiency. Environmental and Emotional Influences Environmentally, a quiet, comfortable space can help improve efficiency, as distractions can reduce milk flow. On the emotional side, a mom's stress levels and emotional state play a crucial role. Feeling relaxed and positive can increase the release of oxytocin, a hormone essential for milk ejection. So, creating a calming pumping environment and managing stress through relaxation techniques or by seeking support can make a big difference in pumping success. How to Make Pumping Efficient and Comfortable? Understanding the factors that influence pumping time is crucial for optimizing the process. Moving forward, let's explore practical strategies to make pumping not only more efficient but also a comfortable experience for mothers. Use a High-Quality Breast Pump Investing in a high-quality breast pump is essential for efficient and comfortable pumping. Choose a pump that suits your needs and preferences, whether it's a manual or electric pump, single or double pump, or hospital-grade pump. Consider factors such as suction strength, adjustable settings, portability, and ease of cleaning when selecting a pump. It is worth recommending that eufy S1 Pro and eufy wearable breast pump E10 redefining motherhood with unparalleled convenience and efficiency. With smart pumping capabilities, effortlessly coordinate pumping sessions through the intuitive eufy Baby app, powered by innovative OptiRhythm™ technology. This intelligent system adapts to your body's rhythm, ensuring maximum comfort and efficiency. Experience peace of mind with hospital-grade suction, delivering a powerful 290 mmHg output for optimal milk expression. eufy Wearable Breast Pump: Pump Warm for a Better Flow The world’s first HeatFlow™ technology revolutionizes pumping for unparalleled comfort. Offers up to 290 mmHg hospital-grade suction power for efficient milk extraction. prioritizes pumping comfort with uniquely angled 105° flanges and soft silicone. Simplifies your pumping routine with the eufy Baby app. Learn More Buy Now Ensure Proper Pumping Methods Ensure that the breast flanges fit correctly and comfortably to prevent nipple pain or damage. Experiment with different suction levels and pumping patterns to find what works best for you. Massage the breasts before and during pumping to stimulate milk flow and ensure thorough emptying of the breasts. Gentle compression or breast compression techniques can also help increase milk flow and speed up pumping time. Maintain Adequate Hydration and a Healthy Diet Staying well-hydrated helps ensure a good milk supply, so aim for at least 8 glasses of water a day. Incorporate a balanced diet rich in fruits, vegetables, whole grains, and lean proteins to support milk production and your overall health. Eating well not only boosts your energy levels but also enhances the quality of your milk. Remember, taking care of yourself is taking care of your baby. Keep snacks and a water bottle nearby during pumping sessions for convenience. This approach not only aids in milk production but also makes the experience more pleasant and stress-free. Keep a Regular Pumping Schedule Keeping a regular pumping schedule is essential for efficient and comfortable breast milk extraction. By establishing a consistent routine, you ensure a steady milk supply and reduce discomfort. Aim to pump around the same times each day, mimicking your baby's feeding schedule. This regularity helps your body adapt and can make the pumping process smoother and more predictable. Conclusion Learning how long does it take to pump breast milk is a fulfilling thing especially to mom who are struggling a lot. The duration it takes to pump breast milk varies depending on individual factors such as pump quality, milk supply, baby's age, feeding patterns, and maternal health. By investing in a high-quality breast pump, following proper pumping techniques, and maintaining a regular pumping schedule, mothers can make the pumping process more efficient and comfortable. Frequently Asked Questions What is a good pumping schedule? A good pumping schedule depends on individual circumstances, but generally, mothers should aim to pump every 2-3 hours during the day and at least once during the night to maintain milk supply and meet their baby's needs. How much milk can be pumped in 20 minutes? The amount of milk that can be pumped in 20 minutes varies among individuals but typically ranges from 2-6 ounces per breast, depending on factors such as milk supply, pump efficiency, and breast storage capacity. Why can I only pump 4 oz at a time? Pumping output can vary based on factors such as milk supply, breast storage capacity, pump quality, and pumping technique. If you're consistently pumping around 4 ounces per session and your baby is gaining weight appropriately, it's likely within the normal range. However, if you have concerns about your milk supply or pumping output, consult with a lactation consultant or healthcare provider for personalized guidance.
Baby · 31/03/2024
Mastering Your Milk Supply: How Often to Pump Breast Milk?
Establishing a breastfeeding routine is crucial for both the health of the mother and the baby. One aspect of this routine is determining how often to pump breast milk. Establishing a pumping routine is crucial for maintaining milk supply and ensuring your baby receives the necessary nutrition, whether you're exclusively pumping or supplementing breastfeeding with pumped milk. In this article, we'll explore the optimal frequency for pumping breast milk, offer tips for establishing an effective pumping schedule, and address commonly asked questions on the topic. General Breast Pumping Frequency for New Moms Breastfeeding is a journey filled with numerous questions, especially when it comes to pumping breast milk. For moms, it is quite a dilemma as to “how often should i pump breast milk”. So let us explore the recommended pumping frequencies for different stages and circumstances. Newborn Stage In the first few weeks after birth, your baby is considered a newborn. This period is critical for establishing your milk supply. Ideally, you should aim to pump every 2-3 hours, including during the night. Yes, it sounds demanding, but remember, newborns eat very frequently! Mimicking your baby's feeding schedule can help ensure a good milk supply. If you're exclusively pumping, aim for at least 8-10 pumping sessions per day. Ages 1-3 Months As your baby grows and your milk supply becomes more established, you might notice that you can go a bit longer between pumping sessions. However, it's still important to pump around 7-9 times per day. Listen to your body and your baby's needs; some days, you might need to pump more frequently, especially during growth spurts when your baby seems hungrier than usual. Ages 4-6 Months By now, you and your baby have likely settled into a more predictable routine. If you're exclusively pumping, maintaining around 6-8 pumping sessions a day is a good goal. This is also the time when many babies start to explore solid foods, but breast milk should remain their primary source of nutrition. Keep an eye on your milk supply and adjust the frequency of pumping sessions as needed. Over 6 Months As solid foods gradually become a more significant part of your baby's diet, you may find that you need to pump less often. However, continuing to pump 4-6 times a day can help maintain your milk supply. It's essential to continue breastfeeding or pumping as long as it's comfortable for you and your baby, aiming for at least the first year, as recommended by health experts. Returning to Work Mothers Returning to work as a new mom comes with its own set of challenges, especially when you're committed to continuing breast pumping. Planning is key. Aim to mimic your baby's feeding schedule by pumping every 3-4 hours during your workday. This might mean scheduling breaks and having a private space where you can pump comfortably. Investing in a good quality, portable breast pump can make this process smoother. Communication is also vital; let your employer know about your needs so they can support you. Remember, maintaining your pumping schedule while working is not just about feeding your baby; it's about your health and well-being too. With the right preparation and support, you can successfully balance work and breastfeeding. Tips to Establish a Pumping Schedule Creating a pumping schedule that fits your lifestyle is essential for successful breastfeeding and pumping journey. Here are some tips to help you establish a pumping routine: Understand Your Body and Your Baby Every mom and baby duo is unique, and understanding your body's milk production and your baby's feeding needs is the first step. Typically, milk production is highest in the morning and tapers off as the day progresses. Try to align your pumping sessions with your baby’s feeding rhythm to maintain a steady milk supply. Start Early and Be Consistent Begin to establish your pumping routine a few weeks before you need to rely on expressed milk. Consistency is key. Try to pump around the same times daily to regulate your body’s milk production. This consistency helps in building up a good stash and maintaining milk supply. Utilize reminders or alarms to prompt pumping sessions if needed. Plan Around Your Most Productive Pumping Times Identify the times of the day when you produce the most milk, known as your "power pumping" sessions. Schedule your pumping sessions during these peak times to optimize milk yield and efficiency. Stay Hydrated and Nourished Your body needs plenty of fluids and nutrients to produce milk. Drinking water and eating a balanced diet can significantly impact your milk supply. Keep a water bottle and healthy snacks nearby during pumping sessions. Create a Comfortable Pumping Space Set up a calm and comfortable area for pumping. Stress can hinder milk let-down, so being relaxed is crucial. Consider creating a small sanctuary where you can sit comfortably, perhaps with a book or your phone, to make pumping more pleasant. Common Challenges with Pumping While pumping offers numerous benefits, it can also present challenges for breastfeeding mothers. Some common issues include: Low Milk Supply: If you're experiencing a dip in milk production, try power pumping, increasing hydration and nutrition, and ensuring proper breast drainage during pumping sessions. Engorgement: Engorgement occurs when breasts become overfull, leading to discomfort and difficulty latching. Use warm compresses, gentle massage, and frequent nursing or pumping to relieve engorgement. Pumping Efficiency: Some mothers may struggle to extract an adequate amount of milk during pumping sessions. Experiment with different pump settings, breast shield sizes, and relaxation techniques to improve pumping efficiency. Difficulty with Letdown: Some women may find it challenging to achieve letdown (the release of milk from the breast) when using a breast pump, which can impact milk expression and overall efficiency. Time Constraints: Pumping can be time-consuming, especially for mothers who need to pump frequently while balancing other responsibilities such as work or childcare. Leaking and Spillage: Improperly fitted pump flanges or malfunctioning equipment can lead to leaking and milk spillage, causing inconvenience and potential waste of breast milk. Cleaning and Maintenance: Breast pumps require regular cleaning and maintenance to ensure hygiene and optimal performance. This can be an additional task for busy mothers to manage. Emotional Challenges: Some mothers may experience feelings of frustration, guilt, or anxiety related to pumping, especially if they encounter difficulties or if it affects their breastfeeding relationship with their baby. Transportation and Storage: Pumped breast milk needs to be properly stored and transported, which can be challenging when mothers are away from home or traveling. Ensuring proper storage conditions to maintain milk quality is crucial. To solve the problems, now we have the eufy wearable breast pump S1 Pro, your partner in making the right choice for your breastfeeding journey. With hospital-grade suction at 290 mmHg, it ensures efficient milk expression, optimizing output for your baby's needs. Crafted for comfort, our pump features soft silicone and 105° angle flanges, providing a gentle and snug fit during pumping sessions. Designed for discretion, it operates quietly, is small in size, and leakproof, allowing you to pump discreetly anywhere, anytime. Its wearable, lightweight design can hold up to 6 oz (177ml) of milk, making it convenient for on-the-go moms. Conclusion Creating a pumping schedule that harmonizes with your baby's requirements and your daily routine is vital for breastfeeding success. This article delved into insightful content on how often to pump breast milk, offering insights into how often to pump based on various stages. By grasping the suggested pumping frequencies for different phases and integrating actionable advice for setting up a pumping regimen, you can enhance milk production and ensure your baby receives optimal nutrition. Frequently Asked Questions Is Pumping Every 2 Hours Too Often? Pumping every 2 hours, especially during the newborn phase, is not too often. It helps stimulate milk production and ensures an adequate milk supply for your baby's needs. Do I Have to Pump Every 3 Hours at Night? Nighttime pumping frequency depends on your baby's feeding patterns and your comfort level. While some mothers choose to pump during nighttime feeds to maintain milk supply, others may opt for longer stretches of sleep. Listen to your body and adjust pumping frequency accordingly. Do I Need to Pump After Every Breastfeed? Pumping after every breastfeed is not necessary for all mothers. However, if you're building a freezer stash or supplementing breastfeeding with pumped milk, pumping after some feeds can help increase milk supply and ensure an adequate milk reserve. Adjust pumping frequency based on your breastfeeding goals and your baby's needs.
Security Cameras · 18/03/2024
How Long Does Ring Save Videos in 2024?: Understanding Ring Video Storage
Ring doorbells have quickly become popular for homeowners wishing to increase their home security. With its convenient installation process and innovative features, it offers homeowners peace of mind. One of its key features is its ability to store recorded video footage. However, it is pertinent for Ring device owners to clearly know and understand video storage times for their devices so that they do not lose important information and data. This article explores Ring’s doorbell’s video storage capabilities and how long they can be saved without a subscription. Quick Insight: Video Storage Duration on Ring Platforms According to Ring's official website, their doorbell cameras have internal storage that can store video footage for up to 60 days. However, this feature is only accessible with a subscription plan. Without a subscription, Ring doorbells offer basic video recording, two-way audio, and live view functionalities. Subscribing to Ring's plans is necessary to fully utilize the video storage feature. Storage Duration by Region and Customization Options Default Settings: The default video storage duration varies depending on the region. For instance, UK users enjoy 30 days of video storage, while users in the US benefit from 60 days. Customizable Durations: Ring offers flexibility in storage time frames, allowing users to adjust their video storage duration to suit their needs. Options range from as short as one day to as long as 180 days, with increments including 3, 7, 14, 21, 30, 60, 90, and 120 days. Detailed Comparison of Ring’s Storage Options Ring offers several subscription plans through its Ring Protect service, bringing distinct video storage levels and additional features to the Ring devices. Comprehending the differences that exist between different plans tends to help users select the best option according to their requirements. Let’s look at a detailed comparison of Ring’s storage options: Ring Protect Basic Ring’s Protect basic plan costs approximately $3 each month or $39.99 per year. It covers video recording for a single doorbell or camera and can store these videos for up to 60 days. It offers other additional features: Event-Based Recording: As soon as it detects motion, the Ring camera will save small video clips that are between 15 to 120 seconds long. This depends on the settings and whether a wired power cord is in use. These videos will stay in Ring’s cloud storage for 60 days, and they can be downloaded in order to keep them permanently. Rich Notifications: Imagine that your cat triggered Ring’s motion sensor. For such times, Ring includes photos in its alert notifications so that you do not have to open the app every time. Snapshot Capture: Even when no motion is detected, the Ring device takes photos at specific intervals. These photos tend to stay online for 7 days only. Person Detection: Your Ring camera sends a custom alert as soon as it detects people. This storage subscription plan is ideal for users who own a single Ring camera or doorbell and need cloud storage and other additional notification features. Ring Protect Plus Ring Protect Plus costs nearly $10 per month and covers unlimited cameras. Its video storage capacity is 60 days for unlimited cameras. It includes all the features of the basic plan and also includes the following features: Storage for Unlimited Cameras: This is an incredibly generous feature that gives users 60 days of video storage for several cameras at once. It prevents you from giving out extra fees every month whenever you add a new camera to your home. Extended Warranty: Most of the Ring cameras come with a one-year warranty. However, Ring’s Protect Plus plan gives lifetime coverage. Discount: This plan gives you a 10% discount on selected products whenever you buy from Amazon or Ring. This plan is ideal for households with more than three Ring cameras or doorbells, offering a more economical option compared to subscribing to each device separately to the Basic plan. Ring Protect Pro This subscription plan costs nearly $20 each month and covers all the Ring devices present at one address. Its video storage time is up to 60 days for unlimited cameras. Ring Protect Pro includes all features of the Plus plan along with the following additional features: 24/7 Professional Monitoring: With this plan, users can receive professional round-the-clock monitoring. As soon as a security breach or a break-in is detected, responders are dispatched to your location immediately. Cellular Backup: This plan also comes with a 24/7 internet backup facility. So even when there is an internet outage or a connectivity issue, 3GB of data is included. This plan is ideal for users with a Ring Alarm or Ring Alarm Pro system who require professional monitoring in addition to cloud storage for their cameras. Key Differences So, what exactly are the key differences between the three plans? Cost and Coverage: While Ring’s basic plan is designed for one single device, the Plus and Pro plans offer coverage for unlimited devices. The pro plan is costly but includes several features, such as professional monitoring and cellular backup. Video Storage Time: All plans offer up to 60 days of video storage, but custom storage time is available to all Ring Protect subscribers. What Happens When Your Storage Time Expires When the allotted storage time for your videos reaches its expiry under the Ring Protect Plan, or if your subscription to the plan itself expires, it’s important to be aware of the consequences regarding your video history. In these scenarios, any videos that have not been downloaded or saved externally will be permanently deleted from Ring’s servers. This deletion is irreversible, meaning those videos cannot be retrieved once the storage period lapses or the subscription ends without renewal. Similarly, any action taken to delete videos from your account manually will result in their permanent loss. Steps to Manage and Preserve Your Videos Regular Ring video management is extremely important in order to avoid losing any crucial footage. Users have the option of either downloading one video at a time from the Ring app or downloading up to 50 videos in bulk through its website. Here is how you can manage and preserve your Ring videos: From the Web Browser Go to Ring’s official website. Sign in to your Ring account. Go to History and then to Manage. Select the videos that you wish to save. Click on Download. From the App 1. Go to the app menu. 2. Select Event History. 3. Scroll to the video that you wish to share and then swipe the video 4. Select Share and then click on Download. How to Save Ring Video Without a Subscription Without a subscription to one of Ring’s plans, the storage capacity available on the Ring doorbell is quite limited. Without a plan, the Ring only relies on its internal storage capacity. All the Ring doorbell models have differing internal storage capabilities that determine the length of the video footage storage. Without a subscription, as the Doorbell’s internal storage reaches its maximum limit, the oldest video recording will automatically be overwritten to give space to the fresh recordings. This means that when you don’t have a subscription, you must resort to alternative ways, such as these four solutions. Use the free trial window to download the Ring videos. Enable your phone’s screen recording feature to save the clips. Use screen recording software on your PC to record and download the videos. Take help from a local camera. How to Recover Deleted Ring Videos Videos that have been removed from Ring’s servers are permanently lost and cannot be recovered. Only the Ring videos that were downloaded to a mobile device or a computer before they were deleted can be retrieved. Even though recovering Ring videos may be difficult, there are two options available to users: 1. Utilization of data recovery software is one option for recovering the deleted Ring videos. This software looks for the deleted files on different storage devices, such as hard discs or memory cards, and tries to restore them. Important Caution: Ring does not officially support or test this method. Utilizing data recovery software comes with inherent risks, including the potential for further data loss or compromise. You should proceed with caution and understand that success is not guaranteed. 2. Users can contact RingCentral support through the Ring website to recover the deleted Ring videos. Tips for Optimizing Video Storage For Maximum Benefits To enhance the section with more detailed advice and include the suggested pointers, here’s a revised version: Regular Backups: Download and save key videos locally to free up Ring account space and ensure access to important footage. Selective Saving: Keep only essential clips for future needs; regularly delete older or irrelevant videos to manage storage effectively. Adjust Resolution: Lower the video resolution to save space, balancing quality with storage needs for optimal security. Smart Event Triggers: Configure monitoring zones and motion sensitivity to minimize unnecessary recordings and streamline the search for significant footage. Why Local Storage Can Be A Better Choice The strength of storing videos locally lies in its complete control over data. It even provides quick access to the stored videos without the need for an internet connection. This is why local storage is always an attractive option for different users. Local storage is also very secure as important data in the videos remains inside the premises and reduces exposure to any external breaches. Conclusion Ring doorbell offers a variety of features, providing homeowners with a combination of peace of mind as well as convenience when it comes to securing homes. While it can store videos without a subscription, the storage capacity and duration remain limited as compared to the options that are offered by Ring’s subscription plans. The plan you should consider depends mainly on the your specific needs and requirements for video storage. Assess your priorities and needs to determine the best choice for you.
Security Cameras · 16/03/2024
A Comprehensive Comparison of Ring Protect Basic, Plus, and Pro Plans: How To Choose
Ring is recognized as a leader in home security and video doorbells, offering various products. A Ring subscription is necessary to fully utilize its features. Next, we will introduce three doorbell plans that have recently increased in price. Read ahead as we will do a comprehensive Ring Protect Basic vs. Ring Protect Plus vs. Ring Protect Pro review. Direct Comparison – What Each Plan Has to Offer Ring offers three plans to optimize device use: Basic, Plus, and Pro. Each package provides specific features, with pricing and details available on their official website. Plan Features Offered Pricing Basic · Video history up to 180 days· Snapshot Capturing· Package and Person Alerts· Rich Notifications· Allows download of up to 50 videos in one go· Automation of camera modes with ring alarm· Arming and disarming of Ring alarm digitally· History of Alarm’s digital notifications· 10% off on selected products at Ring and Amazon $4.99/mo Protect Plus · All the features offered in the Basic plan· Advanced video features· Enhanced notifications· Extended warranties $10/mo Protect Pro · All the features offered in the Basic plan and Protect Plus· 24/7 professional alarm monitoring· Cellular alarm backup· 24/7 backup of the internet with optional additional data· Digital Security· Local video storage with Ring Edge· Save $100 or more every year on home insurance $20/mo A Comprehensive Exploration of Each Ring Plan We have discussed each subscription plan offered by Ring here: Ring Protect Basic Key Facts: Subscription Cost: $4.99/month or $39.99/year Annual Savings: $7.89 (when opting for the annual subscription) Video History: Up to 180 days of access to recorded videos Downloadable Videos: Up to 50 at a time Snapshot Capture: Photos taken at intervals, available for 7 days Person-Only Detection: Reduces unnecessary alerts Motion Zones: Customizable to focus on specific areas Rich Notifications: Photo previews on the phone’s lock screen Home and Away Modes: Adjustable settings for camera activity Remote Alarm Management: Via the Ring app or compatible Alexa devices Exclusive Discounts: 10% off selected Ring products The Ring Protect Basic plan is designed for users with a single Ring device, offering key surveillance features to enhance home security. It provides necessary capabilities for those seeking to improve the functionality of a security camera or doorbell without complexity, focusing on affordability and essential features for daily security needs. This plan includes Rich Notifications, which deliver photo previews of motion alerts directly to the phone’s lock screen, facilitating quick responses. It also allows users to adjust their devices with Home and Away modes, enhancing coverage based on presence. Subscribers can control their system through the Ring app or compatible Alexa devices, adding convenience to the security setup. Ring Protect Plus Key Facts: Video Recordings: Available for all Ring devices in your home, unlike the Basic plan which is limited to a single device. Enhanced Notifications: Offers more detailed alerts than the Basic plan. Extended Warranty: Applies to Ring devices still within the manufacturer’s one-year warranty at the time of subscription. Subscription Cost: More details needed for precise cost. The Ring Protect Plus plan expands upon the Basic plan’s offerings, catering to households with multiple Ring devices. It’s designed for users looking to extend surveillance and security features across all Ring devices in their homes, providing a unified and efficient security solution. Ring Protect Plus is ideal for users with several Ring devices, enhancing security coverage and peace of mind. The addition of enhanced notifications and extended warranty coverage further bolsters the value of this plan, making it a worthy upgrade for comprehensive home security management. Ring Protect Pro: Professional Monitoring Key Facts: Subscription Cost: $20/month, with a $40 saving available on annual subscriptions. DIY Security Solutions: Includes motion detectors, keypads, and more for comprehensive security coverage. Cellular Backup: Ensures the Ring system remains operational even during internet outages. Professional Monitoring: Offers 24/7 response to security breaches, with immediate dispatch of responders. Internet Backup: Provides 3GB of data for continuous connectivity during internet issues. Local Video Storage: Available for Ring Alarm Pro, allowing for local storage of video footage on a microSD card. Home Insurance Savings: Potential discounts on home insurance due to professional monitoring. The Ring Protect Pro plan is Ring’s top subscription service, providing comprehensive features for home security systems. It includes the benefits of the Basic and Plus plans, plus advanced features for the Ring Alarm and Alarm Pro systems. This plan offers cellular backup, professional monitoring, and extra internet backup data, catering to advanced home security system requirements. It also appeals to homeowners looking to enhance their security setup and potentially reduce home insurance costs. Ring Protect Basic vs Plus When it comes to the specifics of Ring Protect Basic and Protect Plus plans, a detailed comparison illuminates the distinctions, particularly regarding numbers and user experience. The Basic plan is an entry-level subscription, offering essential features like video recording and sharing for a single Ring device. On the other hand, the Protect Plus plan is tailored for households with multiple Ring devices, enhancing the user’s ability to monitor and secure their home comprehensively. Number of Devices: The Basic plan is limited to one Ring device per subscription, making it an ideal choice for individuals with a singular entry point to monitor. In contrast, Protect Plus covers unlimited Ring devices within the same location, providing a scalable solution for users with extensive surveillance needs. User Experience: Subscribers to the Protect Plus plan report a more integrated and seamless experience, thanks to the addition of 24/7 professional monitoring for Ring Alarm systems, extended warranties for all devices, and 10% off select Ring products. Ring Protect Plus vs Protect Pro Elevating from the Plus to the Pro plan introduces a suite of advanced features designed for the most demanding user requirements. Both plans cater to users seeking beyond the basics, offering perks not found in the Basic subscription, such as an extended warranty, local video storage, and backup internet connectivity options. Extended Warranty and Local Storage: While both Plus and Pro plans offer an extended warranty, the Pro plan distinguishes itself by adding local video storage options, allowing users to secure footage onsite. Backup Internet: A standout feature of the Protect Pro plan is its backup internet service, ensuring that your Ring devices remain online even during outages, enhancing reliability and peace of mind. Overall User Experience: The Protect Pro plan is the epitome of convenience and security, offering an all-encompassing solution for users who demand the highest level of home security integration and resilience. It’s especially recommended for those with multiple devices and a preference for additional safeguards like backup internet connectivity. Frequently Asked Questions (FAQs) What is the difference between Ring Protect Plus and Pro? The Protect Plus plan is designed to enhance the functionality of all your home cameras and doorbells, offering seamless integration across multiple devices. It includes video recording for all devices, extended warranties, and 10% off future Ring purchases. In contrast, the Protect Pro package extends these offerings to encompass all Ring devices, not just cameras and doorbells. It includes all the benefits of the Plus plan. Moreover, it adds 24/7 Alarm professional monitoring, along with backup internet connectivity to ensure your devices stay online, making it an ideal choice for comprehensive home security and convenience. Is the Protect Plus Plan worth it? The value of the Protect Plus Plan largely depends on individual needs. For those with multiple Ring devices, it offers unlimited video recording and extended warranties, safeguarding your devices. However, considering alternatives like local storage security cameras may provide more security in the long term. Additionally, with Ring's history of subscription fee increases, users heavily reliant on cloud storage must be prepared for potential cost adjustments. Is Ring Pro worth it over Plus? Protect Pro is often valued higher than Plus by those seeking comprehensive security solutions. It expands on the Plus plan with enhanced Alarm professional monitoring and backup internet, positioning it as a solid choice for users prioritizing maximum security and functionality with Ring devices. As an all-in-one plan, it merges Plus and Basic benefits, providing a full package for advanced home protection. About Ring Raising Its Subscription Prices in 2024 On March 11th this year, Ring’s subscription was raised by 43%. Plus, the prices were already raised by 40% not so long ago in 2022. The hikes that users have complained about are designed to force them to subscribe to the higher-tier plans offered by the company. However, it might prove to be a great jump for users who wish to add more devices and features to their home security system. Not only that but there has also been a continuous uproar against this action on social media and community forums like Reddit. Despite everything, Amazon insisted that Ring provides “some of the best value in the industry.” Conclusion and Recommendations You don't need a subscription to access some of Ring's basic features. The Basic plan is ideal for individuals with a single Ring device, offering essential services. For homes equipped with multiple devices or cameras, the Plus plan provides comprehensive coverage. The Pro plan enhances security with 24/7 professional monitoring among other advanced features. Regarding storage options, it's worth considering local storage security cameras and doorbell cameras for long-term security. It's important to note that Ring has increased subscription fees twice, impacting their service costs.
Security Cameras · 15/03/2024
How to Cancel Ring Subscription in 2024 – The Ultimate Guide
Ring has established itself as a renowned company when it comes to smart home protection. It offers a wide range of options, including video doorbells, security systems, and more, to help protect your home. However, nearly all of these products require a subscription, especially when you need more security features and storage. All of this is easy to set up until you realize you do not wish to enjoy a subscription anymore. Read on to know more about convenient ways of how to cancel Ring subscription. The Basic Guide on Canceling Ring Subscription Let us answer the million-dollar question: how do I cancel my Ring subscription? Canceling the subscription from Ring’s official website is as simple as it can get. Follow these steps to do that: 1. Open Ring’s official website on Ring.com and then log in to your account. 2. From the top menu, click on Protect Plan. 3. Choose the plan that you wish to cancel. 4. Click on Cancel Plan at the page’s bottom and choose a reason for cancellation. 5. Select when to cancel your plan. You can choose from immediately to the end of the billing cycle. 6. Confirm the cancellation. Frequently Asked Questions About Canceling Your Ring Subscription Why are people canceling their Ring subscriptions? Ring customers, specifically the video doorbell ones, are calling people and urging them to cancel their Ring subscriptions on popular platforms like Reddit, as the Amazon-owned company has imposed huge price hikes recently. At the end of 2023, Ring announced that it would increase the prices for its Ring Protect Basic subscription, effective March 11, 2024. Are there any alternative security camera options that are more cost-effective than Ring? Currently, there are a few alternative security camera options available in the market that are more cost-effective than Ring. Some of these are Eufy Video Doorbell, Nest Hello Doorbell Cam, August View, and Arlo Video Doorbell. How significant is the subscription price increase for Ring devices in less than two years? Ring’s subscription price has risen twice since 2022, doubling the price as a result. In 2022, they already raised the subscription cost by 40%. They hid the hike by introducing new features. Now, again, in December 2023, Ring announced that there would be another hike in the prices. This increase has been quite significant and has even angered its customers to a great extent. Is Ring useless without a subscription? Ring does not require a subscription for real-time viewing of security cameras and ring doorbells. However, without a subscription, these events will not be recorded. Can I get a refund in case I cancel my Ring subscription? The refund scenarios are different depending on which plan you choose as your Ring Protect subscription. For yearly plans, if you cancel during the plan, the remaining months will be credited to you as a refund. For the monthly plans, you will receive a refund for the days that you did not use the subscription. This refund will appear on the same credit card that you used for buying the subscription. What Happens After Canceling? As soon as you cancel the Ring subscription, all the previously recorded videos on the device will be deleted. In order to save them, you must download all these videos to the device or any other backup source before you cancel the Ring service. Otherwise, all will be lost! It is important to remember that you will still be able to view the Live feed and receive notifications even after the subscription has been canceled. Other than recorded videos, once the subscription has been canceled, you will also lose access to features such as snapshots and motion detection. Can You Re-Activate or Subscribe to the Ring Account Again in the Future? Yes, you can re-activate or subscribe to a Ring Protect Plan again in the future if you decide to cancel your current subscription. Moreover, you have the option to upgrade or change your plan at any time by logging into your Ring account on their website, where you can select and subscribe to the plan of your choice. User Reviews and Experiences on Reddit The recent price hikes by Ring have agitated the users to a great extent. Some have even decided to cancel their subscriptions and stated price as the reason. Some of these users had paid for the entire year and had a couple of months left before their subscriptions actually ended. They were of the view that companies like Ring increase prices as they expect the users to fall in line and ultimately pay them. This is what one user had to say! “Ring subscription went up to $39.99/year for only one camera. I didn’t find much use in paying for it, so I let it expire. The only benefit was being able to review and save older videos, but besides that, it was a waste. I believe since Amazon bought them out, they don’t care as much about having subscribers, and the fee increases to cover those not renewing.” However, they believe that if the majority of the people canceled their subscriptions, the price hike would be called back immediately. Some users also suggested switching to a blink security camera, which costs nothing. In addition to the price mayhem, users are also complaining about how there have been no updates to the Pro and Plus plans, forcing people to get multiple devices in order to save money. In order to battle this, some users stated that they are shifting to other options, such as the POE network cameras due to the increasing cost of Ring. Moreover, the users mentioned that important events’ recorded by Ring were often missed due to connectivity issues or its slow movement detection. This is unfortunate, especially when it fails to provide the required security system even with the purchased subscription plans. Another user suggested opting for an alternative DIY! “I made my own setup with an old cell phone, a Raspberry Pi, and an external hard drive. The beauty is that I can set as many cameras as I have old cellphone, it can even work on battery if I need it to, and most importantly, I don’t need to send all the data through Amazon web service, too. Nanny cam? Pet daytime monitor? Shed surveillance? I can even use my main cellphone as a dash cam and link it to the same server in a pinch.” The Reason Why People Turn to Local Storage and PoE Options? There are many reasons why people might wish to turn to local storage and PoE options. Local storage offers a self-contained solution for data management, granting users direct control over their security footage without reliance on external cloud services. This approach ensures enhanced privacy, compliance with legal standards, and uninterrupted access to recordings, even without internet connectivity, making it a preferred choice for those prioritizing data sovereignty and operational reliability. Power over Ethernet (PoE) technology simplifies networked device deployment by transmitting power and data through a single Ethernet cable. This reduces installation complexity, lowers cable clutter, and offers a scalable and flexible solution for expanding surveillance systems or network infrastructures, appealing to home users and enterprises seeking efficient and streamlined connectivity options. Conclusion There are several reasons why one would wish to cancel their Ring subscription. These include moving to a new location, changing the smart home protection systems, or simply ditching Ring because of their price hikes. Either way, you must go through a process to cancel the subscription fully. Depending on how the service was signed up, the plan can be canceled from the Ring’s official website or Amazon. The solution to all your problems is obviously turning to a local storage video doorbell, which requires no subscription and involves no cost!
Security Cameras · 15/03/2024
The Ultimate Guide On How to Save Ring Doorbell Video Without Subscription
From small break-ins to complicated heists, we have often heard instances where home security was compromised. Protecting our loved ones and homes is everyone’s top priority. In the United States, a burglary is occurring every 26 seconds. This alarming statistic is just one of the several reasons home security is important. This necessitates the introduction of efficient home security measures such as smart doorbells. Smart doorbells are the perfect way of enhancing your home security by letting you see exactly who is at your door. Unfortunately, without a subscription, you won’t be able to see footage from previous notifications. Another security camera company known as Ring is all set to increase its yearly subscription price of Ring Protest Basic Plan. Under such circumstances, it is important to know how to save ring doorbell videos without a subscription. 4 Ways to Save Ring Doorbell Video Without Subscription There are 4 unofficial ways how to save Ring videos without a subscription. Check them out here! Use a Free Trial Subscription As you set up a new Ring doorbell, you can get a 30-day trial subscription. This subscription is a full-featured one that possesses all the monitoring features that are included in the paid subscription, including the ability to share and save videos. For every new Ring device that is purchased, you can acquire a free trial subscription. This means that even after you have used up the trial subscription for one device, you can acquire another 30-day free trial after buying a new device. Save Ring Doorbell Video Via Screenshot With Your Phone Modern smartphones like Samsung tablets and phones have an in-build screen recording function. The next time the Ring doorbell sends an alert, a screen recording can be initiated next time. For instance, if a creepy character or a stranger rings the doorbell, a recording can be immediately started and shared with the neighborhood or even the police. The only drawback of this method is that it will only work once the alert is actively seen. Save Ring Doorbell Video Via Screenshot on PC This method can be made possible by downloading a free tool for screen recording on the computer and signing into Ring’s official website. Once it has been logged in, the live feed of the Ring camera can be viewed. Now, begin screen recording and move on to doing your daily tasks. Save Ring Doorbell Video With a Local Camera For Alternative There are other Ring alternatives available as well, such as automatic video recording onto SD cards, onboard memory, and personal web servers. By selecting a local camera that does not require any cloud storage, it can be assured that the video will remain in possession instead of a remote server, which requires a subscription. Understanding Ring’s Three Subscription Plans For Recording Ring offers three recording-related subscription plans for its users: basic, plus, and pro. All of these plans come with distinct features and characteristics. Choose the one that best suits your needs and requirements. Ring Doorbell Price Features Ring Protect Basic $3.99/m or $39.99/y Video history for up to 180 days, snapshot capture, person and package alerts, rich notifications, download up to 50 videos at once, ring alarm automation, digital arming and disarming of ring alarm, digital alarm notification and event history, 100% off at select products Ring Protect Plus $10/m or $100/y All features of the basic plan + advanced video features, enhanced notifications, extended warranties Ring Protect Pro $20/m or $200/y All features of the Basic and Plus plan + 24/7 professional alarm monitoring, alarm cellular backup, 24/7 backup internet and optional extra data, digital security, local video storage option The above comparison table clearly shows the limitations of not having a subscription. The basic plan does not offer any advanced video features, optional extra data, or any local video storage option. How to Download Ring Video With a Free Trial Subscription As you set up a new Ring camera, doorbell, or alarm, you will acquire a 30-day free trial subscription. This is a full-featured trial that has all the monitoring features that are included with the paid subscription, such as the ability to share and save videos. If you have purchased a Ring device from Costco, you might even be lucky enough to be eligible for a longer free trial for Ring Protection. Your trial period may range from a year to six months, depending on your location and the device purchased. 1. In order to save Ring videos using a free trial, tap on the three-line menu in the app and click on Event History. 2. There, tap on three dots and select Share. 3. Now tap on the download arrow. This video can be found in your tablet’s or phone’s gallery or photos app. How to Do Screen Recording on Smart Phone - Step By Step Guide If you aren’t eligible for Ring’s free trial, you can still screen record the live feed on your iPhone, Android, or iPad. Here is a step-by-step guide to this process. Tap on the Ring alert on your tablet or phone, and open Live View by tapping on the three lines present at the top left corner. Now select Devices and now tap on Live View. Once the camera feed has been added, open up your tablet’s or phone’s screen recorder and save the video. Here, no special screen recording apps are required, as the built-in screen recording options work just fine. For iPhone and iPad, first go to settings and then to Control Center. Now tap the record icon to begin recording. When recording is finished, tap on the bar at the top of the screen and then tap stop. For Android, swipe from the phone’s top home screen and tap on Screen Record or Screen Recorder. Once finished, swipe down again and tap the screen record notification to stop recording. How to Do Screen Recording on PC or Laptop - Step By Step Guide This might even be even more convenient than using a tablet or phone, as computers tend to have more space available for saving videos than a mobile device. Open Ring’s official website and log into your account. Click the camera’s still image and record the screen as the live stream is played. For Windows Type the game bar by pressing the Windows key. Now click on the ‘Enable Xbox Game Bar’ in the search results. Click on the switch to enable it. When you are about to record, press the Windows key and G together. Now click on the camera video icon, then click on the Capture button to begin recording. Now click on the stop button as you are finished. This video recording can be found in the sub-folder known as Captures in the Video folder. For Mac Press Shift, command, and 5 on the keyboard to open the Screenshot toolbar. Now click on the dashed window’s icon with a circle at the bottom in the right corner. Next, select which portion of the browser you wish to record and click on Record. When you are finished, end the recording by clicking on the Stop button. This can be found saved on the desktop. Even though the screen recording apps are fairly legal and allowed, they might raise some eyebrows when it comes to privacy matters. One thing is for sure: these screen recordings cannot in any way be used for commercial purposes. They must be only used for security reasons. Alternative Hardware and Software Solutions There are other methods that are applicable but a bit complicated for the common user. We have discussed them here. Using a different local storage doorbell camera as an alternative to Ring Integrating non-subscription third-party cameras with Ring can offer a good workaround for recording videos. These third-party cameras automatically record the videos onto SD cards, onboard memory, and even personal web servers. Choosing an alternative smart camera or doorbell that does not require any cloud storage can be a convenient option. Moreover, this recorded video will remain in your possession instead of a remote server, which needs a subscription. Here are a few options. Eufy Camera and Video Doorbell: Eufy products are great because they record everything locally. There is also an optional plan available for extra backups and storage. Skybell Video Doorbell: Skybell has no subscription requirements or fees, though these products tend to record on a remote cloud server such as Ring. Blink Video Doorbell: When the Blink Sync Module is purchased, a USB drive can be attached for local storage instead of getting a paid subscription plan. DIY Solutions There is also a possibility of using Raspberry Pi or similar devices to create a custom setup for recording Ring doorbell videos. However, this method is a bit too technical and might violate local laws. So, proceed with caution! FAQs Is it legal to record public spaces? It is not illegal to record people without their consent in public places if they are audible or visible, especially when they don’t have privacy expectations. However, in more personal spaces, such as changing areas or bathrooms, recording someone without their consent is completely illegal. How can the video quality be maximized without a subscription? There are ten simple ways of making video quality better without a subscription: Decide on the right video length. Use longer videos only where appropriate. Consider the digital bit rate. Choose the correct setup and equipment. Edit and enhance videos. How can common issues be solved with third-party solutions? First, identify the actual impact and scope of the issue. Research the third-party solution appropriately and then determine the best possible cause. Now, test the solution and analyze the results. Conclusion One thing has been documented; home security is incomplete without a doorbell camera. However, one may not wish to buy a proper subscription plan to achieve that. Saving doorbell videos without a subscription is not an impossible task. The above-mentioned alternatives are perfect for someone who wishes to take advantage of premium smart home security at a minimum cost. It is best to opt for a local storage camera that offers the best resolution video recording without any need for paying.
Robovac · 06/03/2024
Maximizing Guest Satisfaction: The Ultimate Guide to Vacation Home Cleaning
Travelers sometimes opt to select vacation rentals against hotels and usually have very high expectations regarding their experience. They wish to enjoy their stay as much as possible so that they can relax with their loved ones. However, a dirty vacation rental can ruin a great vacation very fast. Keeping the vacation home spotless and ready before guests arrive can maximize positive reviews and guest satisfaction. Understanding the Basics of Vacation Home Cleaning Vacation rental cleaning is way more different than regular home cleaning. Most importantly, you need to meet the guests’ expectations, ensuring that your property looks spotless. Therefore, the cleaning process definitely takes longer, requiring greater attention to detail, efficiency and tasks. It also needs to be fast to limit downtime between check-in and check-out. Regular home cleaning mainly involves simple cleaning tasks such as vacuuming, dusting, wiping and mopping. Vacation rental cleaning, on the other hand, requires more comprehensive cleaning such as disinfecting, deep cleaning and sanitizing. Moreover, bathrooms, kitchens and bedrooms also need to be cleaned thoroughly. There will be additional tasks to complete as well, such as restocking toiletries, changing bed linens, replacing towels and assessing the vacation home for any potential damages. This is why having enough time between guests is a good idea to ensure enough time to tidy up your vacation rental. Setting Cleaning Standards for Your Vacation Rental Vacation rental cleaning requires good structure and organization to ensure the rental is ready for the incoming guests and leaves the best impression. Here is what you can do to set clear cleaning standards. Creating a Cleaning Checklist Start off by creating a cleaning checklist for areas that require special attention, including bathrooms, kitchens, living areas and outdoor spaces. Here is an example of a checklist. Sanitize and clean all surfaces, including countertops, tables and cabinets Sanitize and clean kitchen appliances such as the coffee machine, toaster, microwave and oven Remove any food left in the fridge to avoid any bad smells Remove trash and sanitize the trash can Mop and sweep the floors Choosing the Right Cleaning Supplies In today’s time, when being eco-friendly is the talk of the town, it is essential to bring sustainable practices to the cleaning processes as well. When it comes to the well-being of your guests, the selection of cleaning products is of utmost importance. You must avoid using conventional cleaning products that contain harsh chemicals, as these can cause skin irritations as well as respiratory problems. Non-toxic and environmentally friendly cleaning products offer a safer alternative for the safety of your guests and the environment. eufy S1 Pro - The World’s First Floor Washing Robot Vacuum Meet eufy S1 Pro, unleash the power of real-time self-cleaning floor washing robot combined with a high-performance vacuum, all in one revolutionary device. Say goodbye to manual labor and hello to groundbreaking innovation and design. Don't miss out on the revolution in home cleaning: Sign up for discounts See eufy deals After all, nobody wishes to spend their vacation having respiratory issues! Professional vs. DIY Cleaning for Your Vacation Home There are different options available when it comes to cleaning your vacation home. The decision to choose a professional cleaning service for your home or to DIY depends on various factors such as available time, resources and budget. When to Hire Professional Cleaning Services Hiring professional cleaning services is usually a better option when you have more than two vacation rentals and are not living locally. Moreover, during the peak season, the property might require cleaning several times during a month, which can be quite stressful. In such scenarios, it is best to outsource the cleaning duties to professional cleaning services such as Molly Maid and Merry Maids. This may not be the most cost-effective option, but it does ensure an impeccable cleaning process. Tips for DIY Cleaning However, if you are a property owner who prefers to handle all the cleaning themselves, here are some practical tips to help you ensure that high standards are met. Have a checklist ready before embarking on the cleaning journey Have all your cleaning supplies handy Begin from the least dirty and easy-to-handle areas of the property and move on to the ones that require more attention and detail Specialized Cleaning Areas in Vacation Homes The extent to which your vacation home may require cleaning can vary depending on which areas need more attention as compared to the others. Dealing with High-Traffic Areas The high-traffic areas in your home, such as the living rooms and entryways, may require more thorough cleaning as they are used frequently. These areas often need deep and frequent cleaning. Kitchens and bathrooms also require special attention as they are usually the most used areas in a rental home. Addressing Unique Challenges There are a few spots that are often overlooked while cleaning rental homes. These may seem trivial but can cause great nuisance to your guests if left unattended. Such areas include handles and knobs, AC filters, coffee makers, fridges, dishwashers and towel racks. Besides, other amenities such as hot tubs, outdoor grills and pools also require intense cleaning, especially after they have been used a couple of times. Enhancing Guest Experience through Cleanliness It is no secret that keeping a vacation rental spotless is a daunting task. However, the important of maintaining hygiene throughout your guests’ stay is essential. The Role of Cleanliness in Guest Reviews Keeping your rental property spic and span will leave your guests satisfied, motivating them to leave positive reviews and to keep coming back to your property. After all, who doesn’t want to destress through another vacation at a spotless vacation home? Leaving a Lasting Impression A little bit of compassion and attention to small details can leave a lasting impression on your guests. For instance, adding welcome baskets or personalized notes can help them feel at home. All of this, when complemented by impeccable cleanliness standards, is bound to leave a great impression. Maintaining Cleaning Standards During Peak Seasons Maintaining cleaning standards during those peak seasons is extremely essential. However, high booking periods bring along a lot of stress, especially when it comes to cleaning. There are different things that can help you maintain cleaning standards during rush hours. First, you need an effective housekeeping strategy that assists you in the optimization of housekeeping tasks. This may include how much staff you require to perform important tasks such as deep cleaning. This will often not be possible to achieve without an in-house cleaning team. Commercial cleaners are trained to deep clean the most important areas of the rental house, helping you attain the required levels of customer satisfaction and ensuring that your guests will keep returning. Conclusion Even though your vacation rental property is not a hotel, your guests require the same standards of cleanliness. As a rental property owner, your goal should be to keep it pristine and succeeding in doing so will reward you with amazing reviews on third-party sites and platforms like Airbnb. Also, it is important to remember that most of this may not be achievable without the help of professional cleaners. It can save you a lot of time, allowing you to focus on other significant aspects of the vacation business. It is time to evaluate your cleaning practices and learn the strategies for a spotless vacation rental home. The tips mentioned in this guide are a good place to start.
Robovac · 06/03/2024
Ultimate Guide to a Practical House Cleaning Schedule
Whether you're a busy stay-at-home parent or an occupied working person, cleaning is never an easy chore. As per research by The Clorox Company, 60% of people are less stressed after cleaning, and 75% are more productive. While it can be a source of relaxation, routine cleaning after a hustling day can drain your energy. Most experts recommend preparing a practical home cleaning schedule. Through this schedule, you can break down time-consuming cleaning chores into daily, weekly, and monthly timeline brackets to manage the process effectively. In this blog, we'll help you maintain a checklist to manage your home cleaning schedule. The Philosophy Behind Effective Cleaning Schedules According to recent studies, our environment has a significant impact on our physical and mental health, so properly cleaning your space should be a priority. But nowadays, with a burden to juggle personal, parental, work, and social life, managing a cleaning routine is always a question mark. That's where cleaning schedules can help. The main purpose of maintaining a cleaning schedule is to make sure your space is neat and maintained every time. It also helps to get rid of excessive cleaning all day, and a clean home prevents the spread of viruses or skin diseases. The key to preparing an effective schedule is to keep it as realistic as possible and not go overboard to maintain consistent motivation. Daily Cleaning Habits for a Tidy Home It is essential to incorporate cleaning habits into your daily routine to keep your home maintained and satisfy your cleanliness trait. Instead of dumping all your cleaning tasks on a specific day, these habits can make cleaning more manageable. You can not adapt all cleaning habits in your life right away; take baby steps and work firmly on a few, then expand as per your comfort. Some of these habits are: Start by making your bed as you get out of bed, leaving the bed as it can lead to a mess in your entire home. Even if it's just a small stain or even a single candy wrapper, throw it into the trash can and clean it immediately. If you're moving from one room to another, look for any spills and wipe down surfaces you've used with a damp paper towel. Wash your day-to-day clothes every day to avoid a big load of laundry on weekends. As you complete cooking, clear unnecessary items off the counter, wash used dishes, and clean the space right away. Dedicating a place for every item in your house can avoid mess as you habitually put them right back where they belong. Declutter and donate your wardrobe regularly. Before going to bed, look through the house and clean the apparent mess. Weekly Cleaning Routine: Balancing Depth with Do Ability Once you become habitual with daily cleaning, a weekly cleaning routine will be less daunting. Make a list of every area of your home and write the cleaning tasks attached to it. Now, you can divide them into days based on priority and your free slot. In addition, you can even designate the time to make it more systematic and help with procrastination. Ideally, the list can be similar to the following: Monday: (Living Room) Vacuuming and dusting furniture. Clean the bathroom surface, sink, and toilet. Tuesday: (Bedrooms) Change bed sheets, clean bathroom, wipe windows and mirror with glass cleaners, and dusting furniture Wednesday: (Fridge) Clean spills from the surface, discard empty containers and expired items from the fridge and freezer. Thursday: (Kitchen) Mop kitchen with anti-bacterial surface cleaner. Clean oven and microwave from inside. Friday: (Small Spaces) Dusting blinds and curtains, organizing wardrobe, vacuuming stairs and throwing garbage Monthly and Seasonal Deep-Cleaning Tasks After weekly clean-up, the monthly cleaning checklist should handle bigger and more time-consuming tasks. It can be helpful for increasing the life of appliances, furniture, and the interior of your home. You can adjust it at any time of the month based on your convenience. However, most people prefer taking care of monthly cleaning before the start of every month. Once you've picked a day to handle these tasks, you don't have to worry about it for at least 5-6 weeks. Here are some of the monthly cleaning tasks to consider: Cleaning backsplash and cooking range Seasoning your cast iron and similar cookware Declutter the freezer and clean its shelves and drawers. Get rid of bathroom grout lines, clean your bathtub and surface behind the sink Clean windowpanes, wash curtains, and wipe baseboards in your room Yearly Cleaning and Maintenance Checklist If you keep up with the monthly cleaning tasks, then there won't be much to manage on the annual or seasonal cleaning haul. It helps maintain the comfort and increase the durability of valuable items at your home. Here's how to maintain a yearly cleaning checklist: Winter Cleaning Schedule Winter brings leisure, and you often don't want to get up and clean, so it is advisable to prepare beforehand. Start by tightening knobs, racks, and handles, fix the locks and deadbolts on doors or windows, remove shower heads, dry clean your comforters, and lastly, inspect and deep clean your basement. Spring Maintenance Checklist Spring is all about preparation for summer and recovering from winter mess, so check your exterior for drainage, inspect the roof for damage or leaks, clean your gutters, get HVAC system maintenance to avoid issues in summer, and clear dead plants or shrubs in the front of your house. Summer Cleaning Schedule Summer calls for repairs, and if you tend to live in hot areas, then precautions are mandatory. Check your bathrooms and kitchen for grouts and repair if necessary, inspect plumbing for leaks, clean your patio, and work on minor repairs. Deep clean your carpets and rugs. Clean out dryer vents and exhaust vents. Clean your garage and throw stuff that hasn't been used for a year. Fall Cleaning Checklist Fall cleaning is majorly sweeping to ensure you're set for cozy days. Inspect and clean your HVAC system and check the water heater for maintenance. Sweep chimneys and look for cracks in the driveway or entrance of your house. Tools and Supplies to Make Cleaning Easier With a busy schedule, people find it difficult to clean, needing cleaning assistance more than ever. Following are some advanced tools and supplies to simplify cleaning: eufy X10 Pro Omni Robot Vacuum X10 Pro Omni is the latest and most comprehensive vacuum that works on artificial intelligence. It is the world's first MopMaster that can avoid more than 100 obstacles working on 8000 Pa power suction strength. Moreover, it has an Omni station for self-washing, drying, emptying, and refilling, so you don't have to do anything. It is cost-effective, user-friendly, and perhaps the best robot-vacuum available. Baffect Magnetic Window Cleaner If you want it hard to clean windows upstairs and getting a ladder isn't always convenient, then you should try out Baffect magnetic window cleaner. It helps to make all your windows spotless with its strong magnetic design, sticking to both sides of the glass and cleaning the front and back of the window simultaneously. TOWNEW Smart Bin We know taking trash out itself is a hassle, and switching trash bags is more daunting. Townew has realized this problem and introduced the TOWNEW Smart Bin for easy waste management. This bin detects when it's full and seals the bag with the help of thermoplastic sealing. It even lifts the sealed bag up to prevent any spills and replaces the bag at the touch of a button. Making Cleaning a Family Affair Most parents, especially moms, love a tidy space to relax, but with energetic children running around spilling and staining surfaces, cleaning becomes more and more difficult. Managing everything alone can be time-consuming and feels like all you do is work. It is helpful to involve your children and spouse in the cleaning ride with the following tips: Children will hop on anything fun, so you should turn home chores into a game. You can also designate rewards for participating and cleaning properly. Rules are important to keep a clean environment, so set some regulations to simplify your load, like making your bed, keeping dirty clothes in the laundry basket, cleaning your own plate after dinner, unloading the dishwasher, folding laundry, etc. Make a chore list for every person in your family, depending on their age and capacity. They can be minimal tasks, but they can save up a major part of your day. You can even give allowance to your children based on the completion of the list. Overcoming Common Cleaning Challenges Once you prepare a personalized home cleaning schedule template, it becomes simple to adjust your routine. However, there are some challenges that may hinder your cleaning routine. Some of them are: Taking time out of your busy schedule is always the hardest. Start by dividing cleaning responsibility with other family members or roommates. You can also designate a time or day for cleaning if needed. Some rigid stains are difficult to remove with the same cleaner. Try out different household and industrial cleaners like water, gel, oil, and acid. People with dust allergies may find it challenging to clean. You can wear a mask or buy equipment that doesn't let dust out. If you have pets in your house, then their hair and odor can be a challenge to get rid of. You can use pet-friendly cleaning products that handle the smells and make sure your pet has a proper clean zone, preferably in a secluded area of your home. Conclusion If you're wondering if preparing a cleaning schedule can magically make your house spotless, that's not the case. It's all about getting up and doing it yourself. However, a schedule can make sure you're not overwhelmed with cleaning tasks amidst your busy routine. Experts recommend making a habit of cleaning on a daily basis to avoid excessive cleaning on a specific day, either before a party or holiday. All you need is 10 minutes from your daily routine to maintain a healthy and tidy home for yourself and your family. It also helps in making you more organized and declutters your time for activities that you love. Ready to prepare your practical home cleaning schedule? Maintain a spotless home without stressing over the process.
Robovac · 06/03/2024
Cleaning New Construction Homes – The Ultimate Guide
Moving into a new home is an exciting time for many – for most, it is even the culmination of their dreams. However, this can also be quite a daunting task, bringing along much stress for the new residents. From packing up everything to coordinating the entire move, there are several things to consider when moving to a new, finished home. A very significant aspect of this process is cleaning new construction homes. Ensuring that your new home cleaning has been done immaculately is essential for a stress-free move. Let us look at how the challenging task of cleaning your new construction home can be made seamless. Assessing the Mess Once you are faced with cleaning up your newly built home, you may be posed with the difficult question of where to begin. The best way to start is to make a comprehensive list of areas that require cleaning. Do you wish to clean the entire house from top to bottom? Or do you want to move from one room to another? Another great way to have an impeccable clean-up is to make a checklist of everything you wish to be cleaned. This will help ensure that no spot around the house is missed. Gathering Cleaning Tools and Supplies Once a careful assessment of the mess around has been done, it is time to bring about all the cleaning supplies that you will need to begin your cleaning spree. Here are a few essentials that can help you with the entire process. Dusters Magic erasers Dish Soap All-purpose cleaner Large sponges White vinegar Stepladder Broom Window cleaners Cleaning rags Trash bags Dustpan Plastic sheets Microfiber cloths Masking tape Some of these are very specific to certain areas of the house, such as bathrooms and windows, such as stepladders, microfiber cloth, dusters, and dustpans. Other equipment may come in handy while cleaning nearly every nook and corner of the house. Cleaning Step-by-Step Once you have all the required supplies, you are all set to begin cleaning your new construction home. The following steps can guide you through. Initial Dust and Debris Removal In the first step of post-construction clean-up, removing the initial dust and debris from the whole house is important. It also involves eliminating drywall, wooden planks, nails, and other materials that may have been left behind during construction. This will make cleaning up of the debris and dust easier. This stage may further include: Removing leftover construction debris Handling any residue from paints or adhesives Wiping glass surfaces on doors and windows Removing stickers from new fixtures or appliances Washing of baseboards, walls, and door frames Vacuuming and sweeping floors eufy S1 Pro - The World’s First Floor Washing Robot Vacuum Meet eufy S1 Pro, unleash the power of real-time self-cleaning floor washing robot combined with a high-performance vacuum, all in one revolutionary device. Say goodbye to manual labor and hello to groundbreaking innovation and design. Don't miss out on the revolution in home cleaning: Sign up for discounts See eufy deals Deep Cleaning Kitchens and Bathrooms As the first step is completed, you will now need to move into deeper cleaning of the two most important areas of the house – kitchens and bathrooms. While initial debris and dust can be removed in just a day, deep cleaning your home will take longer. Kitchens and bathrooms require special attention since this is where most germs will be present. Here is what you can do: Scrub the bathtub, shower, toilet, and sink using a disinfectant cleaner. Wipe clean the countertops, cabinets, and drawers. Sanitize the kitchen appliances carefully, including ovens, kettles, and microwaves. Clean the filters on the range hood. Cleaning Floors and Carpets New carpets and floors can accumulate dirt and dust quite quickly. Here are some ways you can clean your floors and carpets: After vacuuming, hang carpets and rugs outside on a clothesline or a railing. Beat them with the help of a carpet beater to remove dust. For tough spots, apply carpet cleaning solutions to the areas. Let it stay for a few minutes, and then rub the stain with a paper towel or a clean cloth. · Use Eufy’s Home Vac H11 Pure to clean floors thoroughly. It will help clean your floors without damaging them. Windows, Walls, and Ceilings After cleaning every room in the house and dealing with floors and carpets, it is time to attack the windows, walls, and ceilings. Wipe all the ceilings with the help of a damp sponge. You will need a stepladder to do this. Remove all the labels on the windows. Vacuum the window tracks thoroughly to pull out all the dirt. Wash the windows from inside and outside. Focus on removing any paint splatters or smudges carefully without causing any damage. Safety Tips Many new homeowners think that it is fairly easy to carry out the cleaning process themselves. However, if not done carefully, it can sometimes pose serious health risks. It is crucial to perform all cleaning tasks wearing masks and gloves, especially when disinfectants and special cleaners are used. Moreover, it is pertinent to remember that new construction homes usually have hazardous materials, such as chemical residues from adhesives, insulation, and paint. Exposing oneself to these chemicals can pose serious health risks, particularly for those with respiratory issues. Therefore, ensuring proper ventilation while using cleaning chemicals is mandatory. Hiring Professional Cleaning Services Hiring professional cleaning services to do the tough cleaning for you gives you peace of mind that your new home is secure. Some benefits of using professional cleaning services are: Safety Newly constructed homes contain safety hazards such as exposed wiring or loose nails. There can be serious risks of injury due to falling debris. A professional cleaning service will have all the required equipment to keep themselves safe. Efficiency Professional cleaning services will ensure the timely cleanliness of your home so that you can comfortably begin living in it. It will save you much time, helping you focus on other important things, such as unpacking. Cost-Effective In the long run, hiring professional cleaning services will be cost-effective as they bring in thoroughness, work at an incredible speed, and leave no room for re-cleaning anything. While choosing a cleaning service, it is essential to select the one that fits into your budget and cleaning requirements. Maintaining Your New Home While you might be too excited to move into your new home and be motivated to clean it thoroughly, it is often forgotten that home maintenance needs to be done on a routine basis. Here are a few tasks that need to be done regularly: Checking HVAC Filters Heavy use of HVAC in both summers and winters entails changing their filters every 2 months. It not only improves the appliance’s efficiency but also keeps the air around your home cleaner. Checking Water Heater and Softener Check up on your water heater and softener regularly, as mush and salt bridges can gather up quite quickly. Clean and Inspect Vents Remove any debris, dust, and dirt from the air vents regularly. Vacuum dirt from difficult-to-reach areas frequently. Conclusion It is necessary to clean a newly constructed home thoroughly before actually shifting in. It is important that your family can have a fresh start while keeping them healthy and safe. Your home, after all, should be the safe haven you are looking for. Have something to tell about your new home cleaning experiences or tips to help the entire process? Please share with us in the comment section below!
Robovac · 06/03/2024
Understanding Home Cleaning Prices in 2024: What You Need to Know
According to the latest study by Upmetrics, the home cleaning industry is expected to grow 20% every year by 2026, and 80% of households in the US will be using cleaning services in 2024. The services have extended beyond scrubbing floors and dusting shelves, requiring tough physical labor and streamlined teams. Many households think that professionals should consider the total amount of their workload when quoting home cleaning prices. Additionally, understanding the factors influencing the cleaning prices can help customers as well as professionals make informed decisions. Let’s explore all about home cleaning services, the range of services, and estimated pricing. The Basics of Home Cleaning Prices Home cleaning services entail a wide range of household cleaning covering the entire area of your house, ranging from mopping floors, making the bed, cleaning the bathroom and kitchen, and dusting all surfaces. These services involve multiple capacities, including one-time, monthly, quarterly, and repetitive use. Thus, home cleaning costs are based on whichever package you want to avail or services you want to acquire. Following are the different home cleaning services. Basic House Cleaning The basic-level cleaning services charge hourly rates with a minimum two-hour limit. Standard house cleaning includes dusting and scrubbing the apparent surfaces of your house. For the first time, most of them usually demand extra to deep clean your house. Deep Cleaning Deep cleaning is relatively more pricey than basic cleaning because it includes cleaning every part and every object of your house for multiple rounds. It is used for houses that haven’t been used for many years or surfaces that have not been cleaned in a while. Move-Out Cleaning Similar to deep cleaning, move-out cleaning is also expensive as it requires more effort and some irregular work like cleaning inside ovens and fridges. After-Event Cleaning Most people don’t feel like cleaning after a party or an event. For them, there’s an after-event cleaning, and the cost depends on the number of rooms to cover and the cleaning requirements. Now that you know the range of services, here’s the average price range for these services: Hourly Rates Most cleaners charge by hours for basic cleaning, charging $20 to $50 for every cleaner, depending on the location. Per Square Foot Rates This method is the easiest and most preferred for determining the average home cleaning price. In most cities, the prices are around 5¢ to 10¢ for every square foot of routine cleaning. Price by Room and Bathroom Some consider per-room pricing easy to estimate, especially when most people don’t know the square footage of the surfaces requiring cleaning services. It ranges from $75 to $130, adding $25 per room and $10 per bathroom. Factors Affecting Home Cleaning Costs As we’ve mentioned, there are many influential factors that can impact the pricing of home cleaning services. Based on these factors, you can find a cleaner that aligns with your budget. Following are a few of them: Size and Condition The most significant factor is the size of your home and the condition you’re living in. There are different rates for rooms, flats, penthouses, and big houses. If your space is large, then it’ll cost you more. Location The pricing range can differ from location to location, even if they’re near each other. It is recommended that you call your local cleaners to save unnecessary costs. Type of Cleaning Service Home cleaning prices also differ on the type of service you require because of the resources it’ll take to clean. Frequency Another key factor is how frequently your home is cleaned. It takes more to just clean once as it requires more effort than weekly cleaning. Specialized Cleaning Services and Their Costs When we mentioned that home cleaning isn’t restricted to floors and surfaces, it meant the home cleaning service deviated towards specialized cleaning. It involves cleaning specific furniture, certain parts of the house, or cleaning techniques. One of the prominent specialized cleaning aspects is home air duct cleaning, impacting your home environment. As per the Environmental Protection Agency (EPA), the average home air duct cleaning cost ranges from $450 to $1000. It also depends on the size of your house and the number of vents because if you have a big house, then there will be more vents and ducts, requiring more labor and equipment to clean. Another key factor affecting the home duct cleaning cost is the accessibility of your home’s HVAC system. Some houses don’t have a proper mechanism to reach the ducts, so the cleaners charge extra for labor-intensive cleaning. Most households tend to use air duct cleaning as part of their home’s specialized cleaning task as it reflects on the efficiency of your HVAC system as well as the air you’re breathing in your home. How to Get the Best Value for Home Cleaning Finding the right cleaners to take over your home is also a daunting task to achieve. Having an extensive area of services to cover, it often gets difficult to find home cleaners that offer the best value within your budget. Here are some of our expert tips for hiring a great cleaner with budget-friendly pricing: Be Clear on Your Home Cleaning Requirements The first step is to be transparent about the services you need for your home. Whether it be regular maintenance and basic cleaning or specialized deep cleaning, the clearer you are, the more benefits you can reap from cleaners. Research is Mandatory Don’t hire the first cleaner you come across. Take recommendations from friends and family who have tried the services themselves. You can also go through online reviews about the cleaners and pick the one that is rated the best out of them. Ask for Credentials and Certifications If the cleaners have certificates or affiliations from renowned cleaning companies, then their services are more likely to be professional and up to industry standards. The certifications also impact their cleaning practices. Check for Training Research the safety protocols before hiring any cleaning service and judge your cleaners based on them. If your cleaner is trained in the best cleaning techniques, customer service, and safety procedures, they’re ideal. Compare Quotes from Different Cleaners Every cleaning company and individual cleaners have different rates and pricing factors. So, look through different quotes and then choose the one that suits your budget. If the cleaners are charging suspiciously low prices, then it means there are hidden charges, so make sure to read the terms and conditions. Regular vs. One-Time Cleaning Services So, what’s the difference between on-time cleaning and regular cleaning? Most of you must be wondering, apart from the frequency of cleaning, what the drastic difference is between these two types of cleaning. Regular Cleaning When hiring professional cleaners for regular home cleaning, they’ll ask for weekly or biweekly sessions. Most people go for regular cleaning to maintain a clean environment around the house and require less. It includes tidying up the entire house, including basic chores for bathrooms and kitchen. It takes around 2-6 hours for smaller homes, and for houses with more than 5 rooms, it takes up to 8 hours. One-Time Cleaning One-time cleaning is basically deep cleaning that you need to invest in for the initial phase of hiring professional cleaners. It is more expensive than regular cleaning because it covers every tiny detail of your house. It removes deep stuck grime and dirt in your home, which isn’t considered in regular cleaning, taking 4 to 8 hours. Comparing Cleaning Service Providers When hiring a cleansing service provider, it is important to take your time with research and go for the best possible option that matches your requirements and goals. Here are some of the popular home cleaning service providers: Merry Maids: With more than 40 years in the cleaning industry, Merry Maids is one of the most reliable options for home cleaning needs. They curate personalized packages and customized services for every home. Molly Maid: Offering a wide range of cleaning packages, Molly Maid provides specialized cleaning services, including regular house maintenance. They excel in move-out cleaning to simplify your journey. The Cleaning Authority: Known for their systematic cleaning rotation system and eco-friendly cleaning techniques, The Cleaning Authority provides 100% satisfaction to their clients. What To Look For in a Cleaning Service If you’re still struggling to find the perfect cleaner, then consider the one having the following three characteristics: Professionalism: Always prioritize professional cleaning service providers. If they have professionalism, they’ll be committed to their work, which will reflect on their work. Warranty: Your home is precious, and its things must hold significant value for you. Your cleaners should give you a warranty about the quality of their cleaning. No-Contract Services: If you like a certain cleaner, it doesn’t necessarily mean you’ll like them after a year. They may lose touch or slack off with cleaning, so you shouldn’t sign any contract, and if you do, it shouldn’t be a long-term contract. How to Use Online Cost Calculators to Estimate Your Cleaning Project If you’re unsure if your cleaners are charging the right amount for the job you’re asking for, then you can also go for online cleaning service cost estimators. It works by asking a set of questions from you regarding the nature of cleaning and the space that needs cleaning. After that, it gives you an estimated range for the work to help you save time and money. Saving on Home Cleaning Services Some people like cleaning their house in between monthly or quarterly cleaning sessions. Following are some simple tips to keep your home tidy to save you from maintaining a clean home between professional cleanings: Prepare a systematic cleaning schedule Declutter unnecessary stuff regularly Don’t let your clothes pile up on the chair Clean spills and stains immediately Get long-lasting cleaning tools or invest in homemade organic cleaning products Focus on frequently used areas like kitchen counter, dining tables, bed, side tables in bedroom, bathroom sink, etc. Include your family in the cleaning process Conclusion Home cleaning services aren’t simple; they involve detailed research to find the perfect cleaners that fit your budget. With the fluctuating prices of home cleaning in 2024, you shouldn’t go for only cost-effective options, you have to go for the one that gives you efficiency. Don’t let the expensive cleaning packages haunt you! Try a free estimate from a local home cleaning service provider. Schedule now for customized cleaning plans!
Robovac · 05/03/2024
The Ultimate Guide to Choosing the Best Floor Cleaning Machine 2024
Having clean floors in your home might not seem to be too big of a deal. After all, who has time to keep brushing up on those few crumbs here and there? However, whether your floors are made of vinyl, hardwood, linoleum, or any other surface, it is a good habit to maintain clean floors at home at all times. In order to maintain the standards of cleanliness, a variety of sophisticated and powerful floor cleaning machines have been introduced in the market. Here is our ultimate guide to choosing the best floor cleaning machine for your home in 2024. Understanding Different Types of Floor Cleaning Machines Your dream floor cleaning machines improve the overall cleaning efficiency and help achieve better results. Let us look at the different types of floor cleaning machines available and when to use them. Sweepers Floor sweepers are the easiest way of removing accumulated dirt, dust, and debris on all floor types – both soft and hard flooring. Sweepers can thus be used for keeping hard and carpeted floors clean inside homes. Burnishers Hard floor surfaces are often designed to give off a shiny finish that looks clean at a glance. Floor burnishers are supposed to bring out that lustrous and shiny look. Burnishers are usually only used on hard surfaces and indoors. They are available in both ride-on and walk-behind options. Scrubbers While sweepers are used for removing debris and dust, floor scrubbers are utilized for removing other soil built up on hard surfaces. They are also mostly used on hard surfaces indoors. They are also ideal for tight areas and small spaces like bathroom stalls. Carpet Extractors While hard flooring might seem to be difficult to handle, it is even more challenging to clean soft flooring surfaces. Carpet extractors are used to make this easier by keeping carpets dry and clean with strong cleaning capabilities. They also help spot-cleaning in case of spills, stains, and moisture. Vacuums This is probably the most familiar cleaning tool for many individuals. Commercially used vacuums come in various types to deliver enhanced durability and performance. Lightweight backpack vacuums are easily movable for small, tight spaces such as stairways. These can be used through a cord or a battery. Special Cleaning Machines There are different types of special cleaning machines available that can help handle unique and specific floor cleaning demands. For instance, AI-based surface cleaning machines recover dirty water while drying surfaces with a blower fan, making them perfect for cleaning restrooms. eufy S1 Pro - The World’s First Floor Washing Robot Vacuum Meet eufy S1 Pro, unleash the power of real-time self-cleaning floor washing robot combined with a high-performance vacuum, all in one revolutionary device. Say goodbye to manual labor and hello to groundbreaking innovation and design. Don't miss out on the revolution in home cleaning: Sign up for discounts See eufy deals Top 7 Floor Scrubbers of 2024: Features and Benefits Here are our top picks for the seven best floor scrubbers of 2024. eufy Mach V1 Ultra Pros Remarkable cleaning Tackles tough stains Splendid drying Cons Large and expensive With an impressive battery life of 84 minutes, eufy Mach V1 Ultra is the best floor scrubber for larger areas that require tough cleaning jobs. Even though it is expensive, it is the first model with a steam function, mop, and vacuum combination. The steam feature allows for a more efficient fight with grime and dirt. It has other impressive features, such as a dirt sensor and a self-cleaning system. Oreck’s Cleaner Machine for Hard Floors Pros Compatible with carpets 50 ft. long cord Cons Additional brush heads do not come along with the machine and need to be purchased separately Oreck’s cleaner machine is a commercial-grade scrubber that claims to bring out even the toughest of stains. It is compatible with any surface, including carpets. The best part is that it can easily fit into small spaces such as the laundry room or a closet. Shark HydroVac Cordless WD210UK Pros Simple to use Lightweight Excellent cleaning Anti-odor technology Cons Doesn’t have a vacuum-only mode Weighing only 3.95 kg, this cleaner is one of the lightest cleaners for hard flooring so far. It is a three-in-one machine, working as a mop, vacuum, and self-cleaner all together. It is also cordless, which makes it truly convenient to carry it all around the house. Shark Automatic Steam Mop S6002UK Pros Very easy to use Automated steam control Handles tough stains Cons Cannot clean corners Shark Automatic steam mop utilizes two spinning cloths of microfiber to perform the hard cleaning for you. It pumps steam out using two different settings for hard surfaces and laminated ones. Moreover, this machine is capable of scrubbing and steaming at the same time. Hoover FloorMate Pros Comes with a drying and washing mode Separates clean and dirty water in different tanks Cons Does not have the required power for scrubbing grout This scrubber is an excellent option for your home floors as it washes the floor and vacuums all the dirty water left behind. Its four distinct spin brushes provide a solid scrubbing strength while the rest of it washes and dries. Karcher 1-Speed Scrubber Pros Compact Can stand upright Cons Only 20 minutes of battery time An extremely lightweight scrubber, Karcher’s speed scrubber is best for someone who doesn’t have much storage space and no desire for cleaning by hand. It has two separate tanks for storing dirty and detergent water with a separate concentrate cleaning bottle to get it all started. Roborock Dyad Pros Efficient cleaning and mopping Smart auto switch Cons Rollers can get clogged by hair Noisy The powerful but noisy Roborock is an impressive addition to our list of top floor scrubbers. It cleans and vacuums the hard floors. With two separate tanks for dirty and clean water, the cleaner also indicates when the dirty water tank needs emptying. It is perfect for cleaning up tougher stains and loose debris on hard floors. How to Choose the Right Floor Cleaning Machine for Your Home This may not be the easiest decision, but here are a few tips to consider before choosing the right floor cleaning machine for your home: Space Are the areas where you need the machine larger or compact? Is it a high-traffic area or a quieter one? You need to decide accordingly. Type of Dirt What type of dirt typically needs to be cleaned? Heavier cleaning may require ride-on machines. Budget It is wise to pick the most efficient machine under the proper budget. However, we do not recommend opting for a mediocre cleaner just because it is cost-effective. So, decide how much you are willing to spend on a cleaning machine. Noise Cleaners can be quite noisy. How much noise are you ready to bear to fulfill your cleaning requirements? Power Source You will be required to choose between a powered or a battery-operated cleaning machine. The factor you need to keep in mind is the longevity of the one operated through batteries. If it requires charging too frequently, it will upset the whole cleaning routine. So, we recommend reviewing the power capacity of the product. As for powered cleaners, managing the wire is a complete hassle. So, it is up to you what scenario best suits you. The Best Hard Floor Cleaners of 2024 The best hard floor cleaners are a fairly new category but a rapidly growing one. As the world moves away from carpets and shifts to hard flooring, all eyes are on what the hard floor cleaners offer today. The world of hard floor cleaning has advanced to a new level, with machines that will not only mop the floor but will also collect a pile of dust. Not only this, but they are also capable of cleaning themselves afterward. A new feature on the market is the cleaners’ capability to dry the hard floors through blowers after washing them. Undoubtedly, the latest hard floor cleaning machines are a great addition to the cleaning army. The Rise of Robot Vacuums in Floor Cleaning As the cleaning game goes way above the advanced level, we cannot help but discuss the rise of robot vacuums in this area. They provide an amazing hands-off approach. They are quiet and small and come with several advanced features. They are also capable of navigating obstacles during their cleaning spree. Here are our top robot vacuums for 2024. eufy X10 Pro Omni The eufy X10 Pro Omni is an advanced robot vacuum with a powerful 8,000 Pa vacuum design, multi-directional floating brush for carpet cleaning, and a high-efficiency filter for cleaner air. It features state-of-the-art AI.See™ technology with LED sensors for obstacle recognition and smart cleaning. The All-in-One Station offers hands-free cleaning and maintenance. eufy Robot Vacuum Omni S1 Pro S1 Pro is a premium-class robot vacuum cleaner from the celebrated eufy brand. It's a new robot vacuum released in March 2024, so expect to find a collection of modern and improved features. eufy S1 Pro has a unique blend of aesthetic elegance and cutting-edge features. iRobot Roomba j7 Comes with WiFi connectivity and is also suitable for all floor types. It has advanced obstacle avoidance and can also be controlled through Google Assistant or Alexa. It is available for $554 at Amazon. iRobot Roomba s9+ It is one of the best robot vacuums out there and comes with a very corner-friendly style. It uses a 3D sensor for cleaning and detecting around different objects. Moreover, it works adequately with Alexa. The prices start from $599 on Amazon. Conclusion The significance of choosing the right floor cleaning machine cannot be emphasized enough as it is an investment. An unsuited machine will upset your budget and cause cleaning issues on top of it. We have highlighted the best floor cleaning machine for your home that has the trust of the customers. Please look into each of them and select the one that best serves your requirements. FAQs Which type of hard floor cleaner should one go for? There are different types of hard floor cleaners available. However, those with rollers are a brilliant choice as they suck up germs and dirt and separate dirty with clean water all in one go. Should cordless cleaners or powered ones be preferred? Cordless cleaners are a better option as they can be taken anywhere without worrying about a power outlet.
Smart Lock · 05/03/2024
You're trying to balance shopping, a screaming toddler, and a purse that's full to the capacity. It feels like an Olympic feat to reach for your keys. Won’t it be great to enter your home peacefully without thinking about finding your keys in the bag? Then, my friend Google Home Smart Lock is waiting for you. We carefully chose the best Google Home Smart Locks on the market, which makes them your home guards. They have smooth installations and easy-to-use menus for people of all tech skill levels. These Google Home Smart Locks make protecting your home easy and convenient with just voice commands so you can live a safe and stress-free life. Isn’t it cool? Keep reading the article to learn about Google Home Smart Locks. What are Google Home Smart Locks? Google Home Smart Locks are modern security solutions for your home automation. These smart locks are compatible with the Google Home ecosystem, enabling easy control via voice commands or the Google Home app on your smartphone. Think about how easy it would be to secure your door by saying, "Hey Google, lock the door." These smart locks offer a modern take on home security, combining convenience with advanced technology. Easily provide access to family members, create special codes for guests, and keep track of lock activity, all through the convenient Google Home interface. With advanced encryption and two-factor authentication, Google Home Smart Locks emphasize security. By receiving frequent firmware updates and being compatible with well-known brands, these locks provide strong protection against potential risks. Considerations for Choosing a Google Home Smart Lock If you are new to Google Home Smart locks, you need clarification about what factors to consider while choosing a smart lock. Google Home smart lock brings a lot of convenience; you are just a voice command away to upgrade your security system. It is not just about convenience; it's 2-factor authorization, and AI voice recognition will give you peace of mind. 1. Connects With Google Assistant Choose a Google Home Smart Lock that perfectly works with Google Assistant. You can control it with your voice and easily manage everything using the Google Home app. Transform your home into a smart haven that fits your needs. 2. Unique Features Discover a range of features designed to enhance both convenience and security. Focus on keyless entry, remote access through your smartphone, voice-controlled features, auto-locking abilities, and advanced security options to improve your home's safety and simplify your daily tasks. 3. Easy Installation Process Take into consideration how comfortable you are with installation. Choose a smart lock with easy-to-follow installation directions to save time and effort. You can also choose the professional installation if you'd rather someone else do it. This will ensure that your smart lock is installed correctly and works perfectly. 4. Budget Seek out a Google Home Smart Lock that suits your budgetary limitations. A wide variety of alternatives means you may find a smart lock that fits your budget while still having all the desired features. This way, you can save money without sacrificing functionality. 5. Rating and Warranty You should consider how the smart lock looks and ensure it matches your house's style. Check to see if the warranty is valid, and give greater importance to reputable brands with a quality and customer satisfaction history. These extra factors help you make a balanced choice for your smart home protection. 5 Top Google Home Smart Locks Choices 1. eufy Smart Lock C220 Experience the ultimate convenience and peace of mind with the eufy Smart Lock C220. Its 8-month battery life is truly amazing. The self-learning AI assures accurate fingerprint recognition, so you don't have to try to open the door more than once. If you don't want to use your fingerprint, you can unlock your door in less than a second with the Eufy Security app, keypad, real key, Apple Watch, or voice control with Alexa or Google Voice Assistant. The Eufy Security app allows easy remote access over Wi-Fi, so you don't need an extra bridge. For a hassle-free experience, installation only takes 15 minutes and doesn't require any digging. With a working temperature range of -22℉ to 158℉ and features like alarm alerts for strange attempts, the lock's BHMA Grade 3 certification proves its security and durability. With its IP53 rating, the Eufy Smart Lock C220 makes it easier than ever to keep your home safe. 2. eufy Smart Lock C210 The eufy Smart Lock C210 gives you unbeatable ease of use and peace of mind. Its battery life of 18 months is very long, so you don't have to worry about replacing it often. The self-learning AI ensures that your fingerprint is correctly recognized, getting rid of frustrating unrecongnized fingerprint errors. To open your door, use the Eufy Security app, the keypad, a real key, your Apple Watch, or your voice with Alexa or Google Voice Assistant. The Eufy Security app has built-in Wi-Fi, so you don't need an extra bridge to access it from afar. Setting it up is easy; it only takes 15 minutes without digging. The Eufy Smart Lock C210 works with most normal US deadbolts without any problems, making your home safer without any trouble. BHMA approval shows that it will last, and the alarms that go off when strange attempts are made ensure it is very secure. 3. Google Nest x Yale Lock The Google Nest x Yale Lock gives you peace of mind and ease like never before. It replaces your old deadbolt lock without any problems because it is made to be safe. Using the LED keypad, you can lock and open your front door without dealing with a physical key. You can let someone in from anywhere by opening the door with your phone. This makes it easy for guests to get in. Give family and friends their passcodes and control their access by setting their schedules. In Privacy Mode, the keypad is briefly turned off to protect private moments. Get real-time alerts when your smart door lock is locked or unlocked, so you always know what's happening. The Nest app lets you check on and handle your door lock from afar. It has one-touch locking and auto-locking features to make things easier. Just replace your old lock or call a Nest Pro for expert installation. You can easily make your home safer with the Google Nest x Yale Lock, which combines modern technology with features that are easy to use. 4. Kwikset Halo Touchscreen Wi-Fi Smart Door Lock With the Kwikset Smart Lock, you can enjoy ease and peace of mind. You don't have to worry about changing the batteries all the time because it's Wi-Fi enabled and can be controlled from afar using the Kwikset app. The backlit touchscreen makes it easy to share access with up to 250 codes and set up times for people to come in. Work with Amazon Alexa or Google Home to make adding to your smart house easy. Get immediate alerts for any strange lock behavior, which will keep your home safe. Auto-lock protection lets you enter and leave without using your hands. It's easy to set up, and you only need a screwdriver to do it yourself. You'll also get a 1-year warranty on the electronics and a lifetime warranty on the frame and finish. The Kwikset Smart Lock offers high-tech safety and smart home integration, making it simple to handle and control who can get in from anywhere. 5. Wyze WiFi And Bluetooth Enabled Smart Door Lock Experience the most ease and peace of mind with the Wyze WiFi & Bluetooth-enabled Smart Door Lock. Enjoy its great benefits, such as using the Wyze app to lock or unlock your door from anywhere. With the Wyze Lock Gateway, it's easy to connect to your WiFi and take control of everything. Turn on auto-lock and auto-unlock to eliminate the need for keys or codes. The Wyze smart lock makes it easy for people who need to be tech-savvy to set up with Alexa. You can easily give friends, family, or anyone you can access, and it's easy to track when things are locked and unlocked. Because it has a built-in gyroscope, Wyze Lock can tell the lock state and whether the door is open or closed. You can enjoy keyless door entry. Just walk up to your door and let it open itself. Your existing key and deadbolt will keep it safe. You could pair the Wyze Lock with the Wyze Lock Keypad and Wyze Cam (sold separately) to make it safer and more visible. Wyze brings a new level of smart home protection that is easy to use and based on the latest technology. 6. Level Smart Lock Using the Level smart lock will give you unmatched comfort and ease. No more worries about the battery because the Level Home app lets you handle it from afar and connects to Wi-Fi. Its sleek form makes it look like it was always there, and the technology is hidden. The Apple Home Key feature makes it easy to get into your home. You can get in with just a tap on your iPhone or Apple Watch. The Level Connect Wi-Fi bridge lets you control your lock from afar and see live activity logs and key code management. With the Level Home app or key card, you can get in without a key, and it's easy to share access. Speech commands can control this smart lock, and it works with Google Home, Amazon Alexa, and Apple Home. It is made with high-quality security features, like 440C stainless steel and stronger metal alloys, and has a AAA grade from BHMA to ensure it lasts. It's easy to install yourself and works with most American standard outdoor doors. It's easy to do if you follow the setup guide and movies. The Level Lock+ Connect Wi-Fi Smart Lock will make your home safer and easier to manage. Summing Up The Google Home Smart Locks change the way security works by combining ease of use with high-tech smarts. Imagine being able to lock the door to your house with just your voice: "Hey Google, lock the door." These locks work with Google Home and have easy-to-use features for managing entry, creating custom codes, and keeping an eye on what's going on. Putting security first with two-factor login and advanced encryption, picking the right lock depends on things like compatibility, keyless entry, cost, warranty, and how easy it is to install. Some of the best smart locks are the the Eufy Smart Lock, Google Nest x Yale Lock, and the Wyze Smart Lock. With their simple design and high-tech features, these change the way home protection is done. Pick the best fit for a safe, stress-free life. FAQS What is a Google Home Smart Lock? A Google Home Smart Lock is a modern way to keep your home safe while automating it. It is made to work with the Google Home environment without any problems. It lets people use speech commands or the Google Home app on their phones to control and lock their doors. How do Google Home Smart Locks enhance home security? These smart locks come with advanced features like keyless entry, remote access, voice-controlled options, and auto-locking capabilities. Security is their top priority, demonstrated through advanced encryption, two-factor authentication, and regular firmware updates. Do Google Home Smart Locks work with other smart home devices? Yes, these smart locks are crafted to effortlessly work with a variety of smart home devices like Amazon Alexa and Apple Home, offering a complete and interconnected home automation experience.
Security Cameras · 05/03/2024
The Ultimate Guide to the Best Driveway Cameras 2024
In recent years, the evolution of home security has taken a significant leap forward with the advent of sophisticated technologies, among which driveway cameras stand out as a pivotal component. As homeowners seek more comprehensive solutions to safeguard their properties, driveway cameras have surged in popularity, offering not just surveillance but a deterrent to potential intruders. This guide delves into the world of driveway security cameras in 2024, exploring how these devices work, the benefits they offer, key considerations for choosing the right model, and a curated selection of the top 5 driveway cameras on the market. Through expert recommendations and a detailed look at the latest advancements, we aim to equip you with the knowledge needed to enhance your home security effectively. How Do Driveway Security Cameras Work? Driveway security cameras harness cutting-edge technology to keep a watchful eye over the comings and goings within the bounds of your driveway, serving as both a deterrent to potential intruders and a tool for monitoring daily activities. At their core, these security cameras are equipped with sophisticated sensors capable of motion detection, enabling them to activate and record whenever movement is detected within their field of view. This feature is particularly valuable for capturing footage of unexpected visitors or possible security breaches. Enhancing their capability further, many modern driveway alarms with cameras incorporate night vision technology. Through the use of infrared LEDs, these cameras can illuminate the driveway area under the cover of darkness, capturing clear video footage regardless of the lighting conditions. This ensures that the surveillance system remains effective 24/7, providing homeowners with peace of mind even after the sun has set. Taking a step into the realm of advanced surveillance, some driveway security cameras are now being enhanced with Artificial Intelligence (AI) features. Among these, license plate recognition stands out, offering the ability to identify and log the license plates of vehicles entering or exiting the driveway. This can be incredibly useful for tracking frequent visitors, flagging unauthorized vehicles, and even integrating with gate opening systems for automated access control. By sending real-time alerts directly to homeowners through smartphone apps or other connected devices, driveway security cameras empower residents to always stay informed about their property’s security status. Whether it’s a delivery person arriving, an unexpected guest, or an unwelcome trespasser, these outdoor security cameras ensure that homeowners are the first to know about any activity on their property, allowing for swift and informed responses to any situation that arises. Benefits of Installing a Driveway Camera The decision to equip your driveway with a security camera comes with a multitude of benefits that significantly elevate the safety and security of your home. Here’s a closer look at the various advantages that driveway cameras bring to your security setup: Deterrence of Potential Intruders: Perhaps one of the most immediate benefits is the deterrent effect that a visible driveway camera has on potential intruders. The presence of a camera alone can make would-be burglars think twice before targeting your home, as they’re aware their actions are being recorded. Provision of Valuable Evidence: In the unfortunate event of a security breach, theft, or other incidents, show me the driveway cameras can provide crucial video evidence. This footage can be instrumental in identifying the perpetrators, recovering stolen property, and supporting insurance claims or legal actions. Extension of Home Security System: By adding a driveway camera to your security setup, you effectively extend the coverage of your surveillance, ensuring one of the most vulnerable areas of your property is under constant watch. This coverage ensures that not just your home’s perimeter but also its immediate access points are monitored. Peace of Mind: Knowing that your driveway is continuously monitored provides an unparalleled sense of security and peace of mind. Whether you’re at home or away, you can rest assured that your property is being vigilantly watched over, with the ability to remotely access live footage or receive alerts about any unusual activity. Convenience and Control: Modern driveway cameras often come equipped with features that offer convenience and control, such as voice control like “show me the front driveway”, motion detection alerts, and even smart home integration. This allows homeowners to easily check in on their property at any time from their smartphone or device. Increased Property Value: Beyond the immediate security benefits, installing a high-quality driveway camera can also contribute to an increase in your property’s value. A robust security system is an attractive feature for potential buyers, highlighting the property’s safety and the homeowner’s commitment to protecting it. Key Factors to Consider When Choosing the Right Driveway Camera Choosing the ideal driveway security camera requires careful consideration of various features to ensure that it meets your specific security needs. Here’s a breakdown of the critical factors to keep in mind: Resolution The clarity of the footage your camera provides is paramount. A high-resolution camera, ideally 1080P HD or better, ensures that the images and videos captured are clear and detailed enough to identify faces, license plates, and other important details. In environments where every detail matters, opting for 4K resolution can provide even greater clarity and depth in the footage. Connectivity The ability to connect your driveway camera to your home network wirelessly adds a layer of convenience and flexibility to your security setup. Wireless connectivity allows for easier installation and placement, as you’re not constrained by the need to run cables. Additionally, it enables remote access to the camera’s live feed and recordings via smartphones or tablets, ensuring you can monitor your driveway from anywhere, at any time. Durability Given that driveway cameras are typically installed outdoors, durability is a critical factor. The camera you choose should be capable of withstanding adverse weather conditions, such as rain, snow, intense sunlight, and temperature extremes. Look for floodlight cameras rated with an IP (Ingress Protection) code that signifies sufficient protection against dust and water ingress. A robust, weather-resistant design ensures that your camera continues to operate effectively, regardless of the elements it faces. Top 5 Driveway Cameras of 2024: Recommendations and Reviews After extensive research and testing, here are the top 5 driveway cameras of 2024, each offering unique features to cater to diverse security needs: eufy SoloCam S340 The eufy SoloCam S340 shines as a beacon of innovation, offering wireless convenience coupled with 4K ultra-high-definition video quality. Its standout feature is the solar-powered battery, ensuring continuous operation without the need for manual recharging. Equipped with advanced motion detection and night vision, the SoloCam S340 provides round-the-clock surveillance, making it an excellent choice for homeowners seeking reliability and high-resolution footage. eufy Floodlight Cam S330 Designed to illuminate and secure your driveway, the eufy Floodlight Cam S330 combines powerful LED lighting with 1080P HD video capture. The floodlights are triggered by motion, deterring potential intruders while providing clear, brightly lit footage. This camera also features two-way audio, allowing homeowners to communicate with visitors or deter unwanted guests, offering a comprehensive security solution that goes beyond mere surveillance. Arlo Ultra 4K The Arlo Ultra 4K stands out for its superior video quality and expansive field of view. Its 4K HDR recording capabilities ensure that details are crisp and colors are vibrant, even in challenging lighting conditions. The camera offers wireless flexibility and is equipped with an integrated spotlight, color night vision, and smart alerts that differentiate between people, animals, and vehicles, making it one of the most advanced options on the market. Nest Cam Outdoor IQ Google’s Nest Cam Outdoor IQ delivers intelligent surveillance with facial recognition technology, allowing it to send alerts based on who it sees. Its 1080P HD video and HDR imaging offer clear footage, while its robust design withstands the elements. Integration with the Google Home ecosystem provides seamless control and monitoring, making it a smart choice for those invested in the Google smart home platform. Ring Spotlight Cam Battery The Ring Spotlight Cam Battery is designed for flexibility and ease of use, featuring 1080P HD video, motion-activated LED spotlights, and solar charging options. Its wireless design simplifies installation, and the Ring app provides intuitive control and monitoring. With two-way audio and customizable motion zones, this camera is versatile enough to meet a wide range of security needs. Optimal Placement of Driveway Cameras: Maximizing Coverage and Effectiveness Full Driveway Coverage: Position the camera to encompass the entire length and width of the driveway. This ensures no part of the driveway is left unmonitored, capturing all movement towards or away from your home. Clear View of Street and Entrance: Aim to have a vantage point that includes a section of the street and the entrance to your property. This wider field of view helps in identifying vehicles or individuals before they even enter the driveway, adding an extra layer of preemptive security. Height and Angle: Mount the camera at an elevated height (ideally 8 to 10 feet) to prevent tampering and to provide a broad, unobstructed view. Adjust the angle to minimize blind spots and ensure the camera lens is not directly exposed to sunlight, which could cause glare and affect image quality. Consider Vandalism Prevention: Place the camera out of easy reach to deter potential vandals or thieves from damaging or disabling it. Protective casings can also be used for additional security. Step-by-Step Guide to Installing Your Driveway Security Camera Select the Perfect Spot: Based on the placement principles above, choose a location that offers the best coverage and view. Consider the proximity to power sources and Wi-Fi signal strength if using a wireless camera. Mount the Camera: Most driveway cameras come with mounting hardware. Follow the manufacturer’s instructions to securely attach the camera to the chosen spot. Ensure it is mounted firmly to avoid movement from wind or other disturbances. Adjust the Camera Angle: Once mounted, adjust the camera angle to optimize the field of view. Check the live feed from your smartphone or computer to make fine adjustments until you achieve the desired coverage. Connect to Power: For wired cameras, route the power cable to your power source and connect it. If your camera is battery-powered, ensure the battery is fully charged. For solar-powered models, position the solar panel where it will receive adequate sunlight. Connect to Your Home Network: Follow the manufacturer’s instructions to connect the camera to your home Wi-Fi network. For wired options, you may need to connect an Ethernet cable to your router. Configure Camera Settings: Using the camera’s app or software, configure settings such as motion detection sensitivity, alert preferences, and recording schedules to suit your needs. Set Up Alerts: Enable push notifications or email alerts for motion detection events to ensure you’re promptly informed of any activity in your driveway. Test Your Setup: Finally, test the camera’s functionality by walking through your driveway during both day and night to ensure coverage is adequate and the image quality meets your expectations. Conclusion: Embracing a Secure Future with Driveway Cameras As technology continues to advance, driveway camera is becoming an indispensable tool in home security. By choosing the right camera, optimizing its placement, and integrating it with your overall security system, you can significantly enhance the safety and security of your home. FAQ Are Driveway Security Cameras Worth the Investment? When weighing the cost against the benefits, driveway cameras often emerge as a worthwhile investment, offering not just security but also convenience and evidence collection capabilities. How to Power a Driveway Camera? Effective ways to power a driveway camera include traditional wired connections, battery power, or solar power options, each with its own set of considerations for installation and maintenance. Integrating Driveway Cameras with Alarm Systems: Is it Necessary? While not strictly necessary, integrating driveway cameras with alarm systems can enhance the effectiveness of your home security by providing a more comprehensive surveillance solution and enabling more efficient alert systems.
Security Cameras · 05/03/2024
A Comprehensive Guide to Auto Tracking Security Cameras
In the rapidly evolving world of security technology, auto tracking security camera is establishing themselves as indispensable tools. These cameras that follow you, equipped with sophisticated Pan-Tilt-Zoom (PTZ) mechanisms, are not just mere observers but active participants in ensuring safety and security. Their ability to automatically detect and follow movement adds a dynamic edge to security systems, making them more efficient and responsive than ever before. This comprehensive guide delves into the world of auto tracking security cameras, unraveling the technology that powers them, exploring their benefits, and offering insights into selecting, placing, and installing these cutting-edge devices. Let’s dive in! Understanding PTZ Auto-Tracking Security Cameras PTZ (Pan-Tilt-Zoom) auto-tracking security cameras represent a significant leap forward in surveillance technology. These sophisticated devices come with built-in mechanisms enabling them to move horizontally (pan), vertically (tilt), and adjust their focus (zoom) on particular areas or subjects with remarkable precision. The magic behind their motion following camera ability lies in advanced algorithms designed to recognize motion within their field of view. Once movement is detected, these algorithms instruct the camera to automatically follow the moving object, keeping it centered in the frame. This ensures that the subject of interest is not only kept in constant view but also captured with high-level detail, all without the need for someone manually controlling the camera. This autonomous tracking capability transforms how environments are monitored, offering a hands-free solution to keeping a vigilant eye on critical areas. Benefits of Using Auto-Tracking Security Cameras Motion tracking security cameras bring a host of benefits to the table, revolutionizing the way surveillance is conducted and enhancing security measures across the board. Here’s a closer look at the key advantages they offer: Enhanced Security One of the standout features of auto-tracking cameras is their ability to seamlessly track movement across their field of view. Whether it’s a person of interest or a moving vehicle, these cameras ensure continuous surveillance, significantly reducing the chances of missing critical events. This continuous tracking capability is invaluable in maintaining a secure environment, as it ensures that all significant activities are captured and monitored without interruption. Reduced Need for Manual Monitoring With their intelligent tracking capabilities, auto-tracking cameras dramatically decrease the reliance on constant manual oversight. Security teams, instead of having to manually operate cameras or constantly monitor screens for activity, can rely on these smart cameras to alert them to and follow significant movements. This frees up security personnel to concentrate on more strategic tasks, such as analyzing potential threats and coordinating responses, enhancing the overall effectiveness of security operations. Coverage Efficiency The ability of a sports camera that follows you to monitor a wide area is unparalleled. Traditional surveillance setups often require a network of fixed cameras to cover the same extent of space, leading to increased equipment and maintenance costs. CCTV camera tracker, with their dynamic pan, tilt, and zoom functions, can effectively monitor large areas on their own. This not only reduces the number of cameras needed but also makes the surveillance process more streamlined and cost-effective, offering a smart solution for extensive area coverage. Key Features to Consider When Choosing a Motion Tracking Security Camera Selecting the right motion tracking security camera involves careful consideration of several key features to ensure that the device meets your surveillance needs. Here’s what to keep in mind: Resolution The clarity of the footage captured by your motion following camera is paramount. High-definition video quality, especially in resolutions of 1080P HD or higher, is crucial for capturing clear, usable images. This becomes even more important in scenarios where identifying details such as facial features or license plate numbers can be critical. A higher resolution camera ensures that even when the footage is zoomed in for closer inspection, the details remain clear and discernible. Tracking Capabilities The essence of a motion tracking security camera lies in its ability to detect and follow movement accurately. It’s important to choose a camera that demonstrates robust tracking capabilities, capable of distinguishing between different types of movement and adjusting its focus to follow the subject reliably. Look for cameras that minimize false alarms by accurately differentiating between relevant movement (such as people or vehicles) and irrelevant movement (like moving shadows or pets). Connectivity Options The flexibility to integrate your auto camera tracking into your existing network via various connectivity options can greatly influence its convenience and effectiveness. Wi-Fi-enabled cameras offer the advantage of wireless installation and remote access, making them easy to set up and manage. However, in environments where wireless connectivity may be unstable or unavailable, having the option to connect via wired methods ensures that your camera remains operational. Additionally, consider cameras that support the latest Wi-Fi standards for faster data transmission and improved range. Top 5 Motion Tracking Security Cameras: A Curated List Here, we present a carefully selected list of the top 5 motion tracking security cameras, designed to cater to a variety of needs and preferences: eufy Indoor Cam S350 The eufy Indoor Cam S350 excels in indoor surveillance with its sharp 1080P HD resolution and advanced motion tracking technology. It offers seamless integration with smart home systems, real-time alerts, and two-way audio, making it an excellent choice for monitoring interior spaces like homes and offices. eufy SoloCam S340 The eufy SoloCam S340 features a 4K resolution sensor that ensures detailed footage both day and night. Its standout feature is the solar-powered battery, offering uninterrupted surveillance without frequent recharging. Coupled with its weatherproof design, it’s perfect for keeping an eye on exterior areas. Arlo Pro 4 The Arlo Pro 4 is a versatile option that offers convenience, 2K video quality with HDR, and a 160-degree viewing angle. Its integrated spotlight and color night vision capabilities ensure clear footage. The camera’s smart alerts can distinguish between people, cars, and animals, adding extra layer of intelligent monitoring. Wyze Cam Pan v2 The Wyze Cam Pan v2 provides comprehensive coverage with its 360-degree panning and 93-degree tilt capabilities. It features 1080P HD resolution, color night vision, and real-time motion tracking alerts. Its compatibility with Alexa and Google Assistant makes it a user-friendly addition to any smart home setup. Ring Stick Up Cam Elite The Ring Stick Up Cam Elite offers versatile installation options, excellent 1080P HD video quality, and customizable motion detection zones. It supports both Wi-Fi and Ethernet connectivity, ensuring reliable performance in various settings. Optimal Placement Strategies for Auto Tracking Security Cameras Entry Points: Position cameras to monitor front and back entrances, gates, or any access points to capture all incoming and outgoing traffic. Auto-tracking features can follow individuals or vehicles as they approach or leave. Main Corridors: Inside buildings, place cameras in hallways and main walkways. These high-traffic areas are critical for tracking movement throughout the premises. Parking Lots: Large, open areas like parking lots benefit from auto-tracking cameras to monitor vehicles’ movements, providing comprehensive coverage that static cameras might miss. Open Spaces: In outdoor or large indoor spaces, such as warehouses or recreational areas, strategically placed auto-tracking cameras can follow activities across wide areas without the need for multiple fixed cameras. Installation Tips for Motion Tracking Cameras To ensure your motion tracking cameras deliver their best performance, consider these installation tips: Height and Angle: Mounting your movement security camera at an elevated height gives a clearer and wider field of view, allowing for better tracking. Adjust the angle to avoid potential blind spots and ensure the camera can pan, tilt, and zoom effectively without obstructions. Lighting Conditions: Proper lighting is crucial for accurate motion detection. Place cameras in well-lit areas or consider additional lighting sources to enhance visibility, especially for nighttime surveillance. Ensure the camera is not directly facing light sources to avoid glare and false alarms. Power and Connectivity: A consistent power supply is essential for continuous operation. For wireless cameras, ensure a strong and stable Wi-Fi signal. Conclusion Auto tracking security cameras represent a significant advancement in surveillance technology, offering automated, efficient, and comprehensive monitoring solutions. Their ability to enhance security operations while reducing manual efforts makes them an invaluable asset in modern security systems. FAQ Are PTZ Motion Tracking Cameras Worth It? PTZ motion tracking cameras are worth the investment in scenarios where their unique capabilities can be fully utilized. For large, open areas where extensive coverage is required, or in situations where detailed monitoring of moving objects is necessary, the benefits of PTZ cameras can outweigh their higher costs. Do All PTZ Cameras Have Auto Tracking? Not all PTZ cameras come equipped with auto-tracking capabilities. It's a specialized feature found in advanced models designed for dynamic surveillance environments. Are Motion Cameras Always Recording? Motion cameras can be set to various recording modes, including continuous recording or motion-activated recording. The latter saves storage space and power by only recording when movement is detected, providing an efficient surveillance solution.
Security Cameras · 05/03/2024
4K Wireless Security Camera: A Comprehensive Guide 2024
As we move further into the digital age, surveillance technology is advancing at an unprecedented pace, with 4K wireless security cameras at the forefront of this evolution. Offering unparalleled image quality and flexibility, these cameras represent the next generation of property and personal security. This guide dives into the world of 4K wireless security cameras, providing a detailed overview of their capabilities and how they're reshaping surveillance practices in 2024. Understanding 4K Wireless Security Cameras: Definition and Functionality 4K wireless camera is at the forefront of surveillance technology, delivering unparalleled clarity and detail in video capture. These advanced devices record in Ultra HD resolution, boasting a minimum of 3840 x 2160 pixels. This is a significant step up from the 1920 x 1080 pixels found in standard 1080P HD cameras. The increase in pixels doesn't just mean sharper images; it means that even when you zoom in digitally, you don't lose the critical details that could be pivotal in identifying individuals or specific features. This capability is a game-changer in scenarios where recognizing the minutiae could be the key to security. The term "wireless" in 4K wireless CCTV cameras signifies their mode of data transmission. Moving away from the traditional need for physical cables for both power and data, these cameras leverage Wi-Fi or other wireless protocols for connectivity. This shift dramatically simplifies the installation process, removing the hurdles of extensive wiring and allowing for the cameras to be placed in the most strategic locations without the constraints of cabling. Furthermore, the adoption of wireless technology brings the advantage of remote viewing and management. No matter where you are, as long as you have an internet connection, you can access the live feed and recorded footage from your cameras using devices like smartphones, tablets, or laptops. This means you can keep an eye on your property 24/7, providing an added layer of security and peace of mind. Whether you're in the next room or halfway across the globe, monitoring your space is as easy as a few taps on your device, showcasing the advanced technology and convenience that 4K Wi-Fi security cameras offer. The Advantages of 4K Wireless Security Cameras Unmatched Image Quality: At the heart of the 4K Wi-Fi camera’s appeal is its exceptional image quality. Recording at a crisp 3840 x 2160 pixel resolution, these cameras produce footage that’s not just clear but rich in detail, far surpassing what standard HD cameras can offer. This sharpness means every minute detail—be it a facial feature, a distant license plate, or a fleeting expression—is captured with precision. Such accuracy is indispensable in security contexts, where identifying the specifics can often be the key to resolving issues. Expansive Coverage: One of the most compelling advantages of 4K security camera system is their broad coverage ability. With their high resolution, a single 4K camera can monitor an area that would typically require several lower-resolution cameras. This not only streamlines the setup process but also proves more economical, minimizing the number of devices needed for comprehensive surveillance. This feature is especially beneficial for sprawling properties or complex spaces that demand extensive monitoring. Superior Digital Zoom: Digital zoom is where many traditional cameras fall short, often blurring details as the image is magnified. However, the pixel abundance in 4K surveillance cameras means they can zoom in digitally without significant loss of image quality. This capability is crucial when you need to scrutinize a particular scene’s specifics or identify an object or person from afar. It essentially allows for close-up inspection without physically moving the camera closer. Enhanced Surveillance Efficiency: Combining crystal-clear footage, wide-ranging coverage, and powerful zoom, a 4K security camera is equipped for comprehensive surveillance. Whether deployed in homes, businesses, or sensitive areas, these cameras ensure no detail is missed, significantly enhancing security protocols. They empower operators to see more, and see better, ensuring that vital information isn’t overlooked. Critical Factors to Consider When Selecting 4K Wireless Security Cameras Wireless Signal Range The wireless signal range is a pivotal consideration, especially since the strength and reliability of the connection can significantly impact your camera’s performance. A robust signal ensures that your camera remains connected and capable of transmitting high-quality footage without interruption. Consider the layout of your space and any potential obstacles that might affect signal strength, such as thick walls or large distances, to ensure consistent coverage. Storage Options Deciding between cloud storage and local storage options is another critical factor. Cloud storage offers the convenience of accessing your footage from anywhere and often provides additional features such as advanced analytics. However, it usually requires a subscription fee. On the other hand, local storage, such as SD cards or network-attached storage (NAS), might offer more control over your data and avoid ongoing costs, but it may limit remote access capabilities and require more hands-on management. Assess your priorities and choose accordingly. Compatibility with Existing Systems If you’re integrating a new 4K security camera into an existing surveillance system, compatibility is key. Ensure that the camera you choose can seamlessly integrate with your current setup, including any DVRs, NVRs, or smart home systems you’re using. Compatibility issues can limit functionality and create unnecessary headaches, so it’s worth verifying this aspect before making a purchase. Performance in Various Lighting Conditions A camera’s ability to capture clear footage under different lighting conditions—from bright daylight to low light or even complete darkness—is crucial for comprehensive surveillance. Look for cameras equipped with features such as wide dynamic range (WDR) for handling varied lighting and infrared (IR) night vision for clear images in the dark. These features ensure that your camera provides reliable surveillance around the clock, regardless of the lighting environment. Top 5 4K Wireless Security Cameras in 2024 In 2024, the market is flooded with options, but we've narrowed down the top 5 4K wireless security cameras that stand out for their performance, features, and user satisfaction: eufy Indoor Cam S350 The eufy Indoor Cam S350 is a powerhouse in compact form, designed for those who seek unmatched clarity within indoor environments. It boasts Ultra HD 4K resolution, ensuring that every detail is captured with precision. What sets it apart is its ability to integrate effortlessly with smart home ecosystems, providing real-time alerts and footage access through a streamlined app. Its standout feature includes advanced motion detection algorithms that minimize false alarms, making it a smart choice for indoor surveillance. eufyCam S330 (eufyCam 3) The eufyCam S330 (eufyCam 3) redefines outdoor surveillance with its robust build and superior image quality. It’s designed to withstand harsh weather conditions, offering reliable performance come rain or shine. The camera excels in delivering crisp, clear 4K footage, enhanced by its night vision capabilities. Its long battery life and built-in solar panel ensure continuous operation without frequent maintenance. Additionally, its integration with the eufy Security ecosystem allows for seamless monitoring and control. Arlo Ultra 2 The Arlo Ultra 2 stands out for its exceptional video quality and wide-angle view, covering expansive areas with fewer cameras. It features color night vision for detailed video footage even in low-light conditions, and smart alerts that distinguish between people, vehicles, and animals. Its easy-to-use app and cloud storage options make accessing and storing footage hassle-free, solidifying its position as a top contender in 2024. Nest Cam IQ Outdoor Google’s Nest Cam IQ Outdoor offers a blend of sophisticated design and cutting-edge technology. It delivers 4K HDR video quality, providing clear images even in challenging lighting conditions. The camera includes facial recognition technology, offering personalized alerts based on known faces. Its robust construction is built to last, ensuring durability and reliability. Integration with the Google Home app allows for easy control and monitoring, making it a smart addition to any security system. Lorex 4K Nocturnal Smart IP Camera The Lorex 4K Nocturnal Smart IP Camera is designed for those requiring unparalleled surveillance clarity. It boasts powerful 4K resolution paired with color night vision, ensuring detailed footage. Its active deterrence features, including a remote-triggered siren and motion-activated lights, enhance property security. The camera’s compatibility with Lorex’s Smart Home Security Center allows for comprehensive monitoring and control, making it a versatile choice for extensive surveillance setups. Boosting 4K Security Camera Performance with Wi-Fi 6 Technology Wi-Fi 6 technology plays a pivotal role in enhancing the performance of 4K security camera outdoor by providing faster data transfer rates, improved connection reliability in congested areas, and better power efficiency. This advancement ensures that 4K wireless camera can operate more effectively, offering smoother video streaming and enhanced remote viewing experiences. Conclusion As we look towards the future of surveillance, 4K wireless security cameras stand at the forefront, heralding a new era of safety and monitoring. They offer not just peace of mind but a powerful tool in safeguarding our homes, businesses, and public spaces. FAQ Is 4K Resolution Beneficial for Security Cameras? 4K resolution offers significant benefits for security cameras. With a resolution of 3840x2160 pixels, 4K cameras provide a level of detail that far surpasses 1080P HD cameras. This improved resolution is particularly beneficial for identifying faces, license plates, and other critical details in surveillance footage. What are the Disadvantages of 4K Cameras? Firstly, 4K footage requires more storage space than lower-resolution video, potentially leading to higher costs for data storage, whether locally or in the cloud. Additionally, transmitting 4K video requires more bandwidth, which could strain network resources, especially in setups with multiple cameras. How Far Can a 4K Security Camera See? 4K cameras can capture high-quality video footage of areas within 30 to 100 feet, but this can extend further with cameras equipped with specialized lenses or those designed for long-range observation. What Is the Difference between 4K and 1080P Camera? The primary difference between 4K and 1080P cameras lies in their resolution. A 4K camera, with a resolution of 3840x2160 pixels, offers four times the total number of pixels found in a 1080P camera, which records at 1920x1080 pixels.
Security Cameras · 04/03/2024
The Comprehensive Guide to Security Camera with Cloud Storage
In today's digital age, the way we approach security has been transformed by the advent of security cameras with cloud storage. This moves away from the conventional local storage methods marks a pivotal advancement, providing a solution that's not only flexible but also easily accessible and scalable. Cloud storage paves the way for a more dynamic and efficient method of preserving surveillance footage. This comprehensive guide aims to explore the nuances of IP security camera cloud storage integration, shedding light on the multitude of benefits this combination brings to the table, the key features that set it apart, and what the future holds for the storage of security camera footage. How Does Cloud Storage Work with IP Cameras? The integration of IP camera cloud storage represents a transformative shift in how surveillance footage is managed, stored, and accessed. At its core, this combination leverages the power of the internet to provide a seamless, secure, and highly efficient method for handling video data. The Mechanism of Cloud Storage with IP Cameras IP cameras, designed to connect directly to the internet, capture video footage just like any traditional camera but with a crucial difference. Instead of storing data locally on physical devices, they transmit the captured footage over the internet. This is achieved through a secure connection between the camera and the cloud storage provider’s servers. Before transmission, the footage is typically compressed to reduce its size, facilitating smoother and faster uploads. Importantly, this data is encrypted at the source – the camera itself. Encryption is a critical security step that scrambles the data, making it unreadable to anyone who might intercept it during transmission. The encrypted, compressed video data is then uploaded to remote servers managed by the cloud storage provider. These servers are located in data centers that employ advanced physical and cyber security measures, ensuring that your surveillance footage is not only stored safely but is also protected from unauthorized access. Once on the cloud servers, your footage is stored securely, often with redundancy. Redundancy means that copies of your data are stored on multiple servers, possibly in different geographic locations. This ensures that in the event of a server failure, your data remains safe and accessible. One of the most significant benefits of security camera with free cloud storage is the ability to access your surveillance footage from anywhere, at any time. Users can log into their cloud storage account through a web interface, or a dedicated app provided by the storage service. After successful authentication, users can view live feeds, playback recorded footage, and manage their storage settings securely. Security Protocols in Place The security of data, especially surveillance footage, is paramount in cloud storage solutions. To this end, several protocols are implemented: End-to-end encryption: From the moment of capture to storage and eventual viewing, the data remains encrypted, ensuring that only authorized users can decrypt and view the footage. Two-factor authentication (2FA): Many cloud storage providers offer 2FA for accessing the stored data, adding an extra layer of security beyond just a password. Regular Security Audits: Cloud storage providers conduct regular security audits and updates to safeguard against emerging cyber threats, ensuring that the data storage infrastructure remains secure against breaches. Key Features of IP Camera Cloud Storage Cloud-based storage solutions for IP camera have become increasingly sophisticated, offering a range of features designed to optimize surveillance operations. These features not only enhance the security and efficiency of monitoring activities but also provide significant convenience and flexibility to users. Automatic Backup: One of the standout features of cloud storage for IP cameras is the automatic backup of video footage. This ensures that every moment captured by the camera is immediately saved to the cloud, providing a fail-safe in case of hardware malfunctions, theft, or damage to the physical storage devices. Automatic backups minimize the risk of data loss, ensuring that critical footage is preserved securely off-site. Encryption: Security is paramount when it comes to storing potentially sensitive surveillance footage. POE camera Cloud storage solutions employ robust encryption protocols to protect your data both in transit and at rest. This means that the video footage is encrypted as it’s uploaded to the cloud and remains encrypted while stored on the cloud servers, making it inaccessible to unauthorized users. Easy Accessibility: Cloud storage for security camera offers the advantage of easy accessibility, allowing users to view live or recorded footage from anywhere, at any time. Whether you’re on-site or halfway around the world, as long as you have an internet connection, you can access your surveillance data. This remote access capability is facilitated through secure web portals or mobile apps provided by the cloud storage service. Scalability: As surveillance needs grow, camera cloud storage can easily scale to accommodate increased data volumes without the need for significant hardware investments. Users can upgrade their storage plans based on their requirements, ensuring that there is always enough space for new video footage. This scalability feature makes cloud storage a cost-effective solution for expanding surveillance operations. Advanced Search and Analytics: Many cloud IP cameras offer advanced search capabilities and video analytics. Users can quickly locate specific video segments based on timestamps, camera location, or even using object recognition features. This saves considerable time and effort compared to manually reviewing footage and can provide valuable insights into the monitored activities. Multi-User Access: Cloud storage solutions often allow for multi-user access, enabling different users to view live or recorded footage based on their access levels. This feature is particularly useful for organizations where multiple departments or personnel need to monitor surveillance feeds for security, operational, or compliance reasons. Redundancy and Reliability: Cloud storage providers typically employ redundancy to ensure data reliability. This means that multiple copies of your surveillance footage are stored in different locations or servers, protecting against data loss due to hardware failures, natural disasters, or other unforeseen events. Benefits of Using Cloud Storage for Security Cameras The shift towards security cameras cloud storage is transforming the landscape of surveillance systems, offering a suite of benefits that traditional storage methods struggle to match. This evolution brings a new level of efficiency, security, and flexibility to surveillance operations. Enhanced Data Security: Cloud storage introduces an elevated level of data security for your surveillance footage. With advanced encryption protocols, your data is protected both during transmission to the cloud and while stored on cloud servers. This encryption ensures that even in the event of a breach, the integrity and confidentiality of your footage remain intact. Moreover, cloud providers typically implement rigorous security measures, including regular security audits and multi-factor authentication, further safeguarding your data against unauthorized access. Remote Access: Perhaps one of the most compelling benefits of cloud storage is the convenience of remote access. Regardless of your location, you can easily view live feeds or access recorded footage from your security cameras via any internet-connected device. This accessibility not only enhances the flexibility of monitoring but also ensures that you can respond promptly to security alerts or incidents, even when you’re away from the monitored site. Scalability: Cloud storage solutions offer unmatched scalability, allowing your surveillance system to grow seamlessly with your needs. Unlike traditional storage methods that require upfront investment in physical storage devices, cloud storage can be easily expanded with minimal effort and cost. This scalability ensures that you always have sufficient storage space for your footage without the need for constant hardware upgrades or maintenance. Reduced Physical Infrastructure: Opting for cloud storage significantly reduces the need for physical storage infrastructure on-site. This not only minimizes the initial investment in hardware but also lowers ongoing maintenance costs and the risk of hardware failure. By storing footage off-site in the cloud, you also protect your data from physical threats such as theft, damage, or natural disasters, ensuring that your surveillance system remains operational under all circumstances. Disaster Recovery: Cloud storage plays a crucial role in disaster recovery planning. With footage securely stored off-site, you’re better prepared to recover from incidents that could compromise local storage devices, such as fires, floods, or hardware failures. Cloud storage providers typically employ redundancy, storing multiple copies of your data in different locations, which further enhances the resilience of your surveillance system. Simplified Management: Managing a surveillance system with cloud storage is notably simpler and more efficient. Cloud-based platforms often come with user-friendly interfaces that allow for easy configuration of camera settings, viewing of footage, and management of storage preferences. Best Security Cameras with Cloud Storage Here are some of the best security camera models with cloud storage in the market, each offering unparalleled convenience, accessibility, and reliability: eufyCam S300 The eufyCam S300 is renowned for its long battery life and high-definition video quality, making it an excellent choice for those seeking reliability and clarity. What sets it apart is its integrated cloud storage solution, which provides encrypted storage for recorded footage, ensuring that your data remains secure and private. The eufyCam S300 also offers customizable storage plans, allowing users to choose the option that best fits their needs. With its advanced motion detection technology, users receive real-time alerts and can access recorded footage from anywhere, making it a versatile choice for home security. eufy SoloCam S340 Outdoor Security Camera Designed specifically for outdoor use, the eufy SoloCam S340 Outdoor Security Camera stands out for its durability and weather-resistant design, capable of withstanding harsh environmental conditions. Its cloud storage capabilities are complemented by AI technology for person detection, reducing false alarms and focusing on the events that matter most. The SoloCam S340 provides encrypted cloud storage, ensuring that your outdoor surveillance footage is stored securely. Easy to install and manage through a dedicated app, it offers users peace of mind by allowing them to monitor their property remotely with ease. Arlo Pro 4 Spotlight Camera Rounding out our top picks is the Arlo Pro 4 Spotlight Camera, a model celebrated for its superior image quality and direct Wi-Fi connectivity, eliminating the need for a separate hub. The Arlo Pro 4 offers integrated cloud storage solutions with advanced features such as activity zones customization, emergency response services, and an extensive library of stored footage accessible from anywhere. Its spotlight feature enhances night vision capabilities, and with weather-resistant construction, it’s suitable for both indoor and outdoor installations. Arlo’s commitment to data security, with end-to-end encryption for cloud-stored footage, makes the Pro 4 a top contender for those prioritizing both security and accessibility. Alternatives to Cloud Storage for Security Cameras Local Storage Local storage allows users to save data directly on devices such as SD cards or network-attached storage (NAS) units, offering full data control, no ongoing fees, and offline access. Despite these advantages, it's limited by the physical device's storage capacity and is vulnerable to damage or theft, necessitating regular maintenance to manage storage space efficiently. FTP Storage for IP Cameras On the other hand, FTP storage provides a flexible solution by setting up an FTP server for footage uploads. This method boasts scalability, remote access, and the ability to customize server settings to fit specific needs. However, it requires a certain level of technical know-how for setup and ongoing maintenance, potentially incurring higher upfront costs compared to cloud storage. Third-Party IP Camera Cloud Storage Options Third-party cloud services extend beyond what camera manufacturers offer, presenting an alternative for storing footage on external cloud servers. These services afford users more flexibility in storage solutions, potentially lower costs, and enhanced features such as advanced analytics. How to Set Up Cloud Storage for Your IP Camera? Here’s a beginner-friendly, step-by-step guide to help you configure cloud storage for your IP camera, ensuring your footage is safely uploaded and stored remotely. Choose a Cloud Storage Provider: Start by selecting a cloud storage provider that is compatible with your IP camera. Many IP camera manufacturers offer their cloud service, which usually guarantees seamless integration. Alternatively, you can opt for third-party cloud storage services that support your camera model. Create an Account: Once you’ve chosen a cloud storage provider, create an account with them. This process typically involves providing an email address, creating a password, and possibly verifying your account through an email link or SMS code. Ensure that your password is strong and unique to enhance security. Connect Your IP Camera to the Internet: Your IP camera needs to be connected to the internet to upload footage to cloud storage. This can be done via Wi-Fi or an Ethernet cable, depending on your camera model. Follow the manufacturer’s instructions to establish a stable internet connection for your camera. Integrate the Camera with Your Cloud Account: Integrating your security camera with your cloud storage account can vary depending on the camera and storage provider. Typically, this involves entering your camera’s settings menu through a web interface or mobile app and selecting the cloud storage option. Configure Storage Settings: After linking your camera to your cloud account, configure the storage settings according to your needs. This can include setting up which types of footage to upload, video quality settings, and how long the footage should be stored. Adjust these settings to balance between storage space usage and video quality. Test the Setup: Test your cloud storage setup to ensure everything is working correctly. Try accessing the camera’s live feed through the cloud service’s web interface or app, and check if the footage is being uploaded and stored as expected. You might want to trigger a motion alert or record a short video to verify that the uploads are functioning correctly. Secure Your Account: Enhance the security of your cloud storage account by enabling two-factor authentication (2FA), if available. This adds an extra layer of security by requiring a second form of verification, such as a code sent to your phone, in addition to your password when logging in. Regularly Check and Maintain: Regularly check your cloud storage account and IP camera to ensure they continue to function correctly. Keep an eye on storage space usage, review security settings, and ensure your camera’s firmware is up to date to protect against vulnerabilities. How to Access Security Camera Cloud Storage? To begin, you'll need to utilize the mobile app or web portal provided. These platforms can be downloaded from the App Store or Google Play or accessed directly through the service provider's website. Once the app is installed or the portal is accessed, secure login is imperative; utilize your username and password and activate two-factor authentication (2FA) if available. Navigating to your footage involves a straightforward journey to the video library within the app or portal, where recordings are organized. Here, you can utilize calendar or timeline features to select specific dates and times or employ search functions to find footage based on specific events like motion detection. The playback features of these systems are robust, allowing you to play, pause, rewind, or fast-forward through your footage. Some even offer the option to download clips for offline viewing or sharing, with speed controls available for efficiently reviewing longer recordings. To stay updated in real-time, setting up alerts and notifications is crucial. These enable you to receive instant updates via phone or email whenever your camera detects motion or other triggers. Customizing these notification settings helps maintain a balance, ensuring you're informed without being overwhelmed by alerts. Additionally, if monitoring responsibilities need to be shared, many cloud storage services facilitate access sharing with trusted family members or colleagues, allowing for collective vigilance over the monitored space. Conclusion: Embracing the Future of Security Camera Storage Embracing security camera cloud storage represents a forward-looking approach to surveillance. As we look to the future, the role of cloud storage in surveillance systems is set to expand, driving innovation and transforming the way we think about and manage security camera footage. FAQ How Long Do Security Cameras Keep Footage in the Cloud? Generally, cloud storage durations can range from a few days to several years, with most common offerings falling between 7 to 30 days for continuous recording. How Much Does Cloud Storage Cost for Security Cameras? Basic plans can range from being free to around $3 to $10 per month, per camera. Prices for intermediate plans usually range from $10 to $30 per month, per camera. Prices can vary significantly for Advanced Plans but might start from $30 to $100 or more per month, depending on the number of cameras and the included features. How Do I Get Free Cloud Storage for My Security Camera? Manufacturers often provide limited free storage directly with their products, and promotional deals can extend these offers further. Basic free plans are viable for ongoing storage but might need more hands-on management. Free trials of premium services are also an option for temporary, risk-free testing.
Security Cameras · 04/03/2024
Infrared vs. Thermal Camera: What is the Difference?
In the evolving landscape of surveillance and security technology, two devices stand out for their unique capabilities to see beyond the capabilities of the human eye: infrared and thermal cameras. But what exactly separates these two types of cameras, and how can you determine which one is better suited for your specific needs? This guide delves into the heart of the infrared vs. thermal camera debate, unraveling the mysteries behind their operation, the benefits they offer, and their optimal applications. Whether you're securing your home or embarking on a nocturnal wildlife adventure, understanding the differences between these cameras will empower you to make an informed choice. Join us as we explore the intricate workings of infrared and thermal imaging cameras, compare their features side by side, and ultimately guide you to the ideal solution for your scenario. Understanding Infrared Cameras Infrared imager cameras, also known as IR cameras such as the eufyCam S330, have carved a unique niche within the spectrum of surveillance technology due to their extraordinary capability to visualize the unseen. These advanced devices operate by capturing infrared light, a segment of light invisible to the human eye but emitted by all objects as a form of radiation. What sets IR cameras apart is their sophisticated sensors, engineered to detect this invisible infrared radiation. Upon capturing this radiation, the camera processes it, translating the variations in infrared intensity into a comprehensible visual image. This transformative process empowers IR cameras to pierce through the veil of darkness, offering crisp, clear images in low-light or even no-light scenarios, thus positioning them as invaluable assets in the domain of security and surveillance. Benefits of Infrared Cameras One of the standout advantages of IR cameras lies in their adeptness at providing high-resolution, detailed imagery under the cloak of darkness. This is particularly crucial in scenarios where traditional lighting solutions are either impractical or could potentially compromise the element of surprise against intruders or wildlife. Moreover, the strategic deployment of infrared cameras can significantly augment security protocols. Their adaptability to various surveillance needs, coupled with the ability to deliver high-quality imagery regardless of environmental lighting, renders infrared cameras an indispensable tool for a wide array of applications. Whether tasked with protecting valuable assets, conducting scientific research, or ensuring public safety, infrared security cameras provide a dependable, continuous surveillance solution that melds seamlessly with the requirements of stealth and comprehensive observation. Exploring Thermal Cameras Unlike standard cameras that capture the light reflected by objects, thermal cameras delve into the thermal spectrum, detecting the subtle differences in heat emitted by various objects and environments. This capability to perceive temperature variations allows thermal cameras to construct detailed images based on the heat signatures of the scene in front of them, regardless of lighting conditions. At the core of a thermal camera’s functionality is its ability to sense and measure infrared radiation, which is a form of heat energy that all objects naturally emit. This radiation is invisible to humans but can be captured by the specialized sensors within a thermal camera. These sensors, often made from materials sensitive to infrared energy, translate the received thermal information into electronic signals. These signals are then processed and converted into a visual format, producing an image that vividly illustrates the temperature distribution across the scene. Advantages of Thermal Cameras Thermal video cameras’ foremost benefit is the ability to function perfectly in complete darkness by detecting and visualizing heat instead of relying on light. This makes them indispensable for continuous surveillance in environments devoid of illumination. The detection of subtle temperature differences enables thermal cameras to prevent accidents and equipment failures in industrial settings through predictive maintenance, and to monitor wildlife without disturbance, offering insights into nocturnal animal behavior. These cameras also enhance safety and security by improving visibility in challenging conditions, aiding law enforcement in identifying hidden threats. Moreover, their versatility extends their use to border security, maritime navigation, energy efficiency audits, and medical imaging, showcasing their ability to deliver critical thermal data across a broad spectrum of professional fields. Comparing Infrared and Thermal Cameras Wavelength The key difference between infrared and thermal cameras lies in the wavelengths they are designed to detect. Infrared cameras focus on the near-infrared spectrum, just beyond what is visible to the human eye, primarily relying on reflected infrared light. In contrast, thermal cameras capture far-infrared or thermal radiation, which objects emit as heat, making them effective in complete darkness. Sensitivity Variations In terms of sensitivity, infrared cameras require some level of ambient light or infrared illumination to capture images, as they depend on light reflected off objects. Thermal cameras, however, are sensitive to the heat objects emit, allowing them to create images based on temperature differences in an environment. This makes thermal cameras exceptionally useful in conditions where light is absent, showcasing their superior sensitivity to heat over light. Image Quality The image quality between infrared vs thermal camera can vary greatly. Infrared cameras, operating closer to the visible spectrum, tend to produce images with higher resolution and more detail, akin to those captured by standard optical cameras. This makes them suitable for applications where identifying specific features or individuals is necessary. Thermal cameras, while not matching the resolution of IR cameras, excel in visualizing thermal anomalies and patterns, which can be pivotal in scenarios like search and rescue operations or energy audits. Cost Generally, thermal cameras are more expensive than infrared cameras due to the complexity of thermal imaging technology and the specialized materials required for detecting thermal radiation. The advanced functionality of being able to visualize heat signature camera in complete darkness or through obscurants justifies the higher cost. Infrared cameras offer a more budget-friendly option for applications that can accommodate the need for some light to capture images. More Features Both infrared and thermal cameras come with a variety of features designed to enhance their usability and effectiveness in different scenarios. For instance, some thermal cameras are equipped with fusion functionality, blending thermal and visible images for more detailed analysis. Infrared cameras might offer features like varifocal lenses for adjustable fields of view or integrated IR illuminators to enhance night vision security camera capabilities. Infrared vs Thermal Camera: Optimal Choice for Hunting Thermal cameras are particularly valuable in hunting due to their ability to detect heat signatures emitted by animals, making them highly effective for spotting wildlife in a range of conditions, including complete darkness, dense fog, or thick foliage. This capability allows hunters to identify the presence of animals that would otherwise remain hidden to the naked eye or traditional optical equipment. The primary advantage of using thermal cameras is their unparalleled ability to reveal the location of game, regardless of visual obstructions or the absence of light. This makes thermal technology ideal for tracking nocturnal or camouflaged animals, providing hunters with a significant advantage by highlighting temperature differences between the animal and its surroundings. In contrast, infrared cameras rely on reflected infrared light to produce images. While they do not offer the same level of detail in complete darkness as thermal cameras, they excel in environments with varying light conditions. IR cameras can enhance visibility during dusk, dawn, and nighttime by capturing the infrared light available or emitted from an artificial source, such as an IR illuminator. Infrared cameras are particularly suited for monitoring specific areas, such as bait sites, trails, or water holes, where animals are known to frequent. They can provide clear, detailed images, allowing hunters to observe animal behavior, identify species, and make informed decisions without physically disturbing the area. Conclusion Infrared vs thermal cameras serve distinct purposes, each excelling in different scenarios based on their operational mechanisms, sensitivity, and image quality. Understanding these differences is key to choosing the right technology for your specific application, whether it be for security, hunting, or industrial inspection. FAQ Is Night Vision Infrared or Thermal? Night vision technology primarily relies on infrared light to amplify available light, enabling visibility in low-light conditions, distinguishing it from thermal imaging, which detects heat. Why are Infrared Cameras So Expensive? The cost of infrared cameras is influenced by factors such as resolution, sensitivity to low light, and additional features like IR illumination and networking capabilities. Does Thermal Vision Work in Total Darkness? Yes, thermal vision operates independently of light by detecting temperature differences, allowing it to function effectively in complete darkness.
Security Cameras · 04/03/2024
Best SIM Card Security Cameras: Your Complete Surveillance Solution
Surveillance technology has made leaps and bounds, notably with the introduction of SIM card camera. Moving away from the traditional reliance on Wi-Fi, SIM card cameras introduce an approach by using cellular networks for steadfast, continuous monitoring across diverse environments. This comprehensive guide highlights the top picks for the best SIM card security cameras in 2024. Moreover, we will shed light on the nuances of SIM card camera, providing a deep dive into its workings, benefits, and considerations for potential users. Whether you're setting up a new home security system or upgrading your existing setup, our step-by-step installation guide and insights into data consumption and costs will equip you with all the knowledge you need. What Is a SIM Card Security Camera? In the realm of modern surveillance, the SIM card security camera stands out as a groundbreaking innovation that revolutionizes how we monitor and secure our environments. These cameras harness the power of cellular network technology, embedding a SIM card — akin to those used in mobile phones — to facilitate video transmission. This advanced functionality enables the camera to send real-time video footage and alerts directly to smartphones or cloud-based storage systems. The core principle behind a camera SIM card lies in its ability to connect to the internet via cellular networks. Unlike traditional surveillance cameras that require a stable Wi-Fi connection to operate, SIM card cameras rely on mobile data. This distinction is crucial, particularly in scenarios where Wi-Fi connectivity is unavailable or impractical, such as remote agricultural lands, construction sites, or extensive warehouse facilities. Users can access this live feed provided they have internet access on their device, allowing for unparalleled monitoring flexibility. 4 Best SIM Card Security Cameras in 2024 Among the plethora of options, we at eufy present four top SIM card security cameras with exceptional reliability, comprehensive feature sets, and user-friendly operation. Let’s have a closer look: eufy 4G LTE Camera S330 The eufy 4G LTE Cam S330 is a versatile and powerful security camera designed to provide crystal-clear surveillance in any environment, from bustling urban settings to remote, off-grid locations. With its innovative combination of features, it stands as a prime choice for those seeking reliable security solutions. Here’s a comprehensive look, blending detailed features with their real-world benefits: Endless Power Options: Thanks to a large 9,400 mAh battery paired with a solar panel, the camera operates continuously, ensuring that your security is never compromised by power outages. Superior Video Quality: 4K Ultra HD resolution guarantees that the footage captured is of the highest clarity, making it easy to spot important details, day or night. Advanced Night Vision: The 4K color night vision feature pushes the boundaries of low-light surveillance, providing vibrant, detailed images after dusk without missing a beat. Reliable Connectivity: With the flexibility of 3/4G and Wi-Fi connectivity, backed by automatic network selection among AT&T, T-Mobile, and Verizon, the Cam S330 stays connected in areas where Wi-Fi is weak or unavailable. Comprehensive Coverage: The camera’s ability to pan 344° and tilt 70°, combined with AI-driven 360° human and vehicle tracking, leaving no blind spots in its field of view. Whether securing a remote cabin, monitoring urban property lines, or keeping an eye on dark corners of a large backyard, the eufy 4G LTE Cam S330 is tailored to fit the diverse needs of its users. Its robust build and weather-resistant design ensure it can withstand harsh conditions, making it an ideal choice for outdoor surveillance. Check this 4G LTE camera with forever power for the best discounts now! Buy Now Learn More eufy 4G Camera S230 The eufy 4G Camera S230 is celebrated for its versatility and robust connectivity, thanks to its 4G LTE support. This camera is designed for seamless operation in areas where Wi-Fi access is limited or non-existent, offering high-quality video transmission over cellular networks. It features high-resolution imaging capabilities, ensuring that footage is both clear and detailed, which is crucial for identifying potential security threats. Additionally, its durable build and weather-resistant design make it an ideal choice for outdoor surveillance, from monitoring farm perimeters to securing construction sites. The S230’s ease of installation and reliable performance in varying environmental conditions have made it a favorite among users needing comprehensive surveillance solutions outside the reach of traditional internet services. eufy Outdoor Cam E220 The eufy Outdoor Cam E220 excels in providing dependable surveillance for outdoor spaces. This model stands out for its superior video quality, enabled by advanced imaging technology that captures crisp, clear footage day and night. Its integration of motion detection technology allows for real-time alerts, ensuring that any unusual activity is promptly reported to the user. The E220 is also noted for its easy setup and compatibility with various data plans, offering flexibility in operation. With its robust construction, the camera is designed to withstand the elements, making it a solid option for users seeking a durable, high-performance camera to monitor outdoor environments. eufy Indoor Cam S350 For those requiring surveillance within indoor settings, the eufy Indoor Cam S350 emerges as a top contender. This camera combines high-definition video quality with a compact design, making it suitable for discreet placement within homes, offices, or retail spaces. It offers features such as motion detection, night vision, and two-way audio, providing a security solution that can deter intruders and facilitate communication. The S350’s support for SIM card connectivity ensures that it remains operational even in the absence of Wi-Fi, providing continuous monitoring and peace of mind. Users appreciate its straightforward installation process and the convenience of being able to access live footage and receive alerts directly on their mobile devices. What to Consider When Choosing a SIM Card Camera? When venturing into the selection of a SIM card security camera, it’s crucial to navigate through a series of considerations to ensure that the chosen camera aligns perfectly with your surveillance needs and operational context. Here’s a comprehensive rundown of the key features and specifications to keep in mind: Data Plans and Network Compatibility: Given that these cameras rely on cellular networks for data transmission, identifying a suitable data plan is essential. Look for plans that offer sufficient data allowances without breaking the bank, and ensure the camera is compatible with the cellular network available in your area. Camera Resolution: The clarity of the footage captured is paramount. Higher resolution cameras provide more detailed images, making it easier to identify faces or license plates. Consider cameras that offer at least 1080p resolution to ensure quality video output. Battery Life (for Wireless Models): If opting for a wireless SIM card camera, battery life becomes a significant factor. Cameras with long-lasting batteries reduce the need for frequent recharges or replacements, ensuring continuous surveillance. Storage Options: Surveillance footage needs to be stored somewhere, whether on the cloud or locally on an SD card. Evaluate the storage solutions provided by the camera, including the costs associated with cloud storage services, and the maximum supported capacity for SD cards. Specific Security Features: Tailor your choice to include essential security features that meet your specific needs. Motion detection can alert you to unexpected activity, while night vision capabilities ensure clear footage even in low light conditions. Why Do Cameras Need SIM Cards? Unlocking Remote Surveillance Capabilities Incorporating a SIM card into a security camera revolutionizes surveillance with unmatched flexibility and connectivity, leveraging cellular networks to enable live video feeds, alerts, and notifications in places where Wi-Fi is unavailable, unreliable, or prohibitively expensive. This advancement is particularly transformative for remote or rural locations—such as farms, ranches, and undeveloped lands—where traditional internet access is scarce. By utilizing the broad coverage of cellular networks, SIM cameras provide effective monitoring capabilities that often exceed those of Wi-Fi-dependent systems, ensuring continuous surveillance and significantly enhancing both security measures and operational efficiency in areas previously challenging to monitor. Ensuring Reliability in Unconventional Settings The reliability of a security camera with SIM card, unaffected by the instability that can plague Wi-Fi networks due to interference, bandwidth limitations, or outages, stands out as a key advantage. Cellular networks' consistency and broad coverage make these cameras an ideal solution for ensuring uninterrupted surveillance in critical monitoring scenarios. This feature is especially beneficial for locations like construction sites, where the infrastructure for Wi-Fi might not yet be in place, allowing managers and property owners to monitor their assets closely, deter potential theft or vandalism, and adhere to safety protocols without relying on traditional internet connections. Facilitating Real-time Monitoring and Alerts The direct connection to cellular data networks provided by camera SIM cards enables security cameras to offer real-time monitoring capabilities. Users can receive instant alerts on their smartphones or other devices in case of detected motion, unauthorized access, or other security breaches. This immediacy is crucial for timely responses to potential threats, allowing for swift action to be taken, whether it’s notifying law enforcement or simply checking in on the live feed to assess the situation. How to Set Up a SIM Card Security Camera? Choose the Right Data Plan: Before anything else, select a data plan that suits the needs of your camera. Consider factors like the expected amount of video streaming, the resolution at which you’ll record, and how often the camera will be active. A plan with enough data is crucial to avoid overage charges while ensuring your camera remains connected. Insert the SIM Card: Once you have your data plan, it’s time to insert the SIM card into the camera. Turn off the camera before starting, and locate the SIM card slot, which is usually covered by a protective flap or might require unscrewing a compartment. Insert the SIM card for camera, following the orientation indicated by the slot or the camera’s instruction manual. Mount the Camera: Choose a location for your camera, taking into account the areas you wish to monitor and any potential obstacles that could block the view. Ensure the chosen spot also has a strong cellular signal. Use the mounting hardware provided with your camera to secure it in place, whether it’s being attached to a wall, ceiling, or another surface. Power Up and Test the Connection: Power on your camera and give it a few moments to initialize and connect to the cellular network. This might take a few minutes. Once connected, check the signal strength indicator, usually available in the camera’s app, to ensure it has a reliable connection to the cellular network. Configure the Camera via the Dedicated App: Download and install the dedicated app for your camera from the App Store or Google Play. The app will guide you through the process of adding your new camera, which involves scanning a QR code on the camera itself. Once added, you can configure settings through the app, such as motion detection sensitivity, video quality, and alert preferences. Customize Your Surveillance Setup: Take some time to explore the features and settings available in your camera’s app. Adjust the settings to meet your specific surveillance needs, such as setting up activity zones or scheduling recording times. You might also want to set up shared access if other family members or colleagues need to view the camera feed. Regularly Check Data Usage: Keep an eye on your data usage through your cellular provider’s app or website to ensure it aligns with your data plan. Adjust your camera’s settings if necessary to reduce data consumption, such as lowering the video resolution or limiting live streaming. How Much Data Does a SIM Card Camera Use? Understanding data consumption and costs of SIM card security cameras is crucial for managing your surveillance system. The amount of data used by these cameras can fluctuate widely depending on several key factors. Here’s a closer look at how these variables impact data usage and strategies for keeping consumption in check. Factors Affecting Data Usage Resolution: Higher resolution video uses more data. For example, streaming or uploading video at 1080p consumes significantly more data than at 720p. While higher resolution offers clearer images, it’s essential to balance quality with data usage, especially if you have limited data plans. Frequency of Alerts: Cameras configured to send frequent motion or sound alerts can use more data, as they often attach video clips or images to these alerts. Adjusting the sensitivity of motion detection and the criteria for alerts can help reduce unnecessary data use. Length of Video Streams: The duration of live video streaming directly affects data consumption. The longer you stream video footage to your device, the more data you will use. Limiting live view sessions can help manage data usage. Managing Data Consumption Adjust Video Quality: Many cameras allow you to adjust the video quality settings. Consider setting the camera to record at a lower resolution for everyday monitoring and switching to higher quality only when necessary. Optimize Alert Settings: Customize motion detection settings to reduce the frequency of alerts and attached media. Some cameras offer features like human detection or specific zone monitoring, which can help minimize irrelevant alerts and, consequently, data usage. Use Scheduled Recording: If your surveillance needs are predictable, use scheduled recording to ensure the camera only records and transmits data during certain hours, reducing overall data consumption. Wi-Fi Backup: For cameras installed within reach of a Wi-Fi network, configuring them to switch to Wi-Fi when available can significantly cut down on cellular data use. Understanding Costs The costs associated with data usage depend on the data plan you have with your cellular provider. It’s important to select a plan that matches your data needs based on the camera’s settings and your usage patterns. Monitor consumption closely, especially in the first few months, to avoid overages. Conclusion As we look towards the future, SIM card camera is poised to play an increasingly vital role in the surveillance landscape, offering unparalleled flexibility and connectivity. By understanding the aspects of these innovative devices, users can enhance their security systems to meet the challenges of monitoring in the digital age. Related Blogs Check out these articles for more information: Best Farm Security Cameras in 2024 Recommendation of Best Barn Cameras 4 Best Cellular Security Cameras FAQ Do All SIM Cards Fit All Security Cameras? The compatibility between SIM cards and security cameras isn’t universal. Before purchasing a SIM card for your security camera, it’s crucial to check the camera’s specifications for the supported SIM card size and network requirements. Can I Use an Old Phone as a Camera without a SIM Card? Absolutely, an old smartphone can be repurposed into a security camera without needing a SIM card. This is a cost-effective way to utilize the high-quality cameras that come with most smartphones. Where Does the SIM Card Go in a Security Camera? The location for inserting a SIM card can vary across different security camera models, but it is typically found in a protected area to prevent exposure to the elements. In many cases, you’ll need to open a compartment on the camera — this might be secured with screws or a locking mechanism to maintain weatherproofing.
Security Cameras · 04/03/2024
Best Barn Cameras: Enhancing Security in Modern Farms and Stables
The introduction of next-generation barn cameras marks a significant milestone in the quest to boost security measures within modern farms and stables. These surveillance tools are revolutionizing the way farm owners and stable managers oversee the safety and well-being of their livestock, equipment, and overall premises. This comprehensive guide delves into the world of the best barn cameras, exploring their mechanics, the benefits they offer, the innovative solutions available for areas lacking WiFi, and how to select the ideal system for your needs. Whether you're managing a small family farm or a large equine facility, this guide is for you. Understanding Barn Cameras Barn cameras are made tough to handle farm life. They keep an eye on everything from grain stores to horse stables, capturing clear footage no matter if it's day or night, bright or dim. These outdoor security cameras blend high-tech features like sharp imaging, night vision using infrared tech, and motion detection. They can spot anything unusual, like an animal getting loose or a stranger snooping around, and send an alert straight to your phone or computer. Plus, they can even check the temperature, making sure your animals are comfy. Whether you're at home or away, as long as you have internet, you can see what's happening in real-time. 3 Best Barn Cameras Without WiFi In the vast expanses of rural farmland and remote stable locations, WiFi connectivity can often be a luxury that's not always available. Let's explore three best barn cameras without WiFi connectivity: Best 4G Security Camera for Barn: eufy 4G LTE Cam S330 The eufy 4G LTE Cam S330 stands out as the ultimate 4G security camera for barns, offering unmatched surveillance capabilities tailored to the unique challenges of rural settings. Here’s why it’s the top choice for farmers and barn owners: Self-Sustaining Power: With its robust 9,400 mAh battery and solar panel, it guarantees continuous operation, critical for locations like barns where power sources may be distant or unavailable. Crystal-Clear Images: The camera’s 4K Ultra HD resolution ensures every detail is captured with precision—vital for monitoring livestock, equipment, and barn activities both day and night. Enhanced Night Vision: Its advanced 4K color night vision illuminates even the darkest corners of a barn, ensuring clear, detailed images around the clock, an essential feature for early mornings or late-night checks. Reliable Connectivity: Designed with 3/4G and Wi-Fi options and automatic carrier selection (AT&T, T-Mobile, Verizon), it provides a stable connection in remote areas, overcoming the common challenge of weak Wi-Fi signals in rural locations. Comprehensive Coverage: Thanks to its ability to pan 344° and tilt 70°, combined with AI-driven 360° tracking, this camera covers extensive areas without leaving any blind spots, perfect for keeping an eye on every corner of the barn. Subscription-Free: Offering these advanced features without a monthly fee delivers exceptional value, making it a cost-effective solution for barn surveillance. For barn owners, the eufy 4G LTE Cam S330 is not just a camera; it’s a vital farm management tool. Its weather-resistant design withstands the rigors of barn environments, from dust to moisture, ensuring reliable performance. Easy to install and operate, it’s the ideal surveillance solution for monitoring livestock health, safeguarding expensive equipment, and enhancing overall security with minimal effort. Check this 4G LTE camera with forever power for the best discounts now! Buy Now Learn More Affordable 4G Barn Camera: eufy 4G Camera S230 The advent of 4G security cameras has been a game-changer for surveillance barn cameras no Wi-Fi areas. A prime example of this innovation is the eufy 4G Camera S230, a device that leverages the widespread availability of cellular networks to offer seamless surveillance capabilities. This camera’s use of 4G LTE technology means that it can transmit live video footage directly to a smartphone or other devices, ensuring farm owners and managers can keep an eye on their premises from anywhere, at any time. The eufy 4G Camera S230 doesn’t just stop at offering mobile connectivity; it’s designed with the ruggedness required for farm use, featuring weatherproof casing and superior night vision capabilities. Its cellular connectivity also means that it can be installed far from the main buildings, extending surveillance to the most remote corners of a property without the need for complex wiring or the installation of additional network infrastructure. Best Wired Barn Camera: eufy Outdoor Camera E220 For those who prefer a more traditional surveillance setup or where cellular service is unreliable, wired security camera options like the eufy Outdoor Cam E220 provide a dependable alternative. This camera connects directly to a property’s physical network via Ethernet cables, ensuring a stable and continuous data transmission that’s not subject to the whims of wireless signal strength or the availability of cellular networks. The eufy Outdoor Cam E220 stands as a testament to the reliability that wired connections offer, with the added benefit of high-quality video capture that doesn’t depend on the strength of a Wi-Fi or cellular signal. It’s particularly well-suited for installations closer to the main farm buildings or anywhere that a stable wired connection can be easily established. Moreover, this camera model boasts features designed for the demands of outdoor surveillance, including robust weather resistance and excellent low-light performance, making it an ideal choice for monitoring barn exteriors and surrounding areas. Top Picks for Long Range Wireless Barn Cameras For barns where Wi-Fi is stable, wireless barn security cameras stand out for their convenience, flexibility, and ease of installation. Among the myriad options available, the eufy SoloCam S340 Wireless Security Camera stands out, offering superior performance, reliability, and user-friendly features. Best Wireless Barn Camera: eufy SoloCam S340 One of the most significant advantages of the eufy SoloCam S340 wireless security camera is its completely wireless operation, eliminating the need for complex wiring installations. This feature allows for greater flexibility in camera placement, enabling farm owners to position the camera in optimal locations for surveillance without worrying about proximity to power outlets or the logistical challenges of running cables across a working farm. The SoloCam S340 also boasts an impressive battery life, designed to last for extended periods on a single charge. This longevity is crucial for maintaining continuous surveillance without frequent battery replacements or recharges, ensuring that barn activities and livestock are continuously monitored. Equipped with motion detection and night vision capabilities, the SoloCam S340 offers a comprehensive barn security camera. The motion detection feature is particularly useful in a barn setting, where the movement of animals or people can trigger alerts, enabling owners to respond promptly to any unusual activity. Additionally, the camera’s night vision ensures high-quality video footage is captured even in low-light conditions, a common scenario in barns and stables during the night or early morning hours. The combination of these features positions the eufy SoloCam S340 as the best barn camera. Whether it’s monitoring the well-being of livestock, overseeing the efficiency of farm operations, the SoloCam S340 delivers reliable and comprehensive surveillance coverage tailored to the needs of modern agricultural settings. Check this Wireless Outdoor Camera with Dual Lens for the Best Discounts now! Buy Now Learn More More Types of Barn Cameras More security cameras can also work as a barn camera. We list two types of them below, check if they suits your need. Security Cameras with SD Card Storage Cameras equipped with SD card storage represent a straightforward and efficient approach to recording and storing surveillance footage. This feature allows for localized recording, meaning the footage is saved directly onto the camera, eliminating the need for a continuous internet or network connection, making it a foaling camera without wifi. This method is especially beneficial in scenarios where live monitoring isn’t a necessity but reviewing recorded footage is required for incident analysis or routine checks. The advantage of using SD card storage lies in its simplicity and independence from complex infrastructure. It’s a particularly apt choice for barn camera without wifi located in remote areas where internet access might be spotty or non-existent. Farmers can easily retrieve the SD card from the camera to review footage on a computer or other compatible devices, making it a practical solution for managing surveillance data. Battery-Powered Security Cameras: A Versatile Solution Battery-powered security cameras offer unparalleled flexibility in terms of placement and installation, making them best barn cameras without wifi and an ideal choice for monitoring areas that are difficult to wire or for situations where temporary surveillance is needed. The absence of wiring requirements means these cameras can be mounted in various locations without the constraints imposed by the need for power outlets or cable runs. This versatility is valuable on large farms or in outdoor settings where surveillance needs may change based on seasonal activities. Battery-powered cameras can be quickly deployed to monitor livestock movements, oversee temporary work areas, or enhance security for farm equipment stored in distant fields. One of the key considerations with battery-powered models is ensuring that the batteries are regularly checked and replaced as needed to maintain continuous operation. However, many modern battery-powered cameras are designed with energy efficiency in mind thereby extending battery life. Essential Tips for Selecting the Ideal Barn Security Cameras To ensure you choose a setup that best fits your farm or stable’s specific requirements, it’s crucial to take into account a variety of key factors. Here’s a breakdown of essential considerations to guide your decision-making process: Connectivity Options The method by which your cameras will connect to the monitoring system is fundamental. Options include wired connections, Wi-Fi, and cellular (4G) connectivity. Each has its advantages and potential limitations based on your barn’s location and the quality of available services. Wired connections offer reliability but may require extensive installation work, while Wi-Fi offers convenience but depends on signal strength, which can be variable in rural settings. Cellular connections provide flexibility and can be particularly useful in remote areas, assuming good mobile network coverage. Power Sources Consideration of how your cameras are powered is equally important. Options range from traditional wired power, which offers reliability but less flexibility in placement, to battery-powered units that can be placed almost anywhere but require regular battery changes or recharging. Solar-powered options are also available for some models, providing a sustainable and low-maintenance power solution, especially in outdoor settings with ample sunlight. Camera Resolution The resolution of the camera determines the quality of the footage captured. Higher resolution cameras capture more detail, which can be crucial for identifying individuals, animals, or activities within the barn. While high-resolution cameras may be more expensive, the investment can be justified by the superior quality of surveillance they provide. Consider what level of detail is necessary for your surveillance needs when selecting camera resolution. Specific Surveillance Needs Finally, assess your specific surveillance needs. This includes considering the size and layout of the barn or stable area to be monitored, the types of activities you need to keep an eye on, and any particular challenges posed by your agricultural environment. For instance, if monitoring birthing livestock, a camera with excellent night vision and close-up capabilities might be essential. Alternatively, if theft is a concern, a camera with motion detection and alert functions could be more appropriate. The Benefits of Implementing Barn Security Cameras Enhanced Livestock Monitoring One of the paramount benefits of barn cameras is the ability to maintain a constant watch over livestock, which is invaluable in managing the health and welfare of animals. This continuous monitoring capability facilitates the early detection of potential health issues, allowing for timely intervention and treatment. It is particularly crucial in overseeing birthing processes, where immediate assistance can be lifesaving in the case of complications. By providing clear, real-time footage of animals, barn cam enables caretakers to make informed decisions swiftly, ensuring the well-being of livestock and potentially reducing mortality rates. Increased Security Barn cameras for horses act as a significant deterrent to potential thieves and vandals, offering an effective means to enhance the security. The presence of surveillance cameras alone can discourage unauthorized entry, while the ability to monitor and record all activity ensures that any suspicious behavior is captured. This not only helps in preventing theft and vandalism but also aids in the recovery of stolen goods and the prosecution of perpetrators, providing a layer of protection that is indispensable in today’s agricultural operations. Operational Efficiency The adoption of barn cameras goes beyond security and animal welfare, extending into the realm of operational efficiency. These surveillance systems allow farm owners and managers to remotely oversee daily operations, from feeding and cleaning to the movement of livestock, horse stall camera and the use of equipment. This oversight capability means that routine checks can be conducted from anywhere, saving time and resources that would otherwise be spent on physical inspections. Also, the insights gained from monitoring can inform better management practices and enhance productivity by identifying inefficiencies and areas for improvement. Wrapping Up: Ensuring Farm and Stable Security The implementation of the right barn cameras is a vital step toward ensuring the security and efficient operation of farms and stables. As we move forward, embracing these technological advancements will be key to maintaining the safety, productivity, and sustainability of the agricultural industry. FAQ Should I Install Multiple Security Cameras for My Barn? Yes, multiple cameras ensure comprehensive coverage and security in all areas, inside and out. DIY Installation: Can I Set Up Barn Cameras Myself? Many barn cameras are designed for easy DIY installation, but professional assistance may be beneficial for complex systems. Is Wired or Wireless Barn Security Camera Better? The choice between wired and wireless depends on your specific needs and barn setup. Wired cameras offer reliability, while wireless models provide flexibility and ease of installation. You May Also be Interested Check out these articles for more information: Best Cellular/4G Security Cameras Best Farm Security Cameras in 2024 Security Cameras for Jobsite
Security Cameras · 04/03/2024
The Ultimate Guide to Starlight Cameras for Enhancing Nighttime Surveillance
As the sun sets, bringing with it the inherent complexities of night, the demand for reliable surveillance becomes ever more critical. It’s within this nocturnal setting that starlight cameras emerge as a game-changer, advancing the capabilities of surveillance technology. Celebrated for their superior performance in low-light conditions, starlight cameras push the envelope, capturing impeccably clear images under circumstances where traditional cameras simply can’t keep up. This ultimate guide is designed to illuminate the intricacies of these advanced devices, empowering you with the knowledge to enhance your nighttime surveillance capabilities. From understanding the science behind their superior low-light performance to navigating the diverse array of models available, we delve deep into the world of starlight cameras. What Are Starlight Cameras and How Do They Work? Starlight cameras represent a significant advancement in surveillance technology, specifically engineered to excel in conditions where traditional cameras falter due to inadequate lighting. At the heart of their operation lies the ability to function in extremely low-light environments, capturing high-quality video footage that many would assume impossible under such circumstances. This remarkable capability is not by chance but the result of meticulously designed advanced sensors and specialized algorithms that work in tandem to significantly enhance the camera’s sensitivity to light. These cameras harness the minimal ambient light available—be it from the moon, stars, or distant streetlights—and through their sophisticated sensors, they manage to amplify this light to create clear, detailed images that are rich in quality and clarity. The technology behind this involves complex algorithms that process the incoming light, reducing noise and enhancing the image’s sharpness, making it possible to see what’s happening in near-darkness as though it were under better-lit conditions. Diving deeper into the mechanics, starlight cameras adjust their settings in real-time to adapt to the surrounding light conditions. This includes automatically modifying the camera’s shutter speed, aperture, and gain control to maximize the capture of available light, all while maintaining the fidelity of the image. The result is a level of low-light performance that sets a new standard in surveillance, enabling continuous monitoring and security in environments where maintaining visibility after dark is crucial. From monitoring urban alleyways and secluded outdoor areas to safeguarding properties without drawing attention with bright lights, starlight cameras offer a discreet yet effective surveillance solution. Types of Starlight Cameras and Their Key Features The market is rich with models of starlight cameras, equipped with features tailored to specific surveillance goals. Whether the need is for a compact unit that offers stealthy observation or a more elaborate system capable of extensive security oversight, the assortment of starlight cameras ensures a fit for every possible scenario. Compact Starlight Cameras Compact starlight cameras are particularly noted for their small size and discreet nature, making them perfect for unobtrusive surveillance or in settings where cameras need to blend into the environment. Despite their diminutive stature, these cameras do not compromise on the quality of footage, boasting high resolutions that rival their larger counterparts. They typically come with fixed lenses that strike an optimal balance between offering wide-angle views and capturing detailed images, ideal for areas like entryways or tight spaces. Dome Starlight Cameras Dome starlight cameras, with their robust, vandal-resistant housing, are engineered to endure tampering and physical impact, offering a reliable security solution for locations susceptible to vandalism. Their ability to be mounted on both ceilings and walls allows for versatile surveillance angles, while their wide-angle lenses ensure comprehensive coverage of vast spaces such as parking lots and expansive office areas. PTZ (Pan-Tilt-Zoom) Starlight Cameras PTZ (Pan-Tilt-Zoom) starlight cameras elevate the surveillance experience by providing remote control over the camera’s movement, enabling users to pan across an area, tilt the viewing angle, or zoom in for detailed observation from afar. This functionality is particularly valuable for monitoring large, open environments. Many of these cameras also feature auto-tracking, which automatically follows detected movement, thereby enhancing the monitoring of mobile subjects. Bullet Starlight Cameras Bullet starlight cameras are distinguished by their elongated design, which accommodates larger lenses for long-range viewing, making them well-suited for perimeter surveillance. Their design often includes weather-resistant casings, ensuring durability against severe weather conditions, and many models come equipped with integrated infrared (IR) illuminators to improve night vision capabilities in absolute darkness. Networked Starlight Cameras Networked starlight security camera represents the frontier of surveillance connectivity, offering features such as Wi-Fi and Ethernet connections that facilitate seamless integration into existing networked security systems. These cameras allow for remote access, enabling users to view live footage and adjust settings from anywhere, using a smartphone or computer. Furthermore, the option for cloud storage presents a scalable, secure solution for managing recorded footage, ensuring data is both safe and easily retrievable. Pros and Cons of Starlight Cameras Starlight security camera have become increasingly popular for their exceptional performance in low-light conditions, offering a compelling solution for surveillance needs during nighttime or in poorly lit environments. However, like any technology, they have their set of advantages and drawbacks. Pros of Starlight Cameras Superior Low-Light Performance: The primary advantage of starlight camera is their ability to produce clear, detailed images in minimal lighting conditions, far surpassing traditional cameras. This capability ensures reliable surveillance even in near darkness without the need for additional lighting sources. Cost-Effective Surveillance: By eliminating the need for supplementary lighting fixtures, starlight surveillance cameras can reduce overall installation and energy costs. They provide an efficient surveillance solution that operates effectively under the cover of night, saving on the expenses associated with lighting large areas. Discreet Operation: The ability to capture high-quality video in low light makes starlight cameras ideal for discreet surveillance. They can be strategically placed to monitor without drawing attention, maintaining security without the invasive presence of bright lights. Versatile Applications: Starlight technology is adaptable to various settings, from urban to rural, indoor to outdoor. Whether it’s for property surveillance, wildlife observation, or securing perimeters, these cameras provide dependable imaging across diverse environments. Cons of Starlight Cameras Higher Initial Cost: While they save on lighting costs, starlight cameras themselves can be more expensive than traditional surveillance cameras. The advanced technology and superior imaging capabilities come at a premium, which might be a consideration for those on a tight budget. Environmental Limitations: Although starlight cameras excel in low-light conditions, their performance can still be affected by environmental factors such as fog, heavy rain, or extremely low light levels beyond their operational threshold. In such conditions, even these advanced cameras may struggle to provide clear imagery. Complexity in Setup and Operation: To maximize the potential of starlight CCTV camera, a more complex setup and understanding of the camera’s features and settings might be required. This could pose a challenge for individuals without technical expertise or access to professional installation services. Potential Overreliance: There’s a risk of overreliance on the low-light capabilities of starlight cameras, potentially overlooking other aspects of a comprehensive security system. It’s important to remember that no single solution is foolproof, and starlight cameras should be part of a broader, layered security strategy. Starlight vs. Infrared Cameras: Unveiling the Differences In the realm of nighttime surveillance, the competition between starlight cameras and infrared (IR) cameras represents a pivotal choice for those seeking to optimize their security systems. Both technologies offer unique approaches to capturing footage in low-light conditions, but they differ significantly in their operational mechanisms, advantages, and limitations. Understanding these differences is crucial for anyone looking to make an informed decision on the best technology to suit their surveillance needs. Starlight Cameras: Harnessing Minimal Light Starlight cameras are engineered to perform in extremely low-light conditions by utilizing highly sensitive imaging sensors capable of capturing ambient light from sources like the moon, stars, or distant street lighting. This capability allows them to produce colored video footage that is both clear and detailed, even at night. The strength of starlight technology lies in its ability to maintain the natural coloration of the footage, which can be critical for identifying details such as the color of vehicles or clothing in security footage. One of the key advantages of starlight cameras is their versatility in various lighting conditions. They can seamlessly transition from day to night modes, providing consistent surveillance without the need for additional lighting infrastructure. But their performance can still be influenced by the presence of external light sources, and in environments with no light whatsoever, even starlight cameras may struggle to produce quality footage. Infrared Cameras: Illuminating the Darkness In contrast, infrared cameras don’t rely on visible light to capture images. Instead, they use IR LEDs to illuminate their field of view with light that’s invisible to the human eye, allowing them to capture footage in complete darkness. This makes IR cameras incredibly reliable for consistent night vision, as they create their light source to ensure visibility regardless of external conditions. The footage captured by IR cameras is typically in black and white when in night mode, which can limit the detail available for identifying specific features. However, the clarity and contrast in IR footage are often superior in total darkness scenarios, making these cameras indispensable for areas where no ambient light is present. Comparing Technologies: Image Coloration, Range, and External Lighting Impact Image Coloration: The most noticeable difference between starlight and IR cameras is the coloration of the footage. Starlight cameras maintain natural colors under low-light conditions, while IR cameras switch to black and white in their night vision mode. Range: The effective range of the cameras also differs, with IR cameras generally offering a more defined range based on the strength of their IR LEDs. Starlight cameras, on the other hand, depend on the available ambient light, which can vary, affecting their effective range. Impact of External Lighting: Starlight cameras excel in areas with minimal ambient light, where their sensitive sensors can make the most of the available light. In contrast, IR cameras are less affected by external lighting conditions, providing consistent performance in complete darkness by using their built-in IR illumination. Top 3 Starlight Security Cameras on the Market Here, we spotlight three of the best starlight outdoor security cameras, each selected for its exceptional performance, innovative features, and reliability in enhancing nighttime surveillance. eufy 4G Camera S230 The eufy 4G Camera S230 distinguishes itself through its exceptional 4G LTE connectivity, offering a reliable solution for remote surveillance in locales bereft of Wi-Fi or traditional wired internet infrastructures. This capability is invaluable for monitoring distant or ephemeral sites lacking permanent installations. Coupled with its advanced starlight imaging technology, the S230 is adept at producing vivid, full-color videos under extremely low-light conditions, ensuring detailed and clear surveillance footage even in the depths of darkness. Additionally, its design prioritizes durability and mobility, making it perfectly suited for both indoor and outdoor use. Its resilience to harsh environmental conditions, along with its compact size and wireless connectivity, affords significant versatility in terms of installation and repositioning. NightVision Pro X400 The NightVision Pro X400 is celebrated for its unparalleled starlight night vision capabilities, leveraging superior starlight sensor technology to capture crisp and lucid images in scant lighting. This camera is further enhanced by an array of integrated smart features such as motion detection alerts, facial recognition, and automated event recording, thereby offering a holistic security solution that capitalizes on the latest technological advancements. Furthermore, its wide-angle lens ensures extensive coverage, minimizing the need for multiple cameras to surveil large properties and thereby rendering it an economical choice for comprehensive area surveillance. UltraView Stealth C920 The UltraView Stealth C920 stands out for its inconspicuous design, allowing for discreet surveillance that melds seamlessly with its environment, an attribute particularly desirable in settings where aesthetic discretion is as critical as security. Its capability to deliver high-resolution imagery ensures that no detail is overlooked, from the intricacies of facial features to the distinctiveness of license plate numbers, rendering it an impeccable option for areas demanding meticulous attention to detail. The C920 is also designed for effortless integration with existing security frameworks, including a variety of NVRs and cloud storage options, thus offering flexibility in how footage is archived and accessed. Essential Tips for Choosing the Right Starlight Camera Selecting the ideal starlight camera for your surveillance needs goes beyond a simple comparison of technical specifications. It requires a thoughtful assessment of how the camera will fit into your overall security strategy, taking into account the unique aspects of your surveillance environment and objectives. Understand Your Surveillance Objectives: Begin by clearly defining what you aim to achieve with your surveillance system. Understanding your primary objectives will help you determine the features most important to you, whether it’s wide coverage, high resolution, or advanced analytical capabilities. Consider the Installation Environment: The environment where the camera will be installed plays a crucial role in your selection process. For outdoor environments, consider cameras with durable, weather-resistant designs to withstand the elements. For indoor surveillance, factors such as lighting conditions and the aesthetics of the camera may take precedence. Integration with Existing Systems: Evaluate how well the camera integrates with your current security infrastructure. Compatibility with existing video management systems, network requirements, and storage solutions are critical factors to consider. Opt for cameras that can be easily incorporated into your system without requiring extensive modifications or upgrades. Scalability for Future Upgrades: Future-proofing your surveillance system is another important consideration. Look for cameras and systems that offer scalability, allowing you to expand or upgrade your surveillance capabilities. Cameras that support open standards can be integrated with new technologies that will offer flexibility for future enhancements. Evaluate Advanced Features: Starlight cameras come with a range of advanced features that can enhance your surveillance capabilities. Features like motion detection, facial recognition, and automatic tracking can provide additional security benefits. Assess which features align with your surveillance goals and whether they justify the additional cost. Assess Connectivity Options: Connectivity is key to the functionality of your starlight camera, especially if you require remote access or wish to receive real-time alerts. Consider the connectivity options available, including Wi-Fi, Ethernet, or cellular connections, and choose a camera that meets your communication requirements. Review User Feedback and Support: Take the time to review feedback from users who have implemented starlight cameras in similar environments to yours. User reviews offer valuable insights into the camera’s performance and reliability. Consider the level of support offered by the manufacturer, including warranty, customer service, and access to software updates. Conclusion Starlight cameras represent a significant leap forward in night surveillance technology, offering unparalleled clarity in low-light conditions. Their introduction has reshaped expectations for nighttime security, providing reliable, detailed imaging where traditional cameras fall short. FAQ Can Starlight Cameras Record in Color? Starlight cameras are advanced surveillance tools capable of recording in full color in low-light conditions, setting them apart from traditional infrared cameras that produce black-and-white images at night. This feature is especially valuable for identifying specific details such as vehicle color or clothing in security footage. How Far Can Starlight Cameras See? The range of visibility for starlight cameras varies with factors like the model, sensor sensitivity, lens focal length, and available light, often allowing for clear imaging of objects several hundred feet away. The performance of starlight cameras can still provide visibility in complete darkness by creating their light source.
Smart Lock · 04/03/2024
The Ultimate Guide to Locks for Apartment Doors 2024
With the growth of urban populations and ever-changing dynamics of city life, the imperative to protect our homes from potential intrusions has never been more pronounced. Choosing to upgrade locks for apartment doors with high-quality locks transcends mere preventive action; it represents a significant investment in your overall quality of life. This guide is crafted to highlight the critical role that secure, and technologically advanced locking mechanisms play in bolstering the defenses of your apartment. It aims to provide you with understanding of how these locks serve as an essential layer of peace of mind, safeguarding the wellbeing of your loved ones. Benefits of Upgrading Your Apartment Door Locks Upgrading your apartment door lock is not just a matter of enhancing security; it’s about investing in peace of mind and the future value of your property. Here’s a closer look at the multifaceted benefits that come with making this crucial upgrade: Enhanced Security: A Key to Peaceful Living Upgrading your apartment door locks is a proactive step towards ensuring a fortified living environment. Modern locks come equipped with advanced security features that are designed to thwart attempts at unauthorized entry, thereby significantly reducing the likelihood of break-ins. By opting for high-security locks, you’re not just protecting your physical possessions; you’re also safeguarding the personal safety of yourself and your loved ones. This level of security is invaluable, as it allows residents to enjoy their home comforts without the looming anxiety over potential security breaches. Increased Property Value: A Wise Investment Beyond the immediate benefits of improved security, upgrading your apartment door lock typest also contributes to the long-term value of your property. In today’s market, the security features of a home can significantly influence its appeal to potential buyers or renters. Properties equipped with state-of-the-art locking systems are often perceived as more desirable, as they offer an added layer of protection that many find essential. This can translate into tangible financial benefits, increasing your property’s market value and making it stand out in a competitive real estate landscape. For landlords and property investors, this upgrade in security door locks for apartments is a strategic move that can enhance the property’s rental appeal, allowing for higher asking prices and attracting a more security-conscious clientele. Investing in high-quality locks is a prudent decision that pays dividends in both security and property valuation over time. Exploring the Various Types of Locks Suitable for Apartments When it comes to securing extra lock for apartment doors, the choice of lock plays a pivotal role in ensuring the safety and integrity of your living space. Let’s delve deeper into the types of locks that cater to various security needs and preferences, highlighting their unique benefits and functionalities. Traditional Deadbolts: Time-Tested Reliability For years, traditional deadbolts have served as the backbone of residential security, offering robust protection against intrusions. These locks operate on a simple yet effective mechanism that resists forced entry, making them a reliable choice for homeowners and renters alike. The strength of a traditional deadbolt lies in its straightforward design—when engaged, the bolt extends into the door frame, anchoring the door securely in place. This physical barrier significantly enhances the door’s resistance to being kicked in or pried open. Opting for a high-quality deadbolt can be seen as investing in a layer of security that has stood the test of time, providing a sense of safety that is both tangible and proven. Smart Locks: The Future of Home Security The advent of smart locks has revolutionized home security, bringing it into the digital age with features that offer unprecedented convenience and control. Smart locks eliminate the need for physical keys, instead relying on digital keys accessible through smartphones, keypads, or biometrics, allowing for keyless entry. This innovation not only enhances security by reducing the risk associated with lost or duplicated keys but also offers the flexibility of remote access. Homeowners can lock or unlock their doors from anywhere, monitor entry and exit logs, and even grant temporary access to visitors without ever needing to make a copy of a key. Integrating seamlessly with other smart home devices, smart locks can send alerts directly to your phone, providing real-time updates on your home’s security status. As we move forward, the adoption of smart locks continues to grow, offering a sophisticated, user-friendly approach to securing our homes. Keyless Options: Convenience Meets Security Keyless locks represent a fusion of convenience and security, addressing one of the most common nuisances of daily life—carrying keys. These locks can come in various forms, including keypad entry systems, fingerprint scanners, or RFID readers, all designed to grant access without the traditional key and lock mechanism. The primary appeal of keyless locks is the blend of ease and security they offer; users can unlock their doors with a simple code, a swipe of a card, or a touch of a fingerprint. This convenience extends to scenarios where individuals need access to the same door, as codes can be shared without the risk of keys being lost or stolen. Key Factors to Consider When Selecting Apartment Door Locks Selecting the perfect apartment door lock is a decision that intertwines security, compatibility, and financial considerations. Let’s explore these factors in depth to understand how they influence the choice of a lock that not only meets your security needs but also aligns with your living situation and budget. Security Level: Ensuring Maximum Protection At the heart of the decision-making process is the lock’s security level. This factor is non-negotiable because the primary role of a lock is to safeguard your home. The security level of a lock is determined by its design, the materials it’s made from, and its resistance to common burglary techniques such as picking, drilling, or bumping. High-security locks often feature advanced mechanisms, such as complex keyways and reinforced strike plates, which are designed to thwart would-be intruders. However, the landscape of home security is vast, with a lock for every level of desired protection. From traditional deadbolts revered for their sturdy, time-tested security, to smart locks that offer innovative security features like encryption and tamper alerts, understanding the security enhancements of each lock type can guide you in choosing one that ensures that your home remains a sanctuary. Compatibility: Matching Locks with Door Types Another crucial aspect to consider is the compatibility of the lock with your apartment door or a renter friendly door lock. This encompasses not only the physical fit of the lock on the door but also how well it integrates with the door’s design and material. For instance, a heavy-duty lock might require a door of certain thickness and strength to install properly, while smart locks may need specific setups, such as an existing smart home network or a particular type of door frame, to function optimally. Moreover, the aesthetic harmony between the lock and the door, along with the overall design of your apartment, should not be overlooked. A mismatched lock can detract from your home’s appearance and may even impact the door’s functionality. Taking the time to ensure that the lock you select is a perfect match for your door in every aspect—from installation requirements to design compatibility—can save you from future headaches and enhance the seamless operation and look of your entryway. Budget Considerations: Finding the Right Balance While the security and compatibility of a lock are paramount, the reality of budget constraints cannot be ignored. The market offers a wide range of locks at various price points, reflecting differences in technology, materials, and security features. High-end smart locks, for example, may offer a plethora of convenient features but come with a higher price tag, while traditional locks may be more affordable but lack advanced functionalities. It’s essential to find a balance between the level of security you desire and what you’re willing to invest. Remember, investing in a lock is investing in your safety and peace of mind; however, it doesn’t necessarily mean the most expensive option is the best one for your needs. By setting a realistic budget and researching the features and reliability of locks within that range, you can find a solution that offers robust security without breaking the bank. Top 5 Locks for Apartment Doors in 2024 Here, we’ve curated a list of 5 best locks suitable for your apartment doors, each offering robust security levels along with other convenient features: eufy Video Smart Lock S330 The eufy Video Smart Lock S330 stands at the forefront of home security technology. This state-of-the-art smart lock is not just about securing your home; it’s about redefining the way it interacts with your living spaces. Equipped with an integrated 2K HD video camera, the S330 allows homeowners to monitor their doorstep in real-time. Whether you’re at home or away, the ability to see and communicate with visitors directly from your smartphone ensures you’re always in the loop. The lock’s diverse keyless entry options further its appeal, offering fingerprint recognition for quick access, PIN codes for shared access, and remote capabilities via the app for managing entry from any location. The sleek, contemporary design of the S330 doesn’t just secure your door; it enhances its aesthetic appeal, all while the lock’s robust construction and advanced encryption technologies work tirelessly to safeguard your home against any unauthorized access attempts. This lock is a testament to what modern security looks like, marrying functionality with style and advanced protection. eufy Smart Lock C210 On a different note, the eufy Smart Lock C210 emerges as a beacon of versatility and user-friendliness in the realm of smart locks. Designed with the everyday user in mind, the C210 seeks to simplify the security upgrade process without compromising on effectiveness. This lock features intuitive keyless entry via Bluetooth, allowing for seamless smartphone control, alongside the option for traditional key access, catering to diverse user preferences and situations. The emphasis on ease of installation is a standout aspect of the C210, promoting a do-it-yourself approach that requires no drilling or professional assistance. This feature ensures that transitioning to smarter home security is as straightforward as it is rewarding. The lock’s extended battery life and efficient Bluetooth connectivity mean that users can enjoy prolonged periods of reliable service without frequent maintenance. KeyFree Go Lock The KeyFree Go lock emerges as a beacon of convenience in the security landscape, skillfully marrying ease of access with stringent security measures. It features an illuminated keypad for effortless code entry, smartphone integration for remote access, and the ability to generate temporary codes for guests. This lock doesn’t just prioritize user convenience; it also emphasizes security through features like automatic locking and the customization of access codes, all offered at a competitive price point. The KeyFree Go represents a harmonious blend of accessibility and security, catering to users who desire the practicality of keyless entry without sacrificing safety. SecureLink Wi-Fi Connect Further expanding the boundaries of lock technology is the SecureLink Wi-Fi Connect, a lock that seamlessly integrates with a home’s Wi-Fi network to offer features such as remote locking and unlocking, detailed access logs, and compatibility with popular voice assistants like Alexa and Google Home. Its built-in camera for visitor verification introduces an added layer of security, allowing users to visually confirm the identity of anyone requesting entry. Positioned in the mid to high price range, the SecureLink Wi-Fi Connect lock is a testament to the advances in connectivity and security, offering a comprehensive solution for those seeking to incorporate their apartment security system within a broader smart home ecosystem. BoltGuard Pro Lastly, the BoltGuard Pro stands as a bastion of mechanical deadbolt security, characterized by its high-strength steel bolt, anti-pick pins, and design engineered to withstand kicking, prying, and other forms of physical attack. This lock exemplifies the enduring value of traditional security measures, updated with modern engineering to offer unparalleled protection. With its lower to moderate pricing, the BoltGuard Pro is accessible to a wide audience, providing a no-nonsense, robust security solution for individuals who value straightforward, effective protection. DIY Installation Tips and Maintenance for Apartment Door Locks Installing and maintaining extra lock for apartment door doesn’t need to be a daunting task. With the right approach and a bit of know-how, you can ensure your locks are installed correctly and maintained to provide lasting security. Here’s a more detailed exploration of how to achieve a hassle-free installation and maintain your lock for enduring performance. Step-by-Step Guide for a Hassle-Free Installation: Gather Your Tools: Before starting, ensure you have all the necessary tools. Typically, you’ll need a screwdriver, a drill (for some types of locks), a tape measure, and possibly a hammer. Reading the lock’s installation manual beforehand will provide a specific list of required tools. Remove the Existing Lock: Start by removing the old lock. This usually involves unscrewing the mounting screws on the interior side of the door. Once these are removed, the lock should come apart easily. Measure and Adjust: Measure your door’s thickness and the diameter of the existing holes to ensure the new lock will fit. Some locks come with adjustable latches to fit different door sizes, so adjust accordingly. Install the New Lock: Begin with the latch or bolt mechanism, ensuring it’s oriented so that the tapered side faces the direction the door closes. Next, place the exterior part of the lock through the hole in the door, followed by the interior component. Secure both sides together with the provided screws. Test the Lock: Before finalizing the installation, test the lock to ensure it operates smoothly. The key should turn without resistance, and the latch should engage and disengage cleanly. Adjust the tightness of the screws if necessary to achieve smooth operation. Regular Maintenance: Prolonging the Life of Your Lock Maintaining your door lock is crucial for ensuring it continues to function correctly and provides optimal security. Here are some maintenance tips: Lubricate the Lock: At least once a year, apply a lubricant designed for locks to keep the moving parts operating smoothly. Avoid using oil-based products, as they can attract dirt and gum up the internals. Graphite powder or a silicone-based lubricant are good choices. Check for Loose Components: Periodically check the lock for any loose screws or parts and tighten them as needed. A loose lock can compromise your door’s security and make it easier for intruders to gain entry. Clean the Lock Mechanism: Use a dry cloth to clean the lock mechanism and keyhole regularly. If the exterior of the lock becomes dirty or tarnished, a mild soap solution can be used to clean it, but ensure it’s thoroughly dried afterward to prevent rusting. Inspect and Replace Worn Parts: Over time, the keys, latch, or bolt may show signs of wear. Inspect these parts regularly and replace them if they become too worn. Using a worn key can damage the lock over time, making it harder to operate. Conclusion: Securing Your Apartment with Confidence With the right information and tools, securing your apartment can be a straightforward and rewarding process. By choosing the right locks for your apartment doors and understanding how to maintain them properly, you can enjoy enhanced security and peace of mind. FAQ Can I Change the Lock for My Apartment Door? Yes, you can. But ensure you have your landlord's permission as per your lease agreement, communicate your intentions, choose a lock that fits your door and meets your security needs, consider professional installation to avoid damage, keep a spare key safely, and be aware of the costs involved, usually covered by the tenant. How Much Does It Cost to Change an Apartment Door Lock? On average, the total cost for changing an apartment door lock can range from as little as $30 (for a basic lock installed by yourself) to over $400 (for a high-end smart lock with professional installation and additional services). Is There Locks for Apartment Door without Drilling? Yes, there are locks available for apartment doors that do not require drilling for installation. These non-invasive lock options are particularly suited for renters who wish to enhance their apartment’s security without making permanent modifications that could violate their lease agreement.
Security Cameras · 04/03/2024
Exploring Free IP Camera Software (Windows, Mac, iOS & Android Devices)
In today’s era, where digital advancements are at the forefront of shaping our daily lives, the emphasis on robust home security systems has never been more paramount. With the rise of technological innovation, IP cameras have quickly ascended to become a preferred choice for enhancing the security of our homes. These cameras, renowned for their advanced features and adaptability, offer a dynamic solution to security concerns, providing peace of mind to homeowners. This guide is designed to navigate through the expansive realm of free IP camera software. Whether you are utilizing Windows, Mac, iOS, or Android devices, there is a plethora of software options designed to complement your security setup. Understanding IP Camera Software The software designed for IP cameras is a pivotal component in both managing and fully leveraging the capabilities of these advanced security devices. This software acts as the brain behind the operation, enabling you to not only view live video feeds directly from your outdoor security cameras but also to record valuable footage for future reference. Beyond mere viewing and recording, this software is intricately designed to alert you to any motion detected by the security camera, ensuring that homeowners are promptly informed of any potential security breaches or unusual activities around their premises. But the functionality of IP camera software extends even further. It offers you the ability to deeply customize settings to suit your specific needs, optimizing the camera’s performance to match the unique requirements of your home or business environment. Best Free IP Camera Software In the landscape of home security, the best IP camera software can make all the difference, transforming a simple camera into a comprehensive security system. Here, we delve into seven popular free IP camera software options, each bringing its own unique set of features and compatibility across various platforms: iSpyConnect For users operating within the Windows ecosystem, iSpyConnect emerges as a highly versatile choice. This software is celebrated for its extensive compatibility with a wide range of camera brands and models. The user-friendly interface of iSpyConnect makes managing and accessing video feeds straightforward, ensuring a seamless security monitoring experience. Its standout features include sophisticated motion detection capabilities that can be customized to suit specific monitoring needs, and remote access functionality, allowing users to keep an eye on their property from anywhere in the world. ZoneMinder Linux users will find a robust solution in ZoneMinder, an open-source software that excels in providing comprehensive surveillance features. Its strong suit includes not just motion detection but also mobile access, enabling users to monitor their home or business directly from their smartphones. ZoneMinder is particularly notable for its flexibility and the power it offers users to configure it according to their unique surveillance requirements, making it a preferred choice for those who wish for a tailor-made security setup. Blue Iris Lite Tailored for Windows users, Blue Iris Lite is a streamlined version of the more comprehensive Blue Iris software, designed to support a limited number of cameras. Despite this limitation, it doesn’t skimp on features, offering advanced video recording capabilities, timely alerts, and a user-friendly interface that makes surveillance straightforward and effective. It’s an excellent choice for smaller setups where quality and performance cannot be compromised. SecuritySpy Mac users have a dedicated ally in SecuritySpy, a software solution that’s specifically optimized for the macOS environment. It provides a rich set of surveillance features, including high-performance recording and meticulous monitoring capabilities. SecuritySpy stands out for its reliability and the high quality of its live and recorded video, ensuring that users never miss a detail in their surveillance efforts. tinyCam Monitor For Android device enthusiasts, tinyCam Monitor offers a comprehensive app that supports an array of IP cameras. It’s known for its motion detection feature and cloud storage capabilities, allowing users to save and access footage remotely. The app’s versatility and ease of use make it an attractive option for Android users looking to enhance their home security with minimal fuss. eufy Security Catering to both iOS and Android users, the eufy Security app download is easily available on Apple App Store or Google Play. It provides a comprehensive security management solution with features like instant alerts, local AI for privacy, geofencing, scheduling, and the ability to link multiple devices. Its emphasis on privacy through local processing of security data, combined with flexible control options and integration capabilities, makes it an appealing choice for those looking to enhance their home security. VLC Media Player While primarily known as a media player, VLC Media Player also offers functionality for viewing live IP camera feeds across any platform. This makes VLC a versatile, albeit basic, option for those seeking a straightforward solution to monitor their IP cameras without the need for specialized security software. Its broad compatibility and ease of use are key advantages for users looking for simplicity in their security setup. How to Set Up Your IP Camera with Free Software? Setting up an IP camera software free can significantly enhance your home security system without incurring extra costs. The process is straightforward but requires attention to detail to ensure everything works seamlessly. Here’s an expanded guide to help you through each step: Selecting and Downloading the Right Software: Begin by researching to find the software that best suits your needs and is compatible with both your operating system (Windows, Mac, iOS, Android) and your specific IP camera model. Consider the features that are most important to you, such as motion detection, remote access, and the ability to receive alerts. Once you’ve made your choice, download the IP video surveillance software free from a reliable source to avoid any security risks. Installing the Software and Camera Integration: After downloading, proceed with the installation. This process typically involves running the installer file and following on-screen instructions. Most IP cam software includes a setup wizard to guide you through the process of adding your camera. This may involve entering the camera’s IP address, username, and password. Ensure you have this information on hand before starting. Configuring Camera Settings for Optimal Use: Once your camera is added, delve into the software’s settings to fine-tune your setup. This includes configuring motion detection sensitivity and scheduling, setting up alerts for when motion is detected, and adjusting video quality settings. Taking the time to properly configure these settings can greatly enhance the effectiveness and efficiency of your surveillance system. Optimizing Network Settings for Remote Access: For remote viewing and access, ensure your network settings are correctly configured. This might involve setting up port forwarding on your router to allow external devices to connect to your camera. Additionally, secure your camera and network by changing default passwords and using strong, unique passwords for both your camera and Wi-Fi network. Check if your software and camera firmware are up to date to benefit from the latest features and security patches. Tips for Optimizing IP Camera Performance Optimizing the performance of your IP security camera is crucial for maintaining an effective and efficient home security system. Here are some comprehensive tips to ensure your IP camera operates at its best: Strengthen and Secure Your Wi-Fi Network: The reliability of your IP camera heavily depends on the strength and security of your Wi-Fi network. Position your camera within a strong signal range of your Wi-Fi router. Consider using Wi-Fi extenders if your camera is located far from the router to ensure a stable connection. Additionally, secure your Wi-Fi network with strong, unique passwords and enable WPA3 encryption to prevent unauthorized access. Regular Updates for Camera and Software: Manufacturers frequently release updates for IP cameras and their software, which can include important security patches and performance improvements. Regularly checking for and installing these updates can protect your system from vulnerabilities and enhance its overall functionality. Set reminders to check for updates or enable automatic updates if your software and camera support it. Smart Use of Motion Detection Features: Motion detection can significantly enhance the efficiency of your IP camera by recording only when there is activity to report. This not only saves storage space but also makes reviewing footage more manageable. Adjust the sensitivity of the motion detection to avoid false alarms caused by pets, moving shadows, or passing cars. Some software allows you to specify motion detection zones, focusing on key areas like doors or windows for more targeted surveillance. Optimal Camera Placement and Settings: Position your IP camera strategically to cover the areas you want to monitor most effectively. Avoid places where direct sunlight or strong backlight can impair image quality. Adjust the camera’s settings, such as resolution, frame rate, and night vision, to suit the camera’s location and your specific needs. Higher resolutions offer clearer images but can consume more storage and bandwidth. Effective Storage Management: Consider how you want to store your recordings. Many IP cameras offer cloud storage options, which can provide an off-site backup for your footage but may require a subscription. Alternatively, local storage on a network-attached storage (NAS) device or an SD card can offer a cost-effective solution. Regularly review and manage stored footage to ensure you have enough space for new recordings. Enhance Security with Strong Passwords and Encryption: Protect your IP camera system with strong, unique passwords for both the camera and its software. Change these passwords periodically and never use default passwords. If available, enable end-to-end encryption for video transmission to further secure your data against interception. Conclusion Free IP camera software offers a cost-effective way to enhance your home security system. With a variety of options available across different platforms, users can easily find a software solution that meets their needs and maximizes the potential of their IP cameras. FAQ Can I View an IP Camera Directly to My Computer? Yes, using the appropriate software or web interface, you can view live feeds from your IP camera directly on your computer. How Can I Use My Old Smartphone as an IP Camera? Apps like Alfred Home Security Camera allow you to repurpose old smartphones into security cameras, providing a step-by-step setup process within the app. Can I Use IP Camera without NVR? Absolutely. With the right software, you can record and store footage directly on your computer or cloud storage, eliminating the need for a traditional NVR.
Security Cameras · 04/03/2024
Can Neighbors Legally Point Security Cameras at Your House?
The rise in the use of residential security cameras has led to an increase in disputes between neighbors over privacy issues. This blog post will delve into the legality and privacy concerns surrounding the use of neighbors’ security cameras. We'll dissect the appropriateness of neighbors' surveillance practices, and offer strategies to safeguard your privacy. Read on to learn more! Overview of Security Camera Laws by State If your neighbor has a camera pointed at your backyard and you want to take action to prevent it, it’s important to understand the specific laws in your state. Here’s an overview of the legal landscape governing the use of security cameras in residential areas for some states in the U.S.: Alabama: Home security companies are regulated by a licensing board in Alabama. Security cameras are considered part of a home security system. Cameras must not be angled toward neighbors’ properties or their windows. Alaska: Alaska does not have specific laws that regulate the use of security cameras. However, general privacy laws may apply depending on where the cameras are located and what they’re recording. Arizona: In Arizona, it’s generally legal to install security cameras on your own property, both inside and out. However, if your cameras are recording audio or pointed in an area that would violate a person’s expectation of privacy, you could be violating state law. Arkansas: It is against the law in Arkansas to videotape or use any imaging device to secretly view a person who is in a private area, out of public view, and who does not consent to the observation. California: Landlords in California are allowed to prohibit tenants from installing security cameras on their property without prior consent. Legally, tenants can be recorded on video surveillance. Colorado: You are legally allowed to use surveillance cameras in both public and private locations in Colorado as long as the cameras are in plain sight. Connecticut: You are legally allowed to use surveillance cameras on your property for security purposes in Connecticut, but it is illegal to record or monitor footage for unlawful or malicious intentions. Delaware: There are no laws specifically regulating security cameras in Delaware. No permit or permission is needed to install security cameras on your property. Florida: In Florida, you are legally allowed to use surveillance cameras in both public and private locations as long as the cameras are in plain sight. Georgia: You are legally allowed to use surveillance cameras in both public and private locations in Georgia as long as the cameras are in plain sight. Please note that this is not an exhaustive list and the laws can vary greatly from state to state. Always consult with a legal expert or local law enforcement agency to get the most accurate and up-to-date information. Legal Implications of Neighbors Pointing Security Cameras Towards Your House When your neighbor has a camera pointed at your apartment door, there are several legal implications to consider, which can vary significantly based on jurisdiction. Here's an overview of potential legal concerns: Privacy Laws: Many areas have privacy laws that protect individuals from being recorded in places where they have a reasonable expectation of privacy, such as inside their homes or in fenced backyards. Cameras that capture such areas can potentially violate these laws. Harassment and Voyeurism: If the camera is used in a way that is deemed harassing, intimidating, or for voyeuristic purposes, legal action can be taken under harassment or voyeurism statutes. State and Local Regulations: Specific state and local regulations may govern the use of surveillance equipment. These laws can dictate how and where cameras can be installed, including restrictions on pointing cameras towards a neighbor's property. Civil Litigation: If privacy invasion or harassment occurs due to a neighbor's camera, the affected party may pursue civil litigation seeking damages or an injunction to remove or reorient the camera. Audio Recording Consent: In some jurisdictions, audio recording laws require the consent of all parties involved. If a neighbor's camera also records audio, this could lead to legal issues if consent has not been given by those being recorded. Property Disputes: Disputes over property lines and camera placement can also have legal implications. Cameras placed on or pointing over property lines without consent can lead to legal disputes regarding trespass or nuisance. HOA and Community Agreements: In communities with homeowners' associations or similar agreements, there may be specific rules governing surveillance and camera placement. Violating these rules can lead to penalties or required removal of the cameras. When Is It Inappropriate for a Neighbor to Have a Camera Pointed at My House? There are certain scenarios where it is legally permissible for neighbors to have security cameras facing your property. For example, if your neighbor’s security camera captures areas of your property that are visible from public spaces, such as your front door, driveway, or yard, you cannot press charges against your neighbor as there is no expectation of privacy in these outdoor areas. However, if your neighbor has a camera pointed at your apartment door, it could be considered an invasion of privacy. Besides, if a neighbor’s camera is capturing images of areas where you have a reasonable expectation of privacy, such as inside your home or in your backyard, this could be deemed intrusive or even illegal. So, the question arises: can my neighbor record me on my property? The answer largely depends on the specific laws in your state and the exact circumstances involved. Effective Strategies to Block Neighbors' Security Cameras If you find yourself in a situation where your neighbor’s camera is pointed at your backyard or other private areas of your property, there are several strategies you can employ to minimize this intrusion. One approach is to strategically place objects, such as trees or fences, to block the camera’s view. Another option is to install bright lights that can obscure the camera’s vision. You could also consider talking to your neighbor directly and politely asking them to reposition their camera. The Pros and Cons of Installing Your Own Security Cameras When considering the installation of your own security cameras, it's essential to weigh the pros and cons to ensure it aligns with your privacy and security needs. One of the significant advantages of modern wireless security camera, such as the eufy SoloCam S340 Outdoor Security Camera, is their sophisticated technology. The SoloCam S340 exemplifies the advancements in this field with its enhanced dual-camera clarity, capable of capturing every detail in 3K resolution from up to 50 feet away. This feature ensures that you can see exactly who is approaching your home, with an 8× zoom to closely examine any activity. Moreover, the convenience of a solar-powered system cannot be understated. The SoloCam S340's solar-powered design, equipped with a removable solar panel, means that once installed, it provides continuous operation without the need for regular maintenance. This aspect is particularly appealing for those seeking a low-maintenance security solution. Additionally, the 360° surveillance capability of this camera addresses a common concern among homeowners: blind spots. With the ability to monitor multiple areas of your property, such as the front porch, backyard, and driveway, the SoloCam S340 ensures comprehensive coverage, leaving no area unchecked. However, it's also important to consider potential drawbacks. The installation of cameras, especially those that may capture footage beyond your property boundaries, can raise privacy concerns among neighbors and may require careful placement and potentially even dialogue with neighbors to avoid disputes. Balancing the benefits of advanced security features with the importance of maintaining good neighborly relations is key when installing your own security cameras. Concluding Thoughts on Security Cameras and Privacy While the security camera can contribute significantly to enhancing home security, it’s important to strike a balance between security and privacy. If a neighbor’s security camera is causing you concern, remember that there are steps you can take to address the issue. At the end of the day, the key is to ensure that everyone’s rights are respected and that we can all feel safe and secure in our own homes. FAQ Is It Illegal to Install Cameras Around My Own House? No, it’s generally legal to install security cameras around your own property. However, it’s important to ensure that these cameras do not infringe on the privacy of others, such as neighbors, and do not record audio without consent. Do Security Cameras Constitute an Invasion of Privacy? Security cameras can potentially infringe on personal privacy rights, especially if they capture areas where individuals have a reasonable expectation of privacy. However, their use is typically seen as acceptable when they are installed for the purpose of enhancing security. Steps to Take If Your Neighbors Have Surveillance Cameras Pointed in Your Backyard Evaluate the Situation: Determine whether the camera is capturing areas where you have a reasonable expectation of privacy. Document the Issue: Take photos or videos of the camera’s position as evidence of its intrusion into your private spaces. Communicate with Your Neighbor: Politely express your concerns to your neighbor and request that they reposition their camera. Use Obstructions: Strategically place objects such as trees, fences, or blinds to block the camera’s view of your property. Consult with a Legal Expert: If your neighbor refuses to cooperate or if you believe your privacy rights are being violated, consider seeking advice from a legal expert. Report to Authorities: If all else fails, you may need to report the issue to local law enforcement or a homeowners association, if applicable.
Security Cameras · 04/03/2024
How Much Does It Cost to Install Security Cameras?
When it comes to safeguarding your property, installing security cameras is a prudent decision. Security cameras are a necessary part of home security, providing peace of mind by allowing homeowners to monitor their property at all times. However, understanding the intricacies of security camera installation cost is essential for effective planning and budgeting. In this comprehensive guide, we will take a look at the security camera installation cost and explore the various factors influencing the cost of installing security cameras, providing you with valuable insights to make informed decisions. Let's get started! Factors Affecting Security Camera Installation Costs The cost of security camera installations can be influenced by several factors. Here’s a brief overview: Type of Camera: The type of camera you choose can significantly impact the cost of installation. Additionally, the quality of the camera will also affect the price. Higher- resolution cameras typically cost more. Installation Complexity: The complexity of the installation can also affect the cost. Additional equipment, such as software for a wireless system or cables and amplifiers for a wired system, can also add to the cost. Additional Features: Cameras with motion detection capabilities, night vision, and a larger field of view can also affect the cost of surveillance cameras, but they enhance the system’s effectiveness. The ability to view footage remotely adds convenience, allowing you to monitor your property from anywhere. For outdoor cameras, weather resistance is of utmost importance and can increase the cost. While these features can raise the initial investment, they provide enhanced security, effectiveness, and peace of mind, making them a worthwhile consideration for your security camera system. The Average Cost of Security Camera Installation The cost of security camera installations can vary widely, depending on several factors. On average, you can expect to pay around $1,302 for a professional installation. However, this cost can range from $597 to $2,040, depending on the complexity of the system and the number of cameras needed. Below is a detailed cost analysis: Wired vs. Wireless Security Camera Costs The type of security camera system you choose, whether wired or wireless, can significantly impact the overall cost to install security cameras. Wired systems typically cost between $150 to $450 per camera to install. Wireless systems cost $25-$35, while high-end models can cost as much as $400. The cost of a complete wired system can be higher due to the need for additional equipment like cables and amplifiers. On the other hand, wireless security camera require software and may have lower upfront costs but could incur ongoing costs for software updates and maintenance. The average cost to install an 8-CCTV camera is $1,000 to $2,500, including setup and labor. Labor Costs for Security Camera Installation Labor costs can also significantly affect the overall cost of installing a security camera system. Professional installation can ensure that your system is set up correctly and functioning at its best, but it does come at a cost. On average, you can expect to pay between $80 to $200 per camera for professional installation. This cost can vary depending on the complexity of the installation, the type of camera, and the specific rates of the installation company. Costs by Camera Type Finally, the type of security camera you choose can also impact the cost. Dome cameras, bullet cameras, and PTZ (pan-tilt-zoom) cameras all come at different price points. On average, a single security camera can cost anywhere from $125 to $450, but a complete system with multiple cameras will cost more. Higher-end cameras with advanced features like higher resolution, motion detection, and night vision will also cost more. When considering the balance between cost and functionality in security cameras, the SoloCam S340 Wireless Outdoor Security Camera stands out at $199.99. Offering enhanced dual-camera clarity with 3K resolution and 8× zoom, this solar-powered device ensures continuous operation without blind spots, thanks to its 360° coverage. Its compatibility with HomeBase S380 and local storage option, without any monthly fees, makes it a compelling choice for comprehensive and effortless home surveillance. DIY vs. Professional Installation If you want to save more when installing security cameras, you can try Do-It-Yourself (DIY). Installing the system by yourself can be a cost-effective option. Many modern security cameras are designed to be user-friendly, making the installation process straightforward. This approach eliminates the need for professional installation fees, which can make up a significant portion of the total cost. DIY systems are also flexible, allowing you to add more equipment as needed and easily move the system if you relocate. However, DIY installation does require a certain level of technical skill. For larger homes, you may need a range extender to ensure all cameras can connect to the system. Additionally, while DIY systems often have lower upfront costs, they may incur ongoing costs for software updates and maintenance. On the other hand, professional installation ensures that your system is set up correctly and functioning optimally. While this approach may have a higher upfront cost to install surveillance cameras, it can provide peace of mind knowing that your system has been installed by experts. Conclusion Investing in a security camera system involves considering various factors, including the type of cameras, the complexity of installation, and whether to opt for DIY or professional installation. While the security camera installation cost can vary, it’s important to remember that the value of a security camera system extends beyond the initial investment. The peace of mind that comes from knowing your property is secure is invaluable. FAQ Do I Need Permission to Put Up a Security Camera? Generally, you do not need permission to install CCTV cameras on your own property. However, it’s important to respect privacy laws and avoid areas where people expect privacy. Do All Home Security Cameras Have Monthly Fees? Not all security cameras require monthly fees. Some store videos locally, avoiding subscription costs. However, subscriptions can offer additional features like cloud storage. How Long Does It Take To Install a Security Camera? The installation time for security cameras can vary. A typical 4-camera system takes around 4-6 hours to install. However, this can depend on the type of cameras and the complexity of the installation.
Security Cameras · 04/03/2024
4 Renter-Friendly Smart Home Device Ideas
Moving into a rental apartment brings a lot of excitement but also comes with limitations. You can paint walls, drill holes for frames and shelves, and install fancy lighting. Sometimes, you can even keep a pet, but what about personalizing the space and making it feel like your home as well? If you are a renter and want to personalize your space by upgrading to a smart home, then you have to worry no more. This article will discuss renter-friendly smart home device ideas and how they can benefit you in the long run. Keep reading to personalize your space without having trouble with your landlord. Benefits Of Smart Homes for Renters Living in a rental house brings many restrictions, but it doesn't mean one should stop living on one's terms. The smart home is one of the dreams and has become necessary in society as we evolve in the technological era. It has numerous benefits, bringing efficiency and simplifying daily tasks and extra security measures to the tenants. Let’s take a look at how smart homes are beneficial for renters. 1. Convenience and Control With the latest technology, renters can control different features of their homes from anywhere. Using smartphones or voice commands, they can easily adjust the lighting, thermostat, and security systems. This adaptability enables effortless control and personalization of the living space. 2. Automation Automation in smart homes offers numerous advantages for renters, improving convenience and efficiency. Renters can easily manage tasks such as lighting and heating, enhance security measures, and conveniently control devices from a distance. Automation streamlines daily routines and promotes energy efficiency. It creates a customized and cozy living environment without requiring permanent alterations. 3. Enhanced Security Enhance your security with intelligent features like cameras, doorbells, and smart locks that empower renters with advanced monitoring and control over home access. This not only improves security but also provides a sense of tranquility. 4. Cost Saving Despite the initial investments, smart home devices have the potential to generate long-term savings. Using energy-efficient devices can help lower your utility costs, and certain insurance providers may give you discounts for implementing better security measures. 5. Easy DIY Installation Many smart home devices are created with a user-friendly installation process, allowing individuals to set them up quickly without requiring professional help. This aligns with the temporary nature of renting, enabling residents to establish their smart homes without making significant changes. 4 Must-Have Smart Home Devices for Renters You need clarification about how and what devices renters can add for smart home upgrades to avoid conflicts with homeowners. Following are the device ideas renters can consider buying for smart homes. 1. Wireless Smart Doorbell Meet Video Doorbell E340, a smart doorbell for renters. Renters can benefit from real-time monitoring of their doorstep, allowing them to monitor visitors remotely. With easy installation and advanced features, a smart video doorbell camera is valuable for renters seeking extra security and peace of mind. Key Features Let’s take a look at the features of Video Doorbell E340 and how it can benefit you as a renter. Dual Camera: Two cameras collaborate to provide an enhanced viewing experience. The front-facing camera prioritizes capturing people, while the downward-facing camera offers a clear view of the floor before your door. Color Night Vision: Introducing the first dual-light system in the business, along with an innovative algorithm for capturing and processing light. It has less blur than older versions of night vision and can see up to 16 feet (5 meters) away at night. Battery Powered: Installation is made easy with the battery mode. Ensure you have an extra quick-release battery to easily swap out and prevent any interruptions caused by charging. The wired mode is battery-powered and easily set using the wired power source, ensuring long-lasting performance. 2. Smart Plugin Night Light The Lumi Plug-In Night Light is perfect for renters who want a practical and versatile lighting solution. The plug-in design of this product allows for easy installation without any permanent changes, making it suitable for renters. By offering the convenience of remote control and customizable scheduling, renters can effortlessly personalize living space with no hassle of complex installations. Key Features Let’s take a look at the features of Lumi Plug-In Night Light and how it can benefit you as a renter. Glareless lighting: The Lumi Plug-In Night Lights provide excellent, glare-free illumination for nighttime guidance. The gentle glow gives off just the right amount of light to see without being too bright. Integrated Light Control: With their innovative activation feature, these night lights will only switch when the surrounding light level drops below a specific threshold. Because of this quality, they can easily adjust to different lighting situations and shine a light where it is most needed. Energy Efficiency: Thanks to its impressive dedication to energy efficiency, every Lumi Night Light only costs less than 30 cents a year to operate. Based on 12 hours of daily usage and an energy cost of 0.11/kWh, these lights provide a cost-effective, eco-friendly lighting solution. 3. Smart Locks Here is Video Smart Lock E330; it provides a wide range of advantages for renters, improving security and convenience. These cutting-edge devices offer a convenient solution for entry, removing the hassle of traditional keys that can easily be misplaced or copied. Renters can remotely control and monitor their door locks using a smartphone app, providing a convenient way to manage access. Key Features Let’s take a look at the features of Video Smart Lock E330 and how it can benefit you as a renter. Triple Security: This device combines lightning-fast fingerprint recognition, a cutting-edge 2K HD camera with an impressive f/1.6 lens, and a convenient video doorbell, all in one sleek package. Experience enhanced visibility and complete control over your front door, allowing you to see details day and night. Remote Control: Stay connected no matter where you are. Make the most of the Eufy Security app to conveniently monitor visitors at your doorstep and effortlessly control your lock from anywhere. Stay updated with helpful notifications and effortlessly manage visitor access. Rechargeable Battery: Say goodbye to the never-ending cycle of purchasing batteries. The Smart Lock is powered by a high-capacity rechargeable battery, allowing for extended usage without frequent replacements. With a substantial 10,000 mAh capacity, the battery efficiently powers all the features of the Smart Lock. 4. Wireless Security Cameras For renters looking to boost home security, wireless security cameras provide essential advantages in terms of convenience and effectiveness; meet SoloCam S340. These cameras offer a hassle-free installation and eliminate the need for complicated wiring. They provide the convenience of flexible placement, allowing renters to easily monitor their living spaces without making any permanent modifications. Key Features Let’s take a look at the features of SoloCam S340 and how it can benefit you as a renter. Solar Powered: Install it once; it will always work. Enjoy peace of mind all the time with this solar-powered security camera. It's simple to set up and always on because it is easy to remove solar panels. Dual-Camera: Record all activities near your home in crystal-clear 3K resolution. Get a clear view of who is approaching your home with 8× zoom. 360° View: Say goodbye to blind spots with complete home coverage. This security camera offers a 360° surveillance radius, easily monitoring your front porch, backyard, and driveway, ensuring no area is left unattended. 4 Smart Home Setup Considerations for Renters As a renter, consider a few things when setting up your smart home to avoid problems. Let's dive into essential considerations to think about and ways to prevent issues with your landlord. 1. Review your Lease Agreement You should review your lease agreement before setting up any smart home devices. Some homeowners have restrictions on modifications and new setup arrangements so you may require permission for specific installation and changes in your home. Understanding these terms is crucial to avoid any conflicts. 2. Choose Portable Devices Choose portable smart home devices that can easily change while being placed. Wireless and battery-powered devices, like smart plugs and battery-operated sensors provide the convenience of easy placement and removal without causing any harm to the property. It provides a smooth change when moving to a new home. 3. Inform your Landlord Inform your landlords or property managers and assure them with complete confidence. Share your plans to upgrade your home with smart devices, highlighting the advantages and the hassle-free installation process. Approval is essential for conforming to property rules and maintaining a positive landlord-tenant relationship. 4. Consider Privacy and Security Pay close attention to your smart home devices' privacy and security settings. To prevent unwanted access, ensure that devices have robust security mechanisms, such as encryption and secure authentication. Learn how each device gathers data, and choose those whose policies are open and considerate of your privacy. Conclusion Turning a rental property into a smart home is possible and highly beneficial for tenants. The smart home devices mentioned are designed to meet the specific needs of renters. They offer convenience, security, and energy efficiency while maintaining a positive landlord-tenant relationship. Wireless smart doorbells, efficient smart locks, and versatile wireless security cameras seamlessly integrate technology into everyday living, making them ideal for renters. By following lease agreements, opting for portable devices, and emphasizing privacy and security, renters can easily customize their space and enjoy the benefits of a smart home hassle-free. No need to feel left out as a renter; upgrade your space to a smart home and enjoy living as if you own it! FAQS Can I install smart home devices without any destruction to the property? Yes,! Several devices mentioned in this article, like wireless smart doorbells, plug-in night lights, and battery-operated sensors, are created for easy, hassle-free installation. Most commonly, adhesive mounting or plug-and-play functionality is used, enabling you to enjoy the advantages of a smart home without causing any property damage. Do any smart home gadgets need a professional setup? Many smart home devices are accessible for renters to set up themselves. Still, for more complicated options, like security systems with hardwired cams, you should get help from a professional. It's always best to check the device's directions or call the maker for more information about installing something. What will happen to the installed smart home devices once I leave the property? Most smart home gadgets that are good for renters are portable and don't need to be permanently installed, so moving them with you is easy. Just be careful when removing any sticky mounting and return the walls or surfaces to how they were before.
Security Cameras · 04/03/2024
Laws on Outdoor Surveillance Cameras for Home
Home security is a paramount concern for individuals and families across the United States. As technology advances, outdoor surveillance cameras have become a popular choice for bolstering home security. However, the use of such cameras is not without legal implications. This article explores the intricate web of laws on outdoor surveillance cameras for home, covering federal regulations, state-specific variations, and key considerations for lawful usage. Federal Laws and Regulations for Home Security Cameras in the United States The United States has a comprehensive legal framework that addresses various aspects of home security camera usage. The Federal Trade Commission (FTC) plays a pivotal role in regulating consumer privacy and has guidelines applicable to home security cameras. These guidelines emphasize transparency, encouraging homeowners to inform visitors about the presence of surveillance cameras. Additionally, the Electronic Communications Privacy Act (ECPA) prohibits the interception of wire, oral, or electronic communications, offering some protection against unauthorized audio surveillance. Understanding these federal laws provides a foundation for homeowners to navigate the legal landscape surrounding outdoor surveillance cameras. Laws about Cameras at Home by State This section explores state-specific considerations, empowering homeowners to navigate the legal landscape effectively. New York: New York generally allows surveillance cameras on private premises, with audio recording consent laws applying in private domains. Washington: Washington's video recording laws allow covering the perimeter of private property, while audio recording requires consent from all parties. Maryland: Maryland allows video recording on private property with no sound recording unless consent is obtained, and public spaces face minimal restrictions. California: In California, stringent security camera laws mandate consent for recording in private settings, while public areas remain unrestricted. Florida: Florida permits video recording in public places, business areas, and the camera owner's private property, but audio recording requires consent. Massachusetts: Massachusetts imposes strict consent requirements for audio recording, with fewer restrictions on video recording on private property. Texas: In Texas, video monitoring is lawful on private property, and audio recording is permitted with appropriate notification signage. Illinois: Illinois prioritizes audio recording consent, prohibiting it without agreement from all recorded parties, while video recording is unrestricted on one's premises. The Importance of Obeying Home Security Camera Laws Adhering to home security camera laws is not only a legal obligation but also crucial for maintaining a balance between security and privacy. The benefits are as follows: Privacy Protection: Respecting the privacy of others is paramount when installing outdoor security cameras. Unauthorized surveillance can infringe on privacy rights protected by law, leading to legal consequences in many jurisdictions. Legal Compliance: Violating audio and video recording statutes can result in lawsuits or criminal charges. To prevent legal problems, thoroughly research and adhere to surveillance regulations applicable to your location. Trust Maintenance: Following security camera laws is essential for preserving trust between neighbors. Illegally spying on those around you can quickly erode community relationships, constituting a clear violation of residential security camera laws. Enhanced Security: Correctly installing home surveillance systems in legal locations provides homeowners with crucial security enhancements. When done within the confines of the law, these systems offer added protection without sparking controversy. Where Should You Place a Home Security Camera? Strategic placement of home security cameras is a critical aspect of both effective surveillance and legal compliance. While homeowners have the right to install cameras on their property, there are certain boundaries that should be respected to avoid invading others' privacy and adhere to laws about cameras at home. Commonly accepted areas for camera placement include entry points such as doors and windows, driveways, and other areas where there is no reasonable expectation of privacy. If you ask, “Is it illegal to have cameras inside your house: well, technically no. However, avoiding installing cameras pointing directly into neighboring properties or private spaces is crucial. By strategically placing cameras within legal and ethical bounds, homeowners can maximize their security benefits while respecting privacy. Below are the typical locations where employing a security camera may lead to legal complications: Bathrooms Bedrooms Changing rooms Locker rooms Hotel rooms What Is the Difference between Audio Recording and Video Recording in Law? This table provides a concise comparison between audio recording laws and video recording laws, highlighting key differences in many forms and regulations regarding public areas across states. Aspect Audio Recording Laws Video Recording Laws Consent Requirements Strict, requiring consent from all parties; 11 states require all parties to give consent for audio recording including: · California · Connecticut · Florida · Illinois · Maryland · Massachusetts · Montana · Nevada · New Hampshire · Pennsylvania · Washington Typically focus on "reasonable expectations of privacy" Private Conversations Mandates permission for interception Governed by privacy expectations in private places Nanny Cams with Microphones Likely violate wiretapping laws Subject to regulations based on expectations of privacy Altercations with Neighbors Can breach consent requirements Consent requirements may apply, depending on location Public Areas (e.g., Yards, Driveways) Varies by state; fewer expectations Governed by "reasonable expectations of privacy" Bonus Tips: How to Prevent Home Privacy from Illegal Surveillance? Protecting one's privacy in the age of advanced surveillance technology is a growing concern. To prevent home privacy from secret spy cameras, homeowners can take several practical steps: Understand the Laws: Stay informed about federal and state laws regarding home security cameras. For example, avoid bathroom hidden cam for your safety and everybody. Secure Wi-Fi Networks: Ensure that your camera system is password-protected and uses encrypted connections. Regularly Update Firmware: Keep camera firmware up to date to address security vulnerabilities. Choose Reputable Brands: Select security cameras from reputable manufacturers with a track record of prioritizing user privacy, like eufy SoloCam S340 Outdoor Security Camera. Conclusion Navigating the complex landscape of outdoor surveillance camera laws is essential for homeowners seeking to enhance their security responsibly. In this article, we learned more about laws on outdoor surveillance cameras for home. From federal regulations to state-specific variations, understanding the legal framework ensures compliance and fosters a sense of community trust. Moreover, strategic camera placement, awareness of audio recording laws, and proactive privacy protection measures contribute to a balanced approach to home security. FAQ What are the Pros and Cons of Security Cameras in Terms of Privacy Invasion? Balancing safety with privacy concerns is crucial. While security cameras enhance safety, they may infringe on privacy. Pros include crime deterrence, evidence collection, and peace of mind, while cons involve potential privacy violations and the risk of misuse. What is the Legal Difference between a Security Camera and a Surveillance Camera? The terms are often used interchangeably, but legally, there may be no significant difference. Both refer to cameras used for monitoring. Understanding specific functionalities, such as audio recording capabilities, is key to compliance. Is It Legal to Record Audio on Home Security Cameras in California? In California, recording audio without the consent of all parties involved is illegal. Homeowners must adhere to the state's two-party consent requirement when using audio recording features on their security cameras.
Security Cameras · 04/03/2024
The Comprehensive Guide to Security Cameras with SD Cards
In an age where security is very important, the integration of advanced technology becomes imperative. A prime example of this innovation is the integration of SD cards into contemporary security cameras, transforming surveillance capabilities significantly. This comprehensive guide aims to explore the intricacies of security camera with SD card, delving into their functionality, selection criteria for SD cards, and recommend some top choices in the market. Read on! Understanding Security Cameras with SD Cards Designed for motion-activated recordings, memory cards or micro-SD cards in CCTV cameras offer a succinct solution for storing brief video clips. A standalone SD-card security camera, featuring local storage, provides a cost-efficient alternative to subscription-based cloud storage. These cameras are particularly advantageous in areas with limited or no internet access, allowing the preservation of motion-triggered footage in remote locations like farms, sheds, ranches, boats, or summer homes. This makes them a popular choice for consumers seeking reliable video monitoring in off-grid or isolated environments where traditional cloud storage may not be viable. The flexibility and practicality of local storage through SD cards make these security cameras an ideal solution for those prioritizing self-sufficiency in surveillance. How Security Cameras with SD Cards Function? Security cameras with SD cards operate on a simple yet effective mechanism. Instead of relying solely on cloud storage or external recorders, these cameras save footage directly onto SD cards. The SD card serves as a local storage solution, providing a secure and easily accessible repository for recorded video footage. This method offers advantages such as quicker access to footage, increased privacy as the data stays on-premises, and reduced reliance on external networks. This CCTV camera with SD card is an efficient solution, especially in areas with limited or unreliable internet connectivity. Selecting the Ideal SD Card for Your Security Camera Choosing the right SD card for your security camera is crucial to ensure optimal performance and longevity. Several factors come into play when making this decision: Capacity: The storage capacity of SD cards varies widely. Consider the recording duration you need and the camera's resolution. Higher resolution and longer recording times necessitate larger storage capacities. Speed: The speed of the SD card determines how quickly it can read and write data. For seamless recording and playback, especially in high-resolution settings, opt for higher-speed cards. Longevity: SD card cameras often operate continuously, leading to frequent read and write cycles on the SD card. Choose cards with a high endurance rating to ensure they can withstand prolonged use. Brand: For video surveillance camera with SD card, stick to reputable brands when purchasing SD cards. Well-known brands often offer better reliability and performance, reducing the risk of data loss or card failure. Top 5 SD Card Security Cameras in the Market Here are 5 top security cameras with SD cards in the market this year, each offering unique features for various needs and preferences: eufy Indoor Cam S350: The eufy Indoor Cam S350 is known for its crisp video quality, two-way audio, and smart AI detection for recognizing people. This security camera with SD card recording also has dual cameras and 4K UHD resolution. Storage: Use at least a Class 10 microSD card with a maximum of 128 GB. eufy Outdoor Cam E220: The eufy Outdoor Cam E220 is designed for outdoor use, typically weather-resistant with features like motion detection, night vision, and easy installation. This outdoor security camera with SD card recorder comes with Ultra-Clear 2K Resolution and powerful built-in spotlight. Storage: Equipped with a 32GB microSD card for local video recording. Reolink Go PT Ultra: Reolink often offers wireless and versatile cameras. This Go PT Ultra is among the best SD card security camera that include features like 355° Pan & 140° Tilt, cellular connectivity, and high-quality video. Storage: MicroSD up to 128GB, 32GB (pre-installed). Arlo Q Plus: Arlo cameras are known for their wireless capabilities and high-quality video. This SD card security camera may have additional features such as Ethernet connectivity. Storage: Supports micro-SD cards up to 128GB (Micro SD card sold separately). Wyze Cam 1080p HD Indoor Wireless Smart Home Camera Known for being affordable with features like motion detection, two-way audio, and compatibility with SD card WIFI camera smart home platforms. Storage: Supports local storage through microSD cards up to Class 10. Conclusion The security camera with SD card capability provides a valuable solution for local storage of recorded footage. Understanding the working mechanism, selecting the right SD card based on capacity, speed, longevity, and brand, and exploring top choices in the market are essential steps for maximizing the potential of these cameras. The convenience, privacy, and reliability offered by SD card-equipped security cameras make them a popular choice for various applications. FAQ Does Removing SD Card Delete Everything on Security Camera? Removing the SD card from a security camera does not automatically delete the data on the camera. The SD card serves as a storage medium, and removing it will only prevent new data from being recorded. The existing data remains intact on the SD card unless manually deleted or formatted. It's crucial to follow proper procedures to avoid accidental data loss. What Happens When SD Card is Full on Security Camera? When the SD card in a security camera reaches its storage capacity, the camera may stop recording new footage. Different cameras handle full SD cards differently; some may overwrite the oldest recordings with new ones, while others may stop recording altogether. It's essential to check the camera's settings and configure it according to your preferences to manage full SD cards effectively. Can I Use Security Camera without SD? While some security cameras are designed to operate without an SD card, their functionality may be limited. Without an SD card, cameras often rely on cloud storage, which might incur additional costs or face limitations in terms of accessibility and privacy. It's crucial to check the specifications of your camera and explore alternative storage options if you choose not to use an SD card. Keep in mind that using an SD card provides a convenient and reliable local storage solution for security camera footage.
Security Cameras · 04/03/2024
The Complete Guide to Video Loss on Security Cameras (With Fixing Solutions)
Security cameras play a crucial role in safeguarding homes, businesses, and public spaces. They provide a sense of security by monitoring activities and deterring potential threats. However, one common issue that can undermine the effectiveness of security cameras is video loss. In this comprehensive guide, we will delve into the world of video loss on security cameras, understand its causes, explore solutions, recommend reliable camera models, and provide preventive measures to ensure your surveillance system operates seamlessly. Understanding Video Loss on Security Cameras Video loss refers to the sudden interruption or absence of video signals between a security camera and its designated recording device, such as a digital video recorder (DVR) or network video recorder (NVR). When video loss occurs, it results in gaps or missing segments in the recorded footage, leaving blind spots during critical moments. The impact of video loss goes beyond mere inconvenience. In security scenarios, where cameras serve as the eyes and ears of surveillance systems, the loss of video can be detrimental. Criminal activities, emergencies, or other noteworthy events may go undocumented, hindering the investigative capabilities of the surveillance infrastructure. What Causes Video Loss in Security Cameras? 8 Quick Solutions Here are eight common causes and their quick-fix solutions about what causes video loss in security cameras: 1. Insufficient Power Supply Cause: Insufficient power supply is a frequent cause of video loss in security cameras, leading to issues such as CCTV video loss at night, black screens, or flickering video signals. The common culprits include loose cable connections, unreliable PoE switches or injectors, excessive cable lengths, and faulty power cables. Solution: Double-check all power connections, use proper PoE equipment, and optimize cable lengths to prevent power loss. 2. Power Spike & Interference Cause: Power spikes, capable of causing sudden video loss and damage, are a significant threat to video loss on CCTV. Mounting cameras on metal surfaces, lightning strikes, and electrical current interference are common causes. Solution: Surge protectors and UPS units can mitigate these issues, providing a safeguard against power spikes and ensuring continuous power during outages. 3. Weak WiFi Connection or Low Bandwidth Cause: When there is no video but camera LEDs are on, most likely there is a weak WiFi connection or low bandwidth. Causes include long distances, WiFi signal interruptions, and insufficient bandwidth. Solution: Optimize camera placement, check BNC connectors, and evaluate network setups to minimize interference and ensure stable connections. 4. IR Cut Filter and Faulty IR Night Vision Cause: Issues with infrared (IR) cut filters and faulty IR night vision can cause black screens on CCTV cameras during nighttime surveillance. Common causes include disabled IR and defective IR LEDs. Solution: Check camera settings to ensure IR is enabled and test IR LEDs in low-light environments. 5. Signal Type and Compatibility Cause: Mismatched signal types and compatibility issues between cameras and recording devices can lead to video loss and can make cameras black. Causes include resolution mismatches and using cameras from different brands. Solution: Consult support teams, verify compatibility, and ensure uniformity in equipment. 6. Problems in Cables or Wires Cause: Cable or wire-related issues, such as twisted or bent cables, can impact surveillance camera functionality. Hardwired cameras are particularly susceptible to video loss due to wiring problems. Solution: Quick fixes include thorough cable inspections and using new cables to eliminate potential wiring issues. 7. Hardware and Firmware Problem Cause: Persistent video loss problems may stem from outdated firmware or hardware malfunctions in the NVR/DVR or surveillance cameras. Solution: Ensure firmware updates and, if necessary, invest in new and quality security cameras and systems. 8. IP Address Conflicts Cause: Persistent video loss unrelated to power or network issues may indicate IP address conflicts. Duplicated IP addresses can lead to viewing difficulties. Solution: Check and resolve IP address conflicts, ensuring each device has a unique address. Best Security Cameras without Video Loss Issues Here are some of the top security camera models on the market known for their reliability and minimal video loss issues: eufyCam E330 The eufyCam E330 offers top-notch security with no video loss issues. This outdoor security camera is unmatched with its 4K HD clarity, capturing every detail day or night. Its color night vision and BionicMind™️ technology offer advanced facial recognition for enhanced security. The camera ensures continuous operation with a long 16.4 ft power cable and supports stable Wi-Fi across a broad area. Easy to install, it comes with a 1 TB drive for extensive storage of footage, expandable up to 16 TB. eufy Indoor Cam S350 The eufy Indoor Cam S350 guarantees a surveillance experience free from video loss. It excels in delivering crystal-clear visuals with its dual cameras offering 4K UHD resolution. Perfect for keeping an eye on your pets or home, it boasts an 8× hybrid zoom for detailed imagery and 360° pan and tilt for comprehensive room coverage. Night vision is top-notch, ensuring clear visibility up to 32 feet in low light. Plus, its AI-powered tracking smartly follows movement, making it an efficient monitor for families or pets. Arlo Pro 4 The Arlo Pro 4 ensures a secure environment without video loss problems. With 2K resolution, wire-free installation, and advanced motion detection, it provides reliable and high-quality surveillance. Google Nest Cam IQ Outdoor The Google Nest Cam IQ Outdoor excels in security with zero video loss concerns. Its 4K sensor, intelligent alerts, and weather-resistant design make it a robust choice for outdoor surveillance. Ring Spotlight Cam Pro The Ring Spotlight Cam Pro ensures no video loss hassles in outdoor monitoring. With 1080p HD video, built-in spotlights, and a siren, it offers reliable and comprehensive security for your property. How to Prevent Video Loss on Security Cameras? Consider the following tips to prevent video loss: Check All Possible Connections Regularly: Regularly inspect all power and network connections, including power cords, adapters, Ethernet cables, BNC connectors, and cables. Ensure secure and proper attachment to prevent video loss issues and maintain the functionality of your surveillance system. Use Original and Shorter Cable: Opt for shorter BNC or Ethernet cables for your surveillance cameras. Avoid switching original cables to non-professional grade alternatives or using low-quality extension cables, ensuring a stable power supply and reducing the risk of video loss. Use Power Surge Protector and UPS: Install lightning surge protectors to block voltage spikes and surges, safeguarding cameras. Utilize Uninterruptible Power Supply (UPS) units to ensure continuous power during outages, preventing camera power-offs and maintaining surveillance reliability. Choose Reliable Camera System Brands: Prioritize well-received security camera brands, considering customer satisfaction as an indicator of product reliability. Opt for brands with helpful and responsive customer support teams to efficiently troubleshoot any camera system issues. Additionally, purchase security cameras and DVR/NVR from the same manufacturer to avoid compatibility issues. Conclusion Video loss on security camera can have significant consequences, jeopardizing the very purpose of surveillance systems. Understanding the causes and implementing effective solutions is essential for maintaining a reliable security infrastructure. Investing in quality cameras, addressing common issues promptly, and adopting preventive measures will ensure that your security system operates seamlessly, providing the protection and peace of mind you expect. FAQ How Long is Security Camera Footage Stored? The storage duration of security camera footage depends on several factors, including the storage capacity of the system, recording settings, and the number of cameras. In general, footage can be stored for days to several months, with modern systems allowing users to customize storage settings based on their specific needs. How Often Do Security Cameras Delete Footage? The deletion of security camera footage is typically governed by the storage capacity and settings configured by the user. Once the storage reaches its limit, older footage may be automatically deleted to make room for new recordings. Users can customize deletion settings based on their preferences and storage requirements. Are Security Cameras Always Recording? Security cameras offer various recording modes, including continuous recording, motion-activated recording, and scheduled recording. While some cameras may operate in continuous recording mode, others only record when motion is detected or during scheduled intervals. Users can choose the recording mode that best suits their surveillance needs and storage capacity.
Security Cameras · 04/03/2024
The Comprehensive Guide to Window Security Cameras 2024
With home security always changing, security cameras mounted on windows have become essential instruments for protecting our families and properties. As we approach 2024, the importance of these monitoring tools has grown due to both technology breakthroughs and a heightened consciousness of the necessity of all-encompassing security protocols. This in-depth manual seeks to explore the nuances of window security camera, offering a complete grasp of their significance, difficulties, and the most recent advancements in the industry. Effectiveness of Security Cameras Through Windows The effectiveness of security camera through window should be considered if you want to invest in one for your home. Here are some reasons why you need it: Deterrence: Visible security cameras can act as a deterrent, discouraging potential intruders or criminals from attempting illegal activities in the monitored area. Indoor Monitoring: Placing cameras behind windows allows for monitoring indoor spaces without exposing the camera to the elements. This can be especially useful for residential or small business applications. Ease of Installation: Installing cameras behind windows may be simpler and more convenient than mounting them externally, avoiding the need for drilling holes in walls or running cables outside. Challenges of Placing Security Cameras Behind Windows This section explores the common issues faced by users when opting for this installation method, shedding light on the intricacies that need to be navigated for optimal performance. Reflections and Glare: The transparent nature of glass can lead to reflections and glare, especially during daylight hours. These optical disturbances can significantly diminish the clarity of captured images. Infrared Interference: Security cameras equipped with night vision technology often rely on infrared (IR) light. Placing such cameras behind windows can disrupt the IR functionality due to reflections and scattering, compromising nighttime surveillance. Obstruction of View: Screens, blinds, or curtains within the window can obstruct the window cameras’ field of view, limiting its ability to monitor a wide area effectively. Privacy Concerns: While internal monitoring provides security, it raises privacy concerns. Striking a balance between security and privacy is crucial, and users must be aware of legal and ethical considerations. Limited Pan and Tilt Functionality: Traditional security cameras often come with pan and tilt features for comprehensive coverage. However, these features may be restricted when cameras are placed behind windows. Impact on Image Quality: The quality of images captured through windows can be affected by factors like distortion, blurriness, and color shifts, especially if the glass quality is subpar. How to Choose the Right Window Security Camera? Here are key features and considerations to guide your decision: Resolution: Choose a security camera with high resolution for clearer and more detailed images. Night Vision Capability: Choose cameras equipped with reliable night vision technology, considering the specific challenges posed by capturing images through windows in low-light conditions. Two-Way Audio: Cameras with two-way audio capabilities allow for communication, enhancing both monitoring and security. Weather Resistance: If the camera is exposed to outdoor elements, ensure it has adequate weather resistance to withstand varying conditions. Remote Monitoring: Cameras with remote monitoring capabilities provide real-time access, allowing users to keep an eye on their property from anywhere. Privacy Features: Ensure the camera has privacy features to address legal and ethical concerns, such as the ability to turn off recording in specific zones. Integration with Smart Home Systems: For enhanced convenience, choose cameras that seamlessly integrate with smart home systems for centralized control. Power Source: Depending on the installation location, consider the availability of power sources or opt for cameras with versatile power options like batteries or solar panels. Top 5 Window Security Cameras in 2024 As of 2024, the market offers a variety of window security cameras, each with its unique features. Here are the top 5 window security cameras: eufy Indoor Cam C120 The eufy Indoor Cam C120 stands out with 2K high-resolution imaging and advanced night vision, ensuring reliable surveillance day and night. Two-way audio enhances communication, and intelligent motion and person detection minimize false alarms. Its balance of cutting-edge technology and user-friendly features makes it a top choice for comprehensive security. eufy Indoor Cam S350 Equipped with advanced image processing, the eufy Indoor Cam S350 delivers 4K UHD crystal-clear images in various conditions. Its 360° pan and tilt capabilities ensure a complete view of your space without blind spots. Seamless smart home integration and privacy-focused features contribute to its versatility and reliability. Blink Indoor Camera The Blink Indoor Camera excels with its wireless design, extended battery life, and customizable motion detection. The inclusion of a sync module enhances connectivity and camera management. These features make it a standout choice for users prioritizing flexibility and easy installation. Arlo Essential Indoor Camera The Arlo Essential Indoor Camera impresses with 2K resolution, integrated privacy features, and a wide-angle lens for comprehensive coverage. Compatibility with virtual assistants adds convenience, making it a sophisticated and user-friendly security solution for detailed and high-quality video footage. Reolink Argus 3 Pro Designed for indoor and outdoor use, the Reolink Argus 3 Pro features a weather-resistant build, color night vision, and a rechargeable battery for added convenience. Seamless integration with the Reolink security ecosystem provides users with a comprehensive and interconnected surveillance solution. Its standout features make it an attractive option for holistic security needs. Tips for Optimizing Security Camera Usage Through Windows To maximize the effectiveness of security camera through window, consider the following practical tips: Anti-Reflective Coatings: Apply anti-reflective coatings on windows to minimize glare and reflections. Strategic Placement: Position cameras strategically to reduce obstructions and achieve optimal coverage. Regular Cleaning: Keep windows and camera lenses clean to ensure clear and unobstructed views. Use Privacy Features: Leverage privacy features to respect legal and ethical boundaries. Regular Maintenance: Conduct regular maintenance checks to identify and address any issues promptly. Conclusion Window security cameras offer a unique perspective on surveillance but come with their own set of challenges. This article revealed all that we need to know about security camera through window, and all the benefits and usage that we can get for this window camera security. By understanding the factors influencing their effectiveness, choosing the right camera, and implementing optimization strategies, users can harness the full potential of window-mounted security cameras. FAQ Do Night Vision Cameras Work through Windows? Night vision cameras can face challenges when used through windows due to reflections and glare. However, some advanced models are equipped to minimize these issues and provide effective night vision through glass. Can an IR Camera See Through Glass? Infrared (IR) cameras may struggle to see through glass because the IR light can be reflected or scattered. To solve this, either use external IR illuminators positioned outside the glass or opt for cameras without IR features, relying instead on external lighting sources for nighttime visibility. Does Motion Detection Work through Glass? Motion detection through glass can be reliable with modern cameras, but it may be affected by reflections or changes in lighting conditions. Adjusting sensitivity settings and strategic camera placement can enhance motion detection accuracy through windows.
Security Cameras · 04/03/2024
Efficient Ways to Bypass Garage Door Sensors
Garage door sensors play a crucial role just as the security camera in ensuring the safety and security of your home. These sensors are designed to detect obstructions and prevent the garage door from closing if something is in its path. While this safety feature is essential, there may be situations where bypassing garage door sensors becomes necessary. This article will explore the reasons behind sensor bypassing, how garage door sensors work, and provide a comprehensive guide on efficient methods to bypass them safely. How Do Garage Door Sensors Work? Garage door sensors employ infrared technology to enhance safety by preventing accidents and damage. Typically consisting of a transmitter and a receiver mounted on either side of the door, they create an invisible beam. When the garage door is closing, this beam serves as a virtual barrier. If an obstruction interrupts the beam, such as a person, pet, or object, the sensors detect the interruption and trigger the door to stop and reverse its motion, preventing potential accidents. This mechanism ensures that the door does not close on anything in its path, offering a crucial safety feature for households. Understanding the fundamental workings of garage door sensors is essential for maintaining a secure and accident-free environment. Why Should You Consider Bypassing Garage Door Sensors? While garage door sensors are essential for safety, there are instances where bypassing becomes necessary. One common scenario is when the sensors malfunction or falsely detect an obstruction, preventing the door from closing. Another situation may arise during maintenance or repair work when constant door movement is required. In these cases, bypassing the sensors temporarily can be a practical solution. Additionally, some users may find the sensor sensitivity to be too high for their liking, causing frequent interruptions during the door's operation. While adjusting the sensitivity is an option, bypassing the sensors might be a quick fix for those who prefer not to tinker with settings. 5 Methods to Bypassing Garage Door Sensors Now, let's explore several methods on how to bypass garage door sensors. Keep in mind that these methods are intended for temporary use and should be approached with caution. 1. Block the Sensors One of the simplest methods is to obstruct the sensors' line of sight. When knowing how to wire a garage door opener without sensors, use a solid object such as cardboard, tape, or any non-transparent material to cover both the transmitter and receiver. Ensure that the obstruction is secure enough not to be easily moved by wind or other factors. 2. Use Reflective Materials Reflective materials can be employed to bounce the infrared beam back to the sensors, creating the illusion of an uninterrupted path. For garage door sensor bypass. place reflective tape or similar materials on surfaces near the sensors to achieve this effect. Be cautious not to compromise the effectiveness of the sensors in the long term. 3. Temporarily Disconnect the Sensors Another method on how to disable garage door sensors is by physically disconnecting the sensors. This involves unplugging the sensors from the power source. Keep in mind that this method will render the sensors completely inactive, so it should only be used temporarily and reconnected once the need for bypassing has passed. 4. Adjust Sensor Alignment Sometimes, a slight misalignment can trigger the sensors unnecessarily. Adjust the alignment of both the transmitter and receiver to ensure they are perfectly in line. This method requires patience and precision to avoid causing permanent damage to the sensors. 5. Override the Sensor Circuit For those with technical know-how, it's possible to override the sensor circuit temporarily for another option on how to bypass garage door sensor. This involves identifying the sensor wires and connecting them directly, bypassing the infrared detection. However, this method is not recommended for individuals without electrical expertise. Essential Tips for Safely Bypassing Garage Door Sensors While the aforementioned methods offer ways to temporarily bypass garage door sensors, it's crucial to prioritize safety. Here are some essential tips to follow on how to trick garage door sensors: Use Bypassing Methods Temporarily: All the suggested methods are intended for temporary use only. Avoid leaving the sensors bypassed for an extended period, as it compromises the safety features of your garage door for security. Regularly Inspect and Maintain Sensors: To prevent the need for bypassing, conduct regular inspections of your garage door sensors. Clean them from dust and debris, and ensure they are properly aligned. Regular maintenance reduces the likelihood of malfunctions. Seek Professional Assistance: If you encounter persistent issues with your garage door sensors, it's advisable to seek professional help. Garage door technicians have the expertise to diagnose and repair sensor-related problems without compromising safety. Reconnect Sensors Promptly: If you have bypassed the sensors for a specific reason, reconnect them as soon as the need has passed. Leaving sensors bypassed indefinitely poses a significant safety risk. Integrate Garage-Control Security Cameras: Adding a security camera with garage control capabilities offers an additional layer of safety and convenience. These cameras, like eufy Garage-Control Cam E120, not only allow you to monitor the area around your garage door in real-time but can also be integrated with smart home systems to give you control over the door's operation remotely. Conclusion Efficiently bypassing garage door sensors can be a practical solution in certain situations, but it should be approached with caution and responsibility. This article talks about how to bypass garage door sensor and how to use it efficiently. So, if asked “will garage door work without sensors?” well, technically, yes. Understanding how sensors work, reasons for bypassing, and following safe bypassing methods are crucial aspects to consider for security purposes. Prioritizing safety and regular maintenance will help ensure the reliable and secure operation of your garage door. FAQ Can Garage Door Sensors Be Disabled? Disabling garage door sensors is possible, but it comes with significant safety implications. Doing so eliminates the crucial safety feature that prevents the door from closing on objects or individuals in its path. It is strongly discouraged unless absolutely necessary, and even then, professional assistance is recommended. Common Causes of Garage Door Sensor Malfunction Garage door sensors may malfunction due to various reasons, including dirt or debris on the sensors, misalignment, electrical issues, or damage to the sensor components. Regular maintenance and prompt troubleshooting can address many of these issues. Troubleshooting a Non-Functional Garage Sensor If your garage door sensors are not functioning properly, start by checking for dirt or obstructions. Ensure proper alignment, inspect the wiring for damage, and check for any loose connections. If issues persist, consult the garage door manual or seek professional assistance. Is a Garage Door Operational Without Sensors? While it is technically possible to operate a garage door without sensors, doing so compromises safety. Sensors are a crucial component designed to prevent accidents and injuries. Using the door without functional sensors increases the risk of the door closing on objects or people in its path, posing a significant hazard.
Security Cameras · 04/03/2024
How to Install Security Camera Wiring: A Step-by-Step Guide
Installing security cameras has become a crucial step in safeguarding our spaces, ensuring comprehensive surveillance and peace of mind. However, the effectiveness of these security systems heavily relies on the correct installation of security camera wiring. This guide aims to demystify the process, providing you with a comprehensive step-by-step approach on how to install security camera wiring correctly. From understanding the different systems and their wiring requirements to the actual installation—both indoors and outdoors—we cover all the essential aspects to ensure your security setup is not just operational but optimized for maximum surveillance efficiency. Understanding Different Security Camera Systems and Their Wiring Requirements Various security camera systems are available, each with its own specifications and wiring requirements. Here's an overview of different types of security camera systems and their corresponding wiring needs: Analog CCTV Cameras Analog cameras, the veterans of security surveillance, typically utilize a 3-wire system comprising power, video, and audio cables. These systems, known for their simplicity and reliability, are a go-to for basic surveillance setups. The wiring for analog cameras generally involves RG-59 or RG6 coaxial cables for video transmission and 18/2 power cables. This setup is straightforward but requires careful management and a clear 3-wire security camera wiring diagram to prevent interference and ensure quality video output. IP (Internet Protocol) Cameras Transitioning to digital or IP (Internet Protocol) cameras, we encounter the more modern 5-wire system. These cameras operate over a network, allowing for higher resolution video and advanced features like remote viewing and motion detection. The 5-wire security camera wiring diagram typically includes Ethernet cables (Cat 5e or Cat 6) for video and power (using Power over Ethernet, PoE technology), along with additional wires for audio, pan/tilt/zoom controls, and sometimes alarm inputs/outputs. This setup, while more complex, offers enhanced flexibility and scalability, catering to more sophisticated surveillance requirements. Essential Tools and Materials for Effective Security Camera Wiring Before delving into how to install security camera wiring, it's essential to gather the necessary tools and materials. Security Camera Cables: RG-59 Siamese Cables (Power and Video) for Analog systems; Cat5e Ethernet Cables (Power and Data) for IP systems. Wire Strippers: Safely remove insulation for your 4-wire color diagram splicing security camera wires. Crimping Tool: Used for terminating connectors on the cables. Cable Tester: Ensures proper connectivity and functionality. Power Drill: Facilitates the creation of openings and secure mounting of camera brackets. Screwdrivers: Phillips and flathead screwdrivers for various installation tasks. Cable Clips and Ties: Organizes and secures cables for a tidy installation. Tape Measure: Ensures accurate measurements for precise cable lengths. Ladder: Essential for accessing elevated areas for camera placement. Wire Connectors: Provides secure and reliable connections between cables. Power Supply: For IP Systems: 12v Power Supply (if power over Ethernet is not feasible). Step-by-Step Guide to Install and Conceal Security Camera Wiring Indoors Installing local storage security camera wiring indoors requires careful planning and execution for a neat result. Plan the Installation: Identify camera locations and determine the most discreet wiring routes for your camera wiring diagram. Consider concealing wires within walls for a neater appearance. Gather Necessary Tools and Materials: Acquire appropriate security camera cables (RG-59 Siamese or Cat5e Ethernet). Prepare splicing tools, wire connectors, and a cable tester. Turn Off Power: Prioritize safety by turning off power to the areas where you'll be working. Drill Access Holes: Use a power drill to create holes for cable entry and camera mounting brackets. Run Wires Through Walls: Carefully thread the cables through the drilled holes, ensuring a clean and concealed pathway. Secure Cables: Use cable clips and ties to secure the wires along their route, minimizing visibility. Splice Security Camera Wires: Employ wire strippers to expose wire ends for splice security camera wires. Then use crimping tools and connectors to create secure and reliable splices. Test each splice with a cable tester to ensure proper functionality. Mount Cameras: Securely mount cameras in chosen locations using appropriate screws and brackets. Conceal Wires at Camera Locations: Strategically conceal wires near cameras using cable management techniques. Ensure that cables are not easily accessible or visible to maintain a clean aesthetic. Power Up: Connect power sources as per the system requirements. Test each camera to verify proper functioning. Final Checks: Conduct a thorough inspection of the installation to ensure everything is secure and concealed. Restore power to the areas if turned off earlier. Techniques for Running and Concealing Security Camera Wiring Outdoors Concealing security camera wires outside can be effectively achieved by employing burial wires. Follow these steps to learn how to discreetly wire your outdoor IP camera. Plan the Wiring Route: Strategize the wiring path for your outdoor IP camera, aiming for a concise route to simplify the burial process. Prepare the Conduit Pipes: Ready the pipes for wiring, choosing from options like metal conduit or PVC for durability. Mark Drilling Points: Identify and mark the specific points where holes need to be drilled for the conduit pipes. Bury the Pipes: Adhere to safety guidelines; bury PVC conduit at least 18 inches deep and metal pipes at a minimum of 6 inches, complying with the National Electric Code. Run Security Camera Cables: Utilize fish tape to seamlessly pull and thread the security camera cables through the buried conduit. Note: For effective outdoor security camera wiring, use weatherproof cables designed for diverse weather conditions. Position cameras strategically along natural structures for discreet wire concealment and know how to run security camera wires through walls. Employ eaves or soffits to shield wires from the elements. Wrapping Up Navigating the complexities of security camera wiring might seem daunting at first, but with the right knowledge and tools, you can install your security cameras correctly and effectively. Through this guide, we've explored the nuances of different security camera systems, outlined the essential tools and materials for the job, and provided detailed steps for both indoor and outdoor wiring installations. By following the outlined steps and employing the recommended techniques, you're well on your way to creating a safer, more secure environment. FAQs Are Wired Security Cameras Hard to Install? Installing wired security cameras can vary in difficulty depending on your familiarity with electrical work and the complexity of the system. Generally, basic installations involving a single camera and a straightforward wiring setup are relatively simple and can be accomplished by DIY enthusiasts. However, more complex setups, such as multiple cameras, intricate wiring configurations, or integration with other security systems, may require professional assistance to ensure optimal functionality. How Do I Hide Outdoor Security Camera Wires? Hiding outdoor security camera wires is essential for both aesthetic reasons and to prevent tampering. There are several methods to conceal wires effectively: Use wire molding or conduit to cover and protect wires along walls or surfaces. This provides a clean and organized appearance while safeguarding the cables from the elements. Strategically use landscaping elements to hide wires. For instance, plant bushes or tall plants along the camera's wire path to naturally conceal them. Secure wires to structures using cable clips or ties, ensuring they blend in with the surroundings. This method is cost-effective and simple to implement. If possible, run wires through walls or ceilings during the installation process for a completely hidden setup. This may require professional assistance and planning. How Do Wired Security Cameras Get Power? Wired security cameras typically require a power source to operate. The power setup involves the use of 4-wire and 6-wire color diagrams for splicing security camera wires. Here's an overview: Power Source: Wired cameras commonly use a direct power source, such as an electrical outlet or a dedicated power supply box. 4-Wire Color Diagram: The standard 4-wire color diagram includes wires for power (usually red and black), video transmission (typically white), and ground (commonly green or bare copper). Follow the manufacturer's guidelines to match and splice these wires correctly. 6-Wire Color Diagram: In more advanced setups, additional wires may be present for features like audio, PTZ (Pan-Tilt-Zoom) control, or alarms. Refer to the camera's manual for the specific color codes and their corresponding functions.
Security Cameras · 04/03/2024
The Ultimate Guide To 24-Hour Vehicle Cameras to Capture Vandalism While Parked
In recent years, more and more car owners have adopted 24-hour vehicle cameras to capture vandalism while parked. These innovative devices serve as vigilant guardians, tirelessly monitoring your vehicle and providing you with peace of mind and the evidence needed should the worst occur. This guide delves into these 24-hour vehicle cameras, exploring their functionality, benefits, and how to select the right fit for your security needs. We'll also highlight some top car security camera models, compare them with traditional dash cams, and arm you with preventative strategies against vandalism. Let's get started! Understanding 24-Hour Vehicle Cameras 24-hour vehicle cameras, commonly known as parking surveillance cameras or dash cams with parking mode, are specialized devices designed to provide continuous video monitoring of a parked vehicle. Unlike traditional dash cams that primarily record while the vehicle is in motion, these parked car security cameras are equipped to operate around the clock, safeguarding your car when it's stationary and unattended. How Do They Function? To achieve continuous operation, 24-hour vehicle cameras are typically powered in one of two ways: directly from the vehicle's battery or via a dedicated external battery pack. These security cameras for car while parked utilize a variety of recording modes to efficiently manage storage space and battery life. During periods of inactivity, they may enter a low-power state, only activating full recording mode when triggered by motion or impact sensors. This smart functionality ensures that the cameras capture relevant events without wasting storage space on hours of useless footage. Key Features: Motion Sensors: Utilize built-in motion sensors to trigger recording when any movement is detected around your vehicle. Impact Detection: Some models are equipped with impact sensors that initiate recording when the camera senses a collision or impact. Night Vision: Employ infrared or low-light-sensitive technology to ensure clear footage even in dark or low-light conditions. Continuous Loop Recording: Record video in a loop, overwriting the oldest footage when storage capacity is reached to ensure continuous monitoring. The Benefits of 24-Hour Vehicle Cameras 24-hour vehicle cameras offer a suite of benefits that extend far beyond traditional car surveillance methods. Here's an overview of the key advantages they bring to vehicle owners: Deterrent to Potential Criminals: The mere presence of a car security camera when parked acts as a powerful deterrent, dissuading potential vandals and thieves from targeting your vehicle. Enhanced Security and Peace of Mind: These 24-hour security cameras for automobiles provide constant surveillance, offering peace of mind by ensuring that your vehicle is always monitored, significantly reducing the risk of vandalism and theft. Crucial Evidence for Insurance and Legal Use: In the event of an incident, the footage captured by 24-hour vehicle cameras can be invaluable in insurance claims and legal proceedings, helping to resolve disputes efficiently. Real-Time Alerts and Connectivity: Advanced features like Wi-Fi and cellular connectivity allow for real-time monitoring and alerts on your smartphone, keeping you informed about your vehicle's security status wherever you are. All-Condition Monitoring: Equipped with night vision and weatherproof capabilities, these cameras ensure reliable operation in all lighting and weather conditions, providing clear footage anytime. Choosing the Right 24-Hour Vehicle Camera When it comes to selecting the right security camera for car while parked, consider the following key factors to ensure you make an informed decision that aligns with your specific needs and preferences: Video Quality: Opt for a camera that offers high-definition video quality to ensure clear and usable footage. Cameras with 1080p resolution or higher can provide the detail needed to identify faces or license plates. Night Vision: Since many incidents occur at night, a security camera with robust night vision capabilities is essential. Look for cameras with infrared (IR) technology to capture clear video in low-light conditions. Motion Detection: Look for adjustable motion detection settings to customize sensitivity levels. This ensures the camera responds appropriately to different levels of movement, minimizing false alarms. Storage Capacity: Assess the camera's storage capabilities, considering the frequency of use and your preferred duration for storing recorded footage. Opt for models with expandable storage options or cloud connectivity for added flexibility. Battery Life and Power Management: Consider how the camera is powered and its battery life. Cameras that can be hardwired to the car's battery or those with an external battery pack are preferable for continuous operation without draining the car's battery. Connectivity Features: Look for cameras with connectivity features such as Wi-Fi or cellular data. These allow for remote access to live footage and notifications on your smartphone, enhancing the convenience and effectiveness of your vehicle's security system. Durability and Reliability: Choose a camera designed to withstand the rigors of continuous operation in various weather conditions. Reliability over time is key to ensuring your investment continues to protect your vehicle. Price and Warranty: Balance the cost of the camera against the features it offers. Investing in a slightly more expensive model with comprehensive features and a solid warranty can provide better value and security in the long run. Top 3 Security Cameras for Cars While Parked Here are the top three security cameras that stand out for their innovative features and robust performance, offering comprehensive security solutions for your parked car: eufy 4G Camera S230 The eufy 4G Camera S230 cuts the cord with its 4G LTE connectivity, allowing placement far beyond the reach of Wi-Fi without sacrificing surveillance capabilities. It supports carriers like AT&T and EIOTCLUB, with a prepaid EIOTCLUB SIM card included for immediate use. This camera is weatherproof with an IP67 rating; it captures in high-definition 2K color around the clock, thanks to its Starlight Sensor and offers a wide 120° view. Its long-lasting battery, extendable up to forever with an optional solar panel, and built-in AI significantly reduce false alarms, ensuring that you only receive alerts that matter. Plus, with 8GB of onboard storage, you can access your recordings without additional cloud fees. eufy Floodlight Camera E340 The eufy Floodlight Camera E340 provides comprehensive 360° coverage with its dual-camera system, combining a telephoto lens for detailed images from a distance and a wide-angle lens for broader surveillance in 3K resolution. It features 24/7 recording, AI-powered person tracking, and customizable floodlight settings, all supported by fast and stable dual-band Wi-Fi 6 connectivity. This camera doubles as a security light, offering added protection and convenience. Reolink RLC-811A The Reolink RLC-811A security camera impresses with its 4K Ultra HD resolution and 5X optical zoom, ensuring detailed coverage across a wide 128° field of view. It distinguishes between humans and vehicles, reducing false alarms and providing targeted alerts. The camera's full-color night vision, activated by spotlights and a siren in response to intruders, enhances security throughout the night. It supports multiple recording options, including time-lapse videos, offering flexibility without extra costs. Dash Cams vs. 24-Hour Vehicle Cameras: What's the Difference? This comparative analysis highlights the unique features and use cases of dash cams and 24-hour vehicle cameras, helping you discern which is more suitable for your specific security needs. Feature Dash Cams 24-Hour Vehicle Cameras Primary Function Record footage while driving. Provide continuous surveillance when the vehicle is parked and unattended. Motion Detection Limited to driving scenarios. Specialized for stationary use, offering motion detection for parked vehicles. Night Vision Varies; not always optimized for low-light conditions. Typically equipped with enhanced night vision technology for 24/7 surveillance. Power Source Usually powered by the vehicle's battery. May have additional power options, including built-in batteries or external sources. Field of View Wide-angle lens captures the road ahead. Wide coverage around the parked vehicle. Installation Generally straightforward, often DIY-friendly. May involve more complex installation due to continuous monitoring features. Storage Capacity Relies on internal memory or external cards. Typically designed for longer recording durations, often with larger storage capacity. Continuous Recording Limited to driving periods. Operates 24/7, continuously recording events in parking mode. Remote Monitoring Limited or absent. Some models offer remote access for live monitoring and footage review. Preventing Vandalism: Security Tips for Parked Vehicles While surveillance technology like 24-hour vehicle cameras plays a crucial role in capturing incidents after they occur, taking proactive steps to prevent such acts is equally important. Here are effective strategies to deter vandals and safeguard your vehicle: Choose Your Parking Wisely: Parking in well-lit, populated areas can significantly reduce the risk of vandalism. Thieves and vandals prefer operating in the shadows, so a spot under a streetlight or within view of security cameras can offer added protection. Employ Physical Barriers: Physical deterrents like steering wheel locks or window guards can make your vehicle a less attractive target for vandals. Leverage Alarm Systems: A loud, sensitive alarm system can frighten vandals away before they cause significant damage. Utilize Motion-Activated Lights: If you park your vehicle at home, motion-activated lights can startle vandals and thieves, drawing attention to their activities. Be Mindful of Valuables: Leaving valuables in plain sight can attract unwanted attention to your vehicle. Always remove or hide items like electronics, bags, and even loose change to avoid tempting potential vandals. Foster a Community Watch: Engaging with neighbors or joining a community watch program can enhance security for all vehicles in the area. Conclusion Our journey through 24-hour vehicle cameras to capture vandalism while parked culminates in an undeniable truth: the peace of mind and security these devices offer are invaluable. They serve as effective deterrents, provide continuous monitoring, and document evidence against vandalism and theft. With the insights and recommendations provided in this guide, you're now better prepared to make an informed decision on integrating a 24-hour car vandalism camera into your security setup, ensuring that your car stays safe and sound, no matter where it's parked. FAQ Do dash cams capture vandalism effectively? Dash cams primarily focus on recording while the vehicle is in motion, limiting their effectiveness in capturing vandalism during parked periods. Security camera for car while parked, specifically designed for stationary surveillance, are more adept at documenting incidents when the vehicle is unattended. Can 24-hour car cameras operate when the vehicle is off? Yes, 24-hour car cameras are designed to stay on and record continuously or be triggered by motion or impact even when the car's engine is turned off. This allows for continuous surveillance of the vehicle, providing security and evidence in case of theft, vandalism, or hit-and-run incidents while parked. The recording duration of dash cams: how long can they run continuously? The continuous recording duration of dash cams varies depending on several factors. With loop recording enabled, a dash cam can technically run indefinitely by overwriting the oldest files once the storage is full. Without loop recording, the recording duration is limited by the size of the memory card and the resolution at which the camera records. For example, a 32GB card can typically hold around 4-6 hours of footage at 1080p resolution.
Video doorbell · 04/03/2024
Best Doorbell Cameras with Local Storage - 2024 Guide
The Doorbell camera with local storage is increasingly vital in modern home security, offering reliable, cost-effective, and private surveillance solutions, ensuring homeowners maintain control over their footage without dependence on external servers. In this comprehensive guide, we delve into these video doorbells with local storage, exploring their benefits, examining the key features to consider when choosing, and presenting a curated selection of the best options available. Let's dive in! Benefits of Doorbell Cameras with Local Storage Doorbell cameras with local storage offer a myriad of benefits that go beyond the basic functionality of traditional security systems, providing homeowners with increased control, security, and peace of mind. Here are some of the most notable advantages: • Long-Term Footage Storage: Doorbell cameras with local storage allow for the retention of footage over extended periods. Unlike cloud storage, which often limits the duration of stored video without additional fees, local storage capabilities can be expanded with larger memory cards or external drives. • Assistance in Investigating Suspicious Activities: Local storage on video doorbell camera provides readily available evidence for investigating suspicious activities. Timestamped, high-resolution videos aid in identifying individuals and understanding the sequence of events, facilitating prompt action by law enforcement or homeowners. • Bolstering Home Security: Doorbell cameras, acting as visible deterrents, contribute to improved home security. Local storage enhances security by eliminating the risk of unauthorized access to cloud-stored footage, reducing the likelihood of hacking or privacy breaches and ensuring homeowner control over recorded information. • Cost-Effectiveness: Video doorbells with local storage eliminate the need for monthly subscription fees associated with cloud storage services. Once you purchase the device, you can store footage locally without incurring additional costs. Key Features to Consider When Choosing Doorbell Cameras with Local Storage When selecting the ideal video doorbell camera with local storage, several key features should be considered to ensure optimal performance and utility: • Storage Capacity: Ample storage space is crucial for retaining extended footage. A higher capacity ensures that historical data is readily available for review. Opt for expandable storage options if you anticipate needing more space over time. • HD Video Quality: Look for cameras that offer at least 1080p resolution. Higher resolutions, such as 2K or 4K, provide even more detail, making it easier to identify faces, license plates, and other critical details. • Night Vision: Ensure the doorbell camera you choose has a robust night vision feature that can capture clear footage in low light conditions. Infrared (IR) night vision is common and allows the camera to record quality video even in complete darkness. • Motion Detection: Motion detection helps conserve storage space by only recording when activity is detected. Advanced models offer customizable motion zones, allowing you to specify which areas of the camera's field of view should trigger recording. • Wide-Angle Viewing: A wide-angle lens ensures that your doorbell camera covers a broad area in front of your home. This ensures that you can see visitors from head to toe, as well as packages left at your door. • Two-Way Audio: Two-way audio allows you to communicate with visitors through your doorbell camera. This feature is invaluable for instructing delivery personnel, greeting guests, or deterring potential intruders. • Security Features: Consider doorbell cameras with additional security features such as tamper detection or encryption for stored footage to protect your privacy. • Smart Home Integration: For those invested in a smart home ecosystem, compatibility with your existing devices is a significant consideration. Look for doorbell security camera models that integrate seamlessly with your smart home platforms like Amazon Alexa. • Easy Access to Footage: Ensure that the camera system provides an intuitive way to access and review recorded footage. User-friendly apps that offer quick and easy playback, downloading, and sharing of video clips are essential for effective management. • Understanding Potential Additional Fees: While local storage reduces the need for subscription services, some features, like advanced motion detection or smart alerts, may require additional costs. Be sure to understand the full cost of ownership before making your purchase. Top Picks for Doorbell Cameras with Local Storage in 2024 With above considerations in mind, let's explore some of the top picks for doorbell cameras with local storage in 2024, each offering unique features to cater to diverse needs and preferences: eufy Video Doorbell S220 The eufy Video Doorbell S220 stands out for its exceptional clarity, thanks to a Sony 2K sensor and professional-grade lens that ensure sharp, detailed views of visitors. This local-storage model champions affordability and convenience with its one-time purchase cost, eliminating the need for monthly cloud subscriptions. It offers versatile power options, including a long-lasting charge or a continuous wired connection, and an expanded 4:3 aspect ratio for comprehensive head-to-toe viewing. Its advanced motion detection capabilities allow for customized alerts, ensuring you're informed of any activity at your doorstep. eufy Video Doorbell 2K With its crystal-clear 2K image and advanced HDR, the eufy Video Doorbell 2K (Wired) delivers high-quality video recordings. Equipped with an AES-128 chip, it encrypts data on both transmission and the built-in local storage, enhancing the security of your footage. This device also features two-way audio for real-time communication and smart detection technologies that alert you to human presence, reducing false alarms. It's designed for easy integration into your home security system without hidden costs, enhancing both convenience and protection. Arlo Essential Wire-Free Video Doorbell Arlo's Essential Wire-Free Video Doorbell offers flexibility in installation with its easy setup and recharge capabilities. It boasts a 180-degree wide field of view, HD video with HDR for clear footage in any light condition, and Arlo Foresight to capture the moments leading up to a motion-triggered event. Weather-resistant and compatible with major smart home platforms, it provides reliable security and convenient integration options. Additionally, it offers local storage options with an Arlo base-station or Smarthub, ensuring your footage is always accessible. Blink Video Doorbell The Blink Video Doorbell is perfect for those seeking convenience and versatility, offering 1080p HD video, two-way audio, and customizable alerts. It can be installed wire-free or connected to existing wiring, and integrates seamlessly with Alexa for easy operation. Local storage is available with additional Sync Module 2 and USB drive accessories, allowing you to save and share footage without a subscription, making it a practical choice for modern homeowners. Wyze Video Doorbell v2 The Wyze Video Doorbell v2 captures detailed 2K video with a wide, head-to-toe field of view. It supports 24/7 recording on a local MicroSD card for comprehensive coverage and integrates with your home's existing chime. Features like two-way audio, motion-activated voice deterrence, and weatherproof design make it a robust option for securing your doorstep. Plus, with free cloud storage for short clips and compatibility with motion and sound notifications, it's a smart, user-friendly choice for keeping an eye on your home. Installation Guide for Doorbell Cameras with Local Storage Installing a doorbell camera with local storage is a crucial step in fortifying your home security. Whether you've opted for a wired or wireless model, follow this step-by-step guide for a seamless installation process: Wired Setup 1. Power Off: Turn off the power to your existing doorbell at the breaker box. 2. Remove Old Doorbell: Unscrew and disconnect your existing doorbell. Keep track of the wires and their respective labels. 3. Mounting: Install the mounting bracket provided with your doorbell camera. Use the included screws to secure it in place. 4. Wire Connection: Connect the wires from your home to the corresponding terminals on the doorbell camera. Follow the manufacturer's color-coding or labeling. 5. Attach the Doorbell: Securely attach the doorbell to the mounting bracket. Ensure it is level and tightly fastened. 6. Power On: Turn the power back on at the breaker box. Your wired doorbell camera should now be ready for configuration. Wireless Setup 1. Mounting: Install the mounting bracket, usually provided with the doorbell camera, using the supplied screws. 2. Power On: Ensure the doorbell camera is charged or insert the provided batteries. Power on the device. 3. Connect to Wi-Fi: Follow the manufacturer's instructions to connect the doorbell camera to your Wi-Fi network. Use the companion app for a user-friendly setup process. 4. Positioning: Adjust the positioning of the doorbell camera to achieve the desired field of view. Consider angles that cover entry points without capturing unnecessary areas. 5. Testing: Test the doorbell camera by triggering the motion sensor and checking the live feed on the app. Adjust settings as needed. Remember to consult the specific user manual provided by the manufacturer for detailed instructions tailored to your doorbell camera model. Wrapping Up: Why Doorbell Cameras with Local Storage Are a Smart Choice To wrap up, doorbell camera with local storage offers a myriad of benefits, from long-term storage of footage without the need for a cloud subscription to aiding in the investigation of suspicious activities. By providing reliable, on-site storage solutions, these devices empower you to take control of your security. Choosing a doorbell camera with local storage ensures that your surveillance footage remains secure, accessible, and free from the constraints of subscription fees. Invest in the safety of your home with these advanced and reliable security solutions! FAQ Storing your doorbell recordings: where and how? Storing doorbell recordings can be done either through cloud storage, where videos are saved on the service provider's servers and accessed via the internet, or through local storage, where recordings are kept on physical devices like microSD cards or network-attached storage (NAS) units at home. Is cloud storage necessary for video doorbells? No, cloud storage is not necessary. Video doorbells with local storage allow you to store recordings on-site, providing a secure and cost-effective alternative to cloud-based solutions. Some doorbell cameras offer the option to use both local and cloud storage for added flexibility. How to manage full local storage on your doorbell camera? If your local storage is nearing capacity, consider the following: · Regularly review and delete old or unnecessary recordings. · Upgrade to a higher-capacity microSD card or storage device. · Enable loop recording, which automatically overwrites the oldest recordings when storage is full. · If not already active, enable motion detection settings to capture only relevant footage, conserving storage space.
Video doorbell · 04/03/2024
A Comprehensive Guide to Mini Doorbell Cameras in 2024
In an era where the dynamics of home security are evolving rapidly, the advent of mini doorbell cameras marks a significant leap forward. From deterring potential intruders to simply checking in on a delivery, the utility of these compact yet powerful tools extends far beyond traditional security measures. This comprehensive guide delves into the intricate world of mini doorbell cameras, uncovering their basic operations, key features, top picks that have set the standard in 2024, and their installation nuances. Join us to learn everything about these small doorbell cameras! Understanding the Mini Doorbell Camera Mounted by your front door, a mini doorbell camera is a small, internet-connected device that combines the functionality of a conventional doorbell with the advanced features of a security camera. These compact devices are typically equipped with motion sensors, high-definition cameras, and two-way communication systems. Upon detecting motion or a visitor at the door, the motion sensors trigger the camera to start recording and send alerts to your connected devices. The high-definition footage captured by the camera is then transmitted to a designated receiver or stored in the cloud for later access. Via a designated app on your smartphone or tablet, you can watch a live video feed of your doorstep remotely. This real-time access allows you to monitor your front door from anywhere, at any time. Key Features of Mini Doorbell Cameras Mini video doorbell cameras come packed with a myriad of features designed to provide comprehensive security coverage: Compact Design: Unlike traditional security cameras, these devices are designed to be discreet and unobtrusive, blending seamlessly with the exterior of your home. High Video Resolution: Despite their small size, mini doorbell cameras boast high video resolution, providing clear and detailed footage for reliable identification. Effective Night Vision: Equipped with infrared technology, these cameras ensure effective night vision, allowing for around-the-clock monitoring and security. Responsive Motion Detectors: Advanced motion detectors trigger instant alerts, keeping you informed of any suspicious activity near your doorstep. Two-Way Audio Communication: The inclusion of two-way audio communication enables you to communicate with visitors or deter potential intruders remotely. Robust Weather Resistance: Mini doorbell cameras are designed to withstand various weather conditions, ensuring reliable performance regardless of rain, snow, or extreme temperatures. Seamless Smart Home Integration: Integration with smart home systems enhances the overall security ecosystem, allowing you to monitor and control your doorbell camera alongside other smart devices. Cloud Service Compatibility: With cloud service compatibility, mini doorbell cameras offer flexible and secure storage options for recorded footage, providing peace of mind and a valuable resource in the event of a security incident. Top Picks for Mini Doorbell Cameras in 2024 As we navigate through 2024, several mini video doorbell camera models stand out for their innovative features and reliable performance. Here are our top picks for mini doorbell cameras this year: eufy Video Doorbell C210 eufy Video Doorbell C210 guarantees crystal-clear 1080p visuals of your doorstep visitors with its advanced WDR and a 4:3 aspect ratio for accurate, full images. Its smart AI distinguishes humans from irrelevant movements, sending only pertinent real-time alerts. The two-way audio allows for immediate communication with visitors, supported by compatibility with Google Voice Assistant and Amazon Alexa. Impressively, it promises 120 days of coverage on a single charge without the need for a subscription, offering both cost savings and convenience. Its sleek design ensures easy installation and integrates seamlessly onto any doorframe, while locally stored encrypted data promises uncompromised security. Additionally, this is one of the smallest video doorbell cameras that include a free wireless chime for added convenience. eufy Video Doorbell S330 Featuring innovative Dual Cam Technology, eufy Video Doorbell S330 eliminates blind spots with its dual-lens system, capturing both the visitor's face and any packages on the ground. Its sophisticated dual motion detection system minimizes false alerts, ensuring you only get notified of actual activity. The exclusive Delivery Guard™ technology alerts you to package deliveries and potential tampering, backed by 2K HD resolution and HDR for unparalleled clarity. This device also boasts a six-month battery life, a two-way audio system, voice assistant compatibility, and easy installation. Your data remains yours alone, securely stored without the need for cloud services or associated monthly fees. VEIU Mini Smart Video Doorbell Tailored for ease of use among all family members, including children and seniors, the VEIU mini smart video doorbell automatically records visitor interactions, ensuring clear visibility day and night thanks to its night vision capability. The rechargeable battery design is both eco-friendly and cost-effective. Installation is straightforward, requiring no existing doorbell or complex wiring, and its wide-angle lens offers expansive 120° coverage of your home's entrance. Nest Video Doorbell Linen The Google Nest Video Doorbell (Battery) provides a wireless and convenient solution for front door monitoring. Boasting a 720p video camera, it ensures easy tracking of visitors and deliveries. Its portable and easy-to-install design suits those who move frequently. The linen finish adds a stylish touch to your home, and Wi-Fi connectivity enables notifications and live feed access on your smartphone or tablet. Arlo Essential Wired Video Doorbell The Arlo Essential Wired Video Doorbell stands out with its 180-degree viewing angle, allowing you to see visitors from head to toe or spot packages on the ground. It delivers 1080p HD with HDR quality footage, ensuring clarity under any lighting conditions. The doorbell supports two-way audio, quick reply to messages, and with an Arlo Secure plan, offers smarter notifications for enhanced reaction capabilities. Arlo Foresight captures video prior to motion-triggered events, so you never miss a moment. It's also weather-resistant and features a built-in siren for added security, seamlessly integrating with major smart home systems. Installing Your Mini Doorbell Camera The process for mini doorbell camera installation varies between wired and wireless options. Wired models are powered through your existing doorbell wiring, offering constant power but requiring a bit more effort in installation. Wireless models are battery-powered, allowing for greater flexibility in placement and an easier installation process, though they will require periodic recharging or battery replacement. Here's a step-by-step installation guide: Preparation: Before starting, read through the manufacturer's mini doorbell camera instructions carefully. Gather all necessary tools and materials, which typically include screws, wall anchors, and possibly a drill. Mounting Location: Choose a location for your doorbell camera that offers a clear view of your entrance and is within range of your Wi-Fi network for wireless models. The recommended height is about 4 feet off the ground to capture a clear view of visitors' faces. Mounting the Bracket: For both wired and wireless models, you'll need to mount a bracket to your wall or doorframe. Mark the screw holes, drill if necessary, and secure the bracket with screws. Connecting or Inserting the Battery: For wired models, connect the wires to the back of the camera before mounting it to the bracket. For wireless models, ensure the battery is charged and inserted according to the instructions. Attaching the Camera: Snap the camera onto the mounted bracket. For wired models, this may also be the step where you secure the device with additional screws. Setting Up the Camera: Follow the manufacturer's instructions to connect the camera to your home Wi-Fi network and pair it with the corresponding app on your smartphone or tablet. Testing: Test the doorbell camera by ringing it and monitoring the video feed and notifications on your device to ensure everything is working correctly. Conclusion As we've explored, mini doorbell cameras are essential components of modern home security systems. Their compact design, advanced features, and seamless integration with smart home technologies make them invaluable tools for homeowners. In an era where the importance of home security is ever-increasing, integrating a mini doorbell security camera into your setup is a wise, forward-thinking decision that promises convenience, efficiency, and most importantly, safety for your household. FAQ How do I connect my mini doorbell camera to my phone? Connecting your mini doorbell camera to your phone typically involves downloading the manufacturer's app, creating an account, and following the app's instructions for device pairing. This process ensures that you can remotely monitor and control your doorbell camera from your smartphone. Do mini doorbell cameras need to be wired? While some mini doorbell cameras offer wired options, many are designed for wireless installation. Wireless options provide greater flexibility but may require regular battery maintenance or charging. Wired options ensure a constant power source but may have more installation requirements. Do mini doorbell cameras work without Wi-Fi? Most mini doorbell cameras require a Wi-Fi connection for remote monitoring, alert notifications, and cloud storage access. However, some models can utilize a cellular network or a dedicated radio frequency to transmit the video feed directly to a receiver or a mobile device. These cameras enable users to monitor their front door even in the absence of a Wi-Fi network, ensuring continuous access and surveillance.
Security Cameras · 04/03/2024
Ultimate Guide for Smart Home Security
Remember the classical old days when home safety was one of the significant concerns among individuals? The head of the house used to patrol at night, ensuring the family's safety. The constant worry was the fear of burglars breaking in, stealing valuable belongings, and causing trouble. Fast forward to today’s tech world, security concerns have changed remarkably. It's not a significant problem if you are far or near your home. You can easily monitor home security with a tap on your mobile phone. In addition, you can also access months' worth of recorded footage. The assistance of an alarm system is a savior; you will immediately be alerted to any potential intruders or the silent danger of fire. Let's explore the incredible benefits of a smart home security system. What is Smart Home Security? Smart home security is considered an advanced and innovative way of safeguarding your homes using upgraded and intelligent technological devices. Unlike traditional security systems, these smart systems support connectivity and connect with AI and automation to give more proactive security systems. So, no more hiring guards and CCTV cameras setup to record when you have these intelligent options. The smart home security system allows connections between different devices and sensors that work together. These sensors and devices monitor, record, and respond to potential security threats. They may include surveillance cameras, doorbell cameras, motion sensors, smart locks, and integrated security hubs. It typically offers convenient features such as remote monitoring and control via mobile devices, instant alerts, and the option to automate security measures. With an internet connection, Users can easily manage and view their home security systems from anywhere, offering peace of mind. How Does Smart Home Security Work? Smart Home Security integrates advanced technology systems, connectivity, and innovative devices to create a comprehensive and responsive security system. Let’s take a look at the critical aspects of how an intelligent security system works: 1. Sensors Smart home security systems include a range of sensors like motion detectors, door/window sensors, and glass break sensors. These devices are strategically positioned throughout the home to identify unauthorized entry or unusual activities. 2. Connectivity Devices in a smart home security system are connected through wireless communication protocols like Wi-Fi, Zigbee, or Z-Wave. This connectivity facilitates smooth communication between various components, enabling a synchronized and instantaneous response. 3. Centralized Hub Many smart home security systems use a centralized hub or control panel. This hub is the central control unit, handling data from sensors and devices and enabling seamless communication between the user and the security system. 4. Automation Enhancing smart home security involves incorporating automation as a crucial element. Automation can program the system to carry out specific actions automatically when certain events occur. For instance, activating lights upon detecting motion or automatically securing doors at a particular time. 5. Remote Monitoring Smart home security is a game-changer thanks to its ability to monitor your home remotely. Users can check their security anytime and anywhere using mobile apps and web interfaces. Homeowners can now access live camera feeds, receive alerts, and adjust their security settings remotely. 6. Artificial Intelligence (AI) Advanced smart home security systems use AI. These algorithms analyze patterns and adapt to differentiate between usual and possibly concerning acts. AI enhances the system's ability to send precise messages and minimize false alarms. 7. Cloud Storage Smart home security systems typically store video footage and other data in a cloud-based database. It provides a dependable and user-friendly storage solution, allowing users to effortlessly access and monitor previous events and security-related activities. Why is Smart Home Security becoming popular? The smart home security system is becoming popular daily, aligned with modern security concerns and evolving lifestyles. Nowadays, people are more concerned about the safety of their homes, especially regarding robbery and other potential dangers. Therefore, they are making efforts to incorporate modern and innovative security measures. Improved features in smart home security offer the convenience of real-time monitoring and automated responses, ensuring confidence and peace of mind. The rapid growth of advanced connected devices and the Internet of Things (IoT) has led to the development of integrated smart home ecosystems. Homeowners nowadays appreciate the convenience of effortlessly connecting and managing their security systems from anywhere using smartphones and other devices. 4 Factors to consider while setting up Smart Home Security Systems There are many factors to consider when setting up your smart home security system that plays a significant role in the family's safety. Here are the five key ones: 1. Start Simple Begin with essential products like smart plugs, smart bulbs, and switches for the smart home. These items are easy to set up and can efficiently automate various tasks throughout the house. Look at how smart plugs can streamline your daily routine by automating multiple devices such as fans, lights, lamps, slow cookers, curling irons, and space heaters. 2. Home Style and Entrances Look at your home structure and identify the main entering points: your garage entrance, windows, or backyard. Customize the placement and selection of security devices, like cameras and sensors, to effectively monitor vulnerable areas and achieve thorough monitoring. 3. Integration and Compatibility Choose devices that effortlessly combine with your current smart home setup. Enhance compatibility to establish an integrated security network, enabling seamless communication and operation of devices for a more vigorous defense. 4. Privacy and Data Security Place strongly emphasizes safeguarding the privacy and ensuring data security. Choose systems that have strong encryption measures in place to safeguard sensitive information. Make sure to regularly update firmware and passwords to protect against any potential vulnerabilities and unauthorized access. 5. User-Friendly Interface and Accessibility For simple administration, go with a user-friendly interface system. Ensure the remote monitoring and control tools are easy to use so you can effortlessly access and change settings through websites or mobile apps. Smart Security System Devices Smart home security systems offer a wide range of devices to enhance your home security. These devices incorporate the latest technology and connectivity to establish an effective and efficient security network. Meanwhile, Eufy is here to help you strengthen your security system with various devices; let's look below. 1. EufyCam S330 Introducing the eufyCam S330, a revolutionary addition to home security. This device completely transforms your surveillance experience, providing unmatched clarity with its exceptional 4K detail, both during the day and at night. This option features expandable local storage and long-lasting solar-powered endurance, perfect for individuals who value seamless security. The BionicMind™ AI guarantees precise alerts, effortlessly distinguishing between familiar faces and unknown individuals, while HomeBase 3 streamlines centralized management. User Rating "Love the much higher resolution of video recordings at 4k to local storage. I also purchased 4tb Crucial SSD Sata drive and inserted it in the S330 Homebase3 so I could store nearly one year of security video recordings locally." 2. SoloCam S340 Wireless Outdoor Security Camera Here’s the SoloCam S340, a cutting-edge wireless outdoor security system revolutionizing surveillance. Featuring dual lenses and exceptional clarity at a distance of 50 feet in stunning 3K resolution, it effortlessly captures even the finest details. The design is powered by solar energy, allowing for continuous operation. Plus, it offers 360° coverage, ensuring no blind spots. Experience the convenience of local storage with no recurring charges for a single purchase for long-lasting security. The SoloCam S340 is designed to seamlessly integrate with the HomeBase S380, providing users with unmatched surveillance convenience. It has a new level of audio excellence with the SoloCam S340, offering a perfect combination of crystal-clear sound, impressive performance, and effortless usability. User Rating "This solar powered security camera is easy to setup and use. The picture quality is good and the battery status charged. This is a good quality security camera with no monthly fees." 3. Video Doorbell E340 The Video Doorbell E340 is here to help you feel safer at home. The incredible power of a dual-camera system that captures people and the floor view, providing comprehensive surveillance capabilities. Experience an unparalleled viewing experience with our cutting-edge dual-light system, providing color night vision for a clear view of up to 16ft. It has stunning clarity of 2K Full HD, allowing you to see the intricate details of your doorstep visitors. Whether you prefer a battery-powered option for easy installation or a wired option for continuous performance, the E340 can offer you both. Stay connected with personalized alerts throughout your home and effortlessly integrate with various chime options. User Rating "Very impressed! This doorbell camera is great quality! The image is very clear. I love that it doesn't require a monthly subscription. Way better than my first doorbell camera. The camera is very clear and easy to see at night. I'm very pleased with it." 4. Video Smart Lock E330 Introducing the Video Smart Lock E330 - a cutting-edge example of triple security innovation. This versatile device combines advanced fingerprint recognition technology, a high-resolution 2K HD camera with an impressive f/1.6 lens, and a convenient video doorbell feature. Experience the ease of unlocking your door with five convenient methods: fingerprint, app control, voice assistants, keypad, or traditional keys. It offers the convenience of remote control, effortlessly managing visitors and notifications from anywhere. With its long-lasting rechargeable battery, ample local storage, and strong security features, you can enjoy a hassle-free experience. Enhance your home access with the Video Smart Lock E330, where convenience meets protection. User Rating "The installation is much easier than S330 how but new users they may not know how to install it." 5. Eufy Security Siren Here comes the eufy Security Siren, your strong defense against potential dangers. Featuring a robust 105 dB wireless alarm, this system effectively discourages unwanted visitors while keeping the entire neighborhood informed of potential security threats. The weather-resistant design makes it suitable for indoor and sheltered outdoor use. Setting up is incredibly easy, with no need for any tools or assistance from professionals. This siren offers comprehensive control by seamlessly connecting to the HomeBase S380 and S280 through the Eufy Security app. Using two durable CR123 batteries, you can expect a solid two years of dependable performance. Take your security to the next level with the Eufy Security Siren, a perfect blend of power and simplicity. User Rating "I was unaware this product was even in the works. This device was purchased and put into service immediately. Good job everyone. Adds another level of notification to our eufy infrastructure." Conclusion This was the comprehensive guide to your smart home security system to help you set up an innovative security system. Every aspect of intelligent security, from the core components to the setup considerations, is designed to align with modern lifestyles. With the addition of advanced devices like the eufyCam S330 and SoloCam S340 from Eufy, we ensure an ideal combination of technology and efficiency. Enhance your security with these cutting-edge advancements, guaranteeing a solid shield against potential risks. FAQS How does a smart home security system work? Devices in a smart home security system are linked by wireless standards like Wi-Fi or Bluetooth. It finds security risks and takes action against them using sensors, AI, and a central hub. Automation and remote tracking through mobile apps give you peace of mind and real-time control over your home security. Are the eufyCam S330 and SoloCam S340 compatible with an existing smart home setup? Yes, it is recommended that you select devices that seamlessly integrate with your existing smart home setup. For instance, the eufyCam S330 and SoloCam S340 have been designed to offer seamless integration, improving surveillance's overall convenience and efficiency. What are the key factors to consider when setting up a smart home security system? While setting up a smart home security system, factors include starting with basic smart home devices, customizing placement based on home structure, ensuring integration and compatibility with existing smart home setups, prioritizing privacy and data security, and selecting a user-friendly interface for easy administration and accessibility.
Security Cameras · 03/03/2024
A Comprehensive Guide to Fake Doorbell Cameras 2024
As homeowners seek cost-effective ways to deter potential intruders, the advent of fake doorbell cameras emerges as a topic of significant interest. As we step further into 2024, the market for these decoy devices has expanded, offering a range of models designed to mimic the appearance and functionality of their real counterparts. This comprehensive guide delves into the various aspects of fake doorbell cameras, exploring their mechanics, varieties, and the rationale behind their use. By examining the advantages and limitations of these devices, alongside a critical comparison with genuine surveillance options, we aim to equip you with the knowledge needed to make informed decisions about enhancing the safety and security of your homes. Understanding Fake Doorbell Cameras: Function and Mechanics Fake doorbell cameras or dummy cameras are designed to mimic the appearance and sometimes the functionality of real surveillance doorbell cameras without the actual capability to record or transmit video footage. These decoy devices are crafted to look indistinguishable from their genuine counterparts, often featuring realistic designs complete with fake lenses, LED lights, and even motion-sensing capabilities. The primary purpose of these faux devices is to act as a visual deterrent, suggesting to would-be burglars that the property is under constant surveillance, even when it's not. The mechanics behind fake doorbell cameras are relatively simple. These units are usually powered by standard batteries, which fuel LED lights or other minor features to give the impression of an active, recording camera. Some models come equipped with motion sensors that trigger a blinking light or sound when someone approaches, enhancing the illusion of real-time monitoring and recording capabilities. Despite their lack of genuine surveillance technology, fake camera doorbells are often built to withstand the elements. This durability, combined with their realistic appearance, makes them an intriguing option for homeowners seeking a low-cost, low-maintenance security solution. Exploring Varieties: Types of Fake Doorbell Cameras The market for fake video doorbells offers a variety of options, each designed to create the illusion of security with distinctive features. Here's a look at the types available: Basic Dummy Models: These are the simplest and most affordable fake cameras, featuring a plastic casing that mimics a real camera. Models with LED Lights: A step up, these models include steady or blinking LED lights to better simulate an active surveillance system. They're more convincing at first glance, offering a moderate deterrent level. Solar-Powered Variants: For eco-conscious homeowners, solar-powered models use sunlight to power LED lights, eliminating battery needs and providing a sustainable fake surveillance solution. Models with Motion Sensors and Sound: These advanced fake cameras detect movement and respond with the blinking of LED lights or ringing, simulating interaction and enhancing the illusion of real surveillance. The Upsides: Advantages of Using Fake Doorbell Cameras Despite lacking the recording capabilities of their genuine counterparts, fake doorbell cameras offer several benefits that make them an attractive option for homeowners seeking to enhance their property's security: Cost-Effectiveness: One of the most compelling reasons to consider fake doorbell cameras is their affordability. These decoy devices come at a fraction of the cost of real surveillance systems. You can find a wide range of fake doorbell cameras on Amazon at competitive prices. This can be appealing for individuals on a tight budget who want to create the appearance of security without investing in a fully functional system. Psychological Deterrent: The mere presence of a doorbell camera, even if it's fake, can act as a powerful psychological deterrent to potential intruders. The perception of being monitored can make would-be burglars think twice before targeting a home. This psychological impact is a critical component of a fake doorbell camera's effectiveness, contributing to a safer home environment without the need for live surveillance. Weighing the Downsides: Disadvantages and Limitations While fake doorbell cameras offer several advantages as a deterrent to potential burglars, they also come with notable disadvantages and limitations: Limitations in Security: Fake doorbell cameras lack actual surveillance capabilities, offering no real-time monitoring, recording, or alarm functionalities. This renders them ineffective in providing genuine security compared to authentic systems. Experienced burglars can often recognize the lack of functionality, undermining the perceived security. Once identified as fake, the deterrent effect diminishes, potentially making the property more vulnerable. Legal Concerns: Using fake camera doorbells raises ethical and legal issues, as it involves creating a deceptive impression of security. Misleading others about the presence of surveillance can lead to legal consequences and breaches of trust within the community. Some jurisdictions may have specific regulations regarding the use of surveillance equipment, and deploying fake cameras might violate these laws, exposing individuals to legal penalties. If a security incident occurs, relying on fake cameras could lead to legal complications, as their ineffectiveness may be considered negligent in providing adequate security measures. Seeking Better Solutions: Alternatives to Fake Doorbell Cameras While fake doorbell cameras can act as a deterrent, their limitations prompt the need for more effective security solutions. Investing in authentic security solutions, such as real doorbell cameras, combined with additional safety measures, significantly enhances the overall protection of homes and properties. Real Doorbell Cameras Investing in real doorbell cameras is the most straightforward alternative to fake ones. These devices not only provide actual video recording, live streaming, motion detection, and alerts, but often come equipped with advanced features like high-definition video, two-way audio, and night vision, ensuring comprehensive surveillance around the clock. As a reliable security camera manufacturer, eufy offers you advanced video doorbell cameras designed to enhance your home's protection with cutting-edge technology and user-friendly features: eufy Video Doorbell E340 (Battery Powered) eufy Video Doorbell E340 (Battery Powered) brings a unique dual-camera setup to your doorstep, offering comprehensive coverage with front-facing and downward-facing views. This, combined with the industry-first dual-light color night vision, ensures you get a clear, detailed view up to 16ft away, even in the dead of night. With 2K Full HD clarity, the E340 delivers crisp and detailed visuals, ensuring you never miss a thing. Flexibility is key, and this model offers both battery and wired installation options to suit your home's needs. Our commitment to privacy and convenience shines through with no subscription fees, local storage of up to 60 days of event-based recordings, and AES 128-bit encryption to keep your data private and secure. eufy Video Doorbell C210 eufy Video Doorbell C210 ensures you see every visitor in 1080p Full HD, bringing you color-accurate, head-to-toe images every time. Its on-device AI distinguishes human presence, sending only relevant alerts and providing real-time notifications. Engage with visitors directly with two-way audio, and integrate seamlessly with Google Voice Assistant or Amazon Alexa for convenient security checks. Boasting 120 days of front door security on a single charge, the C210 combines efficiency with our commitment to your wallet and privacy. Installation is straightforward, allowing you to set up your device effortlessly and enjoy the slim, sleek design that blends into your home exterior. Comprehensive Home Security Systems A comprehensive home security system is a robust solution for those looking to secure their entire property. These systems can include a variety of components, such as indoor and outdoor security cameras, window and door sensors, motion detectors, and smart locks, all integrated into a single network. This holistic approach ensures multiple layers of protection, deterring intruders and providing real-time monitoring and alerts. Enhanced Outdoor Lighting Good lighting is a simple yet effective deterrent against intruders. Motion-activated floodlights, pathway lighting, and strategically placed outdoor lights can illuminate potential entry points and make it difficult for burglars to approach unnoticed. Comparing Real and Fake: Effectiveness of Fake Doorbell Cameras Here's a table summarizing the comparison between real and fake doorbell cameras to help you make more informed decisions: Factor Real Doorbell Cameras Fake Doorbell Cameras Deterrence Effect Offer a genuine deterrent effect by providing real-time surveillance, recording capabilities, and the potential for homeowners to interact with visitors or intruders through two-way audio Rely on visual appearance to create the illusion of surveillance and potentially discourage casual trespassers. Cost and Installation Higher initial costs, potential ongoing fees for monitoring. Installation might require more time and professional assistance. More affordable and easier to install, requiring minimal technical skills. Scenario Suitability Are best suited for areas with higher security needs, where the recording of footage can assist in the identification of intruders and provide evidence for insurance claims. Might be considered suitable for low-risk areas where the primary concern is deterring petty crime, or as a temporary measure while planning for more comprehensive security solutions. Wrapping Up While fake doorbell cameras provide a budget-friendly means to potentially ward off unwelcome visitors, their effectiveness is inherently limited by the lack of real surveillance capabilities. For those seeking to fortify their homes, integrating real doorbell cameras, like eufy Video Doorbell E340 and C210, along with comprehensive security enhancements, proves to be a more effective and reliable solution. The true value of home security lies not in the illusion of safety, but in the actual protection and peace of mind it affords. FAQ Is it illegal to have dummy doorbell cameras? Generally, it's not illegal to install dummy doorbell cameras as they serve as a deterrent to potential intruders. However, it's crucial to respect privacy rights and avoid placing these cameras in a manner that might infringe on others' expectations of privacy. Always ensure compliance with local laws and regulations, as legal implications can vary. Do fake doorbell cameras deter thieves? Yes, fake doorbell cameras can deter thieves to some extent. The presence of a doorbell camera, even a non-functional one, can create the illusion of surveillance, making potential burglars think twice before attempting a break-in. However, fake cameras are not as effective as real ones, especially against experienced burglars who might be able to identify them as decoys. For maximum security, using real surveillance cameras is recommended. How long do batteries last in fake doorbell cameras? The battery life in fake doorbell cameras varies depending on the model and usage but typically ranges from 6 months to 2 years. Factors such as the type of batteries used (e.g., AA, AAA, or lithium), the frequency of activation (if the camera has motion sensors), and the operating conditions (e.g., weather, temperature) can significantly impact battery life.
Security Cameras · 29/02/2024
Best Smart Home Sensors in 2024: The Ultimate Guide
Ever wish your home could just, well, understand you? Imagine lights that turn on as you enter, thermostats that adjust to your mood, and leak detectors that act faster than a superhero. That's the magic of Smart Home Sensors, and 2024 is bursting with fantastic options! This guide is your ultimate roadmap to pick up the perfect smart home sensor for your needs. If you are a tech noob, then don’t worry. We will keep it as simple and clear as we can. We will show you how these tech heroes make your life convenient and efficient. We will also recommend some of our tried and tested gadgets. Keep reading this article to make your home as smart as you are. What are Smart Home Sensors? Smart home sensors are smart devices that act as little eyes and ears of your house, monitoring and reacting to various conditions within your living space. They first collect information about your house, like temperature, movement, lights, and even water leaks. Then, they use this information magically to control other smart devices in your home and automate tasks or send notifications. They aim to make your life easier, more secure, and more efficient. How do Smart Home Sensors work? Smart home sensors work in a systematic order. Here’s how the magic behind their operation occurs: Detection: Each smart sensor is specialized for detecting a particular element. Some are made to detect motion, while some are made to detect temperature and weather. They employ different technologies for detection, like ultrasonic waves, infrared waves, probes, etc. Processing:The information detected by these smart home sensors at the beginning is now converted into electrical signals. Communication: Depending on the type of sensor used, the information processed is now transmitted wirelessly or through wires to a central hub or other smart devices. Action or alert:The smart devices are set with pre-programmed instructions. The hub or the smart devices now take action upon the signal's arrival. Like a motion sensor to turn lights off or a smart thermostat triggered to open the air conditioner. Learning and adapting:This step is limited to some advanced devices. These devices can learn and adapt to your routine and preferences, personalize your experience, and work accordingly. 6 MUST Smart Sensors for Every Home Let’s look at the top 6 smart home sensors you must consider for your smart home. 1.Temperature Sensors These sensors are installed in devices like smart thermostats, which let you control your home's temperature from anywhere. The sensor constantly monitors your home's temperature and recommends adjusting the temperature. Let’s look at its features. These devices employ cognitive technology to analyze and learn your routine and preferences. They then adjust your home's temperature according to your comings and goings. They use geofencing technology, sense your phone’s location, and pre-heat or cool your home before you arrive. With this feature, you don’t need to worry about adjusting your home temperature after returning home. They usually have a smart mobile app that lets you monitor and control your home temperature from anywhere. They can cater to your room-by-room needs. Each room can have its personalized climate zone, ensuring your ideal temperature is maintained where you want it. The best part about these is that they’re eco-friendly. They smartly manage your home's cooling and heating, slashing your energy bills to ensure you save money and the planet. 2.Light Sensors These sensors are the most energy-saving because we all forget to switch off lights in a hurry. These tiny sensors help us to control our home lighting effortlessly. Let’s take a look at the features it offers. These detectors automatically detect if the room is empty and then switch off the lights. It conserves energy and saves you extra-power usage. The smartphone app lets you conveniently turn your home's lights on and off from anywhere. You can schedule your lights to turn on and off remotely. This feature is helpful when you are away from the town as it creates an illusion of someone being at home. This keeps the potential intruders away. 3.Motion Sensors Motion sensors do what their name tells - they detect motions. These smart sensors act as your guards, keeping an eye on when you’re away. When a motion is detected in your monitored area, it alerts you through a notification. Let’s see what features it offers and how it can help you. These sensors employ different technologies, AI, and even cameras to differentiate between humans, pets, and environmental changes. This technology makes you stress-free from false alarms and gives you more accurate alerts. They offer you an option of customizing activity zones since not all areas of your home need equal monitoring. This feature lets you customize activity zones and let the motion sensors focus on more sensitive areas. You get an instant alert whenever a motion is detected in your activity zone. If your motion sensor is integrated with a camera, you may get a short clip or a snapshot along with an alert. You can connect the motion detectors to other devices and see the home automation magic. For instance, lights turn on on its own when you walk into your room. Some smart motion sensors offer a two-way audio option. This feature lets you speak to whoever triggered the motion. This adds a great layer to your home security. We recommend checking the Eufy motion sensor, which gives you 100° coverage up to 30 ft distance. It has an amazing 2-year battery life, and its sensitivity can be adjusted per your requirements. Check it out now! 4.Window and Door Sensors Door and window sensors are the most efficient way to keep you safe and save energy. They act as the first line of defense for your home. Let’s see how its features keep you safe and save you energy. These sensors send real-time alerts to your smartphone whenever you forget to lock doors/windows, someone enters and leaves your home, or someone tries to break in. If connected to smart lights, these sensors automatically turn on and off lights whenever someone enters or leaves. This feature saves extra power usage. These sensors can be easily integrated with other security measures, like alarm systems and security cameras, to enhance your home security. We recommend checking the Eufy smart entry sensor. It can be easily installed on your windows and doors, protecting you from any potential break-ins. It runs for a whopping 2 years on a single charge and comes with a 100-decibel siren that instantly alerts you of any forced entry. 5.Doorbell Sensors Smart video doorbells are equipped with sensors that alert you when someone is at the door. The smart video doorbells are usually equipped with cameras, so they also let you see a visitor, delivery man, or intruder through a video stream. It offers the following features: They allow you to set activity zones to avoid false alerts. Most also provide a two-way audio feature that lets you communicate with whoever is on the other side. You can get alerts through its smartphone app, even when you’re not at home, enabling you to stay updated on whoever came in your absence. You can connect your doorbell to other smart devices like alarms, cameras, etc, and make the most of it. We recommend you check the Eufy video doorbell S330; it has a dual cam and motion detection technology. It lets you stream the footage in 2K with HDR. Check it out now! 6.Smoke/CO Sensors The mention of fire always sends shivers down spines because of its devastating potential. The smoke detectors have been our first line of defense for the longest time. But in this modern age, the protection must evolve beyond just smoke. Let’s look at what features smart smoke/CO sensors offer: These detectors don’t detect smoke only, but they are programmed to detect carbon monoxide (CO) as well. CO is a colorless, odorless gas which can be deadly for you. These sensors detect it before it rises above dangerous levels. Some of these smart sensors also monitor the air quality you are breathing. They keep on checking dust, pollen, humidity, and even pollution. You can conveniently control these sensors with the ease of your smartphone. Whether checking air quality or needing to hush a false alarm, all can be done through the app. These smart sensors are interconnected. If a fire is detected in one room, it alerts all the other detectors through its interconnectivity. It ensures you have enough time to take action. You don’t need to worry if these detectors are working or not. They test themselves in time intervals, sending you alerts if any maintenance is required. This ensures that your safety is always up-to-date. Choosing the Right Smart Home Sensor With so many options in the market, choosing the right smart home sensor can be challenging. Here’s a guide compiling all the factors to consider while choosing a smart home sensor. Know what you are looking for Do you need it for security? Deter intruders’ break-ins and secure your house. Do you need it for comfort? Automate lights with motion and light sensors or regulate your home temperature through the smart thermostat. Do you need it for safety? Protect yourself from all emergencies with fire, smoke, CO, or water leak sensors Consder compatibility You need to ensure the smart home sensor you are opting for is compatible or not. If you use hub-based systems, ensure the device works with your existing hub, like HomeKit, SmartThings, etc. If you are looking for standalone devices, opt for WiFi or Bluetooth sensors. Choose your connection You must check which connection to choose, whether a WiFi sensor or Bluetooth. The WiFi has a wider range than Bluetooth but drains the battery faster. Think about the power option Check the power mode of your selected smart home sensor, whether it is battery-powered or wired. The battery-powered one offers a flexible placement but has battery hassles, whereas the wired one has a reliable battery but has installation hassles. Conclusion As we summarize our guide for top smart home sensors in 2024, we hope you are no longer a wide-eyed explorer but a seasoned sensor sensei ready to make his personalized automation haven. Remember, the best sensors are the ones that effortlessly integrate into your life, solving problems that you didn’t even know existed. The journey doesn’t end here. The world of smart home tech is ever-evolving. There are new offers and updates every other day. Make sure to stay up-to-date with your gadgets and make full use of their smart technology. Don’t be scared of experimenting because, in the end, the ultimate smart home is the one that reflects your needs and desires. FAQS What are the different types of smart home sensors? There is a wide variety of smart home sensors available. Some of the popular ones include motion sensors, door and window sensors, temperature sensors, light sensors, water leak sensors, smoke and carbon monoxide sensors, video doorbell sensors, etc. What are the benefits of using smart home sensors? These smart home sensors provide multiple benefits, including: The level of security is improved with sensors like motion detectors, video doorbells, and door/window sensors. Sensors like lighting sensors and temperature sensors make day-to-day life more convenient. With lighting and temperature sensors, you can optimize energy usage. With instant alerts, you are updated with everything and get peace of mind. Do I need a hub to use smart home sensors? No, not a requirement. It depends on the sensor you are using. Some sensors can operate independently using your WiFi or Bluetooth connection. However, using a hub gives a more centralized approach to managing your smart sensors. How much do smart home sensors cost? Prices vary with what type of sensor you’re opting for and what features it offers. Research thoroughly and find brands that fit your requirements and budget. Are smart home sensors easy to install? Most sensors are designed for easy installation, often without special tools or expertise, and come with clear instructions. Many brands offer online resources and support.
Video doorbell · 28/02/2024
How to Play Any Doorbell Camera on TV? A Step-by-Step Guide
Integrating doorbell cameras with TVs has become increasingly popular due to its ability to enhance both home security and convenience. Imagine being able to monitor your front door from the comfort of your living room, all with a few simple setups. This guide will walk you through how to play any doorbell camera on TV, turning your living space into a central security hub. From understanding different types of doorbell cameras to ensuring compatibility and offering step-by-step instructions for various devices, we've got you covered. Let's dive into how you can leverage technology to make your home safer and your life easier. Exploring Types of Doorbell Cameras When considering the integration of a doorbell camera with your TV, understanding the various types available on the market is crucial. Doorbell cameras come in a range of styles, each with its own set of features tailored to different security needs and preferences: Wired Doorbell Cameras: These cameras are directly connected to your home's electrical system, providing a constant power supply. They are known for their reliability, as they don't rely on batteries that need regular replacing or recharging. Wireless Doorbell Cameras: Offering flexibility in installation, wireless doorbell cameras connect to your home Wi-Fi network and are powered by batteries. They are perfect for renters or individuals who prefer a less permanent option that they can install themselves without altering the home's wiring. Video Doorbell Cameras with Night Vision: For those concerned about security during the night, video doorbell cameras with night vision capabilities use infrared technology to capture clear footage in low light conditions. This feature ensures that homeowners can identify visitors and detect suspicious activity around the clock. Smart Doorbell Cameras: These doorbell cameras offer advanced features such as motion detection, two-way audio, and integration with smart home devices. Through a mobile app, homeowners can receive alerts, watch live video feeds, and communicate with visitors from anywhere. They are ideal for incorporating doorbell camera to TV. Dual Doorbell Cameras: Doorbell with dual cameras features two lenses for enhanced coverage, capturing a wider field of view or simultaneously monitoring two different areas. This setup is particularly useful for homes with larger entrance areas or for those requiring comprehensive surveillance coverage to monitor deliveries, visitors, and suspicious activity more effectively. Compatibility Check: Is Your Doorbell Camera Smart TV-Friendly? Not all doorbell cameras are compatible with all smart TVs, and the key to a seamless setup lies in understanding the connectivity options and compatibility requirements. Here's how you can check if your doorbell camera is smart TV-friendly: Check for Native Compatibility: Many smart TVs and doorbell cameras are designed to work with popular smart home ecosystems, such as Google Assistant, Amazon Alexa, or Samsung SmartThings. If both your devices support the same ecosystem, there's a good chance they can be integrated directly. App Connectivity: Check if the doorbell camera has a dedicated app compatible with your smart TV. Some doorbell cameras allow streaming and control directly from smart TVs using companion apps. Streaming Protocols: Look for doorbell cameras that support standard streaming protocols like RTSP or ONVIF, as some smart TVs can connect to cameras using these protocols. Chromecast or AirPlay Support: If you own a Google Chromecast, Amazon Fire Stick, or Apple TV, verify if your doorbell camera can integrate with these devices for streaming on your smart TV. IFTTT Compatibility: Check if your doorbell camera supports IFTTT (If This Then That), which can enable custom integrations between various devices, potentially including your smart TV. Manufacturer Recommendations: Refer to the user manuals and specifications provided by both the doorbell camera and smart TV manufacturers for information on compatibility and integration options. Step-by-Step Guide: Viewing Your Doorbell Camera on TV Now that you confirmed the compatibility of your devices, let's delve into the integration steps. Whether you're using a smart TV or a standard television with a streaming device, here's how you can set up your doorbell camera for TV viewing: Setting Up Your Doorbell Camera with Amazon Devices Connect Your Devices to the Same Network: Ensure that your Amazon Fire TV and your doorbell camera are connected to the same Wi-Fi network. This is crucial for seamless communication between the devices. Enable the Camera Skill in Alexa App: Open the Alexa app on your smartphone or tablet, and go to "Skills & Games." Search for the skill associated with your doorbell camera's brand and enable it. This step may require you to sign in to your camera's account to link it with Alexa. Discover Your Camera: Ask Alexa to discover new devices by saying, "Alexa, discover my devices, " or manually add your camera in the Alexa app by selecting "Add Device." View Your Doorbell Camera on TV: To start viewing with your doorbell camera connected to TV, simply say, "Alexa, show [Camera Name], " and the live feed from your doorbell camera should display on your TV screen. Replace [Camera Name] with the specific name you've assigned to your camera. SmartThings App Connectivity For connecting a doorbell camera with Samsung Smart TVs through the SmartThings app: Install the SmartThings App: Download and install the SmartThings app on your smartphone or tablet. Connect Your Devices: Add your Smart TV and doorbell camera to the SmartThings app. This will involve selecting "Add Device " within the app and following the on-screen instructions to find and connect your devices. View Your Doorbell Camera on TV: Once both devices are added to the SmartThings app, you can view your doorbell camera on your TV by selecting your camera from the list of devices within the app and choosing the option to view on TV. Voice Command Integration for Hands-Free Control If your smart doorbell camera is compatible with Alexa and Google Assistant devices, like eufy Video Doorbell E340 (Battery Powered), you can easily integrate voice commands with these voice assistants for hands-free control: Link Your Devices: Make sure your smart TV and doorbell camera are linked to your Alexa or Google Assistant through their respective apps. Set Up Voice Commands: In the Alexa or Google Home app, configure custom routines or use pre-set commands to control your doorbell camera. For example, you might set a routine to display the camera feed on your TV when someone rings the doorbell. Use Your Voice: Simply say, "Alexa, show the front door " or "Hey Google, show [Camera Name] on [TV name]" to start viewing the live feed from your doorbell camera on your television. Troubleshooting and Common Issues During Setup Here are some common issues you might face during setup and how to troubleshoot them: Device Not Connecting to Wi-Fi Ensure your Wi-Fi network is operational and not overloaded with devices. Try moving your router closer to your doorbell camera or smart TV, or consider using a Wi-Fi extender. Restarting your router and the devices can also help resolve connectivity issues. Doorbell Camera Not Linking to App or Skill Ensure you're using the latest version of the app or skill. Log out and then log back into your accounts to refresh the connection. Check online forums or the support section of the app/skill for specific setup guidance. Camera Feed Not Displaying on TV Verify that your doorbell camera is compatible with your smart TV. If you're using third-party apps or skills, ensure they support your camera model. Some devices require specific permissions to share video feeds. Check the app or device settings to ensure your doorbell camera is allowed to broadcast its feed. Video Streaming Delays Video delays are often due to Wi-Fi signal strength or speed. Ensure your internet connection is fast enough to support streaming video. Reducing the resolution of the video feed can also decrease latency. Bonus Tips: Extending Doorbell Camera Playback to Other Smart Devices You can extend the playback and monitoring features to a range of other smart devices, enhancing your home's security and your convenience. Here are some bonus tips to make the most out of your doorbell camera across your smart home ecosystem: Connecting Your Video Doorbell Camera to Google Nest Smart Display Link Your Devices: Ensure your Google Nest Smart Display and doorbell camera are connected to the same Wi-Fi network. Use the Google Home app to link your doorbell camera to your Google account. Enable Voice Control: Set up voice commands through the Google Assistant for hands-free control, such as "Hey Google, show the front door." Automate Alerts: Customize settings within the Google Home app to receive notifications or automatically display the camera feed on your Nest Smart Display when someone rings the doorbell or motion is detected. Streaming Your Video Doorbell Camera on Amazon Echo Smart Display Integrate with Alexa: Like with the Nest Smart Display, ensure your Amazon Echo Show is on the same network as your doorbell camera. Enable the camera's skill in the Alexa app and link your accounts. Voice Commands for Viewing: Use Alexa to control the camera feed with commands such as "Alexa, show me the front door, " allowing you to see who's there without needing to pick up your phone or turn on your TV. Custom Notifications: Configure your Echo Show to alert you when there's movement detected by your doorbell camera, ensuring you’re always aware of activity outside your home. Wrapping Up Embracing the integration of doorbell cameras with your TV can significantly enhance your home's security and your peace of mind. Throughout this guide, we've explored the various facets of how to play any doorbell camera on TV, from ensuring device compatibility to navigating through setup procedures for different platforms and addressing common troubleshooting issues. Remember, the key to a seamless integration lies in understanding the specifics of your devices and following the instructions carefully. Elevate your smart home experience today! FAQ Can a doorbell camera work without Wi-Fi? Yes, doorbell cameras without Wi-Fi can use wired connections with local storage or cellular networks. Wired cameras store footage locally for viewing without Wi-Fi, while cellular cameras use cellular networks to send alerts and video to your smartphone. These alternatives ensure doorbell functionality and video access without needing a Wi-Fi connection. Connecting a doorbell camera to a TV without HDMI: Is it possible? Yes, connecting a doorbell camera to a TV without an HDMI port can be achieved through several methods. If both devices support Wi-Fi, you can stream the camera feed wirelessly. Alternatively, an AV to HDMI converter can bridge older TVs with newer cameras. Smart TVs might allow direct connection via dedicated apps, while streaming devices like Chromecast or Fire Stick offer another route. How to cast your security camera to your TV? To cast your security camera feed to your TV, ensure both devices are connected to the same Wi-Fi network. Use your camera's dedicated app on a smartphone or tablet and look for a casting feature to send the feed to your TV or a connected streaming device like Amazon Fire Stick. Some smart TVs may also have a compatible app available for direct streaming. If your system supports voice commands, devices integrated with Google Assistant or Amazon Alexa can facilitate casting through simple voice commands. Always refer to your devices' user manuals for the most accurate setup instructions, as procedures can vary by brand and model.
Security Cameras · 17/02/2024
What is an NVR and How to Connect Security Cameras to It?
NVR technology is changing how we do security. Instead of traditional methods, NVRs store video data digitally on networks. They work well with IP cameras, offering flexible, high-quality surveillance, and allowing remote access. In this comprehensive guide, we'll demystify the world of NVR technology, focusing on "what is an NVR and how to connect security camera to NVR." Join us as we navigate the landscape of NVRs, ensuring your security setup is at its best. Understanding Network Video Recorders (NVR) What is an NVR? An NVR is a specialized device designed to efficiently process and record video data from IP cameras. Unlike traditional Digital Video Recorders (DVRs), which use analog cameras, NVRs work seamlessly with digital or IP cameras, offering advanced capabilities in video processing and storage. The primary function of an NVR is to act as a central hub for video management in a surveillance setup. It receives, processes, and stores digital video feeds from connected IP cameras. NVRs are equipped with robust processing power, allowing them to handle high-resolution video streams and support various advanced features. Exploring Different Types of Network Video Recorders There are two main types of Network Video Recorders (NVRs) - Power over Ethernet (PoE) and non-PoE. PoE NVRs simplify installation by delivering both data and power to connected IP cameras through a single Ethernet cable. This eliminates the need for separate power sources, offering flexibility in camera placement and reducing wiring complexity. On the other hand, non-PoE NVRs require separate power sources for each IP camera, following a traditional setup. The choice between PoE and non-PoE NVRs depends on specific requirements and preferences, with PoE NVR camera providing a streamlined and efficient solution for certain installations. Comparing NVR, DVR, NAS, and eufy Home Base Here is a detailed comparison of Network Video Recorders (NVRs), Digital Video Recorders (DVRs), Network Attached Storage (NAS), and Home-Based Storage Solutions, unraveling the distinctions in functionality, storage, and usage. Network Video Recorders (NVR): Functionality: NVRs stand out for their ability to handle digital footage exclusively. Unlike DVRs, they encode and process data at the camera before transmission to the recorder. This advanced functionality allows for centralized management, remote access, and event triggering. Storage: Equipped with significant storage capacity, NVRs support high-resolution video files. Their scalability permits the addition of more storage as needed, and they can even upload footage to cloud-based servers for expanded capacity. Usage: Ideal for modern surveillance systems utilizing IP cameras. Suited for applications where centralized management and advanced features are critical. Digital Video Recorders (DVR): Functionality: DVRs convert analog footage into digital format directly at the recorder. The processing of data occurs at the recorder itself, distinguishing them from NVRs. Typically associated with an analog camera, the camera DVR system lacks the advanced features of IP camera systems. Storage: Limited storage compared to NVRs, and scalability can be constrained. Stores video locally on the device, often with a coaxial cable connecting analog cameras to the recorder. Usage: Suited for older surveillance systems with an analog camera or local storage security camera. Commonly used where advanced IP camera features are not necessary. Network Attached Storage (NAS): Functionality: NAS devices act as versatile solutions, akin to mini PCs and private clouds. Equipped with dedicated operating systems, comprehensive file management, and sync/sharing facilities, they extend beyond mere surveillance. Storage: Designed for general file storage, NAS devices may be suitable for surveillance with appropriate software. Additional licensing costs may apply, limiting scalability. Usage: Ideal for general data storage within a network, offering collaborative features beyond surveillance. NVR Alternative: eufy HomeBase for Advanced Home Surveillance Storage When it comes to securing your home, surveillance storage plays a crucial role in capturing and retaining footage. While traditional Network Video Recorders (NVRs) have been the go-to solution, eufy introduces a game-changer with its HomeBase series, particularly the HomeBase S380, also known as HomeBase 3. Embracing Advanced Technology eufy's HomeBase S380 isn't just a storage unit; it's a powerhouse of advanced technology. With features like BionicMind™ AI, it can accurately differentiate between family members and strangers, ensuring you're only alerted when necessary. Expanding Storage Horizons Gone are the days of worrying about storage limitations. HomeBase S380 offers expandable local storage of up to 16TB, providing ample space for storing high-quality surveillance footage without compromising on clarity or duration. Simplified Management Unlike traditional NVRs that can be cumbersome to set up and manage, HomeBase S380 offers a streamlined experience. Its centralized management system allows you to oversee your entire security ecosystem from a single, intuitive interface. The Benefits of Implementing an NVR Camera System Implementing a Network Video Recorder (NVR) security camera system comes with a host of benefits, making it a preferred choice in modern surveillance setups. Here are key advantages: 1. High-Quality Video Footage: NVRs support the processing of digital footage, ensuring superior video quality. With the ability to capture and store high-resolution images, NVR camera systems provide clearer and more detailed footage for effective monitoring. 2. Centralized Management: One of the primary advantages of NVRs is their centralized management capability. Acting as a hub, NVRs allow users to monitor and control multiple IP cameras from a single, user-friendly interface. This streamlines operations and enhances overall system efficiency. 3. Scalability: NVR camera systems offer scalability to adapt to evolving security needs. Easily integrate additional IP cameras without significant infrastructure changes, providing a flexible solution that grows alongside your surveillance requirements. 4. Remote Accessibility: With NVRs, the ability to access live or recorded footage remotely is a game-changer. Connecting NVRs to the internet enables users to monitor their property or business from anywhere, enhancing surveillance capabilities and responsiveness. 5. Event Triggering and Alerts: NVRs can be configured to respond to specific events such as motion detection or alarms. This event-triggering functionality ensures that relevant footage is captured, and alerts are generated, enhancing the proactive nature of the surveillance system. 6. Reduced Wiring Complexity: The shift towards digital transmission in NVR systems reduces wiring complexity. Unlike traditional analog setups, NVRs often use Ethernet cables, simplifying installation and maintenance processes. 7. Advanced Analytics: NVR camera systems support advanced analytics, unlocking features like facial recognition, license plate recognition, and object tracking. These intelligent functionalities enhance the overall security posture, providing valuable insights for proactive decision-making. 8. Higher Storage Capacity and Cloud Integration: NVRs typically offer higher storage capacities compared to traditional DVRs. Moreover, their ability to upload footage to cloud-based servers expands storage options, ensuring that critical data is securely stored and easily retrievable. Implementing an NVR camera system empowers users with advanced features, flexibility, and efficiency, ensuring a robust surveillance infrastructure that meets the demands of modern security challenges. Step-by-Step Guide to Setting Up IP Cameras with an NVR Configuring IP cameras with a Network Video Recorder (NVR) involves a straightforward process, with distinctions for Power over Ethernet (PoE) and Non-PoE NVRs. Below is a detailed guide tailored to both scenarios: Setting Up IP Cameras with PoE NVR: Hardware Setup: Establish a connection by plugging an Ethernet cable from your router into the dedicated port on the PoE NVR. Ensure the NVR is powered on. Use an Ethernet cable to link one of the PoE ports on the NVR to your IP camera, verifying the power connection. Create a visual link by connecting the NVR to a monitor or TV using a VGA or HDMI cable. Adjust the input settings accordingly. Improve control by connecting the provided mouse to a USB port on the NVR. Software Configuration: Power up the NVR and access it by logging in with the provided credentials. Navigate to the Camera section in the NVR's main menu and choose Device Search. Initiate Device Search to discover IP addresses. Add the desired IP camera to the interface. Optionally, utilize the Manual Add function for specific camera types or customized configurations. Setting Up IP Cameras with Non-PoE NVR: Hardware Setup: Connect an Ethernet cable from your router to the NVR, ensuring it is powered on. Link your IP camera to a switch or another router port on the same network as the NVR. Establish a visual connection by connecting the NVR to a monitor or TV using a VGA or HDMI cable. Adjust the input settings accordingly. Enhance control by attaching the provided mouse to a USB port on the NVR. Software Configuration: Power up the NVR and log in using the provided credentials. Navigate to the Setting --> Camera section in the NVR's main menu and select Device Search. Initiate Device Search to discover IP addresses. Add the desired IP camera to the interface. Optionally, utilize the Manual Add function for specific camera types or customized configurations. Always ensure the NVR is powered on before initiating the software setup. Following these steps, you'll seamlessly integrate IP cameras with your NVR, establishing a robust surveillance system tailored to your unique requirements. Enabling Remote Access by Connecting NVR to the Internet Enabling remote access for your Network Video Recorder (NVR) is crucial for convenient and secure remote monitoring. Below are methods and precautions to ensure a seamless and protected connection to the internet: Methods 1. Port Forwarding: - Identify the specific port used by your NVR system for remote access (commonly port 80 or 8080). - Access your router's settings and configure port forwarding to direct external requests to the internal IP address of your NVR. - Assign a strong, unique username and password for added security. 2. Cloud-Based Services: - Opt for NVR systems that offer cloud-based services for remote access. - Register and link your NVR to the cloud service, allowing easy and secure remote monitoring without dealing with complex network configurations. Precautions 1. Strong Authentication: - Implement strong, unique login credentials for remote access. - Avoid using default usernames and passwords to prevent unauthorized access. 2. Firmware Updates: - Regularly update the firmware of your NVR system to patch security vulnerabilities. - Check for and apply updates provided by the manufacturer. 3. Secure Connection (HTTPS): - Configure your NVR system to use HTTPS for a secure connection. - This ensures that data transmitted between the NVR and remote device is encrypted. 4. Limit Access Permissions: - Restrict remote access permissions to only necessary users. - Define access levels based on roles, limiting privileges to enhance security. 5. Network Segmentation: - Consider segmenting your network to isolate the NVR system from other devices. - This prevents potential security breaches from affecting the entire network. 6. Use Dynamic DNS (DDNS): - If your internet service provider assigns dynamic IP addresses, consider using DDNS. - DDNS provides a hostname that dynamically updates, allowing you to connect to your NVR even if the IP address changes. 7. Audit Logs: - Regularly review audit logs provided by your NVR system. - Monitor for any suspicious activities or unauthorized access attempts. 8. Firewall Configuration: - Configure firewalls on both the NVR system and the router to permit only necessary traffic. - Block unnecessary ports to reduce the risk of unauthorized access. By employing these methods and precautions, you can establish a secure and reliable remote access connection for your NVR system, ensuring seamless monitoring while prioritizing the protection of your surveillance data. Wrapping Up In essence, NVRs redefine surveillance with efficiency and adaptability, streamlining digital footage management to ensure top-tier video storage and centralized control. Now that you have understood "what is an NVR and how to connect security camera to NVR," embrace the future of security with the knowledge to maximize the potential of Network Video Recorders. FAQ Will Any Security Camera Work with Any NVR? While there are industry standards like ONVIF that promote compatibility, not every security camera works seamlessly with any Network Video Recorder (NVR). It's crucial to ensure that the camera you choose adheres to the same protocols and encoding formats supported by your NVR. How Many Cameras Can an NVR Handle? The number of cameras an NVR can handle depends on its channel capacity. NVRs are available in various configurations, supporting different channel counts. Choose an NVR that suits your surveillance needs, keeping in mind potential future expansions. How Long Will an NVR Last? The lifespan of an NVR depends on several factors, including usage, maintenance, and technological advancements. On average, an NVR can last anywhere from 3 to 5 years. Regular firmware updates, proper ventilation, and adherence to manufacturer guidelines can extend its lifespan.
Security Cameras · 17/02/2024
Exploring CCTV Camera Full Form: A Comprehensive Guide 2024
Originally developed for security and surveillance purposes, CCTV systems have become integral components in various sectors, playing a crucial role in monitoring, recording, and analyzing activities in both public and private spaces. In this blog post, we decode CCTV meaning, explore basic components, and uncover the workings of CCTV cameras. Discover the pros and cons, types of cameras, and their applications beyond security. Get ready for an enlightening guide on the essence of "CCTV camera full form" and the impactful role of these systems in our lives. What is the Full Form of CCTV? What is CCTV? CCTV stands for Closed-Circuit Television is Closed-Circuit Television, a surveillance system designed for monitoring and recording activities in a specific area. Unlike broadcast television, CCTV operates on a closed circuit, limiting access to a defined set of viewers. CCTV is widely used for security, traffic monitoring, and industrial processes. Its closed-circuit design allows for controlled access, making it valuable for real-time observation and evidence collection. Components include cameras, lenses, monitors, and recording devices, with modern systems featuring advanced capabilities like motion detection and remote access. Professional Term Explanation Collection To better understand what CCTV full form is, let's first unpack some professional terminology explanations: NVR (Network Video Recorder) NVR, or Network Video Recorder, serves as a dedicated device in CCTV systems for recording video from IP cameras. Unlike traditional DVRs, NVRs process and store digital data, offering flexibility and scalability in video storage. DVR (Digital Video Recorder) DVR, or Digital Video Recorder, is a recording device in CCTV systems, mainly used for analog cameras. It captures and processes analog signals, converting them into digital format for storage. Unlike NVRs, DVRs are tailored for older surveillance setups. Home Base Home Base functions as the central hub in home security systems, connecting various CCTV components. It ensures seamless communication between cameras, recorders, and other devices, facilitating effective monitoring and surveillance within a residence. NAS (Network Attached Storage) NAS, or Network Attached Storage, finds application in storing CCTV footage. It provides a centralized location for secure and scalable data storage, allowing easy retrieval of recorded video. NAS systems offer enhanced capacity compared to traditional storage solutions. IP Camera (Internet Protocol Camera) IP Cameras, or Internet Protocol Cameras, boast features and advantages over traditional counterparts. They use internet protocols to transmit data, enabling remote access, higher resolution, and advanced functionalities like motion detection and image analytics. RTSP (Real Time Streaming Protocol) RTSP, or Real Time Streaming Protocol, holds significance in CCTV streaming. It facilitates the real-time communication between cameras and recording devices, ensuring smooth and efficient streaming of video data over the network. ONVIF (Open Network Video Interface Forum) ONVIF, from the Open Network Video Interface Forum, plays a crucial role in standardizing communication between different CCTV devices. This standardization enhances interoperability, allowing devices from different manufacturers to work seamlessly together within a surveillance system. Basic Components of CCTV A CCTV system comprises fundamental components working seamlessly to ensure effective surveillance: Security Cameras (Analog or Digital) These cameras, be they analog or digital (IP cameras), are the eyes of the system, capturing visual data for monitoring specific areas. Cables (RJ45 or RJ59) Cables, using RJ45 for a IP camera and RJ59 for a analog camera, connect system components and transmit data efficiently. Video Recorders (DVR or NVR) Digital Video Recorders (DVRs) process analog signals for analog cameras, while Network Video Recorders (NVRs) handle digital data from IP cameras, offering flexibility and advanced features. Storage Unit (Hard Disk) The storage unit, usually a hard disk, safeguards recorded footage, with storage capacity determining the system's data retention. Display Unit (optional, usually a monitor) Though optional, a display unit, often a monitor, provides real-time visibility, facilitating live monitoring, playback, and system configuration. How Do CCTV Cameras Work? Understanding the operational mechanisms of CCTV cameras unveils the technical intricacies behind their functionality. Let's explore the core aspects that define how these surveillance devices operate: Image Capture CCTV cameras utilize image sensors, either Charge-Coupled Device (CCD) or Complementary Metal-Oxide-Semiconductor (CMOS), to capture visual information. When light hits these sensors, it converts into electrical signals, forming the basis for image creation. Signal Processing The captured analog signals undergo signal processing within the camera. This involves amplifying, adjusting, and digitizing the signals to enhance image quality and prepare them for transmission. Transmission For analog cameras, the processed signals are transmitted through coaxial cables (typically using RG59 cables), while digital (IP) cameras leverage network cables (such as Ethernet, using RJ45 connectors) for data transmission. IP cameras encode the digital signals for efficient transmission over networks. Recording and Storage In the case of Digital Video Recorders (DVRs) or Network Video Recorders (NVRs), the transmitted signals are recorded for future retrieval. DVRs process and store analog signals, while NVRs handle digital data. The storage unit, usually a hard disk, retains recorded footage. Monitoring and Display The optional display unit, often a monitor, facilitates real-time monitoring. It acts as the visual interface, allowing users to observe the captured footage, ensuring immediate awareness of the monitored area. Motion Detection and Analytics Many modern CCTV cameras incorporate motion detection and analytics. Motion sensors trigger recording when movement is detected, optimizing storage space and alerting operators to potential security threats. Remote Access Advanced CCTV systems offer remote access capabilities, enabling users to view live footage or playback recordings from anywhere with an internet connection. This feature enhances surveillance flexibility and accessibility. Understanding these technical facets provides insights into the comprehensive and intricate workings of CCTV cameras. From image capture to signal processing, transmission, recording, and beyond, each step contributes to the efficiency and reliability of these crucial surveillance devices. Benefits and Disadvantages of CCTV CCTV systems play a pivotal role in enhancing security, yet they come with both advantages and challenges. Benefits Crime Deterrence: CCTV acts as a visible deterrent, discouraging criminal activities in monitored areas and promoting a sense of security. Evidence Collection: Recorded footage serves as valuable evidence in investigations, aiding law enforcement in solving crimes and establishing facts. Remote Monitoring: Advanced security camera systems allow for remote access, enabling real-time monitoring from anywhere, enhancing flexibility and responsiveness. Employee Productivity: In a business setting, CCTV can improve employee productivity by discouraging time theft and ensuring adherence to workplace policies. Public Safety: CCTV contributes to public safety in crowded places, assisting authorities in managing large gatherings and monitoring public spaces. Disadvantages Privacy Concerns: The omnipresence of cameras raises concerns about individual privacy, leading to debates on the balance between surveillance and personal freedoms. Costs and Maintenance: The initial setup costs and ongoing maintenance expenses can be significant, making CCTV implementation a substantial investment. Technical Limitations: CCTV systems may face technical limitations such as blind spots, low-light challenges, and susceptibility to tampering, affecting their overall effectiveness. Misuse and Abuse: There is a risk of misuse and abuse, where surveillance data can be accessed or used for unauthorized purposes, posing threats to privacy. Limited Crime Prevention: While CCTV deters some crimes, it may not prevent all incidents, and determined criminals may find ways to circumvent or disable the system. CCTV systems offer undeniable benefits like crime deterrence and evidence collection, but they pose challenges such as privacy concerns. Striking a balance is crucial. Explore advanced solutions like the eufy 4G Camera S230 for efficient surveillance. What are the Types of CCTV Cameras? CCTV surveillance cameras vary in types, primarily categorized by their signal transmission and power supply methods. Signal Transmission Mediums: Analog CCTV Cameras: Traditional analog cameras transmit video signals in analog format over coaxial cables. While effective, they are limited in terms of resolution and advanced features compared to digital counterparts. IP CCTV Cameras: IP cameras, or Internet Protocol cameras, transmit digital data over a network. They offer higher resolution, flexibility, and advanced features like remote access and analytics. IP cameras can be further classified based on their power supply methods. Power Supply Methods for IP Cameras: Battery-powered Surveillance Cameras: These cameras operate on rechargeable batteries, providing a wire-free solution. Ideal for temporary setups or locations without a power source, they offer flexibility but require periodic battery replacements or recharging. PoE Surveillance Cameras (Power over Ethernet): PoE cameras receive both power and data over a single Ethernet cable. This streamlined setup simplifies installation, eliminates the need for separate power cables, and ensures a reliable power source. WiFi Surveillance Cameras: WiFi cameras connect to a wireless network for both data transmission and power. Offering flexibility in placement, they are suitable for areas with reliable WiFi coverage. However, signal reliability may be affected by network conditions. Applications and Impact of CCTV Cameras CCTV cameras have transcended their traditional role in security, finding diverse applications across various sectors, each leaving a distinctive imprint on society. In retail, security cameras and CCTV serve as a vigilant guardian against theft and shoplifting, fostering a secure shopping environment. This not only protects businesses but also contributes to price stabilization by curbing losses. Furthermore, in traffic management, CCTV cameras efficiently monitor roadways, optimize traffic flow, and enhance public safety. By capturing real-time data on traffic patterns and violations, authorities can promptly respond to incidents and implement strategic measures for safer transportation. The societal impact of widespread CCTV deployment extends beyond security and traffic management. In urban planning, CCTV aids city officials in assessing public spaces, ensuring optimal design and functionality. Public spaces become safer, promoting community well-being and a sense of security. However, the increasing ubiquity of surveillance cameras raises concerns about individual privacy, prompting ethical discussions on the delicate balance between safety and personal freedoms. Striking this balance is paramount to harnessing the positive impact of CCTV technology while respecting citizens' rights. Conclusion In conclusion, the future of CCTV technology is promising, with advancements such as IP cameras and video analytics shaping the industry. From understanding the CCTV camera full form to embracing innovations, the focus is on balancing technological strides with privacy considerations. FAQ How Far Can a CCTV Camera See? In general, CCTV cameras have a detection range of approximately 10 to 70 feet during the day. However, advanced night-vision security cameras can extend this range to 100-200 feet, providing enhanced visibility in low-light conditions. Factors like focal length, lens type, and infrared technology play crucial roles in determining a security camera's vision range. How Long Does CCTV Camera Footage Last? The duration of CCTV camera footage storage varies based on factors like storage capacity and video quality. Advanced systems offer extended storage periods, allowing for the retention of recorded footage over days, weeks, or even months, depending on the setup. What is the Difference between CCTV and Normal Camera? While both capture video, CCTV cameras are specifically designed for continuous surveillance. They often include features like motion detection, remote monitoring, and are part of a closed-circuit system. Normal cameras, on the other hand, are typically used for personal photography and lack the specialized surveillance features inherent in CCTV systems.
Security Cameras · 17/02/2024
Is It Illegal to Have Cameras in Classrooms?
In the world of classroom security, a big question pops up: Is it illegal to have cameras in classrooms? As schools look for ways to keep everyone safe, it's crucial to understand the legal rules. In this guide, we break down the legal stuff and look at the good and bad sides of having cameras in classrooms. Come along as we uncover the truth, share top picks for security cameras, and give you the lowdown on the rules for putting cameras in schools. We'll also talk about where to put them to make schools safer. Let's dive in and figure out how to make classrooms safe and sound! Is It legal to Have Cameras in Classrooms? Legal Aspects of Installing Cameras in Classrooms To know whether 'Can schools have cameras in classrooms,' we must first uncover the answer to 'Is it illegal to have a camera in a classroom?' Generally, it is legal to have security cameras in schools, but specific laws and regulations govern their use, ensuring a delicate balance between security and privacy. Let's delve into the legal aspects of installing cameras in educational environments. State-Specific Regulations States in the U.S. may have varying laws regarding school surveillance. It's essential to be aware of and comply with your state's specific regulations. Some states, such as New Hampshire, Maine, Kansas, South Dakota, and Delaware, have stricter laws around hidden surveillance cameras. In these states, consent may be required for the use of any hidden cameras. Visibility of Cameras The visibility of security cameras is a consideration in compliance with state laws. While it may not be mandatory in all states, it is generally recommended to install cameras in locations where they are plainly visible. This serves the dual purpose of complying with state laws and acting as a deterrent against undesirable behavior. Signage Requirements In areas without a reasonable expectation of privacy, signage disclosing the use of cameras may not be legally required. However, some institutions choose to include signage as an additional measure to inform individuals and deter misconduct. Parental Permission In most cases, schools are permitted to record students for safety and educational purposes without obtaining parental permission. However, certain states, like Texas, may require parental consent if the recordings are for purposes other than education or safety. It's crucial to make parents aware of the school's surveillance policy and request signed consent forms when necessary. Understanding these legal aspects is fundamental to ensuring the lawful and ethical installation of security cameras in classrooms. Schools must navigate these regulations to strike a balance between enhancing security measures and respecting privacy rights. Pros and Cons of Classroom Cameras Here are the pros and cons of having cameras in classrooms, considering their impact on safety, privacy, and educational quality: Pros of Classroom Cameras: 1. Enhanced Security: Cameras contribute to a safer learning environment by deterring and preventing incidents of misconduct or unauthorized access. 2. Prevention and Documentation: Security cameras help prevent incidents by acting as a deterrent. Additionally, they provide valuable documentation if any issues do arise, aiding in investigations. 3. Parental Peace of Mind: Parents often find reassurance in knowing that there are security measures in place to ensure the safety of their children during school hours. Cons of Classroom Cameras: 1. Privacy Concerns: Balancing security with privacy rights can be challenging. The constant surveillance of students and teachers may raise concerns about the invasion of privacy. 2. Implementation Costs: The installation and maintenance of security cameras come with financial implications for schools, including the initial setup costs and ongoing maintenance expenses. 3. Potential Misuse: Cameras may be subject to misuse or misunderstanding, leading to concerns among students and staff. This includes worries about footage being accessed inappropriately or used for unintended purposes. In evaluating the pros and cons, it's essential for schools to carefully consider the implications of implementing classroom cameras. Striking a balance between enhancing security and addressing privacy concerns is crucial for creating a positive and effective learning environment. Top Recommended Classroom Cameras The following are top school security camera recommendations have been carefully selected based on their features and suitability for classroom environments: eufy Indoor Cam S350 The eufy Indoor Cam S350 is a powerhouse for classroom surveillance. With dual cameras offering 4K UHD resolution, it provides unparalleled clarity. The 4K wide-angle and 2K telephoto lenses, combined with 8× hybrid zoom, ensure detailed coverage. Its 360° pan and tilt feature covers every corner, while AI-powered tracking enhances security. Night vision capabilities, featuring an f/1.6 aperture sensor and 8 infrared lights, allow clear identification up to 32 ft. The camera's intelligent design makes it a top choice for comprehensive classroom monitoring. eufy Indoor Cam E220 Ideal for classroom settings, the eufy Indoor Cam E220 boasts 2K resolution and a 360° pan with a 96° tilt for comprehensive coverage. Its auto-tracking feature ensures intelligent surveillance. With built-in two-way audio, immediate conversations are possible, adding an interactive element to security monitoring. The camera's intelligent AI further enhances its suitability for classroom use, making it a reliable choice for maintaining a secure learning environment. Google Nest Cam Outdoor or Indoor The Google Nest Cam brings built-in intelligence to classroom surveillance. With alerts through the Google Home app, Bluetooth, Wi-Fi, and battery-powered options, it offers versatility. The 1080p HDR video and night vision capabilities ensure clear footage. Its storage capacity, with up to 60 days of video history, and the ability to store up to an hour during Wi-Fi/power outages, make it a robust choice for continuous monitoring in classrooms. Lorex IP PTZ The Lorex IP PTZ camera, equipped with 2k resolution and HEVC compression, stands out for its Pan-Tilt-Zoom functionality with 4× optical zoom. Designed to withstand harsh conditions, it is vandal-resistant and made of durable metal. This camera provides detailed surveillance, making it suitable for monitoring larger classroom spaces effectively. ZOSI CCTV 1920TVL Security Camera The ZOSI CCTV 1920TVL Security Camera offers versatile compatibility with 1080P Hybrid 4-in-1 HD-CVI/TVI/AHD/Analog video output. With a wide 90-105° view angle, it covers a substantial area. The camera's 1/3"CMOS 1080p Bullet CCTV Camera, 36pcs IR LEDs for 120ft night vision, and high-quality metal aluminum materials make it resilient in various weather conditions. Its 3-Axis camera stand ensures adaptability, making it suitable for both indoor and outdoor classroom surveillance. For enhanced security measures, it is best to consider exploring security cameras with audio capabilities to further fortify your classroom surveillance system. Guidelines for Implementing Security Cameras in Classrooms To ensure ethical use and best practices for security cameras in classrooms, consider the following guidelines: Respect Privacy Boundaries: Install cameras in areas without a reasonable expectation of privacy. Visible Installation: Opt for visible camera placement to comply with state laws and deter misconduct. Educate Stakeholders: Inform parents and staff about the surveillance policy, emphasizing safety and educational purposes. Secure Data: Implement measures to secure recorded data, ensuring it is used for its intended purposes. Strategic Placement of Cameras in Classrooms Strategic placement of cameras is crucial for optimal benefits without compromising privacy. Consider the following locations: Entrances and Exits: Monitor access points to enhance security. Common Areas: Install cameras in shared spaces like hallways and cafeterias. Classroom Exteriors: Ensure coverage of classroom entrances without intruding on privacy. Balancing security needs with strategic and non-intrusive camera placement is key to creating a safe and respectful educational environment. Conclusion In conclusion, the question of 'is it illegal to have cameras in classrooms' generally yields a legal answer, but it necessitates careful consideration of legal aspects, ethical guidelines, and practical considerations. The key lies in finding a balance between enhancing security and respecting privacy to create a safe and conducive learning environment. FAQ Are Cameras in Classrooms an Invasion of Privacy? The integration of cameras in classrooms sparks privacy concerns. Striking a delicate balance between surveillance and privacy rights is paramount. Schools must ensure that camera placement respects individuals' dignity while maintaining a safe learning environment. Do School Security Cameras Have Audio? The inclusion of audio in school security cameras raises legal and ethical considerations. While some cameras may have audio recording capabilities, the use of audio in educational settings requires careful evaluation. Schools must be aware of and comply with relevant laws and regulations governing audio recording, ensuring that privacy rights are respected and ethical standards are upheld. How Much Do School Security Cameras Cost? The cost of implementing security cameras varies. Factors such as camera features, quantity, and installation complexity contribute to the overall cost. Schools should carefully plan and budget for enhanced security measures.
Security Cameras · 17/02/2024
The Ultimate Guide to Choosing the Best Mailbox Camera
When it comes to safeguarding your deliveries and ensuring the security of your home, a mailbox camera is an invaluable asset. In this comprehensive guide, we'll delve into the legal aspects, the importance of having a mailbox camera, key features to consider before purchasing, and even provide you with our top picks. Enhance your home security and delivery experience with the ultimate mailbox camera guide. Understanding the Legality: Can You Put a Camera in Your Mailbox? When it comes to placing a mailbox security camera, understanding the legal considerations is paramount. The legality of installing a mailbox camera can vary, and it's crucial to navigate this terrain responsibly. Generally, installing a camera on your property is permissible, but certain factors need consideration. Firstly, be aware of privacy laws in your jurisdiction. It's crucial to respect the privacy of individuals, especially neighbors and passersby. Avoid pointing the camera in a way that invades someone else's private space. Secondly, if your mailbox is under the jurisdiction of a homeowners' association (HOA) or shared property rules, check their regulations. Some associations may have specific guidelines regarding surveillance equipment. Lastly, refrain from recording audio without consent, as this can infringe on privacy rights. Ensure that your mail box camera setup adheres to local, state, and federal laws. By being informed about these legal aspects, you can make responsible decisions regarding the placement and use of a camera in your mailbox. Always prioritize privacy and comply with relevant regulations to ensure a secure and lawful approach to enhancing your home's security. The Importance of a Mailbox Camera: Why You Need One? Here are some reasons why someone might consider getting a mailbox camera: Deterrence Against Theft and Vandalism The visible presence of a mailbox cam alone can discourage nefarious activities around your property. Potential intruders are less likely to approach your mailbox when they know their actions are being recorded, enhancing overall security. Real-Time Monitoring and Alerts Stay connected to your home even when you're away. Many mailbox cameras offer real-time monitoring and instant alerts for any suspicious activity. Receive notifications on your smartphone, allowing you to take immediate action if needed. Documentation for Incidents In the unfortunate event of a security incident, having footage from your mailbox camera can be invaluable. The recorded video can serve as crucial evidence for law enforcement and insurance claims, aiding in the resolution of any security-related issues. Peace of Mind Knowing that your home and deliveries are under the watchful eye of a mailbox camera provides a sense of peace and reassurance. Whether you're at work, on vacation, or simply inside your home, the added security contributes to a peace of mind that is invaluable. In conclusion, the importance of a mailbox camera extends beyond mere surveillance; it's about safeguarding your home, protecting your deliveries, and ensuring peace of mind in an increasingly interconnected world. Key Features to Consider Before Purchasing a Mailbox Camera Selecting the right mailbox camera involves careful consideration of key features that ensure optimal performance. Here's a breakdown of essential aspects to ponder before making your purchase: Motion Detection: Look for a mailbox camera equipped with advanced motion detection technology. This feature ensures that the camera activates when it detects movement, preserving storage space and capturing crucial moments. Night Vision: Opt for a camera with reliable night vision capabilities. This ensures clear and detailed footage even in low-light conditions, allowing you to monitor your mailbox 24/7. High-Resolution Video: The clarity of the video feed is paramount. Choose a camera with high-resolution capabilities, preferably 1080p or higher, for crisp and detailed footage. This becomes crucial when identifying faces or license plates. Weather Resistance: Given that your mailbox camera will be exposed to the elements, ensure it has a high level of weather resistance, typically indicated by an IP rating. This ensures durability and functionality in various weather conditions. Easy Installation: Look for a camera that offers straightforward installation, preferably with minimal wiring or wireless options. Easy installation not only saves time but also makes the setup process accessible to users with varying technical expertise. Connectivity: Check the connectivity options provided by the camera. Whether it's Wi-Fi, Bluetooth, or other wireless technologies, a reliable and stable connection ensures seamless monitoring and remote access through mobile applications. Considering these key features ensures that your chosen mailbox camera aligns with your specific security needs and provides a reliable solution for safeguarding your deliveries. Top Picks: Best Mailbox Security Cameras In the realm of mailbox security cameras, finding the right model is essential for safeguarding your deliveries and ensuring peace of mind. We've meticulously reviewed and compared the models that are ideal for mailbox use, and list out 5 top mailbox cameras for you. eufy Smart Drop S300 Elevate your package security with the eufy Smart Drop S300 – the ultimate solution for safeguarding deliveries. This powerhouse offers crystal-clear 1080p HD resolution, coupled with motion-detection that ensures 24/7 protection. Its large, waterproof design not only accommodates sizable packages but also comes equipped with an onboard keypad for enhanced security. Open it effortlessly using a PIN code, app access, traditional key, or even voice commands via Alexa or Google Assistant. The eufy S300 seamlessly combines advanced features and ease of use, making this mailbox with camera the go-to choice for those serious about securing their packages. ONE Link - HD 1080P Wire-Free Battery Powered WiFi Outdoor Security 2 Camera System Meet ONE Link – the wireless marvel designed for seamless mailbox surveillance. Boasting crisp 1080p resolution and a generous 130° viewing angle, this camera system ensures clarity in every frame. Attach it magnetically for an effortless setup and enjoy smooth communication with two-way audio featuring background noise suppression. Rain or shine, ONE Link stands strong with its IP65 weatherproof rating. The option to expand storage up to 128GB adds a practical touch, making it a reliable and flexible choice for securing your mailbox. SoloCam S340 Outdoor Security Camera Discover the SoloCam S340 – a solar-powered sentinel redefining mailbox security. Dual-camera 3K resolution captures every detail, while the adjustable solar panel keeps it powered and eco-friendly. Alexa and Google Assistant make it your smart security companion. AI Motion Detection, Human Detection, and Vehicle Detection elevate your surveillance game. Easy installation, compact size, and wire-free design – SoloCam S340 Outdoor Security Camera is the answer when you want robust security without the hassle. braosusner Wireless E003 Mini Camera The braosusner Mini Cam is your compact yet powerful eye on mailbox security. Despite its 10-inch cube size, this camera delivers high-definition 1080P video with a 120-degree wide lens. The 360-degree swivel mount provides versatile coverage, and the 6 invisible IR LEDs ensure discreet night vision. Activated by motion, this mini spy cam features a magnetic base and bracket for easy, stealthy placement. For those seeking discreet yet effective surveillance, the hidden camera for mailbox is the perfect blend of compact design and powerful functionality. Arlo - Wireless Home Security VMS3130 Experience simplicity and reliability with the Arlo VMS3130 – your wire-free partner in mailbox security. With 720p resolution, night vision, and a 110-degree field of view, this camera ensures comprehensive surveillance without the hassle of wires. Motion-activated and compatible with Alexa, the Arlo VMS3130 offers straightforward yet effective security for your mailbox. The ease of use and dependable performance make it a trusted choice for those who prioritize simplicity in their home security setup. Step-by-Step Guide: How to Set Up and Install Your Mailbox Camera Setting up and installing your mailbox camera is a straightforward process that ensures your deliveries are under reliable surveillance. Follow this step-by-step guide for a seamless installation: Step 1: Choose the Right Location Inside the Mailbox Select an ideal location within the mailbox for the camera. Ensure it has a clear view of the contents and the mailbox opening. Consider the camera's field of view and positioning to capture the necessary footage. Step 2: Power Source Determine the power source for your mailbox camera. If it's battery-powered, ensure the batteries are installed correctly. If it requires a power connection, make sure there's a convenient power source available. Step 3: Adhere the Camera Follow the manufacturer's instructions for securely adhering the camera to the inside of the mailbox. Clean the surface before applying any adhesive to ensure a strong and lasting bond. Step 4: Connectivity If the camera requires connectivity, set up the necessary connections. For wireless models, connect the camera to your Wi-Fi network following the provided instructions. Ensure a stable connection for seamless operation. Step 5: Adjust Camera Angle Position the camera at an optimal angle to capture the entire area around your mailbox. If your camera has a magnetic base for inside installation, consider attaching it securely inside the mailbox. Test the view to ensure there are no blind spots and that your camera covers the desired surveillance zone. Step 6: Test Motion Detection Activate the motion detection feature and test its functionality. Walk around the mailbox to ensure the camera accurately detects motion and triggers recording. Step 7: Night Vision Check If your camera features night vision, test it in low-light conditions to ensure clear footage. Adjust any settings related to night vision if needed. Step 8: Set Up Alerts Configure alert notifications based on the camera's capabilities. This could include app notifications, emails, or other methods to alert you when motion is detected. Step 9: Secure Adhesion Ensure the camera is securely mounted or placed in its chosen position. If using a magnetic base inside the mailbox, make sure it adheres firmly to the mailbox interior. A stable and secure installation ensures the longevity of your camera. Step 10: Monitor and Adjust Regularly monitor the camera feed to verify that it captures the desired footage. Make any necessary adjustments to the camera angle or settings based on your observations. Wrapping Up All in all, selecting the right mailbox security camera is paramount for securing your deliveries and maintaining the safety of your home. Whether it's the advanced features, ease of installation, or top-notch resolution, our guide has covered it all. Invest in a mailbox camera today and experience the peace of mind that comes with enhanced security. FAQ Legal Perspectives: Are Mailbox Cameras Legal? Mailbox cameras are generally legal, but it's vital to navigate privacy laws. Placing a camera on your property is acceptable, but avoid infringing on neighbors' privacy. HOA regulations and consent for audio recording should be considered. Always comply with local, state, and federal laws. Legitimate security purposes and visible placement contribute to legality. Consult local regulations and respect privacy to ensure lawful use. Understanding Security Mailboxes: How Do They Work? Security mailboxes incorporate advanced features to protect against theft and vandalism. Robust materials and design deter tampering. Some include anti-fishing mechanisms to prevent unauthorized access. Advanced models may have electronic access systems. Security mailboxes blend durability with innovative designs, ensuring the safe storage of your mail and packages. Explore features like tamper resistance and material strength when selecting a security mailbox for enhanced protection. Surveillance in USPS Mailboxes: Do They Have Cameras? USPS mailboxes typically do not have built-in cameras. The USPS relies on other security measures, such as secure construction and periodic inspections. Surveillance cameras are not a standard feature due to privacy considerations. While the USPS prioritizes the safety of mail, individual mailboxes usually lack integrated cameras. Residents interested in additional security may opt for personal mailbox cameras, ensuring an extra layer of protection for their delivered items. Always adhere to legal considerations when installing personal surveillance devices.
Security Cameras · 17/02/2024
Many people are beginning to appreciate the importance of garden sheds for storing their tools and appliances as well as valuable stuff. The best guide for garden shed security alarms in 2024 is a comprehensive guide for individuals seeking to secure their sheds from burglary and unauthorized intrusion. It provides an overview of new-generation security alarms designed for outdoor storage and offers a range of modern systems available in the market. The guide covers practical aspects such as system installation ease, compatibility with different shed types, and integration into smart functions. As you read further, you'll surely realize how security alarms impact the overall protection of your home and later pick the device that would best protect your valuable belongings from burglars. Why Should You Install a Garden Shed Alarm? A garden shed alarm is a crucial safety measure for outdoor storage facilities, as they store essential tools, equipment, and other assets that are at risk of burglary due to their desolate nature. These sheds are often prone to intrusion by curious individuals, trespassers, or animals, as they are usually behind the backyard or in remote areas. To limit access to dangerous materials, garden shed alarms may include motion sensors, door/window sensors, or advanced detection mechanisms. Modern in-home alarm systems offer smart features like remote monitoring, mobile alerts, and home automation, improving surveillance and keeping homeowners updated on their property. Installing a garden shed alarm ensures the safety and protection of your property, providing peace of mind for you and your valuable assets. Types of Security Alarms for Garden Sheds The choice of the right alarm system for your garden shed is crucial for its protection. Using various types of alarms, you get overall security for that area which is outside your home. Read further below to determine the popular types of security alarms. Door/Window Frame Contact Shed Alarm A Door/Window Frame Contact Shed Alarm deters unauthorized entry by sounding an alert when someone attempts to open the shed door or window, especially for conventional entry points. Vibration Detecting Shed Alarm Vibration Detecting Shed Alarms detect burglar attempts to break into sheds by sensing vibrations, providing additional security, and prompting homeowners to prevent break-ins through unconventional methods. Position-activated or PIR Shed Alarm Position-activated PIR Shed Alarms detect movements and radiant energy changes, automatically activating when intruder enters, providing comprehensive coverage against unauthorized access, especially suitable for larger sheds or expansive storage areas. Features of a Garden Shed Security Alarm When purchasing a garden shed security alarm, there are certain features that you must consider. The features allow you to find a system that provides absolute protection for your outdoor storage. Adjustable Range A garden shed security alarm can be customized to fit the shed's size and structure, providing effective coverage without false alarms. This adaptability enhances precision, ensuring accurate detection and response to potential threats, thereby maximizing security and minimizing false alarm risks. Easy Installation Modern garden shed security alarm systems are user-friendly, offering easy installation options and wireless configurations. Their straightforward mounting instructions make them accessible to individuals without extensive technical expertise, promoting wider adoption and effective use of the security system. Siren and Alerts A loud siren is a crucial component of a garden shed security alarm. When the alarm is triggered, the siren should deter potential intruders and alert you or your neighbors to the intrusion. Additionally, the alarm should send instant alerts to your phone, email, or a designated security company. Personalized Warnings with Smart Locks Advanced security alarm tools for garden sheds provide personalized warnings and integrated smart locks for enhanced security. These tools cater to individual preferences, allowing remote management of access and ensuring only authorized individuals can enter the shed. Remote Monitoring Capabilities High-security Garden shed alarms offer remote monitoring, allowing users to receive real-time notifications on their mobile devices or centralized monitor services, enhancing their effectiveness and allowing them to respond promptly to potential threats. Installation and Setup of Shed Alarms Before you can enjoy the security and peace of mind provided by shed alarms, it's essential to get them installed and set up correctly. Step 1: Identify Vulnerable Areas: Determine key entry points such as doors and windows where sensors or contact switches will be mounted for optimal security coverage. Step 2: Connect to Power Source or Battery: Ensure the shed alarm system is connected to a reliable power source or battery to ensure continuous functionality. Step 3: Strategically Place Motion Sensors: Place motion sensors strategically in key areas to cover the entire shed effectively, considering potential points of intrusion. Step 4: Pair Wireless Components: If your system includes wireless components, pair them with the control unit by pressing the synchronization button, ensuring seamless communication. Step 5: Secure and Accessible Control Unit: Install the control unit in a secure yet easily accessible location, serving as the central hub for monitoring and alerting. Step 6: Configure Alarm Settings: Use the control panel or remote control to configure alarm settings according to your preferences and security requirements. Step 7: Test the System: Before relying on the system for security, conduct thorough testing to ensure all components are functioning correctly and that the alarm triggers appropriately. Step 8: Secure Exposed Wires: Prevent tampering by securing any exposed wires, maintaining the integrity of the system and deterring unauthorized interference. Step 9: Install Warning Signs: Enhance the deterrent effect by installing visible warning signs, alerting potential intruders to the presence of a security system. Step 10: Regular Maintenance: Implement regular maintenance routines, including replacing batteries, ensuring all components are in working order, and updating settings as necessary to keep the shed alarm system in optimal condition. Enhancing Shed Security with Additional Measures Improving shed security involves a comprehensive approach that goes beyond just installing an alarm. Combining these measures with sophisticated shed alarm systems can create an effective security strategy to prevent theft and unauthorized access to outdoor storage. Integration with Broader Security Systems Integrating shed security into broader home security systems is a strategic approach to creating a comprehensive protective environment. By connecting motion sensors and lighting to your security network, you can create a cohesive defense system. The eufy Floodlight Camera E340 is a versatile solution that combines motion sensors and lighting seamlessly. Motion sensors detect movement near your shed, triggering alarms or activating security measures when someone enters the specified range. Proper illumination is essential for security, and placing lights strategically around your shed can deter intruders and improve visibility. The E340 offers comprehensive surveillance and instant illumination whenever motion is detected. It also offers integration capabilities into broader smart home ecosystems, allowing you to remotely control and monitor your shed's security. The device features customizable motion zones, records clear visuals in 1080p resolution, and supports two-way communication for real-time interaction with anyone near your shed. Physical Reinforcements Enhance shed security by installing deadbolts, padlocks, security hasps and smart locks to reinforce entry points. This adds an extra layer of physical security, making it more challenging for burglars to gain unauthorized access. The eufy Video Smart Lock S330 is a comprehensive solution for shed security, offering a 3-in-1 integration of a 2K HD camera, doorbell, and smart lock. This innovative design simplifies installation and provides a streamlined approach to shed security. The lock's rapid fingerprint recognition technology identifies authorized fingerprints in just 0.3 seconds, ensuring quick and secure access to your shed. The 1-second unlocking process adds efficiency to daily interactions with the lock. The device is compatible with the eufy Security App, allowing for remote control and access management. This allows you to monitor and control access to your shed from your smartphone, providing real-time updates on the lock's status. The built-in 2K HD camera provides a clear real-time view of your shed's surroundings, enabling you to identify potential threats and maintain awareness of activities around your shed. The dual motion detection doorbell further enhances security by combining advanced motion sensors with a doorbell, alerting you to motion events and visitor arrivals. This dual functionality adds an extra layer of surveillance and awareness to your shed's security system. This alarm is a comprehensive and innovative solution for shed security, offering a combination of robust physical security, rapid fingerprint recognition, remote control capabilities, a high-resolution camera, and dual motion detection. Conclusion In conclusion, safeguarding your garden shed with a reliable security system is not just a wise choice, it's a necessary step in protecting your valuable belongings. From understanding why garden shed security alarms are essential to exploring various types, features, and installation processes, this guide has provided comprehensive insights into securing your outdoor space. Remember, enhancing shed security doesn't end with just an alarm; consider incorporating additional security measures for maximum protection. So, take action today. Secure your garden shed with a reliable security alarm and enjoy the peace of mind that comes with knowing your valuable tools and equipment are well-protected. Don't wait until it's too late – safeguard your shed now! FAQ How Does a Shed Alarm Work? A shed alarm typically works by employing various sensors to detect unauthorized entry or movement within the protected area. Common types of shed alarms include door/window contact alarms, vibration-detecting alarms, and motion-detecting (PIR) alarms. Door/window alarms activate when the shed door or window is opened, while vibration sensors trigger in response to forceful impacts or tampering attempts. Motion sensors detect movement within their field of view. When any of these sensors are triggered, the alarm system initiates an alert, often in the form of a loud siren, flashing lights, or a notification sent to a central monitoring system. The primary goal is to deter intruders and notify the property owner, enabling a swift response to potential threats. What to Do If Shed Alarm Goes Off in the Middle of the Night? If your shed alarm goes off in the middle of the night, stay calm, check for security alerts, use monitoring tools to assess the situation, contact authorities, if necessary, avoid confrontation, wait for professional assistance, document, and report the incident, and inspect the shed during daylight hours for signs of attempted entry or damage. Prioritize your safety and contact local authorities if you feel uncertain or unsafe. How Much Does It Cost to Install a Wireless Alarm System? The cost to install a wireless alarm system varies but generally ranges from $200 to $1,500, depending on factors like the complexity of the system, the number of sensors, and additional features.
Robovac · 17/02/2024
How to Do Carpet Cleaning During Spring Cleaning
Spring cleaning is one of those unique times when you want everything around your home sparkling clean. During this season, one of the main rugs that will feature highly on your to-do list is a dirty carpet. You're probably dealing with dirty carpets, whether it's in your home or a rental house. So, if you want your carpet to look nice and clean, you've landed on the right spot. I'll teach you some tips for spring carpet cleaning to keep it in good condition without necessarily hiring an expensive professional. Believe me when I say I've been disappointed by the so-called professionals several times. Meta Description: Learn some helpful spring carpet cleaning tips for spring cleaning in this post. From buying the right vacuum and detergent to cleaning and letting it dry. Why is Carpet Cleaning in Spring Cleaning Important? First things first, let's discuss why cleaning your carpet should feature highly on your spring cleaning to-do list. We all know that a carpet is integral to your interior design and can make your bare feet feel comfortable and cozy around the house. However, some people avoid regularly cleaning their carpets for fear of a reduced lifespan. While this could be true, a good quality and well-maintained rug should give you decades of service. So, without further ado, let's list why you should engage in spring carpet cleaning: Carpet cleaning can remove the trapped air pollutants and improve your home's air quality. Thoroughly cleaning your carpets during spring cleaning prevents bacteria, mold, and allergen buildup. Cleaning removes dust, food particles, and dry soils, which could damage your vacuum cleaner. Cleaning your carpet will make the house rooms appear fresh and well-kept. A clean and well-maintained carpet should last longer than a neglected one. 6 Spring Carpet Cleaning Tips Now that we have discussed why carpet cleaning is vital, let's examine some tips to ensure your carpet looks neat and well-kept without involving a professional. These tips should also come in handy even for a professional carpet cleaner. Tip #1: Vacuum the Carpet Before Cleaning You should thoroughly vacuum your carpet before getting it wet and cleaning it. The thing is that your carpet traps a lot of dirt, grime, and air in your home. This means it can hold all the dry hairs, soil, dirt, food particles, and anything else floating around your home. So, when you vacuum it during carpet cleaning in Spring, you're removing the first layer of dirt and grime, allowing you to easily reach embedded dirt and soil when washing it. This point leads us to the most challenging question yet: what is the best vacuum for carpet cleaning? Because cleaning carpets can be intricate for most vacuums, it's vital to do your due diligence before buying a machine for spring cleaning. Ensure the vacuum has lots of suction power and a brush roll to scrub the carpet surface and lift debris when cleaning. Robot vacuums for carpet cleaning have become a popular choice these days. These machines use innovative cleaning technology to ensure excellence when cleaning your carpets without too much input from you. An example is the eufy X10 Pro Omni, which has a strong suction power of 8,000 Pa, enough to effortlessly pick up dirt, pet hair, crumbs, and dust. The multi-directional roller brush of this robovac can also reach and clean the deepest part of your carpet. Tip #2: Choose the Best Carpet Cleaning Solution We're still choosing the tools needed for carpet cleaning. The next step is ensuring you pick the best carpet cleaning detergent, essential in achieving a spotless and fresh-looking carpet. With the endless options in the market, you can be confused and choose the wrong cleaning detergent. So, how should you go about it? First, consider the carpet material because some cleaning detergents are for cleaning natural fibers like wool, whereas others will give you the best results with synthetic fibers. In short, using a suitable detergent on your carpet ensures effective cleaning without discoloration or damage. It's also vital to ensure the cleaning detergent is compatible with your machine to avoid affecting its performance. And yes, the best cleaning detergents should use eco-friendly formulation. These are often labeled as phosphate-free or biodegradable. Avoid detergents with harsh solutions. Tip #3: Banking Powder to the Rescue Your cleaning detergent can sometimes have difficulty removing stubborn, greasy stains and spills. But you don't need to return to the shop to spend money on another detergent. Instead, explore the amazing cleaning powers of the simple-looking baking powder in your kitchen. This powder can breathe some life into any dull and rusty carpet. Here is what to do: scoop several spoons of baking powder and use it to cover the stained area. Now, let it rest for a few minutes. The baking powder will soak up all the oily stains on your carpet, which will be visible as dry cakes. Now bring your robovac and let it clear up all the crusts. Remember, baking powder won't discolor your carpet and other surfaces, making it a handy tool for spring cleaning. Tip #4: Bring Back the Softness and Shagginess Honestly, carpets are some of the most abused things around the house. We step on them with dirt feet, place heavy furniture, spill food over them, and more. Sometimes, your child or pet could even pee on your carpets, leaving an unfriendly odor if not cleaned properly. With this type of abuse, the softness and shagginess of your carpet will disappear with time. Fortunately, you can bring your precious carpets back to life this Spring with some easy ideas. One is to mix equal amounts of water and vinegar and spray it over the dirty carpet. You'll then use a soft cloth or towel to soak the extra moisture before using a hot iron on the fabric to dry the carpet and recover the fluff. Another tried and tested way to add life and freshness to your carpet is by using ice cubes. Don't worry; you won't need a truckload of ice cubes for this trick. Simply identify the flattened areas on your carpet, then place a few ice cubes on that area. Afterward, use a cloth to absorb the water before ironing the affected area. Some people say shaving cream can also do that trick, although we haven't tried it yet. Tip #5: Learn to Use Your Carpet Cleaner Buying the most powerful, full-featured carpet vacuum cleaner is one thing, while getting the best out of it is another. There are some best practices that you must apply to ensure the machine cleans your carpet efficiently and effectively. Below are some ideas: Fill the fresh water tank with warm water from the sink or tap. Don't add soap or additives to it because this water rinses the carpet out. Ensure that you move the cleaning machine slowly and precisely. Remember that the idea is to ensure you rinse all the dirt and soap off the carpet. A robot vacuum cleaner should excel in this case. Tip #6: Let it Dry! This is the most straightforward tip in this guide. After cleaning your carpet, you should let it dry to avoid any moisture buildup when you finally lay it on the floor. You should also ensure that the drying happens as quickly as possible. For example, use a box or ceiling fan to get as much airflow into the room as possible. You may also want to adjust the home environment temperature to about 70°F. And don't forget to buy a carpet grooming rake to stand up the fiber and give your carpet a fantastic finish. Last Words We hope you have picked a few valuable tips from this Spring carpet cleaning guide. As said earlier, you don't need to wait for spring cleaning to clean your carpet. So, follow this guide next time you want to thoroughly clean your carpet without hiring a professional. Good luck!
Security Cameras · 10/02/2024
How to Transform Your Home to a Smart Home?
No matter what, we all, at some point, dream of having a home anticipating all our needs. That dream is now a reality. You can transform your home into a smart home just like the way you want it to be. But maybe the thought of setting up a smart home makes you sweat. Your head spins thinking of those complicated manuals, confusing tech devices, and wiring hassles. But you do not need to worry anymore. This super simple smart home installation guide is your friendly map of the world of smart living. We will break down each scary stuff and show you how to turn your home into a smart home, even if you are not a tech geek. How can I turn my Home into a Smart Home? Transforming your home from an ordinary home to a smart home is an exciting experience that rewards you in the form of comfort and security in your day-to-day life. Let us give you a brief idea of how to bring the thought of a smart home into real life. Know your goals and budget: Get a clear idea of what aspect of your home you want to transform into a smart home. Is it lighting, weather control, security, entertainment, appliances, or all together? Once you have a clear idea, decide how much you are willing to spend. It is important to clear out the budget before executing the plan to avoid last-minute plan changes due to budget restrictions. Decide which platform to go for: Decide your platform for smart home installation. Do you want to go with the smart hubs option or the individual smart devices ecosystem? Smart hubs are devices that act as central controllers of your smart home devices. Each device is integrated with each other and can be easily managed just through a single mobile app. Some well-known smart hub options include Amazon Echo, Google Home, Apple HomeKit, etc. Another option is to go with an individual smart device ecosystem. Some brands have their own line of smart devices. They work with each other but without a hub. This option is best for those planning for smart home installation but on a small scale. However, this can limit future flexibility. Do your homework: Make sure that you do your own research. Read reviews online and compare prices of different brands before making a decision. Explore every option and go with the one that meets your requirements the most. Start small and scale up later: It is not necessary to automate your whole house at once. You can start small with a few devices and see how they work for you. Once you find them fit for your house, then you can move on to automate other aspects of your house. You can check out starter kits offered by different websites. They offer smart home installation in a bundle of a few devices at a discounted price. Make sure to choose compatible devices: Often, people buy devices and later find out that they are not compatible with the platform or hub they decided on. Make sure to know that the devices you are buying are compatible with your chosen platform. You can check this by looking at the "works with" logo or by surfing the manufacturers' website. Network and connectivity The backbone of a good smart home lies in a strong network and connectivity. Your network acts like a super highway; it lets all your smart devices communicate with each other. Make sure to choose the right network. Consider the size of your home, the number of devices you have, and your budget, and then decide accordingly. A good network provides a stable and far-reaching connection, a key for smart devices perfectly working together, What is Included in a Smart Home? A smart home can be as simple or complex as it can be, all depending on your requirements and background. A smart home has the flexibility to be customized and expanded over time to meet the evolving needs of the homeowner, making their daily task easy and convenient. Let's take a look at what a smart home at its core consists of: Smart Door Locks Hiding your door keys under the welcome mat and then struggling to find them in a hurry is old-fashioned now. These smart door locks employ the latest technologies to provide you a secure and key-free method to access your home. You can enter your home by entering a password, through your smartphone app, or even through the touch of your fingertips. Not just this, but these smart door locks give you the convenience to manage your home security from anywhere. You can lock and unlock your doors anytime you want, just through its mobile app. If you are looking for a recommendation, check out Eufy video smart lock S330. The best part about this is it is not just a door lock but a 3 in 1 device. It has got a 2K HD camera and a doorbell. It makes it the ultimate smart solution for your security concerns. You can remotely manage it from the Eufy Security App. Smart Security Cameras Enhancing your security system has never been smarter with the inclusion of smart security cameras. Unlike regular cameras, these do not give you much useless footage. Instead, they have a motion detection sensor that lets them record only those zones where a motion is detected. They also buzz you with alerts through their mobile app whenever suspicious movements are detected. You can then check the live feed from your phone and know what's happening. Different types of security cameras are used for different locations within your home. Indoor cameras have a wide field of view to monitor a large space within your home. Outdoor cameras are made to withstand harsh weather conditions and see farther away than indoors. There is also a variety of doorbell cameras. They are mounted on your doorbells and let you see and speak to visitors from anywhere through the mobile app. You can check the Eufy website; we have quite a wide range of smart security cameras. We offer you with the latest technological advancements at a very reasonable price. Smart Lighting We are sure that everyone has left their home in a rush at some point and then wondered later on if they switched off the home lights. However, with smart home solutions, you will be free from this worry, too. Imagine controlling your entire home lighting with a single tap from your smartphone. Some smart lights can also change colors and brightness, setting the perfect mood for movie nights, romantic dates, or a relaxing evening at home. Dreamy right? But that's how smart home magic works. Smart lighting is not just about convenience but also a sense of security. Often, people are worried about being away from their homes and wondering if someone might break in. But with smart lighting, you can schedule your lights to turn on and off at different times to create an illusion of someone being at home. It keeps the potential intruders away from breaking in. Smart Speakers and Voice Assistants Smart speakers and voice assistants are here to revolutionize how you interact with your home. You can do so much with them! For example, blast your home with your favorite song anytime, controlled with your voice. Is any random question popping up in your mind? Say it loud and get to know the answer. These speakers are like walking encyclopedias. Besides, these are your personal assistants, set reminders, create shopping lists, or check the weather just by your voice. You can also dim the lights, adjust the thermostat, or lock the door with a simple voice command. These devices act as hubs, controlling your entire smart home ecosystem. Smart Thermostat Imagine you are stuck in traffic and dreaming of returning to a cool, chilled room back at home. But you can not leave your air conditioner running all day so that you can get back to a chilled room because that would be wasting energy and jacking up your bills. So what's the solution? The solution comes with another component of smart home installations - a smart thermostat. This tech hero learns your routine and then works automatically. It set different temperatures for different times of day. It also knows when you are coming home through your phone's location, so it sets the perfect temperature just in time. Another plus point is that you can completely control it through your smartphone and ensure that your home is always comfortable and energy-efficient. Smart Appliances It doesn't stop there; ordinary home appliances like ovens, washing machines, etc, are also getting smarter. Imagine a fridge that is your own grocery guru, who keeps track of things you are running low on or tracks the items near the expiry date. An oven that you can preheat through a mobile app on your way back home so you don't have to wait later on. A washing machine that can start a load from your phone while you are out so you don't have to wait until you get home. With these innovative smart appliances, one's life becomes convenient and easy to manage. Conclusion Summing up, a smart home can be as simple or fancy as you want it to be. It totally depends on your preferences. From lights that change with your mood to a security system that keeps an eye on your home while you're out, the options are endless. We have tried to cover all the major smart devices that you can consider for your smart home installation. We recommend you research properly and then decide what to go for. Remember, this is just the beginning. New smart gadgets and features are always popping up; you can keep expanding and have more comfortable and stress-free life! FAQs What is a smart home? A smart home is a house with internet-connected devices that can be controlled remotely or automatically. These devices work together to automate tasks and functions, creating a more convenient, secure, and entertaining living experience. Do I need all new devices to have a smart home? Nope! Many existing devices can integrate with smart systems. Identify existing devices that can integrate with smart systems. Here are some tips: Smart Plugs: Convert regular devices into smart ones. Smart Switches: Control lighting remotely with smart switches. Universal Remotes: Control various devices with a single remote. How much does it cost for smart home installation? Smart home costs vary based on complexity and brand. Start small with one device in key areas like lighting or security. Look for deals and prioritize practicality plus compatibility. What if my internet goes out? Will my smart home still work? While some features might be limited during an internet outage, many devices retain basic functionality. Consider investing in devices with local control options or battery backups for essential functions. How do you choose the best smart home devices? Choosing the right devices can be overwhelming, but these tips will help: Identify your needs and priorities Research compatibility Read reviews and compare features Start small and expand gradually
Security Cameras · 10/02/2024
7 Most Common Smart Home Issues and Fixes
If you are a Disney fanatic, remember Disney's "Smart House" from 1999? The Cooper family wins an advanced tech home; every corner of the house has an AI assistant named PAT( (Personal Applied Technology). Initially, PAT takes care of their every need, from managing household tasks to enhancing their daily lives. Back then, it felt like a fantasy: a click or a voice command would help you with little house chores. Now, here we are today, living out that dream. Get the oven ready; switch on the air conditioner or heater before you get home; use your voice to control the lights, music, and TV; smart devices that monitor your heart rate and blood pressure; etc. However, there are also difficulties associated with any convenience. Aren’t we living the fantasy of a bright house? In this article, we will talk through the frequent issues of smart homes and how you can solve them. 4 Most Common Myths of Smart Homes Smart home technology is advancing rapidly, introducing everyday products with innovative features that enhance your living space effortlessly. From lighting and entertainment to climate control and security, the latest devices offer convenient ways to make your home smarter. Amidst the growing popularity of these devices, several misconceptions surround smart homes. 1. Smart Homes Are Only for Tech Enthusiasts Having a smart home doesn't require any technical expertise. Nowadays, most smart home gadgets are wireless and incredibly easy to set up. You can connect your smart home device with your phone apps. With the convenience of user-friendly smartphone apps, managing smart devices in your home has become incredibly simple. Transitioning to a smart home has never been more effortless. 2. Smart Homes Are Costly The most common concern is the cost; yet, thanks to technological advancements, the prices of essential smart home devices have dropped in recent years. The best way to transform your house into a smart home depends on your preferences and budget, but starting with simple devices like light bulb plugs and working your way up to more advanced ones is always an option. It also helps you keep track of your bills. For example, motion-detecting lights will turn off when you leave the room. 3. Smart Homes Are Only for Convenience Smart homes provide a range of advantages, including convenience and practicality. Automated thermostats help conserve energy, intelligent security systems boost safety, and health monitoring devices offer valuable insights. They strive to enhance daily life by going above and beyond only convenience. 4. Smart Homes Privacy Issues Rest assured, your smart home is always safe for you and your loved ones. A valid concern regarding smart homes is the potential vulnerability of IoT-based devices to hacking. However, homeowners must know that smart device providers prioritize cybersecurity and collaborate with experts to ensure strong passwords. Also, not installing devices with cameras and microphones can lower the risk of security concerns. It helps minimize the possibility of unauthorized access to your devices. Top 7 Issues with Smart Home with Solutions 1. Compatibility Problems One common challenge you may face when setting up your smart home with various thermostats, security cameras, and sensors is device compatibility. Most smart home devices are compatible with a smartphone app. However, you can achieve optimal experience by conveniently controlling your smart devices through a unified interface. 2. Connectivity Issues A common issue encountered by users of smart devices is the inability to establish a network connection. Experiencing dropped feeds from smart cameras and dealing with stubborn bright lights that won't turn off in the living room can be frustrating. Fortunately, you can quickly address this issue. If you're concerned about maintaining a consistent connection with your devices, consider setting up a backup wireless connection. 3. Battery Drain Dilemmas Smart home devices, like security cameras, gaming consoles, and other energy-intensive appliances, use significant power and can drain power sources faster. At times, homeowners may connect various devices to a single power source, which can overload the source quickly. If your smart home devices utilize batteries, outdated batteries may not retain a charge efficiently. Regular and prolonged use of battery-powered smart devices can lead to quicker battery depletion. Replace the batteries regularly. 4. Unexpected device shutdowns One of the most frustrating issues with smart home technology systems is when a high-tech device demands constant attention for all the wrong reasons. Similarly, high-tech monitoring equipment such as cameras and sensors follow the same principle. It is frustrating when security equipment gets undermined by false alarms caused by things like tree branches rustling in the wind or a cat leaping on the furniture. It is crucial to address this security flaw effectively, given the importance of safety, particularly in a home security system. It is advisable to position your cameras and alarms in an inaccessible location to children or pets. 5. Privacy Concerns There are multiple factors, both technological and human, that can give rise to security and privacy concerns in smart home systems. Smart home devices frequently gather extensive user data, including usage patterns, preferences, and audio/video recordings. Improper handling or unauthorized sharing of this data can result in privacy breaches. Insufficient security measures, such as easily guessable or default passwords, can facilitate unauthorized access and control of smart home devices. Manufacturers should focus on enhancing security measures, ensuring regular updates, and giving utmost importance to privacy. Users must update default passwords, regularly update their devices, carefully review and manage permissions, and exercise caution when sharing data with smart devices. 6. Issues with Voice Assistants With a lot of background noise, voice assistants may need help to grasp commands effectively because noises make distinguishing the user's speech harder. Communication assistance may be required for users with non-standard accents or dialects, as voice assistants are usually educated in standard accents and dialects. You can cause your assistants to misunderstand instructions using different speech patterns, intonations, or contexts. The voice assistants may also require clarification if you give them unclear instructions. For example, "light off" might help users specify which lights to turn off. Voice assistants have a limited vocabulary and may require assistance comprehending new slang terms, technical terminology, or specialist vocabulary. 7. Hard to Set Up and Manage Smart home devices operate through hardware, software, wireless communication protocols, and cloud services. Controlling and configuring your devices can be challenging due to the complexity of these technologies. Setting up smart devices t involves connecting to WiFi networks, pairing with mobile apps, and configuring settings. This process may be challenging for users who need to become more familiar with technology. Typically, every smart device will come with its control app. Having multiple apps to manage various devices can frustrate and confuse users. In addition, smart device app user interfaces should be more intuitive and user-friendly, ensuring users can easily navigate and access the required features. Conclusion Smart home ideas bring convenience into your lives, but it’s important to recognize and fix frequent issues in smart homes. Each issue, be it compatibility challenges or privacy and safety issues, provides an improvement. With the continuous advancement of smart home tech facilities, tech experts focus on creating devices that are easy to use with high-security measures and adopting standardized communication protocols such as Matter™. It will not only provide smoother but will create great convenience for users. By being aware and active, users can effortlessly navigate the complicated world of smart homes, ensuring that the benefits of innovation exceed all barriers. eufy is constantly working to improve and enhance smart home technologies, making them more intelligent and user-friendly. FAQs How expensive is it to set up a smart home? The costs of necessary smart home appliances have decreased recently, despite popular belief to the contrary. Depending on your tastes and financial constraints, you can begin with essential gadgets like lightbulb plugs and work up to more advanced ones. Can hackers get into smart home systems? Yes, hackers can attack smart home systems if they don't have strong authentication if they use third-party connections, or if users do things like use default passwords. These holes can let intruders get in without permission, steal data, change device settings, or even take control of them from afar. What steps can I take to enhance the privacy of my smart home? Although privacy concerns may arise with smart homes, it is reassuring that smart device providers prioritize cybersecurity. You can lower the possibility of unauthorized access by avoiding using devices equipped with cameras and microphones and regularly changing default passwords. How can I simplify the process of setting up and managing smart devices? Setting up and managing smart devices can sometimes be a challenge. However, users can reap the rewards of standardized communication protocols such as Matter™ and manufacturers who prioritize creating intuitive and user-friendly interfaces. Keeping up with the new technology advancements can make navigating the world of smart homes easier. My smart home is giving me trouble. Can I fix it myself? You can fix a lot of smart home problems on your own. Common issues can be resolved by simple steps like restarting the device, updating the software, and setting up the network connection. But problems with merging, security, or hardware failures that are more complicated might need technical know-how to fix.
Security Cameras · 07/02/2024
Best Home Security Apps for Android & iOS
As security continues to be a key concern for homeowners, leveraging technology to enhance the safety of our living spaces has become increasingly vital. Home security apps for Android and iOS play a crucial role in this endeavor, offering a seamless integration of convenience and protection. This blog post aims to provide you valuable insights into the best home security apps for Android & iOS available, along with practical tips for choosing the ideal security camera app. By exploring these options, you can make informed decisions to fortify your home with confidence. Top Home Security Apps for Android and iOS Here's a a list of the best security camera app for android and iOS options, including key features and unique benefits of each: 1. Ivideon (Android) Live streaming for real-time surveillance. Audio back online for two-way communication. Cloud storage for convenient data backup. Ivideon facilitates a seamless connection between your Android phone and cameras, providing real-time surveillance with features like two-way audio communication and secure cloud storage. Experience enhanced home security with this reliable app that ensures convenience and peace of mind. 2. Alarm.com (iOS) Comprehensive solution with integrated security features. Remote control for convenient management. Intelligent alerts and live video feeds. Alarm.com serves as an all-in-one app for connected, protected homes. Offering integrated security features, remote control, intelligent alerts, and live video feeds, it automates daily security routines for user convenience. 3. Alfred Camera Home Security (Android) Easy-to-use interface for seamless operation. Live streaming and motion detection capabilities. Transform your spare devices into a DIY security solution with Alfred Camera. This user-friendly app repurposes old smartphones, offering live streaming, motion detection, and unlimited cloud storage for 24/7 peace of mind. 4. Canary (iOS) Monitoring through live or recorded HD videos. Intelligent notifications for unusual activity. Automatic arming modes for simplified operation. Experience high-quality HD video monitoring and smart notifications with Canary. Its automatic arming modes and unusual activity alerts ensure a simplified yet effective home security solution. 5. iSecurity+ (Android) Watch live streaming from different cameras. Snap photos directly from the video stream. Physical control for added customization. iSecurity+ stands out as an efficient home security app, allowing users to watch live streaming from different cameras, snap photos directly, and exercise physical control. It offers versatile features for enhanced security. 6. Ooma Smart Security (iOS) Mobile app and sensors for remote monitoring. Alerts for detected activity and multiple sensor support. Real-time status and logs of all sensors. Ooma provides seamless remote monitoring through its mobile app, offering customizable notification preferences and robust sensor support. Ensure real-time status and logs of all sensors for comprehensive home security. 7. Video Monitor (Android) Motion detection for enhanced security. GPS location tracking and event detection. User-friendly interface with a sleek design. Video Monitor seamlessly combines motion detection and GPS tracking for an appealing and secure experience. With its user-friendly interface and sleek design, this app ensures reliable home security with added convenience. 8. eufy Security (iOS & Android) Instant notifications for detected activity. Local AI ensuring privacy. Whole-home security system. Flexible security modes with Geofencing. eufy security app offers instant notifications and privacy assurance through local AI. With a whole-home security system and flexible security modes using Geofencing, it's a reliable choice for comprehensive home protection. These apps stand out in the home security category by offering a diverse range of features, from DIY solutions to comprehensive security systems, providing you with flexibility and peace of mind in safeguarding your home. Tips for Choosing the Best Security Camera App When choosing the best security camera app, consider the following criteria to ensure it aligns with your needs and preferences: User Interface (UI): Opt for an app with an intuitive and user-friendly interface for seamless navigation and easy operation. Features: Assess the features offered, such as live streaming, motion detection, two-way communication, and cloud storage. Choose a smart camera app that provides the functionalities you require. Compatibility: Ensure the app is compatible with your devices, including your smartphone and security camera. Check for cross-platform compatibility if you use both Android and iOS devices. Security and Privacy: Prioritize apps with robust security measures and a commitment to user privacy. Look for encryption protocols and features that protect your data. Integration: Select an app that integrates well with other smart home devices or systems you may have. Compatibility with various devices enhances the overall security ecosystem.. Customization Options: Look for apps that offer flexibility in setting up security modes, schedules, and automation features based on your preferences. Ease of Setup: Opt for an app with a straightforward setup process. Apps that offer easy installation and configuration contribute to a hassle-free user experience. Updates and Support: Consider apps that receive regular updates and have reliable customer support. Updated apps often introduce new features and improvements, while responsive support addresses any issues promptly. By evaluating security camera apps based on these criteria, you can make an informed decision that aligns with your specific security needs and preferences. Conclusion In conclusion, choosing the right home security app is crucial for seamlessly integrating technology and protection. By prioritizing factors such as user interface, security measures, and integration capabilities, you can fortify your home with confidence. Whether it's live streaming, intelligent alerts, or privacy assurances, the listed apps in this blog contribute to comprehensive security solutions. FAQ Do All Security Cameras Need an App? Not all security cameras require an app, but many modern ones do. Apps enhance functionality by providing remote access, alerts, and customization. The necessity of an app depends on your preferences and the features you seek in a security system. Is There a Free Security Camera App? Yes, there are free security camera apps available. These apps offer basic functionalities like live streaming and motion detection. However, premium features, such as cloud storage and advanced settings, may be limited in free versions. Is There a Security Camera without a Monthly Fee? Indeed, security cameras without monthly fees exist. While certain free apps offer essential features, cameras like the eufy security camera provide one-time purchase options, eliminating recurring fees. These cost-effective alternatives ensure security without requiring an ongoing financial commitment.
Security Cameras · 07/02/2024
Best Security Cameras without Subscription 2024: Protection with No-Subscription
There has been a significant advancement in the market of home and business security cameras that do not require subscriptions. These cameras now offer a wide range of advanced and cost-effective solutions that are of the best quality. Manufacturers have responded to the increasing demand for surveillance solutions without ongoing subscription fees by introducing new products that cater to different user requirements. The best security cameras without subscription in 2024 not only provide high-quality video, a wider field of view, and two-way audio communication but also incorporate artificial intelligence for improved detection without the need for monthly subscriptions. This guide will specifically focus on the leading options available in 2024 that are free from subscriptions and offer reliable security solutions without compromising safety. These options are ideal for you to ensure both peace of mind and cost-effectiveness in your surveillance systems. What to Consider When Choosing Security Cameras without Subscription? When choosing the best security camera without subscription, consider several key factors to achieve satisfactory monitoring results. High-definition images are crucial for better recognition and a wide field of view, increasing surveillance and eliminating dark areas. Real-time communication through two-way audio functionality allows for immediate response against potential threats. AI detection enhances the system's accuracy, allowing cameras to distinguish routine events from abnormalities, and minimizing false alerts. Storage options like local backups, microSD card sets, or cloud options are essential for easy integration into an existing system. Data security and user confidentiality are crucial, and cameras should focus on promoting both. Strong customer support is essential, helping with setup deployments and debugging any concerns raised. These factors help you make independent decisions about non-subscribed security cameras based on your specific needs, such as parking guards or pedestrians controlled by traffic signals. Understanding the terminology used in a solar-powered security cameras without subscription can help you make informed decisions about your security needs. eufy Spring Cleaning Deals is on - check amazing discounts! Spring into cleanliness with eufy's special deals! Elevate your home's hygiene with our advanced robot vacuums and ensure safety with top-notch security cameras. Don't miss out on a spotless and secure home. Act now and embrace a cleaner, safer spring with eufy. Shop the sale today! Save now Sign up for discounts Best Specialized Security Cameras without Subscription eufyCam S330 (eufyCam 3) The eufyCam S330 (eufyCam 3), the best indoor camera without subscription, boasts excellent performance with 4K detail capabilities, providing a panoramic view of the environment for users. Its "Forever Power, Solar Style" design uses solar energy to support power requirements, offering a green option and eliminating the need for regular battery replacements or manual recharging. This best indoor security camera without subscription also offers 16 TB expandable local storage, allowing users to save footage locally and eliminate cloud-based subscriptions. Additional drives can be added to accommodate user-specific needs. The BionicMind™ AI decision makes the security system intelligent, discriminating between family members and strangers, reducing false alarms, and detecting potential threats. These features make the camera a powerful and advanced tool for customers who don't want subscriptions. If you choose eufyCam S330, you’ll find out that the BionicMind™ is a powerful and advanced tool for a reliable and efficient security solution. Check this blog for more information about solar outdoor security cameras. Wyze Cam v3 The Wyze Cam v3, is versatile and suitable for both indoor and outdoor surveillance, capturing important scenes in diverse locations. It features IP65 weather protection, making it durable even in rain or snow. The camera's improved processing capacity enhances surveillance capabilities, allowing for smoother operations and better overall performance. This best home security system without subscription also offers various mounts for optimal coverage. The Cam Plus feature provides premium functionalities, including unlimited video length storage and advanced AI detection, particularly Person Detection, which reduces false alarms and increases camera alerts on relevant security events. Choosing this camera allows you to enjoy features with powerful and versatile solutions for various surveillance applications. eufy SoloCam S220 The eufy SoloCam S220, one of the wireless outdoor security cameras no subscription, offers a versatile and convenient solution for surveillance. It features solar charging, ensuring the battery remains full even with 3 hours of sunlight. This sustainable power supply doesn't require frequent battery replacements and can be used indefinitely. The camera's infrared LEDs and f/1.6 aperture provide day-and-night clarity, ensuring perfect night vision. The compact size and wire-free installation make it easy to place the camera anywhere. The camera's human detection feature with AI prevents unwanted activity, notifying users of someone in their yard. HomeBase 3, which includes individual facial recognition, adds an extra layer of detail to identification. This eliminates monthly fees and provides a one-time purchase with on-device storage with AI for comprehensive security without recurring costs. If you are seeking a reliable surveillance product with advanced features at a competitive price, this camera is an ideal choice. Arlo Ultra 2 The Arlo Ultra 2 offers a high-quality surveillance experience with 4K video with HDR capability, allowing users to capture and review footage with detail and color accuracy. The integrated spotlight enhances the camera's ability to capture clear footage in low-light conditions. Being one of the best outdoor security cameras without subscription, it is wire-free, eliminating the need for constant power sources and ensuring long-lasting operation. The ultra-wide viewing angle reduces blind spots and maximizes the monitored area, allowing users to capture a broader perspective of their surroundings. It has premium two-way audio that facilitates real-time communication, allowing you to interact with individuals on the monitored premises for security announcements or remote conversations. The Arlo secure trial provides you with an opportunity to explore advanced security features and cloud-based storage options, but you can decide whether to continue with the subscription after the trial period. This camera requires a SmartHub for operation, emphasizing the need for a centralized hub for connectivity and control. These features make this camera a high-performance and feature-rich solution for those seeking top-tier surveillance capabilities. eufy Spring Cleaning Deals is on - check amazing discounts! Spring into cleanliness with eufy's special deals! Elevate your home's hygiene with our advanced robot vacuums and ensure safety with top-notch security cameras. Don't miss out on a spotless and secure home. Act now and embrace a cleaner, safer spring with eufy. Shop the sale today! Save now Sign up for discounts Conclusion Security cameras with free services have evolved to cater to various user needs, offering economical and automatic surveillance. Modern video monitoring cameras have advanced functionality that rivals subscription-based equipment. Factors to consider when choosing a non-subscription security system include video resolution, coverage area, two-way sound quality management, artificial consciousness film storage strengths, and flaw support. The security cameras without subscription offer users freedom in choosing models with superior video resolution, wide coverage range, advanced detection technologies, solar power charging, weather-resistant properties, and easy installation. As a thrifty customer seeking long-term security solutions like eufyCam S330 and eufy SoloCam S220, this 2024 is a wise decision. FAQ Are Security Cameras Worth Buying? Yes, an investment in security cameras is important because of various personal reasons and business purposes. They act as a great deterrent to all potential intruders, serve evidence during incidents, and ay peace of mind. Technological advancements have ensured that security cameras are now cheap, available, and advanced as they offer high-resolution video footage through detection intelligence right in various mounting options. As part of a complete security strategy, such as home protection or business surveillance, cameras transformed the image of safety and well-being for premises under camera monitoring. How Much Do Outdoor Security Cameras Cost per Month? Unless they operate under a subscription service, security cameras outdoors have no monthly fee. Most current surveillance cameras provide local storage opportunities or enable storing footage onto the personal cloud with no monthly charges. Nevertheless, there may be other cameras with extra functionality or cloud storage plans that are paid for every month. If a user chooses subscription-based versions, their costs with be diverse from only several dollars to high-level plans which include extra features. It is necessary to review a particular model of the camera and its offered services to understand the pricing system, however, essentially outdoor security cameras do not have monthly fees when users decide just not to subscribe for extra offers. Do Security Cameras with Subscription Record All the Time? Camera subscription services can vary in recording capabilities, depending on the camera type and features included. Some cameras offer absence-free recording, allowing users to shoot all day and talk nightly. Motion detection and triggers can also start the recording process, saving storage space. These features can eliminate tape full cassettes, making them worthless. It's crucial to consider whether the continuous recording plan includes invariant endurance or operates based on event-triggered recording using detected motion and other conditional criteria as filters.
Security Cameras · 07/02/2024
When Were Video Cameras Invented? Tracing Back to Their Historical Origins
In the annals of technological progress, few innovations have left as indelible a mark on society as the video camera. Beyond mere devices capturing images, video cameras have profoundly shaped our collective experience. Have you ever wondered, "When were video cameras invented?" Join us on an enlightening journey as we unravel the historical tapestry, tracing back to the roots of these incredible devices. In this exploration, we'll delve into the brilliant mind behind the invention, pinpoint the exact date of their creation, and venture into the world of the first video cameras. Who Invented the Video Camera? The Inventor Behind the Video Camera Who invented video camera? The invention of the video camera can be credited to Louis Le Prince, a French inventor who left an indelible mark on the history of visual storytelling. In 1888, Le Prince introduced what is often regarded as the first motion picture sequences. His innovative work involved the use of a single-lens camera and paper film to capture the iconic "Roundhay Garden Scene" in Leeds, England. While his technology bore resemblance to early film cameras, it laid the essential foundation for subsequent developments in motion picture technology. When Were Video Cameras Invented? Pinpointing the Invention Date of Video Cameras The journey of 'when was video invented?' began in the late 19th and early 20th centuries, marked by the groundbreaking work of various inventors. In 1888, Louis Le Prince's creation of the first motion picture sequences marked the inception of video cameras. The subsequent timeline showcases key contributors: 1891: William Kennedy Laurie Dickson and Thomas Edison introduced the Kinetograph, a significant leap forward in video camera technology. 1894: Kazimierz Proszynski's invention of the Pleograph, a camera with a projector, and the Aeroscope, the first compressed air camera, revolutionized video camera accessibility. 1920s: John Logie Baird's development of the first operational television system marked a crucial step toward the modern video camera. Early 1930s: Vladimir Zworykin and Philo Farnsworth's contributions to electronic television laid the groundwork for video camera evolution. 1950s: Ampex Corporation's practical videotape recorder represented a major breakthrough, allowing live image capture from television broadcasts. 1980s: Sony Corporation's introduction of the Betamovie, the first consumer camcorder, brought video cameras from the 80's into the hands of the public. This timeline reflects the collaborative efforts of inventors and companies, each playing a pivotal role in shaping the evolution of video cameras. What Were the First Video Cameras? Exploring the First Video Cameras The earliest video cameras were essentially television cameras designed for live broadcasts. Innovations in the early 1930s included: Iconoscope Camera: Vladimir Zworykin's invention, converting light into an electronic signal, was a practical video camera tube for early television cameras. Image Dissector Camera: Developed by Philo Farnsworth, this camera tube captured images as electron scans, contributing to the early development of video cameras. Emitron and Super Emitron Cameras: British company EMI's mid-1930s developments included the Emitron and Super Emitron, enhancing light sensitivity and image quality. Image Orthicon Camera: Introduced by RCA in the 1940s, the Image Orthicon camera tube provided excellent image quality and found widespread use in television studios. These early video cameras, although large, complex, and expensive, laid the foundation for future consumer accessibility. Evolution of Video Camera Technology Over Time The evolution of video camera technology has been a remarkable journey marked by continuous innovation. Analog Era (1950s-1970s) Quadruplex Videotape: Ampex's introduction of the Quadruplex videotape in 1956 marked a significant breakthrough, allowing television networks to capture live images. Video Home System (VHS): JVC's launch of the Video Cassette Recorder (VCR) in the 1970s, using VHS tapes, made video recording more affordable and accessible to the general public. Digital Revolution (1980s Onward) Sony Handycam: In 1985, Sony introduced the Handycam, a portable camera that simplified the process of capturing memories. High-Definition Digital Video Cameras: Sony continued to pioneer video camera technology in the early 2000s, developing the first high-definition digital video cameras and completely digital camcorders. Rise of Cell Phone Cameras Cell Phones: The 1980s witnessed the integration of video camera technology into cell phones. Sharp and Samsung were among the early manufacturers, paving the way for the development of compact yet powerful cell phone cameras. The continuous advancements have led to the integration of video cameras into everyday devices, transforming the way we capture and share moments. Video Cameras and Their Role in Industrial Evolution Video cameras have played a transformative role in various industries, contributing to societal progress and innovation. Filmmaking and Television Production Video cameras revolutionized the filmmaking and television industry, making recording more affordable and enabling easier editing processes. The transition from film to video allowed for more flexibility, affordability, and the incorporation of visual effects. The advent of digital technology further enhanced the creative possibilities, enabling CGI effects, digital green screens, and seamless footage integration. Surveillance and Security Video cameras made surveillance and security practical and accessible. From their origins in Nazi Germany during WWII, security cameras have become ubiquitous, enhancing public safety and providing valuable footage for monitoring and investigative purposes. The evolution of the video camera has played a crucial role in the appearance of a security camera like the eufyCam S330 (eufyCam 3), contributing to the effectiveness of modern surveillance systems. Journalism and Reporting Visual journalism became feasible with the introduction of video cameras, allowing the real-time documentation of historical events. The transition from film to videotapes significantly improved practicality, affordability, and the ability to capture extraordinary events. Video cameras contributed to vlogging and the extensive recording of historical moments. Personal Video Recording The affordability and accessibility of video cameras in the 1980s, with devices like the Video Cassette Recorder (VCR) and camcorders, led to the widespread recording of family memories. The digital era further transformed personal video recording, enabling easy sharing over social media and preserving everyday moments in high definition. Wrapping Up: The Ongoing Journey of Video Cameras Now that we've explored the origins, answering the question "When were video cameras invented," the transformative odyssey unfolds. From Louis Le Prince's 1888 breakthrough to the digital revolution, video cameras have seamlessly woven into our lives, shaping cherished memories and narratives. Today's advancements, embracing AI integration and enhanced capabilities, promise an exciting future for these storytelling companions. FAQ When Did Video Cameras Stop Using Film? The shift from film to digital technology in video cameras gained momentum in the 1980s. Sony's introduction of the first mass-produced charge-coupled device (CCD) video camera in 1983 marked a significant step toward the digital revolution in video camera technology. This shift eliminated the need for film, paving the way for the convenience and versatility of digital video recording. What Was the First Film? The first film in history is commonly attributed to Louis Le Prince, who created "Roundhay Garden Scene" in 1888. This short sequence, lasting about 2.11 seconds, features four individuals walking in a garden and is recognized as the earliest instance of recorded motion pictures using a single-lens camera and a strip of film. What Is the Difference between a Camcorder and a Video Camera? The terms "camcorder" and "video camera" are often used interchangeably, but there are distinctions in their use and technical aspects. A video camera typically refers to a broader category of devices designed for recording video, including professional-grade cameras. On the other hand, a camcorder specifically refers to a portable, self-contained video camera with an integrated recorder. While both capture moving images, camcorders are designed for convenient handheld use, making them suitable for personal video recording.
Security Cameras · 04/02/2024
Outdoor Light with Security Camera: A Comprehensive Guide 2024
In today's world, where security is a top priority for homeowners, the concept of an outdoor light with camera has revolutionized home safety. This innovative technology combines the essential features of outdoor lighting with the advanced capabilities of surveillance cameras. As we delve into this guide, we explore the various aspects of these devices, their benefits, and the key considerations to keep in mind when choosing the right outdoor light with camera for your home. Additionally, we'll highlight top picks of outdoor light cameras, providing insights into some of the best options available, tailored to meet diverse security needs and preferences. Advantages of Outdoor Lights with Cameras Outdoor lights equipped with cameras offer numerous advantages. Firstly, they serve as a deterrent to potential intruders, as the presence of a camera alone can discourage unlawful activities. Additionally, these devices provide real-time surveillance, allowing homeowners to monitor their property remotely through their smartphones or other devices. This feature is particularly useful for identifying and responding to security threats promptly. Furthermore, outdoor lights with cameras often come with motion detection capabilities, triggering the light and recording footage upon detecting movement, thereby enhancing the overall security of your home. What to Consider When Choosing Outdoor Light Bulb Security Cameras? When you're in the market for an outdoor light bulb security camera, there are several key factors you should think about. These considerations will help you choose a camera that meets your security needs and works well in your outdoor environment. Designed for Outdoor Use First and foremost, make sure the camera, like the weatherproof outdoor camera light, is built for outdoor use. This means it should be able to handle various weather conditions like rain, wind, and extreme temperatures. A camera that’s not designed for outdoor use won’t last long in harsh weather. Night Vision Capability A good outdoor security camera should have excellent night vision. This feature allows the camera to capture clear footage even in low light conditions, which is crucial for monitoring your property at night. Light Control Options Look for cameras that offer control over the light settings. This could include features like adjustable brightness or the ability to set timers. These controls can help you manage the lighting according to your needs and preferences. Weatherproof Design Weatherproofing is critical for any outdoor camera. Check that the camera you're considering is weather-resistant, meaning it can withstand rain, snow, and other outdoor elements without being damaged. Motion Detection Motion detection, a feature in products like the blink outdoor floodlight camera, is crucial. It allows the camera to activate and record upon detecting movement. This not only saves energy but also ensures you’re alerted to any activity around your home. Smart Home Integration If you have a smart home system, choose a camera that can integrate with it. This allows you to control the camera and view footage through the same system you use for your other smart home devices. Alarm Feature Some outdoor light cameras come with built-in alarm systems. This feature can help in scaring off intruders and drawing attention to any suspicious activity. Brand Reputation Consider buying from a well-known and trusted brand. Established brands often offer better quality, customer support, and warranty options. Easy Installation Finally, look for a camera that's easy to install. Many outdoor light with security cameras are designed for easy setup, which means you can install them yourself without needing professional help. By considering these factors, you can find an outdoor light bulb security camera that not only improves the safety of your home but also fits seamlessly into your lifestyle and home environment. Top 5 Outdoor Security Light with Cameras In the search for the best outdoor security light with cameras, several products stand out in the market due to their exceptional features and reliability. Below are the top 5 picks for 2024, each offering unique characteristics to cater to different security needs. eufy Floodlight Cam S330 The eufy Floodlight Cam S330 redefines home security with its 360° Pan and Tilt Camera Coverage, eliminating blind spots for complete surveillance. Its 2K Full HD resolution ensures every detail is captured crisply, both in live-streaming and recorded footage. The cam's smart lighting feature, with 3 Tunable Light Panels, adapts to environmental changes, offering optimal illumination based on time, motion detection, or preset schedules. Enhanced with AI Subject Lock and Tracking, it intelligently recognizes and tracks human presence, ensuring focused and continuous monitoring. Moreover, its powerful 3,000-Lumen floodlights turn night into day, deterring intruders while guaranteeing clear, full-color recordings in low-light conditions. This integration of advanced technology makes the eufy Floodlight Cam S330 a top-tier choice for outdoor security. Arlo Pro 3 Floodlight Camera The Arlo Pro 3 Floodlight Camera is another excellent choice, known for its crystal-clear video quality and wide-angle lens. This camera offers color night vision, a feature that sets it apart from many competitors. It's wireless, making installation straightforward and flexible. The Arlo Pro 3 also includes an integrated siren, which can be triggered manually or automatically during a security breach, adding an extra layer of protection. eufy Floodlight Camera E340 Experience unparalleled security with the eufy Floodlight Camera E340. This cutting-edge camera offers 360° coverage, ensuring every movement is tracked with its advanced AI. Its 24/7 recording feature provides continuous peace of mind. Unique dual-camera system allows detailed monitoring from up to 50 ft away in stunning 3K resolution, with up to 8× digital zoom. Enjoy swift, stable connections with dual-band Wi-Fi 6. The 2,000-lumen light, adjustable for motion detection or ambient lighting, adds an extra layer of security. Expandable storage options, compatible with HomeBase S380, make this camera a versatile choice for robust home surveillance. eufy Solar Wall Light Cam S120 The eufy Solar Wall Light Cam S120 is a top-tier choice for those seeking a blend of security and eco-friendliness. Its standout feature is the 2K HD color night vision, offering superior clarity in low light conditions, a significant upgrade over standard 1080P cameras. This camera-light combo brings a convenient, two-in-one solution for outdoor safety, with a bright 300-lumen wall light that activates on motion. Eco-conscious users will appreciate its solar charging capability, needing just 2 hours of sunlight to power a day's worth of surveillance. The camera also boasts AI Smart Detection and a 25 ft range PIR sensor, ensuring intelligent and responsive security. Additionally, its local storage offers up to 60 days of event footage, eliminating monthly fees and making it a smart, cost-effective security solution. Wyze Cam Floodlight Pro The Wyze Cam Floodlight Pro is recognized for its affordability without sacrificing quality. It features a robust floodlight and high-definition video capture, ensuring clear footage both day and night. The camera also supports two-way audio and has a user-friendly app interface, making it accessible for people who are not tech-savvy. Its compact design and easy installation process make it a great choice for a wide range of homes. Each outdoor security camera with light, be it a floodlight camera or wall light model, offers its own set of unique features, catering to different needs. These advanced technology models provide cutting-edge features like superior image resolution and smart detection capabilities, enhancing security efficiency. How Do You Install a Light Bulb Security Camera? Installing a light bulb security camera can be a straightforward process that most homeowners can undertake without professional help. Here’s a step-by-step guide to help you install your light bulb security camera efficiently: Choose the Right Location:Select a location that provides a wide view of the area you want to monitor. Common places include porches, driveways, and backyards. Ensure the location is near a power source if the camera isn't battery-operated. Turn Off Power:Safety first. Before you begin the installation, make sure to turn off the power at the circuit breaker to avoid any electrical hazards. Remove Existing Bulb/Fixture:If there’s an existing bulb or fixture where you want to install the camera, carefully remove it. Install the Mounting Bracket (if applicable):Some light bulb cameras come with a mounting bracket for installation. If yours includes one, secure it in place according to the manufacturer's instructions. Ensure it is firmly attached to avoid any movement or vibration. Screw in the Camera:Just like installing a regular light bulb, screw your camera into the socket. Ensure it's snug but avoid over-tightening, which might damage the bulb security surveillance recorder. Adjust the Camera Angle:Position the camera to ensure it covers the desired area. Some models have adjustable necks or mounts for this purpose. Restore Power and Test the Camera: Turn the power back on and check if the camera lights up and starts functioning. Follow any prompts for setup that appear on the camera or in the associated smartphone app. Connect to Wi-Fi and Configure Settings:Using the smartphone app, connect your camera to your home Wi-Fi network. Configure settings such as motion detection sensitivity, alarm settings, and light controls as per your preference. Check the Footage:Finally, test the camera by viewing live footage or recordings to ensure it covers the right areas and the image quality meets your expectations. Conclusion In conclusion, the integration of an outdoor light with camera offers a smart and effective way to enhance home security. These devices provide not only illumination for safety and visibility but also a vigilant eye over our properties. Frequently Asked Questions about "outdoor light with camera" How Much Power Does a Light Bulb Security Camera Use? The power consumption of a light bulb security camera typically ranges from 5 to 20 watts, depending on the model and features. These cameras are generally more energy-efficient compared to traditional security systems. Do You Need an SD Card for a Light Bulb Security Camera? It depends on the model. Some light bulb security cameras have built-in storage or an SD card slot for local recording, while others rely solely on cloud storage, eliminating the need for an SD card. Do Light Bulb Cameras Work When the Switch Is Off? No, if the switch is off, the light bulb camera will not have power and won't operate. However, some models are designed to keep the camera active independently of the light, allowing for continuous surveillance even when the light is off.
Vacuum · 03/02/2024
Best Commercial Robot Vacuum Cleaner for 2024
The realm of cleanliness and maintenance has been revolutionized with the advent of commercial robot vacuum cleaners. These innovative machines bring efficiency, effectiveness, and ease to the task of keeping commercial spaces spotless. Unlike their residential counterparts, commercial robot vacuums are designed to handle larger areas, more diverse surfaces, and operate for extended periods, making them a staple in various business settings. In this comprehensive guide, we explore the distinctive characteristics and benefits of commercial robot vacuums, delve into the must-have features that set the best models apart, and highlight the most suitable applications for these advanced cleaning tools. Whether for office spaces, retail areas, or other professional environments, understanding the capabilities of commercial robot vacuum cleaners is essential for anyone looking to maintain high standards of cleanliness in 2024. What's the Difference between a Commercial Vacuum and a Residential Vacuum? Commercial vacuums and residential vacuums serve different purposes and are designed to meet distinct cleaning needs. Here are the key differences between the two: 1. Usage Intensity - Commercial Vacuum: Built for heavy-duty and frequent use in large spaces. Commercial vacuums are designed to withstand the demands of cleaning in businesses, industrial settings, and other high-traffic areas. - Residential Vacuum: Geared towards regular cleaning in smaller, residential spaces. They are not intended for the intensity and frequency of use that commercial vacuums can handle. 2. Durability and Construction - Commercial Vacuum: Constructed with durable materials to withstand continuous use. Commercial vacuums are built to be robust and resilient, capable of handling tough cleaning tasks on a regular basis. - Residential Vacuum: Generally designed for lighter use, residential vacuums may have a more compact and lightweight construction. They are not as rugged as commercial vacuums since they are intended for occasional household cleaning. 3. Suction Power - Commercial Vacuum: Equipped with powerful suction to effectively clean large areas and handle a variety of debris, including dirt, dust, and potentially larger particles. - Residential Vacuum: While still providing adequate suction for home cleaning, residential vacuums may not have the same level of power as their commercial counterparts. 4. Size and Weight - Commercial Vacuum: Tends to be larger and heavier due to the need for larger dustbins, more powerful motors, and additional features tailored for industrial or commercial settings. - Residential Vacuum: Generally smaller and lighter, designed for easy maneuverability and storage within a home environment. 5. Features - Commercial Vacuum: Includes advanced features such as larger dustbin capacity, extended battery life, enhanced filtration systems, and smart technologies for efficient navigation and mapping. - Residential Vacuum: Focuses on essential features for home use, such as different cleaning modes, various attachments, and user-friendly controls. 6. Cost - Commercial Vacuum: Typically more expensive due to the robust construction, advanced features, and higher performance capabilities required for commercial applications. - Residential Vacuum: Generally more budget-friendly as they cater to less demanding cleaning tasks in smaller spaces. Understanding these differences is crucial when choosing between a commercial vacuum robot and a residential vacuum robot, as it ensures that the vacuum aligns with the specific cleaning needs of the intended environment. Advantages of Commercial Robot Vacuum Cleaner Here are some key advantages of commercial robot vacuum cleaners: 1. Efficiency Commercial robot vacuums are designed for efficient and systematic cleaning. Their advanced navigation and mapping technologies ensure that they cover the entire designated area without missing spots. 2. Time Savings These robots can operate autonomously, saving significant time for cleaning staff. Employees can focus on more complex tasks, while the robot efficiently takes care of routine floor cleaning. 3. Consistent Performance Commercial robot vacuums provide consistent cleaning performance with each use. They follow programmed routes, ensuring that every part of the floor is cleaned thoroughly without human error. 4. Large Area Coverage With extended battery life and the ability to recharge autonomously, commercial robot vacuums can cover large areas on a single charge. This makes them suitable for cleaning spacious environments such as warehouses, offices, and manufacturing facilities. 5. Reduced Labor Costs The autonomous nature of commercial robot vacuums reduces the need for manual labor in routine cleaning tasks. Businesses in a robot vacuum commercial setting can allocate human resources more efficiently, focusing on tasks that require human intervention. 6. Smart Control and Monitoring Many commercial robot vacuums can be controlled remotely through dedicated apps. This feature allows users to start, stop, schedule, and monitor cleaning sessions from anywhere, providing convenience and flexibility. 7. Advanced Features Commercial robot vacuums often come equipped with advanced features such as enhanced suction power, larger dustbin capacity, HEPA filters for improved air quality, and safety sensors to detect obstacles and prevent collisions. 8. Adaptability to Different Environments These robots are versatile and can adapt to various floor types, making them suitable for a range of commercial settings, including offices, warehouses, gyms, and manufacturing facilities. In summary, commercial robot vacuum cleaners offer a combination of efficiency, time savings, and advanced features that make them valuable assets for businesses seeking effective and convenient floor cleaning solutions. Features of Commercial Robot Vacuums Here are the key features of commercial robot vacuums: 1. Enhanced Suction Power Commercial robot vacuums are designed with powerful motors to provide enhanced suction power. This allows them to effectively pick up dirt, debris, and particles from various floor surfaces. 2. Larger Dustbin Capacity To accommodate the cleaning of larger areas without frequent emptying, commercial robot vacuums are equipped with larger dustbins. This feature ensures uninterrupted cleaning for extended periods. 3. Advanced Navigation and Mapping Technologies Commercial robot vacuums utilize advanced navigation and mapping technologies to systematically clean the designated area. This includes sensors, lasers, or cameras that help the robot create a map of the space for optimized cleaning routes. 4. Extended Battery Life With extended battery life, commercial robot vacuums can cover larger areas on a single charge. This feature is essential for ensuring thorough cleaning without interruptions for recharging. 5. Wi-Fi Connection Many commercial robot vacuums come with built-in Wi-Fi connectivity. This feature allows users to control and monitor the robot remotely through dedicated apps on their smartphones or other devices. 6. Smart Control Smart control features enable users to schedule cleaning sessions, start or stop the robot, and customize cleaning preferences. This adds convenience and flexibility to the cleaning process. 7. HEPA Filters High-Efficiency Particulate Air (HEPA) filters are incorporated into commercial robot vacuums to capture and trap small particles, allergens, and pollutants. This contributes to improved indoor air quality. 8. Safety Sensors Safety sensors are integrated into commercial robot vacuums to detect obstacles and prevent collisions. This feature ensures the robot can navigate around furniture and other objects safely. 9. Multi-Floor Mapping Some commercial robot vacuums have the capability to create and store maps of multiple floors. This allows them to adapt to different environments and cleaning needs within the same facility. 10. Adaptive Cleaning Modes Commercial robot vacuums often offer various cleaning modes to adapt to different floor types and cleaning requirements. These modes may include options for deep cleaning, spot cleaning, and more. 11. Automatic Recharging When the battery is low, commercial robot vacuums can automatically return to their charging stations to recharge. This ensures that the robot is always ready for the next cleaning session. These features collectively contribute to the efficiency, convenience, and effectiveness of commercial robot vacuums in maintaining cleanliness in diverse commercial settings. Best Robot Vacuum for Commercial Use When it comes to the best robot vacuum for commercial use, several top-performing robot vacuums stand out, each offering unique features tailored to meet the demands of large spaces and diverse environments. WHIZ Commercial Robot Vacuum The WHIZ commercial robot vacuum is a standout choice for its impressive capabilities. With a noise level of just 62 dB in normal mode, it operates quietly without causing disruption in commercial settings. Equipped with HEPA filters, it ensures thorough cleaning while maintaining indoor air quality. With a cleaning capacity ranging from 5000 to 6000 square feet per hour, the WHIZ robot vacuum efficiently covers expansive areas. Its 3 hours of runtime on a single charge, coupled with safety sensors for obstacle detection, make it a reliable and efficient choice for commercial cleaning needs. eufy Clean L35 Hybrid The eufy Clean L35 Hybrid is another top contender with advanced features. Boasting iPath™️ Laser Navigation, this robot vacuum ensures precise and systematic cleaning. With a powerful suction of 3,200 Pa, it effectively removes dirt and debris from various surfaces. The controllable water tank, multi-floor mapping capabilities, and app control compatibility, including integration with Amazon Alexa, provide users with customization and convenience in managing cleaning tasks. Another robot vacuum with exquisite appearance and powerful map-drawing capabilities you may want to know: eufy S1 Pro - The World’s First Floor Washing Robot Vacuum Meet eufy S1 Pro, unleash the power of real-time self-cleaning floor washing robot combined with a high-performance vacuum, all in one revolutionary device. Say goodbye to manual labor and hello to groundbreaking innovation and design. Don't miss out on the revolution in home cleaning: Sign up for discounts See eufy deals Rosie Commercial Robot Vacuum For those seeking a commercial robot vacuum that emphasizes autonomy and efficiency, the Rosie Commercial Robot Vacuum is an excellent option. With autonomous vacuuming capabilities, it covers more than 1,000 square feet per hour, making it suitable for large spaces. Its data-driven cleanliness approach ensures strategic and effective cleaning, while features like edge cleaning and maximum space coverage enhance its overall performance in commercial settings. eufy Clean X9 Pro with Auto-Clean Station The eufy Clean X9 Pro with Auto-Clean Station takes commercial cleaning to the next level with its robust features. Boasting a powerful 5500Pa suction, a multi-directional brush, and adaptive pressure mopping with dual rotating mops, it tackles various cleaning challenges with ease. The inclusion of an Auto-Clean Station with heated drying, a 12 mm Auto-Lift Mop, and advanced sensors, including a 3D ToF sensor and an AI camera for detection, make it a sophisticated and efficient choice for commercial environments. Makita DRC200Z Cordless Robot Vacuum The Makita DRC200Z Cordless Robot Vacuum offers continuous cleaning for extended periods, with a maximum runtime of 200 minutes. Covering approximately 5,380 square feet, this robot vacuum utilizes a three-stage cleaning system with side brushes and a main brush. Equipped with two 18V LXT® 5.0Ah batteries, a 5/8 gallon dust box, and a brushless motor for cooler operation, it ensures reliable and efficient cleaning. Additionally, the two cleaning modes provide flexibility to adapt to different cleaning requirements. In conclusion, the choice of the best commercial robot vacuum depends on specific needs and preferences. Whether prioritizing quiet operation, advanced navigation, autonomous cleaning, or high-tech features, these top models offer a range of options for businesses seeking efficient and effective cleaning solutions. Ideal Applications for Commercial Robot Vacuums Commercial robot vacuums are versatile cleaning solutions designed for efficiency and effectiveness in a variety of commercial settings. Here are ideal applications for commercial robot vacuums: Warehouses: Commercial robot vacuums excel in warehouses with large floor areas. Their ability to navigate autonomously and cover extensive spaces makes them ideal for maintaining cleanliness in storage facilities. Gymnasiums: In gymnasiums with open floors and diverse surfaces, commercial robot vacuums can efficiently clean the space, ensuring a hygienic environment for patrons. Manufacturing Facilities: Manufacturing facilities often have expansive and high-traffic areas. Commercial robot vacuums can navigate through these spaces, providing consistent cleaning in areas where dust and debris may accumulate. Offices: Offices with multiple rooms and common areas benefit from the systematic cleaning provided by commercial robot vacuums. These robots can clean during off-hours, maintaining a tidy workspace. Cafeterias: The automated cleaning capabilities of commercial robot vacuums make them suitable for cafeterias where spills and crumbs are common. They can efficiently clean dining areas without the need for manual intervention. Department Stores: Large retail spaces like department stores can benefit from the extended battery life and efficient cleaning patterns of commercial robot vacuums. They can navigate through aisles and open spaces, keeping the store clean for customers. Hotels: Hotels with expansive lobbies, hallways, and common areas can maintain cleanliness without disrupting guests by utilizing commercial robot vacuums during non-peak hours. Schools and Universities: Educational institutions with multiple classrooms, hallways, and common areas can use commercial robot vacuums to ensure a clean and healthy environment for students and staff. Healthcare Facilities: In hospitals, clinics, and medical facilities, where hygiene is critical, commercial robot vacuums can contribute to maintaining clean and sanitized spaces. Retail Stores: Retail environments, including supermarkets and shopping centers, can deploy commercial robot vacuums to manage cleaning tasks in various sections of the store without disrupting customer activities. 11. Convention Centers: Large event spaces benefit from the efficiency of commercial robot vacuums in cleaning exhibition halls, meeting rooms, and common areas during and after events. Conclusion Investing in the best commercial robot vacuum cleaner for 2024 ensures that your commercial space remains impeccably clean, promoting a healthy and productive environment. Consider the unique features and advantages of each model to find the perfect fit for your specific needs. FAQ Is a Commercial Vacuum Worth It? Yes, the durability, powerful performance, and advanced features of commercial vacuums make them worth the investment for businesses with large cleaning needs. Why are Commercial Vacuums So Expensive? The higher cost of commercial vacuums is justified by their robust construction, powerful features, and ability to handle heavy-duty cleaning tasks in large commercial spaces. Their durability and performance make them a valuable long-term investment.
Vacuum · 03/02/2024
Most Quiet Robot Vacuum Cleaner for 2024
Are you tired of the incessant noise that comes along with vacuuming? The loud whirring and buzzing can be not only annoying but also disruptive to your daily life. But fear not, because we have the solution you've been searching for! In this blog post, we will explore the top five most quiet robot vacuum options on the market and discuss the factors that contribute to their low noise levels. We will also provide tips on what to do if your current vacuum cleaner is making too much noise. Say goodbye to annoyingly loud vacuums and hello to a peaceful cleaning experience! Why Should You Choose a Quiet Robot Vacuum? Choosing a quiet robot vacuum offers numerous benefits, especially for households with pets, children, or those working from home. Quiet robot vacuums ensure a peaceful environment, minimizing disruptions during cleanings. This is particularly valuable for those who need to concentrate or relax at home without the disturbance of loud noises. Additionally, they are less likely to startle pets or disturb sleeping children. With advanced technology, these vacuums maintain effective cleaning performance while operating at lower noise levels, providing an ideal balance of convenience and tranquility. Their unobtrusive nature makes them perfect for routine cleanings at any time of the day, ensuring a clean home without sacrificing peace and quiet. Top 5 Quietest Robot Vacuum Cleaners In the realm of quiet and efficient cleaning, the top 5 robot vacuums for 2024 stand out for their impressive features and minimal noise levels. Let's delve into these silent champions: eufy Clean 11S The eufy Clean 11S stands out as a paragon of sleek design and silent efficiency. With its slim profile of just 2.85 inches, it effortlessly glides under furniture for a thorough clean. Operating at a mere 55 dB, this quiet robotic vacuum ensures a hushed cleaning experience. The iPath™️ Laser Navigation system enhances precision, mapping out logical routes for comprehensive coverage. Equipped with a 0.6L dust box, it minimizes the need for frequent emptying. Powered by a robust battery, it cleans for up to 100 minutes per charge, making it an ideal choice for those seeking a quiet and reliable cleaning companion. Fancy some high-tech robot vacuums? Stay tuned for eufy's latest product: eufy S1 Pro - The World’s First Floor Washing Robot Vacuum Meet eufy S1 Pro, unleash the power of real-time self-cleaning floor washing robot combined with a high-performance vacuum, all in one revolutionary device. Say goodbye to manual labor and hello to groundbreaking innovation and design. Don't miss out on the revolution in home cleaning: Sign up for discounts See eufy deals iRobot Roomba i7+ The iRobot Roomba i7+ is a powerhouse of suction and intelligence. Boasting 10x the Power-Lifting Suction, it tackles dirt and debris with unparalleled efficiency. This smart vacuum integrates seamlessly with the iRobot Home app, Google, and Alexa voice assistants, offering convenient control. Its Imprint smart mapping technology ensures strategic navigation, while the inclusion of Dual Multi-Surface Rubber Brushes guarantees a thorough clean. Customizable Keep Out Zones add a layer of personalization, making the i7+ a dynamic and silent cleaning solution for modern households. eufy RoboVac G30 The eufy RoboVac G30 takes cleaning to a new level with its BoostIQ™ Technology. This intelligent feature dynamically adjusts suction power for optimal performance. Smart Dynamic Navigation, complemented by logical route planning and a Location Detection System, ensures efficient coverage. With a suction power of 2000 Pa and a low cleaning noise level of 55 dB, the G30 combines power and silence seamlessly. Its ultra-slim body at 2.85 inches allows it to navigate tight spaces effortlessly, making it a quiet yet formidable cleaning companion. eufy RoboVac 15C MAX The eufy RoboVac 15C MAX strikes the perfect balance between power and quiet operation. With a slim design at 2.85 inches, it effortlessly maneuvers through your home. Boasting BoostIQ Technology, it adapts its suction power for effective cleaning. Connectivity with Alexa or the Google Assistant adds a layer of convenience, allowing you to command your robot vacuum effortlessly. This powerful yet quiet cleaning solution is designed for those who seek performance without compromising on tranquility. DEEBOT X2 OMNI The DEEBOT X2 OMNI stands as a pinnacle of cleaning innovation. With an impressive 8000Pa suction power and a 15mm lift capability, it tackles even the toughest cleaning challenges. The inclusion of washing wipes with hot water expands its capabilities for wet cleaning. Powered by AI Avoidance and Dual-laser LiDAR navigation, it navigates your home intelligently. The dual-rotating mopping system ensures a comprehensive clean. Despite its power, the X2 OMNI maintains a reasonable 64.9dB noise level during operation, offering a powerful and quiet cleaning solution for discerning users. These robot vacuum cleaners not only excel in reducing noise disruptions but also deliver exceptional cleaning performance, making them the top choices for those seeking a harmonious and efficient cleaning experience in 2024. Factors Contributing to the Quietness of a Robot Vacuum When it comes to ensuring a silent and unintrusive cleaning experience, several key factors contribute to the quiet operation of a robot vacuum. Understanding these elements can help you make an informed choice on the best quiet robot vacuum: Noise Level The primary factor influencing the quietness of a robot vacuum is its noise level. Manufacturers prioritize minimizing operational noise, typically measured in decibels (dB). Quieter models, such as those mentioned earlier, often fall within the 55-65 dB range, ensuring discreet cleaning without disrupting your daily activities. Quiet Mode Many advanced robot vacuums come equipped with a dedicated quiet mode. This feature allows users to customize the cleaning experience, prioritizing a silent operation when needed. Activating quiet mode reduces the motor's intensity, making it ideal for cleaning during quiet hours or when you desire a peaceful atmosphere. Brushless Motor The type of motor used in a robot vacuum significantly impacts its noise level. Brushless motors, commonly found in high-quality models, operate more quietly than their brushed counterparts. This technology ensures efficient and silent cleaning, contributing to an overall noise reduction during operation. Noise Reduction Design Manufacturers invest in innovative design elements to minimize noise during a robot vacuum's operation. Soundproofing materials, streamlined airflow designs, and vibration dampening contribute to an overall reduction in the audible impact, creating a more pleasant cleaning experience for users. Navigation and Obstacle Detection Efficient navigation systems play a crucial role in a robot vacuum's quiet operation. Models with advanced navigation and obstacle detection technology can move seamlessly throughout your home, avoiding unnecessary collisions and reducing abrupt movements that might contribute to noise. This ensures a smoother and quieter cleaning process. Additional Factors Beyond the highlighted factors, there are other aspects that contribute to the overall quietness of a robot vacuum. These may include the quality of materials used in construction, the precision of sensors, and the implementation of smart algorithms that optimize cleaning routes for minimal noise disturbance. In considering these factors collectively, you can make an informed decision when selecting the most quiet robot vacuum cleaner that not only excels in cleaning performance but also ensures a peaceful coexistence with your daily activities. What to Do If Vacuum Cleaners Have Loud Noise? Dealing with a vacuum cleaner that emits loud noise can be both disruptive and bothersome. Fortunately, there are several strategies you can employ to mitigate the noise and restore a quieter cleaning experience. 1. Check for Maintenance Issues Before taking any additional steps, ensure that your vacuum cleaner is properly maintained. Clean or replace filters, clear any debris from the brushes, and inspect the overall condition of the vacuum. A well-maintained machine is more likely to operate quietly. 2. Explore Quiet or Eco Modes Many modern vacuum cleaners, including robot vacuums, come equipped with different operating modes. Explore the settings and activate a quiet or eco mode if available. These modes are specifically designed to reduce noise levels without compromising on cleaning performance. 3. Invest in Noise-Reducing Accessories Consider investing in noise-reducing accessories or attachments for your vacuum cleaner. Some manufacturers offer specialized mufflers or sound-dampening kits that can be added to your existing machine to minimize noise. 4. Upgrade to a Quieter Model If noise remains a persistent issue, it might be worth considering an upgrade to a vacuum cleaner specifically designed for quiet operation. Explore models known for their low decibel ratings and advanced noise reduction features. 5. Consult the User Manual Refer to the user manual provided by the manufacturer. It often contains troubleshooting tips and guidance on reducing noise. Follow the recommended maintenance procedures and check for any specific instructions related to noise issues. 6. Seek Professional Assistance If the noise problem persists despite your efforts, it may be prudent to seek professional assistance. Contact the manufacturer's customer support or a certified technician to diagnose and address any underlying issues. By taking these steps, you can effectively address and reduce the noise generated by your vacuum cleaner, ensuring a more peaceful cleaning experience for both you and those around you. Conclusion As we embrace the era of smart living, choosing a robot vacuum that complements our lifestyle is paramount. The quiet operation of these top most quiet robot vacuum models in this blog ensures a harmonious coexistence with your household activities, making cleaning an unobtrusive and efficient task. FAQ Why is My Robot Vacuum So Loud? The noise level of a robot vacuum can be influenced by various factors, including motor design, suction power, and overall construction. Refer to the user manual for troubleshooting tips. What is the Average Noise of a Vacuum Cleaner? Vacuum cleaners typically emit 60-85 decibels (dB), akin to a normal conversation or moderate traffic. Noise varies with design and motor size. Quieter models, often labeled "silent" or "low-noise," operate at 55-65 dB. How to Measure the Noise Level of a Vacuum? To measure a vacuum cleaner's noise level, use a sound level meter at a three-feet distance, mimicking typical usage. Start by noting the ambient noise level in the room. Then, run the vacuum and record its noise at various times for consistency. Compare these readings with the ambient level to determine the vacuum's noise output. This assessment helps ensure the vacuum is comfortably quiet and suitable for noise-sensitive environments.
Video doorbell · 31/01/2024
Understanding How Video Doorbells Work: A Comprehensive Guide
Have you ever wondered, how does a video doorbell work? These innovative devices are reshaping home security, combining the classic doorbell with modern technology to keep your home safe and connected. In this guide, we will explore the inner workings of video doorbell cameras, their advantages, and what you should look for when choosing one. This technology not only offers a new level of security but also adds convenience to your daily life, allowing you to interact with visitors from anywhere. How Does a Video Doorbell Camera Work? Understanding "how does a video doorbell work" is the first step in appreciating its value. Essentially, these devices combine traditional doorbell functionality with a built-in camera, often integrating features like two-way audio and motion detection. How does a doorbell camera work involves the camera activating upon detecting motion or when the doorbell is pressed, sending a live feed to your smartphone or other connected devices. This technology enables homeowners to view and communicate with visitors remotely, adding a layer of security and convenience. Benefits of Video Doorbells The benefits of integrating doorbells with cameras into your home security system are manifold. Firstly, they offer enhanced security by allowing real-time monitoring of your front door area. This feature is particularly advantageous in deterring package theft and ensuring the safety of your home. Moreover, the front door video camera function provides convenience, enabling homeowners to interact with visitors, couriers, or even monitor their doorstep remotely. Additionally, some models feature advanced technology such as facial recognition and motion alerts, which further heightens security by identifying regular visitors and alerting homeowners to any unusual activity. This integration of smart technology not only improves security but also adds a layer of intelligence to home management. Furthermore, with the ability to record footage, video doorbells can serve as crucial evidence in case of any security incidents, offering peace of mind to homeowners. What to Consider When Buying a Video Doorbell? When exploring how do video doorbells work and considering a purchase, several key factors should be considered: Wired vs Wireless:Determine whether a wired or wireless doorbell suits your home setup. Wired doorbells are reliable but may require professional installation, while wireless models offer flexibility and easier installation. Price:Video doorbells come in various price ranges. Set a budget but consider investing in a quality product that offers robust features for long-term satisfaction. Video/Image Quality:High-definition video (at least 1080p) is crucial for clear imagery. Consider models with superior image quality to accurately identify visitors or potential threats. Two-Way Audio:Look for a doorbell with clear two-way audio to communicate with visitors remotely, enhancing both convenience and security. Night Vision:A doorbell with effective night vision is essential for round-the-clock monitoring, ensuring clear images even in low light conditions. Storage Options:Assess the storage options – cloud-based or local. While cloud storage offers more space and accessibility, local storage can be a cost-effective and private alternative. Smart Home Integration:If you have a smart home ecosystem, choose a video doorbell that integrates seamlessly with your existing devices for unified control and automation. AI Detection Features:Advanced doorbells come with AI features like facial recognition and motion detection, which can provide more accurate alerts and reduce false alarms. Connectivity:Ensure the doorbell has reliable connectivity, compatible with your home’s Wi-Fi network, for uninterrupted operation and alerts. Durability and Weather Resistance:The doorbell should be durable and weather-resistant to withstand various environmental conditions. Ease of Installation:Consider how easy it is to install the doorbell. Some models are DIY-friendly, while others might require professional help. Customer Reviews:Finally, read customer reviews to understand real-world performance and satisfaction levels with the product. By considering these factors, you can find a video doorbell that not only enhances your home security but also fits your lifestyle and technical preferences, ensuring a wise and fruitful investment. 5 Best Video Doorbell Camera 1. eufy Video Doorbell E340 The eufy Video Doorbell E340 stands out as one of the best battery doorbell cameras on the market. Its unique dual-camera system ensures comprehensive security, with one camera focusing on visitors and the other providing a ground view. The industry-first dual-light system, coupled with an advanced algorithm, offers exceptional color night vision, enhancing clarity up to 16ft. Experience superior 2K Full HD visuals, capturing every detail at your doorstep. Flexibility is key with both battery and wired options, ensuring continuous operation. Additionally, it integrates seamlessly with various chime systems and is compatible with HomeBase S380 for expanded functionality. 2. eufy Video Doorbell S330 The eufy Video Doorbell S330 is a dual-camera marvel offering package detection and dual motion detection. Experience crystal-clear security with its 2K resolution front camera and 1080p package camera, both equipped with HDR for superior image quality. The HomeBase ensures an expansive Wi-Fi range, compatible with your existing chime. Choose between battery or hardwired installation for flexibility. Enjoy local storage with no monthly fees, supporting up to 90 days of motion-activated recordings. With two-way audio and smart AI support, including human and radar detection, this IP65 weather-resistant doorbell is a robust addition to any smart home, though it's not compatible with HomeKit. 3. Ring Video Doorbell Pro 2 This model from Ring features advanced motion detection with 3D mapping technology, enhanced Wi-Fi connectivity, and crisp 1080p HD video quality. It's known for its sleek design and seamless integration with the Ring app for real-time notifications and communication. 4. Nest Doorbell (Battery) Google's Nest Doorbell offers intelligent alerts through facial recognition and package detection. It operates on a rechargeable battery and provides high-quality video, even in night mode. Its user-friendly interface makes it a popular choice among homeowners. 5. Arlo Video Doorbell Arlo's Video Doorbell is acclaimed for its direct video calling feature, which sends a call to your phone when someone presses the doorbell. It offers a wide viewing angle, 2K video quality with HDR, and night vision, making it a comprehensive video doorbell solution. How to Install Video Doorbell Camera? The installation process for a door camera typically involves the following steps: Selecting the Location:Choose a spot that provides a clear view of your front door and approach path. Mounting the Doorbell:For wired models, this may involve connecting to existing doorbell wires. Wireless models will need a secure mounting spot. Connecting to Wi-Fi:Sync the doorbell camera with your home network for remote access and notifications. Configuring the App:Download and set up the manufacturer’s app to customize settings and view footage. Testing:Once installed, test the doorbell camera to ensure it's functioning correctly, including the camera feed, motion detection, and two-way audio if available. Remember, while some video doorbell cameras are designed for easy DIY installation, others might require professional installation, especially if they integrate into a broader home security system. Conclusion In summary, getting to grips with how does a video doorbell work is key in the modern era of home security. These devices are more than just a way to see who is at your door; they offer enhanced security, added convenience, and greater control over your home environment. As we move forward in an increasingly digital world, video doorbell cameras stand out as a smart choice for keeping our homes safe and well-connected. Frequently Asked Questions about "how does a video doorbell work" Does a Doorbell Camera Record All the Time? No, not all doorbell cameras record continuously. Many start recording only when they detect motion or when someone rings the bell. However, some models do offer 24/7 recording. Do Doorbell Cameras Need Wi-Fi? Yes, doorbell cameras typically need Wi-Fi to function properly for live streaming, remote access, and sending alerts. What Is the Difference between Video Doorbell and Security Camera? A video doorbell is designed for your doorstep, allowing you to see and talk to visitors. A security camera provides wider surveillance and may not have two-way audio or a doorbell feature.
Baby · 30/01/2024
Baby Monitor vs Security Camera: What is the Difference?
Choosing between a baby monitor and a security camera can be perplexing, especially for new parents. Both devices serve the same purpose- to surveil and watch a room or area. However, their functionalities, design specifications, and intended use cases differ significantly. This guide delves into the nuances of both devices, helping you understand their roles in ensuring safety and peace of mind. By comparing their features, advantages, and limitations, we aim to provide clarity on which device best suits your family's needs. Keep reading! Quick guide: you can check eufy's best security cameras collection and smart baby monitors collection here to see the major differences. Understanding Baby Monitor As parents, our primary desire is to provide a secure environment for our children. Thanks to baby monitors, keeping track of your small one any time of the day has never been easier. These devices let parents and caregivers monitor their infants or young children even if they are not in the same room. A baby monitor functions similarly to home security cameras. They both use technologies that transmit video (and even audio) signals from your baby’s room to a monitor or device in another location. Some of the latest baby monitors even have functions such as night vision, temperature monitoring, and movement sensors. Below are the pros and cons of using a baby monitor: Pros It gives parents peace of mind and a sense of security even if they aren’t in the same room as their baby. The device frees up parents to do other tasks during idle times, such as when the baby sleeps, while still having the means to monitor their little ones. Baby monitor models with two-way communication allow parents to talk to their children, soothe their babies, and put them at ease. Most baby monitors now have mobile app integration, allowing parents to check on their baby remotely using smartphones or tablets. Some models also have advanced features to help you understand your baby’s sleep patterns. Cons Setting up and using the multiple features of baby monitors requires a learning curve for parents. Baby monitors with advanced features can be expensive, and a setup with multiple cameras equates to extra costs. So, are camera baby monitors worth it? If you are a parent who values the well-being and development of your infant, then it’s an excellent investment to purchase as your child is born. Understanding Security Camera Many are familiar with security cameras. They are commonly used for surveilling and recording activities in a specific area. You can also use them in the baby room as a means to monitor your child. Much like your baby camera, they too have a wide array of features that can help you in monitoring your child 24/7. These cameras typically have night vision and are equipped with motion detection capabilities. Below are the advantages and disadvantages of security cameras: Pros They are generally versatile in surveillance work and can be used indoors and outdoors. Security cameras often have a wide viewing angle, which allows them to cover larger areas. These cameras also have advanced features like wide-angle lenses and facial recognition. You can integrate multiple security cameras into your smart home systems. Cons Security cameras lack crucial features such as temperature and humidity sensors that are crucial in monitoring your baby. Setting up a security camera is more complex compared to a dedicated baby camera. While security cameras are great for a good deal of surveillance work, they usually lack a few features that give baby monitors the edge of keeping an eye on your young ones. Key Differences Between Baby Monitors and Security Cameras Because they function similarly, some people are tempted to replace their baby monitors with security cameras. However, we discourage parents from doing this because these two systems have subtle differences. Baby monitors were developed mainly to monitor your infant, while security cameras were designed to watch over an area or property. Below are some of the key differences between baby monitor vs security camera: Video and Audio Capabilities A baby monitor’s view is often limited only to the area of the crib. Moreover, it only alerts you of sounds or motions from the baby. In contrast, security cameras continuously track and record every indoor or outdoor activity that is within its range of view. They also alert you of any suspicious motions or sounds in an area. Connectivity and Range Baby monitors tend to have shorter ranges because they are meant to be used within a home. They usually operate using Wi-Fi connectivity and other dedicated frequencies. A security camera, however, is designed for indoor and outdoor use and has short- and long-range monitoring capabilities. Security and Privacy Security cameras capture private family activities, mostly in indoor settings. In some cases, it may raise privacy issues for family members. Meanwhile, baby monitors only broadcast an infant’s room, and the recordings are generally meant for the parents only. Price and Investment Generally, baby monitors are more affordable than security camera systems. The former also has a broader range of features meant for watching children. If you want a budget-friendly option, go for the baby monitor, but if you want a system that offers better surveillance, then go for a security camera. From this information, you might be asking if you should use a security camera as a baby monitor. While you can still use a security camera to watch over your child, they are not tailored to the task and may lack significant features. Furthermore, they are generally a bit more expensive, which means you are spending a few extra dollars for some technology you rarely use, such as Zoom and Spotlight. Best Baby Monitor Recommendation: eufy Smart Sock S340 Every parent is concerned about their infant’s health and well-being. Hence, getting a baby monitor is an excellent choice for those who want to monitor how their kids are doing, especially if their baby is hungry, sleepy, or needs a diaper change. The eufy Smart Sock S340 is a baby wellness tracking device with a 2K resolution camera and an app that helps you monitor everything about your child. The camera has incredible close-up coverage with its ability to zoom, pan, and tilt. To use it, simply mount the device on top of the baby’s crib. You can also use an adjustable crib mat clamp to secure it in place. Meanwhile, you need to attach the smart sock to your baby’s foot. It has various sensors that help you monitor your baby’s status livestream. Using the eafy Baby’s app, you can see their heart rate, sleep state, what time they went to sleep, and their cumulative sleep time for a session. Best of all, you can access your data without a monthly subscription. Its Fresnel lens allows accurate readings to help you better understand your baby’s sleep patterns. The camera can tilt 110 degrees and pan 330 degrees. It also has a 4x zoom and night vision. The smart sock is flexible, dirt-resistant, and made from washable material. It comes in three sizes, meaning it can grow with your baby, and they can wear them until they are 18 months old. This device’s battery can last up to 24 hours on a full charge. Features: Comfortable smart sock that gets vital data such as oxygen levels and heart rate. A Fresnel lens that can capture 2K resolution video. A non-invasive night vision for night-time monitoring. Free access to your baby’s data plus customizable alerts. Eligible for Flexible Spending Account (FSA) and Health Savings Account (HSA) Related Products Check out these pages for more information: Best Smart Sock by eufy Best Wifi Baby Monitor by eufy Best Video Baby Monitor Conclusion Monitoring your child is an integral part of being a parent, which goes double if they are still infants. Fortunately, our modern way of living has produced devices such as baby monitors to help us keep watch on our children even if we are not in the same room as they are. Purchasing a baby monitor is also an excellent investment that rewards the parents and, more importantly, their children. Remember to pick one made from materials safe for infants and recommended by health professionals. FAQ How Much Should You Spend on a Baby Monitor? It depends on several factors, such as your budget and the features you would like the baby monitor to have. Baby monitors typically cost under $100 for video-only models and as much as $400 for the high-end units. We recommend picking one that checks your requirements and offers the best value for your money. H3-Do Baby Monitors Have Night Vision? Many modern baby monitors have night vision functionality, allowing parents to monitor their child even in low-light or dark conditions. A baby monitor achieves night vision capabilities through infrared (IR) technology. The great thing about these baby monitors is they can operate 24/7. At What Age Should You Stop Using a Video Baby Monitor? Most parents stop using a video baby monitor when their child is 2 to 3 years old. Most kids have a regular sleeping pattern and may require less monitoring. However, if you need to monitor your kids based on specific circumstances, you can keep using them until you are comfortable enough to retire the device.
Smart Lock · 30/01/2024
Enhancing Home Door Security in 2024: Top 5 Tips
The need to improve home security in the year 2024 has never been greater, as homeowners look for better ways to protect their families and possessions. As we move into an era dictated by technological advances and increased connectivity, enhancing home door security emerges as a priority. Protecting areas in our homes is an important step in fortifying our habitats from potential disasters. This guide explores the top 5 tips for strengthening home door security in 2024, providing practical insights and solutions to empower homeowners in their quest for a safer lifestyle. The importance of residential door security cannot be overstated, as doors are the primary barrier between our private spaces and the outside world. A secure gate is not just a physical boundary. It provides security and quiet, reassuring residents that their homes are safe. Unfortunately, the rise in domestic assaults and burglaries in recent years has highlighted the vulnerability of homes to external threats. Criminals are becoming more sophisticated, making it necessary for homeowners to take the lead in implementing comprehensive security measures. In this context, strengthening your home door security becomes an important part of a comprehensive approach to protecting your home and loved ones. Choose a Security Door Choosing the right security door is an important step in securing your home from potential intruders and increasing overall security. The security doors are designed to provide additional security, acting as a barrier to entry. When choosing a security door, it is important to consider factors such as materials, design, and the level of security required. There are many types of security locks, each with its features and benefits. Steel security doors are a durable and robust option, resisting forceful impact and tampering, making them suitable for harsh weather conditions. Aluminum security doors are lightweight yet sturdy, resistant to corrosion and rust, and available in various styles for customization. Iron security doors, made from wrought iron or cast iron, combine strength with an elegant appearance, providing a strong deterrent against forced entry. Fiberglass security doors, made from reinforced fiberglass, are lightweight, resistant to corrosion, and often mimic the appearance of wood, offering a blend of strength and aesthetics. Wood core security doors, made from wood core with reinforced steel or aluminum, offer a classic appearance with added security features. Mesh security doors, made from metal mesh, allow airflow and visibility while maintaining security, making them suitable for areas where ventilation and visibility are essential. Choosing the best home door security is an important step in securing your home from potential intruders and increasing overall security. With the benefits mentioned, choose the one that truly secures your home. Change Door Lock Replacing door locks is a practical and relatively simple procedure, providing an opportunity to increase home security. Whether you are updating an existing lock or replacing a damaged one, the process usually involves removing the old one and installing a smart lock. Now, let’s explore the eufy Video Smart Lock S330 and why it’s the recommended choice for you. The eufy Video Smart Lock S330 is a 3-in-1 smart door lock that integrates with Eufy's ecosystem, offering a range of features to enhance home safety and comfort. It offers smart connectivity, allowing users to remotely manage and monitor their locks. The S330 combines three essential security features: a keyless keypad, fingerprint scanner, and built-in 1080p camera, providing multiple layers of security. It also communicates with the eufy ecosystem, ensuring compatibility with other smart devices like cameras, doorbell systems, and home monitoring tools. Keyless entry options, such as fingerprint recognition and a keypad, eliminate the need for traditional keys, increasing security and convenience for homeowners. The built-in 1080p camera provides real-time video surveillance, enhancing security. If you have minimal technical knowledge, the eufy Video Smart Lock S330’s easy-to-install is a huge benefit for you. By turning your traditional door lock into the eufy Video Smart Lock S330, you’re not only increasing your front door security but seamlessly joining the wider smart home ecosystem. Convenience, advanced features, and compatibility with eufy’s ecosystem make the S330 a solid choice for those willing to embrace modern smart home security solutions. Reinforce Glazing Switching to double or triple glazing is a process that enhances your home's energy efficiency and comfort aside from achieving front door extra security. To begin, assess your windows for damage or malfunction and choose the type of glass that best suits your climate strength and efficiency. Choose frame materials like uPVC, wood, and aluminum, each offering unique benefits. Get professional advice to assess the feasibility of the adjustment and get quotes from multiple contractors. Review local codes to ensure compliance with building codes and standards. Install commercially to minimize air leakage and maximize energy efficiency. Enjoy improved insulation, reduced energy costs, increased comfort, and reduced outside noise. Double or triple glazing helps create an environmentally friendly home by reducing carbon emissions. Consider other energy-efficient strategies like improving insulation in walls and ceilings, raising doors, and investing in energy-efficient heating and cooling systems to create sustainable and comfortable lives. Install Security Light Security lights are crucial for enhancing home and office safety, acting as a deterrent to potential intruders and highlighting dark areas. To install security lights, examine key areas like entrances, hallways, and less visible areas. Choose the right lights based on your specific needs, including movement-allowing lights, evening and daytime running lights, and solar-powered lighting fixtures. As you install a security light, you would surely like to install eufy Floodlight Camera E340. It is a reliable and powerful security option, providing a sense of safety. It has a 360° Camera Coverage feature that captures a full view by rotating horizontally. It also uses AI to detect people and track their movements. Moreover, the camera can automatically patrol at designated times, providing an extra level of proactive surveillance to increase security. Additional Door Security Tools Door security tools like reinforced plates, safety bars, safety chains, latches, smart door clocks with cameras, safety hinges, and keyless entry systems can enhance home security. These tools provide additional protection beyond traditional locks, making doors impermeable, providing adjustable barriers, allowing partial opening, and integrating surveillance capabilities. Safety hinges secure hinged parts of the door, while keyless entry systems eliminate the need for traditional keys. Door checks increase visibility, wireless alarms deter unauthorized entry attempts, and window screens or security screens on glass windows add extra protection. When used properly, these tools create a comprehensive security system, promoting peace of mind and protecting homes from potential hazards. Conclusion Home door security is crucial for protecting your property and belongings. A comprehensive security plan combines traditional locks with modern technology, such as keyless entry systems, smart door locks with cameras, and motion-activated lights. These innovations improve access control, and management, and provide real-time warnings, enhancing safety. The tool such as the front door security bar, reinforcing plate, electronic lock, and window film can increase door security by targeting vulnerabilities. As technology advances, homeowners must stay updated on the latest advancements in door security. Regular assessments, timely improvements, and best practices are essential for developing a backup plan. A secure front door not only acts as a physical barrier but also demonstrates proactive measures to ensure the safety of everyone inside. A comprehensive approach to home door security ensures peace of mind, ensuring your home is safe from potential hazards. FAQ Do Security Systems Really Deter Burglars? Yes, security systems have proven to be effective deterrents to thieves. Studies consistently show that homes equipped with visible security systems, such as alarms, cameras, and signs, are less likely to be targeted by burglars The presence of these systems creates an impression of an increased risk for potential intruders, leading to the selection of weaker, less secure targets, and contributing to a safer home environment. Does Leaving a Light on at Night Deter Burglars? Yes, leaving lights on at night can be a deterrent to thieves. The presence of light indicates presence, creating a sense of occupancy and reducing the likelihood of break-ins. This simple but effective measure can help increase the security of your home, making it less attractive to potential intruders who want to target a place where they can operate in the dark without being seen. Do Home Door Security Bars Actually Work? Yes, home door security panels can be effective in increasing security. When properly placed, these frames provide an additional physical barrier, making it more difficult for intruders to force their way through the door. They work by reinforcing the door and making it less susceptible to bumping or pushing. However, its effectiveness depends on the quality of the safety lines and their proper installation. Installing higher, stronger safety bars according to the manufacturer’s instructions can greatly improve the door’s resistance to forced entry.
Vacuum · 29/01/2024
Comprehensive Guide to the Most Powerful Vacuum Cleaners in 2024
Nowadays, the quest for the most powerful vacuum cleaners has become more relevant than ever, especially when it comes to maintaining the pristine condition of our cars. If you are looking for the most powerful auto vacuum, you come to the right place. In this article, we delve into why a high-suction auto vacuum is essential for thorough car cleaning and how it can transform this routine task into a quick and satisfying experience. We simplify the shopping process by highlighting key features to consider, and provide a curated list of the best car vacuum cleaners. Additionally, we offer a concise, step-by-step guide on efficient car vacuuming techniques. Get ready to elevate your car cleaning game! Why Should You Get a Powerful Auto Vacuum for Cleaning Your Car? A powerful auto vacuum is essential for achieving unparalleled cleaning precision in your car. Its robust suction capability ensures the removal of stubborn dirt, dust, and debris from every nook and cranny. The confined spaces and diverse surfaces within a car demand a high-performance vacuum to reach and extract particles effectively. For pet owners or those with allergies, a powerful auto vacuum is necessary. It effortlessly tackles pet hair and dander, promoting a cleaner and healthier interior. The strength of suction is particularly valuable for lifting and eliminating allergens, contributing to a more comfortable and hygienic driving environment. Investing in a potent auto vacuum not only ensures a thorough clean but also saves you time and effort. Its effectiveness means quicker removal of dirt and spills, allowing you to maintain a pristine car interior with minimal hassle. The convenience of a powerful auto vacuum enhances the overall cleanliness, aesthetics, and enjoyment of your driving experience. What to Look for When Shopping for an Auto Vacuum? If you need to choose the most powerful auto vacuum or shop for the most powerful robot vacuum, consider these key features to ensure you make an informed decision: Suction Power: Opt for a vacuum with strong suction to effectively remove dirt, debris, and pet hair from your car's interior. Cleaning Performance: Evaluate the vacuum's ability to clean various surfaces, including carpets, upholstery, and hard-to-reach corners. Weight: Choose a lightweight model for easy maneuverability and reduced fatigue during extended cleaning sessions. Power Source: Decide between corded and cordless options based on your preference for flexibility or continuous power. Accessories: Look for a vacuum with attachments like crevice tools and brushes to address specific cleaning needs in your car. Battery Life: For cordless vacuums, consider battery life to ensure sufficient runtime for thorough cleaning without frequent recharging. Filter System: Opt for a vacuum with a quality filtration system, such as HEPA filters, to trap allergens and maintain air quality in your car. Dust Storage: Check the dust storage capacity to minimize the frequency of emptying the bin during cleaning sessions. Cordless or Cord Length: Decide on the cord length or go cordless for enhanced portability, considering the size of your car and available power sources. 6 Best Car Vacuum Cleaners with High Suction Power To experience unmatched cleaning, and effortlessly tackle dirt, debris, and pet hair, ensuring a spotless and pristine car interior every time, we recommend 6 powerful vacuum cleaner models for your reference. eufy HomeVac H30 Mate eufy HomeVac H30 Mate stands out due to its auto vacuum technology, combining robust performance with intelligent features. With a potent 2000Pa suction power, it effortlessly lifts and removes dirt, ensuring a thorough cleaning experience. Compact yet powerful, it is one of the most powerful robot vacuums that boasts a 600ml dustbin capacity, reducing the frequency of emptying. Equipped with a long-lasting 2600mAh battery, it provides extended cleaning sessions. Better still, the intelligent dust detection system of this handheld vacuum optimizes cleaning modes, addressing specific areas with higher concentrations of debris. DeWalt DXV10S Featuring a robust 5.5-peak horsepower motor, it should be one of the most powerful auto vacuums that effortlessly tackle the most stubborn debris in your vehicle. With an impressive 10-gallon capacity, it ensures extended operation before requiring emptying, making it ideal for demanding cleaning tasks. The built-in blower function adds versatility, while the 20-foot power cord and 7-foot hose provide extensive reach. Equipped with heavy-duty wheels for portability and durable tank construction, the DeWalt DXV10S is built to withstand rigorous use. Vacmaster Beast The Vacmaster Beast Series 9 stands as the epitome of power and efficiency in the realm of auto vacuums. This powerful vacuum cleaner boasts a 9-gallon capacity, ensuring ample space for debris collection without frequent interruptions. Equipped with a 20-foot power cord and a 7-foot hose, it provides extended reach and accessibility. The integrated dust-sealed switch enhances durability, while the extra-large drain port simplifies the disposal process. With an impressive 5.5-peak horsepower motor, it effortlessly tackles the toughest cleaning tasks, making it the go-to choice for demanding automotive environments. Fanttik V9 Mate Fanttik V9 Mate redefines cleaning standards with unparalleled performance. Featuring a robust 150W motor, it effortlessly tackles automotive messes with unmatched suction strength. With a sleek and portable design, this powerful auto vacuum ensures versatility in tackling dirt and debris in every corner of your vehicle. The lithium-ion battery provides extended runtime, while the multiple attachments cater to various cleaning needs. Boasting a large dustbin capacity of 600ml, it minimizes interruptions during cleaning sessions. The handheld vacuum combines power, efficiency, and convenience, making it the ultimate choice for those seeking top-tier performance in an auto vacuum. eufy Clean H20 When searching for a vacuum cleaner with powerful suction, consider the eufy Clean H20. It features a strong 40AW suction and a convenient 1-hour in-car recharge offering a 30-minute cleaning session. Lightweight at just 1.44 pounds, it comes with car-specific attachments like a retractable tool, extension hose, and brush head. The built-in LED light aids in dust detection, and it supports fast USB-C and USB-A charging. Included is a storage bag for accessories, ensuring a convenient, powerful, and tangle-free cleaning experience in every corner of your car. eufy HomeVac H11 eufy HomeVac H11 is a cutting-edge auto vacuum cleaner that combines powerful performance with convenient portability. With a compact design and a robust 5500Pa suction, it effortlessly tackles dirt, debris, and crumbs in your car or home. The H11 boasts a high-efficiency filter, ensuring a thorough cleaning experience while maintaining optimal air quality. Its lithium-ion battery provides up to 13 minutes of continuous use, making it perfect for quick clean-ups. The vacuum features a one-step emptying system for hassle-free maintenance. Whether you're on the go or at home, the device delivers superior cleaning with efficiency and style. Besides, you can simply use a USB charger anywhere in your car and charge with ease. How to Vacuum Car Like a Pro? After selecting your ideal vacuum cleaner, you also need to employ essential tips and techniques to achieve a professionally clean interior, enhancing your vehicle's appearance and hygiene. Dive into these easy-to-follow steps: Step 1: Clear out large items and trash from the car interior. Take out floor mats and shake off loose dirt and debris. Step 2: Start with crevice tools to reach tight spots and corners. Vacuum around and under seats. Attach a fabric brush attachment and vacuum seats, paying attention to seams and crevices. For leather, use a soft brush. Step 3: Vacuum the floor mats thoroughly on both sides with a carpet brush attachment. Move the seats forward/backward to access hidden areas. Employ a soft brush attachment to gently vacuum the dashboard, console, and vents. Be cautious around sensitive electronic components. Step 4: Vacuum door panels, especially pockets and crevices where dirt accumulates. Don't forget to vacuum the trunk and cargo area, removing any items that might obstruct cleaning. Note: For pet owners, use a pet hair attachment or rubber gloves to lift pet hair from upholstery. Step 5: Give the car a final vacuum pass to ensure all loose dirt and debris are removed. After that, you can use a detailing brush or compressed air to clean hard-to-reach crevices. Conclusion In conclusion, a powerful auto vacuum is indispensable for a meticulously clean car interior, ensuring a spotless and comfortable driving environment. When shopping, prioritize features like suction power, accessories, and versatility. The curated list of the 6 best auto vacuum cleaners with high suction power offers excellent choices for discerning car owners. Elevate your car care routine with these insights and the right tools. Take the first step towards a cleaner, more enjoyable driving experience, invest in a powerful auto vacuum today for a car that reflects your commitment to excellence in maintenance. FAQs How Long Should I Pull a Vacuum on a Car? The duration to vacuum a car depends on its size and cleanliness. On average, a thorough vacuuming session may take 15 to 30 minutes. Pay attention to detail, especially in crevices and corners, to ensure a comprehensive cleaning. What Happens If I Don’t Vacuum the Car? If you don't vacuum your car regularly, dirt, debris, and allergens accumulate. It can lead to unpleasant odors, deterioration of upholstery, and potential health hazards. Neglecting vacuuming may also impact the overall aesthetics and resale value of the vehicle. How Much Suction Power Is Required for a Car Vacuum Cleaner? A car vacuum cleaner with at least 100 watts or 12 volts is suitable for effective cleaning. However, a higher wattage or voltage, indicating stronger suction power, is preferable for thorough removal of dirt, pet hair, and debris from various surfaces within the car.
Robovac · 29/01/2024
Complete Guide to Cordless Home Vacuum Cleaner 2024
Cordless vacuum cleaners have witnessed a surge in popularity, revolutionizing home cleaning routines. The freedom from cords allows users to navigate effortlessly, reaching every nook and cranny. Their lightweight design and versatility make quick cleanups a breeze. In this article, we'll delve into the numerous benefits of cordless vacuum cleaners, highlighting how their cord-free design enhances mobility and safety in your home. We'll also guide you through the various types available, each tailored to suit different cleaning needs. Selecting the perfect vacuum can be overwhelming, so we'll equip you with essential considerations. Finally, don't miss our top recommendation for the best cordless vacuum cleaner on the market – a choice that promises to transform your cleaning experience! Benefits of Cordless Vacuum Cleaners Cordless home vacuum cleaners have become increasingly popular due to their notable benefits, particularly in terms of portability and ease of use. The absence of cords offers unparalleled mobility, allowing users to effortlessly move from room to room without being tethered to a power source. This enhanced maneuverability makes cordless vacuums an ideal choice for quick and efficient cleaning, especially in larger spaces. The freedom from cords not only improves mobility but also contributes to safety. Without the risk of tripping over cords or getting entangled during cleaning sessions, users can navigate through their living spaces with ease and focus on the task at hand. This safety aspect is particularly crucial in busy households or areas with high foot traffic. Moreover, cordless vacuum cleaners are often designed with lightweight and ergonomic features, making them user-friendly and reducing fatigue during extended cleaning sessions. The convenience of cordless technology makes these vacuum cleaners a valuable asset for modern households, providing efficient cleaning solutions while prioritizing user comfort and safety. Types of Cordless Vacuum Cleaners There are several kinds of cordless vacuum cleaners on the market. Each type has its unique advantages and is suited for different cleaning situations and preferences. Here are some common types: Stick Vacuums: These are lightweight and often designed for quick, everyday cleaning. They are easy to maneuver and can reach under furniture and tight spaces. Many stick vacuums also have a detachable handheld unit for more versatility. Handheld Vacuums: Compact and designed for small jobs, handheld vacuums are great for cleaning car interiors, furniture, or small spills. They're very portable but generally have less power and smaller dustbin capacity compared to larger models. Upright Vacuums: While traditionally corded, there are now cordless versions of upright vacuums. They usually have a larger dustbin and more powerful suction, making them suitable for larger homes and more thorough cleaning tasks. Robot Vacuums: These are autonomous, cordless vacuums that clean floors on their own. They're equipped with sensors to navigate around furniture and avoid stairs. Many can be controlled via a smartphone app. Wet/Dry Vacuums: Designed to handle both dry dirt and liquid spills, these are versatile cleaners, though more commonly found in a corded design. Cordless models tend to be smaller and more portable. What to Consider When Choosing a Cordless Vacuum? When choosing best cordless vacuum cleaners, you need to consider factors like the size of your home, the types of surfaces you need to clean, battery life, suction power, and any additional features that might be beneficial for your specific needs. Check out the details below. Surface Type: Check if the vacuum is suitable for the flooring in your home, whether it's carpet, hardwood, tile, or a combination. Suction Power: Higher suction power is crucial for effective cleaning. Look for a vacuum that provides strong suction across different surfaces. Cleaning Performance: Assess the cordless vacuum's ability to pick up dirt, debris, and pet hair. Customer reviews and expert opinions can offer insights into performance. Battery Life: Longer battery life allows for extended cleaning sessions. Consider the runtime and charging time to ensure it meets your cleaning demands. Weight: A lightweight design is essential for easy maneuverability, especially if you have multiple levels in your home. Dust Capacity: Larger dustbins reduce the frequency of emptying. Evaluate the capacity based on your cleaning requirements. Ease of Use: Look for user-friendly features like swivel heads, adjustable settings, and easy-to-empty dustbins for a hassle-free experience. Noise Level: Consider the noise output, especially if you have noise-sensitive environments or want a quieter cleaning experience. Warranty: A longer warranty provides assurance of the product's durability. Check the warranty terms and conditions before purchasing. HEPA Filter: If allergies are a concern, choose a vacuum with a HEPA filter to capture fine particles and allergens effectively. Best Cordless Vacuum Cleaner Recommendation The best cordless vacuum cleaner recommendation is a powerful and versatile model with strong suction, long battery life, and user-friendly features for efficient and convenient cleaning. Here are 4 recommended ones you should know. 1. eufy HomeVac H30 Mate eufy HomeVac H30 Mate is a game-changer in handheld vacuum, providing powerful suction and a lightweight design for effortless pet hair cleanup. With 80 AW / 16kPa Suction Power in Eco and Max Modes, it efficiently tackles dirt and hair. Weighing just 1.78 LB (808 g), it offers easy maneuverability for quick and effective cleaning. Specifically designed for pet owners, it includes a Mini-Motorized Pet Brush and a 2-in-1 Crevice Tool. The vacuum boasts a 20-minute runtime, powered by a 2500mAh, 33.84Wh battery, and comes with a Charging Base for convenient storage. 2. Tineco Pure One S11 Tineco Pure One S11 is one of the best high-performance cordless vacuum cleaners designed to simplify your cleaning routine. With powerful suction capabilities and a versatile design, this vacuum effortlessly tackles dirt, dust, and debris on various surfaces. Equipped with smart sensor technology, it automatically adjusts its suction power based on the cleaning task, optimizing efficiency. The detachable battery ensures extended cleaning sessions, while the ergonomic handle and lightweight construction make maneuvering around your home a breeze. It is not just a vacuum, but also a convenient cleaning solution that brings ease and effectiveness to your household chores. 3. eufy HomeVac H11 With its lightweight design and cordless operation, the eufy HomeVac H11 is one of the best cordless stick vacuums that offer portability and flexibility to tackle various cleaning tasks. It features a high-performance motor that delivers strong suction, ensuring the effective removal of dust, debris, and pet hair. Its advanced filtration system captures allergens and provides a clean living environment. The vacuum includes multiple attachments for versatile cleaning options, and its user-friendly design makes it easy to use and maintain. Perfect for quick cleanups and reaching tight spaces, the device also combines performance and convenience in a sleek and compact package. 4. Dyson V12 Detect Slim As the cutting-edge cordless vacuum cleaner designed for a powerful and intelligent cleaning experience, the Dyson V12 Detect Slim ensures a thorough and efficient cleaning process with its innovative laser illumination technology. Powered by the Dyson Hyperdymium motor and Root Cyclone technology, it delivers robust suction capabilities. This lightweight and compact handheld vacuum offers up to 60 minutes of run time, advanced whole-machine filtration, and various attachments for versatile cleaning. Conclusion In conclusion, cordless vacuum cleaners offer unparalleled benefits, combining portability and versatility for efficient cleaning. With various types available, from the best cordless stick vacuum to robotic vacuums, there's a suitable option for every need. When choosing, consider factors like suction power, battery life, and surface compatibility. Embrace the cordless revolution to enjoy hassle-free, effective cleaning that adapts to your lifestyle and living space. Elevate your home maintenance routine with the convenience and performance of the best cordless vacuum cleaner on the market. FAQs Are Stick Vacuums Worth It? Yes. Stick vacuums are worth it for quick cleanups and small spaces. They're lightweight, easy to maneuver, and convenient for daily use. However, for deep cleaning larger areas, a traditional vacuum might be more powerful. Consider your cleaning needs and space before deciding. How Many Years Should a Cordless Vacuum Last? The lifespan of a cordless vacuum cleaner varies but is generally around 3 to 5 years. Factors like usage frequency, battery quality, and maintenance influence durability. Regular cleaning and proper battery care can extend the lifespan. Why Do Cordless Vacuums Stop Working? Cordless vacuums can stop working due to battery degradation, overuse, or charging issues. Rechargeable batteries have a limited lifespan, and constant charging can lead to deterioration. Additionally, motor malfunctions, clogs, or general wear and tear may contribute to their decline in performance. Regular maintenance can help prevent issues.
Robovac · 23/01/2024
The Ultimate Hybrid Solution - Mop & Vacuum All in One
Keeping our homes clean and tidy is a never-ending task. However, advancements in technology have introduced a game-changing solution - the mop & vacuum in one machine. This innovative and ultimate hybrid solution combines the power and effectiveness of a vacuum cleaner with the traditional cleaning method of a mop. This not only saves time and energy but also provides a more thorough and convenient cleaning experience. In this blog post, we will explore the numerous advantages of using a multi-functional mop and vacuum cleaner, how the technology works its magic, tips for selecting the right appliance for your needs, and recommend some of the top-rated all-in-one mopping and vacuuming solutions currently on the market. Advantages of Using an All in One Mop & Vacuum Combo The integration of mop and vacuum functionalities into a single device comes with several benefits. Firstly, it saves time by eliminating the need for separate cleaning sessions. Secondly, it streamlines the cleaning process, making it more convenient for users to maintain a consistently clean home. Additionally, these hybrids are often designed with advanced features that enhance their overall performance, providing an efficient and thorough cleaning experience. How Does a Vacuum Mop Work? Understanding the mechanics behind a vacuum mop is crucial for maximizing its effectiveness. These devices typically combine vacuum suction with mop functions to remove dirt, debris, and stains from various surfaces. The vacuum component captures dry particles, while the mop takes care of wet messes, ensuring a comprehensive cleaning process. This dual-action approach makes these hybrids versatile and suitable for a wide range of floor types. New Release: eufy X10 Pro Omni - Power and Convenience in One Introducing the latest innovation in cleaning technology - eufy X10 Pro Omni. This product combines a powerful 8,000 Pa vacuum with an efficient mop, revolutionizing the way you clean your home. Perfect for pet owners, it offers a healthier living environment with its high-efficiency filter. eufy x10 omni has now been released and has received positive reviews from both the media and users. Come and get yours today! Learn More Buy Now How to Choose the Right Mop & Vacuum Combo? Selecting the perfect all in one robot vacuum is a decision that requires thoughtful consideration of various factors. To ensure you make an informed choice tailored to your specific needs, here's a list outlining the key considerations: 1. Floor Type Compatibility Begin by assessing the compatibility of the device with your flooring. Different mop and vacuum combos are suitable for various surfaces, including hardwood, tile, laminate, and carpet. Choose a model that suits your home's flooring to maximize cleaning efficiency. 2. Tank Capacity The tank capacity plays a crucial role in determining the cleaning session's duration. Opt for a mop and vacuum combo with a sufficient tank capacity to avoid frequent interruptions for refills, especially in larger living spaces. 3. Self-Cleaning and Self-Drying For added convenience, consider models equipped with self-cleaning and self-drying features. These functionalities ensure that the device remains hygienic between uses and minimizes maintenance efforts on your part. 4. Filter The quality of the filter significantly impacts air quality. Look for models with high-quality filters that effectively trap fine particles, allergens, and dust, contributing to a healthier living environment. 5. Suction Power Assess the suction power of the device to gauge its efficiency in removing dirt and debris. Higher suction power is particularly beneficial for thorough cleaning, especially in high-traffic areas. 6. Cordless or Corded Choose between cordless and corded models based on your preferences. Cordless options offer greater maneuverability and flexibility, while corded models ensure uninterrupted cleaning without concerns about battery life. 7. Battery If opting for a cordless model, consider the battery life. Longer battery life is advantageous for covering more extensive areas without the need for frequent recharging. Check for quick-charging features for added convenience. 8. Storage Compact designs and easy storage solutions are essential, especially for those with limited space. Look for models that offer hassle-free storage options to maintain a clutter-free home environment. 9. Ease of Use User-friendly controls and ergonomic design contribute to a positive cleaning experience. Choose a mop and vacuum combo that is easy to operate, with intuitive controls that enhance overall usability. By taking these factors into account, you can ensure that your selection of a mop and vacuum combo aligns seamlessly with your cleaning needs and lifestyle. Best All-in-One Mop and Vacuum Cleaner Let's explore three top robot vacuum and mop cleaners, each boasting unique features that redefine the cleaning experience. eufy X10 Pro Omni The eufy X10 Pro Omni is an innovative MopMaster™ robotic vacuum cleaner with a powerful 8000 pa suction power. Designed for families with pets, it has strong suction and can effectively remove pet hair from carpets and hard floors. In addition, it is equipped with high efficiency filters that can capture tiny particles and improve air quality. Dual mops are equipped with downward pressure and high-speed rotating mops for easy removal of stubborn stains. Its AI.See™ technology enables it to identify and avoid obstacles, making it more efficient when cleaning messy rooms. eufy Clean X9 Pro The eufy Clean X9 Pro with Auto-Clean Station is a reliable cleaning companion for households. The 5500Pa suction power ensures effective dirt and debris removal, while the multi-directional brush and adaptive pressure mopping with dual rotating mops offer versatility in cleaning different surfaces. The Auto-Clean Station, featuring heated drying, adds convenience to the maintenance process. Notable features like the 12 mm Auto-Lift Mop and the incorporation of 3D ToF sensors and an AI camera for detection contribute to its overall efficiency. Its place is a solid choice for those seeking a sensible and effective all-in-one mop and vacuum cleaner. eufy Clean L35 Hybrid Navigating the world of cleaning simplicity, the eufy Clean L35 Hybrid stands out with iPath™️ Laser Navigation for precise cleaning. The 3,200 Pa Ultra-Strong Suction ensures a powerful performance, addressing dirt on various surfaces. Practical features like the controllable water tank and multi-floor mapping provide users with a customizable and efficient cleaning experience. The added convenience of App Control and compatibility with Amazon Alexa makes it user-friendly. With the inclusion of a Child Safety Lock, the eufy Clean L35 Hybrid prioritizes safety without compromising on its cleaning capabilities. In essence, it offers a straightforward and efficient solution for everyday cleaning needs. eufy Clean X8 Pro The eufy Clean X8 Pro with Self-Empty Station introduces robust cleaning innovation with its 2× 4,000 Pa suction power. It seamlessly combines the strong downward pressure of mopping with Tangle-Free roller brushes for a thorough cleaning performance. The iPath™ laser navigation and AI map enhance precision, adapting to the layout of your home effortlessly. The dual suction power ensures efficient removal of dirt and debris, making it a practical choice for those who prioritize cleaning efficiency. While not flashy, the eufy Clean X8 Pro stands out for its innovative features and powerful suction capabilities. Related Products Check out these collection pages for more products: eufy Self-emptying Robot Vacuum for Hands-free Cleaning Robot Vacuum for Pet Hair, Effortless for Pet Owner eufy Robot Vacuum and Mop Combos for Effortless Cleaning Top Robot Vacuums with Mapping that Map Fast and Accurate Conclusion In conclusion, incorporating a mop & vacuum in one into your cleaning routine offers numerous benefits that can ultimately save you time, effort, and money. Not only does it eliminate the need for separate cleaning tools, but it also ensures a more thorough and efficient cleaning experience. If you're still unsure about which product to go for, check out our list of the best all-in-one mop and vacuum cleaners available today. Don't miss out on this opportunity to streamline your cleaning routine and make your life easier. FAQ Are All in One Vacuum Mops Worth It? Yes, the time-saving convenience and advanced features make all-in-one vacuum mops a worthwhile investment for those looking to streamline their cleaning routine. How Often Should You Vacuum and Mop Floors? The frequency of vacuuming and mopping floors depends on foot traffic and use; generally, vacuum at least once a week and mop hard floors every two weeks, or more often in high-traffic areas or if you have pets and children. Are Vacuum Mop Combos Safe for Laminate Floors? Yes, many vacuum mop combos are designed to be safe for laminate floors. However, it's essential to check the manufacturer's guidelines and choose a model with settings suitable for laminate surfaces to prevent any damage.
Robovac · 23/01/2024
Comprehensive Guide to Window Robot Cleaner 2024
Window cleaning has been a tedious and time-consuming task for centuries. However, the evolution of technology has brought forth a revolutionary solution that takes the hassle out of this mundane chore - window robot cleaners. These intelligent machines are designed to effortlessly glide across windows, using advanced sensors and algorithms to navigate and clean with efficiency and precision. In this comprehensive guide, we will delve into the world of window-cleaning robots, exploring how they work, how to choose the right window robot cleaner, and providing tips for maintaining your windows clean, to provide you with all the essential information. How Does a Window Robot Cleaner Work? A robot window cleaner operates through a sophisticated combination of technology, sensors, and mechanical components. Despite its resemblance to traditional robot vacuums, its distinct functionality sets it apart. Instead of relying on vacuuming mechanisms, this robot employs powerful motors to generate suction, allowing it to securely adhere to window surfaces. This suction capability is crucial for ensuring the robot's stability during the cleaning process. The cleaning mechanism involves the use of a mopping pad and water jets, enabling the robot to effectively remove dirt, grime, and water stains from the window. The movement of the robot is facilitated by either rubber track pads or by rotating the cleaning pad, ensuring thorough coverage of the entire window surface. Equipped with a variety of sensors, including infrared and ultrasonic sensors, the window cleaner robot navigates the window space intelligently. These sensors detect obstacles and edges, allowing the robot to create a precise map of the cleaning area. The robot's movement is then controlled through a combination of motors and gears, following a predetermined path to achieve optimal cleaning efficiency. What to Consider When Choosing a Robot Window Cleaner? Choosing the right robot window cleaner involves considering several key factors to ensure it meets your specific needs and preferences: 1. Deep Cleaning Capabilities: Assess the robot's ability to handle deep cleaning tasks effectively. Look for features such as robust scrubbing mechanisms or advanced cleaning technologies that target and eliminate stubborn dirt and stains. 2. Suction Power: Prioritize suction power as it directly influences how securely the robot adheres to the window. Opt for a model with strong suction (2,000 to 3,000 Pascals is generally sufficient) to ensure stability and effective cleaning even on vertical surfaces. 3. Autonomy: Choose models with advanced features like automatic cleaning programs, enabling them to navigate and clean windows without constant manual interference. Additionally, consider features such as edge detection and smart navigation to enhance the robot's autonomy, ensuring it covers the entire window surface effectively. 4. Battery Life: Check the battery life to determine how long the robot can operate on a single charge. A longer battery life is advantageous for uninterrupted cleaning sessions and completing tasks efficiently. 5. Motor Quality: Emphasize the quality of the motor, as it directly impacts the robot's overall performance. Choose a model with a durable and reliable motor to ensure consistent and effective cleaning over time. 6. Ease of Use: Look for user-friendly designs with intuitive controls. Features such as easy setup, straightforward interfaces, and clear instructions contribute to a hassle-free and enjoyable cleaning experience. 7. Weight and Size: Consider the weight and size of the robot, especially if you plan to use it on various windows or store it in limited space. Opt for compact and lightweight models for enhanced portability and versatility. 8. Cost: Compare the cost of different robot window cleaners in relation to their features. Find a model that offers the functionalities you need at a reasonable price point, striking a balance between affordability and performance. 9. Safety Features: Prioritize safety features such as edge detection mechanisms to prevent the robot from falling off windows. Verify the presence of safety measures that protect both the robot and your windows during operation. 10. Additional Features: Explore extra features that enhance convenience, such as remote control options, smartphone app integration, or compatibility with smart home systems. These features can streamline the cleaning process and offer added functionality. 11. Reviews and Ratings: Read customer reviews and ratings to gain insights into real-world performance. Feedback from users can provide valuable information about the robot's reliability, durability, and overall satisfaction. By considering these factors with a clear understanding of the specific functions you desire, you can confidently choose a robot window cleaner that aligns with your cleaning needs and preferences. How to Clean Windows with a Robot Window Cleaner? Cleaning windows with a robot window cleaner is a straightforward process that can be achieved with the following step-by-step guide: 1. Preparation: Make sure the robot window cleaner is fully charged and its cleaning pads are clean. 2. Setup: Attach the clean, dampened cleaning pads to the robot as per the manufacturer's instructions. Place the robot at the top corner of the window, ensuring it is securely attached. 3. Power On and Program: Power on the robot window cleaner using the designated control method (remote control or smartphone app). Program the cleaning settings, including desired cleaning mode and any specific areas that require attention. 4. Initiate Cleaning: Press the start button or initiate the cleaning process through the app. Observe the robot's movements to ensure it follows the predetermined cleaning path. 5. Monitor Progress: Keep an eye on the robot's progress during the cleaning process. Ensure it effectively covers the entire window surface, paying attention to corners and edges. 6. Address Obstacles: If the robot encounters obstacles or particularly dirty areas, consider adjusting its position or using manual controls to ensure thorough cleaning. 7. Completion and Return: Once the cleaning cycle is complete, the robot may automatically return to its starting point. If not, use the controls to bring the robot back to the starting position. 8. Clean Pads and Maintenance: Remove and clean the used cleaning pads. Inspect the robot window cleaner for any dirt or residue and clean as needed. 9. Storage: Store the robot in a safe and dry place, ready for future use. By following these steps, you can effectively use a robot window cleaner to maintain clean and spotless windows with minimal manual effort. Always refer to the specific instructions provided by the manufacturer for your particular model for the best results. Top Window Cleaning Robots Here are three best robot window cleaner recommendations for window cleaning robots, each with advanced features and reliability: Sophinique Window Cleaning Robot X5 The Sophinique Window Cleaning Robot X5 is a smart and efficient solution for pristine windows. Controlled via an intuitive app for iOS and Android or remote control, it offers a cleaning speed of 4 minutes per square meter. Equipped with four automatic operation modes, an anti-fall control algorithm, and the ability to automatically detect window edges, it ensures comprehensive and safe cleaning. The inclusion of a microfiber cloth and a high-strength safety rope enhances its performance, providing a reliable and convenient window cleaning experience. AlfaBot Window Cleaning Robot X7 The AlfaBot Window Cleaning Robot X7 boasts ultrasonic automatic water spray, edge detection, and a safety rope for secure operation. Its versatility extends beyond windows, suitable for cleaning floors and tiles. With a robust 2500pa suction power and three cleaning modes that can be seamlessly utilized through remote control, it offers customizable and effective cleaning. Additionally, a 30-minute backup battery ensures uninterrupted performance, making it a versatile and reliable choice for various surfaces. HOBOT-388 Window Cleaning Robot The HOBOT-388 Window Cleaning Robot stands out with features such as ultrasonic water spray, a replaceable water tank, and a 5-meter long power cord. Its secure DC power connector ensures a stable power supply, while the high-volume centrifugal pump enables multi-surface cleaning. With remote control functionality, this robot provides convenience and efficiency in maintaining spotless windows. The replaceable water tank adds to its practicality, making it a valuable addition to your cleaning arsenal. Whichever model you choose, the convenience and effectiveness of these top window cleaning robots are sure to elevate your cleaning routine to new heights. Bonus Tips: Window Cleaning and Maintenance Enhance the longevity and sparkle of your windows with these bonus tips on cleaning and maintenance: 1. Regular Cleaning Routine: Establish a regular cleaning schedule to prevent the buildup of dirt and grime on your windows. This not only maintains their appearance but also makes the task more manageable. 2. Use Microfiber Cloths: Opt for microfiber cloths when cleaning windows, as they effectively capture and lift dirt without leaving streaks behind. This ensures a crystal-clear finish. 3. DIY Cleaning Solution: Create a DIY cleaning solution by mixing equal parts water and vinegar. This natural solution is eco-friendly and leaves your windows gleaming. 4. Focus on Window Tracks: Don't overlook the window tracks, where dust and debris can accumulate. Use a handheld vacuum, such as the eufy HomeVac H30 Mate, to easily clean these hard-to-reach areas. Its compact design and powerful suction make it perfect for tackling window tracks. 5. Avoid Direct Sunlight: Choose a time for cleaning when the sun isn't directly shining on the windows. Direct sunlight can cause cleaning solutions to dry quickly, leaving streaks on the glass. 6. Clean Window Screens: Remove and clean window screens separately. Use a soft brush or handheld vacuum to remove dust and cobwebs. This improves airflow and keeps your windows looking pristine. 7. Inspect for Damage: Periodically inspect your windows for any signs of damage, such as cracks or gaps. Promptly address any issues to prevent further damage and maintain energy efficiency. By incorporating these tips into your window maintenance routine, you'll not only keep your windows spotless but also contribute to their long-term durability and functionality. Conclusion Investing in a window robot cleaner is a wise decision for anyone looking to achieve spotless views effortlessly and efficiently. Not only do these robots provide convenience, but they also ensure an effective and streak-free clean every time. They eliminate the need for ladders, scaffolding, or other risky equipment, making them the perfect solution for any hard-to-reach windows. So why wait? Start reaping the benefits of a pristine view today by considering investing in a window-cleaning robot for your home or business. FAQ Are Window Robots Worth It? Yes, window robots are worth it for their ability to autonomously clean windows, providing convenience and efficiency. Is Cleaning Skyscraper Windows Safe? Cleaning skyscraper windows is inherently risky due to the heights involved, but it generally remains safe when conducted with strict adherence to safety protocols and the use of advanced equipment. The employment of technology, such as window cleaning robots, further enhances safety by minimizing the need for human exposure to high-altitude risks. How Often Should You Clean Windows at Home? The frequency of home window cleaning depends on various factors, including your local climate, the level of exposure to elements, and personal preferences. As a general guideline, consider a thorough window cleaning at least twice a year to maintain clarity and aesthetics. However, homes in areas with high pollution, pollen, or near the coast may require more frequent cleaning.
Robovac · 23/01/2024
Comprehensive Guide to 2-in-1 Vacuum and Mop Combo 2024
Cleaning your home from top to bottom used to involve dragging out multiple machines - your vacuum for carpets, swiffer for hard floors, mop and bucket for deeper cleaning of the tile. It was a lengthy, two-step process that was a real chore. Thankfully, new innovative technologies have emerged that simplify it all into one easy step. 2 in 1 vacuum and mop combos have become extremely popular for their convenience and effectiveness. In this post, we'll explore the benefits these multi-tasking machines provide, factors to consider when shopping and recommend some of the top-rated options currently available. By learning more about these game-changing cleaners, you can say goodbye to tedious cleaning routines and hello to sparkling, dirt-free floors with minimum effort. Advantages of 2-in-1 Vacuum and Mop Cleaner The advantages of 2-in-1 vacuum and mop cleaners make them a popular choice for households looking to streamline their cleaning routine. Here are some key benefits: 1. Time Efficiency One of the primary benefits is the time-saving aspect. With a 2-in-1 vacuum and mop cleaner, you can vacuum and mop your floors simultaneously, cutting down on the overall cleaning time. 2. Space-Saving Design Owning a single device that combines both vacuuming and mopping functions eliminates the need for separate storage of a vacuum cleaner and a mop, saving valuable space in your cleaning closet. 3. Versatility These devices are designed to work on various floor types, from hardwood to tiles and carpets. This versatility ensures that one tool can handle different surfaces in your home. 4. Advanced Cleaning Technologies Many 2-in-1 models come equipped with advanced technologies such as obstacle detection, self-cleaning mechanisms, and intelligent navigation systems. These features enhance the overall cleaning performance and convenience. 5. Reduced Physical Strain With the combined functionality, users don't have to exert physical effort in multiple cleaning tasks. This is particularly beneficial for those with mobility issues or individuals looking to simplify their cleaning routine. 6. Customizable Cleaning Modes Many 2-in-1 cleaners come with various cleaning modes, allowing users to choose between vacuum-only, mop-only, or a combination of both. This customization caters to specific cleaning needs and preferences. H3- 7. Enhanced Cleaning Performance Combining vacuuming and mopping functions in one device results in a more thorough cleaning process. The dual-action approach ensures that both dry and wet debris are effectively removed, leaving floors spotless. What to Consider When Choosing a 2-in-1 Vacuum and Mop Cleaner? Choosing the right 2-in-1 vacuum and mop cleaner involves considering several important factors to ensure that the device meets your specific cleaning needs. 1. Cleaning Performance Evaluate the cleaning capabilities of the device, including suction power for vacuuming and the effectiveness of the mop. Look for models that excel in picking up dirt, debris, and pet hair while providing a thorough mopping action. 2. Price Set a budget for your purchase and look for models that offer a balance between features and cost. Keep in mind that a higher initial investment may be justified by advanced features and durability. 3. Floor Type Compatibility Ensure that the 2-in-1 cleaner is suitable for the types of flooring in your home. Different models may perform better on different surfaces. Choose a device that can adapt to your specific flooring needs. 4. Noise Level Consider the noise level produced by the cleaner, especially if you have family members, pets, or neighbors who may be sensitive to loud appliances. Look for models that operate quietly without compromising cleaning performance. 5. Self-Cleaning Features Some 2-in-1 cleaners come with self-cleaning mechanisms, which can be highly convenient. These features may include automatic brush cleaning, dirt disposal, or a system that flushes out debris, reducing the maintenance effort required on your part. 6. Brand Reputation Research the reputation of the brand producing the 2-in-1 cleaner. Established brands with positive customer reviews are more likely to provide reliable products and better customer support. Check for warranty information as well. 7. Battery Life and Charging Time For cordless models, consider the battery life and the time it takes for the device to recharge. A longer battery life is beneficial for larger cleaning tasks, while a shorter charging time ensures the device is ready for use when needed. 8. Navigational Technology Look for models with advanced navigational features such as sensors and mapping technology. These technologies enhance the cleaner's ability to navigate your home efficiently and avoid obstacles. 9. Size and Design Consider the size and design of the cleaner, especially if you have tight spaces or furniture that may affect its maneuverability. A compact design with a low profile can be advantageous for reaching under furniture. 10. Cleaning Modes Check for customizable cleaning modes that allow you to choose between vacuum-only, mop-only, or a combination of both. Having different modes provides flexibility in adapting to various cleaning scenarios. 11. Additional Features Explore additional features such as app connectivity, scheduling options, and smart home integration. These features can enhance the overall user experience and make the cleaning process more convenient. 12. Customer Reviews Read customer reviews to gain insights into real-world experiences with the product. Pay attention to both positive and negative feedback to make an informed decision. By considering these factors, you can narrow down your options and choose a 2-in-1 robot vacuum and mop cleaner that best suits your preferences and cleaning requirements. New Release: eufy X10 Pro Omni - Power and Convenience in One Introducing the latest innovation in cleaning technology - eufy X10 Pro Omni. This product combines a powerful 8,000 Pa vacuum with an efficient mop, revolutionizing the way you clean your home. Perfect for pet owners, it offers a healthier living environment with its high-efficiency filter. eufy x10 omni has now been released and has received positive reviews from both the media and users. Come and get yours today! Learn More Buy Now Best 2-in-1 Robot Mop and Vacuum Cleaner In the world of 2 in 1 robot mop and vacuum cleaner, several outstanding options cater to various needs. Let's delve into each one to help you make an informed choice. eufy X10 Pro Omni The eufy X10 Pro Omni, a game-changing MopMaster™ robovac that is poised to revolutionize the way we clean our homes. Boasting an impressive 8,000 Pa powerful vacuum, this innovative device is specifically crafted for households with pets, offering robust suction capabilities to effectively eliminate pet hair from both carpets and hard floors. The dual mop pads equipped with downward pressure and high-speed rotating mops effortlessly tackle stubborn stains, providing a comprehensive cleaning solution for all surfaces. With its impressive array of features and a compelling price point, the eufy X10 Pro Omni stands as an enticing investment for those seeking a 2-in-1 cleaning solution that delivers on both performance and convenience. eufy Clean X9 Pro with Auto-Clean Station The eufy Clean X9 Pro with Auto-Clean Station is a top-tier cleaning solution that redefines convenience and efficiency. With Dual Rotating Mops, it effortlessly tackles tough dirt and stains on hard floors. The Tangle-Free Rubber Brush ensures a hassle-free cleaning experience by preventing hair and debris from clogging the device. One standout feature is X9 Pro's AI.See™ Obstacle Detection, which allows it to gracefully navigate around wires and furniture. You can easily set cleaning schedules and choose from multiple modes, including mop only, vacuum only, or both, to suit your specific needs. Plus, the self-cleaning Auto-Clean Station washes and dries the mops, ensuring hygienic cleaning. Shark Matrix Plus 2-in-1 Robot Vacuum & Mop The Shark Matrix Plus is an advanced cleaning solution that offers a complete and effortless cleaning experience. The Matrix Clean and CleanEdge™ Detect technologies ensure thorough cleaning along edges and corners, leaving no dirt or dust behind. Not only does the Shark Matrix Plus excel in vacuuming, but it also excels in mopping. Thanks to Sonic Mopping™ and a Self-Cleaning Brushroll, it efficiently tackles any mess on your floors. To further enhance its capabilities, you can easily control and customize the cleaning process through the companion app. Spot cleaning and scheduling are just a few of the additional functions this app offers, providing you with ultimate convenience and control. BISSELL CrossWave HydroSteam Wet Dry Vac The BISSELL CrossWave HydroSteam Wet Dry Vac is a versatile cleaning device that combines vacuuming, washing, and steaming functions simultaneously. It features HydroSteam Technology for improved cleaning performance, especially on challenging and sticky messes, providing up to 20% better cleaning. Notably, it is designed to minimize hair wrap around the brush roll, preventing pet hair tangles. The included Hard Floor Sanitize Formula aims to eliminate 99.9% of bacteria, contributing to a thorough and hygienic cleaning process. Additionally, every purchase supports the BISSELL Pet Foundation, which works to save homeless pets. eufy Clean L35 Hybrid Robot Vacuum & Mop For a comprehensive, hassle-free cleaning experience, the eufy Clean L35 Hybrid stands out as a reliable and efficient hybrid robot vacuum and mop. With iPath™️ Laser Navigation, this smart device ensures precise and efficient cleaning, mapping out your space intelligently. The impressive 3,200 Pa Ultra-Strong Suction power tackles dirt and debris effortlessly, leaving your floors spotless. What sets it apart is the controllable water tank, allowing you to adjust the moisture levels according to your floor type. The Multi-Floor Mapping capability enables the robot to seamlessly navigate various surfaces for a thorough cleaning. Enjoy convenient control through the app or voice commands via Amazon Alexa, making it a user-friendly addition to your smart home ecosystem. Besides, the inclusion of a Child Safety Lock ensures a secure cleaning environment. Roomba Combo i5 Robot Vacuum & Mop The Roomba Combo i5 Robot Vacuum & Mop is a versatile cleaning powerhouse that seamlessly switches between vacuum and mop modes with a simple bin switch. Its 4-stage Cleaning System and Dual Multi-Surface Rubber Brushes deliver powerful performance while avoiding pet hair tangles. The Dirt Detect™ Technology ensures a thorough clean by targeting dirtier areas. What's more, the smart navigation, scheduling, and voice control integration with Alexa, Siri, or Google Assistant make cleaning a breeze. Control everything effortlessly through the user-friendly iRobot OS and iRobot Home app for a personalized and convenient cleaning experience. Conclusion The 2 in 1 vacuum and mop combo is a game-changer in the world of home cleaning, offering efficiency, versatility, and advanced cleaning technologies. When choosing the right device for your needs, consider factors such as cleaning performance, price, floor compatibility, and more. If you are wandering around among so many models in the market, the top-tier options recommended in this blog for 2024 each bring unique features to enhance your cleaning routine. FAQ Are Mopping Vacuums Worth It? Absolutely! Mopping vacuums streamline your cleaning routine, saving time and effort. With the ability to vacuum and mop simultaneously, they offer a comprehensive cleaning solution for various floor types. Can I Vacuum My Floor Instead of Sweeping? Yes, modern vacuum cleaners are designed to effectively pick up dust and debris from floors. In fact, vacuuming is often more efficient than sweeping, as it traps particles rather than redistributing them into the air. How Many Times a Week Should You Vacuum and Mop Floors? The frequency of vacuuming and mopping depends on factors such as household traffic, pet presence, and personal preferences. Generally, a weekly vacuuming and mopping routine is sufficient for maintaining a clean and healthy living environment. Adjust the frequency based on specific needs and lifestyle factors.
Robovac · 23/01/2024
Best Budget Robot Vacuum Cleaners for 2024
With advancements in technology, robot vacuums have become increasingly popular and affordable. But with so many options available in the market, how do you know which one is the right fit for your home? In this blog post, we will dive into the best time to purchase the best budget robot vacuum, the key considerations you should keep in mind while choosing one, and finally, our top picks for the year 2024. So, whether you're a tech enthusiast looking for the latest and greatest in cleaning technology or just someone who wants to make their life a little bit easier, sit back, relax, and let us guide you through the world of robot vacuums. Are budget Robot Vacuums Worth It? In the rapidly advancing world of robot vacuums, budget-friendly options now rival their high-end counterparts. Thanks to industry development, affordable models boast functionalities such as effective suction and basic navigation, making them a cost-effective solution for standard home cleaning needs. Gone are the days when quality came with a hefty price tag. Budget robot vacuums leverage technological advancements, providing powerful suction and intelligent navigation at a fraction of the cost. For those seeking efficiency without breaking the bank, these devices offer a practical and valuable solution. When Is the Best Time to Buy the Budget Robot Vacuum? Timing is crucial when it comes to purchasing the best cheap robot vacuum. Keeping an eye on sales events, such as Black Friday, Cyber Monday, Spring peak cleaning season can lead to significant savings. Additionally, new models are often released in the fall, making it an ideal time to find discounts on previous versions. New Release: eufy X10 Pro Omni - Power and Convenience in One Introducing the latest innovation in cleaning technology - eufy X10 Pro Omni. This product combines a powerful 8,000 Pa vacuum with an efficient mop, revolutionizing the way you clean your home. Perfect for pet owners, it offers a healthier living environment with its high-efficiency filter. eufy x10 omni has now been released and has received positive reviews from both the media and users. Come and get yours today! Learn More Buy Now Key Considerations When Choosing a Budget Robot Vacuum When selecting the best affordable robot vacuum, several crucial factors play a pivotal role in ensuring you make the right choice for your cleaning needs: Home Space Consider the size and layout of your living space. Some models are better suited for smaller areas, while others excel in handling larger homes efficiently. Vacuuming Features Evaluate the following features to meet your cleaning requirements: Suction Power: Ensure sufficient power for effective cleaning. Corner Cleaning: Check for capability in cleaning hard-to-reach corners. Dirt Storage: Assess the capacity of the dust bin for uninterrupted cleaning sessions. Mapping: Some models offer basic mapping features for optimized navigation. Self-Empty: Explore options with self-emptying capabilities for added convenience. Scheduled Cleaning: Look for programmable schedules to automate cleaning sessions. Object Detection and Sensors: Ensure the vacuum can navigate around obstacles without issues. Smart Home Integration Check compatibility with smart home systems like Amazon Alexa or Google Assistant for seamless integration into your home automation. Wi-Fi Capabilities Wi-Fi connectivity enhances control and monitoring through dedicated apps, providing added convenience. Price Evaluate the overall value for money by considering the features offered in comparison to your specific cleaning needs. Finding a balance between functionality and cost ensures a satisfactory purchase. Carefully weighing these considerations will guide you to the budget robot vacuums that suit your home and lifestyle. Top Picks for Budget Robot Vacuums The following are our top picks for budget robot vacuums, these models combine affordability with exceptional features to elevate your cleaning experience. eufy Clean 11S - $229.99 The eufy Clean 11S stands out with its sleek 2.85" slim design and impressively low 55 dB noise level. Equipped with iPath™️ Laser Navigation, it navigates your home efficiently. The 0.6L dust box minimizes interruptions, allowing for extended cleaning sessions of up to 100 minutes per charge. This model offers a perfect blend of sophistication and performance for budget-conscious consumers. Shark ION RV765 - $99.99 For a comprehensive cleaning solution, consider the Shark ION RV765. With side brushes, channel brushes, and a multi-surface brushroll, it ensures thorough cleaning. The SharkClean app allows convenient scheduling, and its compatibility with Amazon Alexa or Google Assistant adds a layer of smart automation. Boasting up to 2 hours of runtime, this Shark model is a reliable and intelligent choice. eufy RoboVac G30 - $319.99 The eufy RoboVac G30 is powered by BoostIQ™ Technology and features Smart Dynamic Navigation with logical route planning and a Location Detection System. With a robust 2000 Pa suction power, it efficiently tackles dirt and debris. This model strikes a balance between advanced technology and affordability, making it an excellent choice for those seeking a high-performing budget robot vacuum. iRobot Roomba 694 - $274.99 With dual multi-surface brushes and advanced cleaning habits learning for personalized schedules, the iRobot Roomba 694 is a smart cleaning companion. The Dirt Detect technology ensures no speck of dust is left behind. Compatibility with Google Home and Alexa-enabled devices adds a layer of convenience to your cleaning routine. For a reliable and intelligent budget option, the Roomba 694 stands out. eufy Clean 11S MAX - $249.99 The eufy Clean 11S MAX combines power and versatility with its 2,000 Pa suction, versatile cleaning modes, and drop-sensing technology. Equipped with BoostIQ™ Technology, it adjusts suction power based on the cleaning task. This model is a top contender for budget-conscious consumers seeking a feature-packed robot vacuum that excels in various cleaning scenarios. Conclusion In conclusion, purchasing the best budget robot vacuum can be a game changer for your household chores. With the right timing and careful consideration, you can find the perfect robotic helper to make cleaning a breeze. Take advantage of our top picks for 2024 and choose one that fits your needs perfectly. You won't regret incorporating a robot vacuum into your life. FAQ Should You Run Your Robot Vacuum Every Day? Running your robot vacuum daily can help maintain a consistently clean home, especially in high-traffic areas. However, the frequency may depend on your specific cleaning requirements. What Is the Life Expectancy of a Robot Vacuum Cleaner? The life expectancy of a robot vacuum cleaner varies from one to five years, but with proper maintenance and care, it can last longer. Regular cleaning and replacement of consumable parts contribute to prolonged durability. How Long Does It Take for a Robot Vacuum to Map Your House? The time it takes for a robot vacuum to map your house depends on the model and the size of your home. Some models can complete mapping in a single cleaning session, while others may take a few sessions to create an accurate map.
Robovac · 23/01/2024
Complete Guide to Find Clean Robot Dust Suction Type
Over the past decade, robotic vacuums have emerged as a popular new tool for simplifying home cleaning routines. These autonomous machines have advanced significantly since their early versions, and are now capable of navigating various floor types and obstacles while efficiently removing dirt, dust, and debris with minimal human input. In this comprehensive guide, we will delve into the world of robotic dust suction cleaners, exploring their functionality, and key features, and providing insights into the best clean robot dust suction type available in the market. What is a Dust Suction Robot and How Does It Work? Robotic dust suction cleaners, commonly known as robot vacuum cleaners, are intelligent devices designed to automate the process of floor cleaning. These intelligent gadgets are equipped with advanced technologies that enable them to navigate autonomously across living spaces while efficiently removing dust, dirt, and debris from various surfaces. The primary working mechanism of a dust suction robot involves a combination of sensors, brushes, and a powerful suction system. Sensors play a crucial role in allowing the robot to detect obstacles, map the cleaning area, and navigate seamlessly. This ensures the robot can maneuver around furniture and other objects without colliding, ultimately contributing to comprehensive and efficient cleaning coverage. In addition to sensors, the robot vacuum cleaner utilizes brushes that agitate and loosen dirt on different surfaces. The brushes work in conjunction with the device's powerful suction mechanism, which effectively lifts and captures the loosened debris into the vacuum's dustbin. This dual-action approach ensures a thorough and effective cleaning process on a variety of floor types. Key Features to Look for When Selecting a Robotic Dust Suction Cleaner When in the market for a robotic dust suction cleaner, several key features should be considered: Suction Power The suction power of a robot vacuum cleaner determines its ability to pick up dirt and debris effectively. Higher suction power is often associated with better cleaning performance, especially on carpets and rugs. Navigation and Mapping Advanced navigation and mapping capabilities enable the robot cleaner to move efficiently around the home, avoiding obstacles and covering all areas. Look for devices with sensors and mapping technology to enhance cleaning precision. Obstacle Detection The ability to detect and navigate around obstacles is crucial for a seamless cleaning experience. Intelligent obstacle detection ensures that the robot can navigate through furniture and other items without getting stuck. Noise Level A quieter operation is preferred for a more pleasant cleaning experience, especially in shared living spaces. Consider the noise level of the robot vacuum cleaner, and opt for models that provide a balance between performance and quiet operation. Price While there is a wide range of robot vacuum cleaners available, it's essential to find the clean robot dust suction type price that fits your budget without compromising on key features. Consider the overall value for money when making your selection. Smart Home Integration Many robotic vacuum cleaners offer smart home integration, allowing users to control and monitor the device through their smartphones or smart home devices. This feature adds a layer of convenience to the cleaning process. After considering these key features, it's valuable to read clean robot dust suction type reviews from other users who have hands-on experience with the specific model you're considering can provide valuable insights. By combining these considerations with user feedback, you can confidently choose a robotic dust suction cleaner that best suits your cleaning requirements. Best Robotic Vacuum Cleaner Suction Type Now, let's take a closer look at some of the top robot vacuums known for the impressive dust suction capabilities: eufy Clean X8 Pro with Self-Empty Station The eufy Clean X8 Pro with Self-Empty Station stands out as a top-tier robotic vacuum cleaner, featuring 2× 4,000 Pa suction power for effective debris removal. This model goes beyond conventional cleaning with its strong downward pressure mopping, ensuring a thorough and deep clean on various floor surfaces. Equipped with Tangle-Free roller brushes, it minimizes maintenance hassles. The iPath™ laser navigation and AI map technology enhance its precision in navigating through your home, providing an intelligent and efficient cleaning experience. eufy Clean X9 Pro with Auto-Clean Station For those seeking a powerful cleaning companion, the eufy Clean X9 Pro with Auto-Clean Station excels with its 5500Pa suction capability, effortlessly picking up debris of various sizes. The multi-directional brush, working in tandem with adaptive pressure mopping and dual rotating mops, guarantees a meticulous and all-encompassing cleaning approach. And that's not all — taking convenience to new heights, this model introduces an Auto-Clean Station, elevating your cleaning experience to a whole new level. eufy Clean 11S MAX The eufy Clean 11S MAX epitomizes compact efficiency with its ultra-thin 2.85" body, allowing it to effortlessly glide under furniture and reach challenging spots. Renowned for its efficient cleaning capabilities, this robotic vacuum maintains a slim design without compromising on its robust 2,000 Pa suction power, ensuring effective cleaning on both hard floors and carpets. Also, the 11S MAX incorporates drop-sensing technology, enhancing safety by preventing accidental falls. In essence, it seamlessly blends an ultra-thin design with powerful features, making it an ideal and versatile cleaning companion for modern homes. eufy RoboVac G30 The eufy RoboVac G30 stands out with its advanced BoostIQ™ Technology, allowing it to adapt its suction power dynamically based on the type of flooring. Combined with its smart navigation system, the RoboVac G30 efficiently covers your home, leaving it clean and dust-free. With a suction power of 2000 Pa, the G30 ensures thorough cleaning, while its remarkably low 55 dB cleaning noise level keeps the cleaning process unobtrusive. Complementing its powerful suction, the RoboVac G30 features Smart Dynamic Navigation, employing logical route planning and a Location Detection System. This intelligent navigation system enhances the efficiency of the robotic vacuum, allowing it to cover your home systematically. Bonus Tips: What Will Influence the Suction Power of Robot Vacuum Cleaner? The suction power of a robot vacuum cleaner is influenced by several key factors, each playing a crucial role in determining its cleaning performance: 1. Motor Power The motor power of a robot vacuum is a primary determinant of suction capability. A higher wattage or more powerful motor generally results in stronger suction, allowing the vacuum to pick up dirt and debris effectively. 2. Battery Life The battery life directly impacts the vacuum's ability to operate for an extended duration. A longer battery life ensures that the robot vacuum can cover more area in a single cleaning session, contributing to thorough cleaning. 3. Filter System The efficiency of the filter system influences the suction power and overall performance. High-quality filters, such as HEPA filters, can trap fine particles, ensuring cleaner air and preventing clogs in the suction mechanism. 4. Sensors Advanced sensors contribute to the overall effectiveness of a robot vacuum. These sensors help the device navigate the environment, detect obstacles, and adjust suction power accordingly. 5. Brush Type The type of brushes used in a robot vacuum cleaner affects its cleaning efficiency. Different brushes are suitable for various surfaces, such as hard floors or carpets. 6. Airflow Design The overall airflow design within the vacuum influences suction efficiency. Well-designed airflow channels can enhance the vacuum's ability to lift and capture dirt and debris effectively. 7. Dustbin Design The size and design of the dustbin impact how much debris the robot vacuum can hold before needing to be emptied. A larger dustbin can contribute to a more extended cleaning cycle without interruptions. Most of the information above can be found in the clean robot dust suction type manual. By considering these factors, you can make informed decisions when selecting a robot vacuum cleaner. Conclusion Before making your final decision, consider these tips we've provided to ensure that you find the perfect clean robot dust suction type for your specific needs. We hope this complete guide has helped you understand the world of robotic dust suction cleaners better and has made your decision-making process easier. Investing in a high-quality dust suction robot will not only save you time and energy but also provide you with a cleaner living environment. FAQ How Much Suction Does a Robot Vacuum Need? The ideal suction power depends on factors such as the type of flooring and the amount of dirt in your home. Generally, a suction power of 1,500 to 2,500 Pa is suitable for regular cleaning. Is Higher Kpa Better for a Robot Vacuum? Higher kilopascals (Kpa) indicate stronger suction power. While it's generally better for effective cleaning, the overall performance also depends on other factors like brush design and filter efficiency. What is Considered the Strong Suction of a Vacuum Cleaner? Suction strength is measured in pascals (Pa). A vacuum cleaner with a suction power of 2,000 Pa or higher is considered strong and capable of effectively picking up dirt and debris.
Robovac · 23/01/2024
Ultimate Guide to Pool Robot Cleaners 2024
Spring is just around the corner, which means it's time to start getting our backyard pools ready for some fun in the sun. But let's be real, no one enjoys spending hours laboring over scrubbing and vacuuming their pool. That's where pool robot cleaners come in - an innovative technology that has been gaining popularity for its ability to make pool maintenance a breeze. In this ultimate guide, we will dive into everything you need to know about robotic pool cleaners: from their benefits and how they work, to tips on purchasing pool cleaners robot for 2024, along with some maintenance tips for keeping your swimming oasis in top shape. Get ready to relax by your pristine pool! Benefits of Robotic Pool Cleaners Robot pool cleaners offer a range of benefits that make them a popular choice for pool owners. Here are some key advantages: Advanced Cleaning Capabilities One of the primary benefits of robotic pool cleaners is their advanced cleaning capabilities. These devices are equipped with sophisticated technology that allows them to efficiently and thoroughly clean pool surfaces, including walls and hard-to-reach areas. They use powerful brushes and suction mechanisms to remove dirt, debris, and algae, ensuring a pristine pool. Energy Efficiency Robotic pool cleaners are designed to be energy-efficient. Unlike traditional pool cleaning systems that may rely on the pool's filtration system, robotic cleaners have their own motors and filtration systems. This not only reduces the load on the pool's circulation system but also ensures that the cleaning process is optimized for energy efficiency. Smart App-Enabled Operation Many modern robotic pool cleaners come with smart app-enabled features. This allows users to control and monitor the cleaning process remotely through a mobile app. With the convenience of app control, users can schedule cleaning sessions, track the cleaning progress, and even customize cleaning settings, all from the palm of their hand. Time-Saving and Effortless Operation Robotic pool cleaners operate independently, eliminating the need for manual labor in pool maintenance. Pool owners can set the cleaner in motion, and the device will navigate the pool, cleaning surfaces without any supervision. This time-saving and effortless operation free up the pool owner to enjoy their pool rather than spending time on maintenance tasks. How Do Robotic Pool Cleaners Work? Here's how it works: Robotic Pool Cleaners are simple machines that you can just put in the water and they start cleaning your pool. They work by using smart programming to move around the pool on their own. They can figure out the best path to clean the whole pool, even climbing walls and avoiding things like steps and ladders. These cleaners have their own filters, so they don't need the pool's filter. This makes it easier for them to catch dirt and leaves. Plus, they are easy to take care of because you can quickly take out and clean their filters. In short, they are an easy and smart way to keep your pool clean. Here's a breakdown of how these devices work: 1. Plug-and-Play Simple Setup: Robotic pool cleaners are known for their plug-and-play nature. Once the device is placed in the water, it's ready to start cleaning. There's no need for complex installation or connection to the pool's filtration system. 2. Advanced Programming for Navigation Intelligent Navigation Systems: These cleaners are equipped with advanced programming and intelligent navigation systems. Using sensors and algorithms, they can map the pool's layout to determine the most efficient cleaning path. This ensures comprehensive coverage and avoids unnecessary overlap. Wall Climbing Capabilities: Many robotic pool cleaners have the ability to climb pool walls. This feature allows them to reach and clean not only the pool floor but also the walls and waterline, providing a thorough cleaning experience. Obstacle Detection: The devices are designed to detect and navigate around obstacles such as steps, ladders, and pool accessories. This prevents collisions and ensures a smooth cleaning process. 3. Self-Contained Filtering System Independent Filtration: Robotic pool cleaners have their own built-in filtration systems. This means they do not rely on the pool's existing filtration system, reducing the load on pool equipment. The independent filtration system effectively captures debris, dirt, and even fine particles during the cleaning process. Easy Maintenance: Most robotic cleaners come with accessible filter canisters or cartridges that can be quickly removed, emptied, and cleaned. This user-friendly design enhances the overall convenience of robotic pool cleaners. What to Look for When Purchasing a Robotic Pool Cleaner? Here are key aspects to look for when purchasing the best robot pool cleaners: 1. Your Pool Type Tailored Design: Choose a robotic pool cleaner that is specifically designed for your pool type—whether it's an in-ground or above-ground pool. Different cleaners are optimized for different pool structures, ensuring effective cleaning regardless of your pool's specifications. 2. Cleaning Coverage Comprehensive Cleaning: Assess the cleaning coverage of the robotic cleaner. Look for models with advanced navigation technology that can cover the entire pool surface, including walls and waterline. Comprehensive cleaning ensures a consistently clear and debris-free pool. 3. Vacuum Cleaner Features Energy-Efficient Cleaning: Opt for a robotic pool cleaner with energy-efficient cleaning capabilities. This not only reduces operational costs but also contributes to eco-friendly pool maintenance. High Suction Power: A cleaner with high suction power ensures effective removal of debris, dirt, and algae. This is especially important for maintaining water clarity and preventing the buildup of contaminants. Scheduled Cleaning: Consider a cleaner with the option for scheduled cleaning sessions. This feature allows you to program the cleaner to operate at specific times, providing hassle-free and automated maintenance. WiFi Connectivity for Remote Control: Look for models with WiFi connectivity, enabling remote control through a mobile app. This feature allows you to start, stop, or schedule cleaning sessions from the convenience of your smartphone, providing flexibility and control. Advanced Navigation Technology: Choose a robotic pool cleaner equipped with advanced navigation technology. This ensures intelligent mapping of the pool's layout, efficient path planning, and avoidance of obstacles for a systematic cleaning process. 4. Battery Long Battery Life: Evaluate the battery life of the robotic cleaner. A longer battery life allows for extended cleaning sessions without interruptions. Look for models that can cover your entire pool on a single charge. Quick Charging: Consider cleaners with quick-charging capabilities. This is advantageous for minimizing downtime and ensuring that the cleaner is ready for the next cleaning session promptly. 5. Filter Canister Easy Maintenance: Check the design of the filter canister or cartridge. Models with easily accessible and removable filter canisters simplify maintenance tasks. This ensures efficient cleaning and reduces the time and effort required for filter maintenance. 6. Cost Budget Considerations: While considering features, it's important to align them with your budget. Compare the features offered by different models and choose a robotic pool cleaner that provides the best value for your investment. Taking these factors into account will help you make an informed decision when purchasing the best pool robot cleaners, ensuring that they are well-suited to your pool's specific requirements and your maintenance preferences. Best Robotic Pool Cleaners Investing in the right robotic pool cleaner can significantly enhance your pool maintenance experience. Here are three top recommendations based on their features and capabilities: Dolphin Nautilus CC Plus Robotic Pool Cleaner The Dolphin Nautilus CC Plus stands out with its exceptional wall climbing capabilities, ensuring a thorough clean from the floor to the waterline. The top load fine filter basket simplifies maintenance, while the plug-and-play system guarantees hassle-free operation. With Smart Navigation Technology, this cleaner navigates your pool intelligently, covering every nook and cranny for a spotless finish. AIPER Seagull SE Cordless Robotic Pool Cleaner For unparalleled convenience, the AIPER Seagull SE is cordless, providing freedom of movement without the constraints of cables. With a quick 2.5 hours charge time, it runs for over 90 minutes, delivering efficient cleaning. The dual-drive motors enhance performance, automatically stopping when the cleaning is complete. LED status lights provide clear indicators, ensuring you're always in control. Polaris Alpha IQ+ Robotic Pool Cleaner The Polaris Alpha IQ+ is a powerhouse equipped with an Easy Lift Removal System for effortless handling. Its easy-clean filter canisters maintain optimal performance, while the Tangle-Reducing Swivel prevents disruptions during operation. Take control with the iAquaLink app, allowing remote control for added convenience. This cleaner combines advanced features for a comprehensive and user-friendly pool cleaning experience. Invest in one of these robotic pool cleaners, and elevate your pool maintenance to new heights. Pool Maintenance Tips When Not in Use Proper pool maintenance during periods of inactivity is crucial to ensure a clean and well-preserved pool. Follow these tips to keep your pool in optimal condition: Regularly Check and Clean the Filter Canister: Ensure that the filter canister of your robotic pool cleaner is regularly checked and cleaned. This helps maintain its efficiency and ensures effective debris removal during cleaning sessions. Remove Leaves and Debris Manually: Even when the pool is not in use, leaves and debris can accumulate. Remove them manually using a skimmer or leaf net to prevent clogging and maintain water clarity. Use Pool Covers: Invest in pool covers to prevent debris, leaves, and other contaminants from entering the pool. This simple step significantly reduces the amount of cleaning required when the pool is back in use. Consider the a Vacuum Cleaner: When draining the pool for maintenance, consider using a robot vacuum and mop such as eufy Clean X9 Pro with Auto-Clean Station. This advanced robotic vacuum cleaner offers efficient and thorough cleaning. Its Auto-Clean Station ensures hassle-free disposal of debris, providing a convenient solution for maintaining a spotless pool. By following these tips, you'll not only preserve the cleanliness of your pool but also extend the lifespan of your pool equipment. Introducing robot vacuums into your maintenance routine to keep your pool in top condition during periods of non-use. Conclusion In conclusion, pool cleaners robot are the ultimate solution for maintaining a clean and sparkling pool all year round. Not only do they save you time and effort, but they also improve the overall health and safety of your pool. By removing debris, bacteria, and algae, these advanced machines ensure that you and your family can enjoy a swim without worrying about potential health hazards. FAQ How Long Do Pool Robots Last? The lifespan of pool robots typically ranges from 4 to 5 years, depending on factors such as usage frequency, maintenance, and the specific model. Regular maintenance, proper cleaning of components, and following manufacturer guidelines can contribute to extending the longevity of your pool robot. Do Robotic Pool Cleaners Use a Lot of Electricity? No, robotic pool cleaners are designed to be energy-efficient. These devices use advanced technologies, efficient motors, and optimized cleaning algorithms to minimize electricity consumption. Compared to traditional pool cleaning methods, robotic pool cleaners are a more environmentally friendly and cost-effective option. Can I Leave a Robotic Pool Cleaner in the Pool Overnight? While robotic pool cleaners are designed for efficient and thorough cleaning, they are not meant to stay in the pool 24/7. The exposure to chemicals, particularly chlorine and shock, can have adverse effects on the components of the cleaner over time.
Robovac · 22/01/2024
The Comprehensive Guide to Portable Car Vacuum Cleaners
Maintaining a clean and tidy vehicle is not just about aesthetics; it also contributes to a healthier and more enjoyable driving experience. One of the essential tools for achieving this cleanliness is a portable car vacuum cleaner. In this comprehensive guide, we will explore the workings, types, features, and the best car vacuums to help you make an informed decision for your car care routine. How Does Car Vacuum Cleaner Work? Car vacuum cleaners function through a combination of suction, filtration, and portability. These compact devices are equipped with a motor that generates suction power, pulling in dirt and debris. They often feature filters, such as HEPA filters, to trap particles, ensuring a cleaner and healthier vehicle interior. With a variety of attachments and a compact design, car vacuums are tailored for maneuverability, allowing users to reach tight spaces and maintain a tidy car environment. Whether corded or cordless, these devices offer versatility and convenience, making them an essential tool for car owners aiming to keep their vehicles clean and inviting. Types of Car Vacuums Car vacuums come in various types, each designed to cater to specific cleaning needs and preferences: 1. Handheld Car Vacuums Handheld car vacuums are compact, lightweight, and designed for easy maneuverability. They are ideal for quick clean-ups and reaching tight spaces within the vehicle interior. These portable devices often run on rechargeable batteries, providing flexibility for on-the-go cleaning. 2. Corded Car Vacuums Corded car vacuums are powered by the vehicle's electrical system or an external power source. They offer consistent suction power without the need for recharging batteries, making them suitable for longer cleaning sessions. However, the cord limits mobility to the length of the power cable. 3. Cordless Car Vacuums Cordless car vacuums operate on rechargeable batteries, providing freedom of movement without being tethered to a power source. While they offer greater flexibility, users should consider battery life, especially for more extended cleaning sessions. These vacuums are convenient for quick, on-the-spot cleaning. 4. Wet/Dry Car Vacuums Wet/dry car vacuums are versatile devices capable of handling both liquid spills and dry debris. They come with specialized features and filters to prevent damage when dealing with liquids. This type of vacuum is suitable for those looking for an all-in-one solution for various cleaning needs in their vehicle. 5. Multi-Purpose Vacuum Cleaner for Home and Car Some car vacuums are designed to be multi-purpose, serving both car and home cleaning needs. These versatile devices often come with detachable components or additional attachments that make them suitable for various surfaces, providing users with a comprehensive cleaning solution. 6. High-Pressure Car Vacuum High-pressure car vacuums are equipped with powerful suction capabilities, making them effective in removing stubborn dirt and debris. These vacuums are designed for users who require a more intensive cleaning experience, particularly for detailing and ensuring a thorough interior cleaning of their vehicles. Features to Consider in Car Vacuums When choosing a car vacuum, several key features play a crucial role in determining its effectiveness and convenience: 1. Power Source: Consider whether the vacuum is corded or cordless. Corded vacuums provide consistent power but are limited by the cord length, while cordless ones offer mobility but are dependent on battery life. Choose based on your preference for flexibility or continuous power. 2. Weight: A lightweight car vacuum is easier to handle and maneuver, especially in tight spaces within the vehicle. Opt for a model that balances power with a manageable weight for comfortable and efficient use. 3. Filter Type: The filter is essential for trapping dust and allergens. High-quality car vacuums often feature HEPA filters, providing efficient filtration. Consider the filter type to ensure a clean and healthy vehicle interior. 4. Charging Dock: For cordless vacuums, a convenient charging dock is essential. A well-designed dock ensures easy recharging, storage, and accessibility, making the vacuum ready for use whenever needed. 5. Dust Storage Capacity: The size of the dust storage container matters, especially if you have a larger vehicle or plan on cleaning extensively. Opt for a vacuum with sufficient dust storage capacity to minimize the frequency of emptying. 6. Durability: A durable car vacuum can withstand the rigors of regular use and varying cleaning tasks. Look for models constructed with high-quality materials and robust build to ensure longevity. 7. Ergonomic Design: An ergonomic design contributes to user comfort during operation. Features like a comfortable grip, intuitive controls, and well-placed buttons enhance the overall usability of the car vacuum, especially during prolonged cleaning sessions. 8. Specialized Functions for Car Detailing: Some car vacuums come with specialized functions or attachments tailored for car detailing. These features may include brush nozzles, crevice tools, or adjustable suction power to address specific cleaning requirements for a thorough and meticulous interior cleaning. Considering these features and finding the right balance based on your priorities will help you choose a car vacuum that meets your specific cleaning needs and preferences. Best Handheld Car Vacuums The following are the top 3 best handheld vacuum options for car that excel in performance and convenience: eufy Clean H20 Boasting an impressive 40AW strong suction, the eufy Clean H20 is a powerhouse when it comes to handheld car vacuums. Its car-specific attachments, including a built-in retractable tool, extension hose, and brush head, make it a versatile choice for comprehensive car cleaning. Weighing a mere 654 grams, this vacuum is lightweight, ensuring ease of handling during your cleaning sessions. The addition of a built-in LED illuminates those hard-to-reach and darker areas in your car, providing enhanced visibility. With the convenience of USB-A and USB-C ports for recharging, this portable auto vacuum cleaner combines power, versatility, and user-friendly features for an exceptional car cleaning experience. eufy HomeVac H11 If you're in search of a compact and efficient handheld car vacuum, look no further than the eufy HomeVac H11. Weighing only 1.44 pounds, it strikes a perfect balance between portability and performance. The 5500Pa suction power ensures reliable cleaning, and the 2-in-1 crevice tool adds versatility to tackle various car cleaning needs. Charging is a breeze with the Micro USB port, providing flexibility and ease of use. The eufy HomeVac H11 is the ideal companion for those who prioritize a lightweight yet powerful handheld vacuum for quick and efficient car cleaning. eufy HomeVac H30 Mate Taking handheld car vacuums to the next level, the eufy HomeVac H30 Mate boasts an impressive Max 16kPa suction power. This high suction capability makes it particularly effective in tackling stubborn dirt and pet hair. Weighing a mere 1.78 pounds, it remains lightweight and portable. What sets it apart are the additional features, including a Mini-Motorized Pet Brush and a 2-in-1 crevice tool. These specialized attachments cater to specific cleaning needs, making the eufy HomeVac H30 Mate a comprehensive solution for both general car cleaning and addressing pet-related messes. With its powerful suction and versatile attachments, this handheld vacuum is a valuable tool for maintaining a clean and pet-friendly vehicle interior. Conclusion Portable car vacuums are an indispensable tool for any car owner who values a clean and inviting driving environment. By understanding the workings, types, and key features, and considering top choices like eufy Clean H20, HomeVac H11, and HomeVac H30 Mate, you can elevate your car care routine to new heights. FAQ How Often Should I Vacuum My Car? The frequency of car vacuuming depends on usage and personal preference. As a general guideline, a thorough vacuuming every two weeks can help maintain a clean interior. Can I Use a Regular Vacuum for My Car? While it's possible to use a regular vacuum for your car, portable car vacuums are specifically designed for the job, offering more convenience and maneuverability within the limited space of a vehicle interior. How Much Suction Power Is Required for Car Vacuum Cleaner? The ideal suction power varies based on the intended use. For routine cleaning, a suction power of 4.5-5kPa is typically sufficient. However, for more intensive cleaning tasks and detailing, opting for a model with higher suction power can yield better results.
Robovac · 22/01/2024
How to Pick up Long Hair on Floor?
As beautiful as long hair can be, it also comes with its own set of challenges. Long hair tends to find its way into the most unexpected places, and maintaining cleanliness becomes essential not only for aesthetics but also for hygiene. From clogging drains to getting stuck in every corner, keeping up with the clean-up can feel like a never-ending battle. But fear not! In this blog post, we will discuss the best tips and tools for long hair clean up. Let's dive in and find out how to make your home a hair-free zone! Effective Ways to Clean up Long Hair on Floor Cleaning up long hair on floor can be a challenging task, but with the right strategies, it becomes more manageable. Here are effective ways to ensure your floors stay free from long hair: Using a Microfiber Broom Microfiber brooms are a game-changer in hair removal, especially for those with long hair. Their unique microfiber bristles attract and hold onto hair, dust, and small debris more effectively than standard brooms. This makes them perfect for immediate cleanups on hard flooring surfaces like hardwood, tile, or laminate. The microfiber material not only captures hair but also minimizes airborne dust, making it a healthier cleaning option. Using a Rubber Broom: Rubber brooms are an excellent tool for efficiently removing long hair from various surfaces, including carpets and rugs. The rubber bristles generate static electricity that effectively attracts hair and lint. This feature is particularly beneficial for pet owners or in households with members having long hair. Rubber brooms are durable, easy to clean, and work well on both dry and wet surfaces. Their versatility extends beyond just hair removal; they are also great for cleaning up spills and scrubbing floors, making them a multifunctional tool in your cleaning arsenal. Utilizing Sticky Rollers Quick Clean-Up Solution for Soft Surfaces Sticky rollers are a quick and convenient solution for picking up long hair from soft surfaces such as upholstery, curtains, and carpets. These rollers have an adhesive surface that effortlessly lifts and removes hair, lint, and small fibers. They are particularly useful for targeted cleaning and spot removal. Sticky rollers are compact and easy to use, making them ideal for daily touch-ups and maintaining a hair-free environment in your home. They are a must-have for quick clean-ups, especially when you need to tidy up your space swiftly before guests arrive. Electrostatic Dust Mop: An electrostatic dust mop is a powerful tool for attracting and trapping long hair on various floor types. The electrostatic action ensures that hair, dust, and allergens are not just pushed around but are actually lifted and held by the mop fibers. This makes them especially effective on hardwood, tile, and laminate floors, where hair tends to gather and become more visible. Using a Dampened Towel Using a dampened towel is a simple yet surprisingly effective method for collecting long hair from floors. The moisture in the towel helps to capture and hold the hair, making it easy to gather and dispose of. This method is particularly useful for bathroom floors and other small areas where hair tends to accumulate. It's a quick fix that doesn't require any special tools or equipment, making it a convenient option for those looking to efficiently deal with hair on their floors. Plus, it's a great way to repurpose old towels, adding an eco-friendly aspect to your cleaning routine. Using a Specialized Vacuum The best best way to pick up long hair on floor is to invest in a specialized vacuum like the eufy X10 Pro Omni for advanced and hassle-free cleanup.This specialized vacuum comes equipped with a self-detangling function, ensuring hassle-free maintenance after each cleaning session. Features and uses: Self-Detangling Function: The eufy X10 Pro Omni autonomously detangles hair from its brushes, minimizing maintenance efforts and maximizing efficiency with a Pro-Detangle Comb™. Efficient Suction: With powerful suction capabilities, this vacuum effectively picks up long hair from various surfaces, including carpets and hard floors. Large Dustbin Capacity: Featuring a 2.5L dustbin, the X10 Pro reduces the frequency of emptying, allowing for extended cleaning sessions. Laser Navigation and AI-Enhanced Mapping: The X10 Pro's advanced iPath™ Laser Navigation technology and AI.See™ technology optimize cleaning efficiency by avoiding obstacles and adapting to your home's layout for a thorough and time-saving cleaning experience. Say goodbye to long hair troubles with the quick action of a microfiber broom and the precision of friendly robot vacuums like the eufy X10 Pro Omni. These methods provide tailored solutions for effortlessly keeping your floors immaculate. Diy Tools You Can Use for Clean up Long Hair on Floor Except for the tools in the cleaning methods mentioned above, here are some DIY solutions you can use to clean up long hair: DIY Lint Roller: Materials Needed: Masking or packing tape, paint roller or similar cylindrical object. DIY Steps: Take a long strip of tape and carefully wrap it around the roller with the sticky side facing outwards. Ensure that the entire surface of the roller is covered uniformly for maximum effectiveness. How to Use: Gently roll it over surfaces where hair is present. The hair will stick to the tape. For best results, roll in one direction and avoid back-and-forth movements to prevent hair from resettling. Maintenance Tip: Replace the tape once it's filled with hair or loses its stickiness. This method is particularly useful for upholstery and small rugs. Static Electricity Ball: Materials Needed: A balloon or a small rubber ball, any fabric item (like a towel). DIY Steps: Vigorously rub the balloon or ball against the fabric for about 30 seconds to generate static electricity. How to Use: Hover or gently tap the charged object over the hairy surface. The static charge will attract hair, making it stick to the balloon or ball. Pro Tip: This method works best in dry environments. Humidity can lessen the effectiveness of static electricity. Duct Tape Slippers: Materials Needed: Duct tape, old shoes or slippers. DIY Steps: Cut several strips of duct tape and stick them onto the soles of the shoes or slippers, with the sticky side facing out. How to Use: Simply walk around the room. The hair will stick to the bottom of your slippers. This method is great for quick clean-ups and reaching under furniture. Caution: Be careful walking on smooth surfaces as the slippers may become slippery. DIY Dusting Mitt: Materials Needed: An old microfiber cloth or soft fabric, a rubber band or thread and needle. DIY Steps: If using a rubber band, wrap the cloth around your hand and secure it with the band. If sewing, fashion the cloth into a mitt shape that fits your hand. How to Use: Swipe your hand over surfaces where hair is present. The microfiber or soft fabric will pick up hair effectively. Cleaning the Mitt: Shake off the hair outside or wash the mitt for reuse. This tool is excellent for delicate surfaces and reaching into corners. Additional Tips: Routine Maintenance: Regularly cleaning floors and surfaces will prevent hair build-up. Combining Methods: For thorough cleaning, use a combination of these methods. For example, use the duct tape slippers for an initial sweep and follow up with the DIY lint roller for detailed cleaning. Environmental Consideration: Opt for reusable and washable materials where possible to minimize waste. New Release: eufy X10 Pro Omni - Power and Convenience in One Introducing the latest innovation in cleaning technology - eufy X10 Pro Omni. This product combines a powerful 8,000 Pa vacuum with an efficient mop, revolutionizing the way you clean your home. Perfect for pet owners, it offers a healthier living environment with its high-efficiency filter. eufy x10 omni has now been released and has received positive reviews from both the media and users. Come and get yours today! Learn More Buy Now Conclusion Regular maintenance and effective cleaning strategies are crucial for long hair clean up. By incorporating the right tools and techniques into your routine, you can maintain a clean and comfortable environment. Whether using specialized equipment or DIY solutions, finding the right approach for your needs ensures a hassle-free cleanup process. FAQ What Material Repels Hair? Fabrics such as silk, satin, or microfiber tend to repel hair due to their smooth surfaces. Opting for furniture and bedding made from these materials can help minimize the accumulation of hair. Why Is There So Much Hair in My Room? Excessive hair in a room can result from various factors, including shedding, hair care practices, and even pet hair. Regular cleaning, using effective tools like a specialized vacuum, and incorporating materials that repel hair can significantly reduce hair buildup. How Do You Get Hair Out of a Mop? To effectively remove hair from a mop, try the following: Use Scissors or a Knife: Cut the tangled hair from the mop using scissors or a knife. Soak in Hot Water: Soak the mop in hot water to loosen the hair. Use a Comb or Brush: Run a comb or brush through the mop to dislodge and remove trapped hair. Washing Machine: For mop heads that are machine washable, toss them in the washing machine to remove hair and debris. Regular maintenance of cleaning tools and choosing mops with features designed to repel hair can also prevent excessive hair buildup.
Robovac · 22/01/2024
How to Clean Hair from a Vacuum Brush?
Vacuum cleaners play a crucial role in maintaining a clean and healthy home environment. However, a common issue that many users face is the entanglement of hair in the vacuum brush. This not only affects the vacuum's performance but can also lead to damage over time. In this guide, we will discuss the troubles caused by hair entanglement, the tools needed for cleaning, and provide a step-by-step guide on how to clean hair from a vacuum brush to ensure your vacuum brush stays hair-free. Troubles Caused by Hair Getting Stuck in the Vacuum Brush The entanglement of hair in your vacuum brush is a common issue that, if left unaddressed, can lead to a cascade of problems affecting both your vacuum cleaner and the cleanliness of your carpets. Here's a closer look at the troubles caused by hair getting stuck in the vacuum brush: 1. Reduced Suction Power When hair accumulates in the vacuum brush, it hinders the smooth rotation of the brush. This, in turn, reduces the overall suction power of the vacuum cleaner. A less powerful vacuum means it's less effective at picking up dirt, dust, and debris from your floors and carpets. 2. Potential Damage to Your Vacuum The added stress on the vacuum's motor caused by the resistance from entangled hair can lead to overheating and, ultimately, damage to the motor. This can result in costly repairs or the need for a replacement vacuum. 3. Incomplete Cleaning of Carpets A vacuum with a clogged brush is unable to penetrate deep into the carpet fibers, leaving behind dirt and debris. This compromises the cleanliness of your carpets and can contribute to the buildup of allergens and unpleasant odors on carpet over time. 4. Foul Odors The accumulation of hair, especially if it comes into contact with moisture, can create an environment conducive to the growth of bacteria and mold. This can result in unpleasant odors emanating from your vacuum cleaner. Tools Needed for Cleaning Vacuum Brush Before you embark on this cleaning journey, it's essential to gather the right tools for the job. Here's a list of tools you'll need to effectively clean your vacuum brush: Gloves: Wear protective gloves to shield your hands from dust, debris, and any potentially sharp objects that may be caught in the brush. Screwdriver: A screwdriver, usually a Phillips head or flathead, depending on your vacuum model, is necessary to remove screws and access the brush compartment. Scissors, Safety Cutter, or Seam Ripper: These tools are essential for cutting away hair and threads wrapped around the brush. Choose the tool that best suits your preference and comfort level. Cleaning Brush or Toothbrush: A small cleaning brush or an old toothbrush is handy for removing debris and hair from hard-to-reach places, such as around the bearings and other nooks on the brush. Rubbing Alcohol or Mild Detergent: Use rubbing alcohol or a mild detergent to clean the brush and its components. This helps eliminate any bacteria or unpleasant odors that may have developed. Cloth or Paper Towels: Have a cloth or paper towels on hand to wipe down the brush and surrounding areas. This ensures a thorough cleaning process. New Release: eufy X10 Pro Omni - Power and Convenience in One Introducing the latest innovation in cleaning technology - eufy X10 Pro Omni. This product combines a powerful 8,000 Pa vacuum with an efficient mop, revolutionizing the way you clean your home. Perfect for pet owners, it offers a healthier living environment with its high-efficiency filter. eufy x10 omni has now been released and has received positive reviews from both the media and users. Come and get yours today! Learn More Buy Now Step-by-Step Guide to Cleaning the Vacuum Brush The following are the steps on how to get rid of hair out of vacuum: Turning off and unplugging the vacuum Before you begin cleaning the vacuum brush, ensure the vacuum is turned off, and most importantly, unplug it from the power source. This is crucial for your safety and prevents any accidental start-ups during the cleaning process. Additionally, wear protective gloves to safeguard your hands from dust, debris, and any potential sharp edges. Accessing the Roller Lay the vacuum cleaner on its back, exposing the bottom side. Using a screwdriver, carefully remove the screws securing the bottom faceplate. Place the screws in a safe location to avoid losing them. Once the faceplate is removed, you'll have access to the roller brush. Pop out the roller brush carefully, taking note of its orientation for reassembly. Removing and Cleaning the Roller Use your chosen tool—whether it's scissors, a safety cutter, or a seam ripper—to cut away hair and threads wrapped around the brush. Be cautious not to damage the bristles during this process. Utilize a cleaning brush or an old toothbrush to clean around the roller's bearings. This helps maintain smooth rotation and prevents future entanglements. Reassembling the Vacuum Before reassembly, take a moment to clean the housing where the roller sits. Wipe away any remaining dust or debris. Carefully reposition the roller brush back into its housing. Ensure it is correctly aligned with any notches or grooves. Once the roller is in place, reattach the bottom faceplate and securely tighten the screws. Make sure the faceplate is snugly fitted to avoid any performance issues. Tips for Preventing Hair Tangled on Vacuum Brushes Sweep the Hair First before Vacuuming Before vacuuming, use a rubber squeegee broom to sweep up loose hair from the floor. This minimizes the amount of hair reaching the vacuum brush, preventing excessive entanglement. Use Brush to Clean the Hair Prior to vacuuming, manually use a brush to comb through the carpet or rug. This helps to dislodge and collect loose hair, minimizing the amount that reaches the vacuum brush. For pet owners, the eufy N930 Pet Grooming Kit with Vacuum offers an innovative solution. This specialized kit is designed to tackle pet hair efficiently. It not only vacuums but also offers features like pet hair removal, trimming, and grooming. The grooming brush ensures that loose hair is captured before it becomes a problem for your vacuum. Use a Tangle-Free Vacuum Cleaner To prevent hair tangling on vacuum brushes, consider using a tangle-free robot vacuums, such as the eufy X10 Pro Omni, a powerhouse vacuum featuring an ingenious auto-detangling function with its multi-directional floating roller brush. This cutting-edge feature guarantees automatic detangling in each cleaning session, eradicating the need for constant manual interventions. Highlights: Auto-Detangling Convenience: No worries about hair clogs – the X10 Pro automatically detangles the brush, making maintenance a breeze. Powerful Performance: X10 Pro Omni is a revolutionary MopMaster™ robovac with 8,000 Pa powerful vacuum that effortlessly tackles hair for spotless carpets. Hands-Free Operation: Enjoy up to 60 days of hands-free cleaning with the Self-Empty Station, featuring a 2.5 L dust bag. Smart Navigation & Mapping: Efficient coverage and obstacle avoidance through iPath™ Laser Navigation, complemented by AI Mapping for precise home maps and time-saving cleaning. Conclusion In conclusion, maintaining your vacuum brush is a crucial step in ensuring the longevity of your vacuum. The troubles caused by hair getting stuck in the vacuum brush can not only affect its performance but also lead to costly repairs. By following the step-by-step guide on how to clean hair from a vacuum brush we have provided, including turning off and unplugging the vacuum, accessing and cleaning the roller, and reassembling the vacuum properly, you can effectively remove all hair from your vacuum brush. Additionally, implementing our tips for preventing hair tangles such as sweeping before vacuuming and using a brush or tangle-free vacuum cleaner can save you time and effort in the long run. FAQ Will Hair Ruin a Vacuum? While hair itself may not ruin a vacuum, the accumulation of hair in the brush can lead to reduced performance and potential damage. Regular cleaning is essential to prevent these issues. Can I Wash Vacuum Brush with Water? Yes, you can wash a vacuum brush with water, but this depends on the type and construction of the brush. Brushes that are part of electrically powered heads should not be washed with water to avoid damaging electrical components. For non-electric, detachable brushes, washing with water is usually safe. Regardless of the type, always refer to your vacuum cleaner's user manual for specific cleaning guidelines. How Long Do Vacuum Brushes Last? The lifespan of vacuum brushes can vary based on usage and maintenance. On average, with regular cleaning and proper care, a vacuum brush can last for several years. However, factors such as the frequency of use, the type of debris encountered, and the overall quality of the vacuum can influence its longevity.
Robovac · 22/01/2024
How to Get Rid of Pet Hair in the Air?
If you own a furry four-legged family member, you know the struggle all too well: no matter how often you clean, pet hair seems to magically reappear and spread its way across every surface in your home. Most pet owners can relate to the challenge of removing pet hair from not just furniture and fabrics, but even the very air we breathe inside our homes. Maintaining a clean home environment free of floating allergens is important for both our health and quality of life. In this post, we explore some practical solutions on how to get rid of pet hair in the air, keep ready to learn more. Ways to Get Rid of Dog and Cat Hair in the Air There are effective strategies to keep your home free from airborne pet hair: Grooming Your Pet Regular grooming is a proactive approach to reducing the amount of pet hair shed around the home. Here's a comprehensive guide to various grooming types, their suggested frequency, and tips for each: Grooming Type Suggested Frequency Tips Bathing Every 8-24 weeks( Bathing your pet too often can take away those essential natural oils from its coat.) Use pet-friendly shampoos; ensure a comfortable bathing environment. Brushing Daily for long-haired breeds; Weekly for short-haired breeds Invest in quality pet brushes, grooming gloves, or an auto-grooming tool kit. Teeth Cleaning Regularly Consult your veterinarian for guidance on maintaining your cat's oral hygiene. Ear Cleaning Once a week Use specialized ear cleaning solutions; be gentle and attentive. Feet Cleaning As needed Check for debris or matting between the paw pads; trim excess hair if necessary. Nail Trimming Every 2-4 weeks Use pet nail clippers; be cautious to avoid cutting the quick. Tips for Grooming: Effective grooming is essential for your pet's health and hygiene. Here are some tips and tools to help you: Pet Brushes: Choose a brush based on your pet's coat type; regular brushing promotes a healthier coat and minimizes shedding. Grooming Gloves: These provide a hands-on approach to grooming and can be especially effective for short-haired breeds. Auto-Grooming Tool Kit: Invest in a comprehensive grooming kit like the eufy N930 Pet Grooming Kit with Vacuum. This all-in-one solution handles pet hair removal, trimming, and grooming in a single go, making the process efficient and convenient. Vacuuming Regularly When it comes to banishing pet hair and allergens, regular vacuuming is your go-to solution, and the eufy X10 Pro Omni takes this task to a whole new level. The eufy X10 Pro Omni boasts powerful suction, ensuring thorough cleaning on various surfaces. The floating roller brush with its rubber and bristle combination prevents hair tangles, ensuring a hassle-free cleaning experience. With AI.See™ technology, it recognizes and avoids obstacles, making it efficient in cleaning messy rooms. Regularly employ the eufy X10 Pro for targeted pet hair removal on carpets and hardwood floors. It can efficiently trap pet dander, achieving effective allergen control. The 2.5-liter bacteriostatic dust bag ensures a clean disposal process, adding an extra layer of hygiene. Use an Air Filter Ensuring clean and breathable indoor air involves more than routine cleaning; it requires an effective air filtration strategy. Consider installing a high-quality air filter in your home. These filters are designed to capture and trap airborne pet hair, dander, and other allergens, preventing them from circulating throughout your living space. Remember to adhere to a regular cleaning and replacement schedule for the air filter. Cleaning or replacing it every 1-3 months, depending on the filter type and usage, ensures optimal performance and maintains a healthier indoor environment. Washing Bedding Frequently Pet bedding is a hotspot for hair, dander, and lingering odors. To mitigate these issues, establish a routine of washing your pet's bedding frequently. Use a pet-safe detergent and wash the bedding in hot water to eliminate allergens and bacteria effectively. Additionally, consider using bedding with removable, machine-washable covers for added convenience. This simple yet crucial practice not only enhances your pet's comfort but also significantly reduces the spread of hair and keeps odors at bay. Choosing the Right Surfaces The type of flooring in your home plays a pivotal role in managing pet hair accumulation. Opting for hard flooring, such as tile, hardwood, or laminate, over carpets makes a substantial difference. Unlike carpets, hard surfaces don't trap and hold onto pet hair, making it easier to sweep or vacuum away. Additionally, hard floors are more resistant to odors and stains, contributing to a cleaner and more pet-friendly living environment. Using Blankets on Furniture Your pet's favorite spots on furniture are likely to be prime areas for hair and dander accumulation. Identify your pet's preferred furniture spots naturally with the help of a pet camera. Once identified, place blankets on these frequented surfaces. These blankets act as effective barriers, capturing loose hair and preventing it from embedding in upholstery. Opt for machine-washable blankets for easy cleaning, ensuring that your furniture stays hair-free and fresh. These practices ensure a pristine home where you and your furry companions can enjoy a clean, harmonious environment. Additional Tips for a Hair-Free Home Here are some additional tips to ensure your living space stays impeccably clean. Cleaning with a Damp Cloth Employ microfiber cloths and sponges to efficiently pick up pet hair from various surfaces. Dampening these materials enhances their effectiveness, capturing hair and preventing it from dispersing into the air. Utilizing Rubber Gloves For fabrics and hard-to-reach areas, harness the power of rubber gloves. Their textured surface grips and removes pet hair with ease, making them a versatile tool for maintaining a hair-free environment. This method is especially beneficial in how to help cat allergy naturally by reducing allergens in your home. Use Lint Rollers Regularly employ lint rollers on upholstery, curtains, and clothes to swiftly and effectively remove pet hair. The adhesive surface of lint rollers effortlessly picks up loose hairs, leaving your textiles clean and fresh, , which is a practical way in how to get rid of dog hair in the air. Restricting Pet Access to Certain Areas Limit the spread of dander by strategically restricting your pet's access to specific areas, such as bedrooms. Create designated pet-free zones to minimize hair accumulation and maintain a cleaner, allergen-controlled environment. New Release: eufy X10 Pro Omni - Power and Convenience in One Introducing the latest innovation in cleaning technology - eufy X10 Pro Omni. This product combines a powerful 8,000 Pa vacuum with an efficient mop, revolutionizing the way you clean your home. Perfect for pet owners, it offers a healthier living environment with its high-efficiency filter. eufy x10 omni has now been released and has received positive reviews from both the media and users. Come and get yours today! Learn More Buy Now Conclusion Maintaining a hair-free living space with a pet is undoubtedly challenging, but with the right strategies, it's entirely achievable. From regular grooming and vacuuming to choosing the right surfaces, we've covered the essential techniques on how to get rid of pet hair in the air. But that's not all. We've also shared additional tips such as cleaning with a damp cloth, using rubber gloves, and strategically placing lint rollers throughout your home. And let's not forget about restricting your furry friend's access to certain areas in the house. With these tricks up your sleeve, you'll be well-equipped for a hair-free home. FAQ Can You Control Cat Shedding? Controlling cat shedding is partly achievable through regular grooming and a balanced diet rich in omega-3 and omega-6 fatty acids. Brushing your cat frequently helps manage loose hair, while a good diet and hydration promote healthier skin and fur, reducing excessive shedding. Remember, completely eliminating shedding is not possible, as it's a natural process for cats. Does Pet Dander Float in the Air? Yes, pet dander, including cat hair, can become airborne and contribute to indoor air pollution, potentially triggering allergies. Why Am I Suddenly Allergic to My Cat? A sudden allergy to your cat can develop due to repeated exposure to allergens found in cat dander, saliva, and urine. Over time, your immune system can become sensitized to these proteins, leading to allergic reactions. Environmental changes, like spending more time indoors or shifts in air quality, can also intensify these allergies, making them seem sudden.
Robovac · 21/01/2024
How to Get Rid of Cat Allergy Naturally
Living with a cat can be a joy, but for those with cat allergies, it often means dealing with discomfort such as itching, sneezing, and more. The good news is that there are natural remedies and lifestyle changes that can help alleviate cat allergy symptoms. In this comprehensive guide, we will explore the causes and symptoms of cat allergies, delve into remedies on how to get rid of cat allergy naturally, and provide essential tips for minimizing cat allergies in your environment. Causes of Cat Allergy Cat allergies are primarily caused by a tiny protein allergen known as Fel d1. This protein is found in a cat's skin cells, urine, and saliva. When a cat grooms itself, the allergen is transferred to its fur, and from there, it can easily become airborne. When individuals with cat allergies come into contact with these airborne particles, their immune system reacts, leading to various allergic symptoms. Symptoms of Cat Allergy Cat allergies can manifest through various symptoms, often triggered by the immune system's reaction to the Fel d1 protein. Common symptoms include: Itching: Individuals with cat allergies may experience itching, particularly around the eyes, nose, and throat. Persistent itching can be a notable discomfort. Sneezing: Allergic reactions to cat allergens often lead to frequent sneezing, as the immune system responds to the presence of the allergen. Runny or Stuffy Nose: Nasal symptoms are prevalent, ranging from a runny or congested nose to sinus pressure. These symptoms can mimic those of a common cold. Watery or Red Eyes: Cat allergies commonly cause redness and excessive tearing of the eyes. This can contribute to a feeling of irritation and discomfort. Skin Rashes: Prolonged exposure to cat allergens may result in skin reactions, such as redness, hives, or eczema, particularly in individuals with sensitive skin. Respiratory Issues: In more severe cases, cat allergies can exacerbate pre-existing respiratory conditions, leading to coughing, wheezing, or difficulty breathing. Individuals with asthma may experience intensified symptoms. Recognizing these symptoms is crucial for prompt intervention and effective management of cat allergies. New Release: eufy X10 Pro Omni - Power and Convenience in One Introducing the latest innovation in cleaning technology - eufy X10 Pro Omni. This product combines a powerful 8,000 Pa vacuum with an efficient mop, revolutionizing the way you clean your home. Perfect for pet owners, it offers a healthier living environment with its high-efficiency filter. eufy x10 omni has now been released and has received positive reviews from both the media and users. Come and get yours today! Learn More Buy Now Natural Remedies to Relieve Cat Allergy Symptoms If you're looking for natural ways to alleviate cat allergy symptoms, consider incorporating the following remedies into your routine: Take Probiotics Enhance your immune system with probiotics, promoting a healthy balance of gut bacteria. This can help reduce allergic reactions and improve overall well-being. Drink Apple Cider Vinegar Consider incorporating diluted Apple Cider Vinegar into your routine as a potential natural remedy for allergies. Its acetic acid content may help reduce mucus production and support the immune system. Take Vitamin C Boost your immune system and reduce histamine levels by adding vitamin C supplements to your diet. This can aid in lessening the severity of cat allergy symptoms. Herbal Remedies Explore natural herbal options such as butterbur and nettle, which have shown potential in reducing allergy symptoms. Consult with a healthcare professional before incorporating herbal remedies. Saline Nasal Irrigation Clear nasal passages naturally by regularly using saline solutions. This simple practice can help reduce congestion and irritation caused by cat allergens. Use Natural Nasal Sprays Opt for natural nasal sprays containing saline or herbal ingredients. These can provide relief by soothing nasal tissues and minimizing allergic reactions. By integrating these natural remedies on how to help cat allergy naturally into your daily routine, you can proactively manage and alleviate cat allergy symptoms. Tips for Minimizing Cat Allergy Minimizing cat allergies involves reducing exposure to the allergens that cats produce. Here are some tips to help minimize cat allergies: Do Laundry Regularly Frequently wash and change bedding, pillowcases, and curtains to minimize the buildup of cat allergens on fabric surfaces. To tailor cleaning frequencies, consider investing in a pet camera. This invaluable tool provides insights into your cat's favorite spots, ensuring a proactive and tailored approach to maintaining a clean and allergen-minimized living space. Dust and Vacuum To help reduce cat allergies, it's important to clean your home often. Use a vacuum like the eufy X10 Pro Omni at least two times a week. This vacuum is great for picking up pet hair because it has strong suction, a brush that doesn't get tangled, and a big container that empties itself. Also, wipe surfaces with a wet cloth to catch allergens instead of letting them float in the air. Doing these steps can really help lower the amount of allergens in your home and make your allergies better. The eufy X10 Pro Omni is especially good for homes with pets because it has a strong suction power of 8,000 Pa, making it very effective at removing pet hair from carpets. Use an Indoor Allergen Neutralizer Indoor allergen neutralizers, such as sprays or diffusers, can actively reduce the presence of cat allergens in your home. These products work to neutralize and minimize airborne allergens, contributing to a healthier indoor environment. Use Air Filter Install air purifiers with HEPA filters to trap airborne particles, including cat dander. These filters help maintain cleaner air quality, reducing the concentration of allergens in the environment. Shower Your Cat on Time Regularly shower your cat to significantly reduce the amount of allergens present in their fur. Use cat-friendly shampoos and consult your veterinarian for guidance on an appropriate bathing schedule. Feed Your Cat with a Healthy Diet A well-balanced and nutritious diet contributes to your cat's overall health, including skin and fur condition. A healthy diet may help reduce shedding and dander production, minimizing potential allergens. Brush and Groom Your Cat Groomming your cat to minimize shedding and the spread of allergens. with the eufy N930 Pet Grooming Kit with Vacuum. This 5-in-1 professional grooming kit handles pet hair removal, trimming, and grooming in one go. With 5 detachable guard combs and ultra-low noise operation, grooming becomes a stress-free and effective experience for both you and your pet. Limit Cat Access in Certain Rooms Create designated cat-free zones within your home, especially in areas like bedrooms, to minimize allergen exposure. This provides you with spaces that are more conducive to allergy relief and relaxation. Conclusion From understanding the causes of cat allergies to identifying common symptoms, we can better equip ourselves with the knowledge to combat these pesky allergens. By incorporating natural remedies on how to get rid of cat allergy naturally into our daily routines, we can alleviate discomfort and improve overall respiratory health. However, it's important to remember that every person's experience with allergies is unique, so don't hesitate to seek advice from a medical professional if symptoms persist. FAQ How Do I Know What Cat I Am Allergic To? Identifying the specific cat breed you're allergic to can be challenging, as cat allergies are generally triggered by proteins found in the cat's skin cells, urine, and saliva, rather than the cat's breed or fur length. These allergens are similar across different breeds. However, some people may notice varying reactions to different cats, which could be due to the amount of dander a particular cat produces or individual sensitivity. The best approach is to spend time with various breeds to observe your allergic responses, as individual reactions can vary significantly. Consulting with an allergist can also provide more personalized insights and testing. Can I Build Immunity to Cat Allergy? While complete immunity is unlikely, some individuals may experience reduced sensitivity over time with consistent exposure. Are Long Hair Cats Better for Allergies? Long-haired cats are not inherently better for allergies. Allergy to cats is caused by a protein (Fel d1) in their saliva, skin, and fur, not hair length. Both long and short-haired cats produce similar allergen levels, so hair length doesn't significantly affect allergy severity.
Robovac · 21/01/2024
Dog Hair Allergy Treatment: A Comprehensive Guide
If you've suddenly found yourself sneezing, itching, or experiencing respiratory issues around your furry friend, you may be dealing with a dog hair allergy. In this comprehensive guide, we will explore the reasons behind this sudden sensitivity, the symptoms to look out for, and most importantly, effective dog allergy treatment options to help you and your beloved pet coexist happily. Why Am I Suddenly Allergic to Pet Hair? It's not uncommon to suddenly develop allergies to pet hair, even if you've been around dogs before. Several factors may contribute to this unexpected development: Environmental changes, like introducing a new pet or shifts in seasons, can trigger allergic reactions. Genetic predisposition plays a role, with a family history of allergies increasing susceptibility. Changes in your immune system, such as stress or illness, can make you more prone to allergies. Extended exposure to dogs or environments rich in pet allergens, and hormonal fluctuations are also potential culprits. Cross-reactivity between proteins in dog hair and other allergens might lead to allergy symptoms. If you find yourself sneezing or experiencing other allergic reactions around your furry friend, consider recent changes in your environment and your health. What Are the Symptoms of Allergy to Dog Hair? Recognizing the symptoms is crucial for effective allergy management. Allergic reactions to dog hair can manifest in various ways: Respiratory Symptoms Sneezing: Frequent and sudden bouts of sneezing, especially in the presence of dogs. Runny or Stuffy Nose: Persistent nasal congestion or a runny nose. Coughing and Wheezing: Allergic reactions may lead to coughing or wheezing, particularly if you have asthma. Skin Reactions Itchy Skin: Generalized itching, often accompanied by redness. Hives or Rashes: Raised, red welts on the skin. Eye Irritation Watery, Red Eyes: Irritation and redness in the eyes, often accompanied by tearing. Itchy Eyes: Persistent itching or a sensation of grittiness in the eyes. Generalized Symptoms Fatigue: Allergic reactions can cause fatigue, leaving you feeling drained. Headache: Persistent headaches, especially if exposed to dog hair for extended periods. It's essential to recognize these symptoms early on to facilitate prompt management. If you suspect a dog hair allergy, consulting with a healthcare professional or allergist is advisable for accurate diagnosis and personalized guidance on effective treatment options. New Release: eufy X10 Pro Omni - Power and Convenience in One Introducing the latest innovation in cleaning technology - eufy X10 Pro Omni. This product combines a powerful 8,000 Pa vacuum with an efficient mop, revolutionizing the way you clean your home. Perfect for pet owners, it offers a healthier living environment with its high-efficiency filter. eufy x10 omni has now been released and has received positive reviews from both the media and users. Come and get yours today! Learn More Buy Now Treatment Options for Dog Hair Allergy Allergic reactions to dog hair can be managed effectively through a combination of preventive measures and specialized tools. Here are some dog hair allergy treatment options: Shower Your Dog Regularly Initiate a routine of regular dog baths using pet-friendly shampoos. This practice not only keeps your furry friend clean but also significantly reduces the amount of hair and dander they shed. By minimizing these allergens at the source, you can create a healthier living environment. Dust and Vacuum Regularly To keep dog hair allergies at bay, making regular dusting and vacuuming a priority. Tailored for pet owners, the eufy X10 Pro Omini is your go-to solution. With potent suction and the innovative Pro-Detangle Comb™ on the roller brush, it ensures thorough carpet cleaning and automatic hair detangling. It features a floating roller brush that is designed to be close to the carpet surface and effectively lifts and removes debris with its rubber and bristle combination. It is perfect for removing pet hair, crumbs, and fine debris and dust from deep within the carpet. The Self-Empty Station features a 2.5 L bacteriostatic dust bag, securely containing pet hair and allergens. Brush and Grooming Your Dog Managing dog hair allergies is more effective with regular grooming, and the eufy N930 Pet Grooming Kit with Vacuum is an excellent tool for this. This 5-in-1 kit combines hair removal, trimming, and grooming, efficiently capturing 99% of shed fur with its 400W vacuum into a 4.5L dust box. Its ultra-low noise design ensures a calm grooming experience, vital for routine care. Using the N930 regularly not only keeps your pet well-groomed but also significantly reduces allergens in your home. Limit the Dog Access to the Bedroom Designate specific areas, particularly your bedroom, as pet-free zones. This restriction helps minimize allergen exposure during crucial resting hours, providing you with a sanctuary free from dog hair and dander. Use Air Filter That Captures Allergens Integrate air purifiers equipped with HEPA filters into your living spaces. These purifiers efficiently trap airborne allergens, providing continuous relief, especially in areas where your dog spends a significant amount of time. Keep the Whole Environment Clean Maintaining a clean environment is vital in managing dog hair allergies. Regularly cleaning surfaces, washing bedding, and mopping floors can significantly reduce allergens. Focus on areas where your dog spends most of their time, as hair and dander tend to accumulate there. Use a damp cloth to wipe down surfaces, preventing allergen dispersal. Additionally, incorporating hypoallergenic covers for furniture and bedding can further minimize exposure. Seek Help from Veterinary If you're grappling with dog hair allergies, consulting a veterinarian can be a game-changer. Veterinarians can recommend specific hypoallergenic diets and grooming products that reduce your dog's shedding and dander production. Additionally, they may suggest regular allergy shots for your dog to alleviate symptoms. Veterinarians are also a valuable resource for advice on managing your home environment to minimize allergen exposure. Their expertise ensures you receive tailored solutions that benefit both your health and your pet’s well-being. Additionally, consider incorporating a pet camera into your allergy management strategy. A pet camera can help you identify specific areas where your dog spends time, allowing you to target cleaning efforts more effectively and minimize potential allergen exposure. With these friendly and practical strategies, you can strike a balance between fulfilling pet companionship and managing dog hair allergies effectively. Conclusion In conclusion, living with a dog hair allergy is manageable with a combination of preventive measures and effective dog allergy treatment. Regular grooming, cleaning, and utilizing specialized tools like the eufy X8 Pro and eufy N930 can significantly improve your living conditions. Remember, ongoing care and monitoring are essential for a harmonious relationship between you and your furry companion. FAQs How Often Should You Change Air Filter with Dogs? It's advisable to change the air filter every 2 to 3 months, but the frequency may vary based on your specific air purifier and the level of allergens in your home. Can Dog Hair Allergies Be Completely Cured? While a complete cure may be challenging, symptoms of dog hair allergy can be effectively managed through a combination of lifestyle changes, medications, and allergen reduction strategies. How Long Does Dog Hair Allergy Last? The duration of dog hair allergies varies among individuals. Some may experience symptoms for a short period, while others may have a more persistent condition. Continuous management is key for long-term relief.
Robovac · 21/01/2024
How to Get Rid of Dog Hair in the House
If you have a furry friend at home, chances are you have experienced the never-ending battle of dog hair. From constantly finding it on your clothes and furniture to spending hours vacuuming every week, dog hair can be a major inconvenience in our daily lives. But fear not, how to get rid of dog hair in the house is a common challenge that almost every dog owner faces and there are solutions to help combat it. In this blog post, we will explore effective tools, techniques, smart hacks, and DIY solutions to help you maintain a fur-free, clean, and hygienic living space. Effective Removal Tools and Techniques Discover effective tools and techniques on how to remove dog hair and maintain a fur-free living space: Utilize Specialized Vacuum Cleaners for Pet Hair Unveiling the eufy X10 Pro Omni – Your Pet Hair Cleanup Powerhouse! Designed to tackle the unique challenges of pet hair, this MopMaster™ robovac boasts an impressive 8,000 Pa powerful vacuum for efficient cleaning on both carpets and hard floors. Elevate your living space with its high-efficiency filter, ensuring not only a pristine home but also healthier air quality by trapping microscopic particles. Equipped with dual mop pads and the smart AI.See™ technology, this robovac navigates with ease, effortlessly recognizing and avoiding obstacles in its path. Committed to privacy and user-friendly control, the Eufy X10 Pro Omni responds to voice commands through Amazon Alexa or Google Assistant. Use Rubber Gloves Rubber gloves are a simple yet highly effective tool in your arsenal against dog hair. Choose a pair with a textured surface for added grip. To use, lightly dampen the gloves and run your hands over furniture, fabric surfaces, or even carpets. The damp rubber surface attracts and collects loose pet hair, turning a potentially tedious task into a quick and efficient clean-up. This method is not only practical but also budget-friendly, offering a hassle-free way to keep your living spaces free from the clinging strands of fur. Clean with Rubber Squeegee Harness the power of a rubber squeegee for an effective pet hair removal method. This simple tool is surprisingly efficient at gathering hair from carpets, furniture, and even hard-to-reach corners. For optimal results, use short, firm strokes to pull hair towards you, creating easy-to-pick-up clumps. Its versatility allows you to tackle various surfaces, from windows to tiled floors, making it a must-have in your cleaning arsenal. Regular use of a rubber squeegee not only keeps your spaces hair-free but also extends the life of your fabrics by preventing hair buildup. Use Dampened Microfiber Cloth Microfiber cloths, with their electrostatic properties, are stalwarts in the battle against dog hair. When dampened, these cloths become even more effective at attracting and capturing loose fur. Wipe down surfaces like furniture, countertops, and electronic devices to effortlessly lift and gather pet hair. The damp cloth not only helps in hair removal but also cleans surfaces, leaving them polished. Use Lint Roller and Sticky Tape For quick and precise dog hair removal from clothing and upholstery, the lint roller and sticky tape duo are essential tools. The lint roller, with its adhesive sheets, effortlessly captures stubborn strands of fur, making it ideal for last-minute touch-ups before heading out. Sticky tape, a budget-friendly alternative, wrapped around your hand with the sticky side out, efficiently picks up loose pet hair from furniture and fabric-covered items. Clean with Clothing Brush A clothing brush with fine bristles is a handy tool for maintaining a hair-free wardrobe. Regularly brush your clothing items to prevent pet hair from embedding itself in the fabric. The fine bristles capture loose hair, making it easy to dispose of and ensuring that your clothes remain free from furry adornments. This method not only helps in removing existing pet hair but also serves as a preventative measure, keeping your attire from pet hair. In the quest for a hair-free home, these tools and techniques, especially the eufy X8 Pro, offer a winning combination of efficiency and convenience. Smart Hacks for Reducing Dog Hair in the House Here are some effective methods to minimize pet hair in your living spaces: Dust and Vacuum Regularly To effectively minimize dog hair in the house, regularly dusting and vacuuming are key. Opt for a vacuum cleaner like the eufy X8 Pro specifically designed to pick up pet hair, focusing on areas where your dog spends most of their time. Before vacuuming, lightly sprinkle baking soda on carpets and upholstery. It helps to loosen pet hair, making vacuuming more effective, and also neutralizes any lingering odors. This combined approach not only keeps your home cleaner and fresher but also reduces allergens, creating a healthier living space for both you and your furry friend. Regular Pet Grooming and Brushing Investing time in regular grooming sessions for your pet is a proactive measure to reduce shedding. The eufy N930 Pet Grooming Kit with Vacuum simplifies this process, not only handling pet hair removal but also offering trimming and grooming capabilities in a single go, ensuring a comprehensive approach to pet care. Use Air Filters and Humidifiers Install air filters in your home to help to remove airborne dog hair and dander. Humidifiers can also be beneficial, as they help minimize static electricity, reducing the likelihood of pet hair clinging to surfaces. Cover Your Furniture Protect your furniture and minimize dog hair accumulation with simple yet effective covers. Opt for washable, pet-friendly fabrics that are easy to remove and clean. Covers not only shield your sofas and chairs from pet hair but also from dirt and scratches, prolonging the life of your furniture. Regularly washing these covers helps maintain a hygienic environment. Additionally, choosing colors and patterns that match your decor ensures that functionality meets style, seamlessly blending into your home's aesthetic while keeping it hair-free. Keep Your Pet Healthy Maintaining your pet’s health is key to reducing excess hair in your home. Ensure a balanced diet, enriched with essential nutrients, to promote a healthy coat. Regular check-ups with a veterinarian can identify and address any underlying skin or health issues that might cause excessive shedding. Incorporating omega fatty acids into their diet can also improve skin health, leading to less shedding. A healthy pet not only means less hair around the house but also a happier, more vibrant companion. By incorporating these hacks into your routine, you not only manage dog hair effectively but also create a harmonious living space for both you and your furry companion. New Release: eufy X10 Pro Omni - Power and Convenience in One Introducing the latest innovation in cleaning technology - eufy X10 Pro Omni. This product combines a powerful 8,000 Pa vacuum with an efficient mop, revolutionizing the way you clean your home. Perfect for pet owners, it offers a healthier living environment with its high-efficiency filter. eufy x10 omni has now been released and has received positive reviews from both the media and users. Come and get yours today! Learn More Buy Now DIY and Household Solutions In addition to specialized tools and smart hacks, DIY and household solutions offer effective ways to combat dog hair in your home. Homemade Anti-static Sprays and Fabric Softeners Craft your own anti-static spray by combining water and fabric softener. Lightly mist surfaces with this homemade solution to reduce static electricity, making it easier to remove and prevent dog hair from clinging. Additionally, adding a bit of fabric softener to your laundry can help minimize static and soften fabrics, making them less prone to attracting pet hair. Washing Machine Techniques for Pet Beddings and Blankets Maintain a fresh and hair-free environment by adopting proper washing machine techniques for your pet's beddings and blankets. Before washing, use a lint roller or sticky tape to remove loose hair. Wash these items separately, adding a pet-safe fabric softener or vinegar to the rinse cycle. Opt for a higher spin speed to extract more hair before drying. Ensure the washing machine's lint trap is clean to prevent hair from resettling. These DIY and household solutions offer accessible alternatives to help you manage and reduce dog hair throughout your home. Conclusion Managing dog hair in the house requires a combination of effective tools, smart hacks, and DIY solutions. Besides incorporating specialized vacuum cleaners, regular grooming, and smart cleaning practices, consider integrating a pet camera into your household setup. This addition allows you to keep an eye on your furry friend and ensure their well-being even when you're not at home. By implementing these strategies, you will achieve the primary goal of how to get rid of dog hair in the house naturally. FAQs Does White Vinegar Remove Dog Hair? Yes, white vinegar is a great cleaning ally, especially for pet hair. Add about half a cup to your washing machine during the laundry, which helps relax fabric fibers, making it easier to release and remove stubborn pet hair. What Is the Most Effective Pet Hair Remover? The eufy vacuum cleaner is considered one of the most efficient ways to remove pet hair. Its powerful suction and pet-specific features make it a reliable choice for pet owners. Why Does My House Get So Dusty with Dogs? Dogs contribute to household dust through shedding skin cells, dander, and hair. Regular grooming, cleaning, and using air filters can help minimize dust levels in your home.
Robovac · 21/01/2024
Best Way to Pick up Dog Hair on Hardwood Floors
Hardwood floors exude timeless elegance, but add a furry friend to the mix, and you've got a constant battle against dog hair. Dog hair not only causes aesthetic issues but also initiates an endless cleaning cycle. But fear not, as there are effective methods and techniques to help you tackle this hairy situation. In this guide, we'll explore the challenges posed by dog hair on hardwood floors and unveil the best way to pick up dog hair on hardwood floors. The Struggle is Real: Dealing with the Challenge of Cleaning Up Dog Hair Owning a dog is a source of boundless joy, but it comes hand in paw with the incessant challenge of managing dog hair. The problems unleashed by these furry companions extend beyond mere aesthetics, encompassing health hazards, messy living spaces, and potential damage to hardwood floors. Allergies become a genuine concern as dog hair transforms into a potent allergen, triggering respiratory discomfort for those sensitive to pet dander. Living spaces, no matter how meticulously decorated, can quickly adopt an unkempt appearance due to the relentless shedding. The struggles intensify when attempting to rid the home of dog hair. Traditional cleaning methods prove inadequate as persistent hair finds refuge in every conceivable nook, defying the efforts of standard brooms and vacuums. The battle becomes even more daunting as vacuums frequently succumb to clogging issues, compromising their efficacy and demanding continuous maintenance. Time-consuming cleaning routines add to the challenge, leaving pet owners in a perpetual quest for effective solutions. In the face of these challenges, discovering effective cleaning methods on how to get dog hair off of hardwood floors becomes paramount for maintaining a healthy, and aesthetically pleasing living environment. Effective Methods for Cleaning up Dog Hair on Hardwood Floors Here are five effective methods to ensure your hardwood floors stay clean: Pet Vacuum Cleaner Investing in a high-quality pet vacuum cleaner, such as the eufy X8 Pro, a true pet hair cleaning expert. The roller brush, equipped with automatic detangling capabilities, ensures a seamless cleaning process, eliminating the common issue of hair clogging. With iPath™ Laser Navigation and AI Map functionality, the X8 Pro offers unparalleled precision, navigating your home layout for optimal coverage. Stand out from the ordinary vacuum routine and let the eufy Clean X8 Pro with Self-Empty Station redefine your cleaning experience. Rubber Broom The rubber broom is a simple yet powerful tool in the battle against dog hair on hardwood floors. Its electrostatic properties attract and efficiently gather dog hair. The flexible rubber bristles also ensure that the hair doesn't merely scatter but is effectively collected, simplifying the cleaning process. Microfiber Mop Gentle yet effective, a microfiber mop is a must-have for regular maintenance. The microfiber material acts like a magnet, trapping and holding onto dog hair. Not only does it clean the surface, but it also helps prevent scratches, keeping your hardwood floors in top condition. Use Dryer Sheet Although conventionally associated with laundry, dryer sheets exhibit an unexpected proficiency in mitigating dog hair on hardwood floors. Harnessing static electricity, these sheets attract and adhere to loose hair, simplifying the collection process. A swift pass with a dryer sheet not only captures stray pet hair but also contributes to the overall cleanliness of your hardwood surfaces. New Release: eufy X10 Pro Omni - Power and Convenience in One Introducing the latest innovation in cleaning technology - eufy X10 Pro Omni. This product combines a powerful 8,000 Pa vacuum with an efficient mop, revolutionizing the way you clean your home. Perfect for pet owners, it offers a healthier living environment with its high-efficiency filter. eufy x10 omni has now been released and has received positive reviews from both the media and users. Come and get yours today! Learn More Buy Now Tips for Removing Pet Hair from Everywhere Here are some effective tips to tackle pet hair from every nook and cranny: Regular Grooming to Reduce Shedding Regular grooming is not only essential for your pet’s hygiene but also plays a crucial role in minimizing shedding and keeping your home clean. A remarkable tool to assist in this task is the eufy N930 Pet Grooming Kit with Vacuum. This versatile 5-in-1 kit, featuring a powerful 400W vacuum, efficiently suctions 99% of pet hair into a large 4.5L dust box during grooming. It comes with five adjustable guard combs suitable for various hair lengths and operates with ultra-low noise, ensuring a stress-free grooming experience for your pet. Regular use reduces shedding and keeps your home clean. Frequent Dusting and Vacuuming Consistent and thorough dusting and vacuuming are the foundation of a pet hair-free home. Dust surfaces, furniture, and corners regularly to prevent the accumulation of hair. Choose a vacuum cleaner equipped with specialized attachments for upholstery and crevices to ensure a comprehensive clean. Pay extra attention to high-traffic areas and your pet's favorite spots, as these are prime locations for hair buildup. Quality Air Filters to Trap Floating Hair Upgrade your home's air quality by investing in high-quality air filters. These filters play a crucial role in trapping airborne pet hair, minimizing the presence of floating particles and contributing to a cleaner environment. Opt for HEPA filters specifically designed to capture pet dander for optimal results. Resealing Floors to Prevent Hair Snags Consider resealing your hardwood or other floor surfaces to create a smooth, imperfection-free finish. Resealing minimizes the likelihood of pet hair becoming snagged in surface irregularities, making the cleaning process more efficient. Consult with flooring professionals to determine the appropriate sealing products for your specific floor type, ensuring optimal protection against pet hair embedment. Healthy Diet with Quality Pet Food Addressing the root cause of excessive shedding starts with your pet's diet. Provide a well-balanced and nutritious diet using high-quality pet food rich in essential nutrients. Omega-3 fatty acids, in particular, promote healthy skin and coat, significantly reducing shedding. Consult with your veterinarian to tailor your pet's diet to their specific needs, contributing to a healthier coat and a decrease in loose hair around your home. In addition to the above tips, consider integrating modern technology into your pet care strategy, such as a pet camera. A pet camera allows you to keep an eye on your pet's activities, providing peace of mind and an opportunity to address any potential messes promptly. Conclusion Maintaining a dog-friendly home with hardwood floors is a challenge, but armed with the right tools and techniques, you can keep your space clean and stylish. By incorporating the best way to pick up dog hair on hardwood floors into your cleaning routine and overall pet care practices, you can create an environment that is not only clean but also conducive to the well-being of both you and your furry companion. FAQ Is It Better to Sweep or Vacuum Hardwood Floors? The choice between sweeping and vacuuming hardwood floors depends on various factors. Sweeping is effective for daily maintenance, removing loose dirt and debris. However, vacuuming, especially with a pet-specific vacuum cleaner like the eufy Clean X8 Pro , is more efficient in capturing fine particles, including dog hair. How Often Should I Clean My Hardwood Floor with If I Have a Dog? If you have a dog, the frequency of cleaning your hardwood floors may need to be increased. Aim for at least once a week to remove accumulated pet hair, dirt, and dander. High-traffic areas and your pet's favorite spots may require more frequent cleaning. What Is the Best Tool for Dog Hair on Hardwood Floors? The best tool for removing dog hair on hardwood floors depends on your specific needs. The eufy X8 Pro pet vacuum cleaner stands out for its pet-specific features, including automatic detangling after each clean. Additionally, a rubber broom and microfiber mop are effective manual tools for gathering pet hair. Experiment with different tools to find the combination that works best for your home and ensures a thorough and efficient cleaning process.
Video doorbell · 08/01/2024
The Ultimate Guide to Solar Doorbell Cameras: Sustainable Surveillance Solutions
Solar doorbell cameras have surged in popularity due to their sustainable approach to home security. Their rise stems from harnessing solar power for continuous operation, reducing reliance on conventional power sources. If you're contemplating whether a solar doorbell camera is the right choice for you, it's important to understand its pros and cons, explore the various models available, and consider some useful tips for usage and installation. This article aims to provide comprehensive insights into these aspects, along with presenting some of the best alternatives on the market, helping you make an informed decision. Understanding Solar Doorbell Cameras: Advantages and Challenges Solar doorbell cameras represent a significant leap in home security technology, leveraging solar power for consistent operation and offering several advantages. Their standout convenience stems from their reliance on solar energy, eliminating the need for frequent recharging. Unlike traditional battery-powered devices, solar powered doorbell cameras operate continuously without downtime, ensuring uninterrupted surveillance. This feature significantly reduces user effort, sparing homeowners from the hassle of frequent battery changes. Moreover, the benefits of using solar powered doorbell cameras extend beyond convenience. They contribute to sustainable living by harnessing renewable energy sources and minimizing their environmental footprint. Their installation and maintenance are simplified, offering a hassle-free, long-term security solution for homes. However, challenges may arise in regions with limited sunlight or during extended periods of inclement weather, potentially affecting consistent operation. In such cases, alternative power sources or supplementary charging methods may be necessary to ensure uninterrupted functionality. Despite these challenges, the remarkable convenience and sustainable aspects of solar doorbell cameras make them a compelling choice for those seeking reliable, eco-friendly, and efficient home security solutions. Comparing Solar and Traditional Doorbell Cameras: A Detailed Chart In the quest to choose the perfect doorbell camera for your home, understanding the differences between solar and traditional models is crucial. We will provide a detailed chart comparing solar-powered and conventional doorbell cameras, laying out key features, performance metrics, and other essential factors side by side. Let’s delve into the specifics and see how these two types of doorbell cameras stack up against each other: Aspect Solar Doorbell Cameras Traditional Doorbell Cameras Power Source Harness solar energy for continuous operation Require frequent battery changes or wired power Environmental Impact Eco-friendly, harnessing renewable energy sources Relies on disposable batteries or non-renewable power Installation Simplified setup, no need for extensive wiring Wiring required for power source, potentially complex setup Maintenance Minimal maintenance, no battery replacements Regular battery changes or power source maintenance Reliability Continuous operation, dependent on sunlight availability Reliable but subject to battery life or power source issues Adaptability Works in areas with ample sunlight; may need alternative power Suitable for various locations with wired power availability Three Variants of Solar Powered Security Cameras on the Market Solar powered security cameras come in various types, offering flexible options for sustainable surveillance solutions, from integrated solar solutions for seamless operation to adaptable setups using external panels or modular bases. Learn more about the 3 variants of doorbell cameras with solar powered below. Doorbell Cameras with Built-in Solar Panels These cameras integrate solar panels directly into their design, harnessing sunlight to power the device. So, such a doorbell camera with solar powered eliminates the need for separate solar installations, providing a self-sustaining and hassle-free surveillance solution. External Solar Panels for Battery-Powered Doorbell Cameras Some brands offer external solar panels compatible with battery-powered doorbell cameras. These panels serve as supplementary power sources, ensuring continuous operation by charging the camera's batteries. For instance, Amazon offers solar panels for doorbells compatible with devices like the Google Nest Doorbell, enhancing their sustainability and longevity. Doorbell Cameras with an Official Solar Base Certain models feature official solar bases equipped with small, upgradeable solar panels. These bases offer flexibility, allowing users to attach additional or upgraded solar panels for improved efficiency and customization based on their energy needs. This modular approach caters to varying sunlight conditions and user preferences. Essential Considerations for Solar Doorbell Cameras Which solar powered doorbell camera should you choose? Here are some considerations aiding in selecting a solar doorbell camera suited to the desired environment, ensuring optimal performance, prolonged battery life, and maximizing utilization of solar power for uninterrupted surveillance. Sunlight Exposure: Solar doorbell cameras rely on sunlight for power. Evaluate the amount of direct sunlight the installation spot receives daily. Areas with limited sun exposure may require additional solar panels or alternative charging methods. Battery Life and Backup: Check the battery life of the camera. It's important to know how long the camera will operate on a full charge and the duration it can function without sunlight. Consider models with a backup power option for consistent performance. Camera Quality and Features: Assess the camera’s resolution, field of view, night vision capabilities, and any additional features like motion detection, two-way audio, and integration with smart home systems. Higher resolution and additional features can enhance security but may also consume more power. Durability and Weather Resistance: Since solar doorbell cameras are typically installed outdoors, they need to be durable and weather-resistant. Look for solar powered ring doorbells with a high IP (Ingress Protection) rating to ensure they can withstand various weather conditions. Alternative Solutions: Top Solar Doorbell Camera Options eufy Spring Cleaning Deals is on - Check Amazing Discounts! Spring into cleanliness with eufy's special deals! Elevate your home's hygiene with our advanced robot vacuums and ensure safety with top-notch security cameras. Don't miss out on a spotless and secure home. Act now and embrace a cleaner, safer spring with eufy. Shop the sale today! Save now Sign up for discounts While solar video doorbells are an excellent choice for eco-friendly and wireless home security, they may not be the ideal solution in certain scenarios. For instance, locations with limited sunlight exposure, like shaded backyards, or areas with prolonged winter seasons, might hinder the efficiency of solar-powered systems. In such cases, exploring alternatives that offer reliability and ease of use is crucial. One such alternative is the dual power option that provides a long-lasting battery as well as a wired connection. A good example is eufy Video Doorbell S220, which is a battery operated doorbell with a wired connection. It offers up to six months of coverage on a single charge, which addresses the concern of constant battery replacement. Additionally, for those who prefer a continuous power supply without the worry of recharging, the eufy Video Doorbell S220 can be connected to a wired power source. This flexibility makes it an excellent choice for various user preferences and installation conditions. It is a one-time purchase that combines security with convenience. All your data is stored locally, which means you will never have to pay for cloud storage. The video doorbell provides high-definition 2K video quality for clear visuals. Equipped with AI-powered human detection for precise alerts. Enables two-way audio communication between users and visitors. Wireless connectivity ensures easy setup and flexibility. Conclusion Solar powered doorbell cameras bring several advantages to home security. They offer sustainable, uninterrupted operation, reducing maintenance and operating costs. Their importance lies in eco-friendliness, aligning with the growing trend toward sustainable living. But when you use the solar powered video doorbell, especially in regions with limited sunlight, the battery-powered doorbell or the wired one is the alternative you can consider. FAQs Is there such a thing as a solar doorbell? Yes, there are solar powered doorbells available in the market. These doorbells utilize solar panels to recharge their batteries, eliminating the need for frequent battery changes or wiring for power, making them eco-friendly and convenient for installation. How to connect a solar panel to a ring doorbell? To connect a solar panel to a ring doorbell, attach the panel to the doorbell and connect the provided cable, ensuring proper placement for optimal sunlight exposure.
Video doorbell · 08/01/2024
Choosing the Best Doorbell Camera with Monitor for 2024
The use of a doorbell camera with monitor has become more and more popular as technology continues to advance in the home security industry. This surge in demand has sparked interest amongst homeowners and tech enthusiasts alike, who seek to better understand the appeal, potential benefits, drawbacks, selection criteria, alternatives, and leading recommendations for these innovative devices. As the world continues to seek advancements in home security, the door camera with monitor has emerged as a critical player, offering a combination of convenience, safety, and technological sophistication. The Appeal of Doorbell Cameras with Monitors: Understanding Consumer Interest The surge in consumer interest towards video doorbells with monitor can be explained by many reasons. The main ones would be safety and security. It ranks high on homeowners' priorities and these devices offer a modern and technologically advanced means to monitor entrances. They let homeowners visually verify the identity of visitors before unlocking, adding an extra layer of security. Another reason is the "immediacy" offered by a front door security camera with monitor (built-in), which eliminates the need to check a phone or other device and adds a layer of convenience that is attractive to many. This is especially beneficial for non-tech-savvy individuals or the elderly who may struggle with mobile apps. Pros and Cons of Doorbell Cameras with Monitors While doorbell cameras with monitors offer several benefits, it's important to weigh both their advantages and limitations. This section will delve into the various aspects to consider, helping you make an informed decision about whether these devices are right for your home security needs. Pros: Enhanced User-Friendliness The biggest advantage of a doorbell with camera and monitor is its enhanced user-friendliness. This is particularly beneficial for the elderly, who may struggle with the advanced technological features offered by traditional doorbell cameras. The monitor offers the convenience of immediate visual identification, reducing confusion and adding an extra level of safety. Live View Convenience With a dedicated monitor, homeowners enjoy the live view convenience, getting access to real-time visual information once someone is at their doorstep. This immediate confirmation eliminates guesswork and false alarms, particularly when utilized with motion detection. Phone-Free Operation Another compelling benefit of a front door camera with monitor is the ability to monitor one's doorstep without being tied to a mobile device. The standalone monitor means even in scenarios where one's smartphone isn't accessible or its battery has died, the monitor can still provide a visual status of who is at the door. Cons: Limited Big Brand Options One downside to wireless doorbell camera with monitor lies in their limited availability from big-name companies. Brands like eufy tend to focus more on conventional doorbell cameras, leaving consumers reliant on less-established companies. This could raise concerns about product quality, after-sales support, or long-term reliability. Smart Home System Compatibility Integration into existing smart home systems may also pose a challenge. Given their unique hardware requirements, wireless door camera with monitor may not always mesh well with broader smart home ecosystems, potentially resulting in a fragmented or less streamlined user experience. Key Factors to Consider When Selecting a Doorbell Camera with Monitor When choosing a doorbell camera with a monitor, there are some important factors to consider. Resolution Quality When choosing the best wireless doorbell camera with monitor, the video resolution quality is crucial. You want to be able to clearly identify faces and objects on your doorstep at any time of the day. High-definition (HD) resolution is the benchmark at this time, preferably 1080p or even sharper. Compatibility with Existing Smart Home Systems It's crucial to select a doorbell camera that integrates seamlessly with your current smart home system. Whether you use Apple HomeKit, Amazon Alexa, Google Home, or another platform, your doorbell camera should enhance that system. The integration ensures cohesive interaction between all your connected devices. Touch Screen vs. Non-Touch Screen Options Touch screen front door monitor offers intuitive controls and easier navigation, which benefits many users. However, non-touch models may be more durable and less prone to smudges or scratches. But then again, your personal preference and the specific context of your home will dictate this choice. Two-Way Talk Feature A two-way talk feature is invaluable. This allows you not only to hear what's happening outside your door but also to communicate with the person at the door. This means you can convey instructions to a delivery person, for instance, without having to open the door. Power Source Battery-powered doorbell cameras are portable and easy to install, not needing any wired connection. However, a wireless doorbell monitor with camera requires frequent charging or battery replacements. Wired options offer continuous power but need more effort to set up. Ease of Installation Some doorbell cameras can be installed with just a screwdriver and a little time. Others might need professional installation or even electrical rewiring. Consider your DIY proficiency and whether or not you want to pay for a professional setup. Alternative Solutions to Doorbell Cameras with Monitors While traditional doorbell cameras with monitors are popular, there are several alternative solutions worth considering. These alternatives can offer different features and integrations, making them suitable for various user preferences and home setups. In this section, we will explore some innovative options that might align better with your specific needs and lifestyle. Battery-Powered Doorbell Camera with Amazon Echo Show/Google Hub Integration This set up provides the advantage of connecting your doorbell camera to a voice-controlled smart device. Commands can be given to either display the front door video on the Echo Show or Google Hub, thus eliminating the need for a separate monitor. Battery-Powered Doorbell Camera Connected to Used iPad/Tablet A more cost-efficient and sustainable option is to repurpose an old iPad or tablet as the monitor for your doorbell camera. You can integrate with ecosystems like Apple TV for live viewing, transforming your used device into a dedicated home security monitor. Utilizing Smartphones for Door Monitoring Smartphones offer a significant benefit—convenience. Most doorbell cameras are compatible with smartphone apps, providing portable real-time video surveillance. You can check who is at your door, wherever you are in the house or even away. Top Doorbell Camera Recommendations Selecting the best doorbell camera for your home is essential for enhancing security and convenience. This section focuses on the top doorbell camera models of 2024, ensuring you find a product that meets your specific needs and preferences. 1.eufy Video Doorbell E340 Imagine you've recently moved into a new neighborhood and are looking to enhance your home's security and convenience. You're particularly concerned about monitoring your front door, especially for package deliveries and unexpected visitors. With safety and ease of use in mind, you decide to explore smart doorbell options. The eufy Video Doorbell E340 can be an ideal choice for you. This battery-powered device stands out due to its dual-camera system combined with 2K Full HD resolution, providing an unmatched level of detail and coverage. The front-facing camera monitors visitors with high clarity, while the downward-facing camera captures a detailed view of the ground, ensuring no aspect is missed. This integration of dual cameras with superior resolution guarantees you a comprehensive and crystal-clear view of your entire doorstep area, whether it's capturing a detailed image of a visitor or spotting a package left at your door. The eufy Video Doorbell E340 also boasts color night vision, a feature that sets it apart from many other doorbells. With its industry-first dual-light system and advanced processing algorithm, it offers clear, less blurry images at night up to a distance of 16ft (5m). This means you can identify visitors and monitor your doorstep even in low-light conditions. It is equipped with a suite of advanced features enhancing its functionality and user experience. The eufy E340 includes local storage of 8 GB, allowing you to securely save video footage directly on the device. The quick-release battery pack facilitates easy swapping, minimizing downtime during charging. Instant notifications keep you updated in real-time when someone is at your door. The two-way audio feature enables clear communication with visitors. Smart AI technology is adept at recognizing faces and alerting you to package deliveries. Additionally, its compatibility with popular voice assistants like Alexa and Google Assistant offers convenient, hands-free control. 2.eufy Video Doorbell S330 Imagine you are a small business owner operating a boutique store in a bustling neighborhood. Security and customer interaction are paramount for your business, but you often find yourself away from the storefront, attending meetings or sourcing new products. To stay connected and ensure the security of your store, you realize the need for a smart, interactive security solution. Enter the eufy Video Doorbell S330, a device that perfectly aligns with your business needs. The S330's standout feature is its Dual Cam Technology, which includes a front camera with a 160° view and a package camera with a 97° view. The 2K resolution of the front camera, combined with 1080p quality of the package camera, ensures every detail is captured in high definition. For a business like yours, where package deliveries and customer interactions are frequent, the Smart AI Support is invaluable. This wireless doorbell camera includes package detection, waiting detection, and human detection, ensuring you're alerted to any activity at your storefront. Dual Motion Detection, utilizing both radar and PIR (passive infrared) technologies, offers enhanced accuracy in detecting movement, reducing false alarms, and keeping you informed of genuine events. The eufy Video Doorbell S330's two-way audio feature allows you to communicate directly with customers or delivery personnel from wherever you are, adding a personal touch even when you're not physically present. The motion-activated event recording stores footage locally on the HomeBase 2, which has a 16GB capacity, ensuring you don't miss any important activity. The device's power efficiency is notable, with a battery life ranging from 3-6 months, depending on usage. This long battery life is particularly beneficial for your business, reducing maintenance and ensuring continuous operation. Lastly, the eufy Video Doorbell S330's compatibility with Google Voice Assistant and Amazon Alexa, although not with HomeKit, offers convenient voice control options, aligning well with other smart devices you might use in your business. Conclusion In conclusion, the selection of doorbell camera with monitor depends on individual circumstances, preferences, and existing home automation system. Yet, as a general recommendation, eufy's video doorbells present a balanced bundle of features suited to most homeowners' needs. These cameras’ high resolution and durability, coupled with easy integration with home systems and two-way communication, make them a robust choice. Nonetheless, always carefully consider if the chosen solution sufficiently meets specific security requirements and seamlessly fits into the existing home ecosystem. FAQ Here are some commonly asked questions about doorbell camera with monitor. Do Doorbell Cameras Record Continuously? Most doorbell cameras do not continuously record because it would consume a large amount of internet bandwidth and storage space. Instead, it usually records video when there is motion or when the doorbell is rung. However, some high-end models offer continuous recording features, but these usually require a cloud storage subscription. Choosing Between a Video Doorbell and a Security Camera System The choice between a video doorbell and a security camera system largely depends on your individual security needs. Video doorbells primarily focus on the entrance and offer features like two-way communication and motion detection, making it perfect for monitoring deliveries, guests, or potential intruders. On the other hand, a security camera system covers a broader area with multiple cameras and offers comprehensive surveillance of your property but may lack interactive features. Therefore, assess your specific security goals and choose a system that aligns best with those. Is a WiFi Connection Necessary for Doorbell Cameras? Yes, a WiFi connection is highly necessary for doorbell cameras. WiFi enables the camera to transmit its recordings to either a cloud storage or a specific device like your smartphone. Without WiFi, users cannot receive real-time alerts, engage in two-way talk, or remotely view the recorded footage, which are key features of modern doorbell cameras.
Robovac · 13/12/2023
The Ultimate Powerful Vacuum Cleaner - Unleash Cleanliness
Household cleaning just got a whole lot easier with the latest advancements in vacuum technology. When it comes to keeping your living space pristine, a powerful vacuum cleaner is your best ally. In this comprehensive guide, we'll delve into the world of powerful vacuum cleaner, discussing what constitutes good suction power, the best options known for their robust suction, and how to select the right suction power for your needs. Say goodbye to dust and dirt – it's time to unleash the power of cleanliness! What Is a Good Suction Power for Vacuum Cleaner? When evaluating the suction power of vacuum cleaners, two different measurements are commonly used: Air Watt (AW) and Pascal (Pa). Understanding these measurements is key to determining what constitutes good suction power for different types of vacuum cleaners. Air Watt (AW) Air Watt is a comprehensive and more accurate measurement of a vacuum cleaner's suction power. It takes into account both the airflow (how much air the vacuum pulls in) and suction (the vacuum's ability to lift dirt, measured in inches of water lift). AW is primarily used for upright and canister vacuums, as these types often require strong suction for deep cleaning, especially in removing dirt from carpets and upholstery. Pascal (Pa) Pascal is a unit of pressure that measures the vacuum's suction force. It indicates how much pressure the vacuum creates to lift dirt and debris. This measurement is particularly relevant for robotic vacuums. Given their automated nature and different cleaning patterns, Pa is a more suitable metric to gauge their ability to maintain cleanliness on a regular basis, particularly on hard floors and low-pile carpets. Ideal Suction Power Upright and Canister Vacuums: A good suction power for these vacuums is around 100 to 200 AW. This range is effective for most home cleaning tasks, providing enough power to lift dirt from various surfaces. Robotic Vacuums: As for robotic vacuums, a suction power in the range of 500 to 2000 Pa is typically adequate for routine maintenance cleaning. Higher-end power force vacuum cleaner models may offer up to 2000 to 4000 Pa, which is beneficial for homes with more demanding cleaning needs. Best Vacuum Cleaners with Powerful Suction When you're in the market for a powerful vacuum cleaner, it's essential to consider the various options available. We've rounded up a list of some of the best vacuum cleaners known for their outstanding suction capabilities. Let's explore the top contenders in the world of cleaning: 1. eufy X10 Pro Omni Eufy X10 Pro Omni is a paradigm shift in cleaning technology. With an extraordinary 8,000 Pa powerful vacuum, this groundbreaking MopMaster™ robovac surpasses conventional cleaning devices. Tailored for pet-friendly households, the eufy X10 effortlessly tackles pet hair on both carpets and hard floors. Its high-efficiency filter not only ensures a thorough cleaning process but also enhances indoor air quality by trapping microscopic particles. Packed with innovative features like AI.See™ technology for efficient obstacle recognition, privacy certifications, and compatibility with voice commands through Amazon Alexa or Google Assistant, the eufy X10 Pro Omni transcends the ordinary. 2. X8 Pro Robotic Vacuum The eufy X8 Pro Robotic Vacuum, featuring a Self-Empty Station, is among the strongest vacuum cleaners on our list with its 2× 4,000 Pa Twin-Turbine suction system, excelling at removing deep-seated pet hair from carpets. The innovative Active Detangling Roller Brush automatically untangles hair, reducing manual maintenance. This model boasts up to 45 days of hands-free operation, thanks to its 2.5 L bacteriostatic dust bag in the Self-Empty Station. With the advanced iPath Laser navigation and customizable AI Map 2.0 technologies, it intelligently scans and maps your home, optimizing cleaning routes for thorough coverage with ease. 3. Dyson Ball Animal 2 The Dyson Ball Animal 2 is a high power vacuum cleaner designed to tackle the toughest of tasks across various floor types. Its Radial Root™ cyclone technology and 290 AW suction power in Boost Mode ensure deep cleaning, especially effective for pet owners. The self-adjusting cleaner head and Ball™ technology make it agile and efficient, easily navigating around furniture. The vacuum also features a tangle-free turbine tool, an instant-release wand for high-reach areas, and a washable lifetime filter, making it both powerful and practical for everyday use. Its ability to trap 99.97% of fine dust makes it an excellent choice for maintaining a clean, allergen-free home. 4. Shark Navigator Lift-Away Professional NV356E The Shark Navigator Lift-Away Professional NV356E is a powerful suction vacuum cleaner that excels in versatility and efficiency. Its standout feature is the Lift-Away functionality, enabling seamless transition to above-floor cleaning with a 59.84-inch hose. The vacuum is equipped with an anti-allergen complete seal and a HEPA filter, capturing 99.9% of dust and allergens, essential for allergy sufferers. Its brushroll shutoff provides adaptability between deep carpet and bare floor cleaning. Additionally, the 2.2-quart capacity dust cup allows for extended cleaning sessions without interruption. This model is particularly favorable for pet owners, with its ability to effectively remove pet hair and dander from various surfaces. 5. Miele Complete C3 Marin The Miele Complete C3 Marine is a standout vacuum cleaner with strong suction, boasting a 1200 W motor. Its electrobrush with LEDs expertly cleans heavy-duty carpeting, while the Parquet Twister is gentle on delicate hard floors. Ideal for allergy sufferers, the HEPA Lifetime Filter ensures maximum air hygiene by trapping fine dust and allergens. This vacuum cleaner comes with convenient accessories including a dusting brush, upholstery tool, and crevice tool, all stored internally for easy access. Its versatility and powerful performance make it an excellent choice for thorough, yet gentle cleaning across various floor types. 6. Hoover WindTunnel T-Series Bagged Upright Vacuum The WindTunnel T-Series Bagged Upright Vacuum is among the strongest suction vacuum cleaners available, ideal for comprehensive home cleaning. It boasts a powerful 1200-watt motor and Windtunnel technology, ensuring deep removal of surface debris and pet hair. With its HEPA media filtration, it captures 99.7% of dust, pollen, and allergens, making it suitable for those who prioritize air quality. The 30-foot cord and five-floor height adjustment settings enhance its versatility, effortlessly transitioning between various floor types. This model includes useful attachments like an air-powered hand tool and an 8-foot hose, making it a reliable and efficient choice for thorough cleaning. New Release: eufy X10 Pro Omni - Power and Convenience in One Introducing the latest innovation in cleaning technology - eufy X10 Pro Omni. This product combines a powerful 8,000 Pa vacuum with an efficient mop, revolutionizing the way you clean your home. Perfect for pet owners, it offers a healthier living environment with its high-efficiency filter. eufy x10 omni has now been released and has received positive reviews from both the media and users. Come and get yours today! Learn More Buy Now How to Choose the Suction Power of Your Vacuum Choosing your ideal vacuum cleaner with the right suction power involves considering your specific cleaning needs, the type of surfaces in your home, and any additional considerations like pets or allergies. Here's a guide to help you make an informed decision: Assess Your Home's Cleaning Requirements - For Hard Floors or Low-Pile Carpets: A moderate suction power works well here. Aim for a range of about 100 to 200 AW for upright/canister vacuums. For robotic vacuums, suction power between 500 to 2000 Pa is typically adequate. - For High-Pile Carpets: If you have thick, high-pile carpets or numerous rugs, you'll benefit from a super vacuum cleaner with higher suction. Choose upright/canister vacuums with over 200 AW for deeper cleaning, and look for robotic vacuum cleaner models offering 2000 to 4000 Pa to effectively handle these surfaces. - For Pet Owners and Allergy Sufferers: Homes with pets require higher suction vacuum cleaners for effective pet hair and dander removal. If allergies are a concern, prioritize high suction power combined with excellent HEPA filtration. Additional Tips - Noise and Energy Consumption: Higher suction power may result in louder operation and more energy usage. Balance these with your comfort and environmental considerations. - Design and Features: Beyond suction power, the design of the vacuum, its brush head technology, and additional features like maneuverability and ease of emptying the dustbin are also important. - Budget and Brand: Higher suction power often means a higher cost. Match your budget with your needs and consider the brand reputation and warranty offers. Related Products Check out these collection pages for more products: eufy Self-emptying Robot Vacuum for Hands-free Cleaning Robot Vacuum for Pet Hair, Effortless for Pet Owner eufy Robot Vacuum and Mop Combos for Effortless Cleaning Top Robot Vacuums with Mapping that Map Fast and Accurate Conclusion A powerful vacuum cleaner can be a game-changer in your cleaning routine. The right choice will make your household cleaning more efficient and effective, leaving your home spotless. In this guide, we've covered the best vacuum cleaners with powerful suction, explained what makes a good suction power, and provided tips on selecting the right suction power for your unique circumstances. Armed with this knowledge, you can confidently make an informed decision that will revolutionize your cleaning experience. Frequently Asked Questions How Do I Know if My Vacuum Has Strong Suction? To check if your vacuum has strong suction, try these quick methods: - Visual Test: Vacuum a small area with visible dirt or debris across different surfaces. If it cleans effectively in a single pass, it's a good indication of strong suction. - Sound Check: A steady, robust operating sound typically means strong suction. - Hand Test: Place your hand over the vacuum hose or attachment. A strong pull signifies good suction. Does Higher Wattage in a Vacuum Mean Better Suction? Not necessarily. While higher wattage can indicate a more powerful motor, it doesn't always translate to better suction. The effectiveness of a vacuum's suction power depends on various factors, including its motor efficiency, airflow design, and overall construction.
Robovac · 13/12/2023
Learn How to Clean Carpet: Tips and Tricks for a Fresh Home
Carpets, while being a comfortable and stylish addition to any home, are also prone to accumulating more dust and dirt than any other type of flooring. Understanding how to clean carpet is key to preserving their beauty and ensuring a healthy home environment. In this blog, we'll explore effective strategies for both regular and deep carpet cleaning, discuss the optimal cleaning frequency, and share practical tips to keep your carpets in top condition. Let's dive into the world of carpet care! How to Clean Carpet? Cleaning your carpets effectively not only enhances the appearance of your home but also extends the life of your carpet. Here are steps on how to clean carpet at home to achieve a thoroughly clean carpet: 1) Preparation: Begin by removing all furniture from the carpeted area, if possible. This allows for a more comprehensive cleaning process. 2) Vacuuming Your Carpet: Vacuuming is the most crucial step in carpet cleaning. This helps in removing surface dirt and debris before it settles deep into the fibers. To clean wool carpets and other longer fiber carpets, set the brush to "High" to avoid damage to the delicate fibers and ensure optimal cleaning. However, for carpets with shorter fibers or for hardwood floors, a lower setting may be more appropriate. Make sure to vacuum in both directions to ensure carpet is thoroughly cleaned. 3) Spot Cleaning and Pretreating Stains Next, you’ll want to spot clean and pretreat to get stains out of carpet. Use a clean, damp rag to gently blot the affected area. Never scrub the stain, as this can make it worse. For stubborn stains, you can try a solution of club soda and salt, which is an excellent DIY carpet cleaner solution. Additionally, a mix of vinegar and water is considered the best homemade carpet cleaning solution for machines, especially for tackling tough stains and odors. Remember to always test any DIY solution on a small, inconspicuous area of your carpet first to ensure it doesn't cause any discoloration or damage. 4) Deep Cleaning For a deeper clean, you can use a carpet cleaner or a steam cleaner. These deep cleaning vacuums apply a solution of water and cleaner to the carpet, then extract the dirty water back into the machine. This method is particularly beneficial for removing embedded dirt and allergens that regular vacuuming cannot reach. If you don't own a carpet cleaner, you can rent one from a local store. 5) Drying and Vacuuming After any wet cleaning process, make sure your carpet is thoroughly dried to prevent mold and mildew growth. Use of fans and dehumidifiers will help you speed up this procedure. Avoid walking on the carpet until it is completely dry. After that, vacuum it again to ensure you have got rid of all the debris or dirt trapped in the surface. How Often Should You Clean Your Carpets? Why do you need to clean carpet regularly? Maintaining your carpets through regular and deep cleaning is essential for several reasons. Firstly, regular cleaning helps maintain the aesthetic appeal of your carpet, keeping it looking fresh and vibrant. Dirt, dust, and other particles tend to accumulate in the fibers, which can dull the appearance and texture over time. Secondly, carpets can harbor allergens, pet dander, and dust mites, which can affect indoor air quality and may cause allergic reactions or respiratory issues in sensitive individuals. Regular cleaning helps mitigate these health risks. Deep carpet cleaning, on the other hand, is essential for removing deeply embedded dirt, stains, and odors that regular vacuuming cannot reach. It helps to prolong the lifespan of your carpet by preventing the buildup of grime that can damage the carpet fibers. Additionally, deep cleaning is effective in sanitizing the carpet, removing bacteria and germs that can accumulate in the fibers. Frequency of Regular and Deep Cleaning Regular Cleaning: The best way to clean carpet regularly is to vacuum at least once a week. For homes with pets, children, or high traffic areas, vacuuming two to three times a week is advisable. This prevents dirt from settling deeper into the carpet fibers. Deep Cleaning: The frequency of deep cleaning depends on the usage and exposure of your carpet. For most homes, deep cleaning the carpets once every 12 to 18 months is sufficient. However, in homes with pets, children, or high foot traffic, deep cleaning every 6 to 12 months can help maintain the carpet's condition and hygiene. For commercial spaces or areas with extremely high traffic, more frequent deep cleaning - every 3 to 6 months - may be necessary. New Release: eufy X10 Pro Omni - Power and Convenience in One Introducing the latest innovation in cleaning technology - eufy X10 Pro Omni. This product combines a powerful 8,000 Pa vacuum with an efficient mop, revolutionizing the way you clean your home. Perfect for pet owners, it offers a healthier living environment with its high-efficiency filter. eufy x10 omni has now been released and has received positive reviews from both the media and users. Come and get yours today! Learn More Buy Now Carpet Cleaning Tips Maintaining the cleanliness and longevity of your carpets doesn't have to be a daunting task. With the right approach and regular care, you can keep your carpets looking fresh and extend their lifespan. Here are some essential carpet cleaning tips to help you effectively clean and maintain your carpets. 1) Regular Vacuuming: Vacuum your carpets at least once a week, or more frequently in high-traffic areas. Regular vacuuming extends the life of your carpet by preventing a buildup of gritty particles that can cut carpet fibers. Regular vacuuming extends the life of your carpet by preventing a buildup of gritty particles that can cut carpet fibers. However, for a truly comprehensive and hassle-free carpet care solution, consider integrating the eufy X10 Pro Omni into your routine. This groundbreaking MopMaster™ robovac, tailored for homes with pets, redefines carpet maintenance with its powerful 8,000 Pa vacuum, designed to effortlessly eliminate pet hair from both carpets and hard floors. Equipped with dual mop pads featuring downward pressure and high-speed rotating mops, the eufy X10 tackles stubborn stains, ensuring your carpets remain fresh and spotless. Don't just clean – elevate your carpet care experience with the advanced features and convenience of the eufy X10 Pro Omni. 2) Treat Stains Immediately: When a spill occurs, act quickly! The longer a stain remains, the harder it is to remove. Blot the spot with a clean, white cloth and rinse with cold water. Avoid scrubbing, as it can damage the carpet fibers. 3) Use the Right Cleaning Solutions: For effective cleaning, use a carpet cleaning solution that is compatible with your carpet type. Test any cleaning product in an inconspicuous area first to ensure it doesn’t discolor or damage your carpet. 4) Professional Deep Cleaning: It's recommended to have your carpets professionally cleaned every 12 to 18 months. Professionals have powerful equipment and advanced techniques to remove deep-seated dirt and allergens. 5) Avoid Over-Wetting: During DIY cleaning, use enough water to clean but not so much that it penetrates the backing and underlay. Over-wetting can cause shrinkage, discoloration, and odors. 6) Use Mats and Rugs: Place mats at entryways and rugs in high-traffic areas. They reduce the amount of dirt and moisture brought onto your carpet, thus reducing wear and tear. 7) Attend to Odors: To combat odors, sprinkle baking soda on your carpet, leave it for 15 minutes, and then vacuum it up. For persistent odors, a professional cleaning may be necessary. Conclusion In this guide, we've explored the essentials of how to clean carpet, from effective cleaning techniques to the recommended frequency of cleaning and shared valuable tips to help you maintain your carpets. Remember, regular use of appropriate vacuums, targeted spot treatments, along with periodic deep cleans, are crucial for the longevity and appearance of your carpets. By adhering to these practices, you not only enhance the beauty of your carpets but also contribute to a cleaner, healthier living space. FAQ How to get stains out of carpet? To effectively remove stains from your carpet, start by blotting the area with a clean, wet cloth. For the treatment, you can use a commercial carpet stain remover or a homemade solution like club soda, vinegar, or a mixture of hydrogen peroxide, dish soap, and warm water. Apply your chosen solution gently onto the stain, then rinse with a damp cloth and dry the area thoroughly. Remember, scrubbing is generally not recommended as it can worsen the stain and damage the carpet fibers. What is the best vacuum for thick carpet? eufy X10 Pro Omni is a paradigm shift in cleaning technology. With an extraordinary 8,000 Pa powerful vacuum, this groundbreaking MopMaster™ robovac surpasses conventional cleaning devices. Tailored for pet-friendly households, the eufy X10 effortlessly tackles pet hair on both carpets and hard floors. Its high-efficiency filter not only ensures a thorough cleaning process but also enhances indoor air quality by trapping microscopic particles. Packed with innovative features like AI.See™ technology for efficient obstacle recognition, privacy certifications, and compatibility with voice commands through Amazon Alexa or Google Assistant, the eufy X10 Pro Omni transcends the ordinary.
Robovac · 13/12/2023
The Ultimate Guide on How to Clean a Bathroom
Keeping your bathroom clean and hygienic is not just a matter of aesthetics; it's essential for your health and well-being. But let's face it, cleaning the bathroom can often seem like a daunting task. That's why we've put together this comprehensive guide on how to clean a bathroom. Whether you're looking to do a quick clean-up or aiming for a deep, thorough scrub, our tips and tricks will make the process efficient and effective. From the essential bathroom cleaning checklist to expert advice for deep cleaning, we've got you covered. Let's dive into the world of bathroom cleanliness and transform this often-dreaded chore into a satisfying routine. How to Clean a Bathroom? Professional bathroom cleaning techniques can transform the way you maintain this essential space. By adopting a systematic and thorough approach, you can achieve a level of cleanliness akin to professional standards, enhancing both the hygiene and appearance of your bathroom. Let's explore the necessary tools and specific steps to achieve this. Tools You'll Need for Effective Cleaning To effectively clean your bathroom, you’ll need the following tools: Cleaning Solutions: Disinfectant Cleaner: To sanitize and clean various surfaces. Glass Cleaner: For mirrors and any glass surfaces. Bathroom Cleaner: Specifically formulated for tiles, tubs, and showers. Toilet Cleaner: To effectively clean and disinfect the toilet. Baking Soda and Vinegar: Natural alternatives for various cleaning tasks. Tools and Equipment: Microfiber Cloths: Ideal for wiping surfaces without leaving streaks. Non-Scratch Sponges: Useful for scrubbing without damaging surfaces. Toilet Brush: Essential for cleaning the toilet bowl. Mop and Bucket: For cleaning the floors. Rubber Gloves: To protect your hands from cleaners and germs. Duster: For removing dust from vents and hard-to-reach places. Vacuum: Great for removing hair and finer debris from floors and hard-to-reach corners. Step-by-Step Guide to Cleaning Your Bathroom Let's take a look at the easy-to-follow steps of the best way to clean a bathroom. 1. Preparation • Start by opening a window or turning on the exhaust fan for better airflow. • Wear gloves to protect your hands and face masks to avoid inhaling fumes. 2. Decluttering and Surface Dusting • Clear off all your personal items from the counters and shelves. • Wipe away the dust from all surfaces, including light fixtures and window sills. 3. Cleaning the Shower and Tub • Apply a specialized cleaner to the shower and tub. Let it sit for a few minutes to break down soap scum and grime. • Scrub the surfaces, focusing on grout lines and any mildew spots. • Rinse thoroughly and wipe down with a clean cloth. 4. Toilet Cleaning • Apply toilet cleaner inside the bowl and let it sit. • Clean the exterior of the toilet with a disinfectant, including the handle, lid, and seat. • Scrub the inside of the bowl with a toilet brush and flush to rinse. 5. Sink and Countertop • Use a non-abrasive cleaner for the sink and countertop. • Pay attention to the faucet and handles, scrubbing around them to remove grime and water spots. 6. Mirrors and Glass SurfacesUse a glass cleaner and a microfiber cloth to clean mirrors and any glass surfaces to avoid streaks. 7. Floor Cleaning • Sweep or vacuum the floor to remove hair and debris. • Mop the floor with an appropriate floor cleaner. Start from the farthest corner and work towards the door. 8. Replacing Items and Final Touches • Replace all items you removed, wiping them down if necessary. • This is also a great time to switch out towels and bath mats for fresh ones. 9. Maintaining the Cleanliness To keep your bathroom fresh between deep cleans, consider quick daily wipe-downs of surfaces and using a daily shower spray. In summary, adopting professional cleaning techniques and using the right home cleaning supplies can significantly elevate the cleanliness and hygiene of your bathroom. A systematic approach, coupled with quality tools and effective products, ensures that every corner of your space is thoroughly cleaned and maintained. Bathroom Cleaning Checklist Regular cleaning ensures hygiene and maintains the bathroom's appearance. The frequency of cleaning varies depending on usage and the number of people in the household. Typically, daily tasks focus on preventing buildup and maintaining cleanliness, while weekly and monthly tasks address deeper cleaning needs. To assist in this routine, we've compiled a comprehensive bathroom cleaning checklist. This includes a bathroom cleaning schedule template outlining daily, weekly, and monthly tasks. This systematic approach ensures every aspect of bathroom cleanliness is addressed regularly and efficiently. Daily Tasks - Make sure your cosmetics, hair tools, and toiletries return to their designated places. - Hang up your wet towel after showering to prevent unwanted mold and mildew. - After each use, wipe counters, faucets, and sinks with a disinfectant wipe or sponge. Weekly Tasks - Thoroughly scrub the bowl of the toilet and wipe its exterior to maintain hygiene. - Address soap scum and mildew in the shower or tub, ensuring all surfaces are cleaned effectively. - Disinfect all countertops, door handles, and light switches to eliminate germs and bacteria. Mop the bathroom floor with an appropriate cleaner for a thorough clean. - Empty the trash bin to maintain a hygienic and fresh bathroom environment. Monthly Tasks - Wash or replace the shower curtain and liner to prevent mold and mildew buildup. - Dust and clean air vents, exhaust fans, and ceiling corners to remove accumulated dust. - Scrub the grout lines in the shower and on the floor for a deep clean. - Tidy up and organize bathroom cabinets and drawers to maintain order and reduce clutter. In summary, understanding how often you should clean your bathroom and adhering to a structured bathroom cleaning schedule are crucial for maintaining a hygienic and sparkling space. By following this deep clean bathroom checklist, which outlines daily, weekly, and monthly tasks, you can efficiently manage the cleanliness of your bathroom, ensuring it remains a pleasant and sanitary environment for all its users. New Release: eufy X10 Pro Omni - Power and Convenience in One Introducing the latest innovation in cleaning technology - the eufy X10 Pro Omni. This product combines a powerful 8,000 Pa vacuum with an efficient mop, revolutionizing the way you clean your home. Perfect for pet owners, it offers a healthier living environment with its high-efficiency filter. Take advantage of our special offer: Get $200 off the original price of $799.99 by reserving now for just $1. Act fast, as this offer ends on Feb. 14th, 2024. Get the early bird price of $599.99 before the deal ends! I Want to Know More Get $200 Off Now * For official sale or discount updates regarding X10 Pro Omni, please refer to the product page. Tips for Deep Cleaning a Bathroom Now that you've mastered the basics of how to properly clean a bathroom, let's take it a step further to more detailed deep cleaning. Here are some expert tips to achieve a truly pristine bathroom, tackling everything from grout lines to hard-to-reach corners. 1. Planning and Preparation • Schedule a time: Deep cleaning can be time-consuming, so choose a day when you can dedicate a few hours. • Assemble deep cleaning supplies: In addition to regular cleaning products listed above, include heavy-duty cleaners, a grout brush, and a toothbrush for tight spaces, and possibly a high-performance vacuum cleaner. 2. Tackling Tough Grime and Mold • For tile grout: Use a grout cleaner or a baking soda paste; apply, let sit, then scrub with a grout brush. • For mold spots: Mix a solution of one part bleach to two parts water, apply to mold, wait, then scrub and rinse. 3. Showerhead and Faucet Deep Clean Detach showerheads and faucets if possible and soak in a vinegar solution to remove limescale and buildup. Use a toothbrush for scrubbing nooks and crannies. 4. Ventilation System and Exhaust Fan Turn off power to the fan. Remove the cover and wash it; vacuum and wipe the fan blades and interior. 5. Deep Cleaning the Toilet • Pour vinegar into the tank, let sit, then flush to clean the system. • Address hard-to-reach areas around the base and hinges of the toilet seat. 6. Floor Deep Clean • Move to the floor last to capture any dirt that's fallen during cleaning. • Use a vacuum cleaner with reliable mopping and suction capabilities, like the eufy Clean X9 Pro, for a floor deep clean. This vacuum offers Adaptive Pressure Mopping with Dual Rotating Mops, which spin at 3 rotations per second with 1 kg of adaptive pressure, making it highly efficient in removing tough dirt and stains on hard floors. Its Auto-Clean Station with 40°C (104°F) Heated Drying ensures the mops are washed and dried post-use, preventing bacterial growth and odors. Its 5,500 Pa Strong Suction power effectively picks up dust, dirt, pet hair, and crumbs, leaving floors exceptionally clean. Be sure to focus on corners and edges for a comprehensive clean. Conclusion Congratulations! You've now explored the ins and outs of how to clean a bathroom, from everyday tidying up to the deep cleaning techniques that leave every corner sparkling. Remember, a clean bathroom is not just about appearances; it's about creating a healthy and pleasant environment for you and your family. With the strategies and tips provided in this guide, you're well-equipped to tackle any bathroom cleaning challenge. FAQ How long will it take to clean a bathroom? The time it takes to clean a bathroom can vary depending on the size of the bathroom and the level of cleaning required. Typically, a basic clean-up might take about 15 to 30 minutes, covering tasks like wiping surfaces and cleaning the sink and toilet. A thorough deep clean, including tiles, shower doors, and more detailed areas, can take 45 minutes to an hour or more. How often should you clean your bathroom? Regular cleaning ensures hygiene and maintains the bathroom's appearance. The frequency of cleaning varies depending on usage and the number of people in the household. Typically, daily tasks focus on preventing buildup and maintaining cleanliness, while weekly and monthly tasks address deeper cleaning needs. To assist in this routine, we've compiled a comprehensive bathroom cleaning checklist. This includes a bathroom cleaning schedule template outlining daily, weekly, and monthly tasks. This systematic approach ensures every aspect of bathroom cleanliness is addressed regularly and efficiently.
Robovac · 13/12/2023
How to Clean Car Interior: A Comprehensive Tutorial
A clean car interior not only elevates your driving experience but also helps maintain your vehicle's value. If the thought of spending big on professional car detailing doesn't sit well with your budget, then you've come to the right place. In this blog, we'll walk you through a comprehensive guide on how to clean car interior effectively on your own. From selecting the appropriate cleaning tools and providing detailed step-by-step instructions, to suggesting how often you should clean and sharing simple tips for ongoing maintenance, we'll cover everything you need to know. Let's get started to transform your car's interior into a spotless, cozy, and inviting space. How to Clean Car Interior? The key to achieve a spotless car interior lies in choosing the right cleaning tools and following a detailed, step-by-step approach to ensure a thorough and effective clean. What to Use to Clean Car Interior? Before you start, it’s important to gather all the necessary cleaning supplies. Opt for cleaners specifically designed for car interiors, as they provide a thorough cleaning while safeguarding the materials. While you can repurpose many common household items, avoid using household cleaners that contain harsh chemicals to clean interior of car, as these chemicals can degrade leather and plastic, and they can also damage the cloth. Here are some best cleaning car interior products and tools for your car: - Microfiber Wash Mitt: This is great for dusting and cleaning without scratching the surfaces. - Interior Cleaner: Choose a cleaner that’s suitable for the materials in your car. - Glass Cleaner: A good glass cleaner will help you achieve streak-free windows. - Vacuum with attachments: A quality vacuum equipped with a range of car-specific attachments, like the eufy Clean H20, is ideal for thoroughly removing dirt from deep within seat crevices, carpets, and floor mats. The convenient, lightweight design makes maneuvering around the interior of the car easy, ensuring a thorough and hassle-free cleaning experience. Step-by-Step Instructions for Car Interior Cleaning Now that you have the car cleaning tools and supplies ready, follow these comprehensive steps on how to clean interior of your car: 1. Declutter Your Car: Begin by removing all personal items, garbage, and loose objects from your car, including those in the glove compartment and door pockets. 2. Clean the Floor Mats: Remove all floor mats from the car. Shake them vigorously to dislodge loose dirt and debris. Use a suitable mat cleaner and scrub them down. Rinse thoroughly and let them dry completely before placing them back in the car. 3. Vacuum the Interior: With the floor mats removed, vacuum the seats, carpets, and the areas under the seats. Utilize the various attachments of car vacuums to reach tight spaces, seams, and edges for a more comprehensive clean. 4. Wipe Down Surfaces: Using a damp microfiber cloth and an appropriate interior cleaner, gently wipe down the dashboard, center console, gearstick, steering wheel, and inside door pockets. 5. Clean Windows and Mirrors: Apply a glass cleaner to the inside of the windows and mirrors. Wipe in a circular motion with a fresh microfiber cloth to avoid streaking. 6. Clean the Seats: Treat leather seats with a specialized leather cleaner and conditioner, applying it gently and evenly to avoid discoloration and to maintain the material's quality. For fabric seats, use an upholstery cleaner, following up with a fabric brush to remove any lingering stains or dirt. 7. Deodorize: Conclude your cleaning session with a car deodorizer to leave your car smelling fresh. How Often Should You Do Car Interior Cleaning? Determining the frequency of cleaning your car's interior largely depends on your lifestyle, how you use your car, and the environment it's exposed to. Here's a breakdown to help you establish a car interior detailing schedule that suits your needs: Regular Commuters and Daily Drivers: If you use your car daily for commuting, a weekly quick clean-up (like dusting and removing trash) coupled with a more thorough cleaning once a month is ideal. This helps maintain a pleasant environment and prevents the build-up of dirt and grime. Families with Children and Pets: Families with young children or pets might find that their car interiors get dirty more quickly. Using a vacuum machine for cleaning car seats, carpets, and floor mats every two weeks can help keep up with the additional mess, effectively tackling spills, crumbs, and pet hair. Outdoor Enthusiasts and Adventure Seekers: If you frequently use your car for outdoor activities like hiking, beach trips, or road trips, your car may be exposed to more dirt, sand, or mud. A car deep cleaning every two to three weeks can help manage this, with a vacuum and wipe-down after each adventure. By establishing a car inside cleaning routine that suits your lifestyle, you can ensure that your car remains a comfortable and hygienic space for all your journeys. How to Keep Your Car Inside Clean? Maintaining a clean car interior is easier with these simple, effective habits: - Use Protective Accessories: Invest in quality car mats and seat covers to protect against stains and spills. - Regular Decluttering: Make it a routine to remove trash and unnecessary items after each trip. Use organizers for essential items. - Limit Eating and Drinking: Try to minimize consuming food and drinks inside the car to avoid spills and crumbs. - Immediate Cleaning of Spills and Stains: Keep cleaning wipes handy and tackle any spills as soon as they happen to prevent stains. - Routine Dusting and Wiping: A quick weekly wipe-down of surfaces and the dashboard helps prevent dust buildup. By implementing these practices, you can significantly extend the periods between deep cleanings and enjoy a consistently clean and pleasant car interior. Conclusion As we wrap up our journey on how to clean car interior, remember that this process is more than just a chore; it's an investment in your comfort and your car's longevity. With the tips and techniques we've discussed, you're now well-equipped to tackle car interior cleaning with confidence. Embrace the satisfaction that comes from a job well done and the joy of driving a car that's as clean and welcoming as the day you got it. Keep this guide handy for future reference and enjoy the ride in your beautifully maintained vehicle! FAQ How much to detail a car? Depending on the services one chooses, a car detail cost average stands at between $50 and $300. This may differ based on the size of your car and the amount or level of services you choose to have. Are car vacuums worth it? Yes, car vacuums are worth the investment. These vacuums like our eufy Clean H20 and HomeVac H30 Mate are specifically designed to clean the tight spaces and varied surfaces inside vehicles. Compact and easy to maneuver, they often come with specialized attachments to effectively remove dirt and debris from car seats, floor mats, and those hard-to-reach areas.
Smart Lock · 13/12/2023
Troubleshooting 101: What to Do When Smart Lock Not Working
Smart locks are a fantastic innovation in home security, providing the ability to lock and unlock your door remotely, receive notifications of entries and exits, and even grant access to others without physical keys. However, like any technology, smart locks can sometimes face issues. If you encountered a smart lock not working, don’t worry. This guide delves into the common causes of smart lock malfunctions and offers practical solutions to get your device back in working order. Additionally, we’ll provide essential tips on maintaining your smart door lock, ensuring its longevity and reliability for years to come. Why is Smart Lock Not Working and How to Fix? In this section, we’ll first examine the common reasons why a smart lock doesn’t work and then guide you through targeted solutions to fix them. Let's get started. Causes of Smart Lock Not Working Understanding the root causes of why your smart lock isn’t working is the first step towards finding a solution. This is true whether you’re troubleshooting a smart lock not working as expected, or a Level lock not responding. To start, let’s delve into the common causes behind these malfunctions: 1. Battery Issues: Smart locks are often powered by batteries, and their functionality heavily relies on battery health. Low or dead batteries can result in the lock failing to operate correctly, exhibiting symptoms such as slower response times, failure to lock or unlock, or intermittent functionality. 2. Connection Problems: Smart locks often use Wi-Fi or Bluetooth to connect to your smartphone or home network. If there’s a problem with the connection, the lock may not respond. Additionally, interference from other electronic devices or physical obstructions can disrupt the wireless signal, affecting the lock’s performance. 3. Software Issues: Outdated software or firmware in smart locks can lead to various compatibility and functionality issues. Software glitches can also cause problems in advanced features like remote access and user recognition, where sensors may fail to detect authorized users accurately or cause smart lock Trusted Places missing, disrupting auto-unlocking capabilities. 4. App or Account Issues: Disruptions within the controlling app or problems with your user account can impact the lock's operation. A specific symptom of this issue might be intrusive notifications. If your Google smart lock keeps popping up, it often indicates that the lock is struggling to maintain a stable connection with your Google account or device. 5. Mechanical Failures: Smart locks, like traditional locks, have mechanical parts such as gears, levers, and tumblers that can wear out or break from regular use and environmental factors. Physical damage or internal malfunctions can cause these parts to fail, leading to operational issues. How to Fix Smart Lock Not Working? Now that we’ve identified the potential causes, let’s explore the solutions to get your smart lock working smoothly again: 1. Battery Issues: If the lock is battery-operated, replace the batteries to ensure it has enough power to operate. Check the battery contacts within the lock. Clean any corrosion or buildup to ensure a strong connection. 2. Connection Problems: Restart the router or reconnect the Bluetooth to resolve temporary glitches. Keep other electronic devices that might cause interference, like microwaves, away from your smart lock and router. If connectivity issues persist, reset the lock’s network settings and reconnect it to your home network. 3. Software Issues: Perform a software reset to resolve temporary glitches or operational issues. Refer to the user manual for the correct procedure to reset your specific model. Check for and install any available updates for your smart lock’s software and firmware. These updates often include fixes for known issues and improvements. If you continue to experience issues with specific features, such as smart lock Trusted Places not working correctly, reaching out to the manufacturer or a professional technician may be necessary. 4. App or Account Issues: Ensure that the smart lock app on your smartphone is updated to the latest version. Verify that your user account settings are correctly configured. Ensure that all user permissions and lock settings are accurate and haven't been altered inadvertently. Clear the app’s cache to remove any temporary data that might be causing issues. If this doesn’t work, consider uninstalling and then reinstalling the app. 5. Mechanical Failures: Inspect the lock for signs of wear or damage. Look for issues like stiffness, misalignment, or unusual noises during operation. If you identify mechanical damage or failure, consult a professional locksmith for repair or replacement of the affected parts. By systematically addressing each of these areas, you can effectively troubleshoot and resolve most issues with your Android smart lock not working, ensuring its reliability and security. H2: Tips to Maintaining Your Smart Door Lock Maintaining your smart door lock is essential for ensuring its longevity and optimal performance. Regular maintenance not only prevents common issues but also enhances the security and functionality of your lock. Here’s how you can effectively maintain your smart door locks: 1. Firmware and Software Updates Keep the lock’s firmware and associated app updated. Manufacturers often release updates that fix bugs, improve security, and add new features. If available, enable automatic updates to ensure your lock is always running the latest software. 2. Battery Management Change batteries periodically before they completely drain out. Many smart locks have indicators for low battery; don’t ignore these warnings. Invest in high-quality batteries to ensure better performance and longevity. 3. Regular Cleaning Gently wipe the lock with a dry or slightly damp cloth to remove dust and grime. Avoid harsh chemicals or abrasive materials that could damage the lock. For models with advanced fingerprint sensors, like our eufy Video Smart Lock S330, focusing on keeping the fingerprint recognition area free of smudges or debris is essential for accurate and quick access. 4. Physical Inspection Inspect regularly for any signs of wear, damage, or misalignment. Check if the lock engages and disengages smoothly. If needed, lubricate the mechanical parts of the lock as per manufacturer recommendations to ensure smooth operation. 5. Security Features Review Change access codes or digital keys periodically for enhanced security. If your lock keeps a log of entries, review it regularly to check for any unusual activity. Conclusion Navigating the challenges of smart lock not working can be a daunting task, but with the right knowledge and approach, it’s a manageable one. By understanding the common causes of issues and applying the appropriate fixes, you can often resolve these problems quickly and efficiently. Remember, regular maintenance, such as keeping the software updated and the hardware clean, is key to preventing many of these issues. Keep these guidelines in mind to ensure your smart lock remains a reliable guardian at your door. FAQ How to disable smart lock? To turn off your smart lock, open its app on your smartphone and navigate to the settings. Look for an option like “Disable” or “Deactivate,” and follow the prompts to confirm. If your lock has a manual override, use the physical switch or button on the lock. Does Smart Lock lock automatically? Yes, many smart locks come with an auto-lock feature. They can automatically lock the door after a specified period or when it's closed. Advanced models, like eufy's smart locks, use advanced geomagnetism sensors and gyroscopes to detect the door's position and lock it promptly, providing secure, convenient, and automatic protection.
Robovac · 13/12/2023
How Long Do Vacuums Last? A Thorough Examination
Vacuum cleaners are indispensable tools in our homes, dutifully keeping our spaces clean year after year. Yet, like all appliances, vacuums have their limits. Over time, even the sturdiest of vacuums begin to show signs of wear, losing their once-effective cleaning prowess. In this blog, we delve into the key aspects of vacuum longevity, addressing the common household query 'How long do vacuums last?' We'll explore the lifespan of various types of vacuums, factors that impact their longevity, and signs that indicate it's time for a replacement. How Long Do Vacuums Last? The answer to the question “how long does a vacuum last” is not an exact science. Generally, the average lifespan of a vacuum is around 3 to 8 years, but this duration varies greatly based on its type. From upright to robotic models, let’s delve deeper into how long vacuum cleaners last in each category: 1.Upright Vacuums: Known for their robust build, upright vacuums typically serve you well for about 5 to 8 years. They are ideal for larger homes and can withstand frequent use. 2.Canister Vacuums: Offering a blend of power and flexibility, canister vacuums have an average lifespan of 5 to 7 years. They are designed to be adaptable, handling a variety of surfaces effectively. 3.Cordless Stick Vacuums: These are popular for their convenience and lightweight design. However, they tend to have a shorter vacuum lifespan, usually around 3 to 5 years. 4.Handheld Vacuums: Ideal for quick cleanups, handheld vacuums last about 3 to 4 years, depending on usage and battery care. 5.Robotic Vacuums: With advancing technology, robotic vacuums have a varying lifespan of 4 to 6 years. Regular updates and maintenance can extend their usability. Factors That Influence Vacuum Lifespan While the type and design of the vacuum are foundational to its expected lifespan, they aren't the whole story. Several other key factors also come into play, significantly influencing how long a vacuum should last. Quality and Build: The overall construction and quality of materials used in a vacuum cleaner significantly impact its longevity. Brands known for their durability and robust design tend to offer vacuums that withstand the test of time better than cheaper, less sturdy models. Frequency and Intensity of Use: How often and how intensely a vacuum is used can greatly affect its lifespan. Daily use, especially in larger homes or for heavy-duty cleaning, can wear out a vacuum faster than moderate use in smaller, cleaner spaces. Type of Surfaces Cleaned: Vacuums used predominantly on harsh or heavily soiled surfaces will endure more wear and tear. Conversely, those used on smooth, less dirty surfaces may enjoy a longer life. Maintenance: Regular maintenance is crucial. This involves not just emptying dust containers, or changing bags, but also knowing how often to change vacuum filters and how to effectively remove debris from brushes and hoses. Neglect in these areas can lead to reduced efficiency and a shorter lifespan. Battery Care: For those battery-powered vacuums, battery health is a key factor. Proper charging habits and avoiding deep discharges can extend the life of the battery, thus prolonging the vacuum’s overall lifespan. Storage Conditions: How and where a vacuum is stored when not in use also matters. Storing in a dry, clean, and temperate environment protects it from humidity, dust accumulation, and temperature extremes, which can degrade components over time. Timely Repairs and Replacements: Promptly addressing repairs and replacing parts that are worn or damaged can extend the life of a vacuum. Being familiar with common issues and knowing basic troubleshooting steps, such as how to fix a vacuum cleaner with no suction, is crucial. This knowledge not only helps in quickly resolving simple problems but also prevents minor issues from escalating. Understanding these factors can help you maximize the average life of a vacuum cleaner, ensuring it remains a reliable tool in your cleaning arsenal for as long as possible. New Release: eufy X10 Pro Omni - Power and Convenience in One Introducing the latest innovation in cleaning technology - the eufy X10 Pro Omni. This product combines a powerful 8,000 Pa vacuum with an efficient mop, revolutionizing the way you clean your home. Perfect for pet owners, it offers a healthier living environment with its high-efficiency filter. Take advantage of our special offer: Get $200 off the original price of $799.99 by reserving now for just $1. Act fast, as this offer ends on Feb. 14th, 2024. Get the early bird price of $599.99 before the deal ends! I Want to Know More Get $200 Off Now * For official sale or discount updates regarding X10 Pro Omni, please refer to the product page. Signs of Replacing Your Vacuum While there is no exact answer to how often to replace your vacuum, certain telltale signs can indicate it might be reaching the end of its useful life. Decreased Suction Power: The most apparent sign is a noticeable drop in suction. If your vacuum struggles to pick up debris and leaves behind more dirt than it collects, it’s a clear indicator that the vacuum’s effectiveness is waning. So, if you find yourself frequently asking, “Why isn’t my vacuum picking up?” it may be time to consider a replacement. Unusual Noises or Smells: Any strange sounds like grinding or whistling, or burning smells from your vacuum are red flags. These could indicate a motor struggling to function or a belt that's about to break. Frequent Clogs and Jams: While occasional clogs are normal, frequent blockages suggest a deeper issue. This could be due to a damaged hose, worn internal parts, or a design no longer suitable for your cleaning needs. Physical Damage or Wear: Cracks, loose components, or a damaged power cord not only hinder performance but can also pose safety risks. Physical deterioration is a clear sign that your vacuum needs replacing. Long-Lasting Vacuums At eufy, we take pride in crafting vacuum cleaner solutions that stand the test of time, enhancing your cleaning experience with innovative, reliable, and efficient tools. The eufy X10 Pro Omni epitomizes our commitment to excellence, revolutionizing automated cleaning for every home. Tailored with precision for pet owners, its 8,000 Pa powerful vacuum effortlessly tackles pet hair on carpets and hard floors, ensuring a thorough clean. Prioritizing indoor air quality, the X10 features a high-efficiency filter, actively trapping microscopic particles for a cleaner and healthier home environment. Beyond surface cleaning, it offers a comprehensive solution for families valuing a pristine living space. Innovative design is evident in the X10's dual mop pads, with downward pressure and high-speed rotating mops, efficiently handling visible stains and leaving floors gleaming. This versatility transforms the X10 into a dynamic cleaning companion. The X10's precision navigation is powered by AI.See™ technology, recognizing and avoiding obstacles with efficiency. Our commitment to privacy is upheld by using images solely for obstacle recognition, meeting the highest cybersecurity standards. Conclusion As we wrap up our exploration of 'how long do vacuums last,' it's clear that the longevity of a vacuum cleaner hinges on its type, maintenance, and usage. We've journeyed through the different kinds of vacuums, dissected what affects their lifespan, and highlighted the signals that herald the need for a replacement. Remember, a good vacuum is more than a tool; it's an ally in keeping your home clean and healthy. When your vacuum's performance wanes – be it a loss of suction or odd noises – consider models like our eufy HomeVac H30 Mate, crafted for enduring performance and convenience. Keep these insights in mind to ensure your living spaces remain spotless for years to come. FAQ How often should you vacuum? As a general rule, it's recommended to vacuum at least once a week. Homes with pets or high foot traffic might need vacuuming two to three times a week. Allergy sufferers might benefit from even more frequent vacuuming. How often should you replace your vacuum? The frequency of replacing your vacuum depends on several factors, including its type, usage, and maintenance. Generally, most vacuums can last between 5 to 8 years with proper care. However, if you notice a significant decline in performance, such as reduced suction power, strange noises, or if it's no longer efficient in cleaning, it might be time to consider a replacement. When is the best time to buy a vacuum? The best time to buy a vacuum is during prominent times like Black Friday or Cyber Monday. Spring is also a good time to buy a vacuum as many cleaning-oriented sales happen during these months, generally starting in late February and slowing down during May.
Baby · 13/12/2023
How to Tell If Baby Monitor is Hacked: Security Guide
The baby monitor gives parents peace of mind as it enables parents to check on their infant regardless of their location. However, the increased use of smart monitors raises the possibility of cybercrime. In this blog, we delve into the intricacies of baby monitor security, explore how to tell if baby monitor is hacked, and provide comprehensive strategies on how to secure your baby monitor and ward off hackers. Understanding these aspects is essential for every parent who relies on these devices for the safety of their children. Can Baby Monitors Be Hacked? Baby monitors, like many technological devices, are susceptible to hacking. The risk of hacking can depend on the type of baby monitor you have, the security measures of the device, and the strength of your home network’s security. Types of Baby MonitorsInternet-Enabled Baby Monitors: These modern monitors that connect to the internet or operate over Wi-Fi are at a higher risk. Hacking baby monitors in this category often involves hackers accessing them by breaking into Wi-Fi networks or exploiting vulnerabilities in the device itself. Analog Baby Monitors: These older, simpler devices can be intercepted by nearby hackers, similar to how one might hijack a radio frequency. So, in response to the question of whether non-WiFi baby monitors can be hacked: while it's less common, it is still technically possible, particularly with older analog models. FHSS Baby Monitors: Some non-WiFi digital monitors use FHSS (Frequency-Hopping Spread Spectrum) technology, which rapidly switches frequencies, making it extremely difficult for hackers to intercept the signal. These are often considered the safest baby monitors from hackers. Security MeasuresWeak Default Passwords: Many baby monitors come with default passwords that are easy to guess. Failing to change these to strong, unique passwords makes them susceptible to baby monitor hacking. Lack of Encryption: Some baby monitors do not use encryption for the data they transmit. This makes it easier to hack the baby monitor signal and view the video or audio feed. Unsecured Wi-Fi Networks: If your home Wi-Fi network is not secured with a strong password and encryption, it can be an entry point for hackers to access all connected devices, including baby monitors. It is crucial that one understands the possible risks that surround baby monitors as well as how they are hacked to ensure that one has secured them. Thus, in the following sections we will look at how to identify and secure a baby monitor. How to Tell if Your Baby Monitor is Hacked? So, how do I know if my camera is hacked? Here are some steps to help you identify a potential breach: 1. Unusual Behavior: The first indication that your baby monitor has been hacked can be an unusual behavior of the device. For example, this might involve a sudden camera movement, automatic turning of the equipment on and off, or adjusting settings without your knowledge. 2. Strange Noises or Voices: Any strange voices or noises emanating from the monitor, particularly if it supports two-way communication, could be a significant sign of baby monitor being hacked. This is one of the more direct indications that someone has gained unauthorized access to your baby monitor. 3. Check Your Wi-Fi Network: Ensure you check any of the foreign devices that may be connected to your Wi-Fi network. For a hacker to access a Wi-Fi enabled monitor he/she will have to connect into your network first. 4. Monitor Your Data Usage: A surge in traffic beyond expectation may be an indication that your monitor is streaming video to an unknown location. Most monitors only use data when you’re actively viewing the feed, so a constant high data usage could be a red flag. 5. Changes in Security Settings: Alterations in the security settings of your baby monitor, especially a reset to default passwords, should raise immediate concerns. Such changes can imply that a hacker has accessed your device. If you notice any of these signs, it's essential to act swiftly. Changing passwords, updating security settings, and monitoring network traffic are immediate steps you should take. In cases of severe suspicion, don't hesitate to contact the device manufacturer or seek professional help to secure your baby monitor and network. How to Secure Your Baby Monitor and Ward Off Hackers? Here are some steps to help you enhance your baby monitor security: 1. Change Default Passwords: One of the first steps in securing your baby monitor is to change any default passwords. Hackers often target devices with default settings, so changing these can provide an extra layer of protection. 2. Regular Software Updates: Manufacturers often release software updates to fix security vulnerabilities. Regularly updating your monitor’s software can help protect it from potential hacks. 3. Enable Two-Factor Authentication: If your baby monitor supports two-factor authentication, definitely enable it. This feature adds an additional layer of security by requiring a second form of verification (like a code sent to your phone) in addition to your password. 4. Use a Secure Wi-Fi Network: Make sure your baby monitor connects to a secure Wi-Fi network. Enhance your network security by creating separate networks for your IoT devices, isolating your monitor from other internet-connected equipment. 5. Disable Unnecessary Remote Access Features: If your monitor has remote access features that you don't use, disable them. This reduces potential entry points for hackers. 6. Invest in a Secure Baby Monitor: Choose a baby monitor with advanced security features such as strong encryption, two-factor authentication, and regular software updates. As highlighted earlier, prioritize models employing FHSS technology, like our eufy Baby Monitor E110, utilizing rapidly changing frequencies to provide superior protection against hacking attempts. Related Products Check out these pages for more information: Best Smart Sock by eufy Best Wifi Baby Monitor by eufy Best Video Baby Monitor By following these steps, you can significantly enhance the safety of your baby monitor and reduce the risk of it being hacked. Conclusion While baby monitors offer invaluable benefits in monitoring and ensuring the well-being of our children, they also pose potential security risks that cannot be overlooked. By staying informed about how these devices can be compromised, understanding how to tell if baby monitor is hacked, and implementing robust security measures, parents can significantly mitigate these risks. Stay aware, stay secure, and ensure that your baby monitor serves its purpose without compromising your family's privacy and peace of mind. FAQ Are Wi-Fi baby monitor safe? While Wi-Fi baby monitors are more susceptible to hackers compared to non-Wi-Fi models, they can be safe when equipped with robust security measures. Ensuring strong passwords, regular firmware updates, and using features like encryption helps mitigate the risk of unauthorized access. What to do if your monitor has been hacked? Disconnect your monitor from the internet if you suspect it has been hacked. Update the software, change all passwords, and contact the manufacturer if you need further assistance. It’s important to act quickly to protect your family’s privacy.
Robovac · 13/12/2023
How to Clean House Fast and Efficiently: A Comprehensive Guide
Maintaining a clean and orderly home is a continual process that not only enhances the comfort and aesthetics of your living space but also contributes to the overall health and well-being of its inhabitants. Understanding how to clean house effectively and developing a routine for keeping your home tidy are essential skills for any homeowner or renter. In this comprehensive guide, we'll delve into the specifics of house cleaning, providing a detailed deep cleaning checklist, advice on how often various areas of your home should be cleaned. Whether you're tackling daily chores or embarking on a thorough deep clean, this guide will equip you with the knowledge and strategies you need for a sparkling, well-maintained home. How to Clean House? Effective house cleaning enhances both the aesthetics and health of your living space. With the right tools and a structured approach, you can transform your cleaning routine into an efficient and manageable task. Here, we'll guide you through the essential tools and detailed steps to achieve a spotless home. Essential Tools for Effective House Cleaning Microfiber Cloths: Ideal for dusting and cleaning surfaces without leaving streaks. Vacuum Cleaner: Essential for carpets, upholstery, and hard floors. Broom and Dustpan: For sweeping hard surfaces like kitchens and hallways. Mop and Bucket: Necessary for cleaning tile, vinyl, and wood floors. Cleaning Solutions: All-purpose cleaners, disinfectants, glass cleaners, etc. Sponges and Scrub Brushes: For tougher stains and bathroom cleaning. Duster with Extendable Handle: To reach high ceilings and corners. Protective Gloves: To protect your hands from chemicals and grime. Garbage Bags: For collecting trash and decluttering. Step Ladder: To access high areas safely. Step-by-Step Guide to a Thoroughly Clean Home 1.Declutter and Organize: Start by decluttering rooms. Remove items that don't belong and organize things back in their designated places. This step makes cleaning easier and ensures you don't miss any spots. 2.Dust and Clean from Top to Bottom: Follow the right order to dust and clean your home: from high areas to low areas. It ensures that any dust or dirt that falls from higher surfaces doesn't settle on already-cleaned lower surfaces. So, start by dusting and cleaning high surfaces such as ceilings, ceiling decorations, fans, shelves, and light fixtures, and gradually work your way down to lower areas like countertops and baseboards. You can use tools like microfiber mops, dusters equipped with telescoping handles, or disinfecting cleaning wipes. 3.Window Cleaning: Wipe down windows, frames, and blinds. This allows natural light to brighten your home and create a fresh atmosphere. You can start by removing any dust or loose dirt from the window frames, sills, and tracks using a brush or vacuum cleaner. Then, apply the glass cleaner liberally to the window panes, and you can eliminate the cleaning solution from the top to the bottom using either a microfiber cloth or squeegee in a vertical or horizontal motion. This method helps prevent streaks for a clearer view. For blinds, close them in one direction and clean the slats. Then, reverse the direction of the blinds and repeat the process for a thorough cleaning. Once you've cleaned the windows, use a dry, lint-free cloth to eliminate any remaining moisture or streaks, ensuring a crystal-clear finish. 4.Deep Clean Floors: You can remove loose dirt, crumbs, or debris from the floor surface using a broom or vacuum cleaner. Pay attention to corners, under furniture, and hard-to-reach areas. If necessary, consider moving furniture for a comprehensive cleaning. On hard flooring, use a microfiber mop and an appropriate cleaner tailored to its surface type. For pet owners, handling carpets can be challenging due to embedded pet hair. A professional-grade vacuum cleaner is essential for an exhaustive and meticulous cleaning process in such cases. Now that you've cleared loose dirt and debris, it's time to take your cleaning game to the next level by giving your floors the attention they deserve. And what better way to achieve a thorough and meticulous clean than with the eufy X10 Pro Omni? This revolutionary MopMaster™ robovac is a game-changer for pet owners, offering an impressive 8,000 Pa powerful vacuum that effortlessly tackles embedded pet hair on both carpets and hard floors. No more wrestling with challenging spots under furniture or in hard-to-reach corners; the eufy X10's AI.See™ technology recognizes and navigates around obstacles with precision, ensuring a comprehensive cleaning process. The dual mop pads, paired with downward pressure and high-speed rotating mops, effortlessly handle stubborn stains on hard flooring. As you move furniture for a comprehensive clean, let the eufy X10 Pro Omni do the heavy lifting, prioritizing privacy with its image-based obstacle recognition and cybersecurity certification. Seamlessly control it with voice commands through Amazon Alexa or Google Assistant, integrating this cleaning powerhouse into your smart home routine. House Deep Cleaning Checklist Embarking on a deep clean is a key step in understanding how to keep your house clean. It involves thorough attention to every nook and cranny, going beyond the daily or weekly surface-level cleaning. This checklist will guide you through the process, room by room, ensuring a spotless and rejuvenating outcome for your entire home. Deep Clean Checklist for Bedrooms: Wash Bedding and Linens: Begin by removing all bedding, including sheets, pillowcases, and duvet covers, from the bed. Launder them according to the care instructions, and replace them with fresh, clean ones. Clean Mattresses and Pillows: Vacuum your mattress to remove dust and allergens. If necessary, spot clean stains using a suitable stain remover. Fluff and rotate your pillows to maintain their shape and cleanliness. Clean Furniture: Wipe down furniture surfaces, such as dressers, nightstands, and desks, using a damp cloth or furniture cleaner. Remove any stains or marks, if needed. Organize Closets: Take the opportunity to declutter and organize your closet. Remove any items that you no longer need or wear, and consider donating or selling them. Then, sort your clothes by category and declutter seasonal attire to maintain an organized space. Deep Clean Checklist for Kitchen: Clean the Cabinets and Shelves: Wipe down the insides of cabinets and shelves with a damp cloth or an appropriate cleaner. Then, start wiping both the front and back of cabinet doors with wood cleaner. For painted or laminated surfaces, you can clean them by mixing warm water with a drop of dish soap. Degrease and Clean Stovetop: Clean the stovetop surface with a suitable cleaner to eliminate grease and spills. If possible, remove the drip pans and soak them in hot, soapy water for about 10–15 minutes, then clean them with a sponge and baking soda. Deep Clean Appliances: Clean inside and outside of the refrigerator, oven, microwave, and dishwasher. Remove food residue, spills, and grime from all surfaces. Scrub Countertops and Backsplashes: Move all items off the countertops and clean countertops and backsplashes thoroughly with suitable cleaners, paying attention to any stains or sticky residues. After cleanup, dry the countertops and put the items back on the countertops. Deep Clean Checklist for Bathrooms: Clean Shower and Tub: Apply a suitable bathroom cleaner or vinegar solution to the shower or tub surfaces. Scrub away soap scum, grime, and residue using a sponge or scrub brush. Tackle Grout and Tile: If your bathroom has tiled walls or floors, inspect the grout for any stains or mildew. Use a grout cleaner, bleach or water, disinfectant spray, or DIY baking soda solution to scrub the grout lines. Then rinse it thoroughly. Toilet Cleaning: Clean the toilet bowl using a toilet brush and toilet bowl cleaner. Wipe down the exterior surfaces of the toilet, including the seat and tank, with a disinfectant cleaner. Mirror Cleaning: Wipe down mirrors using a glass cleaner. Ensure a streak-free finish by using a lint-free cloth or paper towel. Wipe Down Countertops and Sinks: Use a disinfectant cleaner to clean the countertops, sinks, and faucets. Pay attention to any stains or buildup and scrub as needed. Deep Clean Checklist for Living Rooms: Clean Electronics: Use appropriate cleaners to wipe down TV screens, remote controls, gaming consoles, and other electronic devices. Vacuum Upholstery: Vacuum sofas, chairs, and other upholstered furniture using an upholstery attachment. Be sure to get into crevices and under cushions to remove crumbs and debris. Refresh Carpets and Rugs: Vacuum carpets and rugs to remove dust and debris. Consider using a carpet cleaner or hiring professional services for a deeper clean if necessary. New Release: eufy X10 Pro Omni - Power and Convenience in One Introducing the latest innovation in cleaning technology - the eufy X10 Pro Omni. This product combines a powerful 8,000 Pa vacuum with an efficient mop, revolutionizing the way you clean your home. Perfect for pet owners, it offers a healthier living environment with its high-efficiency filter. Take advantage of our special offer: Get $200 off the original price of $799.99 by reserving now for just $1. Act fast, as this offer ends on Feb. 14th, 2024. Get the early bird price of $599.99 before the deal ends! I Want to Know More Get $200 Off Now * For official sale or discount updates regarding X10 Pro Omni, please refer to the product page. How Often Should You Clean Your House? Determining the frequency of house cleaning is crucial for maintaining a hygienic and tidy environment. While the specifics can vary, understanding how to clean a house professionally provides a benchmark for setting your own cleaning schedule. This section outlines the recommended frequency for various cleaning tasks, from daily chores to seasonal deep-cleans. Daily Cleaning Tasks: Kitchen: Wipe down kitchen surfaces, clean spills, and wash dishes. Bathroom: Wipe down bathroom surfaces, clean the toilet, and remove visible dirt or grime. Living Areas: Quick tidy-ups, such as picking up clutter and general tidying. Bedrooms: Make the beds and tidy up surfaces. Weekly Cleaning Tasks: Dusting: Dust surfaces, furniture, and electronics. Vacuuming or Mopping: Clean floors, carpets, and rugs. Bathroom and Kitchen: Clean and disinfect countertops, sinks, and appliances. Bi-Weekly to Monthly Tasks: Change Bedding: Change sheets and pillowcases. Deep Cleaning: Focus on deep cleaning tasks like scrubbing bathrooms, cleaning windows, and more thorough vacuuming or mopping. Seasonal or Periodic Tasks: Decluttering: Regularly declutter and organize different areas of the house. Deep Cleaning: Consider deep cleaning house tasks such as steam cleaning carpets, cleaning vents, or washing curtains on a seasonal basis. In summary, maintaining a clean house involves a balanced mix of daily upkeep and more intensive cleaning sessions. By following a structured schedule and employing the best way to clean a house, you can ensure your living space remains welcoming and hygienic. Remember, a consistent and thorough cleaning routine is key to a well-maintained and comfortable home. Conclusion Overall, it is clear that consistent house cleaning is essential for any household. Taking the proper steps to maintain a clean and organized home will help improve your lifestyle and peace of mind. Now that you know the correct techniques on how to clean house, set aside time each week to keep things in order. You might even consider giving yourself a reward once the chores are finished so you have something to look forward to after finishing the task! By following these house cleaning tips and creating a detailed checklist, your home will be cleaner than ever before. So start cleaning your home right now! FAQ What is Included in a Deep House Cleaning? A deep house cleaning typically involves thorough cleaning of various areas and surfaces that are often overlooked during regular cleaning sessions. It typically includes cleaning soap scum and mineral deposits on showerheads, faucets, and kitchen tiles; deep cleaning appliances like refrigerators, ovens, and washing machines; dusting and wiping down all surfaces, including baseboards and light fixtures; scrubbing and disinfecting the toilet, bathtub, and sink; vacuuming all floors, carpets, rugs, and stairs; deep cleaning windows and blinds; and sanitizing frequently touched items like doorknobs and switches. How Much to Clean a House? The cost of cleaning a house can vary based on multiple factors, such as the size of the house, the scope of cleaning required, the frequency of cleaning sessions, and the professional cleaning service or products used. For general house cleaning, the price typically ranges from $20 to $50 per hour per cleaner, with a flat fee ranging between $100 and $200. On the other hand, deep cleaning an apartment usually costs $40~$100 per hour per cleaner, with flat fees typically ranging from $200 to $400. How Long Does It Take to Clean a House? The time it takes to clean a house depends on various factors like the size of the home, its cleanliness level, the number of rooms, and the cleaning method used. For a standard-sized home with average cleaning needs, basic residential house cleaning might take around 1 to 3 hours, while a more thorough deep clean a house could span from 3 to 6 hours or longer. Larger homes or those requiring extensive cleaning may take 4 to 8 hours or more.
Robovac · 12/12/2023
Cheap Vacuum Cleaners: Unbeatable Deals on Quality Models
In a world where cleanliness is key, having an effective vacuum cleaner is a necessity. But you don't have to break the bank to keep your home spick and span. There are plenty of cheap vacuum cleaners that deliver great performance without draining your wallet.In this comprehensive guide, we'll explore some of the best affordable options and help you make an informed choice. Best Cheap Vacuum Cleaners Let's dive into several excellent budget-friendly vacuum cleaner options available: 1. eufy HomeVac H11 The eufy HomeVac H11 is a compact and lightweight cordless stick vacuum designed for convenience and efficiency. This cheap cordless vacuum cleaner, weighing in at a mere 1.2lbs and compactly sized like a wine bottle, effortlessly elevates your cleaning routine to new heights. With a formidable 5500Pa of suction power, it devours dust and debris in a matter of seconds, ensuring every nook and cranny in your home is left immaculate. Equipped with a versatile 2-in-1 crevice tool, it effortlessly reaches into the most challenging corners of your sofa or hidden spaces under low-lying furniture, making it the ultimate cleaning companion that combines power, portability, and precision in one sleek package. 2. eufy Clean L35 Hybrid The eufy Clean L35 Hybrid excels as an affordable robot vacuum with advanced features. Its iPath™ Laser Navigation employs LiDAR technology for precise, efficient cleaning, adapting to different home layouts. With a powerful 3,200 Pa suction and a controllable water tank, it handles various debris and offers both vacuuming and mopping capabilities. The vacuum supports multi-floor mapping, recognizes different levels in your home, and allows for customizable no-go zones through its app. BoostIQ™ technology enhances suction on carpets, ensuring thorough cleaning. Its compatibility with Amazon Alexa and Google Assistant for voice control adds to its convenience. This makes the eufy Clean L35 Hybrid a strong contender for the best cheap robot vacuum, balancing advanced functionality with affordability. 3. Bissell CleanView Upright Bagless Vacuum Cleaner The BISSELL CleanView Upright Bagless Vacuum Cleaner is a top choice for those seeking a best budget vacuum cleaner. Its unique OnePass Technology ensures thorough carpet cleaning in a single sweep, while Scatter-Free Technology effectively captures messes on hard floors with minimal scatter. The vacuum's Active Extension Wand extends up to 10 feet, facilitating easy cleaning of hard-to-reach areas. Additionally, its XL Dirt Container, with a 2-liter capacity, reduces the frequency of emptying. Pet owners will appreciate the powerful pet hair pickup capability, complemented by specialized cleaning tools like the TurboBrush, Crevice Tool, and a Dusting Brush/Upholstery Tool. The vacuum's Multi-Cyclonic Suction System guarantees enduring performance, and the washable filters make maintenance simple. Overall, the BISSELL CleanView combines efficiency, versatility, and affordability, making it an excellent choice for budget-conscious consumers. 4. Eureka Mighty Mite Corded Canister Vacuum Cleaner The Eureka Mighty Mite Corded Canister Vacuum Cleaner stands out as the best affordable vacuum cleaner for its versatility and powerful cleaning capabilities. Weighing just 8.6 pounds, it's exceptionally lightweight, making it easy to carry around the entire house. Its 12-amp motor provides continuous, powerful suction, ideal for deep cleaning across various surfaces, including carpets, stairs, upholstery, and cars. The vacuum's 2.5-liter dust bag capacity and mess-free replacement system simplify maintenance, efficiently collecting dust and pet hair. Its versatility is further enhanced with 2 extension wands and 2 specialty attachments, enabling it to dust furniture, reach high ceilings, and access hard-to-reach areas where traditional upright vacuums struggle. With its convenient cord storage, this vacuum combines practicality, power, and affordability, making it an excellent choice for budget-conscious consumers seeking a comprehensive cleaning solution. 5. BLACK+DECKER Furbuster Handheld Vacuum The BLACK+DECKER Furbuster Handheld Vacuum is a versatile and efficient cleaning tool, particularly adept at tackling pet hair, dirt, and debris in high-traffic areas. It's incredibly lightweight at just 2.6 pounds, making it easy to use on carpets, upholstery, and car interiors. The vacuum features anti-tangle rubber bristles specifically designed to lift stubborn pet hair, and an extra-long crevice tool for reaching difficult areas with less effort. Its washable filter ensures easy maintenance. With two speed settings and a Powerboost mode, it provides enhanced cleaning power when needed. These features make the BLACK+DECKER Furbuster the best inexpensive vacuum cleaner for those needing a compact yet powerful cleaning solution. 6. eufy X10 Pro Omni Introducing the eufy X10 Pro Omni - a cutting-edge MopMaster™ robovac that delivers top-of-the-line features at an unbeatable price. For only half the cost of other premium products on the market, you can enjoy all the flagship features that make it an affordable choice. This innovative product is designed to provide powerful suction, making it ideal for homes with pets by effectively removing pet hair from both carpets and hard floors. Not only does it offer powerful suction, but it also features a high-efficiency filter that traps microscopic particles, promoting healthier air quality in your home. The eufy X10 Pro Omni also comes equipped with dual mop pads and high-speed rotating mops, making it easy to remove stubborn stains from your floors. Its AI.See™ technology allows it to recognize and avoid obstacles, ensuring efficient cleaning in even the messiest of rooms. What to Look for in a Cheap Vacuum Cleaner When shopping for cheap vacuum cleaners, it's essential to consider a few key factors to ensure you're getting the best value for your money. Here's what to look for: Vacuum Type: Determine the type of vacuum that suits your needs. Options include upright, canister, stick, handheld, and robotic. Each has its own advantages and limitations, so choose one that aligns with your cleaning requirements. Bagged or Bagless: Decide whether you prefer a bagged or bagless vacuum. Bagged models typically offer better dust containment and easier disposal, while bagless vacuums eliminate the ongoing cost of replacement bags. Power Source: Consider the power source. Vacuums come in corded and cordless models. Corded vacuums provide continuous power, while cordless ones offer greater mobility but may have limited runtime. Select the one that best fits your cleaning needs. Suction Power: For the best budget robotic vacuum, ensure it has adequate suction power for your needs. Robot vacuums should be powerful enough to pick up pet hair, dirt, and fine debris on various surfaces. Attachments: Check for included attachments and accessories. Attachments like crevice tools, brush rolls, and upholstery brushes can extend the vacuum's functionality, allowing you to clean various surfaces and hard-to-reach areas effectively. Noise Level: The vacuum's noise level is important if you're sensitive to sound or plan to clean in noise-sensitive environments. Warranty: Review the warranty offered by the manufacturer. A longer warranty period can provide peace of mind and assurance of the product's durability. Be sure to understand the warranty terms and conditions to make an informed decision. When integrating these factors with your personal cleaning needs, you'll find that the right balance can lead you to the best affordable vacuum cleaner that's not just easy on the wallet but also efficient and convenient for maintaining your home's cleanliness. New Release: eufy X10 Pro Omni - Power and Convenience in One Introducing the latest innovation in cleaning technology - the eufy X10 Pro Omni. This product combines a powerful 8,000 Pa vacuum with an efficient mop, revolutionizing the way you clean your home. Perfect for pet owners, it offers a healthier living environment with its high-efficiency filter. Take advantage of our special offer: Get $200 off the original price of $799.99 by reserving now for just $1. Act fast, as this offer ends on Feb. 14th, 2024. Get the early bird price of $599.99 before the deal ends! I Want to Know More Get $200 Off Now * For official sale or discount updates regarding X10 Pro Omni, please refer to the product page. Conclusion Cheap vacuum cleaners don't have to sacrifice effectiveness for cost. With the options outlined above, you're well on your way to a cleaner home without breaking the bank. Whether you opt for a corded or cordless model, be sure to consider the factors that matter most to you. With the right choice, you can maintain a clean and healthy home without overspending. Frequently Asked Questions What Should I Expect from A Budget Vacuum? Budget vacuum cleaners should provide sufficient suction power, versatility for different surfaces, and a decent filtration system. While they may not have all the bells and whistles of high-end models, they should meet your basic cleaning needs effectively. What Is the Average Cost of A Vacuum? The average cost of a vacuum can vary widely depending on the type, brand, and features. Budget-friendly models typically range from $50 to $200, while mid-range vacuums can cost between $200 and $500. High-end models can exceed $500. It's essential to choose a vacuum that fits your needs and budget.
Vacuum · 12/12/2023
What is the Best Upright Vacuum Cleaner for Healthy Environment?
Maintaining a clean and healthy living environment is a top priority for many homeowners, and the best upright vacuum can be your trusted ally in achieving this goal. Upright vacuums are renowned for their powerful suction, user-friendly design, and ability to handle various floor surfaces, from hardwood to carpets. In this article, we've meticulously researched and selected the top recommendations for the best upright vacuum cleaners on the market. With our detailed upright vacuum cleaner reviews, you'll gain a deeper understanding of the features, benefits, and specifications of these top upright vacuum cleaners. Let's begin! Best Upright Vacuum in 2023 Selecting the best upright vacuum cleaner is essential for maintaining a clean and healthy living environment. To assist you in making an informed decision, we have compiled a list of top rated upright vacuums, each offering its unique set of features and advantages. eufy HomeVac S11 Go Cordless Stick Vacuum The eufy HomeVac S11 Go Cordless Stick Vacuum Go stands out as a versatile and convenient cleaning companion with its cordless operation. Its remarkable suction power ensures that no dust, dirt, or debris is left behind. Equipped with a long-lasting battery, this vacuum cleaner allows you to tackle quick cleanups and dive into deep cleaning sessions without interruptions. Moreover, the HomeVac S11 Go offers a wide array of versatile attachments, enabling you to address a variety of cleaning tasks with ease. Shark Navigator Lift-Away Professional NV356E The Shark Navigator Lift-Away Professional NV356E is a high-performance upright vacuum that sets the bar for powerful suction and flexible cleaning. Its strong suction capabilities ensure that even embedded dirt and debris can be removed. The swivel steering feature enhances maneuverability, allowing you to navigate around furniture and tight spaces effortlessly. The defining feature of this vacuum, setting it apart as the best upright vacuum for carpet, is its innovative lift-away technology. This allows it to seamlessly transform into a portable canister vacuum, providing flexibility and ease in handling a variety of cleaning tasks. Dyson Ball Animal 2 Upright Vacuum Cleaner The Dyson Ball Animal 2 is the best rated upright vacuum specifically designed to meet the needs of pet owners. Its powerful suction is a pet owner's best friend, effortlessly lifting pet hair, dander, and dirt from your floors and upholstery. Specialized attachments, such as the Tangle-free Turbine tool, make quick work of pet hair removal, ensuring that your home remains clean and allergen-free. Hoover WindTunnel T-Series Rewind Plus UH70120 The Hoover WindTunnel T-Series Rewind Plus UH70120 offers an affordable yet effective cleaning solution. Powered by WindTunnel technology, it excels at capturing dirt and debris from various floor types. What sets it apart is the convenient cord rewind feature, preventing tangles and messes. This lightweight upright vacuum cleaner vacuum proves that you can achieve excellent performance without breaking the bank. Bissell CleanView Swivel Pet Upright Bagless Vacuum Cleaner The Bissell CleanView Swivel Pet Upright Bagless Vacuum Cleaner is designed with pet owners in mind. The Triple Action Brush Roll of this best bagless upright vacuum is a pet hair's worst enemy, efficiently capturing and removing pet hair from your floors and upholstery. Furthermore, this cheap upright vacuum cleaner prevents debris from scattering during cleaning, ensuring a tidy and efficient operation. Additionally, the pet hair corner tool allows you to reach and clean even the most challenging corners and edges. How to Pick a Good Upright Vacuum Cleaner? It can be a daunting task to choose the best upright vacuum with the wide variety of models and features available. To simplify your decision-making process, here are seven essential factors to consider: Floor Type Compatibility The first step in choosing the right vacuum is to assess the floor types in your home. Whether you have hardwood, carpet, or a combination of flooring, ensure that the vacuum you select is well-suited for efficient cleaning on these surfaces. Or you can look for models with adjustable settings or brush rolls that can adapt to different floor types. Suction Power Strong suction is the backbone of any effective vacuum cleaner. It's essential for effectively picking up dirt, dust, and debris from your floors. A vacuum with higher suction power will be more efficient in deep cleaning and capturing fine particles. Corded vs. Cordless Corded models typically offer consistent power without the need for recharging but come with the limitation of a cord's length, which can be inconvenient in larger areas. Cordless vacuums, on the other hand, provide greater flexibility and maneuverability but may have shorter run times and may need recharging. Consider your cleaning requirements and the size of your home to make the right choice. Related Products Check out these pages for more information: Best Handheld Vacuums Best Cordless Vacuum Cleaner Best Vacuum Mop Bagged vs. Bagless Upright vacuums come in both bagged and bagless varieties. Bagged vacuums tend to trap dust and allergens more effectively, making them a better choice for those with allergies. However, you'll need to purchase replacement bags regularly. Bagless models have a container to collect dirt and debris, which is easier to empty but may release some dust during the process. Filtration System Look for vacuum cleaners with HEPA filters or similar high-efficiency filtration systems, as they can capture even the smallest particles and allergens, reducing airborne pollutants. A quality filtration system is particularly important if you have allergies or asthma. Attachments and Accessories The right attachments can transform your vacuuming experience. Crevice tools help clean tight spaces, upholstery brushes are designed to tackle furniture, and extendable hoses reach high ceilings and deep under furniture. These additions enhance the vacuum’s versatility, allowing for a thorough cleaning in every nook and cranny. Ease of Use and Maintenance Look for models with ergonomic handles, manageable weight for maneuverability, and swivel steering for ease of navigation. Adjustable height settings and the option to turn the brush roll on or off make it adaptable to different surfaces. For maintenance, consider user-friendly features like easy-to-empty dustbins, washable filters, and accessible brush roll cleaning mechanisms. By carefully assessing these factors, you can select an upright vacuum cleaner that not only meets your cleaning requirements but also ensures ease of use and maintenance, ultimately making your cleaning tasks more efficient and convenient. Conclusion In conclusion, the top contenders in our upright vacuum cleaner recommendations stand out for their powerful suction, ease of use, durability, and innovative features tailored to meet the varying needs of today's homes. Whether you prioritize allergen filtration, pet hair removal, or versatility for different floor types, there's an upright vacuum on this list that is sure to meet your cleaning needs. Investing in one of these top models will not only ensure a cleaner home but also offer a seamless and efficient cleaning experience. FAQs about Upright Vacuums 1. Canister Vacuum vs Upright: Which One Is Right For You? Choosing between a canister and an upright vacuum depends on your needs. Canister vacuums are versatile and easy to maneuver, ideal for stairs and under furniture, and work well on delicate surfaces. Upright vacuums offer more power for deep carpet cleaning and are more convenient for larger areas. Consider your home's layout, floor types, and personal comfort when deciding. 2. How Long Do Upright Vacuum Last? Upright vacuums typically last for at least eight years. This lifespan can vary based on factors like brand quality, frequency of use, and maintenance, but with proper care, they are a durable and long-lasting option for home cleaning.
Robovac · 12/12/2023
How to Dispose of Vacuum Cleaner Easily and Efficiently?
When the time comes to part ways with your old vacuum cleaner, it's important to do so responsibly. Disposing of a vacuum cleaner isn't as straightforward as tossing it in the trash; it requires consideration for the environment and awareness of the available options. In this blog post, we explore five practical and eco-friendly ways to say goodbye to your old cleaning companion. From recycling programs to charitable donations, we cover a range of methods to ensure your vacuum's disposal is as efficient and environmentally friendly as possible. Read on to learn more! Why Should I Recycle a Vacuum Cleaner? Recycling vacuum cleaners offers a multitude of significant advantages that extend beyond environmental considerations. Before delving into the methods on how to recycle vacuum cleaners, it's essential to understand these benefits: Resource Conservation Vacuum cleaners are comprised of valuable materials, including metal and plastic. These materials can be recovered and reused in the manufacturing of new products. By vacuum recycling or other proper vacuum cleaner disposal methods, you contribute to resource conservation and reduce the demand for raw resources. This not only lessens the strain on the planet's finite materials but also supports the principles of a circular economy. Environmental Protection Vacuum cleaners contain plastics and metals that can be harmful to the environment if not disposed of properly. Recycling prevents these materials from ending up in landfills, where they can take centuries to decompose and potentially release harmful substances into the soil and water. Energy Conservation The process of recycling materials generally consumes less energy compared to producing new items from raw materials. By recycling your vacuum cleaner, you contribute to energy savings, which in turn helps in reducing greenhouse gas emissions and combating climate change. Economic Benefits Recycling creates jobs in the recycling and manufacturing industries. It is often more cost-effective to recycle materials than to extract and process new materials. Safe Disposal of Hazardous Components Some components of vacuum cleaners, like batteries or certain electronic parts, can be hazardous if not disposed of properly. Recycling ensures these components are handled and disposed of safely. 5 Effective Methods to Dispose of Vacuum Cleaner Recycling a vacuum cleaner is more than just an act of decluttering; it's a significant step towards environmental responsibility and sustainability. If you have no idea how to dispose of old vacuum cleaner, here are some easy and effective ways: 1. Recycling Centers A sustainable approach to disposing of your used vacuum cleaners is by checking with your local recycling center to see if they accept such devices. Many recycling centers have established electronic waste (e-waste) recycling programs specifically designed to handle these devices appropriately. By choosing this method, you ensure that your vacuum cleaner's components, especially the valuable materials within it, are recovered and recycled rather than discarded into landfills. 2. Manufacturer Trade-In Programs Some forward-thinking vacuum cleaner manufacturers like eufy offer Trade-In programs, reflecting their commitment to environmental stewardship. For example, when you purchase a new vacuum cleaner like the eufy new X8 Pro Robot Vacuum, eufy will willingly take back your old or broken vacuum for proper disposal or recycling. This initiative not only encourages responsible product life cycle management but also ensures that the manufacturer can safely manage the electronic components of your old vacuum cleaner. 3. Donation If your vacuum cleaner is still in working condition and has some useful life left, what to do with old vacuum? Consider donating it to local charities, shelters, or thrift stores. Your well-maintained device may find a new home where someone in need can benefit from its service. This not only extends the life of the vacuum cleaner but also aligns with principles of reuse and community support, reducing the overall demand for new appliances and making disposal of vacuum cleaners easy. 4. Sell or Give Away Online marketplaces, local classified ads, and community bulletin boards can be used to sell or give away a working vacuum cleaner. This is an effective way to ensure the appliance continues to be used, thereby reducing waste. Websites like Craigslist, eBay, or Facebook Marketplace are popular platforms for this purpose. 5. Scrap Yards Another effective method to dispose of a vacuum cleaner is to take it to a scrap yard. Scrap yards are common, often located near industrial areas, and they can repurpose the metal and plastic components of your vacuum. These parts are either used in repairing other appliances or sold to businesses for recycling. By selling your vacuum to a scrap yard, you not only earn a small amount of money but also contribute to reducing landfill waste. eufy S1 Pro - The World’s First Floor Washing Robot Vacuum Meet eufy S1 Pro, unleash the power of real-time self-cleaning floor washing robot combined with a high-performance vacuum, all in one revolutionary device. Say goodbye to manual labor and hello to groundbreaking innovation and design. Don't miss out on the revolution in home cleaning: Go Now More Robot Vacuum and mops Conclusion Knowing how to dispose of vacuum cleaner properly is essential for reducing e-waste and conserving valuable resources. Recycling is a responsible choice that benefits both the environment and future generations. Consider the disposal options available in your area to ensure your old vacuum cleaner is handled in an eco-friendly manner. FAQs about vacuum cleaners 1. Are Vacuum Cleaners E-Waste? Yes, vacuum cleaners are classified as electronic waste (e-waste). It's important to dispose of them correctly to prevent them from ending up in landfills. 2. Can I throw away a vacuum cleaner? While you can put a vacuum cleaner in the garbage, it's not an environmentally responsible option. Recycling or exploring other disposal methods is a better choice for reducing e-waste and conserving resources. 3. Does Goodwill take broken vacuum cleaners? Goodwill and other thrift stores may not typically accept broken or non-functional vacuum cleaners. They are the ones who buy old vacuum cleaners that are still working, as they aim to resell items that are in working condition. 4. Where to dispose of vacuum cleaner? To dispose of a vacuum cleaner, check with local recycling centers for e-waste handling, attend community e-waste collection events, or inquire about retailer take-back programs when purchasing a new appliance.
Robovac · 12/12/2023
6 Best Wet Dry Vacuum Cleaners for Your Cleaning Needs
In the quest for a pristine and well-maintained home or workspace, the right cleaning tools are indispensable. Wet dry vacuum cleaners, known for their versatility and robust cleaning capabilities, stand out in this regard. In this comprehensive guide, we'll delve into the world of the best wet-dry vacuum cleaners, presenting you with top-notch recommendations of the best wet dry vacuums that will help you conquer any cleaning job. Let's get started! 6 Best Wet Dry Vacuum Cleaner In this section, we present a handpicked selection of the most efficient and versatile vacuum cleaners for 2023. Each model has been thoroughly evaluated to ensure it meets a variety of cleaning needs, from tackling stubborn wet spills to efficiently picking up dry debris. 1. eufy X10 Pro Omni Robotic Vacuum The eufy X10 Pro Omni is a game-changing wet dry vacuum cleaner that is equipped with the innovative MopMaster™ robovac technology and a powerful 8,000 Pa vacuum. This vacuum is specifically designed for households with pets, offering exceptional suction power to effectively eliminate pet hair from both carpets and hard floors. One of the standout features of the eufy X10 Pro Omni is its dual mop pads, which are designed with downward pressure and high-speed rotating mops. The continuously moist mop guarantees a steady supply of clean water that is capable of eliminating even stubborn, dried-on stains. 2. eufy X8 Pro Robotic Vacuum If you're looking for a hands-free cleaning experience, the eufy X8 Pro Robotic Vacuum is an excellent choice for the best cordless wet and dry vacuum cleaner for home. This advanced wet dry robot vacuum is equipped with intelligent navigation and powerful suction. It can seamlessly transition between wet and dry-cleaning modes, making it ideal for various surfaces. With programmable schedules and smart home integration, it offers convenience and efficiency in one package. 3. Tineco Floor ONE S5 The Tineco Floor ONE S5 is celebrated as the best wet dry floor cleaner, showcasing exceptional versatility in cleaning both wet and dry messes with ease. Its proficiency is evident in tackling tough challenges like soggy cereal and slimy egg yolks, making it a reliable choice for diverse cleaning needs. This model's effectiveness extends to various surfaces, including tiles, where it impressively cleans grout lines, ensuring no mess is left behind. Its combination of powerful cleaning performance and adaptability makes it a top choice for thorough home cleaning. 4. Bissell B0440 The Bissell B0440 distinguishes itself as an exceptionally versatile vacuum, ideal for home use, as it seamlessly transitions between various surfaces, from tiles to hardwood floors. Its efficiency is notable, completing cleanups in record time and eliminating the need for additional scrubbing. This makes it not only a time-saver but also a highly effective tool for keeping homes clean. Its ability to swiftly tackle different floor types with ease positions it as the best wet and dry vacuum cleaner for home for those seeking a reliable, all-in-one cleaning solution. 5. Roborock Dyad Pro Wet and Dry Vacuum Cleaner The Roborock Dyad Pro Wet and Dry Vacuum Cleaner stands out as the best wet dry robot vacuum, thanks to its remarkable suction power effective on both tile and hardwood floors. Its thoughtfully designed structure facilitates easy maneuvering under furniture and into challenging nooks and crannies, ensuring no spot is left uncleaned. What further sets it apart is its robust battery life, which allows for prolonged cleaning sessions without the need for frequent recharging. This combination of powerful performance, versatile design, and long-lasting battery makes it a top-tier choice for those seeking an efficient and comprehensive cleaning solution. 6. Dreametech H11 Max Wet and Dry Vacuum The Dreametech H11 Max Wet and Dry Vacuum excels as one of the best wet dry vacs on the market, renowned for its remarkably quiet operation and self-cleaning process. Equipped with advanced smart detect technology, this vacuum intuitively adapts to different types of messes, whether wet or dry, by adjusting its suction power for optimal cleaning. Its extended battery life is a significant advantage, allowing users to undertake comprehensive home cleaning without the worry of frequent recharging. This combination of quiet efficiency, intelligent technology, and long battery life makes it an outstanding choice for anyone seeking a versatile and effective cleaning tool. 7. Bissell CrossWave X7 Cordless Pet Pro Multi-Surface Wet Dry Vac The Bissell CrossWave X7 Cordless Pet Pro Multi-Surface Wet Dry Vac is an exemplary choice, particularly as the best wet vacuum cleaner for carpet. Its unique user-controlled solution dispenser allows for precise and efficient cleaning, ensuring thoroughness without wasting any cleaning product. The vacuum's design is especially user-friendly, enabling effortless navigation around furniture and tight corners. This model showcases its versatility by performing remarkably well on carpets and a variety of other surfaces, ensuring a deep and comprehensive clean. What To Look For In A Wet Dry Vacuum Cleaner? When choosing a wet-dry vacuum cleaner, there are several key factors to consider to ensure you get a model that best suits your needs. Here's a list of what to look for: Suction Power and Efficiency The most powerful wet/dry vac should have robust suction capabilities. For wet-dry vacuums, this is even more crucial as they need to handle heavy-duty debris and liquids. Cordless Convenience If mobility and ease of use are your priorities, the best cordless wet dry vac is an ideal choice. These models offer the convenience of portability, making it easier to move around without the limitation of a cord. Size and Portability Depending on your space and storage options, the size of the vacuum is an important consideration. The best small wet dry vacuum is perfect for those who have limited storage space or need a compact device for smaller areas and quick cleanups. Durability and Build Quality Given their usage in potentially harsh environments, wet/dry vacuums should be built to last. Look for models made with high-quality materials and sturdy construction to ensure longevity and reliability. Ease of Cleaning and Maintenance Consider how easy it is to clean and maintain the vacuum. Features like simple canister emptying, washable filters, and easy-to-clean parts will make your life easier in the long run. New Release: eufy X10 Pro Omni - Power and Convenience in One Introducing the latest innovation in cleaning technology - the eufy X10 Pro Omni. This product combines a powerful 8,000 Pa vacuum with an efficient mop, revolutionizing the way you clean your home. Perfect for pet owners, it offers a healthier living environment with its high-efficiency filter. Take advantage of our special offer: Get $200 off the original price of $799.99 by reserving now for just $1. Act fast, as this offer ends on Feb. 14th, 2024. Get the early bird price of $599.99 before the deal ends! I Want to Know More Get $200 Off Now * For official sale or discount updates regarding X10 Pro Omni, please refer to the product page. Conclusion In conclusion, after thorough testing and reviewing, we have curated a list of the 6 best wet/dry vacuum cleaners for 2023, tailored to suit a variety of needs and preferences. Whether you're looking for powerful suction or specific features like capabilities for fine particle filtration, there is a model on this list that will meet your demands. Investing in the best wet/dry vacuum cleaner not only simplifies your cleaning tasks but also ensures longevity and efficiency in tackling both dry debris and liquid spills. Remember to consider your specific requirements and preferences when making your choice, and rest assured that any option from our top picks will be a valuable addition to your cleaning arsenal. FAQs about vacuum cleaners 1. Can Wet Dry Vac Replace Mop? A wet dry vacuum can partially replace a mop in certain situations, especially when dealing with spills or liquid messes. These vacuums are adept at quickly sucking up liquids, making them efficient for cleaning up spills that would otherwise require mopping. However, for regular floor cleaning and sanitizing, particularly on surfaces like hardwood or tile, a mop is still necessary. 2. What Can You Use A Wet-Dry Vacuum For? A wet-dry vacuum is a versatile home cleaning tool, ideal for quickly handling liquid spills. It's also effective for general cleaning, easily picking up dust, crumbs, and pet hair from various surfaces.
Baby · 12/10/2023
Best Budget Baby Monitors of 2024: Big Protection for Small Budgets
Baby monitors have become indispensable tools for many families, not only to ease the stress of parenting, but also to ensure the safety of their children. Today's baby monitors have evolved into multifunctional devices, offering features such as remote access, nighttime monitoring, two-way communication, and even smart features such as cry detection and growth tracking. As more features become available, many expensive baby monitors have come on the market. But, is it necessary to invest in a more costly model with additional features? Actually, that is not the case. We should consider cost-effectiveness. This article will review the best budget baby monitors of 2024, and compare their prices and features to help you choose the perfect baby monitor within your budget. Reviews of Best Budget Baby Monitors Let's get right to the point and dive right in with our picks for the 4 best budget baby monitors in 2024. eufy Baby Monitor E110 Pricing: $159.99 eufy Baby Monitor E110 is a budget-friendly option that effortlessly blends essential features with affordability, providing a comprehensive solution for parents in search of reliable monitoring. With a crystal-clear 720p display and an impressive range of 1000 feet, this monitor ensures that not a single moment will be missed. Moreover, the lens included expands the viewing angle to 110 degrees, with a 360-degree pan and a 110-degree tilt, granting complete coverage of your entire home. The E110's features allow for expanded functionality, including two-way audio, the ability to monitor in low light, and customized alerts, allowing for seamless communication with your child, and ensuring the safety of your little one even in dim environments. As the most reasonably-priced baby monitor on the market, the eufy Baby Monitor E110 stands out for its clear display, wide coverage, two-way communication, and budget-friendly pricing, making it the ultimate pick for parents who prioritize both superior quality and affordability. Baby Monitor E210 Pricing: $169.99 Baby Monitor E210 by eufy is a versatile and affordable monitoring solution for parents to keep an eye on their little babies and ensure their well-being. E210's large 5-inch HD display offers clear visuals of your baby's surroundings, while its long-range coverage of up to 1,000 feet allows you to move around your home while staying connected. Additionally, it offers a selection of soothing lullabies to help your baby relax and enjoy peaceful sleep. Notably, one of E210's outstanding features is that it doesn't require Wi-Fi, addressing privacy concerns for users. This best affordable baby monitor stands out with high security without Wi-Fi concerns, an easy setup process, strong battery life, and versatile features. It is an excellent choice for parents who seek a reliable monitoring solution without the need for Wi-Fi, making it particularly suitable for those with privacy concerns. Chillax Giraffe Pro Smart Baby Monitor Pricing: $159.99 Chillax Giraffe Pro Smart Baby Monitor offers a convenient remote viewing feature through a mobile app, allowing you to monitor your baby from anywhere using your smartphone. Additionally, it provides sleep analysis and keeps a baby tracking journal for valuable insights. Moreover, the Giraffe Pro stands out with its impressive 1080p camera resolution and a wide range of up to 1200 feet for clear and extensive monitoring. Its motion detection technology enhances safety by alerting you to any movement in your baby's room. In summary, the Chillax Giraffe Pro Smart Baby Monitor provides remote monitoring, high-quality visuals, an extended range, safety features, and data tracking – making it an advanced and user-friendly monitoring solution designed for modern parents. See what eufy can help if you're still looking for more smart baby monitor to keep your baby safe. Cubo Ai Plus Smart Baby Monitor Pricing: $199.00 Featuring advanced artificial intelligence technology, the Cubo Ai Plus Smart Baby Monitor is a cutting-edge and innovative option for comprehensive baby monitoring. What sets the Cubo Ai Plus apart is its AI technology, which can alert parents when their baby rolls over or covers their face to sleep. It's great at capturing pictures and videos, and can automatically save photos to the Moment Wall. You can also conveniently playback nighttime events with the 18-hour video playback feature. Plus, it's shaped like a charming little bird that blends effortlessly into any nursery, avoiding the typical security camera vibe. With a variety of great features, including AI technology, attractive design, and excellent photo and video capture capabilities, this best inexpensive baby monitor provides parents with up-to-date and all-encompassing baby monitoring. Related Products Check out these pages for more information: Best Smart Sock by eufy Best Wifi Baby Monitor by eufy Best Video Baby Monitor How to Choose a Cheap Baby Monitor? Having introduced the top 4 best cheap baby monitors, you may be wondering how to choose the perfect one to suit your specific needs. To help you make the right decision, consider these key factors: Determine Your Budget and Must-Have Features:Begin by setting your budget and listing the essential features you need, like audio or video monitoring, night vision, two-way communication, and temperature or humidity monitoring. Consider Range and Power Source:Think about the size of your home and where you intend to use the monitor. Make sure it has adequate range for signal coverage. Additionally, decide if you prefer a rechargeable battery or a monitor that requires constant power. Read Reviews and Compare Brands: Make an informed choice by reading user reviews and comparing different baby monitor brands. This research will help you select the most suitable and budget-friendly option. Conclusion In summary, we've explored 4 cheap but good monitors, each designed to meet various parenting needs. By thoughtfully evaluating your budget, monitoring requirements, brand reputation, and other specific criteria, you can confidently choose the ideal baby monitor. This choice not only ensures your baby's safety but also provides you with peace of mind while staying within your budget.
Smart Lock · 11/10/2023
Finding the Best Smart Lock for Airbnb: Your Ultimate Guide
As an Airbnb host, you may have considered many ways to improve the security and convenience of managing your Airbnb. The emergence of smart locks is a timely help. They can open the door by entering the password, thereby reducing the security risks caused by the transmission of keys. Not only that, it can also customize the password for each check-in guest to improve the security of Airbnb. Nowadays, more and more Airbnb hosts choose to install smart locks. If you are also considering looking for the best smart lock for Airbnb, then please continue reading this article to get the detailed best smart lock for Airbnb buying guide. What's the Importance of Smart Locks for Airbnb Hosts Smart lock is still a relatively new and evolving technology for many people. If you are still hesitant about using smart locks, let's take a look at the benefits and importance of using smart locks for your Airbnb. Convenient management:Smart locks simplify the guest check-in process with keyless entry. Airbnb hosts only need to provide the entry code, and then the guest can complete the check-in independently. Enhanced security:Smart locks can reduce the risk of key transmission. Plus, they provide advanced security features and access control. Remote management:Airbnb hosts can remotely manage access and monitor their property easily. Temporary access control:Smart locks can let you generate temporary entry codes for each check-in guest to improve Airbnb security. Cost-effectiveness:While smart locks cost more upfront, the long-term savings in key management and enhanced security make them a cost-effective option as well. 4 Best Smart Locks for Airbnb There are many smart locks available for you to choose from in the market. For a first-time buyer of a smart lock, this is undoubtedly a great challenge. Don't worry. In this section, we will provide you with the 4 best smart locks for Airbnb. Let's scroll down and pick up one of them. eufy Security Smart Lock E130 E130 Smart Lock, a WiFi-based and Bluetooth door lock from eufy, is our top choice for the best smart lock for Airbnb. As an all-around security smart lock, it features advanced materials and encryption technology to enhance the security of your Airbnb. It supports four ways to unlock the door, such as using your fingerprint, the eufy Security app with Bluetooth, the electronic keypad, or the key. Additionally, it boasts the function of automatically locking the door. Its built-in sensor will automatically lock the door when it is closed. In this way, you do not have to worry about property loss if a guest forgets to lock the door when they go out. Besides that, it comes with an IP65 weatherproof rating design, which makes it able to keep your home safe in any environment. What’s more, it uses durable stainless-steel plating, guaranteeing that you can use it for a long time. August Home Smart Lock If you only want to install the smart lock inside the door and keep it unchanged outside, then you can try August Home Smart Lock which can provide you with a keyless entry experience with no traditional key or entry code. You can directly use a smartphone app to lock or unlock the door. In addition, it also supports remote control, enabling you to unlock the door for guests when you are not at home. One of the features we like about this Bluetooth door lock is that it is compatible with many smart home devices, such as Alexa, Google Assistant, Z-Wave, and more. You don't even need to take out your smartphone, just give a voice command and it will automatically lock or unlock the door. Although the keyless entry system provided by August Smart Lock is very convenient, it does have a drawback. Once you forget your phone or your smart home device goes offline, you won't be able to enter the door. Yale Assure Lock 2 If you prefer a smart lock with a stylish design, then you cannot miss Yale Assure Lock 2, which offers multiple colors like black, bronze, magenta, and silver with 3 finishes - Satin Nickel, Black Suede, and Oil Rubbed Bronze to match your door. For sure, this smart lock covers all the basic services to make it a competent product. For example, it features DoorSense, which can activate the Auto-Lock once it detects the door is closed. Also, it supports Auto-Unlock when your hands are full. Additionally, it works well with the Airbnb app, allowing you to provide scheduled and secure access with a custom code to guests during their stay. However, it does require careful attention to its battery life since there is no battery life indicator on its panel, which may lead to no charging for a long time and battery life running out. Schlage Connect Smart Deadbolt Schlage Connect Smart Deadbolt is our final pick for the best smart lock for Airbnb. It has ANSI/BHMA Grade 1 certification, which is the highest security level possible for a deadbolt. Also, one of its best features is that it comes with a built-in alarm, which can sense potential door attacks and offer timely ringing. Plus, it boasts Z-Wave technology for enhanced security. We can say that it is one of the most secure smart locks on the market with no doubt. Just like other smart locks, it is well-compatible with smart home devices, making it easier to manage guests' access. On the contrary, it is not equipped with a relevant phone app to extend its smart functions. If you want to program a new access code, it can only be changed manually, unlike other smart locks that offer app-based convenience. Conclusion In this article, we recommend the four best smart locks for Airbnb, covering the features that Airbnb hosts are most concerned about, such as high security, convenience, intelligence, etc. They can provide a variety of unlocking methods to further enhance the security of your Airbnb. Ability to provide only temporary access codes without leaving spare keys with guests for a few days. If you're also considering whether to use a smart lock on your Airbnb, why not give it a try?
Robovac · 08/10/2023
Can You Put Vinegar in a Steam Mop? (Explained)
In today's cleaning world, many are seeking natural and effective ways to keep their homes sparkling clean. One such solution is using vinegar in tandem with steam mops. This intriguing combination raises questions about its effectiveness and safety. Can vinegar truly be a valuable addition to your steam mop routine, or are there caveats to consider? This article delves into the intriguing world of putting vinegar with steam mops, exploring its merits and providing guidance for those looking to harness the power of this natural cleaning agent for their homes. Can You Put Vinegar in a Steam Mop Vinegar is often considered a natural and eco-friendly cleaning solution, which makes it an attractive option for use with steam mops. However, its compatibility with these devices can vary depending on the specific steam mop model. In general, vinegar can be used with steam mops, but there are some important factors to consider. When considering using vinegar in your steam mop, do it safely to protect your device and maximize its effectiveness. Here are some recommendations: Dilution Ratios:Always dilute vinegar with water. A commonly recommended ratio is 1:1, meaning equal parts vinegar and water. However, this can vary depending on your specific steam mop model. Filtered Vinegar:Always use filtered and clear vinegar with your steam mop,as the unfiltered vinegar may contain particles that can clog your steam mop. A stronger mixture may increase the risk of damaging your steam mop. Distilled Water:To further reduce mineral buildup and potential clogging, use distilled water instead of tap water in your steam mop. Keep an eye on your steam mop's components for any signs of damage or wear. Filter Replacement:If your steam mop has a filter, regularly check and replace it according to the manufacturer's recommendations. A clean filter ensures efficient steam production and minimizes potential vinegar buildup. What are the Benefits of Mopping with Vinegar Does vinegar disinfect floor? Yes. Mopping with vinegar is an effective and natural way to clean and disinfect floors, remove stains and odors, and maintain a healthy environment. When used correctly, vinegar is a cost-effective and eco-friendly alternative to commercial floor cleaners. Here are some of its benefits: Natural Disinfection:One of the key benefits of mopping with vinegar is its ability to naturally disinfect floors. Vinegar has acetic acid, which has antimicrobial properties. While it may not be as potent as commercial disinfectants, it can effectively inhibit the growth of bacteria and germs on your floors. However, note that it might not kill all types of pathogens, so it's not a replacement for specialized disinfectants. Gentle Cleaning:Can you mop with vinegar for all floors? Vinegar is a gentle and non-toxic cleaner, making it suitable for various types of flooring, including hardwood, tile, laminate, and linoleum. Unlike harsh chemical cleaners, it won't strip away finishes or damage surfaces. Removes Stains and Odors:Vinegar is excellent at breaking down stains, especially those caused by spills or pet accidents. It can also help neutralize and eliminate lingering odors, leaving your floors fresh and clean. Cost-Effective:Vinegar is an affordable cleaning solution that's readily available in most households. It offers an economical way to maintain clean and hygienic floors without the need for expensive commercial cleaners. Environmentally Friendly:Using vinegar for mopping is an eco-friendly choice. It reduces your reliance on chemical cleaners that can harm the environment. Additionally, vinegar is biodegradable, so it won't contribute to pollution. Minimizes Residue:When properly diluted, vinegar leaves minimal residue on your floors. This means you won't have to rinse as thoroughly as you might with some commercial cleaners. Shine Enhancement:On hard surfaces like tile and laminate, vinegar can impart a natural shine, leaving your floors looking clean and polished. Note: It is generally not recommended to put bleach in a steam mop. Steam mops are designed to clean using hot steam, and bleach can have adverse effects on the internal components and materials of the mop. How to Use Vinegar in a Steam Mop Using vinegar in a steam mop can help effectively clean and sanitize your floors. But you should always check your steam mop's user manual to confirm compatibility with vinegar and avoid any potential warranty issues. Here's a step-by-step process to put vinegar in some general steam mops. Step 1: Dilute Vinegar: Mix equal parts of white vinegar and water in a container. This dilution helps prevent potential damage to the steam mop. Step 2: Fill the Reservoir: Put vinegar in a steam cleaner reservoir, following the manufacturer's guidelines. Step 3: Preheat the Mop: Turn on the steam mop and allow it to heat up according to the instructions. This ensures that the vinegar solution is effectively turned into steam. Step 4: Start Mopping: Begin mopping the floor as you would with plain water. The steam will help loosen dirt and grime, while the vinegar's acidity can aid in disinfection. Step 5: Ventilate the Area: Since vinegar has a strong odor, ensure proper ventilation while using the steam mop. Step 6: Empty the Reservoir: After cleaning, remove any remaining vinegar solution from the reservoir and rinse it with clean water to prevent any residue buildup. Step 7: Rinse the Mop: Perform a final mopping pass with plain water to rinse away any vinegar residue and leave the floor fresh. Step 8: Maintenance: Regularly clean and maintain your steam mop according to the manufacturer's instructions to prevent clogs or damage. 5 Things to Keep in Mind When Using Vinegar in Steam Cleaners Using vinegar in a steam cleaner can be an effective, natural, and economical way to clean and disinfect your home, but it's essential to do so with care and consideration for your specific cleaning needs and surfaces. Machine Compatibility:Ensure your steam cleaner is designed to handle vinegarbefore you put vinegar in a steamer. If you still need to know the details, you can consult the user manual or manufacturer's guidelines. Surface Suitability:Vinegar is safe for many surfaces like tile and linoleum but can damage natural stone like marble or granite. Confirm compatibility. Ventilation:Steam cleaning with vinegar can produce a strong odor. Maintain good ventilation while cleaning by opening windows and doors. Hard Water Buildup:Vinegar can help dissolve mineral deposits in the steam cleaner's heating element. Use it occasionally for maintenance. Stainless Steel Appliances:Avoid using vinegar on stainless steel appliances, as it can cause discoloration or damage. Extend: Can you put vinegar in robot vacuums? Let's put it in a simple way: it's the best not to add vinegar in robot vacuums water tank, even mostly water with a few glugs of vinegar. It will harm and corrode the internal parts of you robot vacuum little by little. Besides, Use of unauthorized cleaning solutions may invalidate the warranty. According to iRobot and Ecovas official, hot water or water + vinegar are not recommended. eufy S1 Pro - The World’s First Floor Washing Robot Vacuum Meet eufy S1 Pro, unleash the power of real-time self-cleaning floor washing robot combined with a high-performance vacuum, all in one revolutionary device. Say goodbye to manual labor and hello to groundbreaking innovation and design. Don't miss out on the revolution in home cleaning: Go Now More Robot Vacuum and mops Conclusion Can I put vinegar in my steam mop? Yes. Using vinegar with steam mops can be effective for many cleaning tasks, but it comes with important considerations. It's compatible with some steam mop models but may not be suitable for all. Dilution is crucial, usually at a 1:1 ratio with water, to prevent potential damage or strong odors. Vinegar's benefits include natural disinfection and deodorizing properties, making it great for general cleaning. However, it may not be suitable for all surfaces, so compatibility testing is essential. In summary, vinegar in steam mops can be a valuable cleaning tool when used correctly. Careful consideration of machine compatibility, dilution ratios, surface suitability, and safety measures will help you achieve effective and eco-friendly cleaning results.
Smart Lock · 08/10/2023
How Do Smart Locks Get Power? Unveiling the Secrets of Smart Lock Power Sources
As the digital age evolves, the security landscape is undergoing a transformative shift, with smart locks becoming an integral part of modern homes. These innovative locks offer convenience, enhanced security, and remote access control. Behind their sleek designs and advanced features lies a crucial factor that keeps them operational: How do smart locks get power? In this article, we'll delve into the intriguing world of smart lock power sources, exploring how these intelligent devices stay powered up to safeguard our homes and ease our lives. How Do Smart Locks Get Power? Smart locks come in various types, each with its own set of features and power requirements. Understanding how are smart locks powered is crucial for reliable operation. Here's an overview of different smart lock types and the batteries they commonly use. Battery-Powered Smart Locks Features: Battery-powered smart locks typically use standard AA or AAA batteries. These batteries need to be replaced periodically, and the frequency depends on usage. Some locks have low-battery indicators to alert you when it's time to replace the batteries. Lifespan: Typically, 6 months to 1 year, depending on usage and battery quality. Rechargeable Smart Locks Features: Rechargeable smart locks have internal rechargeable batteries that can be charged using various methods, such as USB charging. You'll need to periodically recharge the lock when the battery level gets low. Lifespan: Rechargeable batteries can last up to 3-6 months on a single charge. Solar-Powered Smart Locks Features: Solar-powered locks have built-in solar panels that capture energy from sunlight to recharge the internal batteries. These locks are designed to operate for extended periods without requiring battery replacement. Some models have built-in rechargeable batteries that store solar energy for use during cloudy days or at night. Lifespan: Solar-powered locks can have a longer lifespan, up to 9 months on a single charge. Hardwired Smart Locks Features: Hardwired smart locks are connected directly to your home's electrical system. They don't rely on batteries and are continuously powered through the wiring. But they may require professional installation. Lifespan: Hardwired locks can potentially last for many years without needing battery replacement. Hybrid Smart Locks Features: Hybrid smart locks combine both battery power and a hardwired backup. When the batteries run low, the lock can switch to the hardwired power source to ensure continuous operation. Lifespan: Similar to battery-powered smart locks, the battery lifespan can vary from 6 months to a year. What to Do if the Smart Lock Battery Drains? Always familiarize yourself with your smart lock's user manual and instructions for battery replacement, backup access methods, and troubleshooting. Being prepared and informed can resolve smart lock battery-related issues and regain access to your property. Emergency Key Access:Most smart locks come with a physical key backup. Use the key to manually unlock the door and gain access to your property. Replace or Recharge Batteries:If your smart lock uses replaceable batteries, have spare batteries on hand. Remove the drained batteries and replace them with fresh ones. For rechargeable locks, charge the battery according to the manufacturer's instructions. External Power Source:Some smart locks offer an emergency external power source option. Connect a 9-volt battery to the lock's backup power terminals to provide temporary power and access. Mobile App or Backup Codes:If your smart lock is integrated with a mobile app, you may be able to unlock it using the app. Additionally, some locks provide backup codes that can be entered on the keypad. Manufacturer Support:If none of the above options work or if you're unsure, contact the smart lock's manufacturer or customer support for assistance. They can provide guidance or troubleshooting steps tailored to your specific lock model. To avoid future battery drain issues, regularly check the battery level through the app or keypad. Replace batteries when they're low and keep spare batteries handy. Is There a Smart Lock Without Changing Batteries Frequently? Video Smart Lock S330 is powered by a 10000mAh Rechargeable Lithium-ion rechargeable Battery, which works for one full year. You'll get a low-battery notification when the battery of the smart lock is under 10%. If the battery dies, you can charge it via the port on the lock. It includes 2 manual keys. You can find the cylinder under a cover and open it using a physical key. Even if you need to have a long vacation, you do not need to worry about the power sources of the smart lock and monitor the visitors easily. Additionally, the Video Smart Lock S330 features a 2K resolution camera that delivers clear and crisp video, even in low light conditions. You can use the camera to see who's at your door, even if you're not home. You can also use the camera to talk to visitors through the built-in speaker and microphone. Conclusion In this comprehensive guide, we've explored the various power sources that smart locks rely on, including batteries, rechargeable options, solar power, and hardwiring. We've also discussed the lifespan of these power systems and how to handle situations when your smart lock's battery drains. Remember that smart locks are designed to provide both security and convenience and selecting the appropriate power source is a crucial part of ensuring their consistent performance. So, whether you're considering a new smart lock installation or troubleshooting an existing one, making informed choices about power sources will help you enjoy the benefits of smart security technology to the fullest.
Video doorbell · 08/10/2023
How Much Does It Cost to Install a Doorbell? (Full Explanation)
How much does it cost to install a doorbell? Doorbells, those humble guardians of our homes, often go unnoticed until they're needed. Yet, they play a crucial role in our daily lives, announcing visitors/deliveries, and ensuring our security. With advancements in technology, doorbells have evolved beyond their traditional chime into sophisticated devices that offer convenience, connectivity, and peace of mind. In this guide, we'll take a closer look at the world of doorbells, exploring the various types available, from the classic wired to the modern wireless versions. But more importantly, we'll delve into the financial aspect of installing these essential home features. How much to install a doorbell that is loud and clear, or perhaps even sends you a smartphone notification when someone's at the door? Uncover the answers and help you make an informed decision when it comes to doorbell installation. How Much Does It Cost to Install a Doorbell Camera Whether the doorbell is wired or wireless can impact the total cost to install doorbell. Here is a comparison between the cost of installing a wired doorbell and a wireless doorbell. Wired Video Doorbell Installation Cost The actual wired video doorbell installation costs may vary depending on factors like your location, the complexity of the installation, the specific doorbell model, and any additional features or accessories. Labor charges can be a significant portion of the total cost, with more complex installations and regions with higher living costs potentially resulting in higher labor fees. Cost Category Average Cost Range ($) Labor Charges $80 - $150 Wired Video Doorbell Unit $100 - $300 Wiring and Electrical Supplies $20 - $50 Mounting Hardware $10 - $30 Total Average Installation Doorbell Cost $210 - $530 Additionally, permits and inspection fees may apply depending on your local regulations. It's advisable to obtain quotes from licensed electricians or installation professionals in your area to get a more accurate estimate tailored to your specific circumstances. This breakdown can serve as a general guideline for understanding the potential cost components of a wired video doorbell installation. Wireless Doorbell Camera Installation Cost The installation of wireless doorbell cameras is generally less complex than wired options, often making it a suitable DIY project for those with basic technical skills. However, if you prefer professional installation, you may incur additional labor charges, which can vary by region. Always consider your specific needs and preferences when considering the cost to install a doorbell camera. Cost Category Average Cost Range ($) Wireless Doorbell Camera Unit $100 - $300 Mounting Hardware $10 - $30 Battery or Power Source $5 - $20 Wi-Fi Network Enhancements $30 - $80 Smartphone App Setup $20 - $50 Optional Subscription Fees Vary Total Average Installation Doorbell Cost $165 - $480 Additionally, some doorbell camera brands offer optional subscription plans for cloud storage and advanced features, which can add to the long-term cost but are not typically included in the initial installation expenses. What are the Factors Affecting Doorbell Installation Costs When you need to have a detailed breakdown of the doorbell installation cost, here are the variables that will help you make an informed decision when planning your doorbell installation project. It's advisable to obtain multiple quotes from professionals to get a better understanding of the specific costs related to your installation needs. Type of Doorbell:The choice between wired and wireless doorbells is a significant cost determinant for doorbell installation. Wired doorbells typically require more extensive installation work, including running wiring through walls, which can increase labor costs. Wireless doorbells are generally easier to install and may have lower labor costs. Location of Installation:Where you intend to install the doorbell matters. The type of wall material can affect installation difficulty and cost. For example, installing a doorbell on a wooden wall is generally easier and less expensive than on concrete or brick, which may require specialized tools and labor. Existing Wiring:If your home already has pre-existing doorbell wiring in place, you may incur lower installation costs. Electricians can utilize existing wiring, reducing the need for extensive rewiring, which is common in homes without prior doorbell installations. Additional Features:The features your doorbell possesses can significantly impact installation costs. Basic doorbells with a chime may be relatively inexpensive to install. However, doorbells with advanced features like video capabilities, smart integration (such as connecting to a smartphone app), or intercom systems will require more intricate installations, increasing both labor and equipment costs. Professional V.S. DIY Installation:Whether you choose to hire a professional installer or opt for a DIY approach will also affect costs. Professionals bring expertise and ensure proper installation but may charge for their services. DIY doorbell installation can save on labor costs but might require more effort and time. Regional Variations:The cost of doorbell installation can vary based on your geographic location. In urban areas with higher living costs, labor rates for electricians and contractors may be more expensive than in rural regions. Permits and Regulations:In some areas, electrical work requires permits and adherence to local building codes. Acquiring permits and complying with regulations may involve additional fees, contributing to the overall cost. Material and Equipment:The materials and equipment required for installation, such as wiring, transformers, mounting hardware, and doorbell units themselves, factor into the total cost. Conclusion To make an informed decision, assess your specific needs, home setup, and budget. Consider whether you prefer a wired or wireless system, the complexity of the installation, and if you'll opt for professional help, especially for doorbell cameras. Obtaining quotes from local installers is also advisable for accurate cost estimates. Prioritize security, convenience, and peace of mind when budgeting for your doorbell installation.
Vacuum · 08/10/2023
The 5 Best Vacuums for Tile Floors in 2024 for Squeaky Clean
Are you tired of struggling to keep your beautiful tile floors spotless? The truth is, maintaining pristine tile floors can be quite the challenge. Dust, dirt, and debris seem to appear out of thin air, and the wrong vacuum can leave unsightly scratches. But fear not, because there's a vacuum for every tile floor need in today's bustling market. In this comprehensive guide, we'll delve into the world of tile floor cleaning and reveal the top 5 best tile vacuums tailored to this task. Say goodbye to endless sweeping and hello to hassle-free, pristine floors. Your journey to spotless tile floors begins here. 5 Best Vacuum for Tile Floors of Different Scenarios In this section, we introduce the 5 best tile floor vacuums tailored to different needs. Dive in and discover the ideal solution for your tiled spaces! eufy HomeVac H30 Mate Vacuum - The Best Overall Vacuum for Tile Floors eufy HomeVac H30 Mate Vacuum is a powerful and portable handheld vacuum that is perfect for quick cleaning. It features 80AW of suction power, which is enough to pick up even the smallest dirt particles and pet hair. The H30 Mate also has two suction modes, so you can choose the right setting for the job at hand. Key Features Powerful 80AW Suction Power: Ensures efficient and thorough cleaning, picking up even the tiniest debris with ease. Moreover, it provides two suction modes (Eco and Max). Lightweight and Portable Design: A major benefit for handheld vacuums, the HomeVac H30 Mate boasts a lightweight structure and comfortable grip, ensuring seamless maneuverability throughout your living space. HEPA Filter:Not just any ordinary filter, the HEPA filtration system in this vacuum captures 99.97% of allergens and pollutants, offering a cleaner and healthier environment inside your home. Battery Life:No need for frequent recharges with the HomeVac H30 Mate. With a maximum runtime of 20 minutes, you can undertake quick cleaning sessions without any interruptions. BISSELL Featherweight Stick Lightweight Bagless Vacuum - The Best Budget-Friendly Tile Floor Vacuum BISSELL Featherweight Stick Lightweight Bagless Vacuum is a great choice for anyone looking for a powerful and versatile tile floor cleaner machine. It is lightweight and easy to maneuver, making it perfect for cleaning hard floors, carpets, stairs, and upholstery. It also comes with a crevice tool for cleaning tight spaces. Key Features Ultra-Lightweight Design:It weighs just 4.1 pounds, making it easy to carry and maneuver around your home. It is one of the best tile floor cleaners for people who have small apartments or limited mobility. 2-in-1 Versatility: Not just limited to being a stick vacuum, the BISSELL Featherweight can effortlessly convert into a handheld vacuum. This feature is perfect for cleaning stairs, upholstery, furniture, and those tricky, hard-to-reach areas. 15-foot Cord Length: No more constantly unplugging and moving to different outlets. The generous 15-foot cord length ensures you can clean larger areas of your home seamlessly, making it a convenient choice for comprehensive home cleaning. Multifunctional: Beyond just tile floors, its design allows for effective cleaning on multiple surfaces, from floor to furniture, ensuring a thorough cleaning solution for your entire home. eufy RoboVac G20 Hybrid - The Best Robot Vacuum for Tile Floors eufy RoboVac G20 Hybrid is a powerful and versatile robot vacuum that can vacuum and mop your tile floors at the same time. It features Smart Dynamic Navigation for efficient cleaning, 2500 Pa of suction power for deep cleaning, and a 2-in-1 dustbin and water tank. It is also compatible with Alexa and Google Assistant for voice control. Key Features Smart Dynamic Navigation:It uses Smart Dynamic Navigation to clean your floors in an efficient way. It divides your cleaning area into zones and cleans them one by one, ensuring that no spot is missed. 2500 Pa of Suction Power:The RoboVac G20 Hybrid has 2500 Pa of suction power, which is more than enough to deep clean your tile floors. It can easily pick up dirt, dust, pet hair, and other debris. 2-in-1 Dustbin and Water Tank:The RoboVac G20 Hybrid comes with a 2-in-1 dustbin and water tank, which means that you can use the device to vacuum and mop your floors at the same time. Compatible with Alexa and Google Assistant: The RoboVac G20 Hybrid is compatible with Alexa and Google Assistant. Soyou can control it with your voice, which is very convenient. TMA Cordless Vacuum Cleaner - The Best Cordless Vacuum for Tile Floors TMA Cordless Vacuum Cleaner is one of the most popular cordless vacuum cleaners that are perfect for any home. It features a 2200mAh detachable battery that provides up to 30 minutes of runtime, making it ideal for cleaning large areas. The vacuum cleaner also comes with a variety of attachments, including an LED floor brush, a crevice tool, and more. Key Features Powerful suction:The TMA Cordless Vacuum Cleaner has strong suction that can pick up dirt, dust, and even pet hair from all floor types. It provides the 15KPA Power Suction that can be used for any type of floor. Detachable battery:The vacuum cleaner's battery is detachable, so you can easily swap it out for a fresh one when the battery runs low. Long runtime:The vacuum cleaner provides up to 30 minutes of runtime on a single charge, so you can clean large areas without having to worry about running out of power. HEPA filter:It has a HEPA filter that captures 99.97% of allergens and pollutants, making it ideal for allergy sufferers. Moreover, it is a 6-1 handheld vacuum coming with a variety of attachments. WOWGO Cordless Vacuum Cleaner - The Best Handheld Vacuum for Tile Floors When you need to find the best vacuum for tile floors and carpet, WOWGO Cordless Vacuum Cleaner is the desired choice. It features a 12000Pa powerful suction that can easily pick up dirt, dust, hair, and food crumbs from any surface. The vacuum cleaner also comes with a 2-speed suction power, so you can choose the right setting for the job. Key Features Filtration System:It provides a 4-stage filtration system that traps dust and particles to 0.1 microns. The best handheld vacuum for tile floor helps to ensure that the air you breathe is clean and free of allergens. Powerful 12000Pa Suction:It features a 12000Pa powerful suction that can easily pick up dirt, dust, hair, and food crumbs from any surface, including the accumulated dirt and grime from the grout lines. Long runtime:The cordless vacuum for tile floors has a 2600mAh large battery capacity, which provides 40 minutes of runtime. It is perfect for home and car cleaning, and it is backed by a one-year warranty. Easy to Use:It has a variety of attachments, making it easy to use. Moreover, it is quiet, so you can use it without disturbing others. What to Consider When Buying the Best Vacuums for Tile Floors By carefully evaluating these factors, you can select the best vacuum cleaner tile floors that suits your cleaning requirements and ensures your floors remain clean and scratch-free. When shopping for the best cleaner for tile floors, here are the 10 key factors to consider to ensure you make the right choice: Floor Type Compatibility:Look for a vacuum specifically designed for hard floors like tile. These vacuums typically have settings or attachments that prevent scratching and provide effective cleaning. Suction Power:Opt for a vacuum with strong suction to effectively remove dirt, debris, and fine particles from the grout lines and tile surface. Brush Roll Type:Choose a vacuum with a brush roll that can be turned off or adjusted. For tile floors, a vacuum with a soft or motorized brush is preferable to prevent scratching. Filtration:Consider vacuums with high-efficiency particulate air (HEPA) filters to trap allergens and fine dust particles, ensuring cleaner air in your home. Weight and Maneuverability:A lightweight and maneuverable vacuum is easier to handle, especially in tight spaces or when cleaning under furniture. Corded V.S. Cordless:Cordless vacuums offer convenience but may have limited run time. Corded models provide consistent power but may have cord length restrictions. Attachments and Accessories:Look for additional tools like crevice tools, upholstery brushes, or extension wands to tackle various cleaning tasks effectively. Noise Level:Consider noise levels, especially if you have noise-sensitive family members or live in an apartment. Brand Reputation and Reviews:Read product reviews and consider reputable brands known for their vacuum quality and durability. Budget:Set a budget that aligns with your needs and preferences. High-end models may offer more features, but there are effective options available at various price points. Conclusion In this article, we've uncovered the secrets to achieving spotless tile floors and introduced the importance of selecting the right vacuum for the job. We explored a variety of vacuum types, from robot vacuum for tile floors to handheld and cordless options, to suit every preference and budget. Now, armed with this knowledge, it's time for you to make an informed decision. Choose a vacuum that aligns with your unique needs to ensure your tile floors remain pristine and gleaming.
Video doorbell · 07/10/2023
How to Wire a Doorbell Transformer Easily (Step-by-Step)
If you're replacing an old doorbell or installing a new one, correctly wiring the transformer is essential. The good news is that you can easily do it yourself! In this article, we provide a concise guide on how to wire a doorbell transformer, suitable for beginners who have never tackled this task before. We'll help you choose the right transformer and guide you through the entire process, from locating it to connecting it to the doorbell chime. Let's get started! Preparation Wiring a doorbell transformer can indeed be a straightforward and safe task, but it's important to make some preparations before you begin. By following the instructions below, you'll ensure a smooth installation process. Tools Required Screwdriver:Used to tighten or loosen screws, especially those used to secure the transformer and doorbell buttons. Wire Stripper:Used to strip wires to connect them to the transformer and doorbell. Materials Required Doorbell Transformer: This is the key component needed, converting standard household power supply (usually 120V) to a lower voltage (typically 16V to 24V) safe for the doorbell system. Doorbell Push Button: The external component installed on the outside of the door, triggersthe doorbell chime when pressed. Low voltage cables: These cables connect the transformer, push button, and doorbell chime, transmitting the reduced low voltage to ensure proper doorbell function. Wire nuts: These small connectors are used to securely join the ends of wires, providing both a reliable connection and insulation. Doorbell Chime: Installed indoors, this component produces an audible sound when visitors press the push button, alerting you to their presence. Warnings Before any action, always keep in mind that safety is the first priority. First, turn off the power to the doorbell system to avoid the risk of accidental electric shock. Strictly follow the guidelines to ensure proper wire connections. Double-check all wire connections when you are finished. If you are still unsure about electrical work, don’t hesitate to consult an electrician. How to Wire and Install a Doorbell Transformer Now you already have all the required tools and materials, you can start to learn about how to wire a doorbell transformer. Step 1: Locate the Transformer The transformer is typically found in the basement or attic near the main electrical panel. If not, check the vicinity of your heating and cooling system, or inspect the area around the chime. Knowing the transformer's location is crucial for two reasons: It enables you to safely turn off the power to the doorbell system. It ensures you work with the correct set of wires when replacing the old transformer. When adding a new transformer, locating the old one facilitates a smoother installation process. You can install the new transformer next to it, ensuring it connects to the existing wiring correctly. Step 2: Turn Off Power Turn off the circuit breaker dedicated to the doorbell at the main electrical panel. If you're uncertain about which breaker controls the doorbell, consider shutting off the main power supply to your entire home. Turning off the power to the doorbell is of paramount importance for your safety, making it the critical step to follow. Step 3: Disconnect and Replace After turning off the power, the next step is to disconnect and replace the old transformer. How to Disconnect the Old Transformer? If the transformer is mounted on a junction box, first remove the box cover. Loosen the screws on the cover to remove it. Inside the box, you will see two sets of wires, three in a set, connected by wire nuts. Unscrew the wire nuts to separate the wires. The three wires are a hot wire, a neutral wire, and a ground wire. They are in different colors. You can match the wires by their colors. Then locate the thinner, low-voltage wires in the box that are attached and screwed to the transformer terminals. These lead to the other components of the doorbell. Loosen the wires and pull them off the terminals with a screwdriver. Finally, ensure that all wires connected or screwed to the transformer are removed. Then, loosen the screws securing the transformer to the junction box to remove the old transformer. How to Install a Doorbell Transformer? Identify the three wires of different colors from the new transformer and connect them to the wires going through the walls. Match the wires by color. Twist the ends of each pair of wires and screw them together with the wire nuts. Mount the new transformer onto the junction box and tighten the screws to ensure it's properly secured. Step 4: Connect Doorbell Chime Now that your new doorbell transformer is properly installed, you are ready to connect the doorbell chime. Identify the low-voltage wires (they are usually thinner than other wires) and wrap the ends of these wires around the screw terminals (typically, there are two screw terminals on the transformer). Tighten the screws to hold the wires in place. You will probably find two sets of low-voltage wires if you have wired doorbells on both your front and back doors. Screw them both to the two screw terminals. It doesn't matter which wires go to which screw terminals, but you can't wind them together on one screw terminal. Then, don’t forget to put the cover back to the junction box if you removed it. Step 5: Test and Finish Double-check all wires are connected properly, and you can turn on the power to test the doorbell. Press the push button on your doorbell, and if you hear a chime, that means you have successfully installed the transformer and the doorbell. Congratulations! And don’t forget to check the second doorbell if you have one. If you don’t hear the chime ring, turn off the power again and check the connected wires. Did you connect the wires in the right places and tighten them up? Check all the processes again. If all wire connections are done but the doorbell still doesn't work properly, call a professional to help. If you don't want to experience the complicated installation of a doorbell transformer, the other option will be you install a wireless doorbell instead. There are portable battery-operated doorbells that require only simple installation. If you want more sophisticated ones, there are video doorbells that provide videos and allow communication between you and the visitors. Conclusion Doorbells are the first notification that someone is at your door. And a transformer is the heart of a doorbell. If you want to replace the old transformer or add a new one, you can try to do it yourself! This post introduces how to wire a doorbell transformer. Follow the guidelines and you will find it is not difficult. But remember, safety is the number one priority. Always consult a professional when necessary.
Baby · 07/10/2023
4 Best Travel Baby Monitors Reviews
If you're planning a trip with your little one, ensuring your baby's safety throughout the journey is paramount. This is especially crucial when your baby is tired and needs rest while you're outdoors or in an unfamiliar Airbnb. In such situations, a travel baby monitor becomes your best ally. It allows you to vigilantly oversee your baby's well-being at all times. Moving forward, we will provide you with a comprehensive introduction to the 4 best travel baby monitors that we've tested and reviewed. eufy Baby Monitor E110 Your go-to solution for keeping an eye on your little one. Price: $159.99 eufy Baby Monitor E110 is the ultimate solution for vigilant parenting. Featuring a spacious 5-inch 720p display, it delivers crystal-clear visuals of your baby. The included camera lens provides a wide 110-degree viewing angle, ensuring you capture every moment. What sets it apart is its impressive coverage range of 460 to 1000 feet in open areas, guaranteeing that you always remain connected with your kids. The camera's flexibility is a standout feature, offering a 330-degree pan and a 110-degree tilt, allowing you to position it perfectly, whether you need a corner-to-corner view or a floor-to-ceiling perspective. Moreover, instant Alerts are your peace of mind. When your baby needs you, you'll know immediately. It's important to note that the eufy Baby Monitor E110 doesn't support Micro SD cards. However, its exceptional features, extensive coverage, and reasonable price make it an outstanding choice for ensuring your baby's safety and comfort. eufy Baby Monitor E210 Your ultimate solution for keeping a close watch on your baby. Price: $169.99 eufy Baby Monitor E210 is a comprehensive upgrade to the eufy Baby Monitor E210. Standing as the best baby monitor for travel, it not only retains the impressive 5-inch 720p display and expansive viewing angle but also addresses its predecessor's limitations. With a substantial 5,200mAh battery, this monitor offers a remarkable 30 hours of monitoring in standard usage (default mode) and a continuous 12-hour operation for more frequent checks and extended monitoring sessions, which can fully meet the battery life requirements for travel. Additionally, it features night vision capabilities, ensuring you can keep a close eye on your child even during nighttime hours. eufy Baby Monitor E210 is the ideal choice for parents seeking an advanced and reliable monitoring solution, offering enhanced functionality and extended battery life to provide peace of mind around the clock. See what eufy can help if you're still looking for more smart baby monitor to keep your baby safe. Check this colection page if you're looking for non-wifi baby monitors instead. Infant Optics DXR-8 PRO Video Baby Monitor Your considerable choice for a feature-rich baby monitor. Price: $199.99 Infant Optics DXR-8 Pro Video Baby Monitor also stands out as one of the top choices for travel baby monitors. Its independence from Wi-Fi connections and the convenience of a replaceable battery guarantee uninterrupted use. Moreover, its exceptional zoom capabilities, facilitated by interchangeable lenses, provide a close and crystal-clear view of your baby. This versatile monitor can even accommodate up to four cameras, ensuring comprehensive coverage throughout your home. With its 270-degree pan and 120-degree tilt, you can effortlessly position the camera for the perfect view. Furthermore, it offers a suite of convenient features, including a silent mode with LED light indicators, alarms for added convenience, and two-way audio, ensuring that you can maintain a strong connection with your baby and effectively monitor their well-being. However, it should be noted that these advanced features come with a higher price tag, making it a more suitable choice for parents with a more generous budget. Nanit Pro Smart Baby Monitor A great choice for monitoring your child with smart features. Price: $234.99 Nanit Pro Smart Baby Monitor boasts high-quality video performance in both day and night conditions, offering parents a clear view of their baby through WiFi connection. What sets Nanit Pro apart is its smart features. It provides valuable sleep-tracking data through a subscription service and can be paired with specialized breathing wear for monitoring a baby's heart rate. The monitor offers push notifications for movement, sound, temperature, and humidity changes on your phone. It also features temperature and humidity sensors, motion detection, two-way communication, a nightlight, white noise, and sound activation. However, it comes with a notable downside of being expensive, and there's a subscription fee for continued access to sleep data after the first year. Additionally, it lacks built-in lullabies. Tips for Choosing the Best Baby Monitor for Travel While choosing the best travel baby monitor, here are some essential tips to consider: Portability and Convenience:Opt for a travel baby monitor that is compact, lightweight, and easy to carry. Convenience is key when you're on the move. Ease of Installation: Look for a monitor that is simple to set up and doesn't require extensive technical knowledge. Quick and hassle-free installation is a must. Long-Range Coverage:Ensure the monitor offers a long-range capability to maintain a strong signal, especially if you're in a larger space or outdoors. Strong Battery Life: A longer-lasting battery is essential for baby monitors for travel, so you don't have to constantly recharge or replace batteries. Wireless Connectivity:Consider a monitor that supports wireless connections for easy access from your smartphone or other devices. Baby monitors with Wi-Fi support usually allow remote access via smartphones, offering convenience. In contrast, those using DECT or FHSS transmission provide enhanced data security due to dedicated frequencies. By keeping these factors in mind, you can select the best baby monitor for travel that suits your specific needs and ensures your baby's safety and comfort while on the go. Conclusion The above 4 best travel baby monitors all cater to the needs of you on the move. They offer a range of features, from enhanced portability to extended battery life and wireless connectivity. As we've explored the top contenders in this category, it's important to prioritize your unique requirements when making a selection. By selecting the right travel baby monitor, you can embark on your travels with confidence, knowing that you've taken the necessary steps to ensure your baby's safety and comfort while you explore the world together. Safe travels!
Robovac · 07/10/2023
5 Best Robotic Vacuum for Tile Floors to Make Cleaning Easier
Tile flooring is a practical choice for areas like kitchens and bathrooms due to its hardness, durability, and resistance to moisture. Though tile floors are usually easy to clean, the grout lines between the tiles are prone to accumulate dirt and stains. With the help of the best robotic vacuum for tile floors, you can schedule a hand-free cleaning every day to pick up dust, dirt, pet hair, and debris so as to maintain cleanness with ease. Now, let's grasp the ideas of the 5 top picks of the year and get your best match here. Best Overall: eufy Clean L35 Hybrid+ Suction: 3,200 Pa Dust Bag: Yes/3L Noise Level: < 62 dB (in Max Mode) Battery Life: Up to 145 Mins Navigation: iPath Laser Navigation eufy Clean L35 Hybrid+ is a fully-fledged robot vacuum for tile floors in all aspects. It combines a vacuum and a mop to make it possible to pick up debris while cleaning tile floors at the same time. Its BoostIQ technology increases the suction power from 600 Pa to ultra-strong 3200 Pa so that it can remove any tough stains on the floor. Moreover, it offers 3 options for different water levels, enabling you to choose a suitable water flow for a thorough cleaning. This smart robotic cleaner utilizes iPath Laser Navigation to virtually map out your home. Through its dedicated app, you can also personalize the cleaning plan for different rooms. Besides, eufy Clean L35 Hybrid+ can automatically climb up 20mm so that it moves freely on the tile floor and even cleans your carpet. With the Auto-Empty Station, this vacuum cleaner can serve as a self-emptying robot vacuum. You can enjoy 60 days of hands-free cleaning using its 3L anti-bacterial and deodorizing dust bags. When it's time to empty the station, you'll receive an alert on the matched app. eufy Clean L35 Hybrid+ is furthermore compatible with Amazon Alexa and Google Assistant, so you can voice control it nearby. Its Child Safety Lock can help prevent unexpected operations at any time. Simply put, this best tile floor vacuum cleaner can automate cleaning sessions and keep your tile floors clean without you having to lift a finger. Best Budget: ILIFE A4s Suction: 2000 Pa Dust Bag: No Noise Level: 54 dB Battery Life: Up to 120 Mins Navigation: Mini-Room Technology ILIFE A4s is an affordable pick of the robot vacuum for tile floors. Though it only costs you around $100, this compact gadget is all-rounded. It offers various cleaning modes to suit your preferences, such as Auto, Schedule, Edge, and Spot. Its slim design allows it to effortlessly slide under furniture and reach those hard-to-access spots for a thorough clean. Equipped with advanced sensors, it can efficiently free itself from jams, navigate around obstacles, and prevent falls. With its 2600mAh Li-ion battery, it can operate for up to 120 minutes on a single charge. Additionally, the ILIFE A4s operates quietly at a low volume, making it an excellent choice for cleaning hard floors, including tile. Best Battery Life: Ecovacs Deebot T10 Plus Suction: 3000 Pa Dust Bag: Yes/3.2L Noise Level: < 80 dB Battery Life: Up to 260 Mins Navigation: TrueMapping 2.0 Ecovacs Deebot T10 Plus is a great option if you want the best vacuum cleaner for tile floors that runs for a long time. Thanks to a large battery capacity of 5200 mAh, it can work from 180 mins up to 260 mins. For tile cleaning, this robot vacuum can generate a powerful suction of up to 3000 Pa to suck up dust and grime. Moreover, its mopping system makes use of dual side brushes and a floating main brush to sweep away any debris and stains and clean the tile floor with 3 water-level controls. Ecovacs Deebot T10 Plus is smart as well. TrueMapping 2.0 technology can take a few minutes to create a 3D map of your home. What's more, you can edit your home layout design and adjust manually it for more accuracy in its app. Simply by taping a piece of tile floor, the robotic vacuum will instantly go clean around it. If you're too busy to do cleaning, Ecovacs Deebot T10 Plus can be a diligent helper. Best for Mopping: iRobot Braava Jet m6 Suction: N/A (Mop and Sweep) Dust Bag: No Noise Level: < 50 dB Battery Life: 90 Mins Navigation: vSLAM Navigation iRobot Braava Jet m6 is one of the best robotic vacuums for tile floors. Different from other cleaners, it is a mop cleaner that comes with a precision jet spray to help tackle tough stains. Its advanced Pad system will smartly use the suitable mode for Wet Mopping or Dry sweeping pads under certain circumstances. While using electrostatic force to increase surface contact with tile floors, it can efficiently remove sticky messes. iRobot's Imprint Smart Mapping technology enables the cleaner to learn, map, and adapt to your home. It'll automatically name each room for precise and quick cleaning of tile floors. Furthermore, you can set up Keep Out Zones and Clean Zones. Along with its advanced vSLAM navigation, it can navigate and clean tile floors in your home in neat and efficient routes. If you're looking for a robotic mop vacuum to erase tough stains and sticky messes, opt for iRobot Braava Jet m6. Best for Pet Hair: iRobot Roomba J7+ Suction: 10Xpower-lifting suction Dust Bag: Yes/2.4L Noise Level: < 50 dB Battery Life: 75Mins Navigation: Precision Vision Navigation iRobot Roomba J7+ is a great choice for homes with pets. With its 10X power-lifting suction, edge-sweeping brush, and dual multi-surface rubber brushes, iRobot Roomba J7+ can remove pets' hair and footprints from tile floors with ease. And this robot vacuum comes with a self-emptying feature that can require less effort and time to deal with on-floor pet hair everywhere. Additionally, there is a Clean Base Automatic Dirt Disposal, with which J7+ can empty itself for up to 60 days. Amazingly, iRobot brings you the Pet Owner Official Promise that the company will replace the vacuum for free if it cannot avoid cat or dog waste. What to Look for When Buying Robotic Vacuum for Tile Floors You should figure out what a robotic vacuum you're looking for. Here are some features that you may keep in mind when shopping around for the best tile floor vacuum cleaner. Suction Power - Look for a robotic vacuum with good suction for effective cleaning. Higher suction power is generally beneficial, but make sure it is adjustable to prevent any damage to delicate tile surfaces. Battery Life- Consider the battery life of the robotic vacuum. Longer battery life is advantageous if you have a larger tile floor area or more rooms to clean. Navigation & Control- Look for models with advanced navigation technology, such as mapping or laser sensors, which help the vacuum efficiently navigate the tile floor while avoiding obstacles. Noise Level- Consider the noise level of the robotic vacuum, especially if you prefer quiet operation or you have kids or pets at home. Height - You may choose the one with a low-profile design to fit under furniture, cabinets, and other hard-to-reach areas. Conclusion When selecting a robotic vacuum, there are 5 top recommendations for your reference in terms of budget, battery life, mopping, and pet hair removal. You can choose your best robotic vacuum for tile floors according to your specific requirements. By investing in one of these top-tier robotic vacuums, you can enjoy a pristine living space without manual labor, making the routine of cleaning both efficient and effortless.
Smart Lock · 07/10/2023
The Ultimate Guide to Choosing the Best Fingerprint Door Lock
In today's world, the security of our homes and valuables is paramount. Traditional locks relying on physical keys and passwords no longer provide the level of protection we need. This is where the search for the best fingerprint door lock becomes essential. Fingerprint door locks, powered by advanced biometric technology, offer a cutting-edge solution to verify entry through personal fingerprints, ensuring unparalleled security and minimizing the risk to your property. But it's not just about security; it's about convenience in your daily life. No more fumbling with keys or trying to remember complex passwords. Fingerprint door locks are designed with your ease of use in mind, making your life simpler and safer. In the following, we'll introduce 4 best fingerprint door locks to help you select the ideal fingerprint door lock based on your budget and specific requirements. Why Fingerprint Door Locks? While traditional locks have long been used to protect our homes, they come with inherent limitations. The primary drawback is the risk of key loss. And if your key falls into the wrong hands, unauthorized access becomes a real concern. These limitations underscore the need for a more advanced and secure alternative, fingerprint door locks. Fingerprint door locks leverage cutting-edge biometric technology, offering a level of reliability that traditional locks simply can't match. They authenticate individuals based on their unique and tamper-proof fingerprints, ensuring that only authorized individuals gain access. This unparalleled security is further complemented by exceptional convenience. With a simple touch on the sensor, you can effortlessly unlock your door, eliminating the need for keys or the hassle of remembering complex passwords. 4 Best Fingerprint Door Locks in 2023 In the upcoming sections, we'll delve into a detailed exploration of 4 different fingerprint door locks, highlighting their individual features, benefits, and suitability for different security needs. eufy Security Smart Lock S230 The S230 Smart Lock offers both speed and convenience as it recognizes your fingerprint in just 0.3 seconds and swiftly unlocks your door in just 1 second, which ensures quick and hassle-free access. But that's not all. This smart lock also provides you with the flexibility to control it from anywhere, thanks to its all-new Wi-Fi connectivity through the eufy Security app. Additionally, it caters to your diverse unlocking preferences, whether you want to use your fingerprint, or your smartphone via the app. If you prefer traditional methods, the lock also offers keypad and key options for added flexibility. This comprehensive range of features makes the S230 Smart Lock an outstanding choice for the best fingerprint door lock. Foxgard Smart Fingerprint Door Lock Foxgard Smart Fingerprint Door Lock is a fusion of convenience and security. With lightning-fast fingerprint recognition taking only 0.3 seconds, it offers hassle-free, keyless entry. You can also choose between fingerprint access for daily use and a mechanical key for emergencies or low-battery situations. This feature-rich fingerprint door lock is designed with user convenience in mind. It not only accommodates up to 100 fingerprints but also ensures you're never caught off guard by a low battery warning, which has a blinking red LED as an indication. For added peace of mind, there's a built-in USB emergency power port. However, it's worth noting that despite its Bluetooth capability, its range is limited. Don't expect to open the door from your sofa 20 feet away; it requires close proximity and often works best when you're right by the door handle. Ultraloq U-Bolt Pro Transitioning from the Foxgard Smart Fingerprint Door Lock, let's dive into the Ultraloq U-Bolt Pro, a smart fingerprint lock that marries technology and convenience. Ultraloq U-Bolt Pro boasts rapid fingerprint recognition, thanks to its AI-powered self-learning fingerprint algorithm, unlocking in just 0.3 seconds with up to 99.8% accuracy. But its benefits go beyond that. This smart lock automatically unlocks as you approach with your smartphone and locks behind you when the door closes. Furthermore, by pairing the lock with the U-tec mobile app, residents can effortlessly manage access, and unlock the door remotely. Nonetheless, it's essential to consider its drawbacks. This fingerprint storage capacity isn't explicitly specified on the U-tec website, leaving room for some uncertainty. GeekTale Smart Door Lock Continuing our exploration of the smart lock, the last recommendation is the GeekTale Smart Door Lock. GeekTale Smart Door Lock is a versatile three-in-one solution, that combines a traditional key lock, fingerprint recognition, and app control for seamless keyless entry. It simplifies your life and enhances security, allowing you to manage fingerprints, review unlocking records, and enable various security features through the app. This fusion of classic door handle design with fingerprint and app control makes it ideal for various settings, including bedrooms, offices, apartments, Airbnb rentals, and hotels. However, it's important to note that the expected battery life may vary depending on usage, potentially depleting more quickly with heavy usage. Factors to Consider When Picking the Best Fingerprint Lock Selecting the best fingerprint door lock involves careful consideration of several key factors to ensure the right fit for your security needs. Here are the essential factors to keep in mind: Security and Accuracy:Prioritize locks with high accuracy in fingerprint recognition. Look for models with advanced algorithms to minimize false readings and enhance security. Battery Life: Evaluate the lock's battery life and whether it provides low-battery warnings. Longer battery life reduces the need for frequent replacements. Durability: For outdoor or exposed installations, choose a lock with a robust, weather-resistant design to withstand various environmental conditions. Compatibility and Budget: Establish your budget and seek locks that strike a balance between affordability and the desired features. Ensure compatibility with your door type and smart home system. Conclusion In summary, we have introduced the 4 best fingerprint door locks in this blog. Each lock offers distinct features tailored to different security needs. As you explore your options, consider factors like storage capacity, battery life, and compatibility with your door type. Select the best fingerprint door lock for your needs to safeguard your property and enjoy the convenience of keyless entry.
Robovac · 06/10/2023
How to Clean Tile Floor with Vinegar in an Effective Way
For environmental reasons, you may choose to install tile floors and use vinegar as a natural cleaner for floor cleaning. However, since vinegar is acidic, using it directly on tile floors may have adverse effects on the tiles and grout. Therefore, to strike a balance between using vinegar and preserving your floors, it's essential to know the correct cleaning method with vinegar and select the appropriate cleaning tools for tile floors. Today's blog will primarily guide you on cleaning floor tiles with vinegar in an appropriate way to ensure the most effective results. Now, let's get started. What You'll Need for Cleaning Tile Floor with Vinegar Vinegar is acidic and has a strong odor, which may not be the most effective choice for directly cleaning tile floors. Therefore, it's important to prepare all the necessary cleaning tools, dilute vinegar with water before cleaning, and promptly remove any excess moisture after cleaning. And here's a compiled list of items you'll need for the cleaning process. Vacuum Cleaner and Brush:Robot vacuum for tile floors can remove debris on the ground before using vinegar to wipe them. In addition, a brush can bring efficient help to clear tile floor grout for you. Vinegar and Water:Mix vinegar with warm water (It's better not to exceed 40°C/104°F) to create a cleaning solution. If you don't have white vinegar, apple cider vinegar is also a good option. Spray Bottle or Bucket:Use a bucket to mix water and vinegar, and fill a bottle with this cleaning solution for easy application on stains during cleaning. Also, a bucket can be used to wash the mops and rags used for cleaning floor tiles. Baking Soda:For stubborn stains cleanup, you also need to prepare baking soda that can loosen up dirt and deliver a thorough cleaning. Mop or Rag:A mop or rag can wipe the stubborn dirt and stains on the ground, or dry the wet floors after completing cleanup to prevent slipping. Rubber Gloves: Protect your hands from getting stimulatedby mixing vinegar solutions and baking soda. Step-by-Step Tutorial on Cleaning Floor Tiles with Vinegar After you have prepared all the required cleaning tools, you are ready to process cleaning tile floors with vinegar. Now, simply follow the step-by-step guide below and do it properly. Step 1. Dust Tile Floor Using a Vacuum Cleaner Before cleaning floor tiles with vinegar, you are recommended to sweep or vacuum the floors to remove all debris, ensuring a clean surface to avoid any hard debris left scratching the floor during the cleanup. To boost more efficient and effortless cleaning outcomes, you can turn to a clean machine like RoboVac X8. This robot vacuum provides a suction power of 2*2000 Pa specifically designed for intelligent cleaning of tile floors, not only improving efficiency but also freeing up your hands. Step 2. Mop Tile Floor with DIY Vinegar Cleanser When you have kept the tile floor surface clean now, move on to DIY vinegar cleanser and mop the floor to clear stubborn dirt and stains completely. DIY Vinegar Cleanser Step 1. You need to fill a bucket with warm water (It's better not to exceed 40°C/104°F), approximately one or two gallons. Because the warm water can soften stubborn grime or stains on tile floors. However, be careful not to use water that is too hot, as it can cause the vinegar to evaporate and reduce the cleaning effectiveness. Step 2. The recommended ratio of water to vinegar is ten to one. So, once you have prepared the water, add one-tenth of a gallon of white or apple vinegar for every gallon of water. Then gently shake the bucket to thoroughly mix them, and your cleanser is ready. Mop Tile Floor Step 1. Now, mop your tile floors with the well-mixed vinegar cleanser. Remember to spread the cleanser widely and evenly over the entire surface of the floor. Simply mop from side to side to ensure the cleanser covers the entire tile floor surface. Step 2. Don't wait too long, and you'll need to rinse tile floors with fresh water then. This will help remove loose stains and any remaining vinegar efficiently. Next, use a mop or rags to soak up excess water, especially in the floor joints. Finally, simply wait for the air to dry the floor completely. Step 3. Deep-Clean Tile Floor with Vinegar and Baking Soda It is actually not a difficult task to clean up the surface of tile floors. However, when the tile floor joints become dirty and grime gets hidden, it can be challenging to remove them from the surface. In such cases, you should mix vinegar and baking soda for a deep cleaning. First, you will need a spray bottle to combine warm water with both vinegar and baking soda. This combination will cause a mild chemical reaction, creating fizzy foam to effectively loosen tough stains. Second, spray the tile floor seams and wait until the foam completely dissolves the dirt. Finally, use a stiff-bristled brush to work along the edges and thoroughly clean the tiles. Bonus: How to Maintain Tile Floor and Keep it Shining Cleaning floor tiles with vinegar is only a basic step to keep floors clean. To ensure they always remain in the best condition, you also need to perform proper maintenance for tile floors. In this part, we would like to recommend three tips for tile floors upkeep to ensure their longevity and good condition. Regular Tile Floor Cleaning:Always remember that the best way to maintain tile floors in good condition is through regular cleaning. For frequent tile floor cleaning, you can use a robot vacuum with a mapping to automate the cleaning process, saving you time and effort. Prompt Spill and Mess Cleanup:Never leave spills and mess on tile floors, as they will gradually become stubborn stains as time goes time. So when you discover any dirt or food particles on tile floors, sweep them and clean the area instantly. Steer Clear of Chemical Cleaners:Stop using harsh chemical cleaners as they can potentially damage the surface of tile floors after just a few uses. Therefore, it's better to replace them with environmentally-friendly solutions like vinegar and baking soda. Conclusion By mixing the cleanser with the right formula and using it properly, cleaning floor tiles with vinegar ensures a thorough cleaning outcome in an eco-friendly manner. Additionally, vinegar can help eliminate germs from the floor surface and effectively maintain the tile floors. So, start learning this vinegar cleaning method on your tile floors and keep them as good as new.
Smart Lock · 28/09/2023
Kids Safety First: Ensuring Your Peace of Mind with eufy Video Smart Lock Notifications
As a parent, there's nothing more important than the safety of your children. Every time they step outside the house, a tiny part of your heart goes with them. And when they return home, that part breathes a sigh of relief. But what if you could keep an eye on them, even when you're not physically present? Enter the eufy Security Video Smart Lock S330. Imagine your home as a castle, and you, the king or queen, always aware of who's coming or going. That's what it feels like to have a smart lock with video. It's like having a loyal knight standing guard at your door, always ready to notify you of any activity. The eufy Security Video Smart Lock S330 is more than just a digital door lock. It's a top-rated smart lock that comes with a built-in video feature. This means it doesn't just lock and unlock your door; it also lets you see who's at the door, in real-time. Think of it as a digital doorman, always on duty. When your kids come home from school, the eufy Video Smartlock sends a notification to your phone. You can see them arrive home safely, and even watch as they step inside. It's a level of peace of mind that traditional locks just can't offer. But it's not just about watching your kids come home. The eufy Video Smart Lock also helps keep them safe while they're inside. If they answer the door, you can see who's there and even speak to the visitor through the lock's two-way audio feature. It's like being there with them, even when you're miles away. Now, you might be thinking, "That sounds great, but I'm not a tech wizard. Isn't it hard to set up and use?" Not at all. The eufy Smart Locks are designed to be user-friendly. Once you get the hang of it, you'll wonder how you ever managed without it. So, are you ready to take the next step in home security and peace of mind? With the eufy Video Smart Lock, you can always know when your kids are coming home, and ensure their safety even when you're not physically present. Shop now for the eufy Security S330 Video Smart Lock or explore other smart locks with video to find the perfect fit for your family's safety needs. Remember, with the right smart lock, you can enjoy peace of mind, knowing your kids are safe and secure, whether you're home or away. In the end, the safety of our kids is what matters most. And with the eufy Video Smart Lock, you can rest easy, knowing you've done everything you can to keep them safe.
Video doorbell · 17/09/2023
Cheapest Video Doorbells in 2024: Budget-Friendly Security
Video doorbells are a popular option to stay guarded on your porch. These smart devices can track who comes or goes in front of your home and ensure that you don't miss any deliveries with peace of mind. The question is, sometimes the price tag can discourage potential buyers. If you're looking for a budget choice with great functions, here we round up 4 cheapest video doorbells at an affordable price of around $100 in the market. Now, check out some useful features first and get the best pick. Key Features to Consider in Budget Video Doorbells Cheap video doorbells can also be a qualified guard as long as they have essential features. Except for basic functions like two-way audio, motion detection, and night vision, let's focus on other key features including video quality, storage method, battery life, and smart integration. Video Quality: Consider the quality of images and recordings to provide clear footage of people and packages at your door within a certain field of view. Storage Method: See whether thecheap doorbells are using a local SD card to store images and recordings or uploading them to a cloud service through a network so that you can check them out at any time. Battery Life: Check how long the video doorbell can stay working if you opt for a battery-operated doorbell. Also, consider a wired choice for a longer working time and a stable network connection. Smart Integration: Learn whether thecheap video doorbells can integrate with your other smart home devices or voice assistants. Moreover, check whether it has a dedicated app for remote access and control. H2: Top 4 Cheapest Video Doorbell Models The following options are handpicked after hands-on testing among tens of cheap video doorbells. Now, let's take a look at the 4 cheapest doorbell cameras in the desired aspects. eufy Security Video Doorbell C210 eufy Security Video Doorbell C210 is the best cheap doorbell with longer battery life and a local storage feature. It takes only a few minutes to set it up with ease. Then, this battery-powered video doorbell can provide surveillance for 120 days at a time once it's fully charged. One standout feature is the ability to customize an Activity Zone, allowing you to precisely detect motion in the designated area. When motion is detected, you receive instant alerts and can engage in real-time communication with whoever is at your door. The camera provides a crystal-clear view of your visitor in 1080p resolution, from head to toe, at a 4:3 aspect ratio. All your video recordings are securely stored directly onto the Wi-Fi Chime's SD card, offering convenient access for review at any time. Notably, there's no need for a subscription to access cloud storage, saving you additional costs. In short, if you're looking for the cheapest video doorbell without an extra fee for cloud storage that works for a long time, eufy Security Video Doorbell C210 will be a good choice. Price: $99.99 Ring Video Doorbell 3 Ring Video Doorbell 3, while slightly higher in price, offers compelling features that make it worth considering. One of its standout features is its expansive surveillance area, providing a wide field of view at 160° horizontal and 84° vertical. This allows you to monitor a larger portion of your property. What sets this video doorbell apart is its dedicated app, which allows you to remotely check in on your home at any time. It offers a convenient dashboard where you can access all security and privacy controls. Moreover, the Ring app seamlessly integrates with voice assistants like Alexa, offering hands-free monitoring and control. It's important to note that for extended video storage, a Ring Protect Plan is required, allowing you to store recordings for up to 180 days. Keep this in mind when considering your budget. Add Ring Video Doorbell 3 to your shopping cart if you're looking for a cheap video doorbell with a larger field of view and smart integration. Price: $149.99 Blink Video Doorbell Blink Video Doorbell is a budget option at a totally affordable price with satisfying features. It provides full HD 1080p video quality with infrared night vision to safeguard your home day and night. Instant alerts are triggered when motion is detected, and you can customize activity zones to ensure you never miss important events. There are 2 ways to install this cheapest video doorbell. You can connect it to your existing doorbell wiring or pair it with a Sync Module (sold separately) to enable live view and two-way audio functionality. For recording options, you have two choices: subscribe to the Blink Subscription Plan or store clips locally using Sync Module 2 and a USB drive. In summary, Blink Video Doorbell is an ideal choice for those on a limited budget who still want reliable home security and video doorbell functionality. Price: $59.99 Arlo Essential Wired Video Doorbell Arlo Essential Wired Video Doorbell is a loyal guard at your entrance for 24/7 surveillance. It's a wired option that requires existing electrical wiring with a voltage between 16V AC and 24V AC and a 10VA. It's, therefore, able to secure your home from the uninvited and your packages from being stolen every second every day. With its surveillance area at 180° horizontal, it'll never miss an event and deliver you a 1080p HD view in detail even in low light or bright conditions. Additionally, you can engage in clear two-way audio conversations with visitors, allowing you to communicate with individuals at your doorstep instantly. After subscribing to an Arlo Secure plan, you can get smarter notifications for people, vehicles, packages, and animals across your front door. Moreover, this affordable doorbell seamlessly integrates with smart devices from various brands, including Amazon, Google, Apple, and Samsung. To consider long-term monitoring and well-compatibility with smart devices, Arlo Essential Wired Video Doorbell is a great pick. Price: $75.42 Conclusion In conclusion, as technology evolves and becomes more accessible, the market for video doorbells has expanded, offering a plethora of options catering to different budgets and needs. While high-end models come with advanced features and superior performance, the demand for affordable yet functional video doorbells is on the rise. This latest ranking in this blog provides a comprehensive look at the most cost-effective video doorbells available in the market today. You can now make an informed decision that not only meets your security needs but also fits well within your budget.
Baby · 17/09/2023
Best Baby Monitors for Two Rooms: 4 Top Picks
“I have twin babies, and they sleep in separate rooms during the night. Recently, I've been considering buying a monitoring camera. Any split camera baby monitor recommendations?” For parents who have two babies or more, taking care of the little ones simultaneously could be extremely challenging. This is where dual-room baby monitors come into play, serving as helpful and indispensable tools for parents. In this article, we’ve curated a list of 4 best baby monitors for two rooms. From top-notch video quality to budget-friendly options, we've got you covered. If you have spent a long time comparing the features and prices of different baby monitors, just join us to explore these lifesavers. Best Overall: eufy Baby Monitor E110 2-Cam Bundle Price: $239.99 eufy Baby Monitor E110 2-Cam Bundle is the best dual baby monitor for new parents who want to enjoy time for themselves while keeping an eye on their babies. It includes two cameras with 720p HD resolution, so you can enjoy crisp and clear visuals on the large 5-inch display screen with 10 times more details. No worry if you have a toddler and a newborn, as you can attach the included lens to expand the view to 110° to see floor to ceiling and 330° to see corner-to-corner. This 2-cam kit bundle has a high-capacity 2900mAh rechargeable battery, which can provide 15-hour monitoring. Plus, it excels with its night vision functionality, providing a clear view of your baby even in low-light conditions. This feature is especially useful for nighttime check-ins without disturbing your little one. One thing to note is that this monitor doesn't support split-screen functionality, meaning you'll need to switch between camera views manually. While this may be a minor inconvenience, the overall performance of the eufy Baby Monitor E110 2-Cam Bundle more than makes up for it. Best Split-Screen: Babysense 5" HD Split-Screen Baby Monitor Price: $159.99 Babysense 5" HD Split-Screen Baby Monitor is the best split screen baby monitor, designed for parents who want to see both cameras side by side on the same screen. It is equipped with two HD cameras, each offering remote pan, tilt, and zoom capabilities. Together with the 720 HD images on the 5-inch LCD display, the monitor allows you to get the perfect view of your child's room, ensuring no detail goes unnoticed. With built-in night light and night vision, you can be confident in your ability to monitor your child in any lighting condition. Moreover, the baby monitor comes with programmed lullaby sounds and white noise sounds to calm your baby remotely. Best Budget: VTech VM5463-2 Video Baby Monitor Price: $149.95 If you want a budget-friendly dual baby monitor, VTechVM5463-2 Video Baby Monitor is your best option. It includes two cameras, each capable of 720p video quality. Plus, the baby unit has a color night light with a unique glow on the ceiling projection. This adds a soothing ambiance to the room and can help lull your baby to sleep. One standout feature is the multiple viewing options: single view (one camera only), split view (simultaneously watch both camera views side by side) or patrol mode (single view that transitions to a different camera every 10 seconds). Though this baby camera offers a lower price, it doesn’t compromise security. The system's video & audio transmit in a secure, encrypted signal, so you can rest assured you're the only one who can see and hear your baby. Best Smart and Video Quality: Nanit Pro Camera Multi-Pack Price: start at $679 Nanit Pro Camera Multi-Pack is a premium and smart solution for parents who demand the highest level of video quality and advanced features in their baby monitor. It has two mounting options: floor stand and wall mount, which will meet families in different situations. Equipped with an overhead crystal clear 1080p camera, you can have comprehensive coverage of your baby's surroundings and see every detail with precision. What sets the Nanit Pro apart is its smart capabilities. It comes equipped with advanced sensors that track your baby's breathing motion and sleep patterns, and show you sleep efficiency score, daily, weekly, and monthly analytics, nap and nighttime summaries, and more, providing valuable insights into your baby's well-being. Features to Look for in the Best Dual Baby Monitor Here are some important factors to keep in mind when it comes to choosing the best dual baby monitor for monitoring multiple rooms or children: Multiple Cameras:This ensures comprehensive room coverage and the ability to monitor multiple children simultaneously. Video Quality:Opt for a monitor with high-resolution video capabilities, such as 720p or 1080p. They provide clear and detailed visuals. Split-Screen:This feature enables you to view multiple camera feeds on the same screen. Night Vision:Night vision functionality ensures that you can see your baby clearly in low-light or dark conditions without disturbing their sleep. Battery Life:Consider the monitor's battery life, especially if you plan to use it wirelessly. Longer battery life means fewer interruptions for recharging. Wireless Connection:Choose baby monitors supporting wireless connection for easier setup and access. WiFi baby monitors usually offer more smart features while non-WiFi baby monitors like DECT and FHSS ones are more secure because of the data encryption technology. By considering these features and functionalities, you can make an informed decision and choose the best dual baby monitor that meets your specific needs as a parent. Conclusion In the quest for the best baby monitor for two rooms, we've explored a range of options designed to meet the diverse needs of modern parents, whether you're seeking top-notch video quality, budget-friendly choices, or smart features that provide peace of mind. See what eufy can help if you're still looking for more smart baby monitor to keep your baby safe. The final option depends on your specific requirements and preferences. We hope this guide has equipped you with the knowledge and insights needed to make an informed decision.
Robovac · 12/09/2023
5 Best Laminate Floor Cleaning Machines: Keep Your Laminate Floors Shining
Laminate flooring is a popular choice for houses due to its versatility as well as the wide range of designs and styles. It's made from multiple layers of various materials fused together, including a layer of waterproof coating. Despite that laminate floors are technically sealed, they're still sensitive to heat, moisture, and chemicals. Hence, it's important to be cautious when cleaning laminate floors. If you're unsure about how to clean laminated floors effectively, think about investing in a professional and versatile laminated floor cleaning machine. The use of the best laminate floor cleaning machine can make your cleaning routine more straightforward and efficient. Now, this buying guide brings you the 5 top recommendations that help you maintain the cozy charm of laminate flooring. Go get your best pick if you’re in need of a good helper. Best Overall: eufy Clean G40 Hybrid+ Vacuum Type: Robot Vacuum Weight: 28 lbs Charge Mode: Station Charging Navigation: Smart eufy Clean G40 Hybrid+ is an optimal robot cleaner that takes no effort and saves your time for hands-free cleaning on laminate floors. It combines a vacuum and a mop in this smart machine, which can generate a powerful suction of 2500 Pa to pick up dirt, debris, hair, and stains easily. After that, it can make your laminate floors spark with its roller brushes that mop and sweep across every corner. eufy Clean G40 Hybrid+ is also able to arrange the best routes around your home to effectively and quickly clean it up. Moreover, its slim design allows it to fit in hard-to-reach spots for thorough cleaning. Thanks to its large dust bag of the auto-empty station, it's estimated to store trash for 2 months. What's more, it offers 3 options to control the water level, so you can avoid excessive moisture that may sink into the flooring. Check here if you're looking for more eufy robot vacuums: eufy Best Robot Vacuums for Hardwood Floors eufy Robot Vacuums for Tile Floors: Top Picks Best Budget: Shark VACMOP Pro Cordless Hard Floor Mop Vacuum Type: Upright Vacuum Weight: 3.3 lbs Charge Mode: Plug Charging Navigation: Manual Shark VACMOP Pro is a cordless handstick at an affordable price and it is suitable for laminate floors. It is lightweight weighing less than 5 lbs and you can therefore take it anywhere around your house. In the meantime, its automatic LED headlights can expose hidden debris and dust to light, so you can perform a deep cleaning on laminate floors easily. Shark VACMOP Pro combines powerful suction and spray mopping, so it can tackle tough messes and stains with ease. Moreover, it uses an innovative all-in-one disposable pad to lock away debris and absorb wet stains. Then, you can simply throw the pad away after cleaning without touching it. That can help you clean laminate floors in a hygienic way. Best Robot Vacuum Mop: eufy Clean X9 Pro Vacuum Type: Robot Vacuum Weight: 26.01 lbs Charge Mode: Station Charging Navigation: Smart eufy Clean X9 Pro Self-cleaning Robot Vacuum is the best laminate floor cleaner machine that you may take into consideration. As an advanced robot, it can generate 5,500 Pa strong suction to remove any debris left on the ground. Then, the auto-life mop can sweep the floor at 3 rotations per second with 2.2 lb of pressure. Your laminate flooring will no doubt restore shine afterward. Employed with accurate AI.See detection, this robot vacuum mop can smartly bypass any household object and lift up when a carpet is detected. After you've done the house chores, its auto-clean station can automatically wash the mop pads and dry them out with 104°F hot air. All bacteria and odors will be eliminated, and the robot vacuum will be ready for the next cleaning task. eufy S1 Pro - The World’s First Floor Washing Robot Vacuum Meet eufy S1 Pro, unleash the power of real-time self-cleaning floor washing robot combined with a high-performance vacuum, all in one revolutionary device. Say goodbye to manual labor and hello to groundbreaking innovation and design. Don't miss out on the revolution in home cleaning: Go Now More Robot Vacuum and mops Most Feature-Rich: Bissell PowerFresh Slim 2075A Vacuum Type: Upright Mop Weight: 6.125 lbs Charge Mode: Plug Charging Navigation: Manual Bissell PowerFresh Slim 2075A is one of the best laminate floor cleaning machines. It is said to kill 99.9% of germs, bacteria, and viruses in your house with hot steam. Meanwhile, you can also adjust the amount of steam at a time. In this way, laminate floors can be cleaned not only by wet mopping but also to prevent potential damage from excessive moisture accumulation. Besides, this handy cleaner can extend a traditional mop to a handheld cleaner. With an on-hand tool kit, it can work for any cleaning scenario like cleaning tile walls, brushing sinks, removing messes from stove tops, etc. Thanks to its swivel steering, it can maneuver around tight spaces and clean up every corner. Best Corded: Miele Complete C3 Calima PowerLine Vacuum Type: Canister Vacuum Weight: 20 lbs Charge Mode: Plug Charging Navigation: Manual Miele Complete C3 Calima PowerLine is an ideal canister vacuum cleaner with a cord of 24 feet. Thus, you don't have to constantly move the vacuum cleaner to remove stains in every corner of the room. Additionally, this luxury pick can generate a strong suction power of 1200W, but it only picks up debris, dirt, hair, and grim without damaging the laminate flooring. Its HEPA AirClean filter caters to all filtration demands providing a germ-free and healthy household environment. With the help of its plus/minus foot controls, you don't have to stoop all the time when cleaning. Things to Consider: How to Clean Laminate Floors Properly After you pick the best floor cleaning machine for laminate, no matter whether it’s a cordless handstick or a robot cleaner, you should also pay attention to how you clean laminate floors. Here are some tips for your reference. Frequent Cleaning- Vacuum or sweep the laminate floor to remove any dirt and debris on the ground frequently. Then, use a mop to clean the floor at least once or twice a week. Special Spot- Tackle tough messes or stains manually or using appropriate solvents. Please ensure that these solvents do not damage the laminate floor. No Excessive Moisture- Mop the floor lightly instead of soaking it and ensure that no excess water sinks into the crevice. Avoid leaving water spills on the floor while or after cleaning. Appropriate CleanserChoice- Avoid using excess water-based cleansers and opt for those specifically designed for laminate floors like a mild pH-neutral cleanser. Cleaning laminate floors is a relatively simple process but requires gentle methods and appropriate cleanser. Also, you should prevent excessive moisture and any harsh chemicals from damaging the laminate floors. Conclusion Selecting the right cleaning machine is essential for maintaining the shine and longevity of your laminate floors. After going through the 5 best floor cleaning machines for laminate, we hope you can get your best match. Furthermore, it is wise to clean the laminate floor properly. By doing so, you can ensure your floors continue to gleam and serve you well for years to come.
Robovac · 12/09/2023
Discover the Best Vacuum Mop Combo: 2024’s Top 7 Picks
Are you tired of juggling multiple cleaning devices to keep your floors spotless? Enter the world of convenience with a vacuum mop combo, or a wet-dry vacuum, a dual-function tool that simplifies your cleaning routine. This innovative solution not only saves time but also ensures a more effective clean, tackling both dust and spills effortlessly. Whether you’re dealing with hardwood floors, tile, or carpet, the right vacuum mop combo can make all the difference. Dive in as we explore the 7 top-performing models on the market and share tips on selecting the best vacuum mop combo to keep your floors spotless without hassle. 7 Best Vacuum Mop Combos Innovative in both design and functionality, below are our top 7 choices of the best vacuum and mop combos that synergize suction power with mopping prowess for a spotless home: Best Robot Vacuum Mop Combo with Self-Empty Station: eufy X10 Pro Omni The eufy X10 Pro Omni stands out as an exceptional robot vacuum mop combo, equipped with a potent 8,000 Pa suction power and a multi-directional floating roller brush to effortlessly tackle deep-set dirt and pet hair in carpets. Its MopMaster 2.0 system uses dual mop pads rotating at 180 RPM and exerting 1 kg of downward pressure to remove stubborn stains and leave floors shining. The smart system prevents the mops from wetting carpets by lifting them 12 mm automatically upon carpet detection. Navigation is streamlined with iPath Laser Navigation, creating efficient cleaning routes. The customizable AI.Map 2.0 allows you to set no-go zones and virtual boundaries, tailoring the cleaning experience to individual preferences. Additionally, the AI.See Smart Cleaning technology enhances obstacle avoidance, identifying over 100 types of objects, even in low-light conditions. The all-in-one station of this robot vacuum mop enhances convenience, washing and drying mop pads, and automatically emptying the dust bin into a 2.5L bag that only needs replacement every two months. Plus, its auto-detangling roller brush system saves you from the hassle of manual cleaning of the brush, making the eufy X10 Pro Omni the ultimate tool for convenient and thorough cleaning. Best Slim Robot Vacuum Mop Combo: eufy Clean G40 Hybrid+ Slim yet powerful, the eufy Clean G40 Hybrid+ not only vacuums but also mops, delivering a thorough clean in one go. Its ultra-slim design allows it to glide under most furniture, so you no longer need to move heavy couches for a clean floor. With a robust 2,500 Pa suction, it picks up everything from food crumbs to dust effortlessly. Its logical path planning ensures comprehensive coverage, maximizing efficiency without missing spots. Despite its power, the G40 Hybrid+ operates quietly at just 55 dB, allowing for undisturbed relaxation or entertainment. It is equipped with TÜV Rheinland certified multi-layer filtration that captures 99.9% of germs and uses activated carbon for a fresh scent. Control your cleaning from anywhere using your smartphone, and never worry about battery life—when low, it automatically recharges and resumes cleaning, ensuring your floors are immaculate. Best Steam Mop Vacuum Combo: eufy MACH V1 Ultra (STEAM VERSION) The eufy MACH V1 Ultra (STEAM VERSION) revolutionizes floor cleaning by combining vacuuming, mopping, and steam cleaning into a single, cordless device. It delivers an unmatched clean with a powerful 16,800 Pa suction and steam heat of 230°F, quickly dissolving and erasing stubborn stains and grime. Its JetBlades technology dries floors instantly, preventing slips and streaks. This device not only cleans but also maintains itself. The Always Clean Mop system washes the mop during use, preventing recontamination. After cleaning, the triple self-cleaning system takes over—washing the mop, minimizing odors with ozone, and drying the system with hot air, readying it for its next use. Designed for convenience, the MACH V1 Ultra separates wet and dry messes for easy disposal, keeping your hands clean and your home healthier. Best Cordless Vacuum Mop Combo: Tineco Floor ONE S7 PRO The Tineco Floor ONE S7 PRO redefines convenience with its advanced MHCBS Technology, delivering a constantly clean floor through continuous fresh water washing and efficient dirty water recycling at a rapid 450 times per minute. This model simplifies the cleaning process with its SmoothPower bi-directional self-propulsion system, which assists movement whether you’re pushing forward or pulling back. Enjoy up to 40 minutes of uninterrupted cleaning thanks to Tineco’s iLoop technology, which smartly manages the device’s clean and dirty water and battery power. With its dual-sided edge cleaning, this cordless vacuum mop reaches within 0.4 inch of baseboards and into tight corners, ensuring no spot is missed. The comprehensive self-cleaning cycle not only cleans the brush roller and tubing but also engages centrifugal drying to maintain hygiene and reduce odors, setting a new standard for hands-free maintenance in vacuum mop combos. Best Vacuum Mop Combo for Pet Hair: BISSELL CrossWave HydroSteam Wet Dry Vac The BISSELL CrossWave HydroSteam Wet Dry Vac is one of the best wet dry vacuums, offering an all-inclusive cleaning solution. In addition to being a vacuum that mops, it can also wash and steam simultaneously, streamlining your cleaning routine. Powered by HydroSteam Technology, it excels in tackling tough, sticky messes with up to 20% better cleaning performance. Its tangle-free design minimizes hair wrap around the brush roll, making it ideal for pet owners. The included Hard Floor Sanitize Formula ensures thorough sanitation by eliminating 99.9% of bacteria. Its two-tank technology separates clean and dirty water, ensuring optimal cleaning efficiency. LED headlights illuminate hidden pet hair and debris in dark corners, while the self-cleaning cycle maintains the machine’s performance. Best Vacuum Mop Combo for Hardwood Floors: Dreametech H11 Max Smart Cordless Wet Dry Vacuum Cleaner The Dreametech H11 Max Smart Cordless Wet Dry Vacuum Cleaner impresses with its Smart Detect Technology, effortlessly tackling both wet and dry messes on sealed hard floors by intelligently adjusting suction power and water flow. This 4-in-1 marvel swiftly vacuums, washes, mops, and dries floors in one seamless operation. Its intuitive LED display and voice prompts keep you informed of power levels and cleaning modes. The automated self-cleaning feature ensures hassle-free maintenance, while its long runtime of up to 35 minutes guarantees thorough cleaning sessions. With separate water tanks and ample capacities, it keeps your cleaning process efficient and uninterrupted. Best Powerful Vacuum Mop Combo: roborock Dyad Pro Wet and Dry Vacuum The roborock Dyad Pro Wet and Dry Vacuum is engineered to tackle both wet and dry messes with unparalleled efficacy. Featuring DyadPower technology, its multi-roller cleaning head delivers extraordinary suction power and ensures thorough edge-to-edge cleaning. With a remarkable 17000Pa of suction power, it effectively handles all types of floor messes. The RevoBrush system ensures the rollers are continuously cleaned during operation, and the self-drying function uses hot air to dry the rollers, preventing odors. Its adaptive cleaning capabilities, guided by the DirTect Smart Sensor, automatically adjust the cleaning power and water flow based on floor conditions, displayed via an on-screen LED indicator. You can control your cleaning with ease using the Roborock App, which allows for effortless mode changes, activation of self-cleaning, and monitoring of cleaning progress. How to Choose the Best Vacuum Mop Combo Selecting the best vacuum mop combo for your home involves considering a range of factors that can significantly affect your cleaning routine and efficiency. Here’s how to make an informed choice: Suction Power:The primary aspect of any vacuum mop combo is its suction power, which determines how effectively it can remove dirt and debris from various surfaces. Look for a model that offers strong suction capabilities, ideally with different settings for different floor types, such as hardwood, carpet, or tile. Mop Functionality:Equally important is the mop functionality. Some vacuum mop combos come with advanced mopping features such as automatic mop lifting on carpeted areas, adjustable water output, and even steam mopping capabilities. Choose a model that offers the mopping technology that suits your home’s flooring types and your cleaning preferences. Battery Life and Corded vs. Cordless:Battery life is a crucial consideration if you opt for a cordless model. A longer battery life allows for extended cleaning sessions without the need for recharging. Cordless models offer greater flexibility and ease of movement. If you choose a corded model, check the length of the cord to ensure it is sufficient for your cleaning areas. Robot Vacuum Mop Combo:For robot vacuum mop combos, look for advanced navigation systems and the ability to set virtual boundaries or specific cleaning zones, which are crucial for autonomous operation without supervision. Effective obstacle detection and avoidance are crucial to prevent the robot from getting stuck or damaging furniture and other items around the house. Water Tank Capacity:The capacity of the clean and dirty water tanks affects how much area you can clean before needing to refill or empty them. Larger tanks provide greater convenience for extensive cleaning sessions, reducing the frequency of stops. Weight and Maneuverability:A lightweight and easy-to-maneuver vacuum mop combo is essential for comfortable use, especially in homes with multiple levels or various types of flooring. Check for models with swivel steering and ergonomic handles to enhance maneuverability and ease of use. Ease of Maintenance:Consider how easy it is to maintain the vacuum mop combo. Features like self-cleaning cycles, automatic brush cleaning, self-drying systems, and washable filters can make maintenance simpler and more efficient. Filtration System:If you or your family members have allergies, consider a vacuum mop combo with a high-efficiency particulate air (HEPA) filter or a multi-layer filtration system. These can trap fine particles such as pollen and dust mites, improving indoor air quality. Smart Features: Modern vacuum mop combos may include smart features such as Wi-Fi connectivity, app integration, voice control, and customizable cleaning modes. These features can enhance user convenience and allow for more personalized cleaning settings. Price and Warranty:Finally, compare the cost of different vacuum mop combos and evaluate their value based on their features and durability. A longer warranty period or a brand known for excellent customer service can provide added peace of mind. Conclusion Choosing the best vacuum mop combo for your home means balancing between features, functionality, and budget. Throughout this guide, we’ve explored various models that stand out for their efficiency, ease of use, and versatility. By considering the factors discussed, you can make an informed decision that meets your specific cleaning needs. A good vacuum mop combo not only streamlines your cleaning tasks but also enhances your living environment, making it cleaner, healthier, and more comfortable. Invest wisely and enjoy the benefits of a truly clean home. FAQs Are vacuum mop combos safe for laminate floors? Yes, vacuum mop combos can be safe for laminate floors if used correctly. However, it’s essential to ensure that the vacuum function doesn’t have a beater bar, as it can damage the laminate surface. Additionally, using a gentle mop setting and avoiding excessive water is crucial to prevent warping or swelling of the laminate. Are mop vacuum combos worth it? Mop vacuum combos can be worth it for individuals seeking convenience and efficiency in floor cleaning. They streamline the process by eliminating the need to switch between separate vacuuming and mopping tools. However, their value depends on factors like floor type, frequency of use, and personal preferences for cleaning methods. How many times a week should you vacuum mop? The frequency of vacuum mopping depends on various factors, including household traffic, pets, and personal preference. Generally, it’s advisable to vacuum mop high-traffic areas at least once or twice a week to maintain cleanliness and prevent dirt buildup. For less frequented areas, once a week or as needed may suffice. Adjust the frequency based on the specific conditions of your home.
Robovac · 12/09/2023
5 Best Floor Cleaning Mops of 2024 for All Types of Floors
A high-quality mop can simplify your home cleaning routine and help you create a spotlessly clean space. However, choosing the best floor cleaning mop can be challenging, as it's not easy to balance effectiveness and ease of use for each type of floor cleaning mop. Meantime, you need to consider other factors like different flooring materials in your home and the different types of messes you need to tackle. Now you can say goodbye to all that confusion. We have tested several mops, and in this post, we will list and review the 5 best floor cleaning mops that cater to different types of flooring. Whether you have hardwood, tile, laminate, or any other type of flooring, our comprehensive list will guide you to the ideal mop for your specific needs. Read on to find the perfect mop for your needs. What are the Best Floor Cleaning Mops? Best Spin Mop with Bucket: O-Cedar EasyWring RinseClean Microfiber Spin Mop List Price: $49.97 O-Cedar EasyWring RinseClean Microfiber Spin Mop stands out for its simplicity and user-friendliness. With a triangular, reusable microfiber spin mop head, it ensures efficient cleaning even in hard-to-reach corners. This mop's remarkable feature relies on its ability to eliminate most dirt and bacteria using just water. Its innovation lies in the patented dual-chamber bucket technology, featuring separate clean and dirty water tanks. This setup allows for continuous mopping with clean water on various hard floors like laminate and tile. Additionally, the bucket includes a foot-activated spinning wringer. This convenient feature lets you effortlessly wring out the mop head without the need to bend over or get your hands wet. Overall, this mop offers a practical and effective solution for thorough and hassle-free floor cleaning. Best Spray Mop: Bona PowerPlus Hardwood Floor Motion Spray Mop List Price: $54.30 If you don’t like to use mops with a bucket while being able to maintain moisture control, Bona PowerPlus Hardwood Floor Motion Spray Mop is an excellent choice. Designed with a sturdy telescoping mop handle and an extra-large mop head, it's perfectly suited for effortless hardwood floor cleaning. What sets it apart is its flexible spray head and the inclusion of a dedicated hardwood floor cleaner. As you mop, the spray head dispenses the right amount of cleaning solution, effectively eliminating dirt, grime, and buildup. This results in a thorough deep clean for your hardwood floors without the need for additional effort. Best Vacuum Mop: MACH V1 List Price: $579.99 MACH V1 takes the spotlight as one of the best mops for floor cleaning. What sets it apart is its seamless integration of both vacuuming and mopping functions, creating a holistic solution suitable for a wide range of flooring types. Equipped with Eco-Clean Ozone technology, this vacuum mop utilizes the power of aqueous ozone to effectively tackle common floor stains and eliminate odors in a natural manner. Moreover, the MACH V1 boasts automatic mopping capabilities, complemented by a triple self-cleaning system. It also provides you the flexibility to select your preferred cleaning mode, such as a smart mode or suction mode, allowing you to tailor its operation to your liking. This innovative device seamlessly tackles both wet and dry messes in one go, simplifying your cleaning routine. So, this comprehensive mop not only enhances your cleaning experience but also helps establish a healthier living environment, rendering it safe for both children and pets. Best Steam Mop: Bissell Steam Mop List Price: $102.95 If you have hard floors in your home, then Bissell Steam Mop is perfect for you. It can work on various types of hard floors, including hardwood, tile, laminate, and even a mix of surfaces. It integrates advanced steam technology and allows you to customize relevant steam mode settings, which can not only tackle dirt, grime, or stubborn stains but also sterilize the cleaned floors without using harsh chemicals. With its versatility and convenience, it will no longer be difficult to ensure a healthier living environment for you and your loved ones. Best Robot Mop: eufy Clean LR30 Hybrid+ List Price: $399.99 If you've grown weary of the chore of cleaning mops after every use, eufy Clean LR30 Hybrid+ could be your solution. This remarkable robot vacuum combines the benefits of both vacuuming and mopping in a single device. With its 2-in-1 capabilities, it simplifies your cleaning routine by tackling both tasks seamlessly and automatically. One of its standout features is the automated self-emptying function, allowing you to enjoy continuous cleaning without interruption. Thanks to its generous 60-day dustbin capacity, you won't have to frequently empty the debris bin as often. Besides, it has an iPath laser navigation system that lets it map multiple floors, providing full coverage of your living space. If you would like to use smart control, the LR30 Hybrid+ also integrates with Alexa, enabling you to issue advanced commands through its dedicated app. If you are tired of mopping by yourself, this intelligent and highly capable solution is a perfect choice for your cleaning needs. Also check the latest robot mop with amazing tech: eufy S1 Pro - The World’s First Floor Washing Robot Vacuum Meet eufy S1 Pro, unleash the power of real-time self-cleaning floor washing robot combined with a high-performance vacuum, all in one revolutionary device. Say goodbye to manual labor and hello to groundbreaking innovation and design. Don't miss out on the revolution in home cleaning: Go Now More Robot Vacuum and mops Tip: How to Choose the Best Floor Cleaning Mop According to the Floor TypeEfficient and effective cleaning relies on choosing the best floor cleaning mops for the specific type of flooring. Tailoring your mop choice to the flooring material not only enhances cleaning but also preserves the quality of the floors. Below are the four common floor types along with mop recommendations: Hardwood Floors: Opt for mops designed for hardwood floors, such as those with microfiber or spray features. Tile Floors: When choosing the best floor cleaning mop for tile floors, consider robot vacuums, microfiber mops, or traditional string mops with disinfection capabilities. Stone Floors:Choose steam mops or spin mops for regular stone floor cleaning, while avoiding acidic or abrasive cleaners that may harm the finish. Carpeting Floors: Use vacuum mops and avoid excessive moisture to prevent water stains. Conclusion After reading this post, we believe that you have comprehended the features of the 5 recommended floor cleaning mops and made the decision of which is the best floor cleaning mop for your requirements. Now, you can acquire one of them that suits you the most, to release your hands, and give you and your family healthier, cleaner living environments.
Baby · 04/09/2023
4 Best Baby Monitors Without WiFi for Your Little Ones
Ensuring baby’s safety is of paramount importance for every new parent. Baby monitors have become indispensable aids in many households. While WiFi-enabled monitors offer convenience, it's crucial to recognize that those without WiFi often excel in security, privacy, and stability. Non-WiFi monitors can operate independently, prioritizing offline privacy and real-time monitoring. If you're seeking the best baby monitor without WiFi, search no more. This article will guide you through excellent choices that offer unobtrusive, secure, and close connections to your little ones. Let's explore these options and find the perfect fit for your family's needs. Before Shopping: What to Look for in a Baby Monitor Before you embark on the journey of choosing the best non WiFi baby monitor, it's essential to be well-informed about the features that matter most: Security and Privacy:When opting for a monitor for babies, safety should be the first feature to consider among all issues. Baby monitors employing signal encryption technology such as FHSS or DECT can help you prevent unauthorized access and protect your and your baby's privacy. Signal Stability and Range Coverage:A great baby monitor should offer a stable signal throughout your home and provide features like pan and tilt capabilities to cover a wide area and keep an eye on your baby's surroundings. Audio and Video Quality:Look for monitors that provide clear audio and video feeds. Clear audio and video transmission allow you to hear every giggle and observe every move of your adorable baby, providing you with an immersive experience even from a distance. Night Vision Capability:Night vision functionality ensures that you can monitor your baby even in low-light or dark conditions, offering a clear view without disturbing their sleep. Interaction Features:Consider monitors that enable interaction features such as two-way audio and lullabies, so that you can interact with and comfort your babies at any time even if you are not with them. When you explore the best baby monitor without WiFi, keep these features in mind, and it will help you to make an informed and confident choice. Best Baby Monitors Without WiFi: 4 Top Picks Here are 4 exceptional non-WiFi baby monitors we have selected for you. Each of them features cutting-edge capabilities and robust security protection. eufy Baby Monitor E110 Price: $159.99 The eufy Baby Monitor E110 is a compelling choice, catering to parents who seek exceptional clarity in monitoring their baby. With its 5-inch 720p screen, it unveils every detail with 10 times more precision than standard monitors. Remarkably, its 330° pan and 110° tilt capabilities ensure an all-encompassing view, covering every corner and inch. Designed for larger homes, the Baby Monitor E110 boasts an impressive range of 460 to 1000 feet, enabling monitoring from any corner of your house. And the transmission signal is well-secured with advanced FHSS encryption, which also ensures real-time monitoring even if there’s no Internet connection. If you have multiple babies, simply add an Add-on Baby Camera Unit to the monitor, allowing you to oversee them simultaneously. With automatic cycling between camera views, this monitor for baby ensures comprehensive coverage of your little ones' surroundings. Pros: Large screen for detailed viewing. Wide lens angle for expansive coverage. Impressive pan and tilt capabilities. Instant alert when your baby is crying. Cons: Micro SD Card is not supported eufy Baby Monitor E210 Price: $169.99 eufy Baby Monitor E210 is also an option that you should not miss. As the name suggests, it's an upgraded iteration of the eufy’s Baby Monitor, ideal for caregivers seeking extended battery life. With a 5200mAh battery, it offers an impressive 30 hours of regular monitoring or 12 hours of continuous use for more frequent check-ins. This pro baby monitor also comes with a 5-inch screen that can capture all magic moments in sharp 720p clarity. It pans the lens 330° and tilts 110°, so you can keep tabs on every corner of your baby’s surroundings. The exceptional night vision feature ensures a clear view even as they slumber. Additionally, features like two-way audio and lullabies contribute to better care for your baby at any moment. Pros: Extended battery life for extended monitoring. Night vision capability for clear visuals at night. Comprehensive camera movement. Big screen viewing with high clarity. Cons: Higher price than the normal version. Infant Optics DXR-8 PRO Video Baby Monitor Price: $325.05 The Infant Optics DXR-8 PRO Video Baby Monitor stands as an advanced choice as well, operating on 2nd-generation FHSS frequency within a closed-loop system. Beyond its standard features like two-way talk, sleep mode, and night vision, this monitor elevates monitoring with cutting-edge functionalities. These include Active Noise Reduction (ANR), a high-definition display, and interchangeable lenses. With ANR, background noise can be effectively filtered, while the 5" ultra-clear LCD display captures video at 720P resolution, complemented by enhanced night vision. Notably, the 6X zoom capability allows you to observe your baby sleeping without sacrificing image quality—a pixelation and blurring-free experience that sets it apart from other monitors. Pros: Interchangeable lenses for flexible monitoring. Noise reduction option to filter “static noise”. Big LCD display at high resolution. Secure audio and video transmission. More advanced featuresare Cons: The price is so high that is not affordable for everyone. VTech VM819 Video Baby Monitor Price: $98.42 Among the 4 best video baby monitors with no WiFi, the VTechVM819 Video Baby Monitor is the most affordable one, which is more suitable for new parents with limited budgets. Yet, it is also powerful and comes with many sparkling features that help keep your baby safe. It is transmitted via secure internet 2.4GHz channels with FHSS technology, achieving a long operation range of up to 1000 feet outdoors. What makes the monitor special is that it has two calming melodies and two soft ambient sounds, with which you can soothe your baby. Plus, it has a 2.8-inch LCD screen and boasts a temperature sensor, which allows you to view the numerary temperature on the LCD screen. Moreover, VTech VM819 has an excellent battery that can keep monitoring throughout the night with up to 19 hours of video streaming on one charge. Pros: Light and compact. Budget-friendly. Soothing sounds and lullabies. Temperature sensor for better environment monitoring. Longe battery life for 19 hours monitor with one charge, Cons: Small LCD screen. 480p viewing definition only. Limited advanced features. Conclusion In conclusion, this article has explored the selection of the best baby monitor without WiFi and presented 4 top recommendations. These non-WiFi baby monitors excel in maintaining safety and privacy while delivering exceptional functionality. As you make your own final choice, remember to consider your home's layout, your specific requirements, and the features that hold the utmost significance for you and your precious little ones.
Vacuum · 04/09/2023
How to Troubleshoot Vacuum Cleaner Issues: DIY Repair Solutions
Keeping your home clean and dust-free is essential for a healthy living environment. A vacuum cleaner is a valuable tool in achieving this. However, it can be disappointing when problems like low suction force, excessive noise, and ineffective cleanup outputs happen to your vacuum cleaners. Fortunately, instead of discarding the appliance or paying a high fee for repairs, you can actually try some manual methods to fix your vacuum cleaner without hassle. We'll explore why your vacuum cleaner might stop working and provide insights into vacuum disassembling guides. Additionally, we've gathered 6 easy solutions for repairing vacuum cleaners on your own. Now, let's dive in and get your vacuum cleaner working again. What Causes Vacuum Cleaners to Stop Working It's better to identify the exact cause of the issue before attempting to repair the vacuum cleaner. Here are some common problems resulting from a vacuum cleaner that is malfunctioning: Clogs and Blockages:Blockages in filters, a broken vacuum bag, an obstructed floor head, neck, hose, or clogged brush can all lead to reduced suction power, resulting in decreased cleaning efficiency. Broken Belts: Vacuum cleaners with belt-driven brush rollers can experience belt breakage or slippage, leading to reduced cleaning effectiveness. Full Dustbin or Bag:If the dustbin or bag is full, airflow can be restricted, leading to reduced suction and possibly causing the vacuum to shut off. Overheating: Frequent use can cause the vacuum cleaner to overheat. Additionally, a malfunctioning motor could be responsible for overheating. Power Issues: If the vacuum cleaner is not properly connected to the power source or is not functioning correctly, it may fail to operate. Mechanical Wear:Wear and tear on various mechanical components can accumulate over time, affecting the overall performance and reliability of the vacuum. NOTE: It's important to address these issues promptly to ensure your vacuum cleaner's optimal performance and longevity. Different Types of Vacuum Cleaners: How to Disassemble Them Generally, to repair a vacuum cleaner, you'd better grasp the right way to disassemble the device. But pay attention that the ways to disassemble the upright and canister vacuum cleaners can be different. Check the guide below, which will lead you to take apart both types of vacuums respectively. Before getting started, prepare the following tools in advance: screwdrivers; pliers; multimeter Disassemble An Upright Vacuum Cleaner An Upright Vacuum Cleaner is a common type of vacuum with a vertical design, featuring a handle and nozzle, allowing it to be used in an upright position on floors. Let's take a closer look at the steps involved in disassembling an upright vacuum cleaner. STEP 1. Unplug the handheld vacuum cleaner and loosen the lower handle screw to detach the handle. If your device is equipped with a hose, remove it as well. STEP 2. From the bottom of the vacuum cleaner, find the top cover screws and remove them to take off the cover. STEP 3. Now remove the brush roller and the drive belt from the vacuum. Next, loosen the screws used for securing the motor clamp. Then, carefully extract the motor. NOTE: Be careful not to damage the gasket on the other side of the motor no matter when dismantling or installing it. Disassemble A Canister Vacuum Cleaner A Canister Vacuum Cleaner, also known as a Cylinder Vacuum Cleaner, has a separate design consisting of a main unit and a flexible hose, handle, and nozzle. Here, we will guide you through the dismantling procedure with the sequential steps. STEP 1. Unplug the vacuum cleaner and directly take off the hoses, dust bag, and filter from the device. STEP 2. Loosen the screws on the vacuum's body and move the cover off it. You can easily see the motor and electrical components inside the cleaner. STEP 3. Now, to repair the vacuum cleaner's motor or its brushes, remove all screws and take the motor out of the vacuum's body. STEP 4. For the brush roller repair, clean out the dust and debris from the nozzle, and then move to the top cover to take it off. Repair Manual for Vacuum Cleaner: 6 Steps to Fix Now, when you have disassembled the vacuum cleaner and evaluated the exact components leading to the problems, you are able to follow the step-by-step guide below to manually process the vacuum cleaner repairs. Service the Vacuum Beater Bar The beater bar is a round roller with brush fibers, which is placed at the front edge of both the upright and canister vacuum cleaners. Due to being the first component to contact with debris, it may increase the risk of entanglement and wear-down when using the vacuum for hair or stubborn stain cleaning. Therefore, replacing the beater bar is a proper way to vacuum cleaner repair. The steps below can be followed: STEP 1. Put the vacuum upside down and remove the clips on both sides of the cleaner to take off the drive belt. Then you can access the beater bar and lift it over. STEP 2. Next, remove the cap and flange on both sides of the beater bar to get it off the vacuum cleaner. STEP 3. Check the beater bar’s condition to replace the brush, cap, flange, or case accordingly. You can also directly change to an entirely new beater bar. Replace the Vacuum Belt A vacuum belt is one of the necessary vacuum attachments connecting with the beater bar. It performs to pass the motor power to the beater bar and enables the vacuum cleaner to clear the dirt. When you discover that the vacuum belt is worn and needs to be replaced, you can process with the guide here: STEP 1. Follow the above guide to remove the beater bar first, and then loosen the vacuum belt to get it off the vacuum. STEP 2. Use a new vacuum belt to slip over both the beater bar and around the motor pulley again. STEP 3. Put the beater bar back into the vacuum cleaner and adjust the belt to get it well installed. Empty or Change the Vacuum Bag Some vacuum cleaners are equipped with vacuum bags to prevent dirt and dust from entering the inner components of the devices. Hence, for the bagged vacuum cleaner, you can empty or change the vacuum bag to repair the vacuum cleaner when it is not functioning properly: STEP 1. Unplug the vacuum cleaner. Then loosen the clips to open the vacuum bag. STEP 2. After that, slide out the bag's cardboard collar enabling it to disconnect with the vacuum cleaner to get it off. STEP 3. Get the cleaned or new vacuum bag and slide on its collar to complete the vacuum bag cleanup or replacement. Clean or Replace the Vacuum Filter If the vacuum filter is what you need to deal with for repairing vacuum cleaner, distinguish the 3 main types of vacuum filters (Foam Filters, Pleated Paper or Synthetic Cartridges, and HEPA Filters) and follow the proper guide to process it: Foam Filters: Place the filter in the mixed liquid with both hot water and two drops of cleaning solution. By gently squeezing the filter to clean all its dust. Finally, use a microfiber towel to absorb the water and place the filter to dry it completely. Pleated Paper or Synthetic Cartridges: You don't need to soak or rinse paper and synthetic filters into water because this can damage them. Simply hold it under a flowing stream of water to remove the dust, then get it dried and the filter cleanup is done. HEPA Filters: HEPA Filters can easily be cleaned by being rinsed with cool water, or directly tapping them to remove some dust. Clear the Vacuum Clogged Hose If the hose is not attached to the vacuum permanently, you can directly disconnect it to remove the clogs inside. It will be placed in the front of the vacuum cleaner and connected from the bottom roller to the tank/bag. Here guides you on how to unclog it: STEP 1. Reach the end of the hose and pull it out from the base of the vacuum. STEP 2. Use broomsticks to pull out all clogs getting stuck in the hose. STEP 3. As the hose can be deep and there are some clogs that can't directly be reached deep inside, use wire or a snake to twist it around and get them all out to unclog the hose. STEP 4. Finally, pour 1/2 cup of baking soda and mix with vinegar to kindly clean out the hose by breaking apart all sticky dirt inside. Reconnect or Replace the Power Cord When your vacuum cleaner is performing improperly, try reconnecting it to the power source. If it doesn't solve the problem, consider whether the power cord fails to work normally. To replace or reconnect the power cord, you'd better check the user manual first. If there lack of instructions on how to fix it, you may as well consult for professional help instead of immediately doing it by yourself for safety reasons. Conclusion Vacuum cleaner repairing is a daily task many people will need to process. So for those commonly seen problems, the blog has provided you with the correct and workable ways to do vacuum cleaner repair on your own. But if you lack experience and worry about safety, you'd better turn to a vacuum repairing shop for help instead. Don’t forget that taking the time to peruse through user manuals is always an incredibly helpful option as well! With the help of these processes and techniques, you will be able to accurately diagnose potential repairs as well as equipment problems.
Robovac · 04/09/2023
Best Smart Scale for Healthier Living: 5 Top Choices in 2024
Smart scales now break into the market and shine through at houses taking the place of traditional bathroom scales. Smart scales are more than a common scale now. While measuring more insightful body composition metrics, smart scales can help you know yourself from the toe to the head. For those who are ready to get a weighing scale, it’s necessary to get a smart scale for basic health evaluation. In this post, we shall discover what factors to consider first when choosing the best smart scale. Additionally, before you make your purchase, we'll provide you with a rundown of the top-rated smart scale options available for seamlessly tracking your health data moving forward. How to Pick Your First Smart Scales: 5 Features to Consider There are countless smart scales on the market to choose from, so beginners may be at the wits' end. To get an informed option, here are some features to help you pick one in a million. Accuracy: Opt for the best smart weighing scale that offers high accuracy in measuring detailed body composition data. Check customer reviews and ratings to ensure the scale provides consistent and precise readings. Weight Metrics:Consider whether you need a smart scale that measures additional metrics besides weight like Body Fat, Body Mass Index (BMI), Basal Metabolic Rate (BMR), Lean Body Mass, Bone Mass, Muscle Mass, Body Water Weight, and Heart Rate according to your needs. App Compatibility: Check if the smart scale is compatible with Android or iOS and whether it has a dedicated app for tracking and analyzing your weight metrics. Connectivity:Consider the connectivity options available with the scale like Bluetooth or Wi-Fi. Opt for the one with Wi-Fi capability to enable fast and automatic data syncing and cloud storage. Weight Capacity:Check the maximum weight it can accurately measure. Ensure the weight capacity meets your requirements, especially if you plan on a strength training or weight loss program. Close Look at the 5 Best Smart Scales - Suit Your Needs We've tested and rounded up the top 5 picks of the year here. You might as well grasp a quick idea of the best smart weight scales in specific terms that you may be concerned about. Most Accurate Smart Scale: eufy P2 Pro Smart Scale Size: 11.0 × 11.0 × 1.0 inches Connectivity: Bluetooth and Wi-Fi Weight Capacity: 0.2 lb -397 lb Max Users: Unlimited users Metrics: Weight, Heart Rate, Body Fat, Visceral Fat, Body Fat Mass, Lean Body Mass, Subcutaneous Fat, BUM, Muscle Mass, Bone Mass, Water Weight, Protein, BMR, Body Age, Body Type, Skeletal Muscle Mass eufy P2 Pro Smart Scale is the best smart scale that enables you to get a holistic look at yourself with a wide range of 16 weight metrics available. This gadget employs state-of-the-art technology like BIA (Bioelectrical Impedance Analysis) Technology and ITO (Indium Tin Oxide) Coating Technology. Moreover, it ensures high accuracy of your health data through advanced High-Precision Manganese Steel Sensors. This informed gadget will also generate an insightful report with a 3D model that lets you track and keep up to date with your and your family's fitness. After in-depth data analysis, it'll give feedback on your health life. What's more, it can work with third-party apps like Apple Health, Google Fit, or Fitbit and sync your health data for the long term. To begin your fitness journey, it's the most accurate smart scale to take into consideration. Pros High precision and accuracy. 16 weight metrics available. Wi-Fi and Bluetooth capability. 3D model to see visual changes. Full body report and feedback. Compatibility with iOS and Android. Water resistance with IPX5. Unlimited users for the whole family. Cons Lack of nutritional advice. Tend to sell out and out of stock. Most Affordable Smart Scale: Wyze Scale X Size: 11.8 × 11.8 × 1.18 inches Connectivity: Bluetooth Weight Capacity: 11 lbs - 400 lbs Max Users: 8 users Metrics: Weight, Body Fat Percentage, Heart Rate, Muscle Mass, Visceral Fat, Bone Mass, Metabolic Age, Body Water Percentage, Basal Metabolic Rate, Lean Body Mass, Protein, Muscle Mass, BMI Wyze Scale X is the best body weight scale at a reasonable price that can track various body composition metrics. Its first-class ITO Glass electrodes give accurate measurements on the Wyze app, allowing you to follow up your exercise process. Meanwhile, it can sync with popular third-party fitness apps like Apple Health, Google Fit, and Fitbit. Moreover, it provides up to 8 users with different modes like Baby, Pet, Luggage, and Pregnancy Modes to ensure the fitness of your whole family. Pros Affordable price. 13 weight metrics available. ITO coating technology for high accuracy. Various modes for people and pets. Cons No Wi-Fi connection. Best Bluetooth Scale: Fitbit Aria Air Size: 11.8 × 11.8 × 1 inches Connectivity: Bluetooth Weight Capacity: 10 lbs - 400 lbs Max Users: Multiple Metrics: Weight and BMI Bluetooth scale is always the budget option for the best smart body weight scale like Fitbit Aria Air. It lets you automatically sync health data to the Fitbit app wirelessly while your phone is nearby. Furthermore, it works with sports watches under the same Fitbit eco-system. You can also set goals, track progress, and get a complete picture of your health and fitness on the app. However, it can only display 2 metrics including weight and BMI after calculating your weight and height. Pros Affordable price. Integration into the Fitbit ecosystem. Support for multiple users. Cons No Wi-Fi connection. No in-depth data analysis. Only 2 metrics available. Best WiFi Scale: Withings Body+ Size: 12.8 × 12.8 × 0.9 inches Connectivity: Bluetooth and Wi-Fi Weight Capacity: 9 lbs - 396lbs Max Users: 8 users Metrics: Weigh, BMI, Muscle Mass, Fat Mass, Bone Mass, Body Water Weight Withings Body+ makes use of bioelectrical impedance analysis (BIA) technology to estimate body composition with a low-amplitude electrical current through the body. It can pair with the Withings App and enables you to track 4 body composition metrics. Better yet, it will display a picture of instant weight trends and offer tailored health insights for better health. It can furthermore connect with 100+ fitness apps over a Wi-Fi connection and leverage your health data with your favorite apps. Pros Full body composition analysis. Automatic synchronization via Wi-Fi. Compatibility with 100+ apps. Baby mode and athlete mode. Up to 8 users. Cons Fewer weight metrics tracking. Expensive option. Less accurate data is based on reviews. Best Smart Scale for Athletes: Garmin Index S2 Size: 12.6 × 12.2 × 1.1 inches Connectivity: Bluetooth and Wi-Fi Weight Capacity: Up to 400 lbs Max Users: 16 users Metrics: Weight, BMI, Body Fat, Skeletal Muscle Mass, Bone Mass, Body Water Percentage Garmin Index S2 is a luxury pick for athletes with an exercise goal for a long time. This best smart scale can deliver you a more holistic view of your and up to 16 users' health. With no more fancy designs, this gadget can directly show you the weight trend as well as 6 types of weight metrics on the smart display screen. For athletes with packed schedules, the ability to have quick and intuitive body data is truly ideal. Plus, you can connect to the Garmin Connect app to get trend graphs with a custom view. Pros Smart display for metrics and trends. Support for up to 16 users. Compatibility with Garmin ecosystem. High precision and accuracy. Cons Fewer body composition metrics. Expensive for beginners. No insightful health analysis. Conclusion As we pursue a healthier lifestyle, the best smart scales for weighting have become a catalyst for technological advancement. As we conclude our exploration of the top smart scales, it's evident that these devices have surpassed mere weight measurement. They have evolved into comprehensive health companions, providing insights that go far beyond numbers. Each smart scale we've introduced offers unique value, catering to diverse needs. With the help of the best smart scale for body, you can keep an eye on your health data and adjust your training plan or weight loss program in time. That will be a good helper that drives you to keep a healthy lifestyle.
Vacuum · 28/08/2023
5 Best Tile Floor Cleaner Machines for Toughest Dirt Cleaning
Tiles are the common option for bathrooms and kitchens for durability and water resistance, but they will look dingy and discolored with spilled sauce, water spots, and footprints if lacking frequent cleaning. To remove tough stains, dirt, and grim from the floor and restore shine, a robot vacuum for tile floors must be an effective and time-saving cleaning solution for your home. In this case, this guide will take you through the 5 best tile floor cleaner machines to help you get the optimum pick and make tiles neat as a new pin. How to Choose the Right Tile Floor Cleaning Machine? Choosing the best tile floor cleaning machine involves considering several important factors to ensure effective and safe cleaning for your specific needs. To assist you through the process, follow these three essential steps when selecting a suitable cleaning robot for tile floors. STEP 1. Assess Your Home Environment To embark on your journey to find the perfect tile floor cleaning machine, begin with a thorough evaluation of your home environment. Different types of tile demand specific cleaning techniques and features for optimal performance. Tile Type:Identify your tile variety—ceramic, porcelain, natural stone, etc. Diverse tiles demand specific cleaning techniques and robot features to clean effectively without damage. Area Size:Measure your cleaning area—small bathroom, medium kitchen, large living room. Robots offer varying coverage and efficiency; choose a machine that fits your space. Tile Locations:Note tile positions—kitchen, bathroom, etc. Areas differ in cleaning needs; for example, kitchen tiles face grease, and bathroom tiles gather deposits. STEP 2. Explore Desired Features Once you've assessed your home environment, it's time to delve into the features that will make your tile floor cleaning experience seamless and effective. Preferred type of cleaning machine:Consider the type of tile floor cleaning machine you prefer, such as a cordless handstick, robot cleaner, vacuum cleaner, or traditional cleaner. Preferred Cleaning Method:Select a preferred cleaning method, whether it's steam cleaning, mopping, scrubbing, or a combination of these approaches. Water capacity for water-based cleaning:If you are leaning toward water-based cleaning, check the water capacity of the cleaner to make sure it meets your needs. Ease of cleaning and maintenance after use:After use, evaluate how easy it is to clean and maintain the cleaner. User-Friendly Features:Evaluate whether the tile floor cleaning machine offers user-friendly features such as intuitive controls, displays, or app interaction for effortless operation. Maneuverability:Consider maneuverability, including factors such as intelligent navigation, swivel steering, adjustable handles and more. STEP 3. Make an Informed Choice With a solid understanding of your home environment and desired features, it's time to make a well-informed decision that aligns perfectly with your cleaning needs. Reputable brands for reliability:Consider reputable brands when choosing the best tile floor cleaning machine to ensure reliability and quality. Customer Feedback Insights:Browse customer reviews and testimonials to gain insight into user experiences and best practices. Warranty Length and Support:Prioritize machines with favorable warranty lengths and strong after-sales support. Budget considerations and comparison shopping:Set a budget and do some comparison shopping to find the best deal. Now, equipped with the essential selection process, let's delve into top-tier choices. Discover the cleaning devices that excel in creating pristine and secure tile floors. Best Overall Tile Floor Cleaner Machine MACH V1 Ultra Steam Vacuum and Mop presents an all-in-one cleaning solution, seamlessly integrating Vacuum, Mop, and Steam functions for comprehensive cleaning. This versatile eufy cleaner effortlessly eliminates wet or dry messes, including resilient tile grime, with its potent 16,800 Pa suction power. Its 230°F (110°C) heated steam and aqueous ozone annihilate 99.9% of germs and bacteria, particularly beneficial for homes with pets, kids, or allergies. This makes it perfect for areas like kitchens and bathrooms. Facilitating convenience, the cordless cleaner integrates a self-cleaning mop to avert recontamination. Its sophisticated triple self-cleaning mechanism cleans the roller brush with fluid and uses hot air for swift drying. With a runtime of up to 82 minutes per charge, it ensures a thorough cleaning session, revitalizing spaces with a healthful atmosphere. Price: $699.99 Best Budget Tile Floor Cleaner Machine Elevate your tile floor cleaning with the Bissell Power Fresh Steam Mop. This corded cleaner boasts an impressive 23-foot reach, eliminating the need for frequent outlet changes and ensuring seamless coverage across your tile and hard floors. Its ingenious combination of a mop and continuous steam system offers three steam options that effectively eradicate 99.9% of germs and bacteria, ensuring a healthier environment. What sets this steam mop apart is its handy scrubber, capable of effortlessly tackling tough and sticky stains. Moreover, its flip-down design allows for thorough cleaning of grout lines and deep crevices. With its performance-to-price ratio, the Bissell Power Fresh Steam Mop stands as a budget-friendly choice, delivering exceptional tile cleaning results without compromising on quality. Price: $92.69 Best Steam Tile Floor Cleaner Machine McCulloch MC1385 Deluxe Canister Steam Cleaner is an essential asset for expansive ceramic tile surfaces, making it a perfect fit for high-traffic areas such as grand halls and bustling commercial spaces. Its robust steam temperature and 4 bar pressure effortlessly eliminate stubborn grime and stains. The substantial 64-ounce tank guarantees efficient cleaning for even the largest tile expanses. The package comes complete with 23 versatile accessories, including a floor mop and tailor-made mop pads for effective tile cleaning. This comprehensive set provides up to 120 minutes of uninterrupted steam, ensuring thorough coverage. Notably, the McCulloch MC1385 transcends its tile-focused capabilities, excelling in various household chores, thanks to its wide range of attachments. Price: $199.99 Best Lightweight Tile Floor Cleaner Machine Dyson Omni-Glide is a sub-5 lbs cordless vacuum tailored for simplicity. While it lacks steam and mop functions, it excels at efficiently suctioning dust from ceramic tiles. Its dual motorized brush rollers capture debris and particles as small as 0.3 micronsm making it ideal for smaller tile-adorned spaces. With an articulated design and 360-degree castors, it navigates easily and reaches beneath furniture. Switching between stick and handheld modes, it offers versatility, although it just has a 20-minute runtime resulting from its lightweight design's smaller battery capacity, a common trait among such vacuums. Price: $279.99 Best Powerful Tile Floor Cleaner Machine roborock Dyad Pro Wet and Dry Vacuum Cleaner stands as a robust cleaning solution, wielding an impressive 17,000 Pa suction power capable of tackling various messes, wet or dry. Its on-screen LED indicator uncovers hidden dirt, while multi-roller rotation in opposing directions leaves no stains or grime untouched. Notably, the RevoBrush Self-Cleaning function ensures ongoing roller maintenance during tile and floor cleaning. Complementing this, the Self-drying capability streamlines upkeep, utilizing hot air for efficient maintenance. Overall, the roborock Dyad Pro is undeniably a powerful cleaner, offering remarkable performance for your cleaning needs. Price: $499.99 Comparison Table of the 5 Tile Floor Vacuums Here's a table comparing the main features of the 5 tile floor cleaner machines: MACH V1 Ultra Bissell Power McCulloch MC1385 Dyson Omni-Glide roborock Dyad Pro Function Vacuum, Mop, and Steam Mop and Steam Mop and Steam Vacuum Vacuum Suction Power 16,800 Pa N/A N/A N/A 17,000 Pa Noise Level <65 dB N/A N/A 70 dB N/A Run Time Up to 82 Min Corded Corded 20 Min 43 Min Tank Volume 820 ml + 720 ml 16 oz(473ml) 64 oz(1893ml) 200 ml 900 ml + 770 ml Weight 5.7 kg (12.57 lbs) 6 lb 13.00 lbs 4.18 lbs N/A Price $699.99 $92.69 $199.99 $279.99 $499.99 Conclusion In conclusion, the 5 best tile floor cleaner machines available in 2023 provide impressive cleaning power while making it easier than ever to clean tile flooring. Not only do they allow for thorough cleaning and a deep scrub to eliminate dirt and grime, but they are also user-friendly and easy to store. From budget-friendly mops to sophisticated steam cleaners, we have looked at the most popular options on the market today. Ultimately, it is important for everyone to assess their lifestyle and budget before deciding which one of these tile floor cleaner machines is the best fit for them.
Vacuum · 27/08/2023
4 Best Car Vacuum Cleaners in 2024 (Tested & Reviewed)
Like exterior cleaning, regular interior cleaning is essential to maintaining a comfortable driving environment. This practice not only maintains the overall condition of your vehicle but also keeps your health. In this scenario, choosing the right car vacuum cleaner becomes both essential and invaluable in the pursuit of this goal. With its robust features, this tool effectively removes dirt, maintains the hygiene of your car's interior, and acts as a barrier against direct contact with the dust inside the vehicle, thus contributing to the preservation of your well-being. This article provides an in-depth guide on considerations for selecting the best car vacuum cleaner and recommends 4 popular vacuum cleaning products available on the market. Read on, choose your favorite vacuum, and create a comfortable car interior environment for you and your family! Key Considerations for Choosing the Best Car Vacuum Cleaner Before you dive into selecting a car vacuum, it's wise to have a solid grasp of its performance and features. Explore the aspects below beforehand to ensure that the vacuum cleaner you choose not only fits your needs but also maximizes the effectiveness of your purchase. Motor Power & Suction Power:In general, the optimal performance for a car vacuum cleaner is in the range of 200W to 2400W motor power consumption, coupled with a suction power of at least 3000Pa. In addition, certain vacuum cleaners have the ability to fine-tune their suction power to meet different needs. Size & Portability:While maintaining uncompromising performance standards, opting for a relatively compact car vacuum cleaner offers improved ergonomics and easier portability. This convenience factor comes from the practicality of being able to transport it with ease. Conversely, an overly large size could present challenges when trying to position it either on a seat or within the confines of a trunk. Power Options:The power options of car vacuums are typically categorized into 2 types: cordless models and corded models. Cordless vacuums are ideal for cleaning large areas that require mobility. Corded vacuums offer increased cleaning power, which is beneficial for longer cleaning sessions. Extra Tools & Attachments:Some high-end products often come with different accessories, such as slot suction, seat brush, extension hose, etc. They can assist you in thoroughly cleaning the interior of your car. In addition to the points mentioned above, other requirements such as noise level during operation, the presence of an antibacterial filtration system, and self-cleaning capabilities can also be taken into account when selecting the best vacuum cleaner for car. 4 Recommendations for the Best Car Vacuum Cleaners After gaining a basic understanding of the key features to consider in a car vacuum cleaner, you can continue reading for detailed reviews of the 4 recommended models, and select the one that perfectly suits your needs. HomeVac H11 Handheld Vacuum Cleaner - Lightest Wireless Option If you prefer a cordless Vacuum Cleaner that is lightweight and easy to carry, the eufy HomeVac H11 Handheld Vacuum Cleaner will be the right choice. The device weighs a mere 1.2 pounds, yet boasts a commendable suction power of 5500Pa, making it capable of effectively cleaning car floor mats on a daily basis. It can be conveniently charged anywhere in your home using a USB cable and offers an impressive battery life. What's more, it comes with a versatile 2-in-1 crevice tool that effortlessly reaches deep into the most inaccessible corners and crevices of your car seats. eufy H20 Car Vacuum Cleaner - Comprehensive Attachments eufy Clean H20 Car Vacuum Cleaner is another powerful cordless car vacuum cleaner. It weighs only 1.44 lb (654 g), and is combined with a powerful suction of 40AW, ensuring its easy storage and popularity among several users. It has a built-in LED probe light, which will also be effortless for car floor mat cleaning, as well as cleaning dust and dirt from every nook and cranny of your car. Unlike other models, it is equipped with a comprehensive set of professional accessories, including retractable tools, extension hoses, and brushes, making it more suitable for versatile cleaning of the interior of your car. BLACK+DECKER Furbuster Handheld Vacuum - Extended Battery Life BLACK+DECKER Furbuster Handheld Vacuum is an effective tool for car floor mats cleaning. It provides enhanced suction power, allowing for quick and efficient cleaning of hair, dirt, and debris from the interior cushions and seats of the vehicle. Additionally, it is equipped with an extra-long crevice tool and anti-tangle rubber bristles, which greatly facilitate effortless cleaning of hard-to-reach areas as well as stubborn pet hair. What makes it stand out from others is that it has the best battery life of the 4 products. It offers a 145% improvement in runtime and is equipped with a battery indicator that allows you to easily monitor the remaining power for task completion. Saimour Wireless Handheld Car Vacuum - Best Budget If your budget is tight, Saimour Wireless Handheld Car Vacuum could be a great value option, as it is the cheapest one among the 4 best car cleaning vacuums. For just $24.99, you can acquire this product equipped with a 120W motor and 9000pa of suction power. Not only does it boast a cordless rechargeable design, but it is also foldable and portable. Weighing merely 0.76 pounds, it offers effortless hand-cleaning in vehicles, households, and offices alike. Its unique 90° angle folding feature allows for easy storage within the car's interior space. Moreover, it is complemented by an integrated wide-angle LED light that ensures thorough cleaning even in dimly lit corners of your vehicle. Conclusion After reading this post, you should have comprehended the features of these 4 car vacuum cleaners and developed a definite inclination to procure the best car vacuum cleaner that aligns with your specific requirements. The above-recommended products have exhibited exceptional performance and can cater to your diverse needs. Now acquire a car vacuum cleaner that suits you best in order to perpetually maintain cleanliness and hygiene in your vehicle, thereby providing yourself and your family with a comfortable and healthy driving environment!
Robovac · 16/08/2023
Best Robotic Vacuum for Tile Floors: Your Home Cleaning Solution for 2024
Robotic vacuums, the automated cleaning marvels, redefine home maintenance by autonomously navigating spaces and keeping floors pristine. These ingenious devices utilize advanced sensors and algorithms to detect and eliminate dirt, dust, and debris with precision. Their importance lies in revolutionizing household chores, offering convenience and efficiency while freeing up valuable time for other tasks. In this article, we will delve into the best robotic vacuum for tile floors and discover how it serves as your ultimate home cleaning solution. Keep reading to learn more! Can You Clean the Tile Floor with a Robotic Vacuum? It is no doubt that you can clean tile floors with a robotic vacuum. Robotic vacuums are designed to automatically navigate around a room and clean various types of flooring, including tile. They use sensors to avoid obstacles and detect dirt, ensuring a thorough cleaning. Many robotic vacuums also have settings specifically for hard floors like tile, adjusting their cleaning method accordingly. The vacuum’s brushes and suction power effectively remove dirt, dust, and debris from the tile surface, leaving it clean and polished. Therefore, the robotic vacuum can clean your tile floor and save you time and effort while maintaining a clean and hygienic living space. Factors to Consider When Choosing a Robotic Vacuum When selecting a robotic vacuum, it's essential to consider various factors to ensure it meets your cleaning needs effectively and seamlessly integrates into your home maintenance routine. Floor Type Compatibility: First, you should ensure the vacuum is suitable for your floor type. For carpeted floors, a vacuum with strong suction and rotating brushes to effectively lift dirt and debris from carpet fibers. For tile or hardwoodfloors, a vacuum with rubberized brushes and sensor technology prevents scratching or damage while still providing effective suction for debris removal. Suction Power and Filtration: A vacuum with a high-powered motor and advanced filtration system boasts optimal suction power and filtration. This ensures efficient removal of dirt, dust, and allergens from both carpets and hard floors, providing a thorough clean and improved indoor air quality. Battery Performance: A vacuum with long battery life and quick charging will be better, particularly for larger homes. Regular runtime should typically range from 60 to 120 minutes on a single charge. Additionally, opt for a model with fast charging capabilities to minimize downtime and ensure uninterrupted cleaning sessions. Size and Layout: Opt for a model with slim dimensions and maneuverability to navigate through tight spaces and around furniture easily. This ensures thorough cleaning in all areas of your home, even those with complex layouts. Pets or No Pets: If you have pets, prioritize features like strong suction and specialized brush designs to tackle pet hair effectively. 7 Best Robotic Vacuums for Tile Floors: Our Picks For homeowners with tile floors, selecting the right robotic vacuum can make daily cleaning effortless and efficient. Here are seven best vacuum cleaners for tile floors in 2024, each designed to tackle dirt, debris, and hair with advanced features and exceptional performance. eufy Clean 11S The eufy Clean 11S is celebrated for its slim build and impressive suction power, making it a standout choice for thorough cleaning on both carpets and hard floors. Recognized by Tom’s Guide as one of the "Best robot vacuums of 2019," this model operates quietly while delivering deep cleaning performance. Advantages: High-Performance Triple-Filter System: The eufyClean 11S vacuum cleaner is equipped with a triple-filter system that ensures a thorough cleansing, leaving your home clean and dust-free. Advanced Design and Technology: With its super-slim design and BoostIQ technology, the eufyClean 11S vacuum cleaner automatically increases suction and can meticulously clean a tile floor, making it a hassle-free solution for maintaining a pristine living space. Physical Advantages: Featuring large wheels and a low profile, the eufy Clean 11S effortlessly rolls over carpets and climbs over door ledges for continuous, uninterrupted operation, ensuring maximum cleaning efficiency. Impressive Specifications: With 1300 Pa max suction power, a 0.6L dust collector capacity, and a noise level of just 55dB, the eufyClean 11S combines powerful performance with comfort and convenience for the user. RoboVac G30 The eufy RoboVac G30 boasts smart technology and a powerful 2000Pa suction, ensuring comprehensive coverage and noticeably cleaner floors. Its logical route planning allows for thorough cleaning without missing any spots. What's more, you can control and monitor the G30 from your smartphone via the app, enabling scheduled cleaning and mode switching with ease. The eufy RoboVac G30 offers a convenient and effective solution to keeping tile floors immaculately clean. Advantages: Smart Home Compatible & WiFi Enabled: The eufyRoboVac G30 robot vacuum is compatible with both Amazon Alexa and Google Assistant, allowing seamless integration into your smart home system. With Wi-Fi compatibility, it provides convenient controls and scheduling directly from your mobile device. Advanced Navigation & BoostIQ Technology:It employs Smart Dynamic Navigation 2.0 which enhances cleaning efficiency by ensuring methodical path tracking. Coupled with 2nd Generation BoostIQ Technology, the vacuum automatically increases suction power as needed, delivering a deep clean for your hard floors and medium-pile carpets. Powerful Suction Performance: The eufyRoboVac G30 robot vacuum boasts a maximum suction power of 2000Pa, ensuring outstanding cleaning performance, particularly on stubborn debris and deeply-embedded dirt. Detailed Cleaning History & Versatility: It offers a comprehensive cleaning history feature, which records the area cleaned and cleaning time. eufy Clean X9 Pro The eufy Clean X9 Pro Robot Vacuum is an exceptional addition to your household, representing a perfect blend of design, innovation, and technology. This intelligent cleaning assistant promises to deliver superior results with its advanced features and robust functionality. Advantages: Advanced Cleaning Capabilities: Adopting unique mechanisms such as Adaptive Pressure Mopping with Dual Rotating Mops with 1 kg of pressure, and an impressive vacuum system with 5,500 Pa of strong suction, the eufyClean X9 Pro guarantees immaculate cleaning results. It tackles stubborn stains and accumulated dirt or debris confidently, leaving your floors spotless after each cleaning session. Auto-Clean & Hygienic Maintenance: The vacuum includes an Auto-Clean station, which not only takes care of cleaning and drying the mops with 40°C (104°F) heated drying but also fosters hygiene by preventing bacterial growth and lingering odors. This results in fresh, clean home environments after every use. Intelligent Carpet Detection & Whole Home Cleaning: The X9 Promodel features an automatic 12mm mop lift when carpets are detected. This technology enables it to deliver an efficient cleaning performance over different types of surfaces, transitioning effortlessly from hard floors to carpets. Smart Navigation & Obstacle Avoidance:Equipped with Accurate AI.See™ Detection, LDS navigation, a 3D ToF+RGB Camera, the eufy Clean X9 Pro is adept at avoiding obstacles such as wires, slippers, or furniture. The apparatus ensures a thorough cleaning without causing any disturbances or potential damage within your home. Versatile Control Options: With support for voice-control via Alexa or Google Assistant, and the availability of APP Remote Control, this vacuum offers convenient and user-friendly control options, which add to the overall ease-of-use and cleaning efficiency. Roborock Q5 Pro The Roborock Q5 Pro presents a tailored approach towards indoor cleaning, promising ease of use, effectiveness, and efficiency in a single package. As a product built with user needs in mind, it blends advanced technology with innovative design to provide a hassle-free and comprehensive cleaning solution. Whether you're dealing with fine dust or stubborn grime, marble or wood, the Q5 Pro is the intelligent cleaning assistant you’ve been looking for. Advantages: Noteworthy Cleaning Abilities:The Roborock Q5 Pro is versatile and efficient in both vacuuming and mopping tasks. Not only does it provide an excellent clean, but it also ensures the protection of your floors during the cleaning process, thanks to its ScratchSafe wheels and DuoRoller Brush. This capability makes it incredibly suitable for various floor types, including tile floors. Intelligent Mapping and Navigation: With the implementation of PreciSense LiDAR Navigation and Adaptive Route Algorithms, the Q5 Pro is capable of intuitive and efficient navigation around your space. Regardless of location diversity within your home, these features ensure that all areas, from open spaces to intricate corners, receive exhaustive and detailed cleaning. Convenient and Comprehensive: One of the Q5 Pro's main selling points is its smart design and user-friendly operation. The integration of a large dustbin capacity and off-peak charging support is a clear indication of this. These features provide users with extended, uninterruptible cleaning and maintenance periods, which means less worry for you and more time spent in a freshly cleaned home. Roomba s9 The Roomba s9 is a finely tuned machine combining elegance, efficiency, and innovation to redefine household cleaning. This advanced robotic cleaner seamlessly integrates into your home's environment, employing cutting-edge design and technology to ensure every inch of your floors shines. With the Roomba s9 at your service, maintaining immaculate floors has never been easier or more convenient. Advantages: Intelligent Design for Comprehensive Cleaning:The Roomba s9 is engineered to reach even the most challenging spaces in your home. Its thoughtful design enables it to clean deep into corners, along edges ensuring a thorough cleaning. This makes it highly efficient in rendering a comprehensive cleaning experience, leaving no room for specks or dust. Efficient Mapping and Navigation: One of the prime features of the Roomba s9 is its advanced mapping and navigation capabilities. As it intelligently learns and adapts to your home's layout, it cleans in a more structured, purposeful way, covering all areas efficiently. This ensures your home enjoys a consistent, thorough clean during every cleaning session. Automated Dirt Disposal: The Roomba s9 features the Clean Base Automatic Dirt Disposal, which simplifies the chore of emptying the dustbin. This innovative feature adds another level of convenience to your cleaning routine, reducing the need for manual intervention, and maintaining cleanliness and hygiene without any added hassle. DreameTech D10 Plus The DreameTech D10 Plus is the epitome of cleaning convenience, designed to complement your modern lifestyle perfectly. Combining elegant design with robust functionality, this highly versatile machine caters to all your cleaning needs with ease. From tackling everyday messes to embarking on challenging deep cleaning sessions, the D10 Plus offers an efficient and enjoyable cleaning experience. Advantages: Versatile Cleaning with Wi-Fi and Voice Compatibility:The DreameTech D10 Plus supports built-in Wi-Fi and voice assistant functionality, which allows you to control your vacuum remotely, adding a layer of convenience to your cleaning routine. Plus, its self-emptying dustbin and built-in mopping pad ensure versatile cleaning, making it a practical option for various floor types, including tile floors. Compact yet Powerful: Don't let its compact size fool you—this device boasts a powerful suction and LiDAR navigation system that ensures precise, deep cleaning. The D10 Plus proves that big things indeed come in small packages, offering excellent cleaning performance while occupying minimal space in your home. Efficient and Uninterrupted Cleaning: Beyond its powerful cleaning capabilities, the D10 Plus also offers large dustbin capacity and an extended battery life that assures uninterrupted cleaning sessions. This means you can enjoy a consistently clean home without the need to stop and recharge or empty the dustbin frequently. SwitchBot K10 Plus Resting at the intersection of cutting-edge design and advanced technology is the SwitchBot K10 Plus, a smart device that brings a new level of convenience and efficiency to your everyday cleaning tasks. Despite its compact size, it rivals larger models in performance, making it an excellent choice for those with fast-paced routines or smaller homes. It's all about doing more with less, providing a competitive, efficient cleaning solution while maintaining a minimalist aesthetic. Advantages: Compact Yet Efficient: A key feature of the K10 Plus is its compact design. Being nearly half the size of current cleaning devices, it can easily maneuver into tight spaces, ensuring thorough cleaning in every corner of your home. This element of agility is a major advantage, particularly for those challenging to read nooks and crannies. Powerful Suction: Don't be fooled by its small size; the SwitchBot K10 Plus packs an impressive 2,300 Pa powerful suction, fully equipped to tackle various dirt stages efficiently. Whether dealing with microscopic dust particles or larger debris, the K10 Plus ensures your floors remain spick and span. Automatic Emptying Dock: To add to the convenience, the K10 Plus comes with an auto-empty dock feature. This means less time spent emptying the dustbin, simplifying the overall cleaning process, and keeping productivity and convenience high. Conclusion In conclusion, investing in the best robotic vacuum for tile floors can upgrade your cleaning routine. When selecting a robotic vacuum, consider factors such as suction power, battery performance, and its ability to navigate and adapt to different surfaces. The seven models we've highlighted as the best for tile floors offer a range of options tailored to meet various needs. Investing in one of these can significantly simplify your cleaning routine. Remember, the key to maximum satisfaction is selecting a vacuum that aligns well with the specific demands of your space. FAQs What Makes a Robotic Vacuum Good for Tile Compared to Other Surfaces? A robotic vacuum good for tile typically features stronger suction power and larger wheels for smooth navigation. It often includes specialized brushes and a mopping function to tackle dirt and stains specific to hard, flat surfaces, ensuring thorough cleaning without scratching the tiles. How Often Should I Run My Robotic Vacuum on Tile Floors? It is recommended to run your robotic vacuum on tile floors four times per week to keep them clean and free of dirt and debris. However, the frequency may vary depending on the amount of foot traffic and dirt in your home. Consider running the robotic vacuum more frequently in high-traffic areas or if you have pets that shed a lot. Can Robotic Vacuums Handle Different Levels of Dirt and Debris on Tile? Yes, robotic vacuums can handle various levels of dirt and debris on tile. Many models come equipped with adjustable suction settings and sensors to detect dirt levels, allowing them to modify cleaning intensity accordingly. This adaptability helps them effectively clean everything from fine dust to larger debris.
Vacuum · 16/08/2023
Top 4 Vacuum Cleaners for Carpet, Rated and Tested by Experts
Why do you need the best vacuum cleaner for carpet? The thick fibers of a carpet can trap and hide dirt, dust, dander, crumbs, and debris. Moreover, the carpet makes it invisible to notice spills and stains on time. Day after day, a carpet may accumulate allergens or bacteria and increase the risk of illness. Therefore, it's necessary to clean up the carpet and keep it from hiding messes. Now, let's get down to the criteria of a qualified helper first followed by the 4 best carpet vacuum cleaners of the year. For the health of you and your family, there's no time for any hesitation. How to Choose a Vacuum Cleaner for Your Carpet If you're a new buyer, you should picture what type of vacuum cleaner for carpets is your ideal choice. For those who have no idea in mind, let's see what aspects you should take into consideration when choosing one as follows. Carpet Type- You should consider the type of your carpet. Thick carpets may require stronger suction power and a brush for help while low-pile carpets are usually easier to be cleaned up. Suction Power- Usually a stronger one can pick up debris within the fibers and ensure deep cleaning for thicker and long-pile carpets. Plus, you should opt for those with various modes for different suction power. Vacuum Type- There are a range of vacuum cleaner types, including handheld, robotic, stick, canister, and upright options. Most of them require manual cleaning while robotic vacuum cleaners are built for convenience. Corded or Cordless- A corded vacuum cleaner is restricted by the cord's reach while a cordless one is more portable and lightweight to bring along the way. Floor Type- You should consider the floor type in your house like hardwood, tile, laminate, and vinyl as well as pick up the one for your floor surface or all types of flooring. Attachments - You may see whether any attachments and accessories are included like a crevice tool, upholstery brush, or pet hair attachment. Filtration System -it's vital to choose a vacuum cleaner with a quality filtration system like HEPA filters since a carpet is somewhere easy to accumulate bacteria and allergens. Now, bear these tips and pick the best vacuum cleaner for carpet in the following that suits your carpet cleaning needs, ensuring a clean, fresh, and healthy living atmosphere. Capacity Cord Length Runtime Weight Max Suction Price eufy G20 Hybrid Robot Vacuum and Mop 450 ml Cordless 90 min N/A 2500 Pa $249.99 eufy HomeVac S11 Go 650 ml Cordless 40 min N/A 20000 Pa $249.99 WORX WX030L 20V Power Compact Vacuum 198 ml 4 Feet 15 min 3.00 lbs 10000 Pa $73.08 BISSELL CrossWave HydroSteam Wet Dry Vac N/A 25 Feet N/A > 11 lbs N/A $349.99 Best Robotic Vacuum Cleaner for Carpet eufy G20 Hybrid Robot Vacuum and Mop is the best robotic cleaner that allows you to schedule cleaning and free up your time. It comes with a vacuum and a mop inside that sweeps out and picks up hidden debris, dust, dirt, and everything inside the carpet. It offers 5X suction power from quiet 600 Pa for hardwood to a max of 2500 Pa for carpet to ensure effective cleaning in any scenario. Its smart dynamic navigation system will divide your home of up to 1000 sq. ft. into zones and ensure deep cleaning of zone after zone. Fit in hard-to-reach areas like sofas, dressers, and beds What's more, it works with the app and voice-control assistants for remote control. Simply put, it would be the best carpet cleaner vacuum for convenience. Best Cordless Vacuum Cleaner for Carpet eufy HomeVac S11 Go is the best cordless stick vacuum cleaner of the year. This portable and lightweight cleaner can deliver a maximum suction power of up to 20k Pa to dig out any mess deep within the fabric, never leaving any hidden debris behind. In addition, you can clean not only floors, but also high chairs with ease, and you can lift it up to clean hard-to-reach areas such as murals and tapestries. With its 5 included cleaning tools, you can use it to perform deep cleaning anywhere from inside out. Now, let's take a look at its advanced 5-tier filtration system including a first cyclone filter, second cyclone filter, high-performance filter, net filter, and high-density sponge. This system will greatly help remove all particles and improve your indoor air quality. Furthermore, it has a washable high-efficiency filter to ensure minimal maintenance and improved performance. For the price, it would be the best vacuum cleaner for carpet and hardwood floors. Best Budget Vacuum Cleaner for Carpet WORX WX030L 20V Power Compact Vacuum is the best budget deal compared with the price and functionality. This handheld vacuum cleaner ensures on-the-go cleaning around every corner of your home and in your car. It can generate a 10K Pa suction power to pick up hidden dirt, dust, hair, debris, dander, and crumbs in the thick fabric. With its large dirt cup, it can hold up to 198 ml of trash. The pity is that it can only work for up to 15 minutes on a single charge. Best Pet-friendly Vacuum Cleaner for Carpet If you have pets at home, then BISSELL CrossWave HydroSteam Wet Dry Vac is the best vacuum cleaner for carpets and pets with vacuuming, washing, and steaming all in one. Its tangle-free brush roll can get rid of hair wrap and tangles of pets. Plus, its HydroStream technology can remove tough pet messes and eliminate odors. Coming with two tanks, it can keep dry debris and dirty wet trash separate. While working with an acceptable sound, you never have to worry about scaring your cute cats and dogs. Conclusion Carpets are great decorations that add comfort and style to your home, but they become a haven for bacteria and dirt if you don't clean them regularly. Then a vacuum cleaner for carpets is your must-have. Be it a handheld vacuum or a robot vacuum for carpets, choose one to make a perfect match. These exceptional appliances have demonstrated their prowess in effectively removing dirt, debris, and allergens from carpets, ensuring not only a visually appealing space but also a healthier living environment. After going through the 4 best vacuum cleaners for carpets of 2023, do you meet your crush here? You can choose the right one according to your home situation.
Vacuum · 08/08/2023
How to Clean Vacuum Filter (A Complete Guide)
A clean vacuum will clean your home better and make it spotless. As we rely on our vacuums for daily cleaning, it's natural for the filters to collect dirt and debris over time. However, excessive dirt buildup can lead to clogged filters and a decrease in the vacuum's suction power. But don't worry, you don't need to rush out and buy a new vacuum. A simple and easy clean-up of the filter can restore its performance and ensure your vacuum continues to operate effectively. Before cleaning your vacuum filter, you must identify the type of filter in use and follow the correct guide to clean it. This post explains each type of vacuum filter thoroughly and the steps on how to clean a vacuum filter of each type. Continue reading to discover the best techniques for cleaning your vacuum filter. Types of Vacuum Filters There are three kinds of vacuum filters that are commonly available: HEPA, foam, and paper vacuum filters. Now, let's understand what they are and learn more about the differences among them. HEPA Vacuum Filter A HEPA vacuum filter, which stands for High-Efficiency Particulate Air, is a highly effective air filtration system designed to trap small particles and allergens, such as dust mites, pollen, pet dander, and other airborne contaminants. Inside a HEPA filter, densely packed layers of fiberglass fibers create a maze-like structure, allowing air to pass through while effectively trapping particles and allergens. It's important to note that the HEPA filter's primary function is to improve indoor air quality by capturing tiny airborne particles during the vacuuming process. While it does not directly impact the overall humidity of the air, its efficient filtration helps create a cleaner and healthier environment by reducing the presence of airborne allergens and dust. Foam Vacuum Filter A foam vacuum filter is a type of filter made from foam material, designed to capture dust, dirt, debris, hair, paper, and larger particles. As air passes through the filter, it traps these contaminants, preventing them from being released back into the air. Foam filters are commonly used as pre-filters, positioned in front of the main filter (often a HEPA filter) to protect it from larger particles, extending the primary filter's life and optimizing the vacuum cleaner's performance. One of the advantages of foam filters is their washable and reusable nature, making them easy to clean and cost-effective. Regular cleaning of foam vacuum filters helps maintain their efficiency. While foam filters are proficient at trapping larger particles, they may not be as efficient as HEPA filters when it comes to capturing smaller particles and allergens. Paper Vacuum Filter A paper vacuum filter typically refers to a filter with a cartridge made of pleated paper. This type of filter is designed to capture small particles, dust, germs, and powders in the air during the vacuuming process. The pleated design allows for a larger surface area, enhancing the filter's efficiency in trapping contaminants and keeping the air cleaner. Paper vacuum filters are commonly used in various vacuum cleaner models and are often relatively inexpensive and disposable. Users need to replace them periodically to maintain the vacuum cleaner's performance and ensure effective filtration. Additionally, some paper filters are made from a non-woven synthetic material, similar to a dryer sheet, making them washable and reusable, which can be a cost-effective and eco-friendly option for users. How to Clean a HEPA Vacuum Filter There are washable and non-washable HEPA vacuum filters. Cleaning a non-washable filter with water may reduce its effectiveness or damage it. Please refer to your owner's manual to determine the type of filter you have. Then follow the step-by-step guide to clean a vacuum filter. Steps to clean washable HEPA vacuum filter Step 1. Unplug the vacuum cleaner. Step 2. Unscrew and disassemble the HEPA filter. Step 3. Rinse it under running water to remove any remaining dirt and debris. Step 4. Leave the HEPA filter to air dry completely. Step 5. Reinstall the filter, and clean the vacuum body and other components. Steps to clean non-washable HEPA vacuum filter Step 1. Turn off and unplug the vacuum cleaner. Step 2. Remove the HEPA filter following the owner's manual. Step 3. Gently brush away debris and dust clogs from the filter's surface. Step 4. Optionally, use low-pressure compressed air to dislodge finer particles. Step 5. Check for any damage or wear on the filter; replace if necessary. Step 6. Clean the vacuum cleaner's body and components. Step 7. Reinstall the cleaned or replaced HEPA filter following the manual's instructions. Step 8. Turn on the vacuum cleaner and ensure proper functioning. Remember that non-washable HEPA filters have a limited lifespan, and regular replacement is necessary to maintain the vacuum cleaner's efficiency. How to Clean a Foam Vacuum Filter Foam vacuum filters are usually washable and reusable. If you perceive that the foam filters are clogged with dust, hair, or particles, follow the tutorial below to clean a vacuum filter. Step 1. Unplug the vacuum cleaner for safety. Step 2. Remove the foam filter from the canister or designated compartment. Step 3. Prepare a sink or bowl with warm water and add a small amount of mild dish soap. Step 4. Place the foam filter into the water and gently agitate it to ensure the soap covers the entire filter. Step 5. Allow the foam filter to soak for a few minutes to loosen dirt and debris. Step 6. After soaking, rinse the foam filter thoroughly under running water, squeezing it gently to remove any trapped particles. Step 7. Air-dry the foam filter completely before reinstalling it back into the vacuum cleaner. How to Clean a Paper Vacuum Filter Paper vacuum filters are typically disposable and not meant to be cleaned or reused. Once they become filled with dust, dirt, hair, debris, and particles, it's better to replace them with new filters instead of attempting to clean them several times. However, if you want to try cleaning the filter before replacing it, follow these steps: Step 1. Turn off and unplug the vacuum cleaner for safety. Step 2. Locate the cartridge that contains the paper vacuum filter. This cartridge is usually located near the dust collection area. Step 3. Remove the cartridge from the vacuum cleaner to access the paper filter. Step 4. Take off the paper vacuum filter from the filter compartment in the vacuum cleaner and gently tap it to dislodge any loose dust. Step 5. After most of the loose dust has been removed, reinsert the paper filter back into the filter compartment of the vacuum cleaner. Step 6. It's important to note that cleaning paper vacuum filters may not be as effective as using a new one, and it may impact the vacuum's performance. For optimal cleaning and suction, it's recommended to replace the paper filter with a new one as needed. How Frequently Should You Clean Your Vacuum Filter? Regularly cleaning your vacuum filter is essential to maintain optimal vacuum performance and indoor air quality. The recommended cleaning frequency depends on the type of filter and how often you use the vacuum in different room sizes. In most cases, it's recommended to clean HEPA filters every 1 to 3 months, and foam and paper filters every 1 to 2 months. The exact cleaning frequency will depend on how often you use the vacuum and the size of the room. While regular cleaning can extend the filter's lifespan, eventually, filters may need replacement. HEPA and foam filters are more durable and can be cleaned many times. However, if you notice a decrease in the vacuum's suction power or notice significant damage to the filter after multiple cleanings, it's time to replace it with a new filter. Usually, when you buy a satisfying product like the MACH V0 Ultra Steam Vacuum and Mop, the seller will provide you with an extra filter. You can find the replacement filter in the product box. Even if the product you bought didn't come with a replacement, you can easily buy a new one from the store where you bought the vacuum cleaner. As for paper filters, they are less durable and it's best to replace them with a new one after cleaning them once or twice. Related Products Check out these pages for more information: Best Handheld Vacuums Best Cordless Vacuum Cleaner Best Vacuum Mop Conclusion Now that you've learned how to clean a vacuum filter effectively, it's time to take charge of your cleaning routine. Check which type of filter your vacuum uses, and follow the detailed tutorials above to achieve a thorough cleaning. Remember, a clean filter is key to efficient room cleaning and improved indoor air quality. If you find yourself cleaning the filter frequently or notice reduced suction power, it's advisable to consider a replacement for optimal performance. Stay proactive and keep track of your filter's maintenance to ensure your vacuum operates at its best.
Vacuum · 08/08/2023
How Often Should You Vacuum? Here's the Answer
Nowadays, vacuuming is probably one of the most popular ways to clean up your home. How often do you vacuum? Twice a month? Once a month? Do you only vacuum when you have time? Exactly how often should you vacuum to get rid of dust, crumbs, pet hair, and even invisible bacteria? Some experts say you should vacuum your floors at least once a week. But in fact, the frequency of vacuuming should depend on your type of flooring, your lifestyle, the people who live in your home, and whether you use one of the best vacuum cleaners, etc. Different situations will require different vacuuming frequencies. In the following, we will first discuss why a regular vacuum is necessary, and then introduce how often should you vacuum your house based on various factors. Why Do You Need to Vacuuming Regularly? Regular vacuuming is more important than you may realize. It's not just about keeping your home clean and preserving the value of your carpets and rugs. It's also a crucial step in eliminating harmful bacteria, germs, and mites that can harm your health and the health of those around you. In addition to these benefits, there are other reasons to vacuum regularly, including: Extend the life of the floor and furniture:It can extend the life of your floor and furniture by preventing the long-term accumulation of dust and particles that may scratch and damage their surfaces. Improve indoor air quality: Regular vacuuming can improve indoor air quality and keep the environment fresh and comfortable by removing dust and dirt from the air. Prevents allergies and asthma:Regular vacuuming helps reduce indoor allergens and asthma triggers such as dust, pet dander, and pollen. Reduce the chance of pest breeding:Vacuuming regularly can reduce the chances of pest breeding by removing food residues and debris from the floor, eliminating pest habitats, and preventing pest problems from occurring. Therefore, regular vacuuming is important to maintain a clean, healthy, and comfortable home. Then, how often to vacuum? Let's take a look. How Often Should You Vacuum Carpets? Vacuuming carpets is a challenging task when it comes to home cleaning but we suggest you do it at least twice a week. Some people may assume that carpets can be left alone if they don't look dirty, but this is wrong. There are numerous small things present in carpets, such as bacteria and mites, that are not easily visible to the naked eye and can be hidden deep in the fibers. Not vacuuming them can affect the life of the carpet and gradually impact your health. While twice a week is just a suggestion for common household conditions. When you are deciding how often to vacuum carpet, there are still a few factors that should be taken into account, which may make you need to vacuum your carpet more often: How many people live in the house Whether you have pets or children Whether you or your family have allergies to dust, pollen, etc. The type of carpet you use This means that in some situations, for example, if you have pets at home or use a high-quality wool carpet, it may be necessary to vacuum the carpet more frequently, like three times a week. How Often Should You Vacuum Hardwood/Laminate Floors? When it comes to hardwood/laminate floors, we recommend it at least once a week. There is a common misconception that hardwood/laminate floors without fibers don't need to be vacuumed frequently. However, it's essential to not overlook the dust, small particles, and debris, especially on hardwood floors. Neglecting such particles can lead to scratches and other types of damage. Therefore, vacuuming at least once a week is a must. Moreover, sometimes you may need to vacuum several times a week because the actual frequency of vacuuming hardwood or laminate floors can be affected by several factors, including: High-traffic areas like the kitchen and entryways Floor condition Home environment Indoor air quality Besides, when vacuuming hardwood or laminate floors, it's important to use a vacuum cleaner that is suitable for these surfaces. Avoid using stiff roller brushes, as this could potentially scratch the floor and damage the surface. If you're tired of cleaning every week, you can use a sweeping robot such as eufy G30 RoboVac, which is hands-free and operates quietly. How Often Should You Vacuum Tile Flooring? You should vacuum tile flooring at least once a week. Although tile surfaces are generally easier to clean than hardwood or laminate floors, it is still important to be diligent in your cleaning routine. Regular vacuuming is an effective way to remove dirt and keep your tile floors looking their best. Before vacuuming your tile floor, it's best to sweep or mop it first to get rid of large particles like sunflower seed shells, tissues, and large pieces of plant debris. Doing this can prevent them from clogging the vacuum cleaner's brush or nozzle and improve its cleaning performance. When vacuuming, it's important not to over-wet the floor to prevent water from seeping into the tile crevices. If you find it complicated and tiring to sweep or mop before vacuuming, you can consider using a cleaner like the MACH V1 Ultra Steam Vacuum and Mop that can vacuum, mop and steam at the same time. Conclusion Maintaining an immaculate home requires a regular vacuuming routine. With the help of modern vacuum cleaners, you can remove dirt and debris from your carpets and floors without hassle, resulting in a pleasant and refreshing smell throughout your home. After reading this post, we believe you've learned how often should you vacuum exactly. Share it with your friends and family to let more people get help!
Vacuum · 08/08/2023
Best Lightweight Vacuum Cleaners for Elderly (Buyer's Guide)
Efficient vacuum cleaners are helpful for cleaning your home, but many of the mainstream vacuums on the market today can be too heavy and difficult for older people to use. Therefore, it's important to get the best lightweight vacuum cleaner for the elderly that makes cleaning a breeze. However, not all lightweight vacuums are excellent enough to meet the needs of the elderly. The best vacuums for them should be easy to use as well as effective at cleaning up the entire house. If you want the most comprehensive lightweight vacuum cleaner recommendations, please scroll through the detailed buying guide below. Things to Consider When Choosing a Lightweight Vacuum Cleaner for Seniors In this section, let's take a look at what to consider when choosing the best lightweight vacuum cleaner for the elderly. Weight: First and foremost, the weight of the vacuum is crucial. Look for models specifically designed to be lightweight, making it effortless for seniors to handle and carry. Opt for a vacuum that weighs around 10 pounds or less. Wireless: Wireless vacuum cleaners offer seniors freedom from cord tangles, making cleaning more convenient and efficient. Lightweight, maneuverable, and easy to use, they enhance independence, while long-lasting batteries ensure uninterrupted cleaning sessions. Ease of Operation- A vacuum cleaner with simple controls is much easier for seniors to use and they are less likely to encounter technical problems while using it. Stick vacuum cleaners and cordless models are ideal, as they offer easy swivel steering and smooth gliding. Handle Design- To reduce hand fatigue, it's essential to look for a vacuum cleaner with a comfortable handle design. Vacuums with ergonomic design can provide comfort experience during extended cleaning sessions. Suction and cleaning performance - When choosing a vacuum cleaner, it is important to ensure that it has sufficient suction power to effectively clean different types of floors and surfaces, whether they are on smooth tiles or sofa surfaces. To perform efficient and time-saving cleaning, a vacuum cleaner model with a robust motor is a must, which can effortlessly pick up dirt and debris. Noise level - A vacuum that produces excessive noise can be bothersome, particularly for seniors with sensitive hearing. So, please pay attention to the noise level of the vacuum cleaner and choose a lower-noise vacuum cleanerto reduce noise disturbance at the maximum level. A vacuum with a noise level of approximately 70 decibels or lower is considered quiet and would be a suitable choice. Safety- It is crucial to carefully assess the vacuum's safety features and certifications before making a purchase. You need to check if the vacuum has safety certifications and product specifications and look up the brand and model of the vac you are considering buying to ensure the vacuum cleaner is safe for seniors. The 4 Best Lightweight Vacuum Cleaners for Elderly Recommended Don't be overwhelmed by the large number of lightweight vacuum cleaners on the market. Please keep reading to explore our top 4 picks for the best lightweight vacuum cleaners for the elderly that are easy to use and affordable to simplify the cleaning routine. eufy Lightweight Steam Vacuum Cleaner The eufy Lightweight Steam Vacuum Cleaner - MACH V1 Ultra Steam Vacuum and Mop has been on our list of the best lightweight vacuum for seniors for a while and is still a decent value at about $699.99. Designed as the next generation in floor cleaning technology, this cordless wand vacuum offers a one-stop cleaning solution by vacuuming, mopping, and steam cleaning at the same time, which makes cleaning less complicated for the elderly. By providing a constant flow of heated steam, you can easily erase tough stains and household germs in one go. Moreover, this all-in-one cordless StickVac offers eco-clean ozone that can erase up to 99.9% of common germs and odors, keeping your family safe. Also, its triple self-cleaning system ensures that the mop is thoroughly washed and completely dried by circulating hot air, making the handling of the used mop simpler. Tineco Hardwood Floors Lightweight Vacuum Cleaner Tineco Hardwood Floors Lightweight Vacuum Cleaner is another pick that is one of the best lightweight vacuums for seniors. What makes it stand out is that this cordless vacuum is equipped with iLoop smart sensor technology. Hence, it can detect wet or dry messes on hardwood floors to keep your house clean at all times. It can also intelligently adjust the suction and water flow as it cleans the floor, leaving the hardwood floor dry quickly and streak-free. Weighing only 17.64 pounds and with a self-propelled design, Tineco Vacuum Cleaner makes it easy for anyone, including the elderly, to clean every corner of the house. Also, it only produces 78 dB of noise, which is low enough to reduce noise to achieve no-disturb. Eureka Lightweight Cordless Vacuum Cleaner If you prefer cordless lightweight vacuum cleaners, you cannot miss Eureka Lightweight Cordless Vacuum Cleaner. Without the restriction of cords, this vacuum cleaner's range of movement is wider and its operation is more flexible, making it more suitable for the elderly to use without frequently plugging and unplugging the cord. Also, it provides 3 different modes with long-lasting runtime for effective cordless cleanings, such as 45 minutes in Eco-Handheld Mode, 20 minutes in Mid Mode, and 10 minutes in Max Mode. Then, you can choose the proper mode to clean all types of flooring from tile to carpet with ease. Shark Lightweight Upright Vacuum Cleaner Our last pick is Shark Lightweight Upright Vacuum Cleaner, which specializes in anti-allergen technology featuring a HEPA filter to effectively remove 99.9% of particles and hairs from the floors to the carpets. If you have pets, this Shark upright vacuum can keep them from heavy cleaning jobs with no doubt. Likewise, the lightweight of only 10.6 lbs for the vacuum cleaner provides the convenience of cleaning the entire house. Besides, unlike the other three we mentioned above, it is powered by a 25-foot cord, ensuring you can have a deep cleaning with a power nozzle to get your floors extra clean and allergen-free. Related Products Check out these pages for more information: Best Handheld Vacuums Best Cordless Vacuum Cleaner Best Vacuum Mop Conclusion That's the end of a detailed buying guide to help you find the best lightweight vacuum cleaner for the elderly. Considering the unique needs and challenges that seniors may face, we have highlighted key factors to consider, such as weight, handle design, suction power, noise level, safety, etc. By taking these factors into account, you can make an informed decision and choose a vacuum cleaner for your elder. After viewing the 4 best lightweight vacuum cleaners for seniors listed above, we hope you can select the most suitable one for you or your parents or grandparents.
Baby · 08/08/2023
Where to Put Baby Monitor: Important Tips for You
Baby monitors play a significant role in childcare, especially for new parents. When using a baby monitor for the first time, proper positioning is very important, as it ensures clear vision and a safe distance from the baby. In this blog, we focus on providing valuable guidance to all parents, offering insights on where to put a baby monitor. By following our practical tips, you can enhance the effectiveness of your baby monitoring setup and gain the confidence to embrace parenthood. Let’s get started! When You Need to Place a Baby Monitor: Factors to Consider Properly placing a baby monitor requires careful consideration of several factors, including viewing angle, safety, and distance. Viewing Angle For effective monitoring, a wide viewing angle is a crucial factor to consider when deciding where to place baby monitor. Choose a position where you can get a full view of the area where your baby will stay or move around. Besides, most baby monitors nowadays are equipped with features for better viewing such as panning, tilting, and zooming. Depending on the specific baby monitor model you have purchased, the accessible angle may vary. Therefore, it is also essential to test the viewing ranges while placing the monitor in the baby's room. Safety and Distance While you may prefer a closer distance to capture every detail about your little ones, safety should be the primary concern. Keeping a proper distance between your baby and the security monitor is recommended to prevent any accidental harm. Additionally, electronic devices emit optical radiation while running, so it is also advisable to maintain a distance of at least 6 feet / 1.8 meters from the baby monitor to your baby. See what eufy can help if you're still looking for more smart baby monitor to keep your baby safe. Check this colection page if you're looking for non-wifi baby monitors instead. Best Locations to Put a Baby Monitor Taking the above factors into consideration and from our experience, the following locations are the best places to put your baby monitor. Wall-Mounted Near the Ceiling Mounting the baby monitors high near the ceiling is usually the preferred choice. This ensures a wide and well-defined view while maintaining a reasonable distance from your baby. If your baby monitor comes with remote pan, tilt, or zoom features, this location is ideal as it allows the monitor to cover almost all areas in the room for effective monitoring. To position your baby monitors in this manner more conveniently, it’s recommended that you opt for models that support wall-mounted installation and offer related accessories, for example, eufy E210 Spaceview Pro Baby Monitor is an excellent choice. After deciding where to mount baby monitor, remember to ensure it is securely mounted to avoid any unexpected falls in the future. Place on a Shelf Another good option for placing baby monitors is on a tall shelf. Generally, this ensures a wide and expansive monitoring view while keeping the devices out of the baby's reach, providing a higher level of safety. If your shelf is not tall enough (at least 5-6 feet), you can use additional boxes or books as supportive tools to elevate it (but ensure stability). This positioning method offers more flexibility compared to wall-mounted setups. It is especially suitable if your monitor lacks features like zooming or remote tilting. Other Locations In addition to the above-mentioned places, there are several other locations to consider based on the layout of your room: On other furniture higher than the baby bed:This ensures the best view to monitor your baby's behavior consistently. In high places at the corners of the room:The baby camera's view can cover the entire room, allowing you to keep a close eye on your baby's movements. Outside the door or in the corridor:This can help you know when your baby is leaving the room, allowing continuous monitoring (if your baby can walk on his/her own). Regardless of the chosen location, always ensure that your baby monitor is securely mounted/placed to avoid any accidental falls. Also, avoid putting it within the baby's reach to ensure their safety. Locations to Avoid While Placing a Baby Monitor Now that you have learned about the ideal locations for placing a baby monitor, don’t forget to check some places you need to avoid at the same time, which include: Inside the baby bed where your baby sleeps:It could pose hidden dangers as the baby may accidentally hit the monitor. Too high on the wall:This may not cover wider areas in the room or provide a good view of the baby. Hanging over the baby bed:The device may easily fall down and potentially hurt your baby. Near water sources:This could lead to the device falling into water and getting damaged. Exposed to direct sunlight:This can shorten the lifespan of the baby monitor and may result in unclear views on the screen. Conclusion In conclusion, when deciding where to put baby monitors, always follow two principles: one is to keep the baby monitors out of baby’s reach or at any location that may affect the baby’s movements; second, ensure that the monitors can provide the best views, allowing you to keep an eye on your baby from the screens at all times. Finding the right location for a baby monitor can be a challenging task, as it requires balancing safety and ensuring a good view. By taking these factors into account, you can explore more suitable options for mounting baby monitors, beyond the ones mentioned earlier.
Baby · 08/08/2023
5 Best Long Range Baby Monitors: How to Choose & What to Buy
As a new parent, it's understandable that you want to be by your adorable baby's side as much as possible. However, it’s hard to do, and that's where a long-range baby monitor comes in handy, allowing you to keep a watchful eye on your little one at all times. In this article, we'll guide you on how to choose the best long range baby monitor for your needs by exploring the essential criteria and presenting our top 5 recommendations for this year. Let's explore the best long range baby monitor and make your parenting journey smoother! Before Shopping: How to Choose the Best Long-Range Baby Monitor A long-range baby monitor gives you peace of mind when you're not in the same room as your baby or even when you're away from home. Before you order, there are a few things to consider: Signal Range: Be sure to look for a baby monitor with a long transmission range. A long-range baby monitor should be able to transmit audio and video signals even when there are significant distances between the baby's room and your location, so you can check on your baby's status anytime, anywhere in your home. Signal Strength and Security: Ensure that the security camera's signal strength is robust enough to transmit clear and uninterrupted audio-visual signals over long distances, even through obstacles like walls or floors. Additionally, to ensure reliable data transmission and prioritize security, consider choosing a camera equipped with FHSS, DECT technology, or similar features designed to secure wireless data transmission. Ease of Monitoring: You need tofind a user-friendly long-range baby monitor for convenience. It should interact with a receiver or app on your phone that lets you pan, tilt, and zoom the camera to check on your child in real-time. Audio and Video Quality:You should choose a baby monitor with higher audio and video quality so that you can notice and clearly see every movement of your sweet baby. Night vision is essential to take care of your baby in the dark. And for those sweet soothing moments from afar, you can also select a model with two-way audio. Additional Features: There are some useful additional features such as motion detection, instant alerts, lullabies, temperature sensors, and so on. Consider which features are important to you and choose the best long range baby monitor that meets your specific needs. 5 Best Long-Range Baby Monitors Reviews So far, do you have your own criteria in mind? Based on the criteria we mentioned, here are the 5 best long range baby monitors we choose for your reference. eufy E110 SpaceView Baby Monitor Price: $159.99 eufy E110 SpaceView Baby Monitor is the best long range baby monitor with no wifi. Equipped with FHSS technology, this baby monitor provides a stable and secure connection allowing for real-time monitoring on a clear 5-inch screen with zoom capabilities of 1.5x and 2x. Enjoy peace of mind with an impressive 1,000 ft range and a wide 330° field of view. Additionally, the included lens lets you expand the vertical view to an impressive 110°, ensuring you never miss a moment of your baby's precious milestones. It is an ideal long range baby monitor for new parents. No matter when your baby cries, you'll get an instant alert to remind you. This baby monitor delivers encrypted streaming in 720p with night vision, so you can check on your little one anytime with crisp, real-time footage. Plus, the 2900mAh battery lasts between 8 and 15 hours for continuous working. eufy E210 Spaceview Pro Baby Monitor Price: $169.99 eufy E210 Spaceview Pro Baby Monitor, as an updated version of eufy SpaceView Baby Monitor, is also the ideal helper for new parents. Your entire home is covered within its range of up to 1,000 ft. What's more, the camera can pan 330° across the room and tilt up and down from 50° to 110°. With a more powerful 5,200 mAh battery, it can provide up to 30 hours of baby monitoring and the instant alert helps you never miss a thing. This advanced baby monitor offers seamless wireless FHSS transmission, guaranteeing a steady live stream on its large 5-inch monitor display with impressive 720p resolution. Enjoy peace of mind during the nighttime with its exceptional night vision capability, ensuring a clear view of your baby even in low-light conditions. Plus, the convenient zoom function allows you to get a closer look at your little one for added reassurance. With the clear two-way audio, you can talk to your baby from anywhere in your house. To make your parenting experience even better, the monitor features 5 soothing lullabies that can effortlessly lull your baby to sleep, giving you more time to take care of other tasks while ensuring your baby is comforted and safe. Related Products Check out these pages for more information: Best Smart Sock by eufy Best Wifi Baby Monitor by eufy Best Video Baby Monitor Infant Optics Video Baby Monitor Price: $199.99 Infant Optics Video Baby Monitor is one of the best long-distance baby monitors without a Wi-Fi connection, utilizing a secure 2nd generation FHSS frequency for private and interference-free monitoring of your newborn within a range of 300 meters. It offers enhanced monitoring on a 5-inch LCD screen with 720p resolution and improved night vision for clear visuals even in low-light conditions. The monitor is equipped with Automatic Noise Reduction (A.N.R) technology, ensuring that you can hear every move your baby makes with minimal background noise. Nanit Pro Smart Baby Monitor Price: $229.28 Unlike baby monitors that come with a real monitor to watch your baby, the Nanit Pro Smart Baby Monitor allows you to watch your baby from anywhere via its app. Its 130° field of view protects your baby and delivers 1080p video so you can stay in touch at all times. Plus, Nanit's sensor-free sleep and breathing motion tracker will never miss your baby's cry. With its continuous recording, you can access the history to see the baby's patterns as well as personalized sleep-tracking analytics. What's more, the Nanit Pro Smart Baby Monitor offers a split-screen feature if you have more than one baby, so you can monitor two at the same time. VTech VM321-2 Video Baby Monitor Price: $69.99 VTech VM321-2 Video Baby Monitor features two zoom cameras to keep an eye on your baby and stay connected via a 2.8" color LCD screen within a range of up to 1,000 ft. This long range baby monitor uses DECT 6.0 digital technology (using 1.9 GHz frequency) to filter out background noise and transmit encrypted signals safely for baby monitoring. To help you look after your baby, this monitor also offers useful features, like giving you a vibrating sound alert when your baby cries or soothing your baby with 5 different soothing lullabies. Table Comparison After going over the best long range baby monitors of 2023, let's check out the overview of their differences below. Range Angel Transmission Night Vision Resolution Screen Price eufy SpaceView Baby Monitor 1,000ft Pan: 330° Tilt:110° FHSS √ 720p 5-inch $159.99 eufy Spaceview Pro Baby Monitor 1,000ft Pan: 330° Tilt:110° FHSS √ 720p 5-inch $169.99 Infant Optics Video Baby Monitor 300m N/A FHSS √ 720p 5-inch $199.99 Nanit Pro Smart Baby Monitor N/A Pan: 130° WiFi √ 1080p × $229.28 VTech VM321-2 Video Baby Monitor 1,000ft N/A DECT √ N/A 2.8-inch $69.99 Conclusion Baby care can be a lot of work, but you can always reduce your stress with the help of the best long-range baby monitor. If you have no idea how to choose a preferred baby monitor, check out the criteria above and explore your preferred baby monitor. With a dependable baby monitor by your side, you can ensure your little one remains safe and comfortable, providing you with reassurance even when you're away.
Vacuum · 03/08/2023
The 5 Best Lightweight Vacuums: Reviewed in 2024
Are you tired of lugging around heavy vacuums that make cleaning feel like a workout? It's time to embrace a new era of cleaning comfort with our expertly curated list of the 5 best lightweight vacuums! Designed with your convenience in mind, these innovative vacuum cleaners combine power with portability. From elegant cordless models to energy-efficient options, we've uncovered the ultimate lightweight gems that will transform your cleaning experience. Continue reading with us, and we have no doubt you will find a vacuum that suits your needs. Tips for Choosing the Right Lightweight Vacuum Cleaner Selecting the perfect lightweight vacuum can revolutionize your cleaning routine. However, with so many options available, what is the best lightweight vacuum cleaner on the market and what criteria need to be considered when judging its quality? Here are some essential tips to make the process easier: Weight Matters: Choose a vacuum with lightweight construction, usually weighing less than 10 pounds. This ensures easy maneuverability, allowing you to glide through your home effortlessly. Power and Suction: A good vacuum should have sufficient power and strong suction capabilities (normally ranging from 100 watts to 300 watts) to effectively pick up dirt and debris on various surfaces. Versatility: With rotating functionality, detachable attachments, various brush rolls, and adjustable settings, it makes cleaning around furniture and tight spaces a breeze. Cordless Convenience: Cordless vacuums offer unmatched flexibility and portability. Always opt for products with long-lasting battery life to clean multiple rooms without interruptions. Filter Efficiency: Ensure the vacuum has efficient filters. HEPA filters are excellent at trapping tiny particles and ensuring cleaner air quality. Noise Level: Consider a vacuum with a lower noise levelfor a quieter cleaning experience, especially in noise-sensitive environments or homes with young children. Types of flooring: Ensure that the vacuum cleaner is suitable for the different types of flooring in your home, such as hardwood, carpet, and tile, to ensure one vacuum can handle all your cleaning needs throughout the entire house. Bagless vs. Bagged: Decide between bagless or bagged options based on your preferences. Bagless vacuums are more cost-effective, while bagged vacuums may contain allergens better. Certainly, in addition to the above tips, you can also consider factors like the vacuum cleaner's warranty and customer reviews based on your individual needs. All of these can provide valuable reference information to help you choose the best lightweight vacuum cleaner. 5 Best Lightweight Vacuum Recommended Building on the tips mentioned above, we have also meticulously selected the 5 best lightweight vacuums. Each of them has its unique strengths. Now, let's take a closer look at each one together. eufy Lightweight Cordless Vacuum (STEAM VERSION) The first one I am going to introduce is the MACH V1 Ultra Steam Vacuum and Mop, an incredibly versatile and budget-friendly vacuum cleaner. With its all-in-one design, it offers vacuum, steam, and mop functions for complete floor cleaning. The Eco-Clean Ozone™ technology efficiently eliminates up to 99.9%* of common germs and odors, while remaining safe for pets and children. Moreover, its Always Clean Mop™ feature ensures the mop is washed during cleaning to prevent floor recontamination. The Triple Self-Cleaning System enables a thorough post-cleaning process, with the mop being washed using cleaning fluid, ozone to minimize odors and germs, and hot air circulation to ensure 100% dryness. This outstanding vacuum and mop combo guarantees a powerful and hygienic floor cleaning experience like no other and it will be your top choice among the best lightweight cordless vacuums. Shark IZ462H Vertex Ultra Lightweight Vacuum The second recommended vacuum is the Shark IZ462H Vertex Ultra Lightweight Vacuum. It provides incredible cleaning performance with hypervelocity accelerated suction in an ultra-lightweight design. And its removable battery ensures up to 60 minutes of runtime, allowing for extended cleaning sessions without interruption. Furthermore, the Shark IZ462H Vertex is also a cordless vacuum, giving you the freedom from cords and outlets during your cleaning process. You can move more conveniently between rooms and from floor to floor without being restricted by wires. This leads to a faster and more effective cleaning process. Briefly, featuring deep-cleaning powerful for all surfaces, a self-cleaning brush roll for pet hair pickup, and all other functions, Shark IZ462H Vertex Ultra Lightweight Vacuum has a superior cleaning performance. Hoover Small Upright Vacuum Cleaner If you're on a tight budget, you might want to consider the Hoover Small Upright Vacuum Cleaner. Not only is it reasonably priced, but it's also highly practical. This cordless vacuum comes with a detachable ONEPWR 4.0 Ah MAX battery, providing you with the convenience of cord-free operation and flexible mobility. Plus, weighing under 9 pounds, it feels lightweight during use, simplifying your cleaning chores. Ideal for pet owners, this upright vacuum effortlessly tackles stubborn pet hair and dirt throughout your home. Unlike traditional stick vacuums, it's equipped with a large-capacity dustbin, meaning fewer trips to the trash can. Moreover, you can adjust the brush roll and suction settings to optimize performance on both carpets and hard floors with just a button press. So, if you're in the market looking for a relatively affordable cordless vacuum, the Hoover Small Upright Vacuum Cleaner is a great option that can meet your basic daily cleaning needs. Dyson Slim Cordless Lightweight Vacuum Dyson is renowned for its design and manufacture of various household appliances. That's why the Dyson Slim Cordless Lightweight Vacuum is also a great choice. It boasts laser illumination, cordless convenience, and an LCD screen display that shows the total particles picked up as you clean, along with power mode, maintenance alerts, and remaining run time to the second. Thanks to Dyson DLS Technology, the vacuum intelligently adapts power based on detected debris for efficient cleaning. Moreover, the Dyson Slim Cordless Vacuum features advanced whole-machine filtration, trapping 99.99% of particles as small as 0.3 microns and expelling cleaner air. Made from durable and lightweight materials, it comes with a 2-year warranty and lifetime Dyson support, guaranteeing its reliability and long-lasting performance. If you're a loyal fan of Dyson products or prefer slim vacuum cleaners that offer portability and lightweight convenience, this product is worth considering. Bissell Cordless Handheld Lightweight Vacuum The Bissell Cordless Handheld Lightweight Vacuum is a handheld vacuum cleaner that comes at a relatively affordable price. Its triple-level filtration system ensures improved cleaning performance. And with a 14V lithium-ion battery, it provides strong and long-lasting cleaning power. Moreover, it has a set of specialized pet tools, including the motorized brush tool, upholstery tool, and crevice tool, making it perfect for tackling various pet messes. Also, it comes with a spacious and effortless-to-empty dirt bin, tackling pet hair removal with ease. In short, this handheld vacuum is an excellent option for pet owners seeking a cost-effective, convenient, and efficient cleaning solution. Conclusion In conclusion, these 5 best lightweight vacuums offer a range of outstanding features to suit different cleaning needs. Whether you prioritize overall performance, pet hair removal, or cordless convenience, there's a perfect vacuum for you. No matter which one you choose, you'll be equipped with a powerful and efficient cleaning tool. Don't let heavy vacuums weigh you down, embrace the lightweight revolution and keep your home spotless with ease!
Video doorbell · 03/08/2023
Video Doorbell vs Security Camera, Which Is Right for You?
Video doorbell vs security camera, which one is better? If you live in a single-family home with a front door, you may be considering either a video doorbell or a security camera to improve your home security. Indeed, these devices offer improved video quality and security, making them the ideal alternative for home monitoring. As an effective security solution, video doorbells and security cameras share some common features, while at the same time, they are different in many ways. In this post, we'll compare video doorbells and security cameras so that you can quickly learn the differences between them and get the one that's right for you. Just keep reading. Video Doorbell vs Security Camera: Unveiling the DifferencesVideo doorbells and security cameras are both important home security devices. They have some common features such as motion detection, 2-way audio, and night vision to help you keep an eye on your property. However, there are several key differences between the two types of devices, including daily uses, field of view, installation, cost, and so on. If you're unsure which you should get, let's unveil the differences together. Everyday Use Situations Although video doorbells can also be considered as a type of security camera, they are designed for different application scenarios. For example, video doorbells are primarily used to monitor the front door of a home or building. After a visitor rings the doorbell, you can hear the chime inside the house and see who the person is on your smartphone or on the video doorbell's display, and then decide whether to go to the door and greet them. Security cameras, on the other hand, are designed to provide comprehensive surveillance of your property. They can be installed in various locations around your home or building, such as backyards, driveways, and other outdoor areas. For apartment dwellers, video doorbells are suitable for monitoring the front door and greeting customers. For owners of a single house, security cameras are better suited for comprehensive property surveillance and intruder detection. Device Installation Video doorbells are typically installed near the front door while security cameras can be installed in a variety of hard-to-reach locations or even some hidden places, such as on-the-wall corners. What is more, as for installation complexity, most video doorbells can be installed by simply mounting them to your door frame with only a few screws. However, security cameras may require more advanced installation, such as running wires. Compared with security cameras, video doorbells are easier to install, and you can even do it yourself. However, if you'd prefer to have the video doorbell installation done by professionals, whether it's cameras or doorbells, you can get help from specialized installers. Video Coverage Due to the location and angle of the installation, video doorbells and security cameras have different coverage areas. Video doorbells typically have a narrower field of view than security cameras, as they are designed to focus on the area around the front door, typically around 100-120 degrees. Security cameras, on the other hand, can have a wider field of view, typically around 180-360 degrees, and may be able to capture footage of larger areas. Besides, some security cameras may offer a zoom feature, allowing you to zoom in on a specific part of a video. Overall, video doorbells can only monitor the area around the front door, while security cameras are designed for more comprehensive surveillance of larger areas. Detection Function Basically, both security cameras and doorbells have motion detection, and sound detection, which can trigger recordings and alerts to inform you what is happening outside your door, even if you're not at home. In addition, they also have special features. Video doorbells may have package detection features that can trigger alerts when a package is delivered or removed from the doorstep. Some advanced security cameras may use AI to analyze video footage and detect anomalies or potential threats. This can include identifying unusual behavior or objects in the footage and triggering alerts or actions based on this information. When comparing doorbell security cameras to surveillance cameras, the latter is typically more advanced in terms of its detection capabilities, with features like AI-powered detection. Video Quality In addition to the above differences, security cameras and video doorbells also differ in the video quality that they provide. The recording of video doorbells typically has a lower resolution than security cameras. This is because video doorbells need to be small and compact enough to fit on a door frame, while security cameras can be larger and more powerful. But both video doorbells and security cameras feature night vision, allowing them to capture clear footage even in low-light conditions. In comparison, security cameras are often more advanced in terms of their video quality than video doorbells, as they are designed for more comprehensive surveillance applications. Price Security cameras and video doorbells are both excellent solutions to boost your home security. However, in terms of pricing, video doorbells are generally less expensive than security cameras. Basic video doorbells with limited features may be available for as little as $50, while more advanced models with features like HD video, night vision, and motion detection can cost upwards of $200. On the other hand, security cameras can range in price from around $50 for basic models up to $500 for high-end systems with advanced features like facial recognition and AI-powered detection. But overall, prices differ for different brands and models. Before purchasing, it's always a good idea to scrutinize the specifications and features, and compare them with other products to find the option that best meets your needs and budget. Video Doorbell vs Security Camera: Advantages and Disadvantages With the above information, you must be exclaiming that video doorbells and security cameras really differ in many ways, such as price, installation, and video coverage. To help you easily grasp the key information, we've listed the pros & cons concisely below. Video Doorbell Security Camera Advantages • Enhanced front door security • Easy to install and use • Motion detection, sound detection, and package detection • More affordable • Can be installed in multiple locations around your home or business • Larger coverage of the area • Motion detection, sound detection, and AI-powered detection • Higher image resolution Disadvantages • Limited coverage • Lower resolution • Privacy concern • More difficult to install • More expensive • Privacy concern All in all, both video doorbells and security cameras have advantages and disadvantages, and the best way to decide which one is right for you depends on your specific needs and budget. If you're on a budget, it's perfectly fine to buy both of them, which will help you build a more secure home. Top-Recommended Video Doorbell and Security Camera Options Based on the comparison table provided earlier, I assume you have already come to a decision regarding which one to choose, a video doorbell or a security camera. However, if you find yourself overwhelmed by the numerous brands and products on the market, here are the two top recommendations tailored for you. S330 Wired Video Doorbell - Best Delivery Guard The eufy S330 Wired Video Doorbell offers a variety of features such as facial recognition, human detection, and package detection. When your package arrives, it can serve as a delivery guard and send you pick-up reminders. It also has a 2K with HDR camera that provides clear video footage even in low light conditions. And compared to single-camera doorbells, its dual-cam technology offers a relatively larger view of your porch. Even better, its built-in two-way audio can help you communicate in real-time with anyone in the coverage area. eufy S230 SoloCam Security Camera - Solar Power Charged The eufy S230 SoloCam Security Camera is a wireless, solar-powered charged security camera that charges itself so you never have to worry about changing batteries. It offers 2K resolution video recording with two-way audio to help you capture every event and communicate with people. Besides, the camera has a built-in spotlight that can be used to illuminate your front porch at night, while the color night vision picks up details in the dark up to 8 meters away. In addition, one of its standout features is its advanced AI person detection, which allows it to distinguish between humans and other objects. And it's weather-resistant, with an IP67 rating, so you can install it outdoors without having to worry about it getting damaged by rain or snow. Conclusion In conclusion, this article has explored the key information on video doorbells vs security cameras. Both of them are great tools to improve your home security. And whether you should get a video doorbell or a security camera is based on your specific needs and budget. A video doorbell may be the better choice if you are looking for a device that is easy to install and use, which can monitor activity at your front door and communicate with visitors. If you are looking for a device that can provide more coverage for your home and has more advanced features, then a security camera system may be right for you.
Smart Lock · 03/08/2023
The Ultimate Guide to Choosing a Smart Lock for Your Airbnb Property
In an era of increasing technological advancements, hosting an Airbnb property requires not only providing comfort and style but also ensuring safety and convenience through modern solutions. One such innovation that has become increasingly popular among hosts is the use of Video Smart Lock S330. With various options available in the market, choosing the perfect smart lock can be quite daunting. In this blog post, we will explore essential factors to consider when selecting a smart lock for your Airbnb property. 1. Compatibility with Your Door Before diving into different makes and models, it's crucial to determine if a smart lock will work with your existing door setup. Begin by checking the type of deadbolt on your door (single-cylinder or double-cylinder), as some smart locks may not support certain types. 2. Level of Security Security should be a top priority when choosing a smart lock for your Airbnb property. Look for models that offer strong encryption methods like AES 128-bit encryption or better yet, end-to-end encryption protecting communication between devices from potential hackers. 3. Guest Access Options As an Airbnb host, you'll need flexible access options allowing guests easy entry while maintaining security levels high during their stay - all without having physical keys exchanged hands! Some popular access methods include: PIN Codes: Temporary codes assigned to guests which expire after their stay. Mobile App Access: Guests can unlock doors using their smartphones. Key Fobs: A small device that allows entry upon proximity detection without requiring physical contact. 4. Integration with Other Devices & Platforms A well-rounded experience often involves seamless integration between devices within one ecosystem; therefore it's essential to ensure compatibility between chosen products/platforms – e.g., Google Home, Amazon Alexa, or Apple Homekit – when selecting a smart lock for your Airbnb property. 5. Battery Life & Backup Options Most smart locks operate on batteries, so considering battery life is essential. Look for models that offer extended battery life and low-battery notifications. Additionally, backup options like physical keys or external power sources can be beneficial during emergency situations. 6. Ease of Installation & Use As an Airbnb host, you want to minimize the time spent on installations and troubleshooting; thus, opting for a user-friendly smart lock with straightforward installation instructions is crucial. Also, consider how easy it will be for your guests to use the lock without requiring extensive guidance from you. 7. Price & Warranty Lastly, consider your budget constraints while choosing the right smart lock but avoid compromising on security features in favor of cost savings alone! A reliable warranty period also provides peace of mind knowing that any issues arising with the product will be addressed promptly by manufacturers. In conclusion, choosing the perfect smart lock for your Airbnb property involves weighing multiple factors like compatibility with existing doors/setup; level of security; guest access options; integration capabilities; battery life/backup options; ease of installation/use and price/warranty considerations before making an informed decision about which product best meets requirements ensuring happy guests safe stays every time!
Video doorbell · 01/08/2023
4 Best Doorbell Cameras Without Subscription: Buyers Guide
With the desire to provide additional advanced features, many doorbell camera brands offer subscription services with monthly fees. These cumulative costs can be quite expensive, posing a financial burden for some households. As a result, more and more consumers are seeking the best doorbell cameras without a subscription as an alternative. In this article, we will recommend the 4 best video doorbell cameras that don't require a subscription and provide a plethora of functionalities. These cameras offer not only great value for money but also boast high-definition video quality, intelligent motion detection, two-way audio communication, and more, ensuring optimal home security without the hassle of costly subscription fees. Possible Differences Between Doorbell Cameras with or Without Subscription When considering a doorbell camera, there may be differences between subscription-based and non-subscription options. In most cases, subscription models offer slightly more comprehensive features but require a monthly payment, while non-subscription models do not require any ongoing fees but some of them may come with certain limitations on features, storage, and personalized settings. To make a well-informed purchase decision that meets your specific needs, it is crucial to grasp the potentially significant differences. Read on to find out. H3: Functionality Subscribed doorbell cameras provide a range of advanced features, including cloud storage for video recordings, higher video resolutions, intelligent motion detection with facial recognition, and customizable alerts. With these added benefits, you can securely access and review footage from anywhere. On the other hand, non-subscribed doorbell cameras typically offer more basic features, such as real-time video monitoring and two-way audio communication. While still valuable for home security, these cameras may not provide the same level of enhanced functionality as their subscribed counterparts. Cloud Storage and Video Playback Doorbell cameras with a subscription generally provide cloud storage for video recordings. This allows users to access and review past footage from anywhere, even if the camera is stolen or damaged. Some doorbell cameras without subscriptions may still offer video recording, but the storage might be limited to local options, such as an SD card, which may have space restrictions. Ownership and Privacy For subscription-based doorbell cameras, some manufacturers may claim ownership of the video data stored on their cloud servers, which may raise concerns among users about the possible sharing or sale of their personal data. On the other hand, some non-subscription doorbell cameras tend to give users more control over their video data because recordings are typically stored locally on the device, avoiding the involvement of third-party cloud storage. 4 Best Doorbell Cameras Without Subscription and Restriction Recommended Now that you are familiar with the differences mentioned above, you have come to the right place if you still think that no subscription-required doorbell cameras are for you. In the following sections, we'll introduce you to 4 of the best doorbell camera without subscription that meet your needs and provide superior home security features without recurring costs. eufy Dual Cam Video Doorbell (Delivery Guard) As one of the best wired doorbell camera without subscription, eufy S330 Video Doorbell (Wired) features Dual Cam technology, which greatly expands the doorbell's field of view, allowing you to clearly see the lower area of your doorstep clearly. Additionally, a remarkable feature called Delivery Guard is equipped, which provides you with a notification when a package is being delivered. This camera can also utilize its dual cameras to identify whether the person picking up the package at the door is a member of your family, ensuring the security of your deliveries. It also stands out with other exceptional features, including 2K resolution that delivers crisp and detailed images, HDR technology that enhances image quality in various lighting conditions, two-Way Audio that enables real-time communication with visitors, etc. Besides, with 8GB of local storage and no monthly fees, it allows you to securely store up to 90 days of recorded footage. Pros: Dual Cam Technology Delivery Guard 3-Second Preview Videos 2K with HDR No Monthly Fee Cons: Wired Installation Limited Local Storage Pricing: $199.99 H3: eufy Wireless Video Doorbell (Expanded Field of View) The eufy S220 Wireless Video Doorbell is one of the best wireless doorbell camera without subscription. With its expanded field of view, 2K resolution, and human body and face detection, you'll enjoy comprehensive coverage and sharp video quality. Meanwhile, the two-way audio facilitates seamless communication with visitors. It allows you to choose between battery-powered or wired installation for flexible power options. You can easily set it up yourself for hassle-free integration. Moreover, the 16GB local storage on HomeBase ensures ample recording capacity without the need for cloud subscriptions. Additionally, the eufy S220 Wireless Video Doorbell offers multiple chime options, including using the HomeBase speaker, an Alexa Echo device, or compatibility with a mechanical chime (not a digital chime), providing a personalized and versatile experience. Pros: 5x the Clarity Dual Power Options Expanded Field of View Next-Level Detection Cons: Limited Remote Access Internet Dependence for Certain Features Pricing: $199.99 Reolink Wired WiFi Video Doorbell (Easy to Install) Reolink Wired WiFi Video Doorbell is a top-notch smart home security solution designed to enhance doorstep safety and convenience. It stands out with its 5MP camera resolution, two-way audio, intelligent detection system, and expansive 256GB SD card storage, offering exceptional video clarity, seamless communication, and enhanced security. One excellent feature of the Reolink Video Doorbell is its easy installation process. With user-friendly setup instructions and included installation accessories, you can effortlessly install the doorbell, making it a hassle-free addition to your home security system. Pros: 2K+ (5MP) HD Video 4/5GHz WiFi Person Detection Works with Reolink NVRs Cons: Internet Dependency Limited Local Storage Pricing: $ 109.99 Lorex LNWDB1 1080P WiFi Video Doorbell (Best Budget) Lorex LNWDB1 1080P WiFi Video Doorbell is an advanced and cost-effective home security solution. With its high-definition video resolution, motion detection, and two-way audio, it offers sharp and detailed visuals while enabling real-time communication with visitors. The doorbell's night vision ensures clear footage even in low-light conditions, and the wide-angle lens provides full coverage of your property. Its wireless connectivity simplifies installation, and the cloud storage option allows secure access to your recordings. With the Lorex LNWDB1, you get exceptional features at a budget-friendly price, making it a cost-effective choice for anyone seeking reliable and advanced home security. Pros: Cost-effective price Real-Time Alerts Night Vision Wireless Connectivity Cons: Internet Dependency Limited Local Storage Limited Compatibility Pricing: $89.00 Conclusion Now you have learned the 4 best doorbell camera without subscription. Whether you prioritize advanced AI-powered detection, expanded field of view, easy installation, or cost-effectiveness, there is a perfect choice for you among these top-notch options. So, start your selection process now and bring peace of mind to your doorstep with the ideal doorbell camera tailored to your needs!
Video doorbell · 01/08/2023
Discover the Best Doorbell Camera of 2024: Unlocking Security
One of the smartest ways to enhance the safety of your household is by installing a doorbell camera. These innovative devices not only let you see who’s at your door, but also allow you to interact with them through audio even when you aren’t home. If you are asking “What is the best doorbell camera of 2024?”, you’ve come to the right place. In this comprehensive guide, we’ll review the top 7 doorbell cameras on the market this year and provide you with tips on how to choose the best doorbell camera to meet your security needs. Read on to make an informed decision. What Are Doorbell Cameras? Doorbell cameras, also known as video doorbells, are small cameras integrated into doorbells that allow you to monitor your front doors via live video feeds. When someone presses the doorbell, or when motion is detected, the camera activates and sends a real-time video alert to your smartphone or other connected devices. Many models feature two-way audio communication, enabling you to speak directly with visitors whether you’re home or not. This is particularly useful for verifying a visitor’s identity or handling deliveries remotely. Advanced models also come equipped with features like night vision, high-definition video quality, facial recognition technology, and integration with other smart home devices. Top 7 Doorbell Cameras Let’s delve into the top 7 doorbell cameras on the market that cater to different needs, from wired models offering continuous power to versatile battery-operated options that fit every type of household: Best Wired Doorbell Camera: eufy Video Doorbell (Wired) S330 The eufy Video Doorbell (Wired) S330 stands out as the best wired option, ensuring reliability without the worry of battery life. It features innovative Dual Cam Technology with a front camera that offers 2K resolution and HDR with a 160° field of view, alongside a package camera at 97° and 1080p resolution for focused package monitoring, ensuring comprehensive coverage of your doorstep. This model does not require a monthly subscription fee, thanks to its 8GB of built-in local storage. It also supports two-way audio and smart AI features such as package detection, facial recognition, and human detection. The S330 is IP65 rated for weather resistance and is compatible with Google Assistant and Amazon Alexa, allowing seamless integration into your smart home systems. Best Doorbell Camera Without Subscription: eufy Video Doorbell S220 Opt for the eufy Video Doorbell S220 to enjoy crisp images without ongoing costs, thanks to its 16GB local storage secured by AES-128 encryption. Equipped with a Sony 2K sensor and professional-grade lens, this device delivers unparalleled clarity. It offers convenient dual power options—operate it up to six months on a single charge or connect it permanently with a wired setup. The S220’s expansive 4:3 aspect ratio provides a head-to-toe view of visitors, while advanced detection features let you customize motion sensing and receive real-time alerts. It also features two-way audio with the ability to record and use pre-recorded responses for interacting with visitors. Like its sibling, this best wireless doorbell with camera integrates smoothly with Google Assistant and Amazon Alexa. Best Battery Doorbell Camera: Google Nest Doorbell (Battery) The Google Nest Doorbell (Battery) is an intelligent, self-sufficient solution for those who prefer a wireless setup. This camera differentiates between people, packages, animals, and vehicles, sending tailored alerts directly to your phone via the Google Home app. It offers HD video streaming with HDR and night vision, ensuring you never miss a detail. In case of a Wi-Fi disruption or power outage, it stores up to one hour of recorded events. Installation is straightforward, thanks to its wireless design, making it adaptable for any home. The device supports two-way communication, allowing you to interact with visitors remotely through pre-recorded messages or live chat. Compatible with Google Nest and Amazon smart displays, it enhances your ability to monitor your doorstep effectively. Best Wireless Doorbell Camera for Value: Blink Video Doorbell The Blink Video Doorbell offers exceptional value at just $41.99, providing high-quality 1080p HD video during the day and infrared night vision after dark. It features a long-lasting battery, allowing you to install the device wire-free or connect it to existing doorbell wiring. This flexibility makes it ideal for any home setup. You can receive motion-activated alerts and communicate with visitors via two-way audio. It integrates easily with Alexa for convenient voice commands and can store video clips in the cloud with a free trial of the Blink Subscription Plan, or locally when paired with a Sync Module 2 and a USB drive (each sold separately). Setup is straightforward, involving just two AA batteries and a quick app connection. Best Doorbell Camera for Apartments: Arlo Video Doorbell 2K (2nd Generation) The Arlo Video Doorbell 2K (2nd Generation) is perfect for apartment dwellers seeking enhanced security. It delivers sharp 2K HDR video, allowing you to zoom in and see fine details clearly. The doorbell camera sends instant notifications upon motion detection and offers live streaming capabilities. With 2-way audio and pre-recorded message options, you can easily communicate with visitors. The included Arlo Secure plan trial offers additional features such as cloud storage and advanced detection capabilities, which continue with a paid subscription. Its Color Night Vision technology, and a built-in siren make this camera a robust choice for any apartment. It also offers multiple power options, including a rechargeable battery and hardwiring. Best Head-to-Toe Doorbell Camera: Ring Wired Doorbell Pro 2 The Ring Wired Doorbell Pro 2 is the ultimate choice for those needing comprehensive doorstep surveillance. This best Ring doorbell camera provides head-to-toe HD+ 1536p video quality, enhanced with two-way audio and 3D motion detection. The built-in Alexa Greetings feature, available with a Ring Protect Plan subscription, greets visitors and handles interactions. Advanced motion settings, including Bird’s Eye View, offer a detailed overview of movements near your home, allowing you to pinpoint and customize detection zones. It is hardwired, ensuring continuous operation and peace of mind. Compatible with select Alexa-enabled devices, it supports in-home monitoring and can automatically display the video feed on Echo Show or Fire TV when linked with a Ring Protect Plan. Best Doorbell Camera for High Resolution: Lorex 4K Wired Video Doorbell For those who prioritize crystal-clear video quality, the Lorex 4K Wired Video Doorbell is a top contender. It delivers sharp 4K resolution, capturing enhanced details around your doorstep, even in low-light conditions thanks to its Color Night Vision. This doorbell camera excels in functionality with person, vehicle, animal, and package detection features, ensuring comprehensive monitoring. It also offers 2-way audio with quick response messages for convenient communication. Additional features include a motion-activated nightlight and a full head-to-toe view (9:16 aspect ratio). With a pre-installed 32GB MicroSD card, expandable up to 256GB, and no monthly subscription requirements, the Lorex doorbell provides excellent value and high-end performance. How to Choose the Best Doorbell Camera? Selecting the best doorbell camera for your home involves balancing several factors to find the perfect match for your security needs and lifestyle. Here’s what to consider: Video Quality: The resolution of your doorbell camera is crucial as it determines how clearly you can see your visitors. Look for cameras that offer at least 1080p resolution for clear footage. Higher resolutions like 2K or 4K provide even greater detail, which can be beneficial for identifying faces or other important details. Field of View: The camera’s field of view (FOV) dictates how much of your doorstep and surrounding area you can see. A wider FOV (160 degrees or more) helps you monitor a larger area. Power Source: Decide if you want a hardwired doorbell camera or a battery-powered unit. Hardwired cameras are ideal for continuous operation without worrying about battery life, while battery-powered models offer easier installation and flexibility in placement. Storage Options: Consider how you want your footage stored. Some cameras offer local storage on an SD card, which can save you from ongoing cloud storage fees. Others provide cloud storage solutions for easy access and larger capacity, requiring a monthly subscription. Two-Way Audio: This feature allows you to communicate with visitors through your doorbell camera, whether you’re home or away. Ensure the audio quality is clear and the system is responsive. Night Vision: Night vision for doorbell cameras is essential for providing round-the-clock security, enabling you to see who is at your door or what happens in front of your house at any hour. Look for cameras that provide enhanced infrared (IR) Night Vision or Color Night Vision. Smart Features: Look for cameras with advanced features such as precise motion detection and AI capabilities like facial recognition or package detection. These features enhance security by providing more precise alerts and better monitoring. Compatibility with Smart Home Systems: If you have a smart home system, check the doorbell camera’s compatibility with your existing devices. Integration with platforms like Amazon Alexa, Google Assistant, or Apple HomeKit can streamline your home automation and security. Weather Resistance: Ensure that the doorbell camera is suitable for your climate. It should be able to withstand your local weather conditions, be it rain, snow, or extreme temperatures. Ease of Installation: Consider how easy the system is to install. Some models come with everything needed for installation, while others might require professional installation, especially if they’re hardwired. Privacy and Security: Given that these devices are connected to the internet, choose a doorbell camera that offers strong encryption and security features to protect your data from breaches. Cost: Finally, balance the cost of the doorbell camera with the features it offers. More features and higher quality generally increase the price, so consider which features are most important to you and whether they justify the expense. Conclusion Doorbell cameras offer a proactive approach to home security, allowing you to monitor your doorstep and interact with visitors remotely. Throughout this guide, we’ve reviewed some of the best video doorbell cameras available and discussed key features to consider before making a purchase. With the right information and a clear understanding of your own security needs, you’re now well-equipped to select the best doorbell camera that offers peace of mind and keeps your home and loved ones safe. FAQs Do any doorbell cameras record all the time? Most doorbell cameras utilize motion-activated recording to conserve storage and battery life. However, some models offer continuous recording capabilities with optional subscription services for cloud storage. Are camera doorbells worth it? Camera doorbells provide added security and convenience, allowing you to monitor your doorstep and interact with visitors from anywhere using your smartphone. While they require an initial investment, many homeowners find the peace of mind they offer to be invaluable. Is it better to have a doorbell camera or an outdoor camera? Doorbell cameras and outdoor cameras serve distinct purposes in a home security setup. A doorbell camera is ideal for monitoring your front door and receiving alerts when someone approaches, making it great for closely monitoring deliveries and visitors. An outdoor camera, on the other hand, provides a broader view of your property, which is better for overall surveillance of yards, driveways, and other outdoor spaces. Consider what areas of your home you want to monitor most to decide which type of camera is best for you.
Vacuum · 31/07/2023
How to Use a Vacuum Cleaner: 6 Easy-to-Follow Steps
House cleaning can be a daunting task, and for many of us, it can feel quite bothersome. However, maintaining a clean indoor environment is essential for a healthy and comfortable living space. Among the various cleaning tools available, a vacuum cleaner stands out as a practical and efficient solution. If you know how to use a vacuum cleaner correctly, it can significantly ease the burden of routine cleaning. In just six simple steps, you can transform your living space into a highly cleaned and tidy oasis. Let's explore the proper techniques for using a vacuum cleaner and make your cleaning experience a breeze. 6 Steps to Properly Use a Vacuum Cleaner How to properly vacuum? Follow these 6 steps to get the most out of your vacuum cleaner and keep your house tidy. Step 1: Dust Your Furniture and Clear the Area for Vacuuming To prepare for vacuuming, it’s recommended that you first wipe all the dust from your furniture down to the floor. Then remove the chairs, tables, sofas, etc. to make room for the easier vacuuming process. Simple as this step is, it can greatly improve your vacuuming efficiency. Step 2: Prepare the Vacuum Cleaner The next step is to prepare the vacuum cleaner and make regular adjustments before you start cleaning. For example, you need to make sure that the vacuum bag has enough room to collect the dust; check that the filters are clean to get the most cleaning effect. Step 3: Adjust Settings and Attachments Now it is time to set up your cleaner properly. Note that it's important to choose the appropriate cleaning mode and attachments for different cleaning purposes. Typically, a vacuum cleaner offers you several cleaning modes to clean different areas and objects, such as floors, carpets, area rugs, and so on. For example, if you are using an all-in-one vacuum cleaner designed for both hard floors and carpets, like the MACH V1 Ultra Steam Vacuum and Mop, you should use the stream mode for floors and the vacuum mode for carpets. Step 4: Vacuum the Area Slowly When you're vacuuming to clean your room, please go slowly as you move the cleaner back and forth to make sure it fully absorbs the dust from the floor or dirty rugs. If you rush the cleaning, the vacuum cleaner won't have enough time to do the cleaning and remove all the dirty things for you effectively. It is also recommended that you reserve the vacuuming process from the opposite sides, which further ensures you a deep clean to pick up the missed dust staying on the floor or carpets. Step 5: Pay Attention to Corners and Edges Don't miss the nooks and crannies in your room! In order to effectively and thoroughly vacuum these places, you will need to change to a more appropriate accessory or some thinner nozzles to make sure the vacuum cleaner can completely pass through them. Otherwise, dust will still be left in the corners and edges. Step 6: Complete the Vacuuming Process and Empty the Dust Container When you've finished vacuuming, there's one last thing you need to do - empty the dust container in preparation for the next cleaning. Be careful when moving the container to prevent the dust from escaping. If necessary, you can also clean the filter in advance after vacuuming. Finally, remove all vacuum attachments and place the vacuum cleaner in a safe place. Related Products Check out these pages for more information: Best Handheld Vacuums Best Cordless Vacuum Cleaner Best Vacuum Mop Do's and Don'ts of Using a Vacuum Cleaner After you master the basic vacuuming procedures and some details you need to pay attention to while using the vacuum cleaner practically, here further inform you with some do's and don'ts guiding you on how to use a vacuum cleaner more properly. Do's Do clean up the dust filters regularly to make the vacuum cleaner work effectively. Do use suitable nozzles for vacuum cleaners to function different cleaning jobs. Do clear hairs and fibers stuckon the brush rollers to enable a smooth vacuuming experience. Do remember to check the vacuum bag to make sure enough space before starting vacuuming. Do use the vacuum cleaner properly and smoothly but not violently. Don'ts Don’t leave some big items to stop the vacuum cleaner from performing properly. Don’t keep using the vacuum cleaner once it sounds unusual or comes out with smells from the machine. Don’t repair the vacuum cleaner by yourself as it could be hard to handle. Don’t directly put your vacuum cleaner in water toget it wet improperly. Don’t put your vacuum cleaner in places where your kids and pets can reach easily. Conclusion Now that you should know how to use a vacuum cleaner properly for doing the cleaning chore effectively, it's time to take action. Remember that using the best way to vacuum can save your effort and get effective cleanup outputs while greatly extending the life of your vacuum cleaner and keeping it always functioning in good status.
Vacuum · 31/07/2023
How to Fix a Vacuum Cleaner with No Suction: Possible Reasons and Fixes
A malfunctioning vacuum cleaner may ruin your day when you rise and shine in beautiful daylight then plan to clean up the house. However, before you consider replacing your machine, there are several possible reasons for the loss of suction that you can investigate and resolve on your own. Let's check out the following fixes first to see how to fix a vacuum cleaner with no suction in 7 aspects. Be confident. You can repair the vacuum not sucking issue on your own. Why is My Vacuum Not Suctioning and How to Fix a Vacuum Cleaner with No Suction There are many possible causes that may result in a vacuum not picking up. Let’s go over the solutions below one after one. Check the Vacuum Bag or Canister Firstly, if you have used the cleaner for a long time without changing the bag or canister, you should check whether the bag or canister is full of dirt and debris. If the bag or canister becomes clogged with dust, the airflow of the cleaner may be reduced, resulting in a lack of suction. In this situation, try emptying the canister or replacing it with a new bag and see if the cleaner works normally. Check If the Filters are Clogged A vacuum cleaner may have several filters to trap dust and debris and prevent it from recirculating into the air. These filters can become clogged with accumulated dust after prolonged use. Therefore, you should rinse and clean washable filters under running water (remember to dry them before using them again). As for non-washable filters, simply replace them with new ones to solve the problem of the vacuum not sucking. Inspect the Hose for Blockage Air passes the hose to create the suction power of a vacuum cleaner. Similarly, if the hose is blocked by accumulated dirt, debris, or objects, then the air cannot travel through the hose and the vacuum cleaner will lose the power of suction. In this case, disconnect the hose and wand from the cleaner and use a flashlight to see if there is a blockage inside. If so, use a long, flexible, soft object to gently push it out and avoid damaging the hose. Inspect the Floorhead and Rotating Brush for Issues To solve the vacuum lost suction problem, you can also check the floorhead and rotating brush. A tangle of debris, such as hair or thread, can interfere with suction. Use scissors or a utility knife to remove any visible debris. Then thoroughly clean the floorhead and brush. Check the Vacuum Cleaner's Power Cord and Plug Don't forget to inspect whether the power cord and plug are well connected and working normally. Meanwhile, check for any damage to the cord, such as cuts, fraying, or exposed wires. If yes, you may need to purchase a new cord and plug. Also, if the outlet is broken, plug the vacuum into a different outlet and see if it turns on. Make Sure All Parts of the Vacuum are Attached Properly In addition to clogging, if one of the parts of the cleaner falls apart and loses its connection, it will also stop the cleaner from picking up dirt and debris. Therefore, you can go through all the parts of the cleaner and check that they are securely attached. Also check for any visible leaks or cracks that could reduce suction. See If There Is a Problem with the Motor Pay attention, if everything is running fine but the motor is making an abnormal noise, the motor may be the culprit. To check for motor failure, unplug the cleaner for safety and locate the motor housing on the back of the unit. Refer to the owner's manual to remove any screws or clips. Then inspect for visible damage such as burned wires, loose connections, or excessive dirt and debris. Also check the motor fan blades for any blockages. Finally, perform a bump test if necessary. If it's the motor that's causing the vacuum to lose suction, you'll need to contact a professional repair service for motor-related issues. Additional Tips for Using a Vacuum Cleaner To ensure the long life of a vacuum cleaner, you will have to pay more attention when using it daily. There are some useful tips for you to avoid malfunctions and extend the lifespan of a vacuum cleaner. Now, let's grasp the ideas below. Regularly clean the vacuum cleaner including filters, floorhead, rotating brush, roller, hose, and so on. Avoid sucking in wet debris or objects, which may result block the way and damage the components. Opt for a qualified vacuum cleaner in reputable brands likeeufy MACH V1 Ultra Steam Vacuum and Mop. Avoid crashes or conflicts with walls or furniture that may lead to loose connections. Do not use the vacuum cleaner for a long time at once. Keep the vacuum cleaner in a cool, dry place. Conclusion It's actually not as difficult to repair a smart machine like a vacuum cleaner as you might expect. You'll get the solutions to how to fix a vacuum cleaner with no suction in this post, and all of them require no prior expertise at all. Moreover, to extend the life of a vacuum cleaner, you can get down to the above practices in daily use.
Video doorbell · 31/07/2023
Best Doorbell Cameras That Don't Require WiFi
WiFi-based doorbell cameras are more commonly seen in the market. However, not every household enjoys WiFi coverage, and using WiFi-connected visual doorbells poses a certain risk of being vulnerable to hackers and network intrusions. Therefore, it's necessary to find a trustworthy doorbell camera without WiFi. This article will show you the types of them and recommend 2 picks that may help you quickly get the product you need. Is There a Doorbell Camera that Works Without WiFi? Absolutely yes, there are video doorbells that don't require WiFi. Most doorbell cameras require WiFi because they need to be connected to the Internet to synchronize information and recorded video to cloud storage or the owner's mobile phone for remote monitoring. But if WiFi is not available in your home, you can sacrifice this feature and still use some doorbells without WiFi to monitor your home. Generally speaking, there are 3 types of them and you can check them out below. 3 Types of Non-WiFi Doorbell Cameras (With Pros & Cons) Currently, there are 3 main popular types of doorbell cameras without WiFi you can mostly see on the marketplace. Doorbell Camera Working with Local Storage Cloud-based doorbell cameras require a WiFi connection to upload data for storage. But if you choose a doorbell camera equipped with the local storage saving feature, you can get rid of the Internet to store and view doorbell videos. These cameras without WiFi connection work to store the recorded videos for you to access locally. Meanwhile, there are also some video doorbells without WiFi connection that will enable you to insert an external SD card for storage expansion as they would be overwritten over time. Pros Your data will be highly safeguarded as it is kept locally in the doorbell cameras and will not be uploaded and shared online automatically. You can access the captured videos easily without the Internet. Cons The storage space of your doorbell cameras will easily run out, and regular device cleanup is needed. It would be a risk to lose all your data once the doorbell cameras are damaged or stolen by others before you can access the data to back up. Doorbell Camera Working with Ethernet When your doorbell cameras are not connected to the Internet, you might miss out on several essential functions. To ensure features like remote access and monitoring, consider opting for a PoE (Power over Ethernet) doorbell camera. PoE doorbell cameras provide a higher-speed data transmission and a more stable connection compared to WiFi-based models, resulting in smoother video streaming and enhanced performance. With Ethernet connectivity, you can experience seamless access and monitoring capabilities, making your doorbell camera even more reliable and efficient. Pros Ethernet-based doorbell cameras ensure high network connection stability without risking unstable WiFi signals that weaken the device's performance. Ethernet connection improves greater security because hackers can't track you through WiFi and attack your doorbell cameras. Cons To use Ethernet, an oriented setup path is needed to be pre-installed in your house. It takes a high learning curve to set up and connect with Ethernet to use if you haven't dealt with it before. Doorbell Camera Working with Cellular Data Cellular data doorbell cameras are innovative devices that use cellular networks instead of WiFi for data transmission. They offer unique benefits and considerations over their WiFi-based counterparts, from extended coverage to high-resolution streaming and instant notifications. Essentially, these devices add a layer of security and convenience to your use cases. Pros You don't need to worry about data security as such Internet connection methods can stay away from some malicious attacks originating from WiFi. Cons Cellular data can be expensive. Using a SIM card for a video doorbell camera without WiFi may cost more expenses. Doorbell Camera Without WiFi: Best Picks Till now you've known that there are several types of doorbell cameras that can work without WiFi. However, the PoE doorbell camera is difficult to install and use for beginners, and the doorbell that works cellular will cost you a lot of money. Therefore, using a doorbell with local storage is the best idea. Just in case you don't have any idea which model to buy, here are the 2 best picks from us. eufy 2K Wired Video Doorbell The eufy 2K Wired Video Doorbell is a smart choice for those seeking a reliable doorbell camera even without WiFi. Equipped with a secure 4GB local storage space, this camera can function seamlessly without an internet connection. Whether there's WiFi signal coverage or not, it can efficiently store the captured videos locally. With its lightweight design and impressive 2K resolution, you can enjoy clear and detailed images of your surroundings in real-time. Furthermore, this video doorbell utilizes cutting-edge AI technology, intelligently discerning human body shapes and facial patterns to provide exclusive notifications for human visitors, while ignoring other animals like stray cats. Its sturdy equipment is built to withstand various weather conditions, and it is conveniently powered through electrical wires, ensuring a stable and consistent monitoring experience. Plus, the best part is that this video doorbell is a one-time purchase, with no recurring monthly fees. eufy S330 Wired Video Doorbell The eufy S330 Wired Video Doorbell is an exceptional choice for those seeking a reliable doorbell camera even without WiFi. In fact, even if it originally comes with WiFi connectivity feature, it operates smoothly using its 8GB local storage to instantly and securely store high-definition video recordings. As a wired doorbell camera, it ensures a stable power connection, providing you with a seamless surveillance experience. Moreover, not only is it equipped with Dual Cam technology with up to 2K quality while recording videos, but it also adopts HDR to enhance the dynamic range, and improves the details while dealing with video images. Better yet, it can also be used as a Delivery Guard. The down-facing camera allows you to see the lower area of your doorstep. When a delivery person drops off a package, you can check to make sure they left it safely on your doorstep. Conclusion In conclusion, while the popularity of WiFi-enabled doorbell cameras continues to rise, there are viable alternatives for those seeking non-WiFi options. Our exploration of the three types of doorbell cameras without WiFi has shed light on their distinct advantages and limitations. Hope this article can help you choose the most suitable video doorbell for home security.
Vacuum · 19/07/2023
Should You Vacuum or Dust First | Cleaning Tips
We've all stared blankly at the endless piles of dust around our homes and wondered the age-old question: should I dust or vacuum first? Cleaning is essential to keeping your home free of allergens and contaminants, but which order will make sure you get it just right? In this blog post, we'll explore why it's important to have an effective cleaning routine in place as well as provide some tips on when tackling vacuuming versus dusting. By investing a little time into understanding the reasons behind this seemingly simple decision, you can future-proof yourself from any potential confusion in the months and years ahead. Read on for more! Should You Vacuum First or Dust First? Vacuuming and dusting are two key components that should be done regularly to keep your home clean and tidy. But which one should you do first? Should I vacuum or dust first? The answer to this question is simple: Always dust before you vacuum and others! Dusting before vacuuming is recommended because it allows you to capture and remove loose dust and particles from surfaces before they settle on the floor. When you dust, some of the dust may become airborne and settle on the floor or other surfaces. By vacuuming after dusting, you can effectively clean up any dust or debris that has fallen onto the floor, ensuring a thorough and efficient cleaning process. Dusting before vacuuming helps to prevent the redistribution of dust and ensures that both tasks are performed effectively, leaving your home cleaner and more dust-free. But remember to make sure sweeping is done before dusting, since sweeping can help clear out larger debris. What Is the Best Order to Clean a Dusty Room? Cleaning a dusty room not only involves dusting and vacuuming. There are other steps to make cleaning effective. Here's a step-by-step guide to cleaning a dusty room: Step 1: Dust surfaces Is it better to dust or vacuum first? Definitely dust first. Begin by dusting all surfaces in the room, including furniture, shelves, and window sills. Use a microfiber cloth or a duster to remove as much dust as possible. Step 2: Vacuum Can you dust with a vacuum? Of course. Once you've dusted all surfaces, vacuum the floors. Be sure to vacuum underneath furniture and in corners where dust tends to accumulate. What is the first thing to do before vacuuming a carpet? Remember to prepare your vacuum by checking the filters and recovery bag. Wondering how long does it take for dust to settle after vacuuming? It often takes more than two hours. Step 3: Wash hard surfaces Do you mop or vacuum first? Here comes the answer. After vacuuming, use a damp cloth or mop to clean hard surfaces such as wood, tile, or vinyl flooring. This will help remove any remaining dust and dirt. Step 4: Clean windows Next, clean the windows using a window cleaner and a squeegee or microfiber cloth. This will help remove any streaks or smudges left behind by dust. Step 5: Clean bedding If the room has bedding such as sheets, carpets, or duvets, wash them in hot water to remove any dust and allergens. Step 6: Air out the room Finally, open windows or use a fan to circulate fresh air throughout the room. This will help remove any remaining dust and improve air quality. No need to be worried about dust before or after vacuuming! Following these steps can help ensure that you clean the room effectively and efficiently, leaving it fresh, clean, and dust-free. Tips for Dusting And Vacuuming If you're looking to keep your home clean and healthy, dusting and vacuuming are essential. To make the process as efficient and effective as possible, there are several tips to follow. Use the right tools: Make sure you have the right tools for the job, including a quality duster, microfiber cloths, and a good vacuum cleaner with attachments. Dust from top to bottom: Start by dusting the highest surfaces, such as ceiling fans and light fixtures, and work your way down to lower surfaces like furniture and floors. Use the right dusting technique: Use a gentle touch when dusting delicate items, and use back-and-forth motions rather than circular ones to avoid spreading dust around. Don't forget hidden areas: Dust can accumulate in hidden areas such as baseboards, vents, and behind furniture. Use a crevice tool attachment on your vacuum to reach these areas. Choose a good-quality Vacuum: Use a vacuum cleaner with strong suction and a HEPA filter to effectively remove dust and allergens from carpets and floors. A good example is the H30 Mate eufy vacuum, which offers a powerful, portable, and versatile cleaning solution that is well-suited for tackling a variety of cleaning tasks around the home. With up to 80 AW/16kPa suction power, this vacuum cleaner for dust can effectively remove dirt, dust, and pet hair from carpets, upholstery, and hard floors. Weighing less than 2 pounds, the H30 Mate is easy to carry around and use in hard-to-reach areas such as stairs and tight spaces. Conclusion Now you must have known the answer to the question “Do you dust or vacuum first”. Having a clean home is important for both physical and mental well-being. By following the proper order when cleaning - dust first, then vacuum - you can guarantee that all areas of your house will be adequately maintained. With some dedication and effort, you can create an environment that is safe from allergens while still being aesthetically pleasing! Taking action today will not only save you time in the long run but it can also greatly improve your quality of life!
Smart Lock · 28/06/2023
How to Change Code on Keypad Door Lock Easily?
Ensuring the security of our homes is a top priority for many homeowners, and one effective way to achieve this is by using a keypad door lock (also called a smart lock). The smart lock provides convenience and peace of mind, allowing you to control access to your home with a unique code. In this guide, we will delve into the importance of changing the code on your keypad door lock, provide step-by-step instructions on how to change code on electronic door lock, and offer useful tips for using smart locks. Why to Change Smart Lock Code? Before we get into how to change smart lock code, let’s explore why to change first. Here are the two most common reasons: Enhanced Security Regularly updating your code reduces the risk of unauthorized access. If someone has gained knowledge of your existing code, changing it renders their knowledge obsolete, keeping your home secure. More Control over Entry Permissions For some, changing the code is a way to manage entry permissions. For example, if you're a landlord or regularly have guests staying in your home, changing the code ensures that previous tenants or visitors cannot gain access once they've left. How to Change Code on Keypad Door Lock? To figure out how to change keypad code for smart locks and enhance the security of your home, follow these step-by-step instructions: Access the Lock's Settings To begin with, go to your lock's page or launch the lock's companion mobile app. You can also navigate to the control panel on the lock itself. This will provide you with access to the lock's settings. Authenticate Yourself Once you have accessed the lock's settings, authenticate yourself as the owner or administrator by providing the necessary credentials. This step ensures that only authorized individuals can make changes to the lock's code. Locate the Code Management Section Look for the section in the lock's settings that pertains to code management. It may be labeled as "Manage Access," "User Codes," or something similar. This is where you can view and modify existing codes associated with the lock. Select the User Identify the user for whom you want to change the code. It could be your own account or another authorized user's account. Selecting the correct user is crucial to ensure that the desired code is modified. Edit or Delete the Existing Code Once you have selected the user, you will be presented with options to edit or delete the existing code. Choose the option that suits your preference. If you choose to edit the code, enter a new code that adheres to any requirements specified by the smart lock, such as a minimum length or specific character type. Save the Changes After entering the new code, save the changes within the lock's settings. Look for a "Save" or "Apply" button to confirm the update. It's important to complete this step to ensure that the new code is successfully programmed into the lock's system. By following these steps, you can change the code on your keypad door lock and enhance the security of your home. Remember to refer to the specific instructions provided by the manufacturer of your lock for any additional guidance or nuances specific to your device. Tips of Using Smart Locks To make the most of your smart lock and ensure a seamless experience, consider the following tips: Choose a Strong Code When setting a new code, opt for a combination that is unique and memorable to you, but difficult for others to guess. Avoid using easily guessable codes, such as birth dates or sequential numbers. Enable Two-Factor Authentication Some smart lock systems offer two-factor authentication for added security. Enable this feature to require an additional verification step, such as a fingerprint or mobile app approval, along with the entry code. Regularly Update Codes Make it a habit to change the codes on your smart lock periodically, such as every few months. This practice minimizes the risk of unauthorized access due to lost or compromised codes. Conclusion Learning how to reset door lock code is a fundamental aspect of maintaining home security. By periodically updating your code, you enhance the protection of your home and belongings, ensuring that only authorized individuals can access your property. Additionally, following best practices for using smart locks, such as selecting strong codes and enabling two-factor authentication, further fortifies your home's security. Stay vigilant, and enjoy the convenience and peace of mind that smart locks bring to your everyday life.
Smart Lock · 28/06/2023
Are Smart Locks Safe: What You Need to Know
When it comes to home security, smart locks have gained significant popularity in recent years. These innovative devices offer convenience, flexibility, and advanced features. However, many homeowners wonder, "Are smart locks safe?", “Are electronic door locks safe?” In this article, we will delve into the safety aspects of smart locks, address concerns about hacking vulnerabilities, compare their security to traditional locks, and provide tips on keeping your smart home electronic locks secure. Are Smart Locks Safe? Smart locks are designed with security in mind. Some of them employ advanced encryption protocols, such as the AES128 encryption chip, to protect communication between the lock and your smartphone or home automation system. As a result, you don’t need to be particularly concerned about questions like are keypad locks safe or are keyless door locks safe, since the use of unique digital keys and biometric authentication methods, like fingerprint recognition, can enhance security to a great extent. However, it's important to choose reputable brands and install the latest firmware updates to ensure optimal safety during using process. Can Smart Locks Be Hacked? Are smart locks hackable? Concerns about smart electronic locks vulnerabilities exist, but with proper precautions, the risk of hacking can be mitigated. Reputable smart lock manufacturers prioritize security by implementing strong encryption, two-factor authentication, and robust software. On the user’s part, regularly updating firmware and using secure Wi-Fi networks can further reduce the chances of unauthorized access. It is worth noting that no system is completely immune to hacking, but the risk can be minimized with smart lock best practices. Are Smart Door Locks Safer Than Regular Locks? Are smart locks worth it by outscoring regular locks in safety? In fact, smart door locks offer certain advantages over traditional locks in terms of both convenience and enhanced security features. They eliminate the need for physical keys, reducing the risk of lock picking or unauthorized key duplication. So, compared to regular locks, they are locks that can’t be picked. Additionally, smart electronic locks allow you to monitor and control access to your home remotely, providing an extra layer of security and peace of mind. This said, we can safely assume that most smart locks perform better at safety than regular locks. How to Keep Your Smart Home Locks Safe? To further reduce any concern about “Are smart locks secure?”, ensuring the best possible safety practices is crucial. By following these tips, you can maximize the safety of your smart locks and prevent unauthorized access in an effective manner. Choose a reputable brand with a strong track record in security: When selecting a smart lock, opt for well-established brands known for their commitment to security. Reputable manufacturers invest in robust encryption technologies and regularly update their firmware to address any potential vulnerabilities. Look for certifications or industry standards compliance, such as ANSI/BHMA (American National Standards Institute/Builders Hardware Manufacturers Association), to ensure the lock meets stringent security requirements. Regularly update the firmware to address potential vulnerabilities: Smart lock manufacturers often release firmware updates that include security patches and enhancements. Regularly check for updates and install them promptly to protect against emerging threats. Firmware updates not only address vulnerabilities but also improve the overall performance and reliability of your smart lock. Enable two-factor authentication for an added layer of security: Two-factor authentication (2FA) adds an extra step to the login process, significantly enhancing security. When enabled, you will be required to provide a secondary verification method, such as a unique code sent to your smartphone, in addition to your password. This ensures that even if someone manages to obtain your password, they still won't be able to access your smart lock account without the secondary verification. Protect home WiFi network with a strong password and encryption: A strong and unique Wi-Fi network password is essential to prevent unauthorized access to your smart home devices, including your smart lock. Use WPA2 or WPA3 encryption protocols to secure your Wi-Fi network, as older encryption methods may be more susceptible to hacking attempts. Additionally, consider enabling a guest network for visitors to prevent them from accessing your primary network. Monitor the activity log of smart lock for any suspicious entries: Regularly review the activity log provided by your smart lock. Check for any unusual or suspicious entries, such as repeated failed access attempts or unexpected lock activity. If you notice any anomalies, investigate further and take appropriate action, such as changing access codes or contacting customer support. Conclusion Smart locks offer convenience and advanced security features that make them a viable option for modern homes. While no system is completely impervious to hacking, following best practices and choosing reputable brands can significantly enhance the safety of your smart lock. With proper precautions in place, smart locks provide secure and convenient access control for your home. So, if you're considering adopting this technology, rest assured that smart locks can be a safe and reliable addition to your smart home security system.
Smart Lock · 28/06/2023
What Happens If Smart Lock Battery Dies: Everything You Should Know
Have you ever wondered what would happen if your smart lock battery suddenly dies? Smart locks have revolutionized home security, providing convenient keyless entry options. However, when the battery of a smart lock reaches its limit, it can leave you feeling locked out of your own home. In this article, we will explore the implications of a dead smart lock battery and guide you on how to open electronic door lock without key. We will also cover essential information on how to change the battery in your smart locks, ensuring that you're well-prepared for any battery-related challenges that may arise. What Happens if Smart Lock Battery Dies? When your smart lock battery dies, these consequences may occur. Firstly, you will lose the ability to access your home through keyless methods such as fingerprint scanning, keypad entry, or smartphone connectivity. This can be inconvenient and frustrating, especially if you rely solely on your smart lock for entry. Secondly, any remote access features, such as granting temporary access to guests or monitoring your lock remotely, will be disabled until the battery is replaced. It is crucial to understand these implications and be prepared with alternative methods of entry. How to Know When the Smart Lock Battery Is Low? Recognizing the signs of a low smart lock battery is crucial for ensuring uninterrupted access to your home. Before you ask “Why is my keyless entry pad not working”, here are some key points to help you identify when the battery is running low ahead of time: Visual Indicators Many smart locks have LED lights or indicators that flash or change color to indicate a low battery. These lights are usually located on the front or side of the lock. Pay attention to any changes in the light pattern, such as a slower or more frequent blinking, as this could be a sign of a low battery. Audible Alerts Some smart locks are equipped with built-in speakers that emit beeping sounds when the battery is running low. These alerts are designed to draw your attention and prompt you to replace the battery. If you hear consistent beeping or irregular sounds coming from your smart lock for the house, it's a clear indication that the battery needs to be replaced soon. Mobile App Notifications If your smart lock is connected to a mobile app, it may send notifications to your smartphone when the battery is low. These notifications can be in the form of pop-up messages, push notifications, or emails. Make sure to enable notifications for your smart lock app and keep an eye out for any alerts indicating a low battery. Reduced Functionality As the battery power decreases, you may notice a decrease in the responsiveness and functionality of your smart lock. For example, it may take longer for the lock to recognize and respond to your input or there may be intermittent failures in authentication methods such as fingerprint scanning or keypad entry. These performance issues can be a sign that the battery is running low. Backup Unlock Methods Some smart locks provide backup unlock methods, such as a physical key or an emergency power supply. If you find yourself needing to use these backup methods more frequently than usual, it could indicate a low battery. Take this as a reminder to replace the battery soon to avoid being locked out completely. How to Open Electronic Door Lock Without Key? If you find yourself locked out due to a dead smart lock battery, don't panic. There are a few methods you can employ to regain access to your home without a key. Similar to how to unlock a keypad door lock without the code, here are some options: Backup Power Source Some smart locks come with a backup power option, such as a 9-volt battery terminal. By connecting a fresh 9-volt battery to this terminal, you can temporarily power the lock and regain entry using your usual authentication method. Physical Key Override Many smart locks are equipped with a traditional keyhole as a backup option, like eufy S330 Smart Lock. Insert the provided physical key into the keyhole and turn it to unlock the door manually. It's crucial to keep your physical key in a secure and easily accessible location. Mobile App or Bluetooth Backup If your smart lock is connected to a mobile app or uses Bluetooth, you may still be able to unlock the lock even if the battery is dead. Ensure that your smartphone has enough battery power to establish a connection and use the associated app to unlock the door. Good News! With Eufy WIFI Smart Lock C210, you can unlock your door intelligently by using the keypad or physical key, from Apple Watch, or by using your voice with Alexa/Google Voice Assistant. It has been gaining more and more popularity as a long-lasting keyless entry door lock. How to Change Battery in Keyless Door Lock? Keyless entry door lock battery replacement is essential for uninterrupted operation. It is the most direct way for keyless entry door lock troubleshooting. Follow these general steps to change the battery: Identify the battery type Check the manufacturer's instructions or consult the user manual to determine the type of battery required for your smart lock. Locate the battery compartment Most smart locks have a battery compartment, usually located on the interior side of the door. Open the cover or slide off a panel to access the compartment. Replace the battery Remove the old battery and replace it with a new one of the same type. Ensure that you insert the battery correctly, following the indicated polarity markings. It is similar to how to change battery on keypad door lock. Test the lock After replacing the battery, test the lock to ensure it functions properly before closing the battery compartment. Conclusion In conclusion, understanding what happens when your smart lock battery dies is crucial for maintaining a secure and convenient home environment. By recognizing the signs of a low battery, you can take proactive measures to avoid being locked out. In the event of a dead battery, alternative methods such as backup power sources, physical key overrides, or mobile app connections can help you regain access. Remember to change the battery regularly to prevent any unexpected lockouts. With these insights and solutions, you can confidently navigate the challenges associated with smart lock batteries and ensure seamless access to your home.
Smart Lock · 28/06/2023
How to Install Smart Lock for Enhanced Home Security?
If you're looking for a way to enhance the security and convenience of your home, installing a smart lock can be a smart choice. Smart locks have become increasingly popular, offering keyless entry, remote control, and enhanced security features. In this guide, we will walk you through the process of installing a smart door lock, providing you with the necessary steps and considerations to ensure a successful installation. Why Should You Install a Smart Lock? Before we dive into the installation process, let's explore the reasons why installing a smart lock can greatly benefit your home security and daily life. Smart locks offer a range of advantages, such as: Enhanced Convenience Say goodbye to fumbling for keys. With a smart lock, you can unlock your door using your smartphone, a PIN code, or even your fingerprint. No more worries about lost or forgotten keys. Improved Security Smart locks utilize advanced encryption and authentication methods, making them more secure than traditional locks. You can also receive real-time notifications and monitor access to your home, ensuring peace of mind. Remote Control With smart lock integration into your smartphone, you can remotely lock or unlock your door from anywhere. This feature proves useful for granting access to family members, friends, or service providers when you're not at home. Easy Installation As for how to install digital door lock, it is a relatively straightforward process, and you can do it yourself with basic tools. It eliminates the need for professional assistance and allows you to have complete control over the digital door lock installation process. How to Install Smart Locks? Smart door lock installation involves a few simple steps that can enhance the security and convenience of your home. Before you begin, make sure you have the necessary tools and components, including a smart lock kit, screwdriver, and drill (optional). Here's a detailed guide on how to change a front door lock to a smart one: Remove the Old Lock To start, you'll need to remove the old lock from your door. Typically, this involves unscrewing the lock from the inside of the door using a screwdriver. Take out the screws and separate the lock into two halves, leaving only the deadbolt. Unscrew the deadbolt from the edge of the door, allowing the entire assembly to slide out. Remove the Strike Plate Next, remove the strike plate on the door jamb. Consider replacing the screws that came with your smart lock strike plate with longer screws for added security. Longer screws provide a more robust connection, securing the strike plate to the door frame. Install the New Deadbolt &Strike Plate Now, it's time to install the new deadbolt and strike plate that came with your smart lock kit. Use a screwdriver to install the screws for the new deadbolt into the top and bottom holes of the deadbolt mounting plate. Then, install the strike plate. If needed, you can drill pilot holes to accommodate longer screws for the strike plate. Ensure Proper Alignment Close the door and test the deadbolt's alignment by throwing it a few times. Make sure the deadbolt extends fully into the new strike plate when locked. If the deadbolt stops before fully locking, you may need to adjust the receiving hole on the door frame to accommodate the new deadbolt. Install the Front Half of the Lock Carefully install the front half of the smart lock into the door, ensuring the ribbon cable is fed under the deadbolt. To prevent it from falling out while installing the rear mounting bracket, use painter's tape or masking tape to secure the front side of the lock tightly to the door. Once the rear mounting bracket is in place, remove the tape. Install the Rear Mounting Bracket Install the rear mounting bracket according to the provided instructions, using the appropriate set of screws based on your door's thickness. Ensure that the lock slides into place smoothly and securely. Insert Batteries and Set up Additional Features Insert the required batteries into the smart lock, following the manufacturer's instructions. If your lock has additional features like open/close detection, install the included magnet on the door jamb within close proximity to the lock. Adhere to the magnet securely with the adhesive backing. What to Look For in a Smart Lock? When choosing a smart lock for your home, it's important to consider several factors. Here are key aspects to evaluate before making a purchase: Security Features Look for smart locks with robust security features, such as strong encryption protocols, tamper alarms, and two-factor authentication. Ensure that the lock complies with industry standards and has a good reputation for security. Compatibility Check if the smart lock is compatible with your existing door and lock setup. Consider the size, type, and compatibility requirements mentioned by the manufacturer. Connectivity Options Evaluate the connectivity options provided by the smart lock. Choose a lock that supports a wide range of connectivity methods, such as Bluetooth, Wi-Fi, or Zigbee, to ensure seamless integration with your home automation system. Battery Life Consider the battery life of the smart lock. Look for locks with long-lasting batteries or those that provide low-battery notifications to avoid any inconveniences. Conclusion Installing a smart lock is a great way to enhance the security and convenience of your home. How to install a door lock is not complicated. By following the step-by-step smart lock installation process and considering the important factors when choosing a smart lock, you can enjoy keyless entry, remote control, and advanced security features. Embrace the future of home security and make your life easier with a smart lock installation now!
Vacuum · 28/06/2023
The Ultimate Guide to How to Clean A Vacuum
When it comes to keeping our homes clean and dust-free, vacuum cleaners are our trusted allies. However, it's important to remember that these hardworking machines require regular cleaning and maintenance to ensure optimal performance. In this guide, we will take you through the step-by-step process of cleaning a vacuum, including the hose, filter, brush, and more. How to Clean a Vacuum? Of course, a clean vacuum works more efficiently. Whether you're wondering how to deep clean a vacuum, how to remove dust from vacuum cleaner, or how to clean vacuum filter from a vacuum cleaner, this part has got you covered. What You May Need Before diving into the cleaning process, gather the following tools and materials: New vacuum bags or emptying bin Disposable or reusable filters (depending on your vacuum model) Scissors or box knife Soft cloth or small brush Broom handle Damp cloth or disinfectant wipes Warm soapy water Instructions for Cleaning a Vacuum Properly cleaning your vacuum is essential for maintaining its performance and prolonging its lifespan. Follow these detailed steps to ensure a thorough cleaning: Safety First Before starting the process to clean up vacuum cleaner, prioritize safety by turning off and unplugging your vacuum cleaner. This will prevent any accidents or mishaps during the cleaning procedure. Emptying the Bag or Bin Begin by emptying the bag or bin of your vacuum into a trash can. Take this opportunity to assess the condition of the bag or bin and replace it if necessary. A fresh bag or bin will optimize the cleaning efficiency of your vacuum. Handling the Filters Remove the filters from your vacuum and determine whether they are disposable or reusable. If the filters are disposable, replace them with new ones. For reusable filters, rinse them gently with cold water to remove dirt and debris. Allow the filters to air dry completely before reinserting them. This step ensures that the filters are clean and fully functional. Tending to the Roller Brush Inspect the roller brush on the vacuum head for any tangled hair, strings, or debris. These obstructions can hinder the brush's rotation and overall cleaning performance. Carefully use scissors or a box knife to remove stubborn tangles, ensuring not to damage the brush bristles or other components. Clearing the Vacuum Hose Straighten out the vacuum hose and examine it for any clogs or blockages. Gently push a broom handle or a long object through the hose to dislodge any trapped debris. Avoid using sharp objects that could puncture or damage the hose. By clearing the hose, you ensure proper suction and efficient cleaning. Tackling Transfer Points Pay attention to the transfer points, including hose connections and attachments. These areas can accumulate blockages and debris over time, affecting the vacuum's performance. Use a soft cloth or a small brush to remove any obstructions and ensure unimpeded airflow. Cleaning Brush Attachments Take a moment to clean brush attachments, such as pet hair brushes or upholstery tools. How to clean vacuum brush attachments? Generally, you need only to remove any tangled hair or debris by using scissors or your fingers. This step ensures that the brush attachments are free from obstructions and ready for optimal cleaning performance. Exterior Maintenance Wipe down the exterior of your vacuum cleaner with a damp cloth or disinfectant wipes. Pay particular attention to areas that are prone to dust and grime, such as the handle, buttons, and cord. Keeping the exterior clean not only enhances its appearance but also prevents dirt from transferring back onto cleaned surfaces. Attending to Bagless Vacuum Cleaners So how to clean bagless vacuum? If you own a bagless vacuum cleaner, take the extra step of detaching the canister or dustbin. Wash it with warm soapy water to remove accumulated dirt and debris. Ensure that the canister or dustbin is thoroughly dry before reattaching it to the vacuum cleaner. How to Clean a Vacuum Hose? A clean vacuum hose is essential for effective cleaning. But in the first place, we need to make sure the hose is free of blockages. Here's how to unclog a vacuum hose: Detach the hose from the vacuum. Remember to turn off the vacuum first to ensure safety. Gently straighten out the hose to access any blockages or debris. Use a broom handle to push through the hose, dislodging any clogs. Avoid using sharp objects that may puncture the hose. As for how to clean a vacuum cleaner’s hose, you can follow these steps: Take a tub and fill it with water to around 15 centimeters deep. Mix some dish soap or other mild detergent with water. Submerge the hose and clean it with a damp cloth or a brush. Rinse out the inside and let it air dry. By following these steps through, the hose should be gleaming with perfection now. Tips for Cleaning up Vacuum Cleaners Some users may still have concerns like “how to remove hair from vacuum roller”. Fortunately, the following tips help with your cleaning process a great deal: Regularly check and clean the wheels and brushes underneath the vacuum to prevent tangling and damage. Use scissors or your fingers to remove hair or debris from the vacuum roller. Store your vacuum cleaner in a clean and dry area to prevent dust buildup. Conclusion A clean vacuum cleaner is essential for maintaining a clean and healthy home environment. By following the step-by-step instructions outlined in this guide, you can effectively clean your vacuum, hose, filters, and brush attachments. Remember to perform these cleaning tasks regularly to ensure your vacuum operates at its best. By giving your vacuum cleaner the care it deserves, you can continue enjoying its efficient cleaning power for years to come.
Smart Lock · 28/06/2023
Smart Door Lock vs Traditional: Which Is Better?
Nowadays, advancements in technology have seeped into our homes, transforming the way we secure them. With the rise of smart home devices, one of the notable innovations is the smart door lock. In this article, we will delve into the world of smart door locks and compare them with their traditional counterparts. We will explore their features, advantages, and drawbacks, helping you make an informed decision when choosing the right lock for your home. What are Smart Locks? Smart locks are innovative security devices that offer a convenient and technologically advanced alternative to traditional key locks. They are designed to provide access control to your home through various means such as smartphones, keypads, or even voice commands. Smart locks use wireless technology, usually Bluetooth or Wi-Fi, to communicate with your devices and enable remote access and monitoring. Here are some smart lock pros and cons: Pros: Convenience Smart locks allow you to lock and unlock your door without the need for physical keys, making it easier to manage access to your home. Remote Access With smart locks, you can grant temporary access to family members, friends, or service providers from anywhere, using your smartphone or computer. Integration with Smart Home Systems Smart door locks can be seamlessly integrated with other smart home devices, enabling automation and enhancing security. Activity Monitoring Many smart locks provide activity logs, allowing you to monitor who enters and exits your home and at what time. Enhanced Security Features Smart locks often come with advanced security features like fingerprint recognition, facial recognition, or two-factor authentication. On the other hand, can deadbolts be picked? Quite often, and this is exactly where smart locks have an edge due to their smartness. Cons: Power Dependency Smart locks require power to function, either through batteries or wired connections. Battery-powered locks may need regular battery replacements. Vulnerability to Hacking As with any connected device, smart locks are susceptible to hacking attempts, emphasizing the need for strong passwords and regular software updates. Compatibility and Connectivity Some smart locks may not be compatible with all smartphones. Bonus: Among the smart locks on the market, the eufy security S230 smart lock takes pride in its powerful features like easy setup, video smart lock with built-in doorbell camera, flexible control, BHMA certified, IP65 weatherproof, touchscreen keypad, advanced fingerprint scan, etc. It perfectly shows the scope of functionality of smart locks. What are Traditional Locks? Traditional locks, also known as key locks, have been the standard method of securing doors for centuries. They rely on mechanical mechanisms, typically a combination of pins and tumblers, to lock and unlock the door. Traditional locks require a physical key to grant access to your home. Pros: Simplicity and Reliability Traditional locks are simple in design and have been proven to be reliable over time. No Power Dependency Traditional locks do not rely on power sources, ensuring they can be operated even during power outages. Familiarity Many people are accustomed to using traditional locks and find them easy to understand and operate. Cons: Key Management Traditional locks require physical keys, which can be misplaced or duplicated, potentially compromising home security. Limited Access Control Traditional locks offer limited flexibility in granting access to others, as you need to physically provide them with a key. Lack of Integration Traditional locks do not integrate with smart home systems or offer remote access and monitoring features. Smart Door Lock vs Traditional: What's the Difference? Are smart locks safer than key locks? We have already explored the characteristics of both smart locks and traditional locks, now let's compare them based on various factors to help you understand their differences and make an informed decision: Convenience Smart locks provide keyless entry, remote access, and control options, offering a higher level of convenience compared to traditional locks. Security Features Smart locks often include advanced security features such as alarms, cameras, and integration with home security systems, while traditional locks have limited built-in security measures. Vulnerability Traditional locks are more susceptible to lock picking and bumping, whereas smart locks may face potential hacking risks. Cost Smart locks have a higher initial cost, considering the technology and features they offer, while traditional locks are more affordable. Technology Smart locks require batteries or electric power, whereas traditional locks do not rely on any external power source. Factors to Consider When Choosing a Lock When deciding between a smart door lock and a traditional lock, it is essential to consider several factors to make the right choice for your home: Security Needs Assess the level of security you require. If you prioritize advanced security features and remote monitoring, a smart lock may be the better option. Convenience Determine the level of convenience you desire. Smart locks offer keyless entry, remote access, and integration with other smart home devices, while traditional locks provide a more straightforward, manual operation. Budget Consider your budget, as smart locks tend to be more expensive than traditional locks due to their advanced features. Just consider: are smart locks worth it? If you think they are, then go for them. Compatibility If you go for a smart lock, you should check the compatibility of smart locks with your existing devices beforehand, including smartphones and smart home systems. Power Source Evaluate your preference for power sources. Smart locks rely on batteries or electrical connections, while traditional locks operate without power. Conclusion In conclusion, smart locks offer convenience, advanced features, and integration with smart home systems, but they require power and may be susceptible to hacking. Traditional locks, on the other hand, provide simplicity, reliability, and a familiar operation but lack the advanced functionalities of smart locks. The choice between a smart door lock and a traditional lock depends on your specific needs and preferences.
Video doorbell · 28/06/2023
How to Install a Doorbell: Comprehensive Guide
Installing a doorbell is a practical and essential home improvement task that adds convenience and security to your household. Whether you're looking to install a wired doorbell or a wireless doorbell, this comprehensive guide will walk you through the step-by-step process. Read on and get useful tips for removing an existing doorbell as well as the installation of wired and wireless doorbells. How to Remove a Doorbell? Before diving into the smart doorbell installation process, it is crucial to take a glimpse at how to remove the old one first (if any). This is beneficial even if you don’t have an old one since knowing this helps with possible future replacements. To remove it, start by turning off the power to the doorbell circuit at the main breaker box to ensure safety. Next, unscrew the old doorbell chime and button from the wall or junction box. Finally, disconnect the wires attached to them. How to Install a Wired Doorbell? Now comes the main part of the article: how to install a doorbell without existing doorbell. If your home is wired for a doorbell and you prefer a traditional option, installing a wired doorbell is the way to go. Follow these steps for a successful wired doorbell installation: Step 1: Choose the Right Doorbell Chime and Button To begin, select a new doorbell chime and button that match the voltage of your transformer. It's crucial to ensure compatibility between these components to avoid any issues during installation. Refer to the manufacturer's instructions or consult an electrician if you're unsure about the appropriate voltage for your specific setup. Step 2: Mount and Connect the Doorbell Chime Once you have the right doorbell chime, it's time to figure out how to wire a doorbell chime and how to hook up a doorbell. Start by positioning the chime unit in a suitable location on the wall near an electrical outlet. You can use screws or adhesive to secure it firmly in place. Make sure the chime is easily accessible and audible throughout your home. Next, we can get to the problem of how to wire a doorbell transformer. Carefully connect the wires from the transformer to the designated terminals on the chime unit. Most wired doorbell systems have two terminals labeled "front" or "trans" for the transformer wires. Attach the wires securely, ensuring a tight connection. Take note of the wire colors and their corresponding terminals for reference. Step 3: Install the Doorbell Button With the chime unit in place, it's time to install the doorbell button. Choose a location near your front door, preferably at eye level for visitors. Use screws or adhesive to mount the button securely to the wall. Ensure it is positioned in a prominent and easily accessible spot. Now, connect the button wires to the corresponding terminals on the chime unit. Typically, the button wires are also connected to the "front" or "trans" terminals. Double-check that the connections are tight to avoid any loose wiring. Step 4: Test and Activate the Doorbell Before completing the installation, it's essential to test the doorbell camera and ensure it functions correctly. Turn on the power at the main breaker box to activate the doorbell circuit. Then, press the button to test if the chime sounds. If everything is connected properly, you should hear a pleasant chime sound throughout your home. If the doorbell doesn't work as expected, double-check the wiring connections and consult the manufacturer's instructions. It's also advisable to verify that the transformer is providing the correct voltage. How to Install a Wireless Doorbell? For those seeking a more convenient and versatile option, wireless doorbells are an excellent choice. Here's how to install a wireless doorbell: Step 1: Choose a Wireless Doorbell Kit To begin, select a wireless doorbell kit that suits your needs. Ensure the kit includes a battery-powered button and a plug-in or battery-powered chime unit. It is crucial to choose components from the same manufacturer, as they are designed to work seamlessly together. Additionally, carefully read and follow the manufacturer's instructions provided with the kit. Step 2: Pair the Button and Chime Unit Wireless doorbells rely on a wireless connection between the button and chime unit to function properly. Following the instructions provided by the manufacturer, pair the button and chime unit. This process typically involves pressing a sync button on both devices or following specific steps outlined in the instruction manual. Establishing a secure wireless connection ensures reliable communication between the button and the chime unit. Step 3: Mount the Doorbell Button Next, choose a suitable location near your door to mount the wireless doorbell button. It is recommended to select a spot that is easily accessible and visible. Ensure the chosen location is clean and free from any dirt or debris that could hinder the adhesive or mounting process. Depending on the design of the button, you can attach it to the wall using screws or adhesive tape, following the manufacturer's instructions. Take care to align the button properly and securely fasten it to the chosen surface. Step 4: Position the Chime Unit Once the button is securely mounted, find a suitable location within the effective range of the button for the chime unit. If you have a plug-in chime, select an available outlet within range and insert the plug. Make sure the chime unit is easily audible from various areas in your home. If your chime unit is battery-powered, mount it on the wall or a suitable surface using screws or adhesive tape. Ensure the chime unit is properly positioned and securely attached to the chosen location. Step 5: Test the Wireless Doorbell With the button and chime unit in their designated positions, it's time to test the wireless doorbell. Double-check that the batteries are correctly installed in both the button and chime unit. Once verified, press the button to activate the doorbell. If the installation was successful, you should hear the chime sound from the chime unit, indicating that the wireless doorbell is functioning correctly. Conclusion Installing a doorbell or doorbell camera is a practical home improvement project that enhances convenience and security. Whether you opt for a wired doorbell or a wireless option, the installation process is straightforward if you follow the steps outlined in this guide. Remember to consider your specific needs, choose the right components, and ensure compatibility between the doorbell chime, button, and transformer. By following these instructions, you can successfully install a doorbell and enjoy its benefits in your home.
Smart Lock · 28/06/2023
Smart Lock Installation Cost [Comprehensive Guide]
Smart locks have become increasingly popular in modern homes due to their convenience and enhanced security features. If you're considering installing a smart lock, you might be wondering about the associated costs. In this article, we will explore the average smart lock installation cost, the pricing of different types of smart locks, and factors that affect the installation cost, and provide a comprehensive guide to help you understand the expenses involved. Whether you're interested in how much to install a keyless entry door lock or the cost of digital door lock installation, we've got you covered. Average Smart Lock Installation Cost On average, homeowners should anticipate a price range between $100 and $200 for professional smart lock installation. It's important to note that this estimate predominantly covers the labor involved in ensuring a seamless and secure installation of the smart lock. There are several factors to determine the average smart lock installation cost. The complexity of the installation plays a significant role in determining the overall expense. If your door requires additional modifications or adjustments to accommodate the smart lock, it may incur higher costs. Similarly, the location of your property can influence the installation charges, as service providers may factor in travel time and distance. Additionally, the inclusion of any supplementary services, such as removing an existing lock or integrating the smart lock with a home automation system, can contribute to the final cost. Cost of Different Types of Smart Locks Smart locks come in various types, each with its own features and price range. Here are some common types of smart locks and their associated costs: Keypad Smart Locks Keypad smart locks offer convenient keyless entry using a numeric keypad. Prices for keypad smart locks typically range from $100 to $300, depending on the brand, features, and quality. Bluetooth Smart Locks Bluetooth-enabled smart locks utilize your smartphone's Bluetooth connection for unlocking and locking your door. These locks generally cost between $150 and $400. Wi-Fi Smart Locks Wi-Fi smart locks provide remote access and control through an internet connection. Due to their advanced features, Wi-Fi smart locks can range from $200 to $500 in price. Of course, if you’re looking for a budget smart lock with WIFI, Eufy C210 Smart Lock can be your best choice. Without any bridge required, you can easily control your smart lock from anywhere via the Eufy Security app. Biometric Smart Locks Biometric smart locks use fingerprint recognition technology for unlocking doors. These high-tech locks tend to be more expensive, with prices typically ranging from $300 to $800. How Much Does It Cost to Install a Smart Lock? Now let's delve into the question on everyone's mind: how much do smart locks cost? Basically, this mainly depends on whether you have a professional install the lock. Hire a Professional Locksmith If you choose to hire a professional locksmith or handyman to install the smart lock for you, the labor cost to replace door locks can typically range from around $100 to $200, depending on the complexity of the installation and the rates charged by the service provider. This option offers the advantage of professional expertise and assurance that the installation will be done correctly. DIY Installation On the other hand, if you have prior experience with how to install smart lock and feel confident in your DIY skills, you can opt for a self-installation approach to save on labor costs. However, it's important to note that DIY installation requires careful attention to detail to ensure proper functioning and security. Factors That Affect Smart Door Lock Installation Cost Several factors can impact the overall cost of smart lock installation. Here are they: Existing Door and Lock If your door and lock are in good condition and compatible with the chosen smart lock model, the installation process is likely to be smoother and less expensive. In such cases, the smart lock can be easily integrated into the existing setup without the need for extensive modifications or adjustments. However, if your door or lock requires modifications or replacements to accommodate the smart lock, it can result in additional expenses. For instance, if new holes need to be drilled, the door alignment needs adjustment, or the lock mechanism needs upgrading, these tasks may require specialized tools and skills, potentially increasing the overall installation cost. Additional Features and Integration Some smart locks offer additional features like integration with smart home systems, voice assistants, or compatibility with other devices. While these features can enhance functionality, they may also affect the overall cost of installation. Professional vs. DIY Installation Choosing between professional installation and a DIY approach will significantly impact the cost. While professional installation ensures expertise and proper setup, it comes with an additional cost compared to a DIY installation, as illustrated in the above section. Conclusion Installing a smart lock can offer convenience, security, and peace of mind. When considering the installation cost, it's essential to factor in the average cost, types of smart locks, and other factors that can affect the overall expense. By understanding these aspects, you can make an informed decision and choose the right smart lock that suits your needs and budget. Remember to weigh the benefits, features, and security aspects of different smart locks before making a final decision. With proper installation and careful consideration, a smart lock can be a valuable addition to your home.
Smart Lock · 28/06/2023
What Is a Smart Lock and How Does It Work?
In today's technologically advanced world, smart home devices are becoming increasingly popular. One such device that has gained significant attention is the smart lock. If you've ever wondered what a smart lock is and how it works, you've come to the right place. In this article, we will delve into the world of smart locks, exploring their functionality, main features, potential concerns, and more. Let's unlock the secrets of smart locks together. What Is a Smart Lock? A smart lock is an electronic lock that allows you to secure and control access to your home or property using advanced technology. Unlike traditional locks that rely on physical keys, smart locks utilize digital code mechanisms to grant or restrict entry. These smart door locks are typically connected to your home's Wi-Fi network, enabling remote access and management via a smartphone app. How Do Smart Locks Work? Smart locks employ various methods to provide secure access to your home. One common approach is Bluetooth connectivity. By connecting your smartphone to the smart lock via Bluetooth, you can lock or unlock the door when you are within a certain range. This method offers convenience as you don't need physical keys. Additionally, the smart door lock with WIFI can connect directly to your home network. This feature enables you to control the lock remotely from anywhere using a dedicated app on your smartphone. You can grant access to family members, friends, or service providers even when you're not at home. 4 Main Features of Smart Locks Smart locks offer a range of features that enhance the security and convenience of your home. Let's explore the main features of smart locks in more detail, understanding how they can revolutionize your everyday life: Keyless Entry One of the primary advantages of smart locks is the elimination of physical keys, offering a convenient and secure way to enter your home. Instead of fumbling for keys, you can use your smartphone, a keypad, or even your voice to unlock the door effortlessly. By simply carrying your smartphone or remembering a unique access code, you can gain entry with ease. Access Management Smart locks excel in providing efficient access management for your home. With smart lock technology, you have the power to grant temporary or scheduled access codes to visitors, ensuring they can enter your home during specific timeframes. This is especially useful for service providers, houseguests, or rental properties. Moreover, smart locks allow you to monitor and track who enters and exits your home, providing you with a clear overview of access activity. If needed, you can revoke access remotely, offering you peace of mind and control over your home's security. Integration with Smart Home Systems Many smart locks are designed to integrate seamlessly with larger smart home systems. This integration allows you to control multiple devices from a centralized app or through voice commands. For example, when you unlock your smart lock, it can trigger other actions such as turning on lights, adjusting the thermostat, or even disarming the security system. This interconnectedness creates a cohesive and convenient smart home experience, enhancing both security and comfort. Enhanced Security Smart locks prioritize the security of your home with advanced features. Many models come equipped with tamper detection capabilities, which can alert you if someone tries to forcibly tamper with the lock. Some smart locks also have built-in alarm systems that can emit a loud sound if unauthorized attempts to gain access are detected. Additionally, smart locks employ encryption protocols to safeguard communication between the lock and your smartphone, ensuring that only authorized devices can control the lock. These enhanced security measures provide peace of mind, knowing that your home is protected against unauthorized access attempts. What Makes You Hesitant About Smart Locks? While smart locks offer numerous benefits, it's natural to have some concerns. Here are a few factors that may make you hesitant about adopting smart locks: Power Dependency Smart locks rely on batteries for their operation, so what happens if smart lock battery dies? If the battery dies or is not replaced on time, you may find yourself locked out of your own home. However, most smart locks provide low-battery notifications to avoid such situations. And smart door locks, like eufy Video Smart Lock S330, provide physical backup keys in case. Potential Hacking Some may ask: can smart locks be hacked? As with any internet-connected device, there is a small risk of smart locks being hacked. Manufacturers take measures to enhance security, such as encryption, but it's most essential to choose reputable brands of smart door lock for front door and regularly update the firmware to mitigate potential risks. Compatibility with Existing Locks Not all smart locks are compatible with every type of existing lock or door. Before purchasing a smart lock, ensure it is compatible with your door's specifications to avoid installation issues. Conclusion Smart locks are revolutionizing home security and access control, providing convenience, flexibility, and enhanced features compared to traditional locks. With their keyless entry, access management capabilities, and integration with smart home systems, smart locks offer a modern and efficient solution for securing your home. Selecting a reliable brand like Eufy smart door lock with finger print and WIFI can better secure your home. Embrace the possibilities of smart lock technology and unlock a new level of convenience and security for your home right now!
Stay In Care with eufy

Lynx chillin at the cabin. Eufycam 2 Pro #SpringScene.

No more needing to wait in for deliveries, happy days & no need to bug my neighbours

I have been looking for the perfect solution to receiving packages whilst I’m out and now I’ve found it

Rare Albino Squirrel captured via eufy floodlight.

What does the fox say? Nom nom nom, that's what.

caught this bear trying to break into our trash cans late at night.

the camera captured him on the front of the truck so he had to had crossed from that way from the neighbors house/cars

my 7 year old son walks up to the front door & immediately started singing Star Spangled Banner when he sees the flag!

This is my favorite Eufy moment from a while back. Recycling truck ate too much at our house.
Lynx chillin at the cabin. Eufycam 2 Pro #SpringScene.
No more needing to wait in for deliveries, happy days & no need to bug my neighbours
I have been looking for the perfect solution to receiving packages whilst I’m out and now I’ve found it
Rare Albino Squirrel captured via eufy floodlight.
What does the fox say? Nom nom nom, that's what.
caught this bear trying to break into our trash cans late at night.
the camera captured him on the front of the truck so he had to had crossed from that way from the neighbors house/cars
my 7 year old son walks up to the front door & immediately started singing Star Spangled Banner when he sees the flag!
This is my favorite Eufy moment from a while back. Recycling truck ate too much at our house.
Captured On
Download App
Security


eufy Clean
eufylife
© Fantasia Trading LLC 2022 200923810277


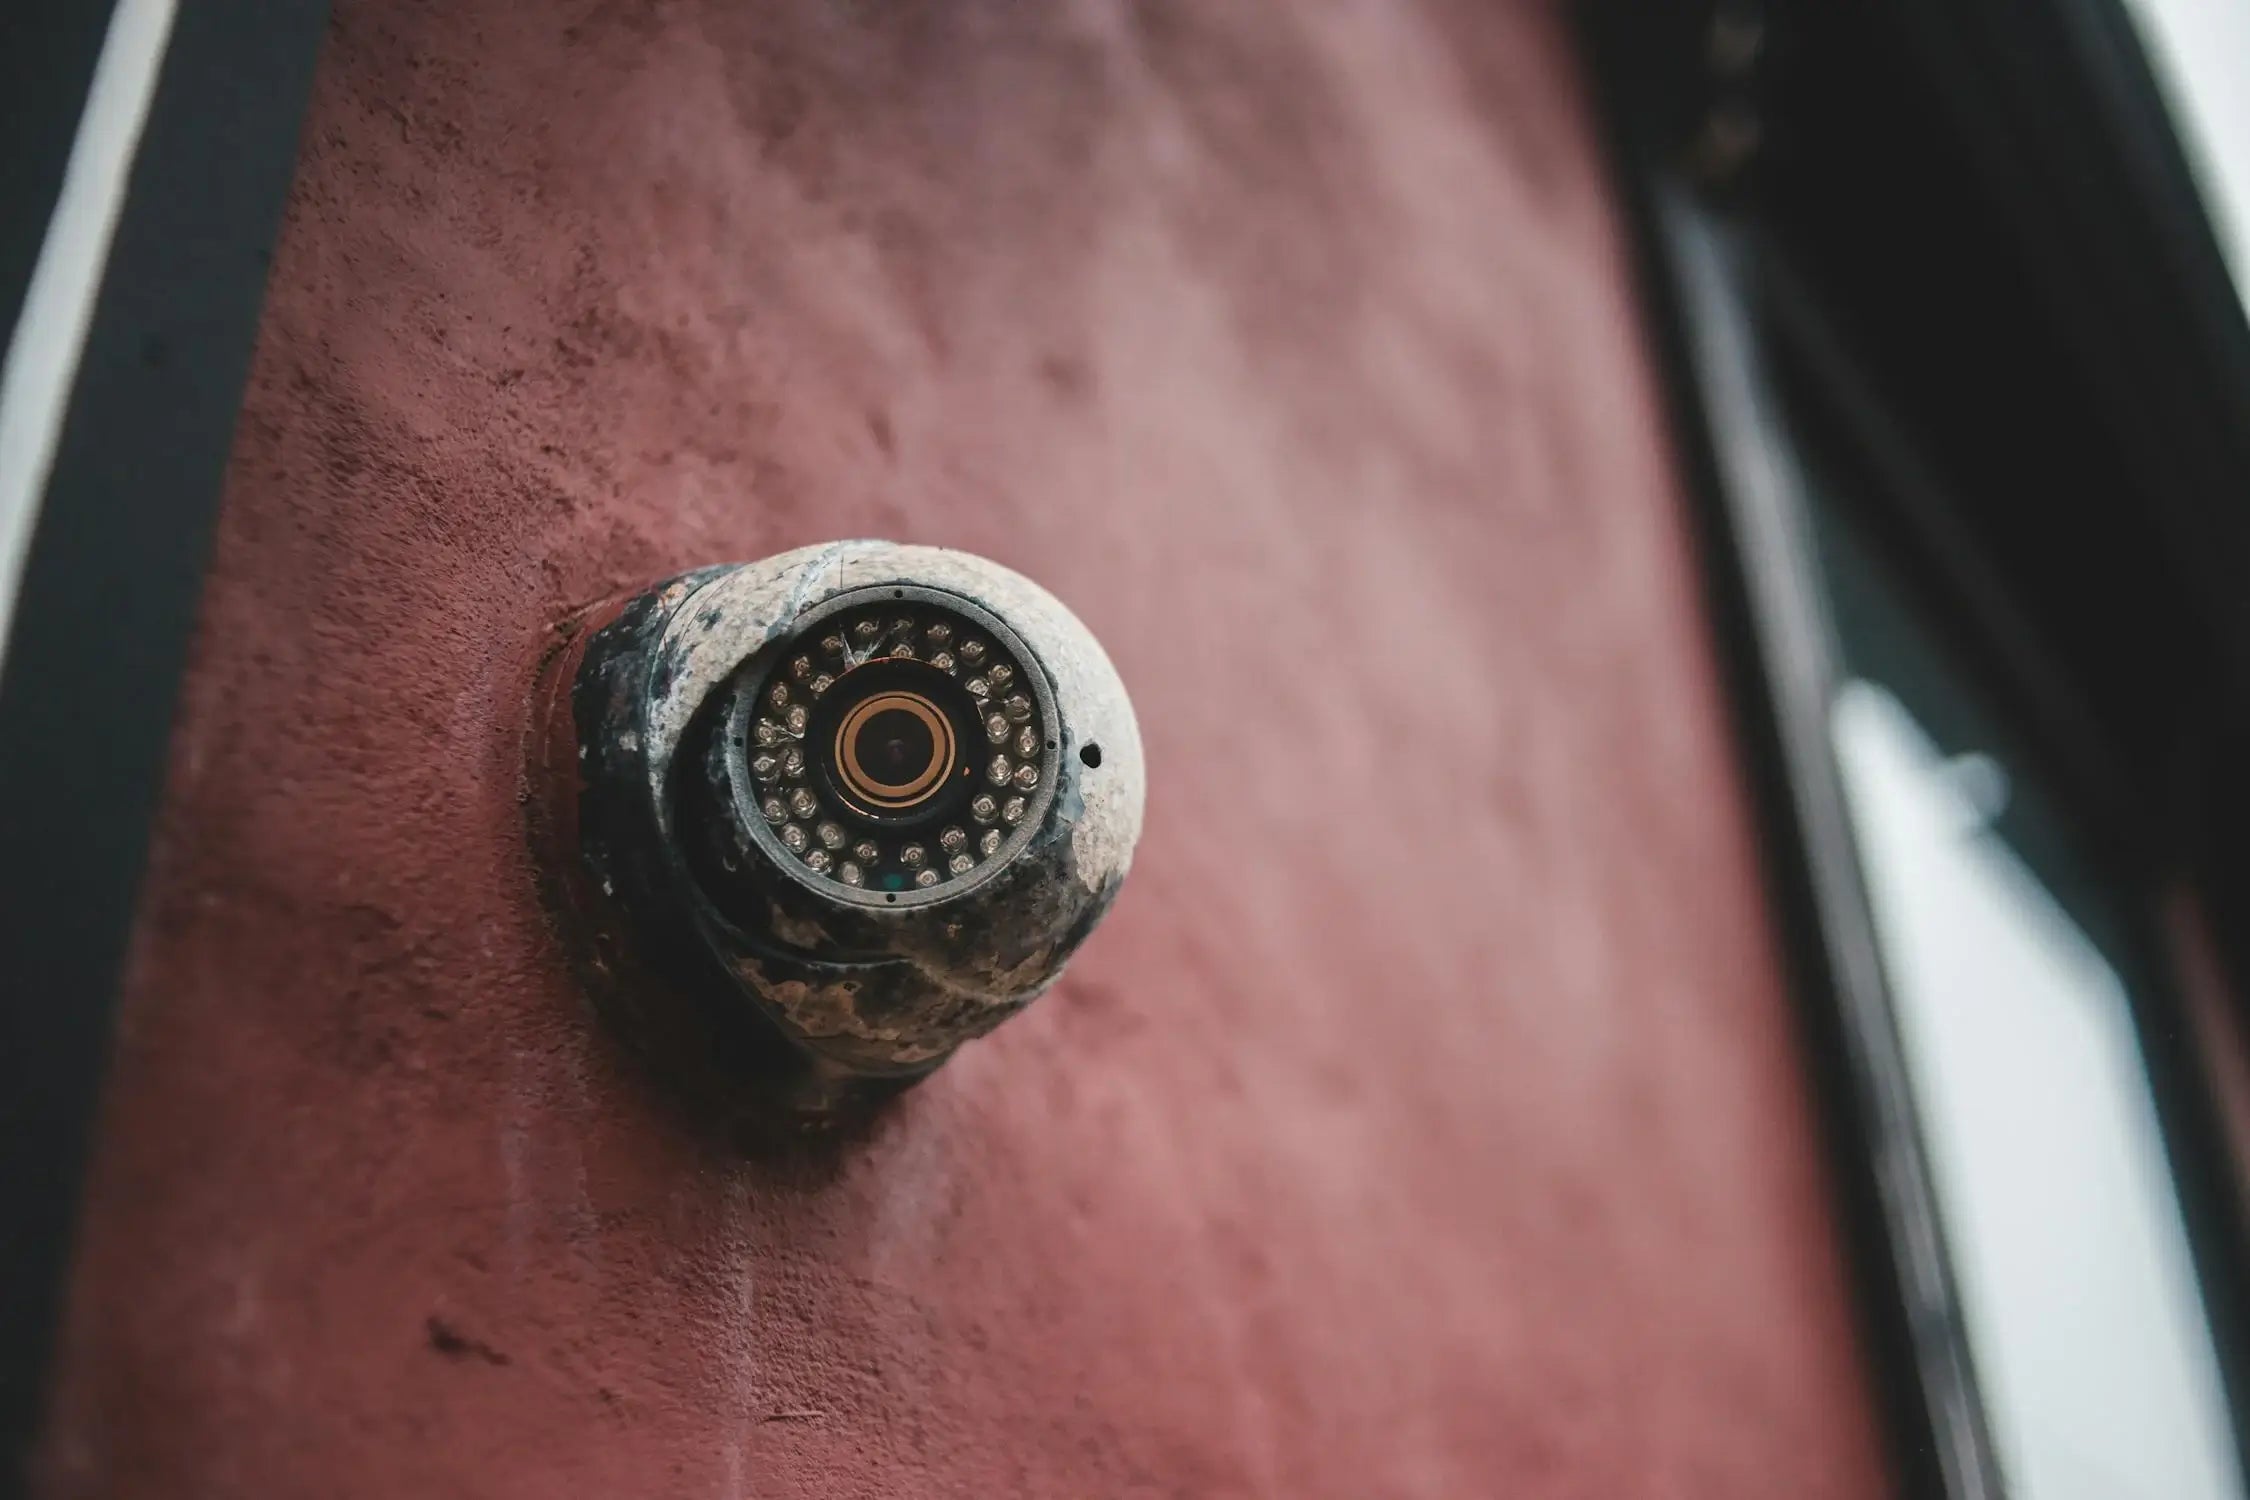


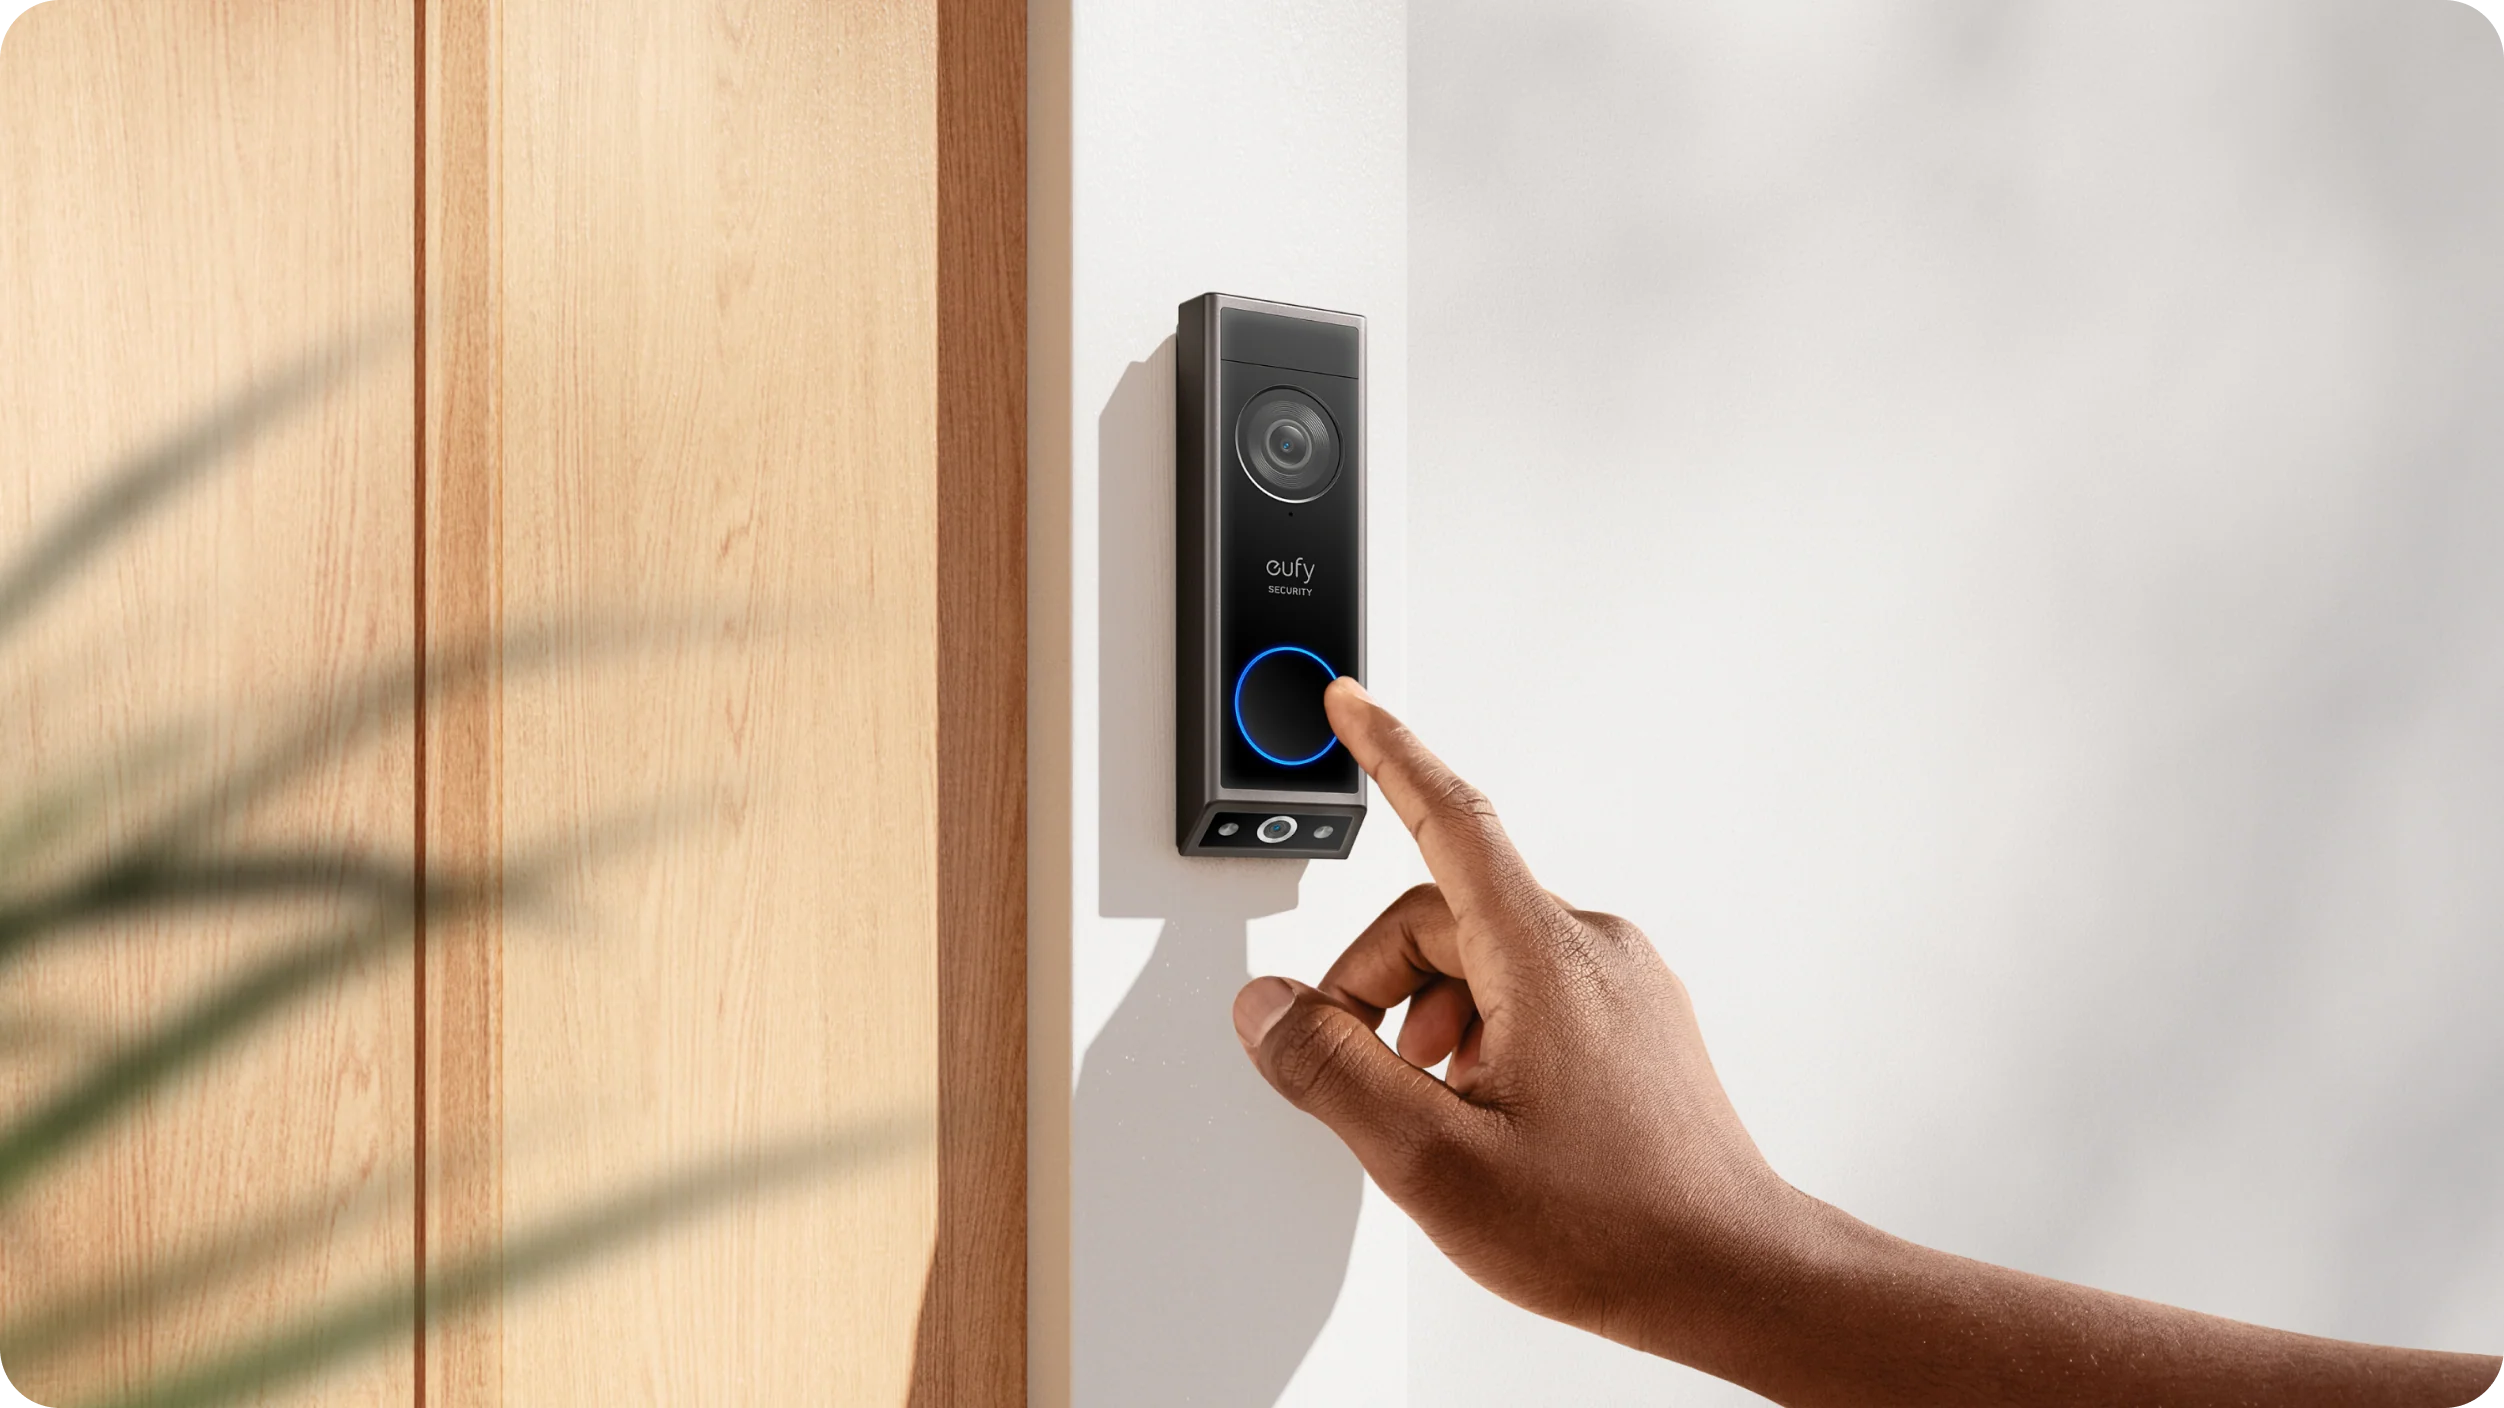


![Smart Lock Installation Cost [Comprehensive Guide]](http://us.eufy.com/cdn/shop/articles/Smart_Lock_Installation_Cost_Comprehensive_Guide_741e98d1-09d4-42d4-9f8f-0c8ea9e56712.png?v=1688385452)